5.0 Records Scanning
This screen is seen when the user clicks on one of the sessions in the “My Sessions” screen. At the top of the screen is the session name that was clicked on. There are two-tab sections on this screen. The “Scan” tab and the “Records” tab. This tab is where all the stock recording and item scanning takes place while the records tab is where all the records created by the unique stock take device for the session.
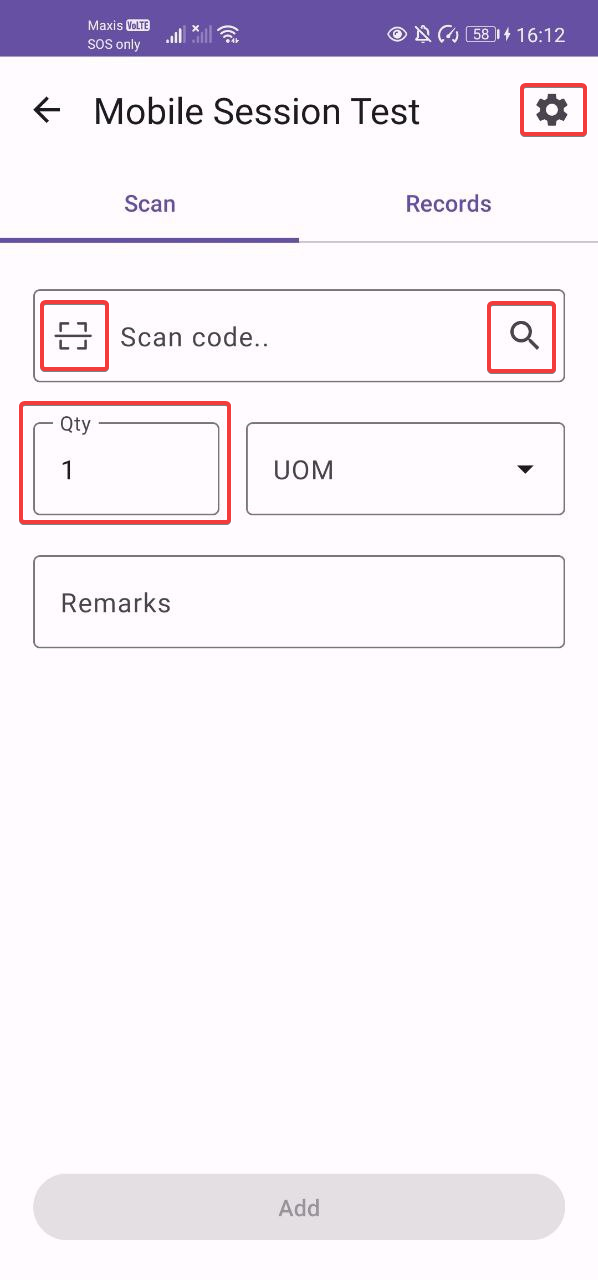
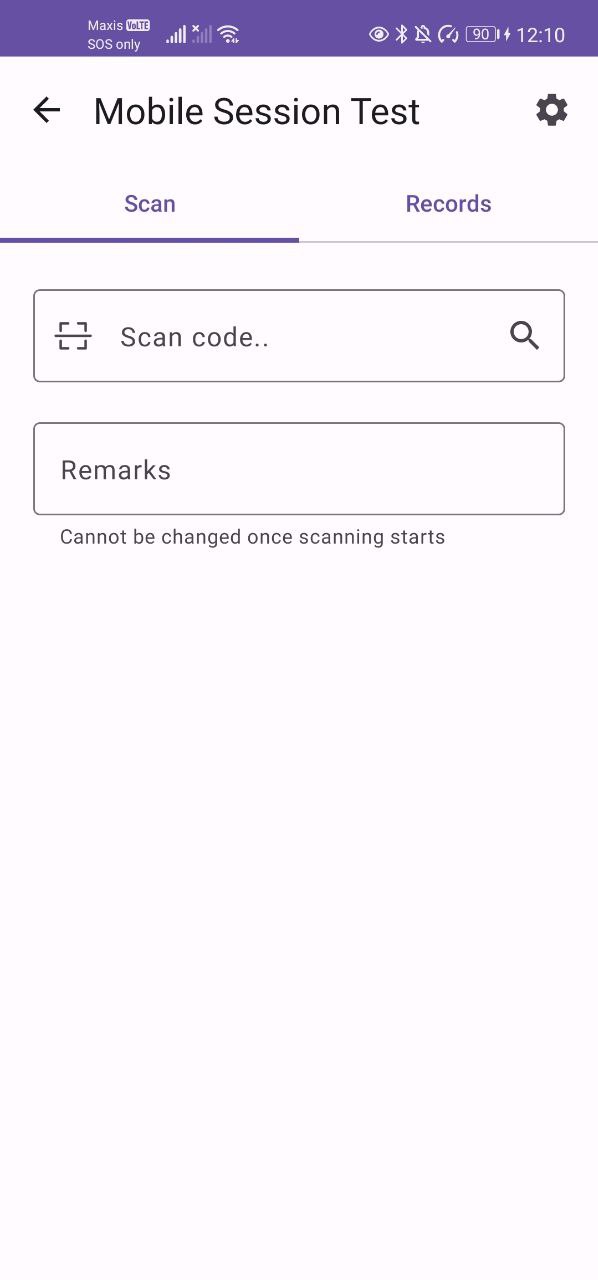
5.1 Scan Tab
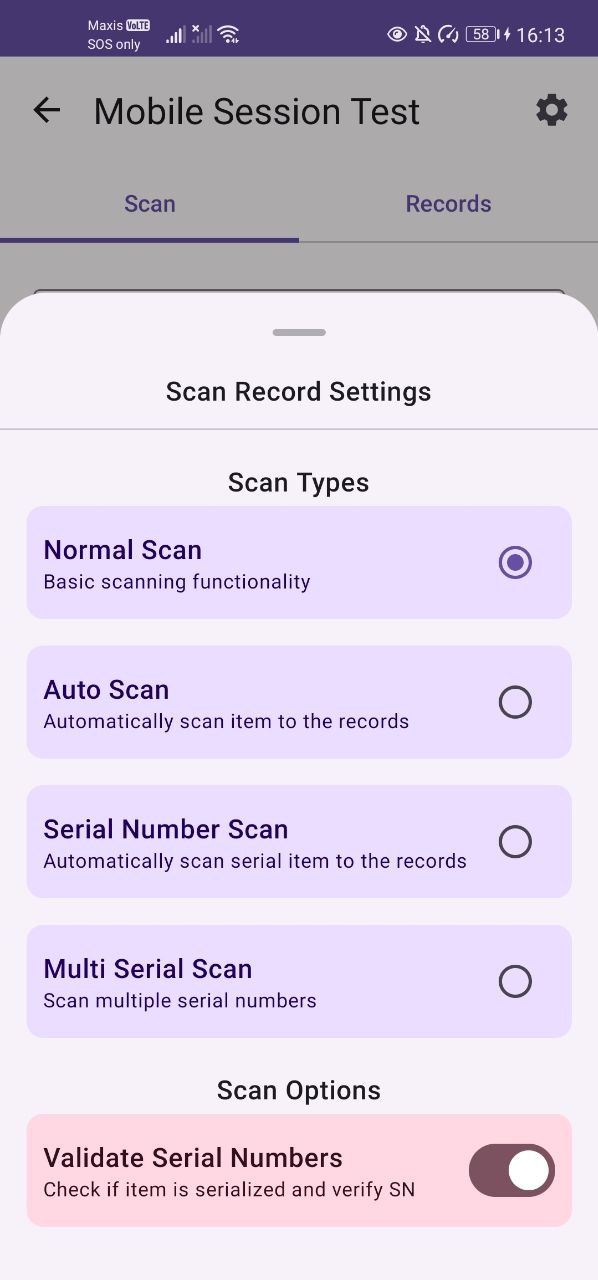
The user can choose from 3 different scanning types from the scan settings. The scan settings are accessible through the settings icon top right of the title bar. The user can also choose if they want to validate serial numbers during the stock take recording. The serial numbers are validated by default.
Users can manually type in the item code/EAN code and click on the search button on the keypad to check and look up the item.
Users are also able to scan directly the item code by clicking on the scan icon on the left. It will open a camera scanner view. This would eliminate the need of manually typing in the item code. If the scanned code is valid, it will find the corresponding item.
There is also a third way of selecting an item. In the search text field for the code scanning, on the right, there is a search button. Clicking this will open a new screen listing down the items in the tenant. You can select an item from here and also filter the items based on the item code or the item name.
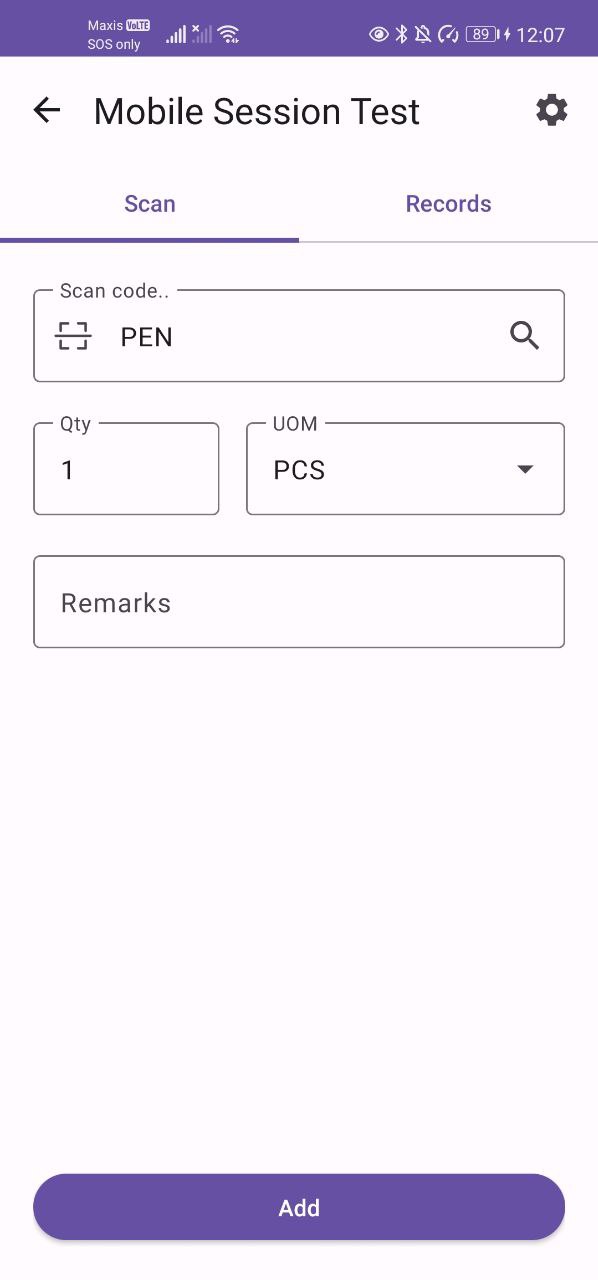
Once the item has been chosen by the available options the user can proceed to fill the remaining details regarding the stock record and then finally click the “Add” button. This will create a record that you can then view in the “Records” tab.
5.1.1 Normal Scan (Scan Tab)
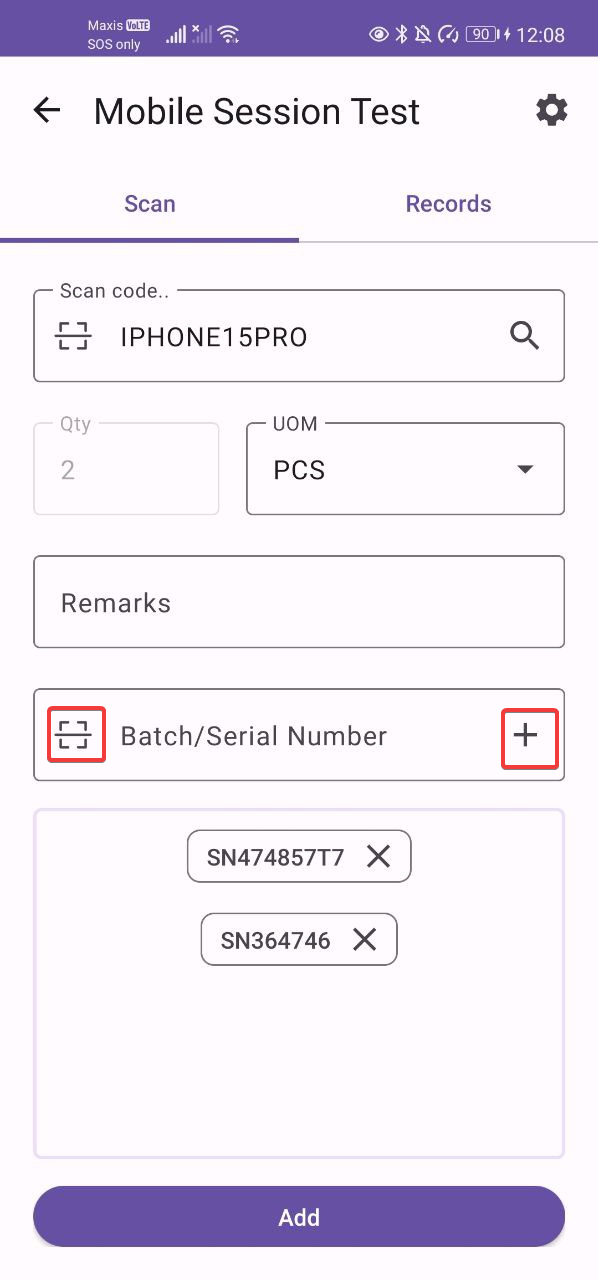
This feature is the basic scanning feature as outlined earlier. If the item is a serialized item the user will have to add a serial number in order to create a record. The quantity will automatically increment as user scans more serial numbers for the stock take record. It provides the ability to scan in multiple serial numbers at a time so there is no need to repeatedly scan the same item code.
5.1.2 Auto Scan (Scan Tab)
This feature allows the user to directly scan a non-serialized item’s item code or EAN code and automatically create a record with a default quantity of 1. It does not work for serialized items. Manually scan and click the search button or scan through the camera scanner.
5.1.3 Serial Number Scan (Scan Tab)
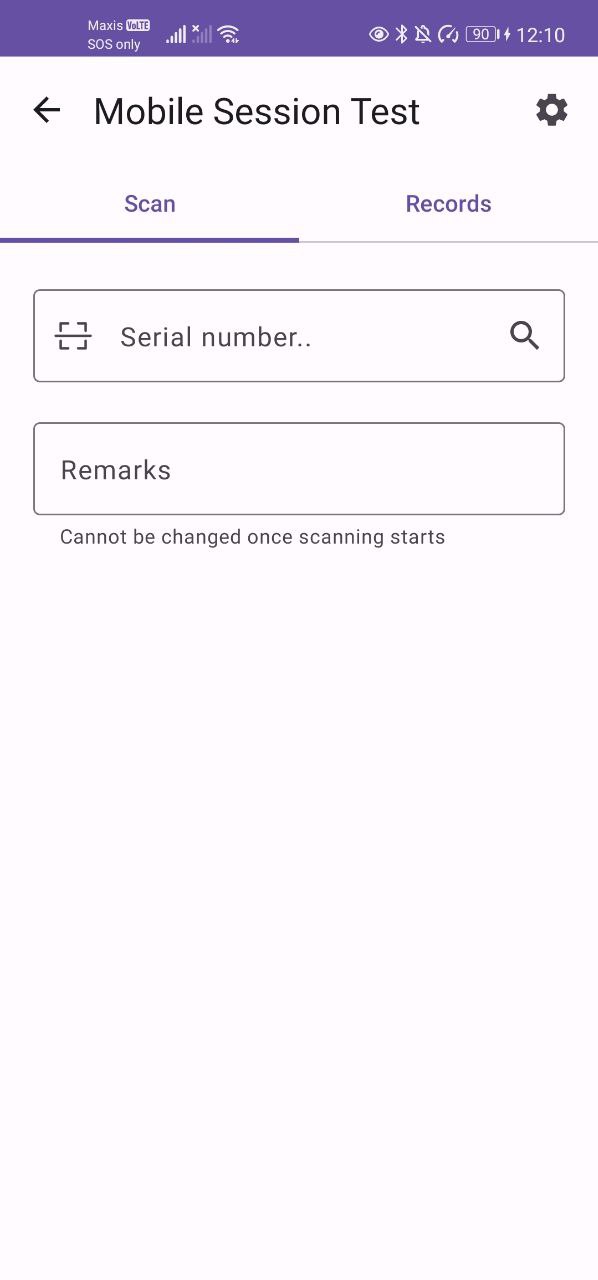
This feature allows to directly scan a serial number directly and will create a record for the corresponding inventory item and the serial number that was scanned. Manually scan and click the search button or scan through the camera scanner.
5.2 Records Tab
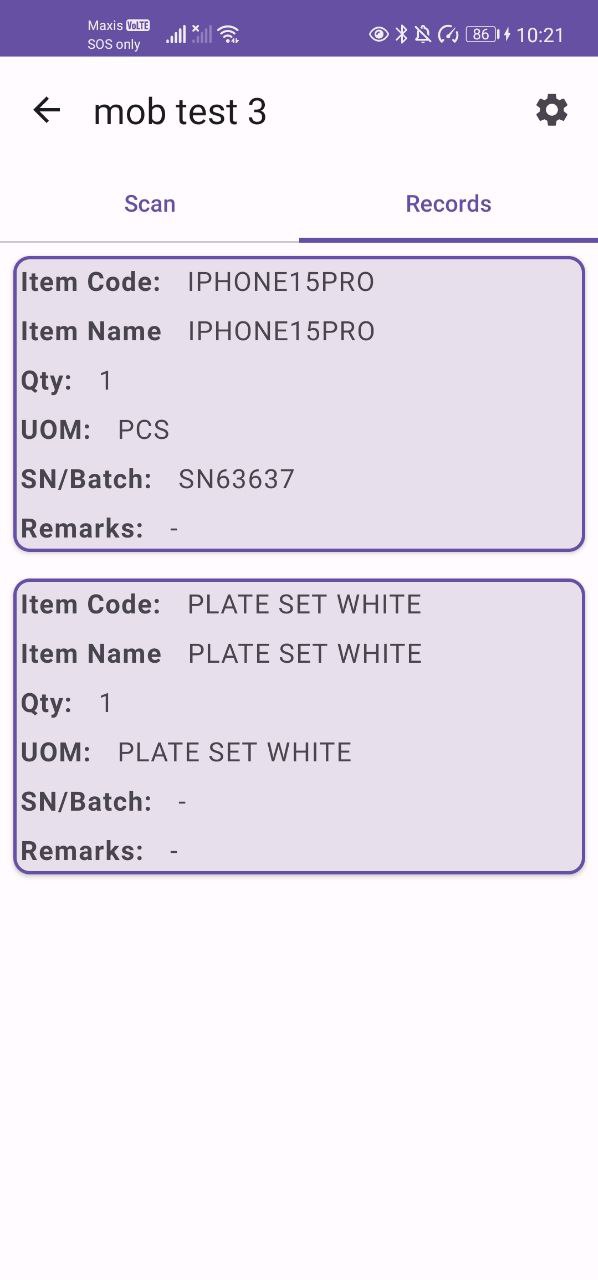
This tab lists down all the records the user’s unique stock-take device has created in the particular session. The user can click on the record card to view the details of the record in another screen.
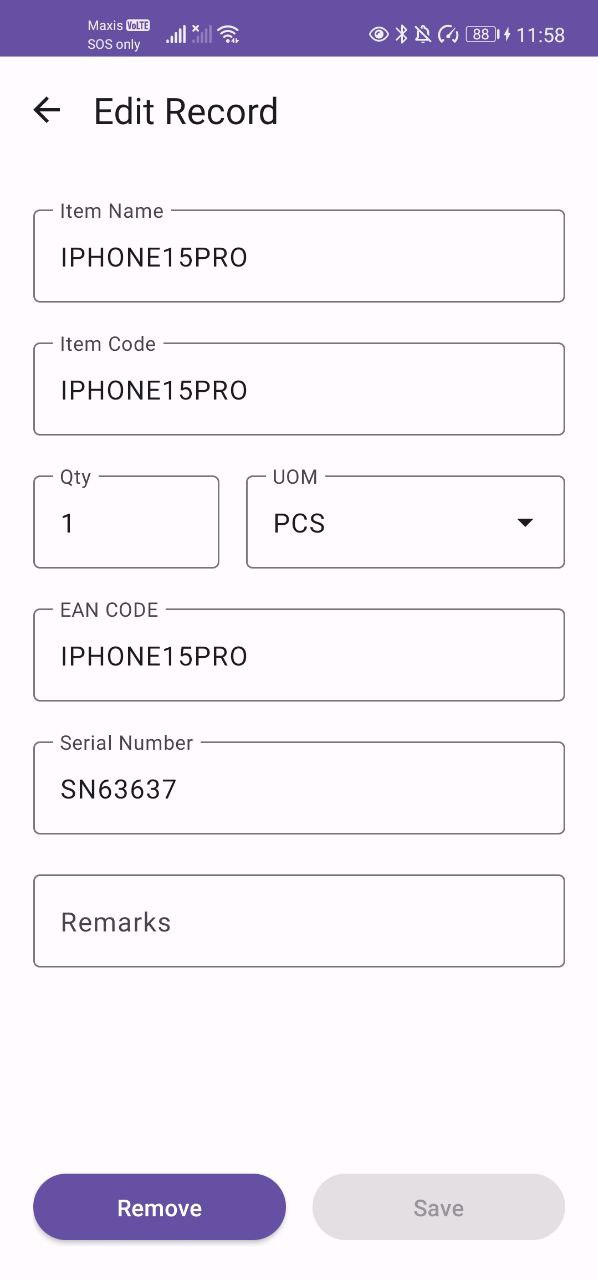
The record details screen allows the user to either remove/delete the record and also edit the record and save the changes. For serialized items no changes can be made, while for non-serialized items the quantity can be changed.