Introduction
This module guide outlines the steps required to configure for logistics.
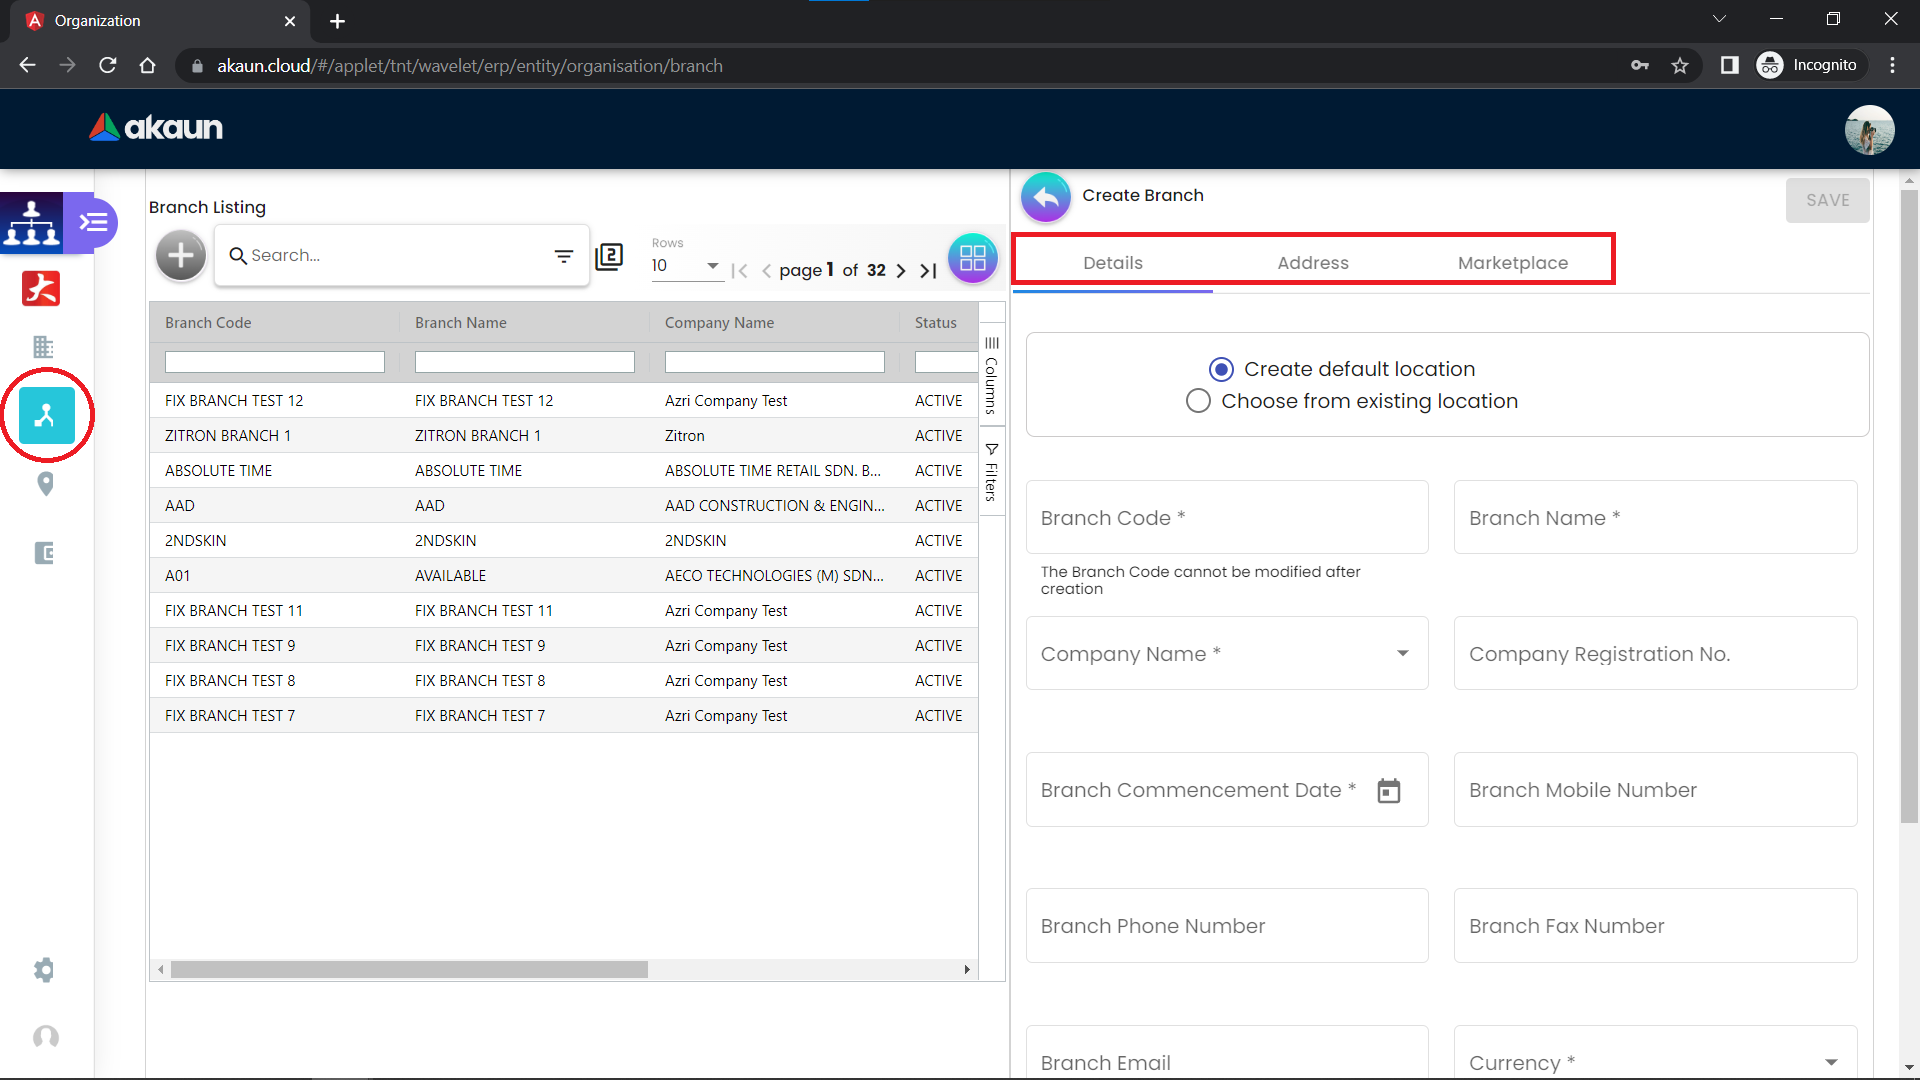
Organization - Branch Location Code
Based on the Packing File Naming, associate them to branches, and use the Organization Applet to set up the branches.
Each Packing File Naming has its own Associated Branch/ Location Code.
-
TNL xxxxx - Guang Zhou to Klang Port: WH-BKTRAJA
-
YWTNL xxxxx - Yiwu to Klang Port: WH-BKTRAJA
-
PG xxxxx - Guang Zhou to Penang Port: WH-BMERTAJAM
-
YWPG xxxxx - Yiwu to Penang Port: WH-BMERTAJAM
-
KK xxxxx - Guang Zhou to Kota Kinabalu Port: WH-KKINABALU
-
KU xxxxx - Guang Zhou to Kuching Port: WH-KUCHING
Goods Received Note
From the packing list, create a Goods Received Note in the Internal Purchase GRN Applet.
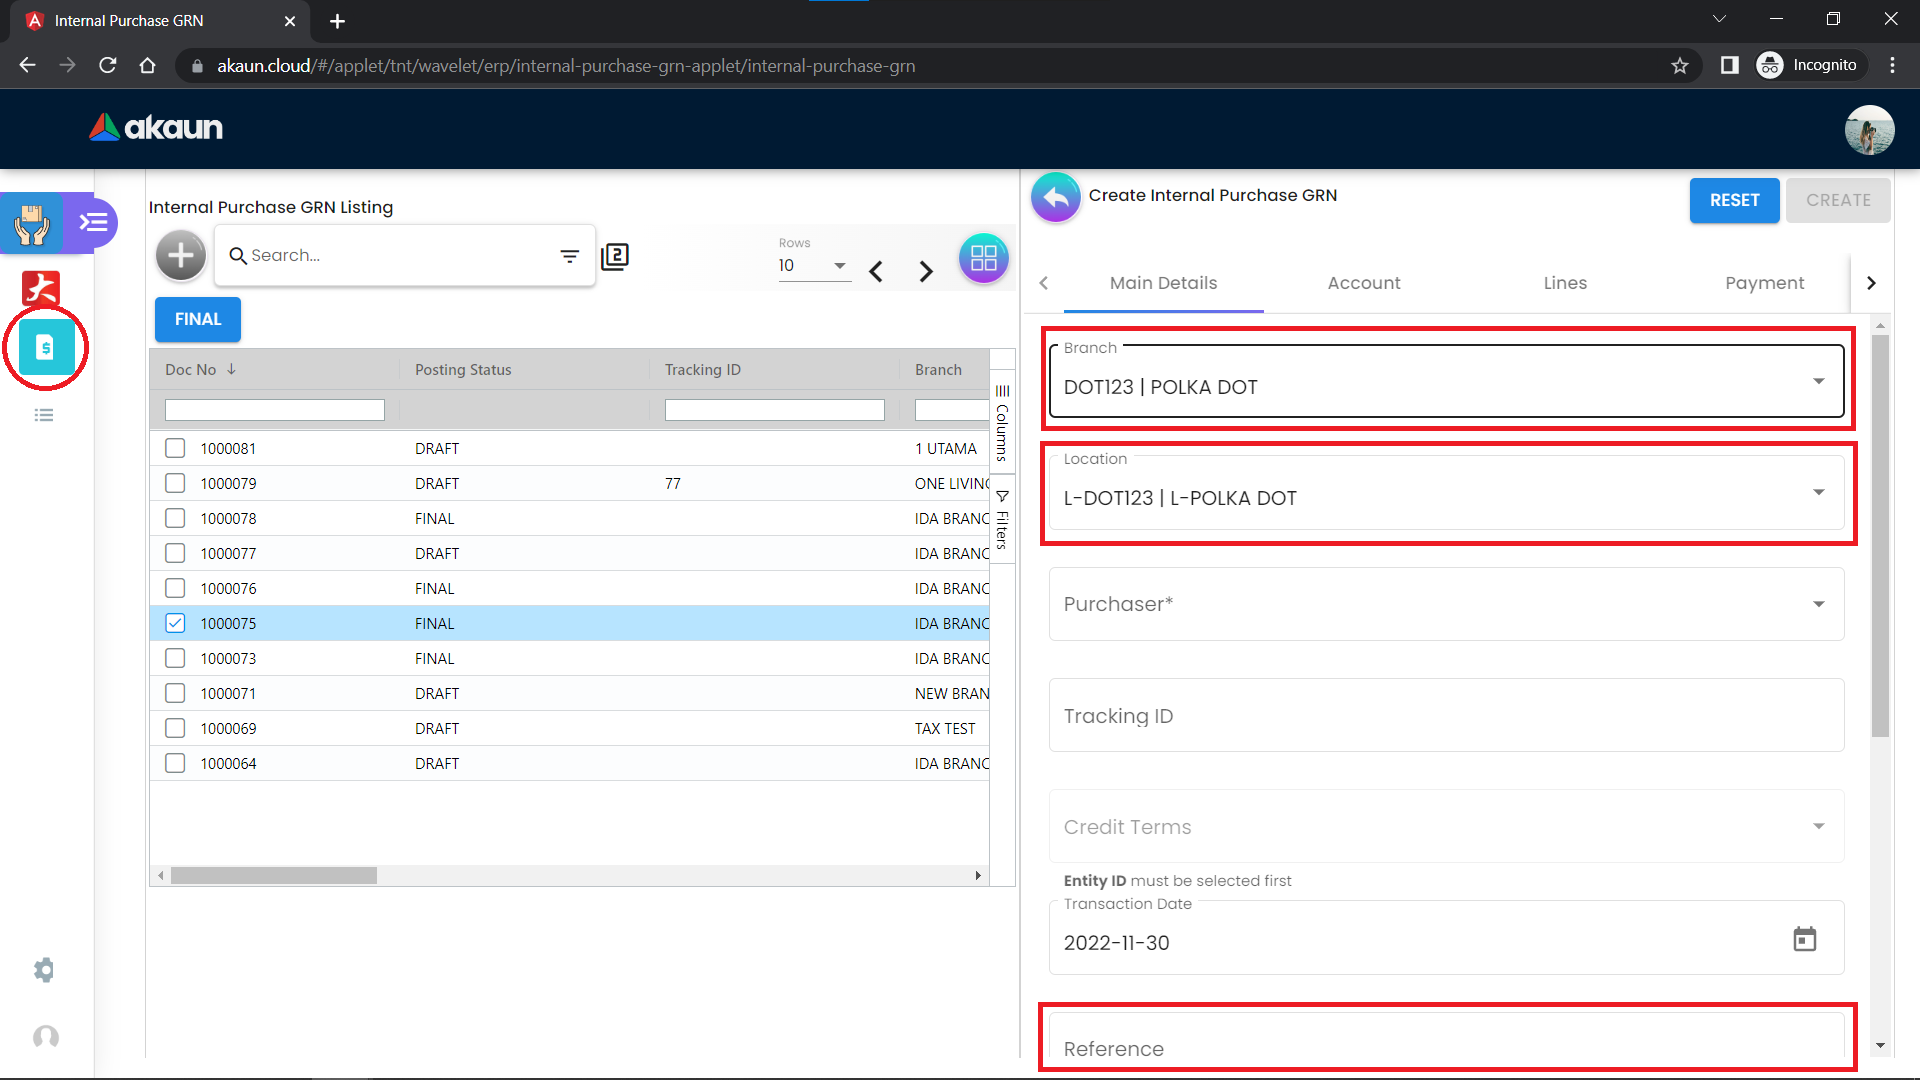
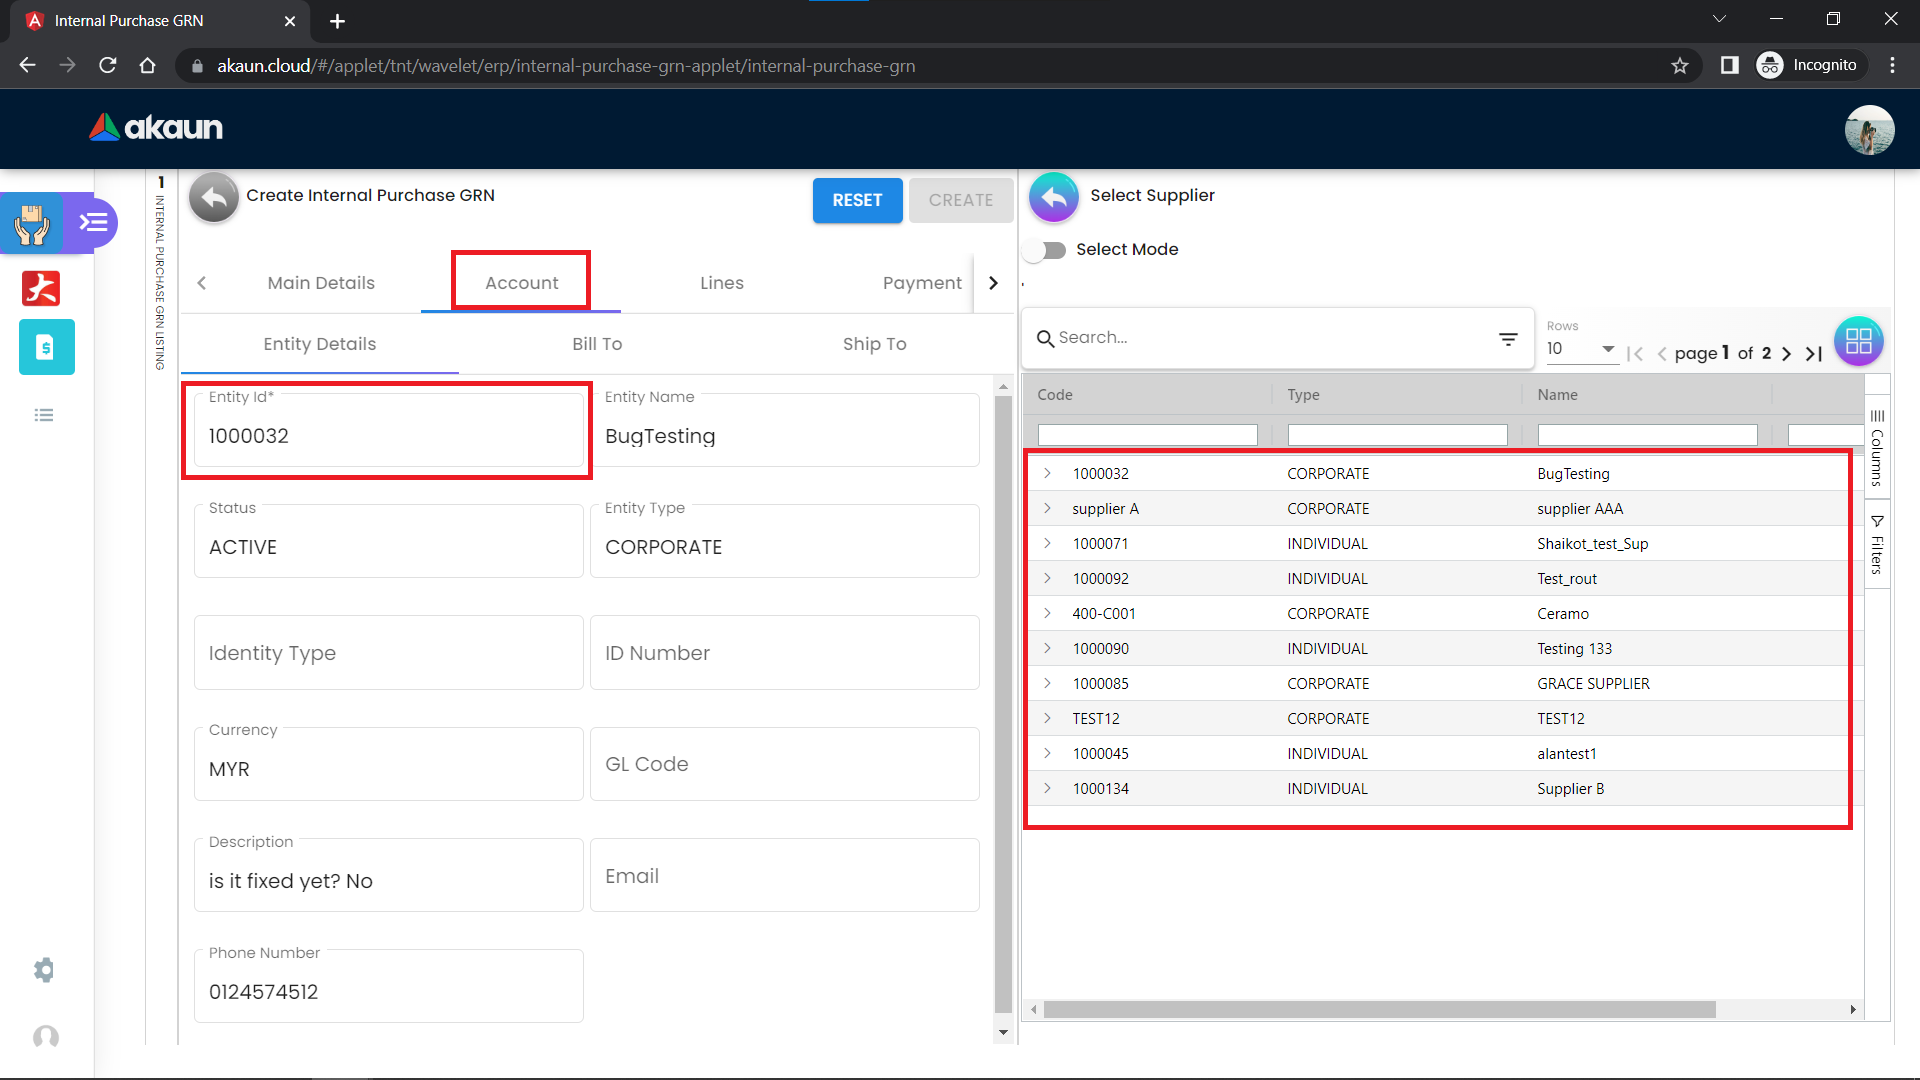
Make sure the branch and location matches up with the Packing List. You can put the Packing List file name in the reference input. Then, go to the Account tab, and choose a supplier.
The Lines Tab represents the item in the packing list.
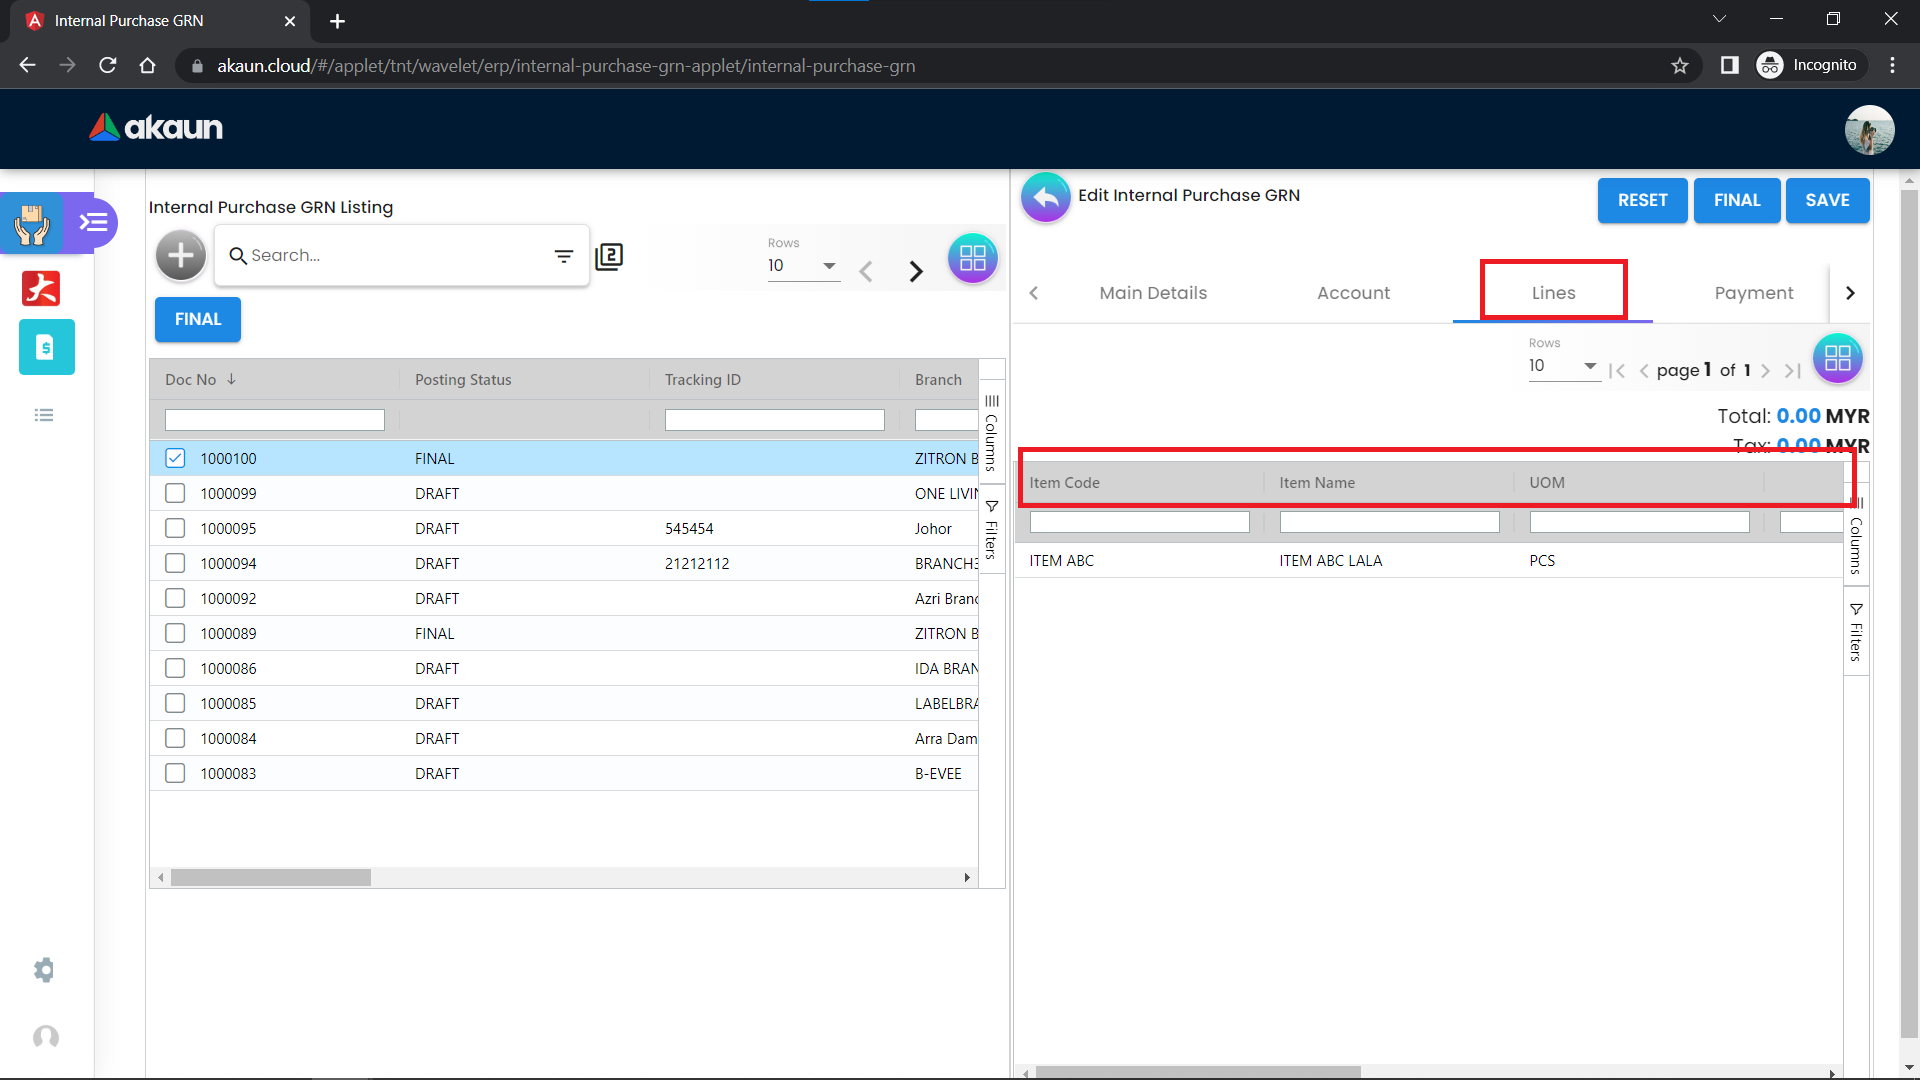
The Item Code means the Customer Marking Number. The Tracking ID is just a combination of the Customer Marking Number and the PO Number.

A newly created Goods Received Note will have the status - Goods departed from port, the user can then choose from 3 other options:
-
Goods have arrived at part, custom clearance in progress
-
Custom cleared
-
Goods have arrived at warehouse
Customers will be notified through the Goods Tracking App, which will show the progression of the goods.
Goods Movement Scenarios
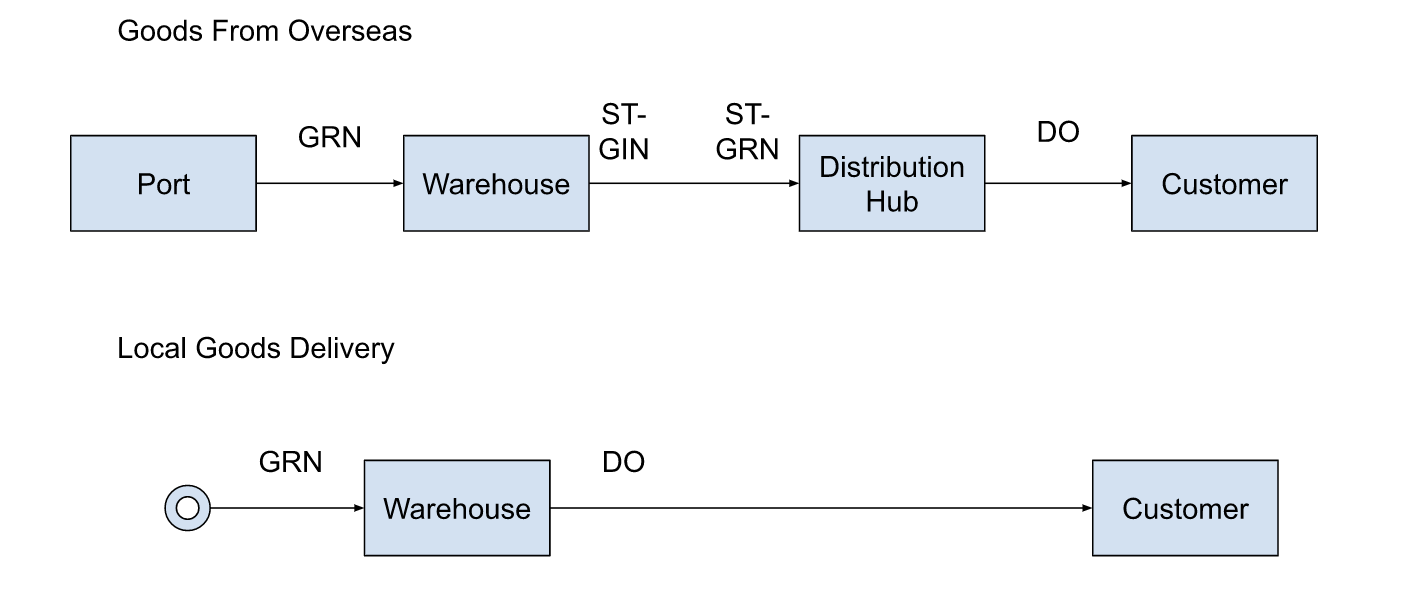
Keys: GRN - Goods Received Note ST-GIN - Stock Transfer Goods Issue Note ST-GRN - Stock Transfer Goods Received Note DO - Delivery Order
You can make a Goods Received Note ‘FINAL’ with 2 ways:
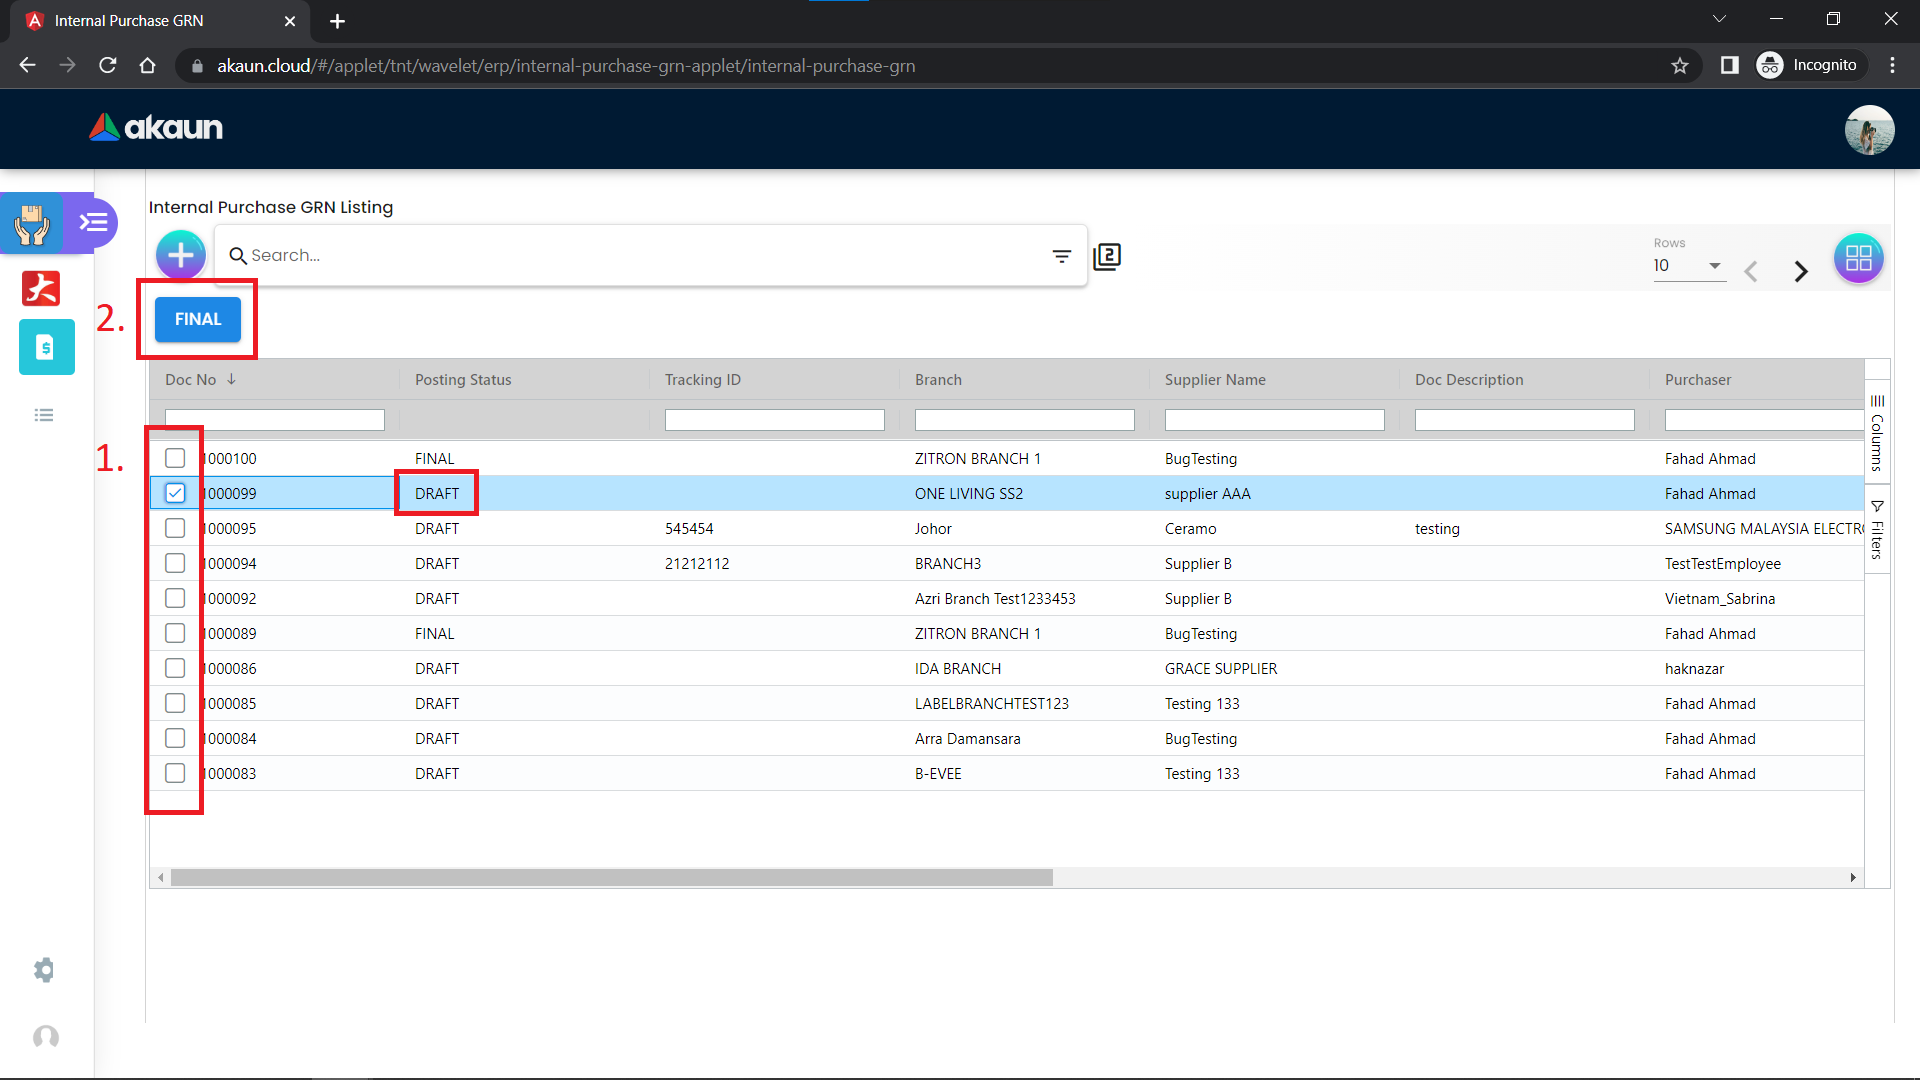
-
Select the Goods Received Note that has a Posting Status of ‘DRAFT’, by clicking on the checkbox on the left of it
-
Click on the ‘FINAL’ button on the top to make it ‘FINAL’
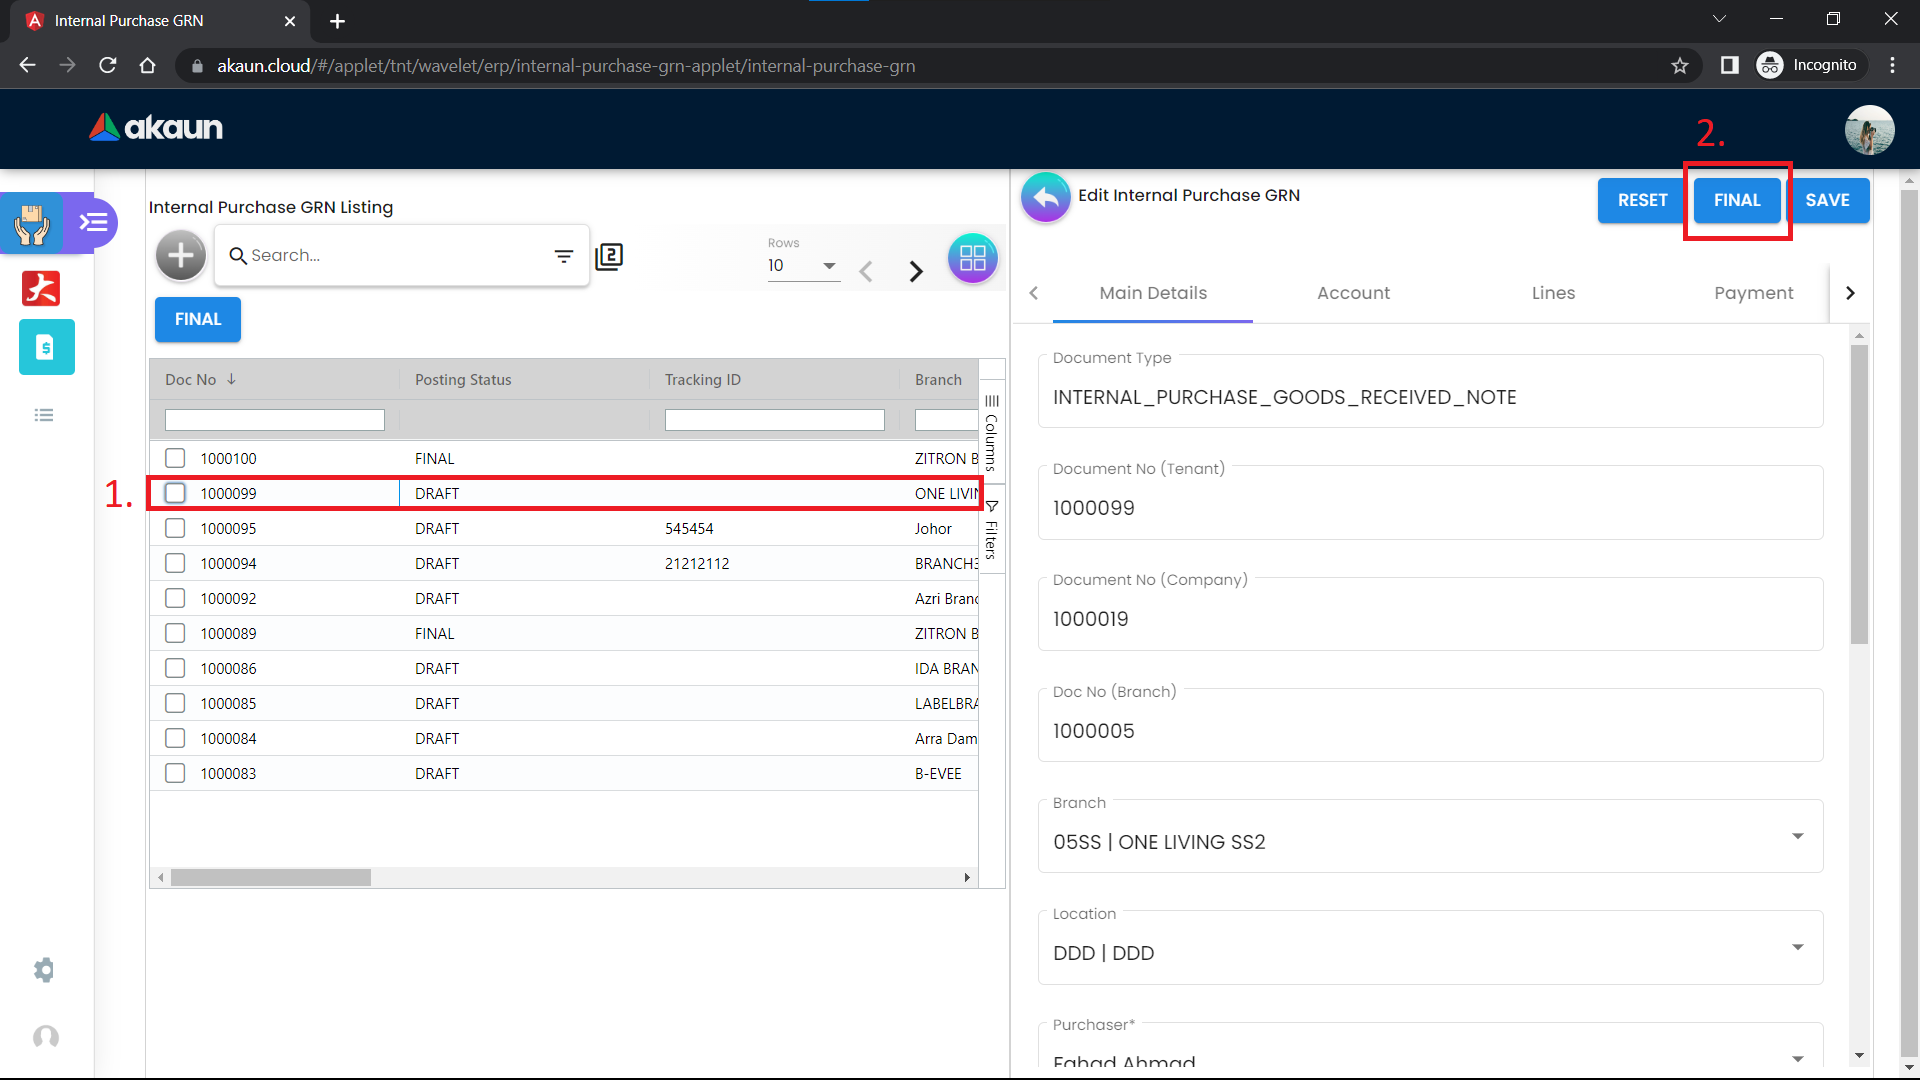
-
Select the Goods Received Note that has a Posting Status of ‘DRAFT’, by clicking on the row on the listing
-
Click on the ‘FINAL’ on the top-right corner to make the Goods Received Note ‘FINAL’
‘FINAL’ means changes can no longer be made to the Goods Received Note.
Stock Transfer Applet
It is used to transfer goods from warehouse to the distribution hub.
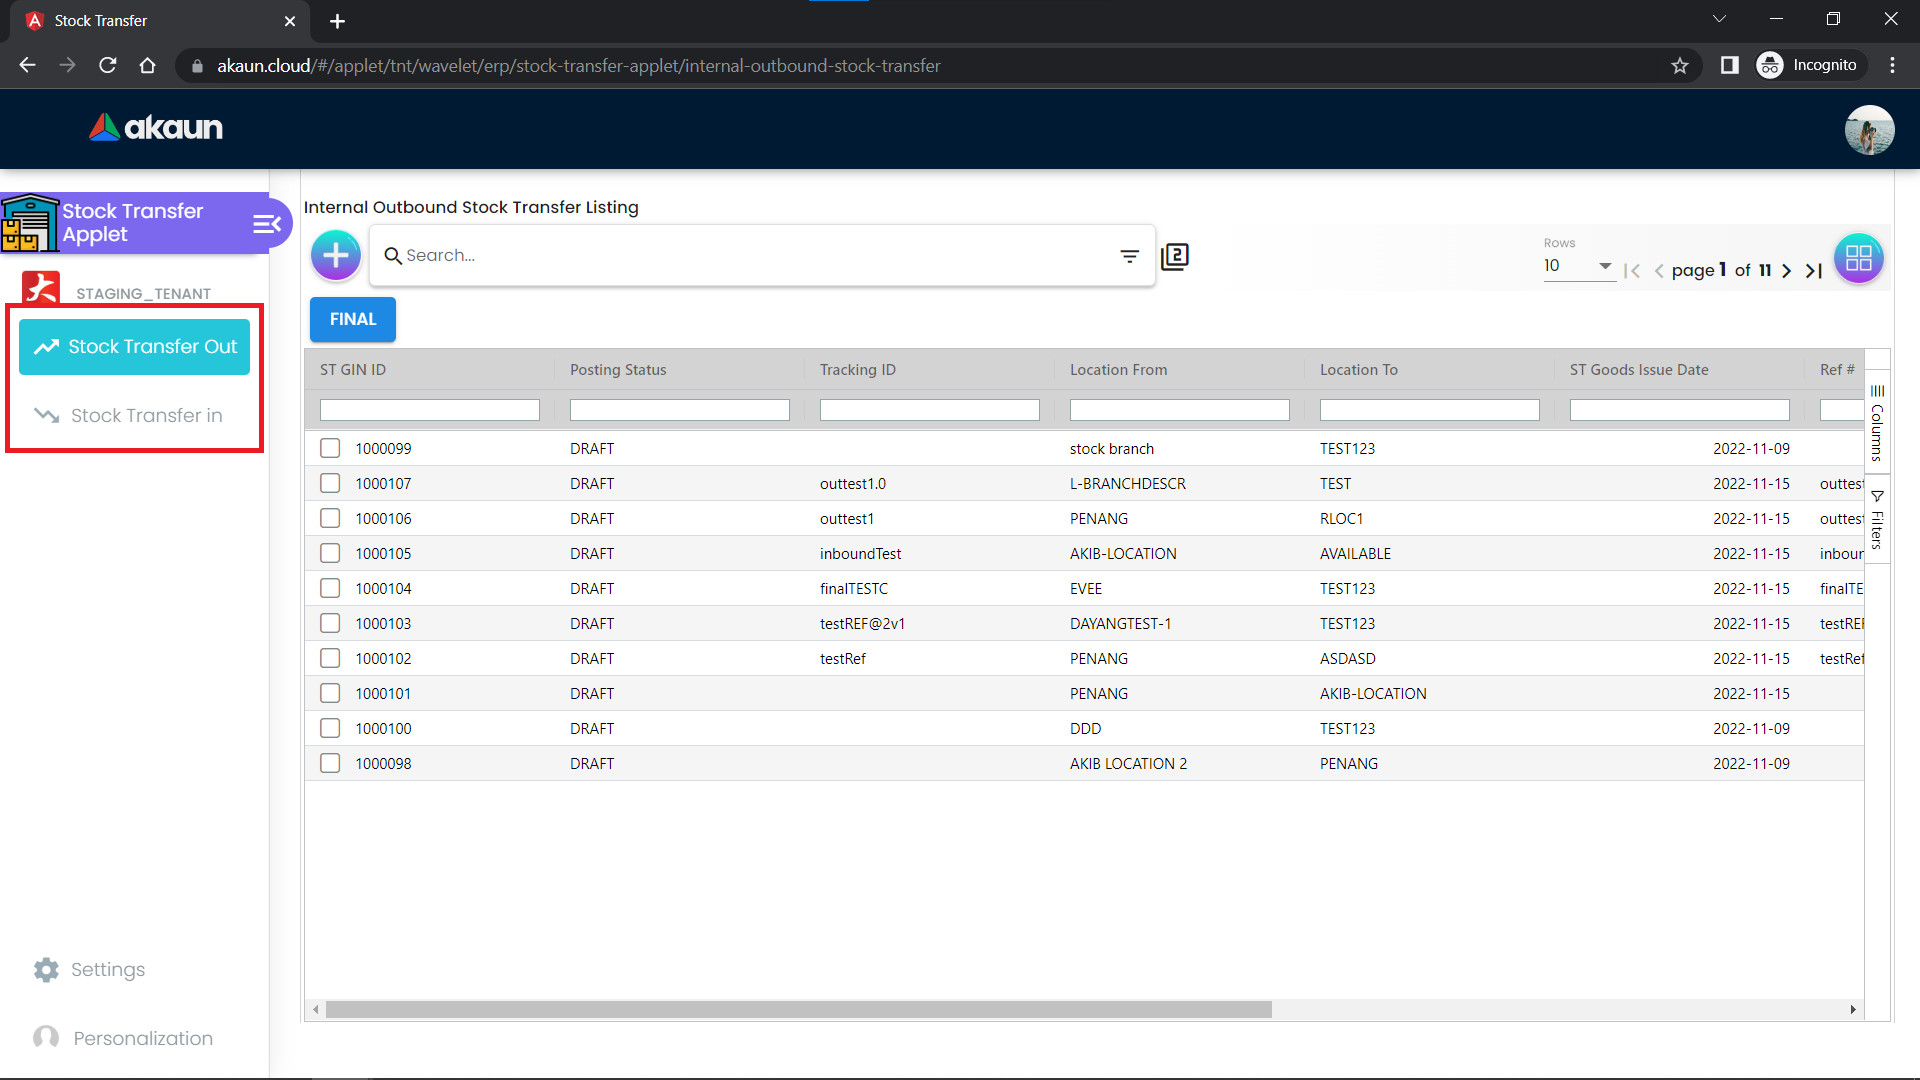
-
Stock Transfer Out: Outgoing warehouse/distribution hub
-
Stock Transfer In: Receiving warehouse/distribution hub
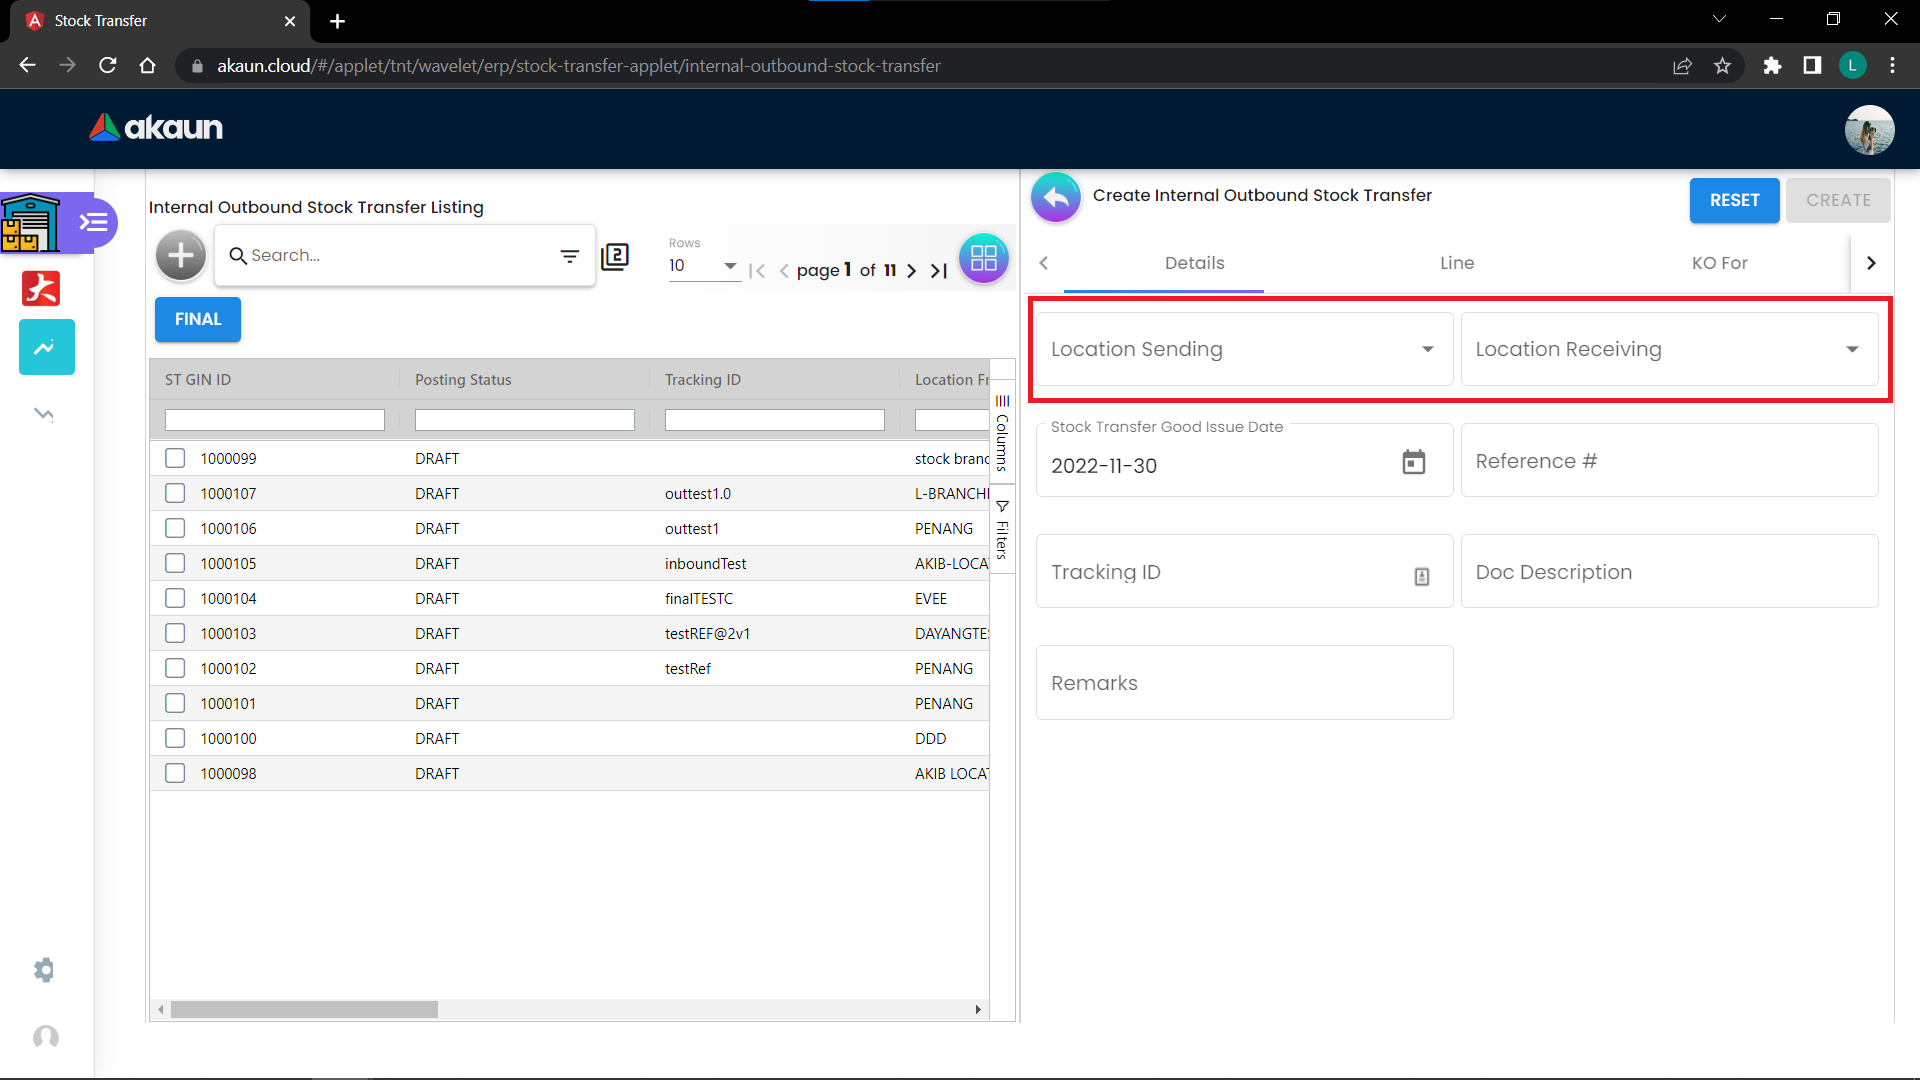
It indicates the location sending and receiving.
To add lines into the Stock Transfer, go to the KO (Knockoff) Tab, GRN Tab, to select Goods Received Note to Knockoff.
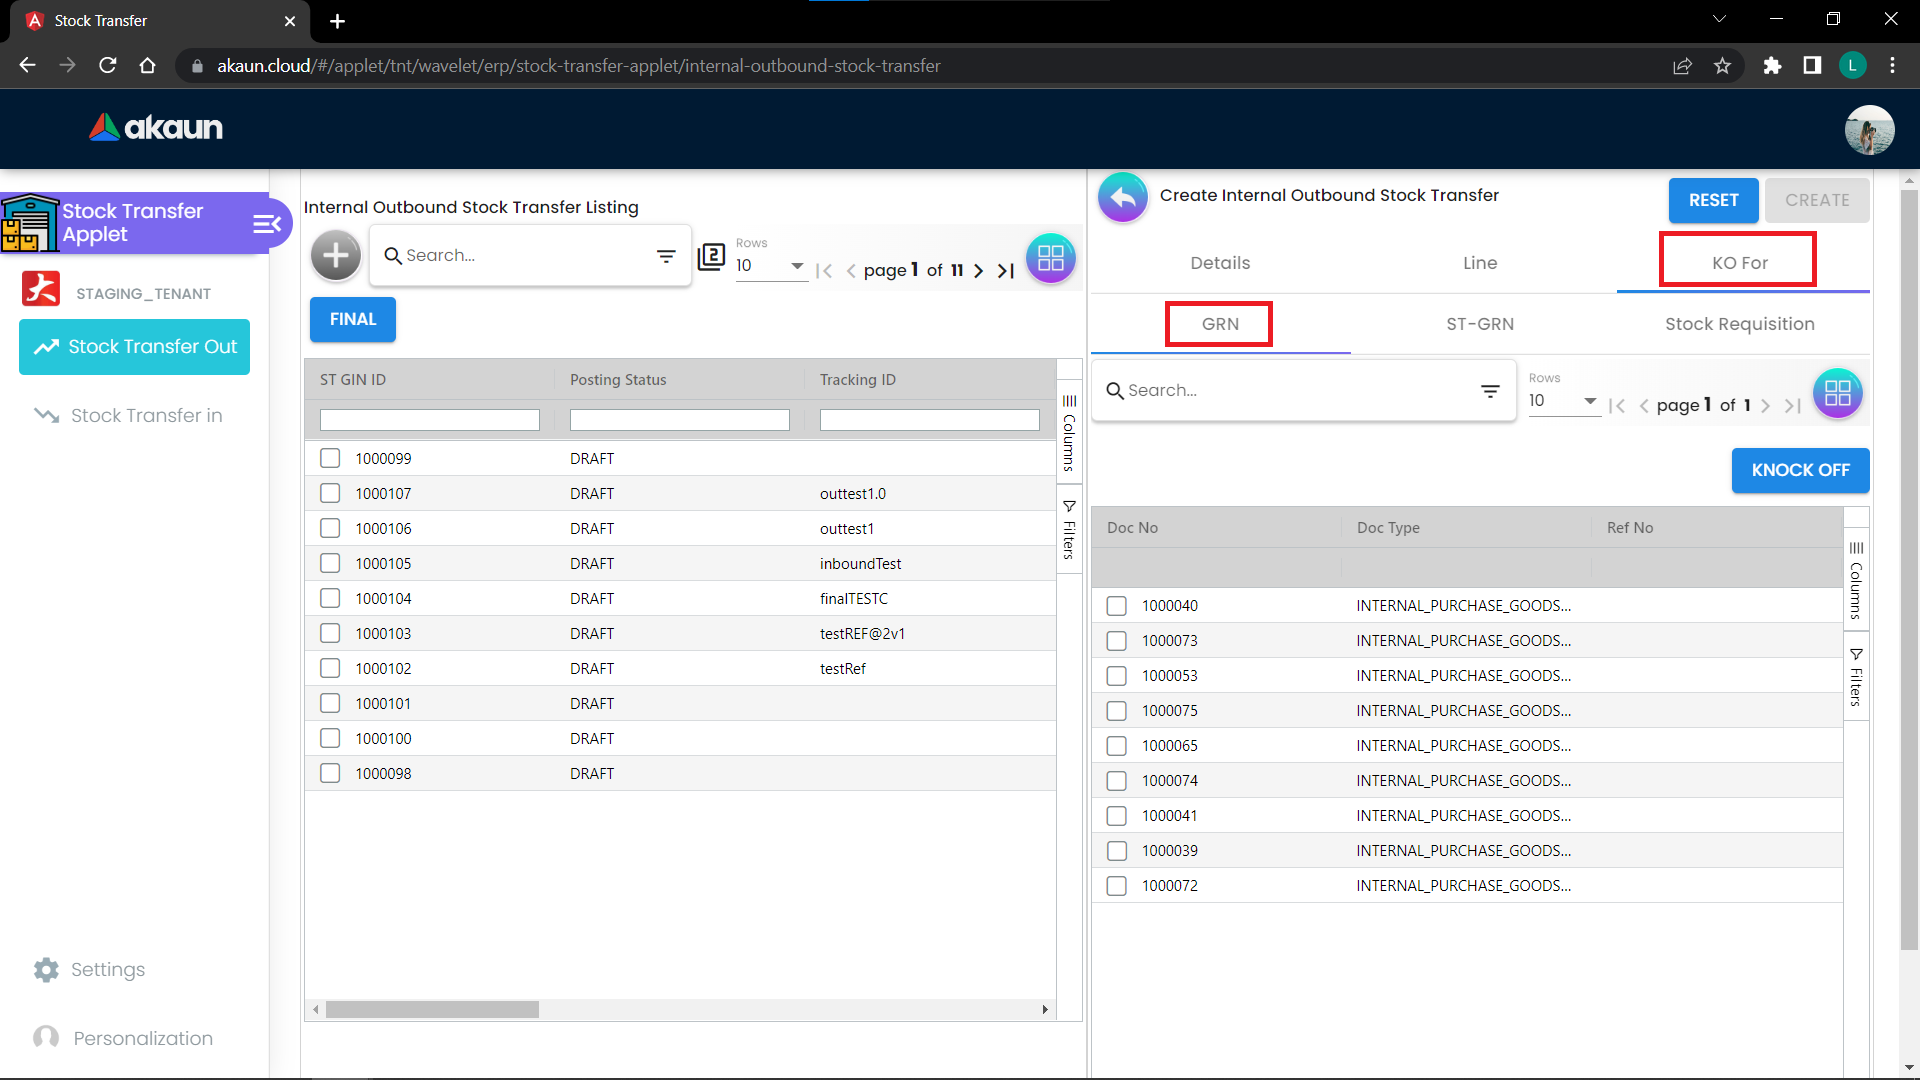
Click on the checkbox of the Goods Received Note to select it and click on the Knock Off button. Items should appear in the Items Tab. Once done, click the create button to finish.
To finalize a Stock Transfer Out, you can perform the same way as with the Goods Received Note.
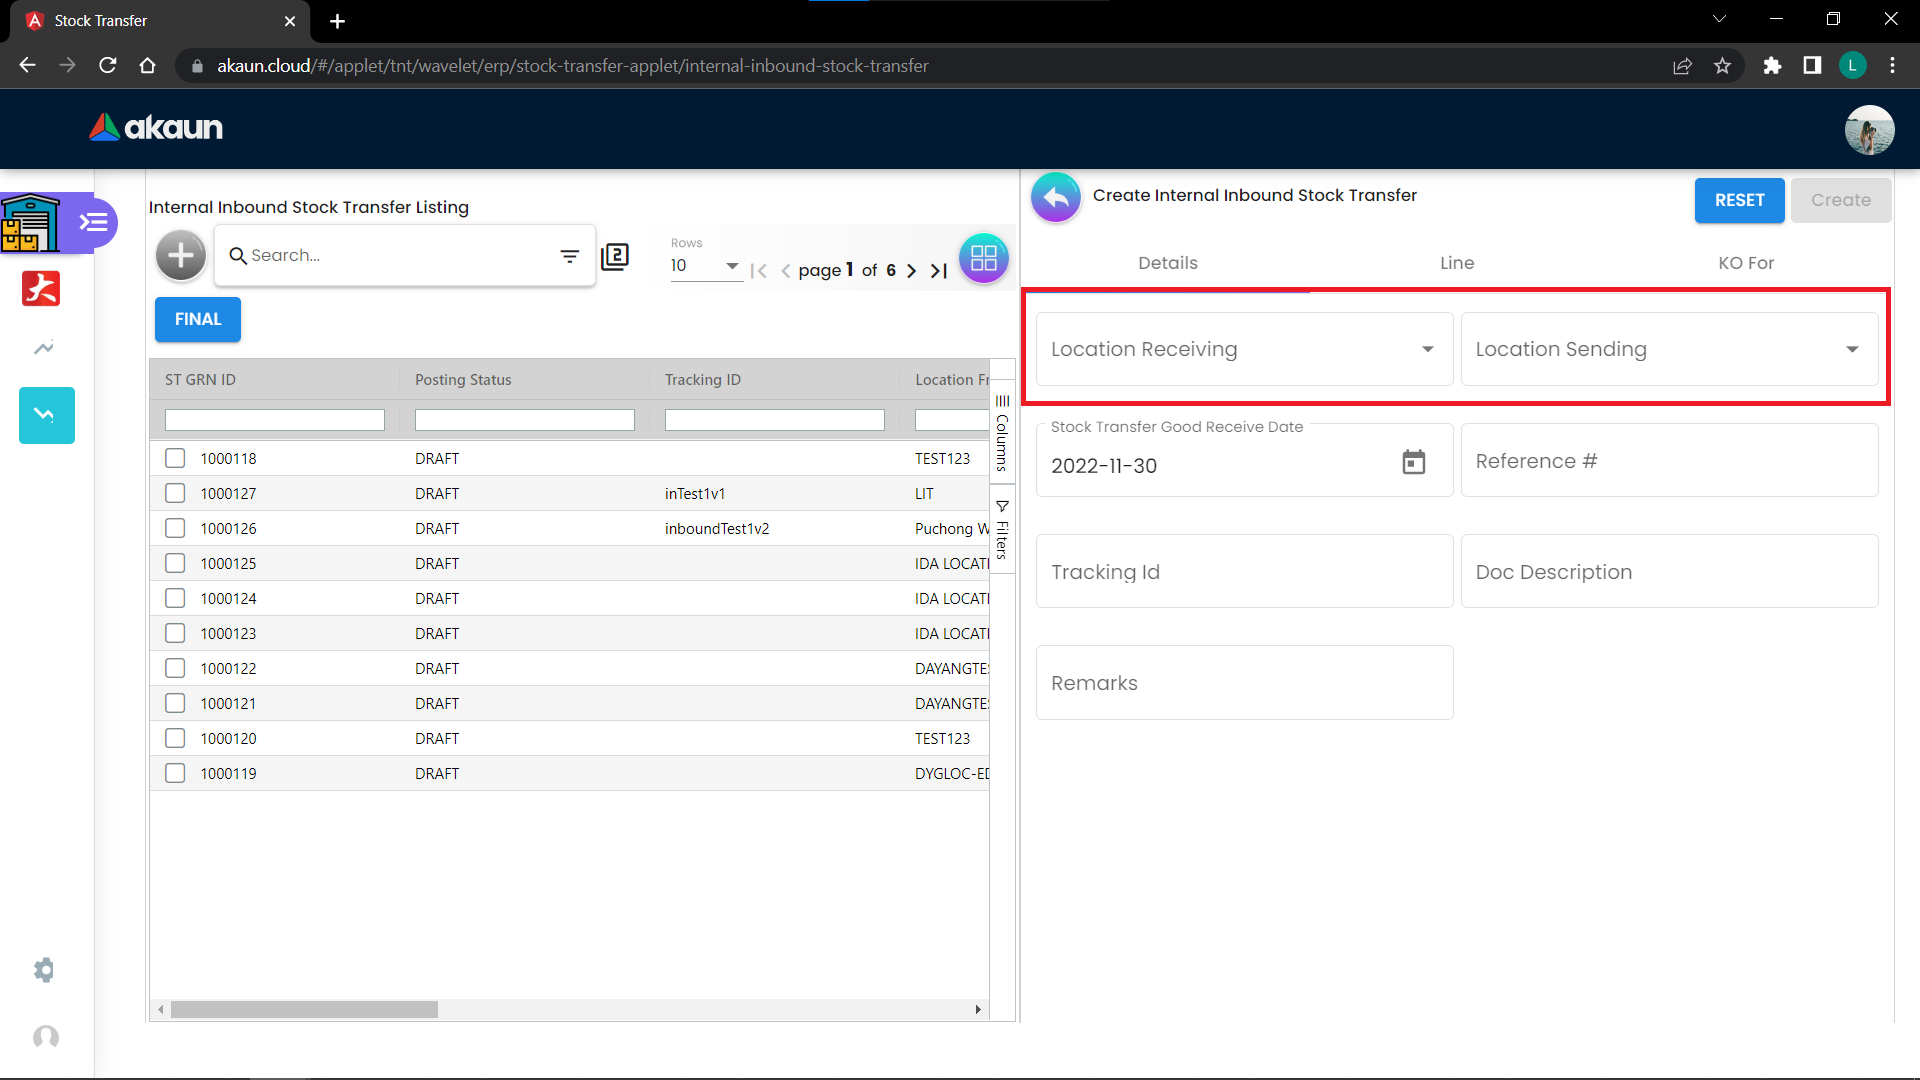
It indicates the location receiving and sending.
Go to the KO for Tab and select the Goods Issue Note that has been created earlier to be Knocked Off.
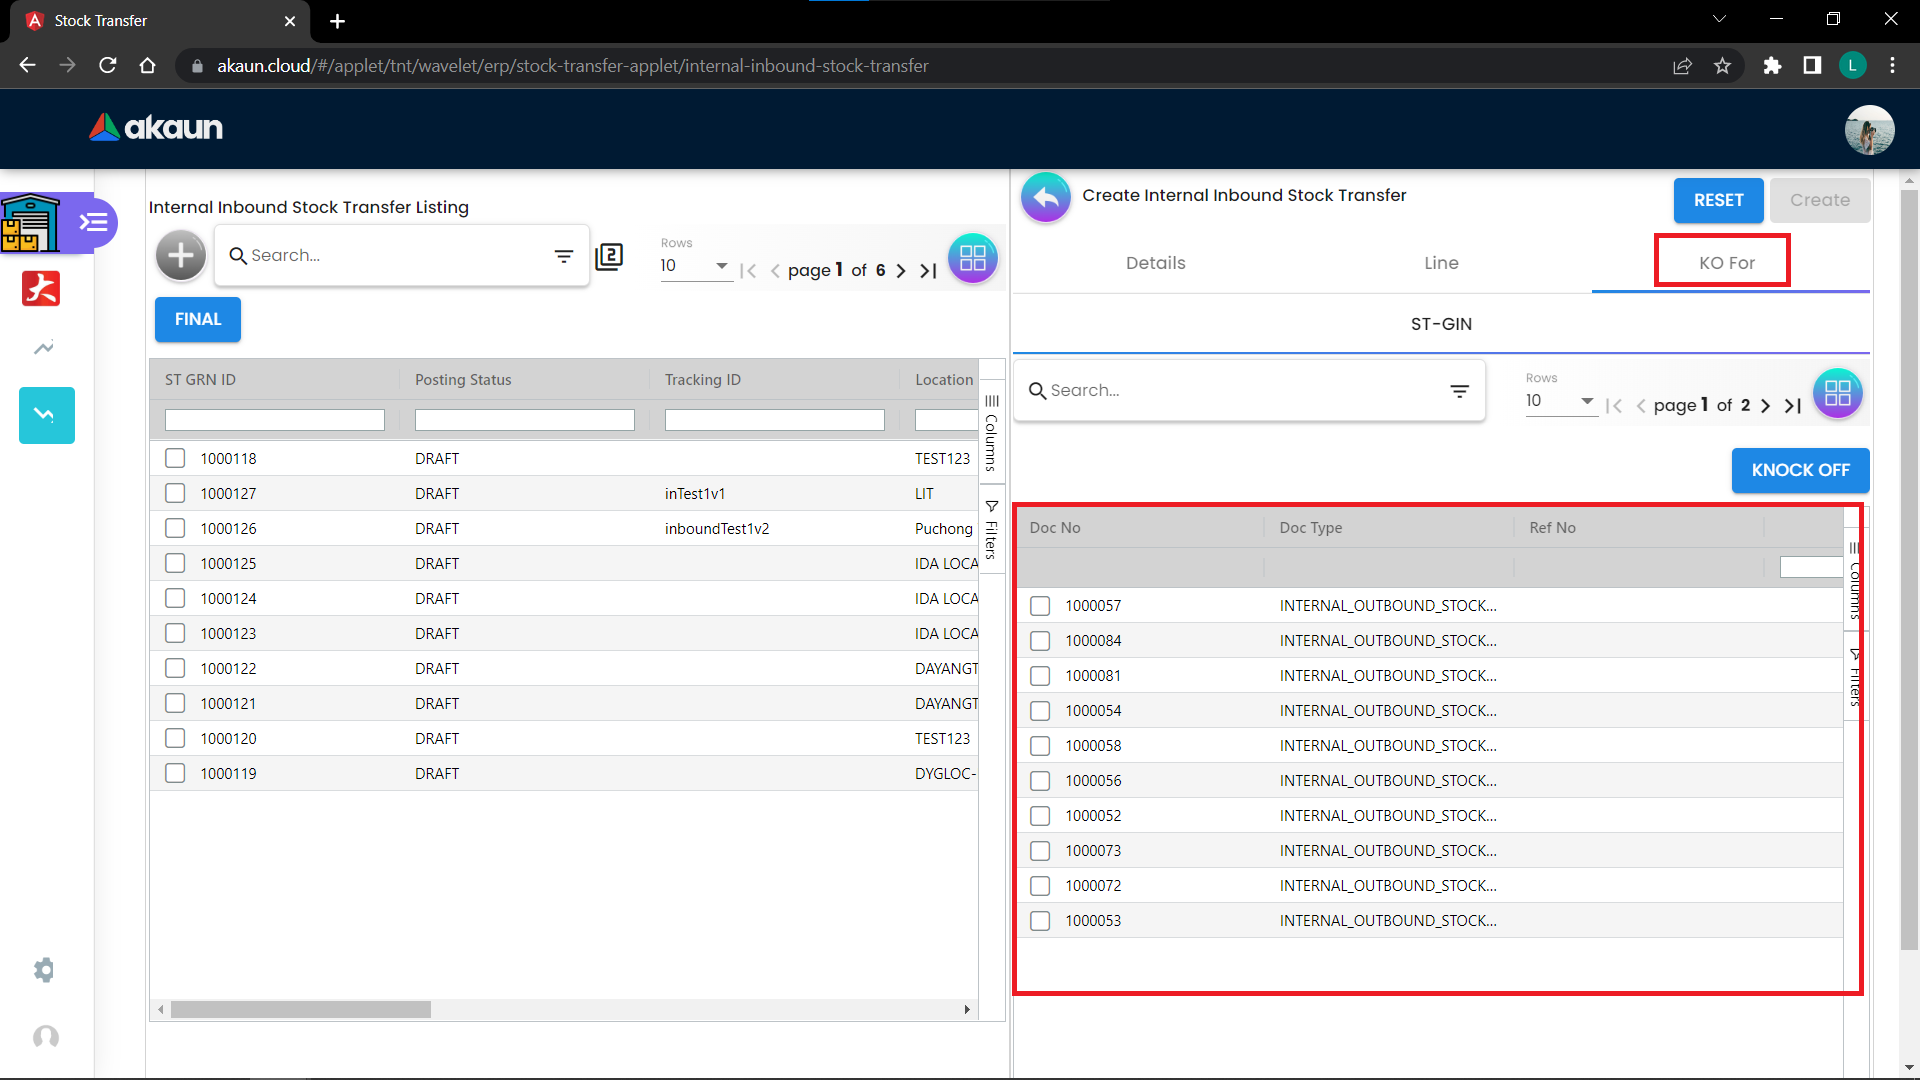
Note: Only Goods Issue Note that are finalized will be shown here.
Select the Goods Issue Note by clicking on the checkbox on the left of them, and click on the Knock Off button. There should be items added into the Line Tabs. Once done, click on the create button.
To finalize a Stock Transfer In, you can perform the same way as with the Goods Received Note.
Customer Maintenance Applet
Used to maintain the shipping address of the customer.
After creating a customer, click on the customer that you want to edit, and go to the Address Tab.
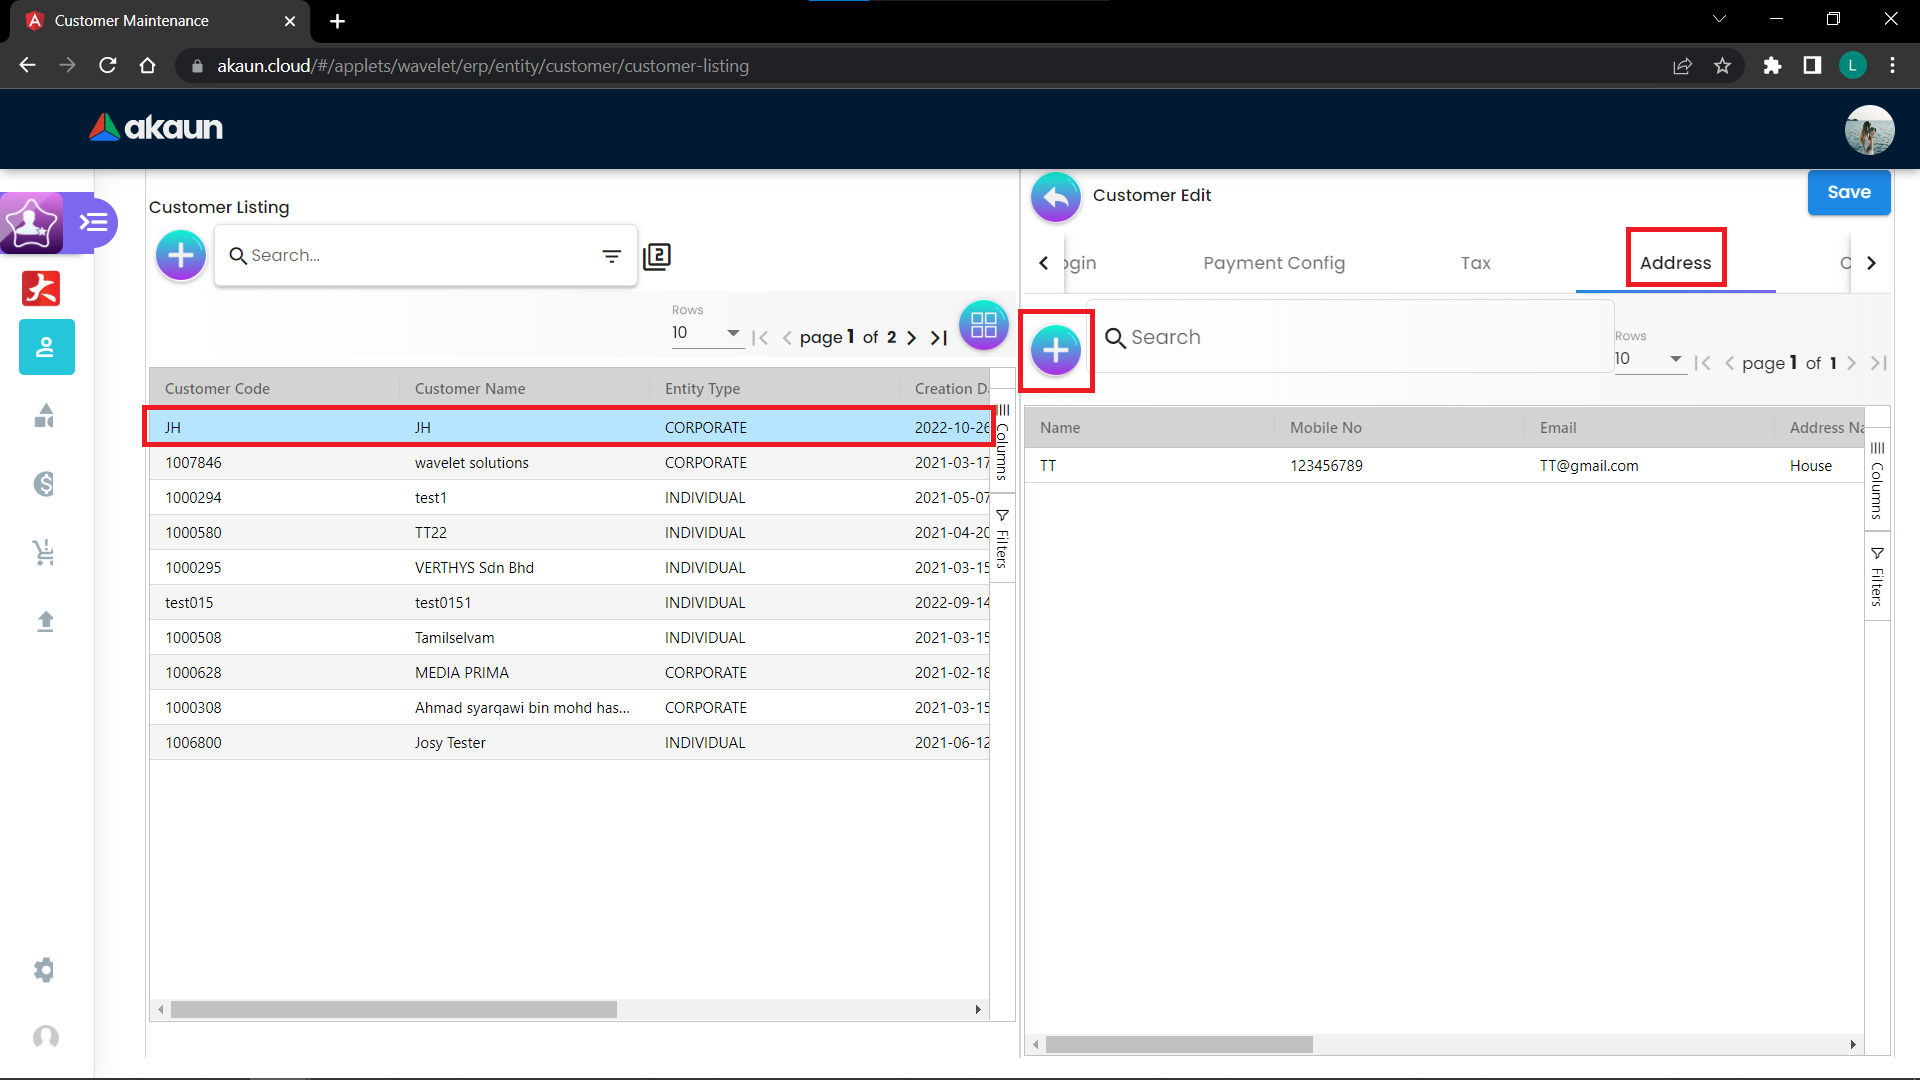
Note: New customers have no addresses.
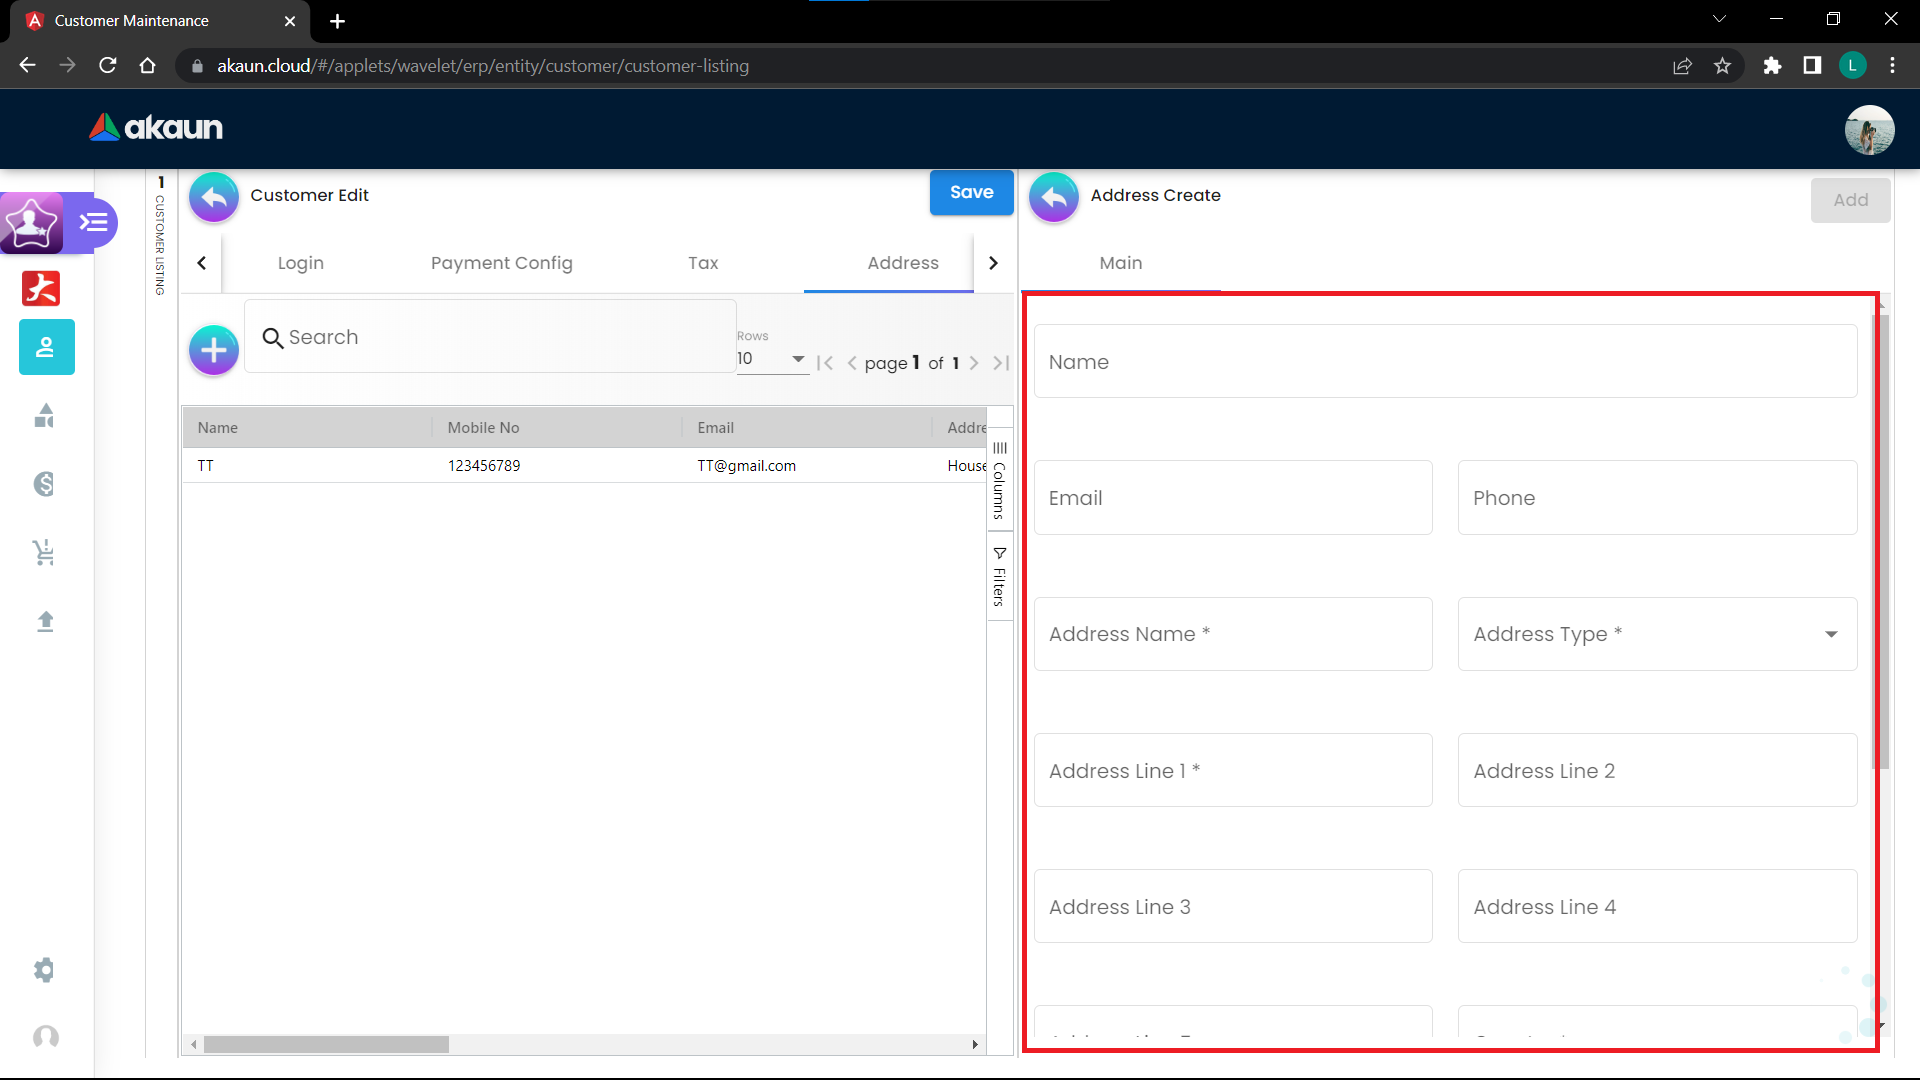
Fill in the required information to create an address. Once done, click on the Add button.
Internal Delivery Order Applet
It is used to deliver goods to the customer.
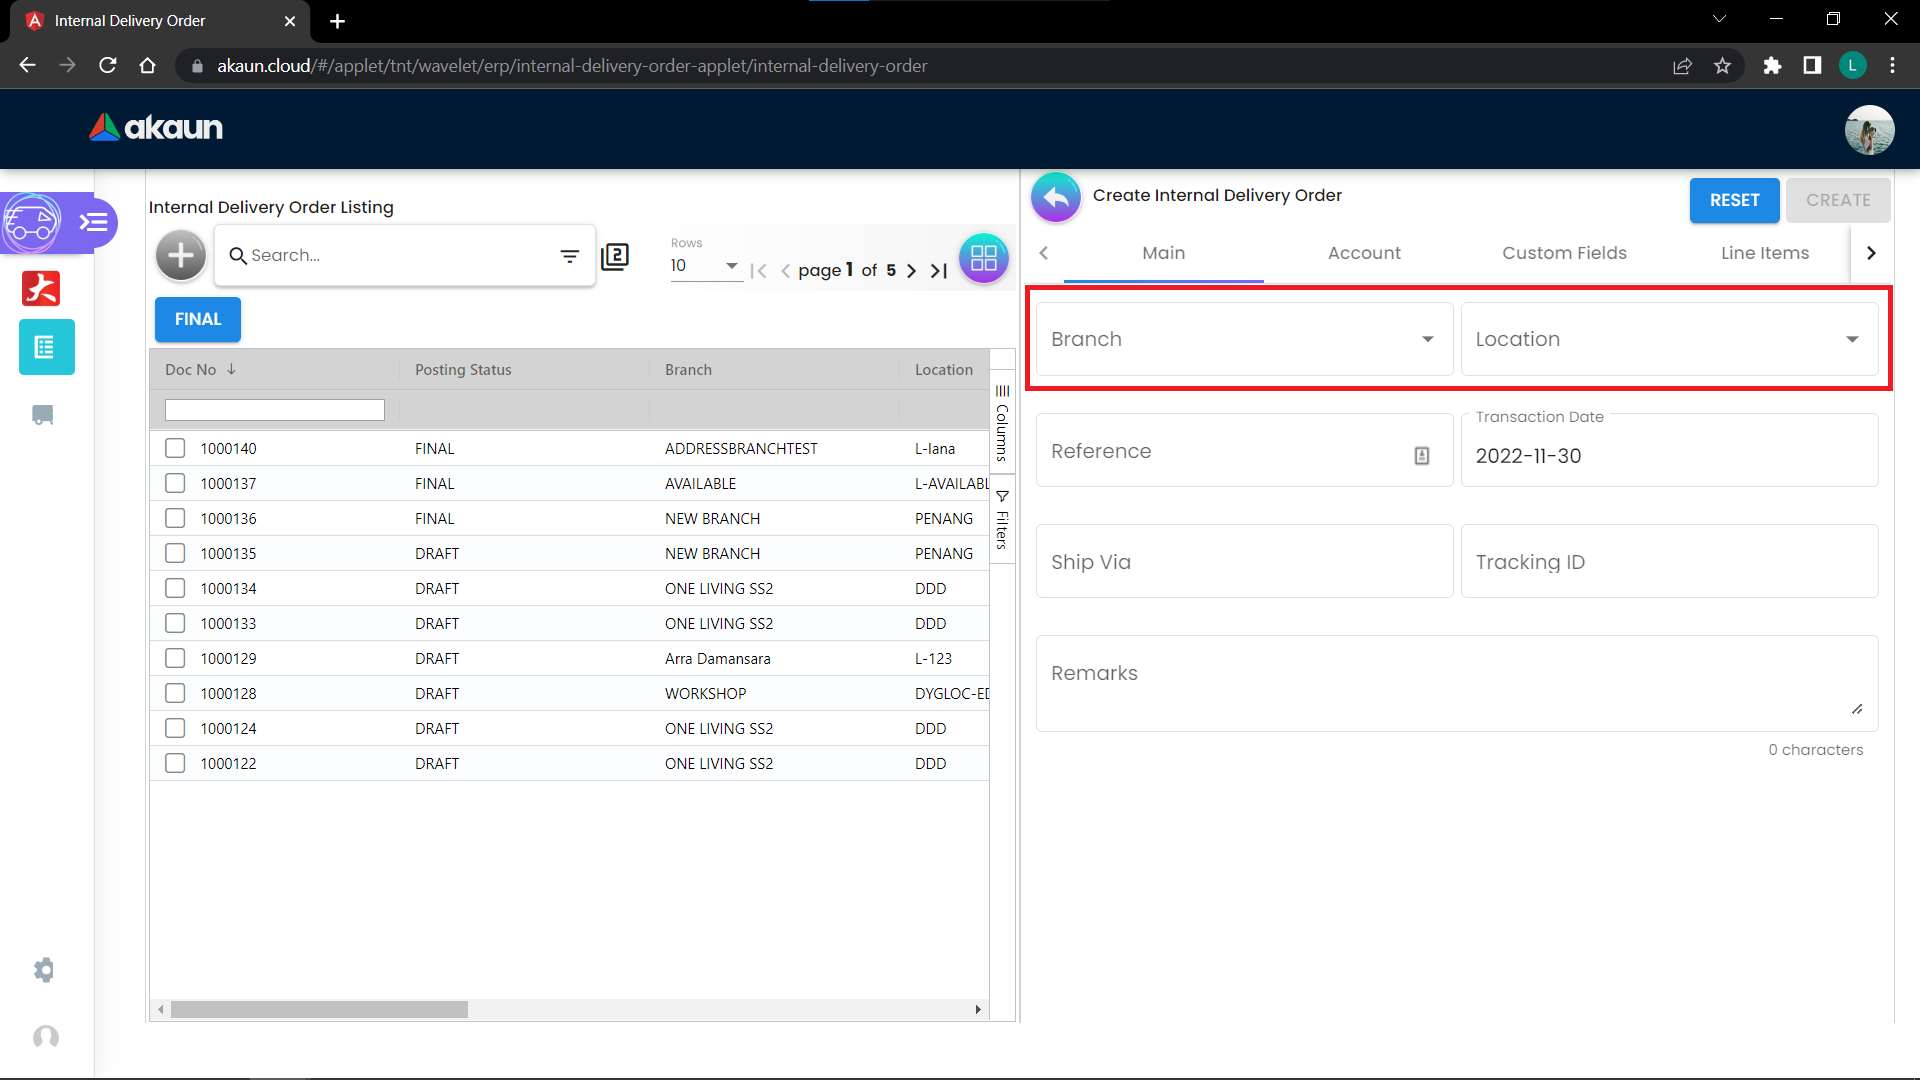
The branch and location should be the outgoing branch/location.
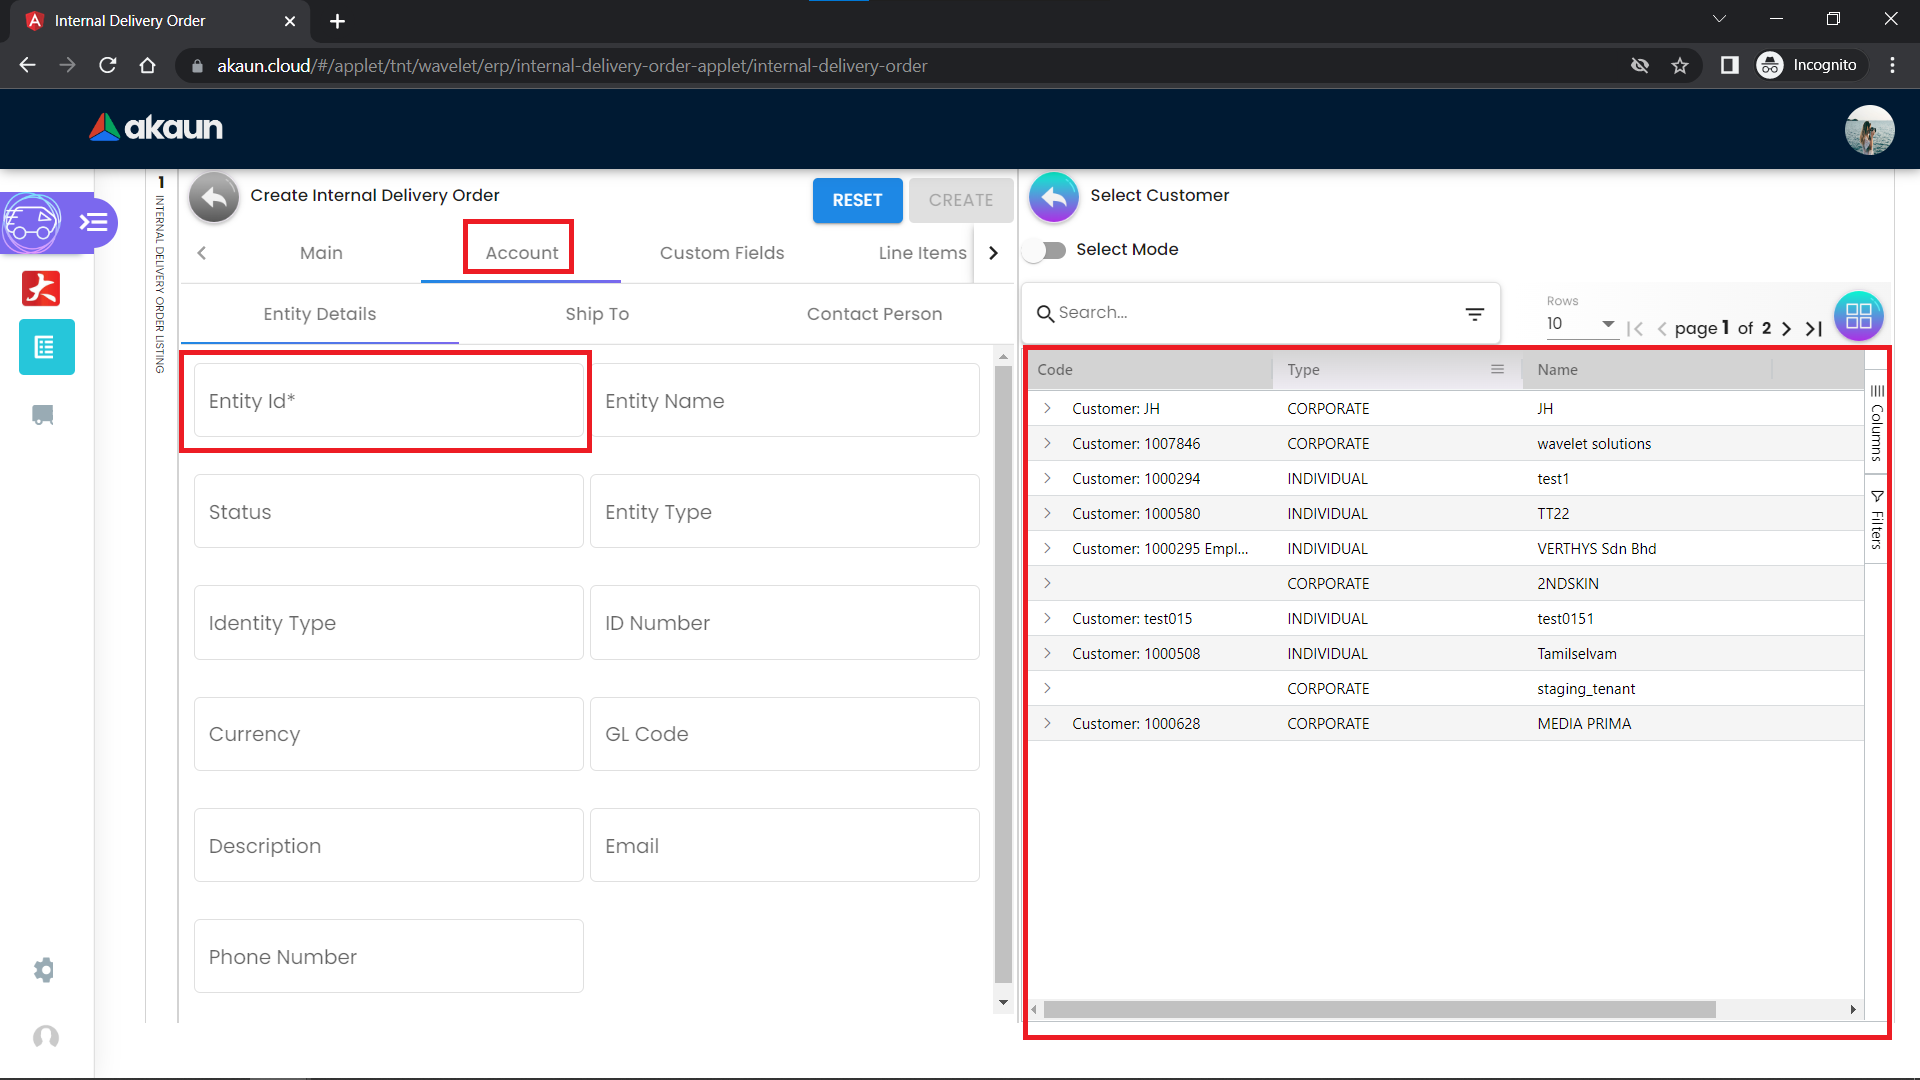
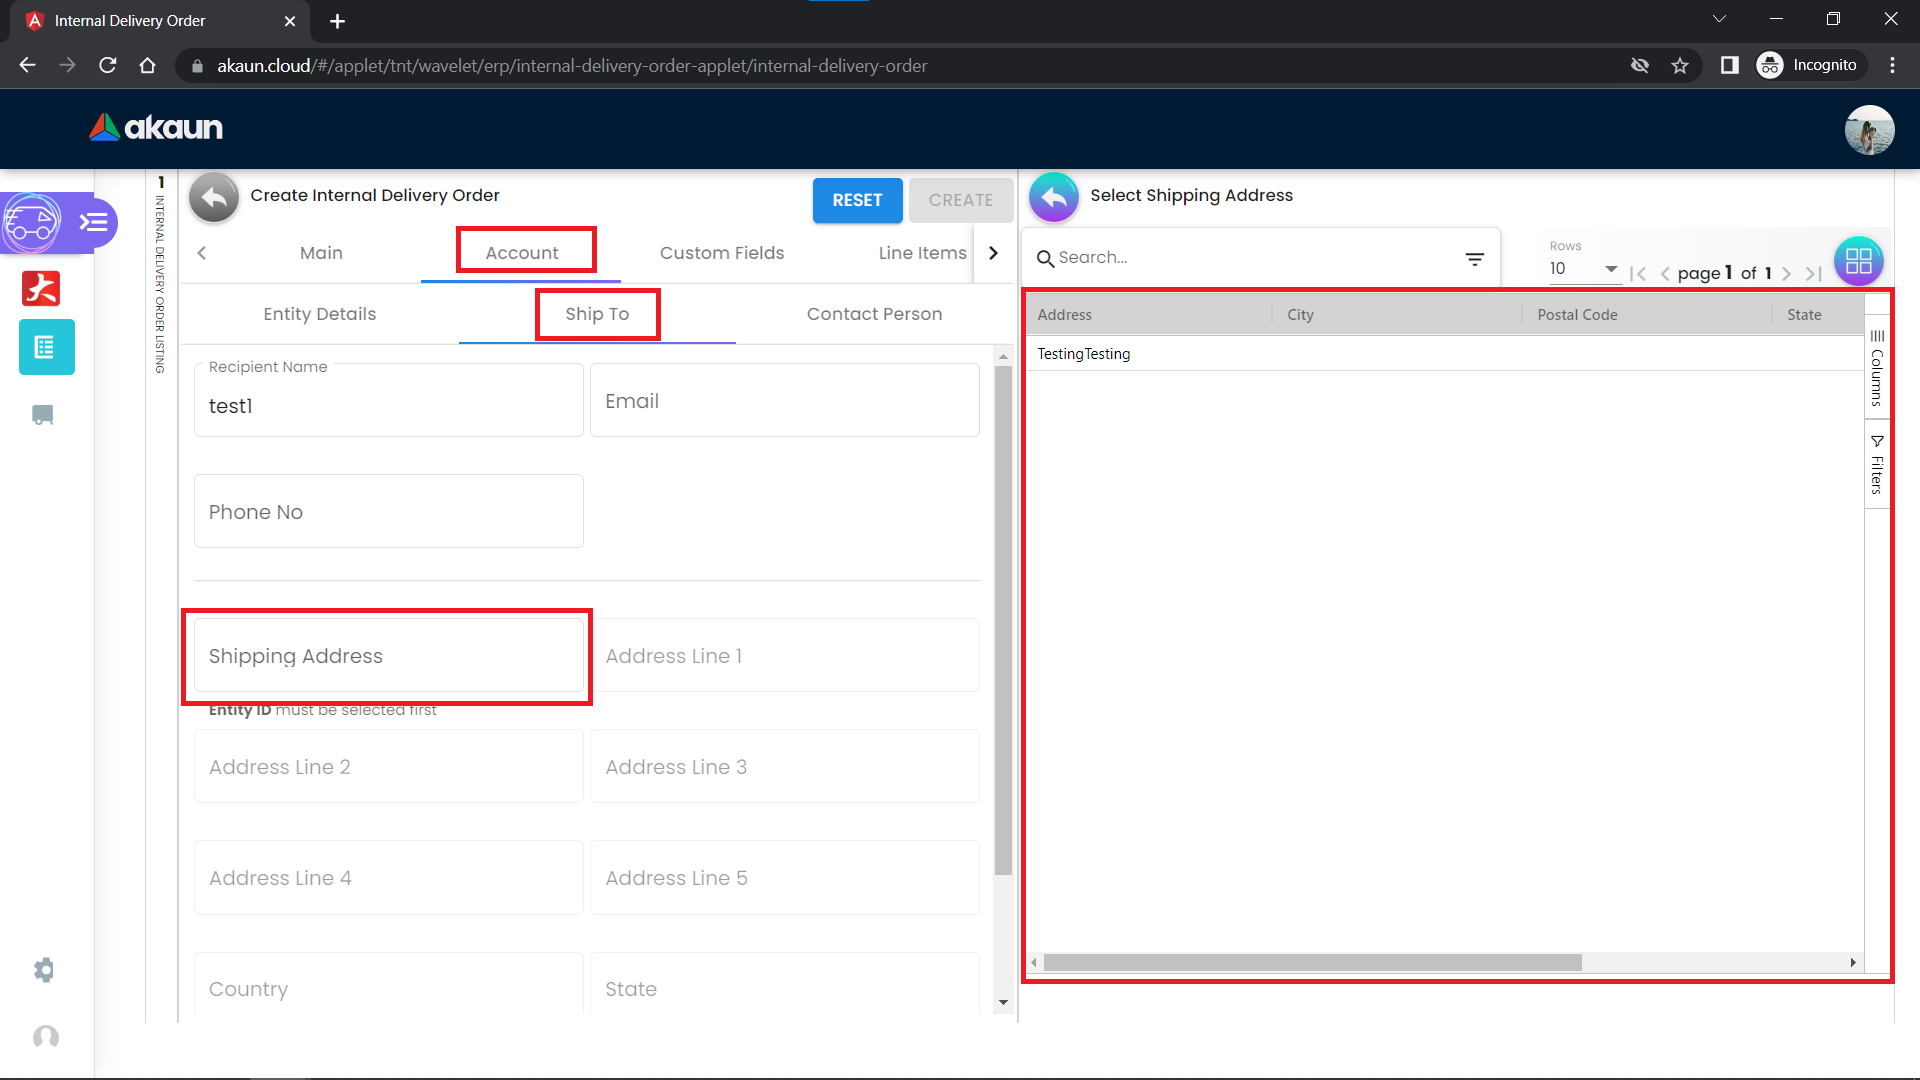
Next, go to the Account Tab and click on the Entity Id and it will prompt you to choose a customer.
Next, go to Account, Ship To Tab, and click on the Shipping Address. The shipping address is the one that you have maintained in the Customer Maintenance Applet.
Next, go to the Line Items Tab and select from the listing.
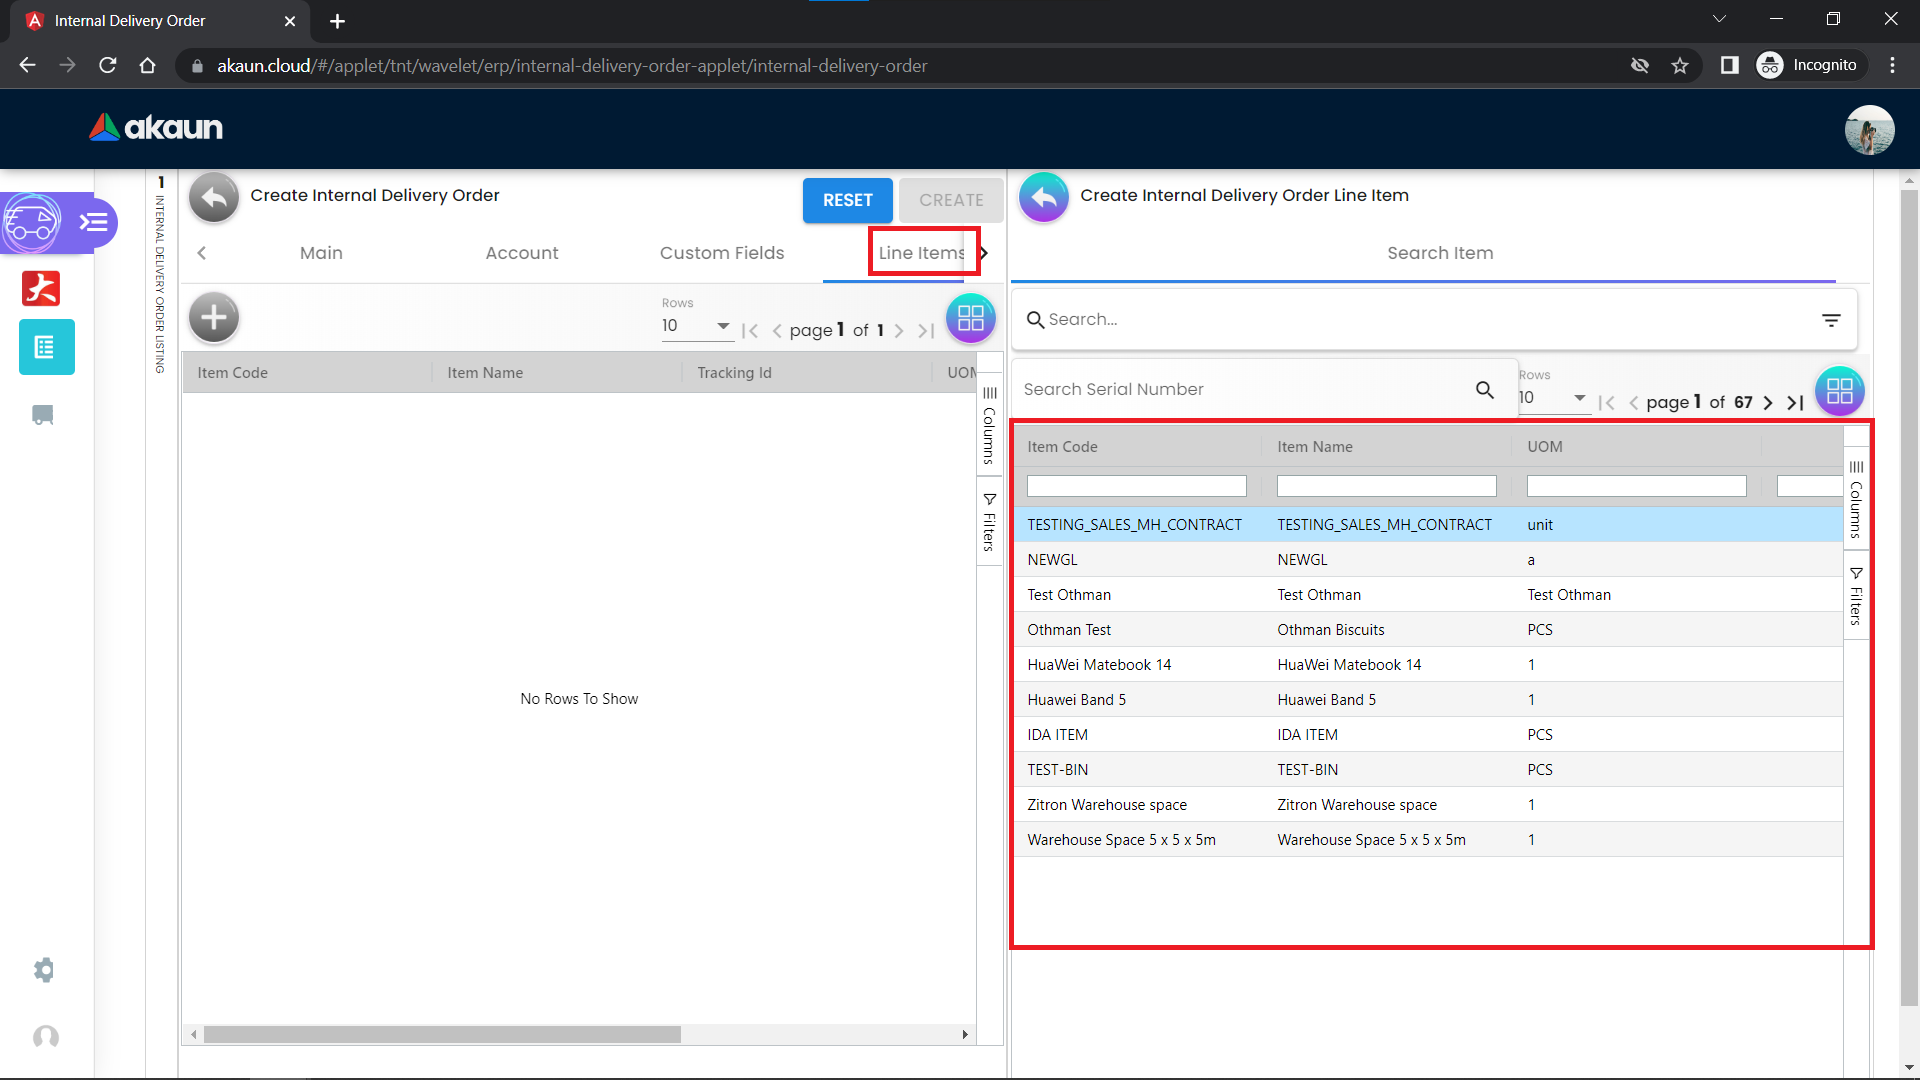
Once done, click on the create button.
For the status of the Delivery Order, there are 2 possible options:
-
Delivery in progress
-
Goods delivered

Once done, click on the save button to save changes.