3.0 Supplier Setup
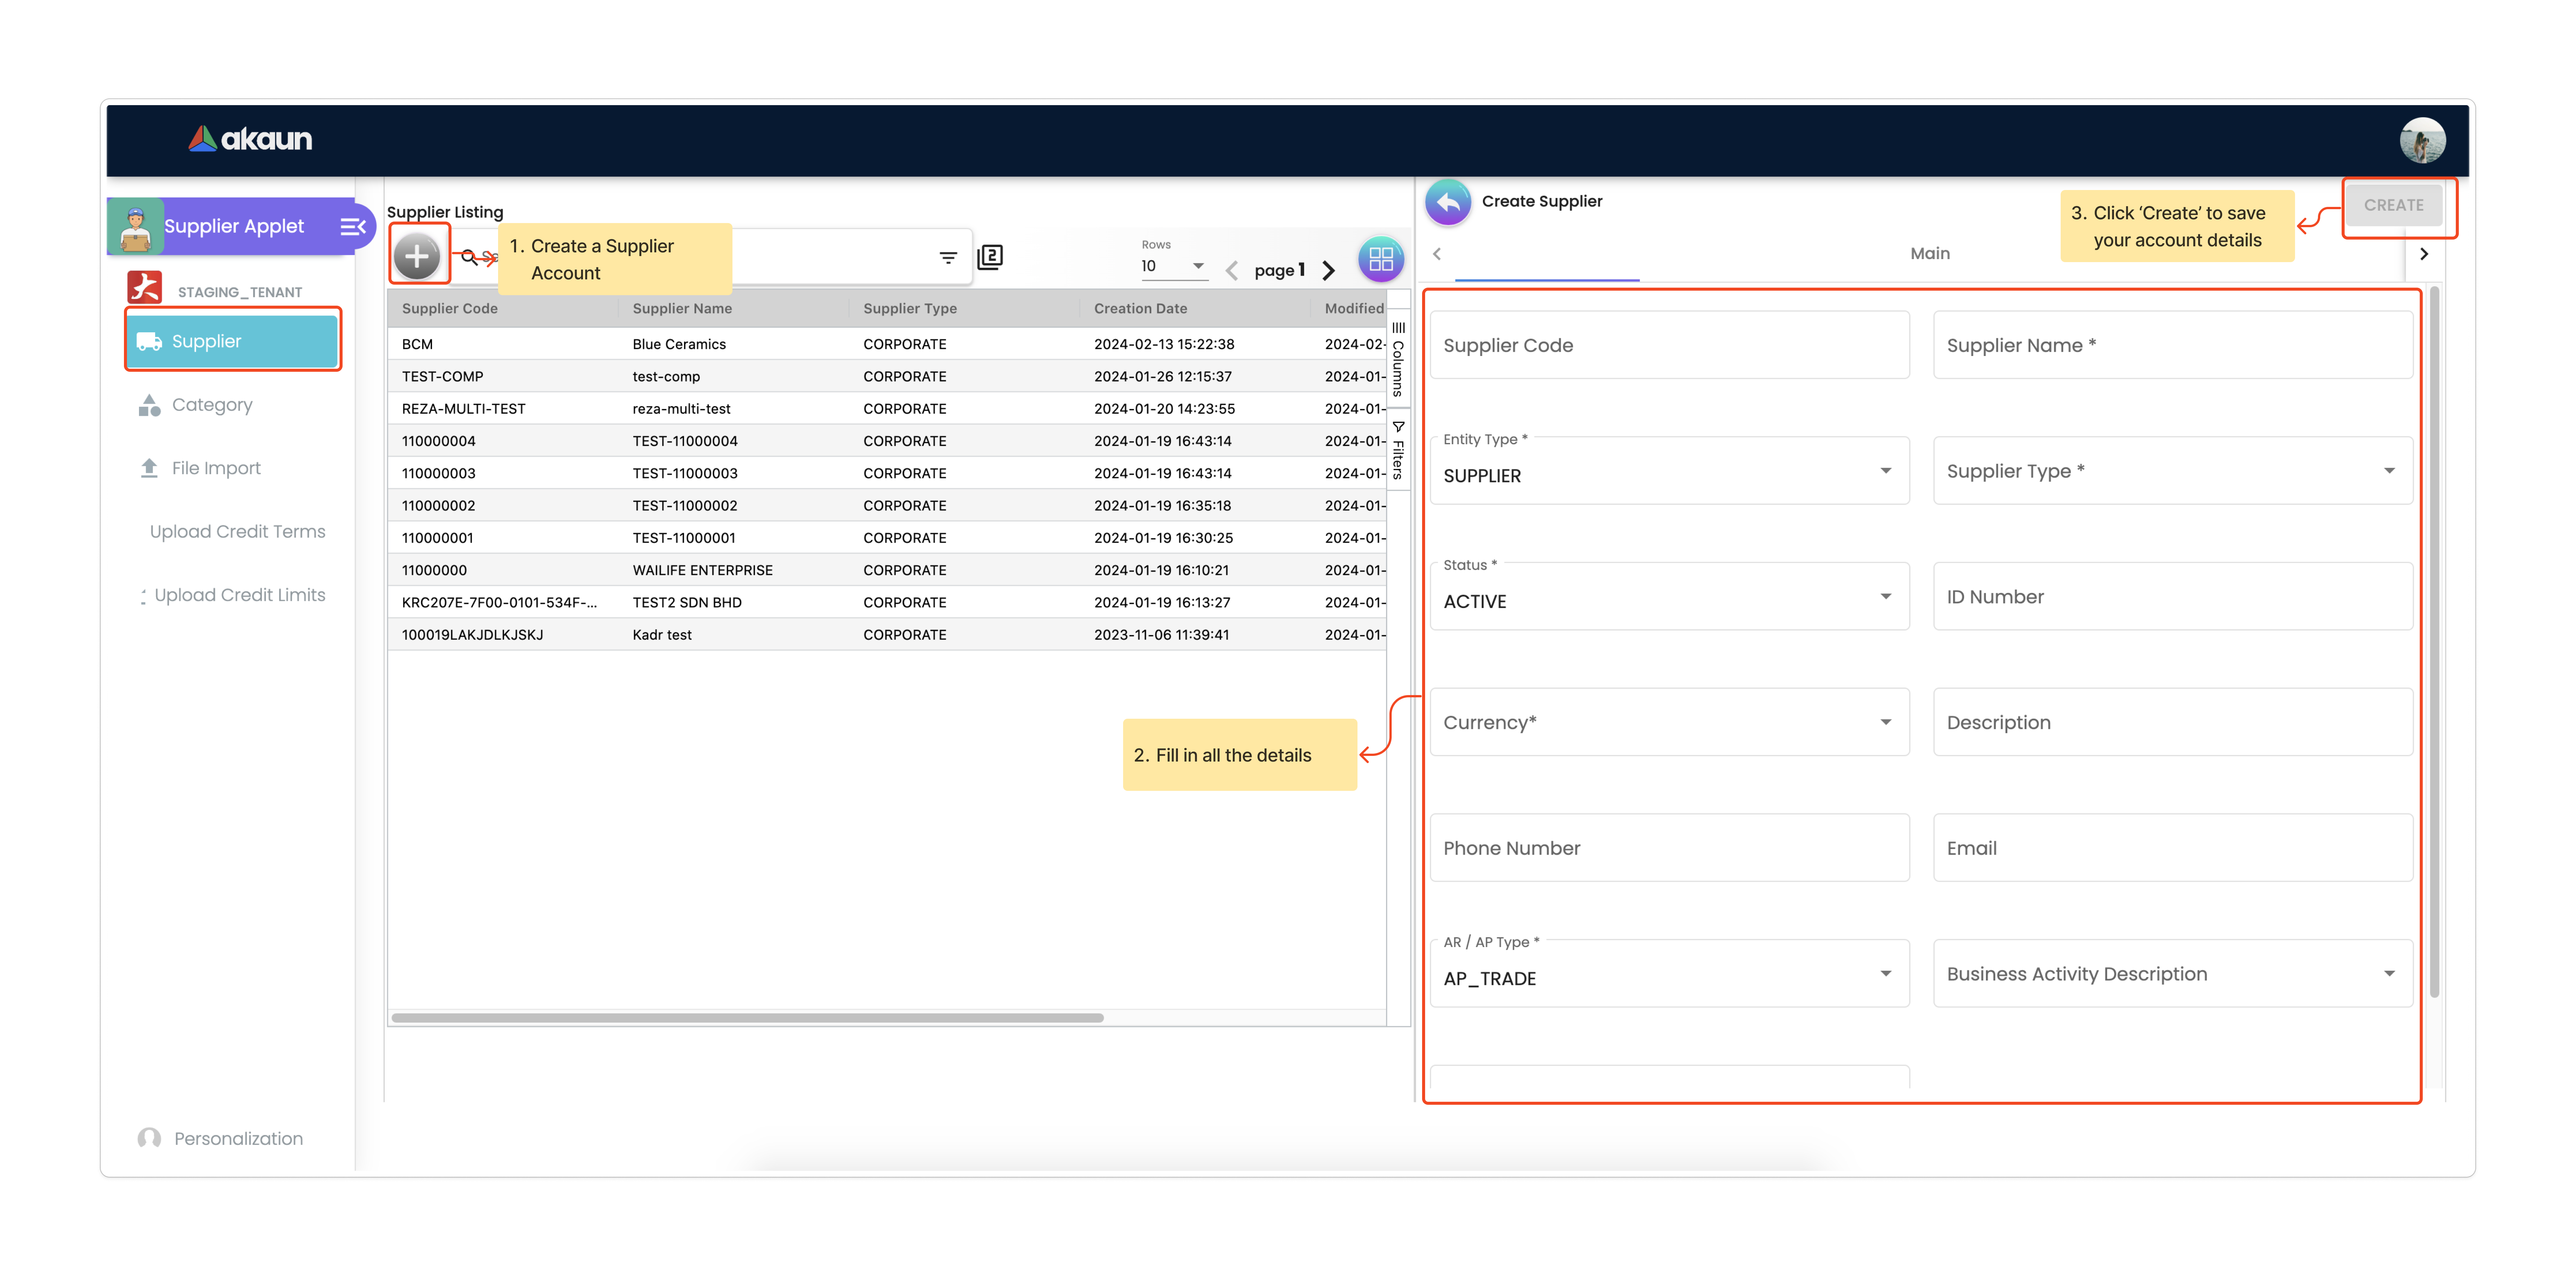
3.1 Create Supplier
This step ensures that customers are directly sent to the payment channel when making a payment.
-
To set up a payment channel, start by creating a supplier account using the Supplier Maintenance Applet.
-
Go to the supplier listing page and click the '+' button to add a new supplier.
-
Fill in all the details and click 'Create.
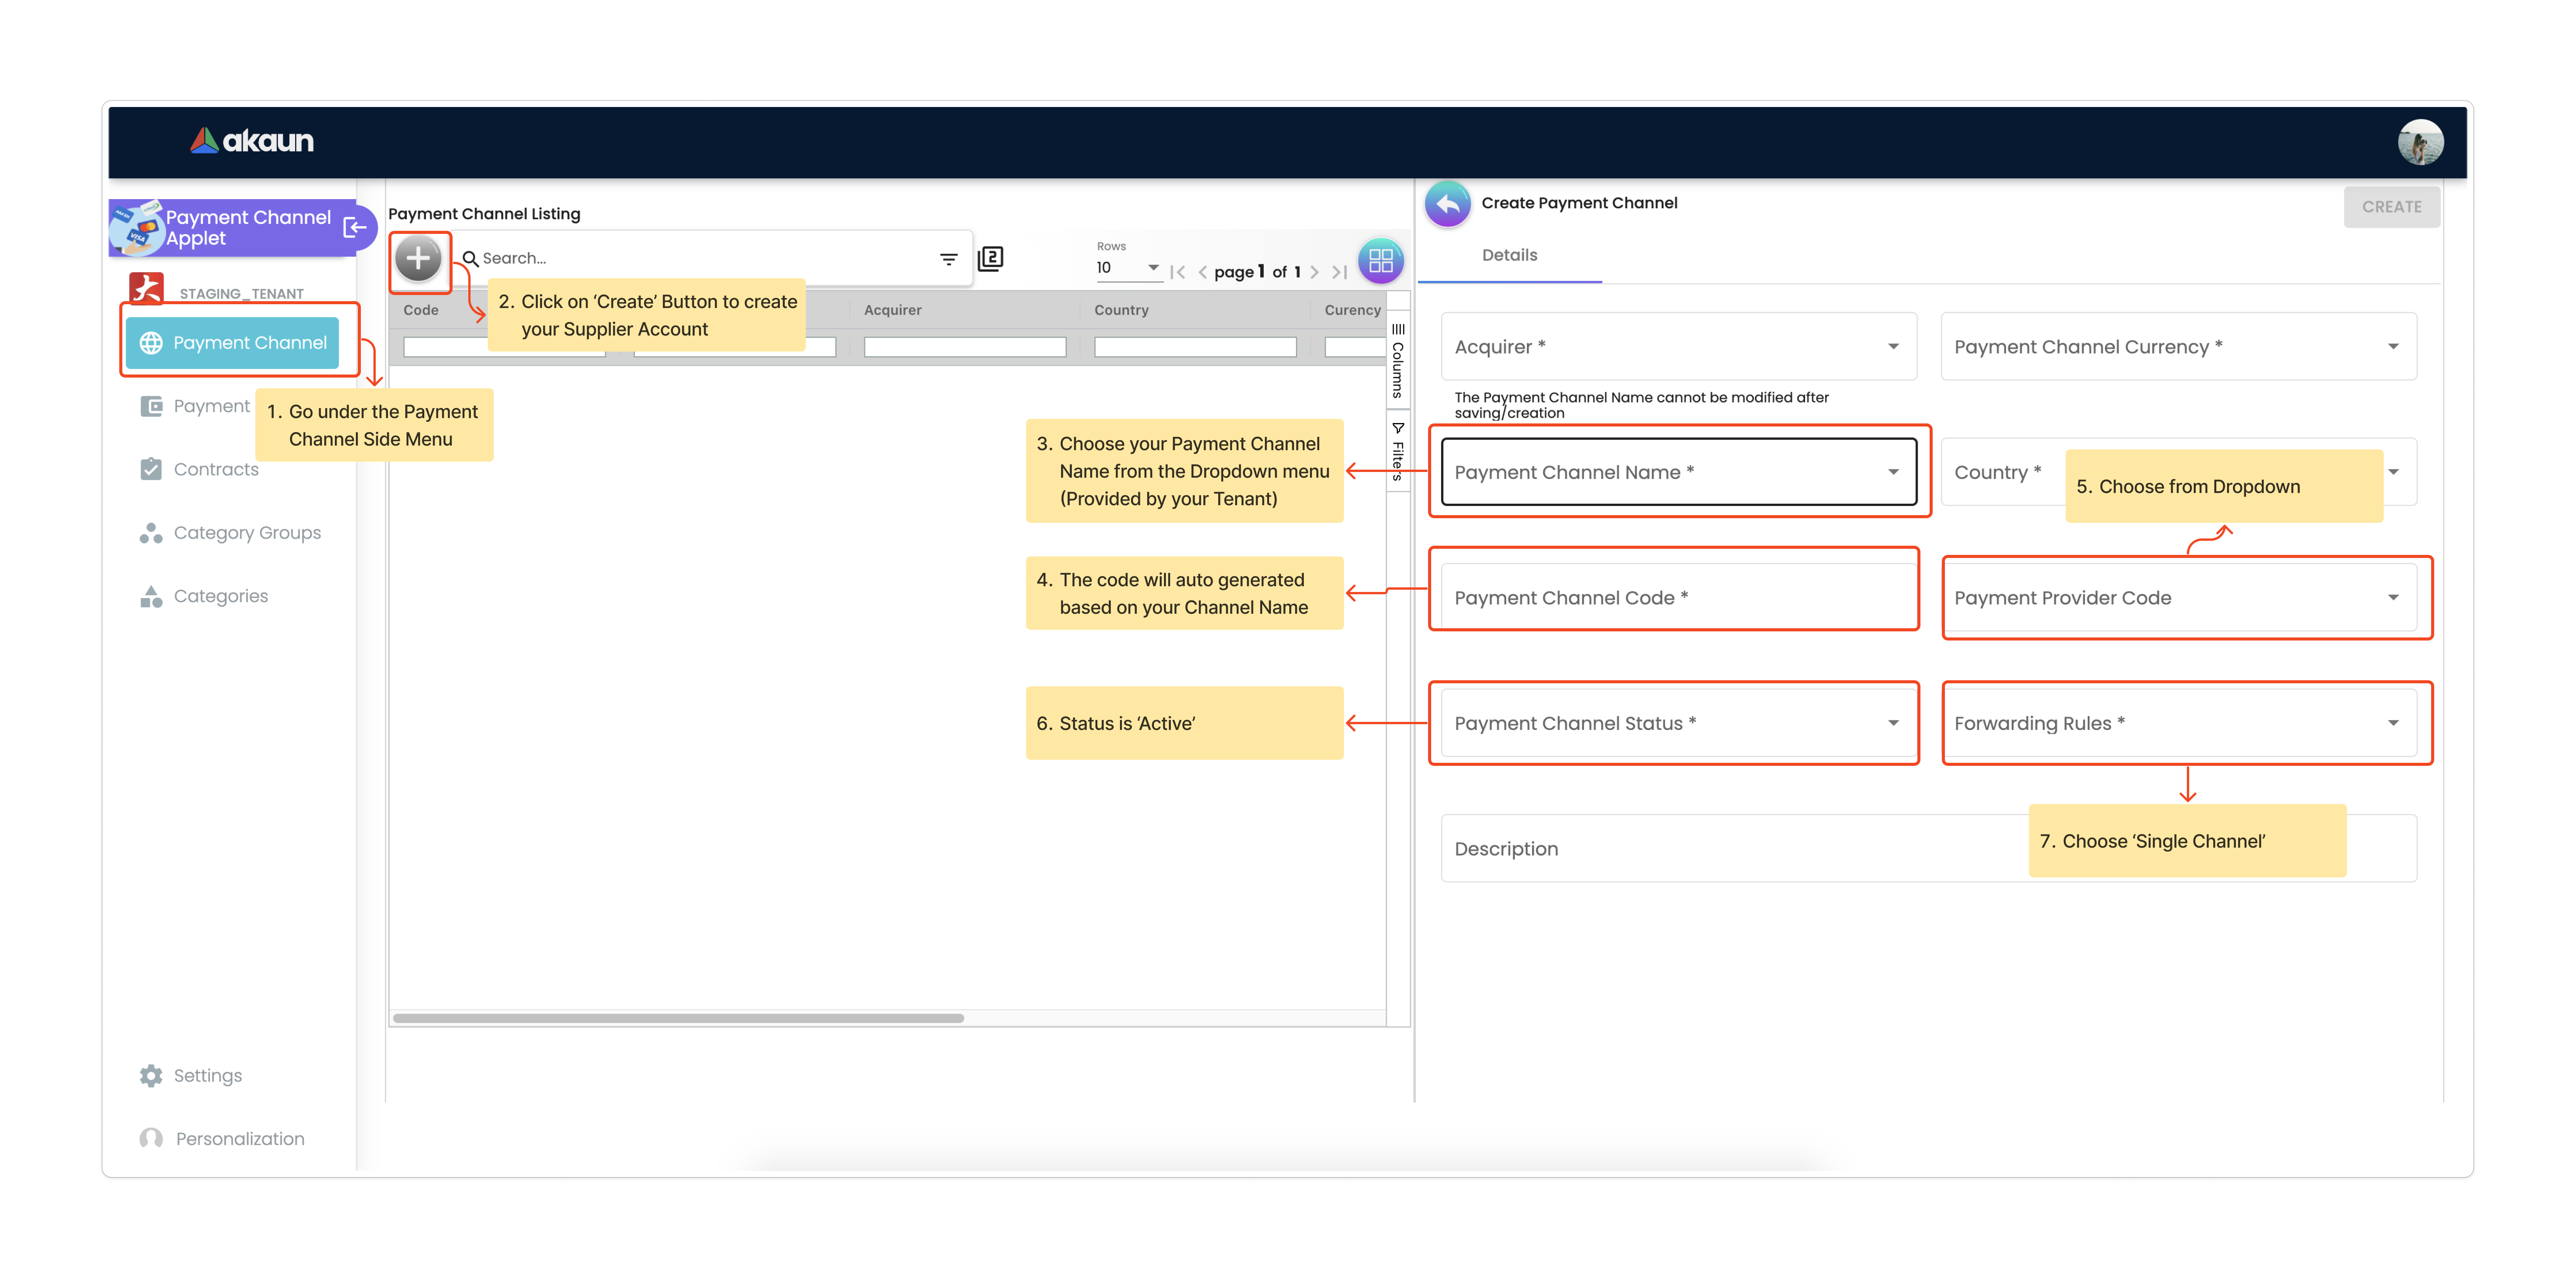
4.0 Payment Channel Setup
4.1 Create Payment Channel
Once done creating a Supplier Account, go to Payment Channel Applet:
-
Specify the Acquirer, which is the Payment Gateway Supplier created in the Supplier Applet.
-
Choose the payment channel name from the dropdown menu (provided by your tenant), and the Payment Channel Code will fill in automatically.
-
The user will notice they do not have any Payment Provider for now. If do not show anything, check the steps from 5.0 - Payment Provider Setup later.
-
Set the Payment Channel status to 'Active.’
-
Select 'Forwarding Rules' as 'Single Channel'.
5.0 Payment Provider Setup
5.1 Create Payment Provider
This guide explains how to set up a payment provider in the Payment Channel Applet. Users create a new provider, input details, and can modify settings later. After creating a payment channel, they link it to the provider for seamless operation, setting priority for functionality.
-
Go to Payment Channel Applet.
-
In the Payment Provider section, click the '+' button to create a new payment provider.
-
Enter all payment provider details.
-
. Navigate back to the listing and click on the created payment provider.
-
Access the 'Edit Payment Provider' page to modify details.
-
Users can update the logo in the 'Manage Images' tab.
-
In order to link the payment provider to the payment channel, users must created a Payment Channel beforehand. Which is already mentioned in the previous steps.
-
After Payment Channel is created, users can view the linked payment channel in the 'Payment Channel Priority' tab under 'Edit Payment Provider' page.
-
Users are required to set the priority in order for the payment provider to fully function.
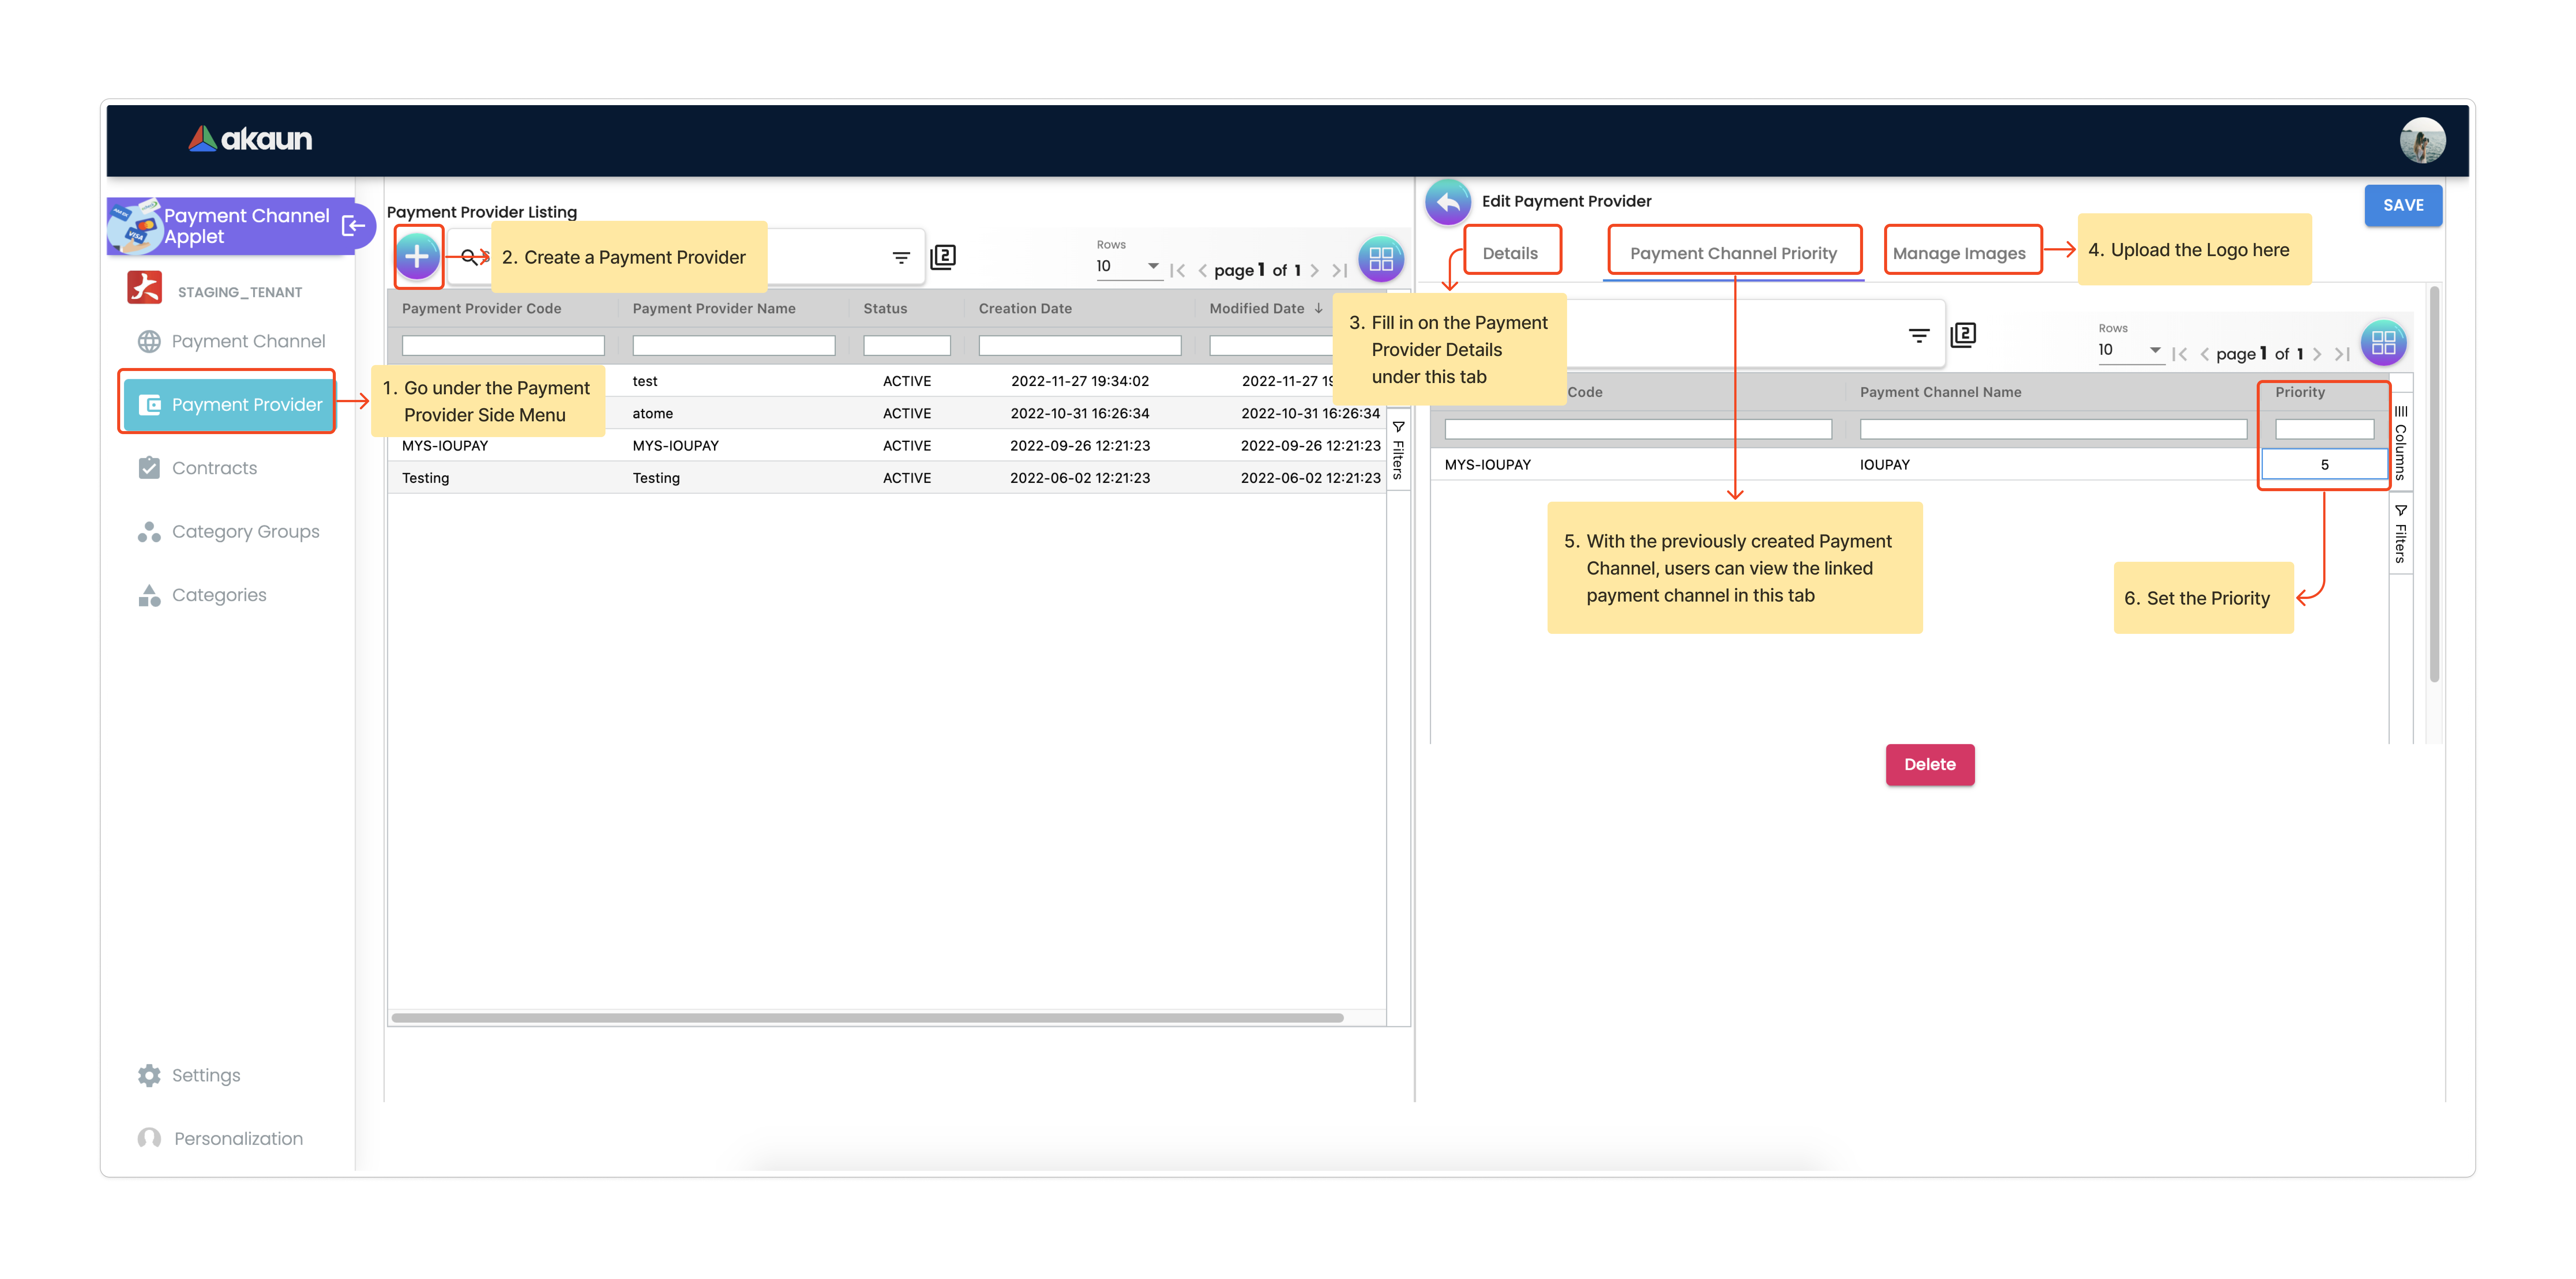
Finally, navigate back to the Payment Channel side menu, and now users should be able to fill in the Payment Provider Code from the dropdown menu.
6.0 Payment Channel Contract Setup
To establish the link between the Payment Service Provider and Your Company, users are required to provide details such as:
-
Contract Company Name
-
Payment Gateway Company
-
Payment Channel
-
Contract Key
-
Contract Status
Users can configure this in the Payment Channel Applet, you’ll find a Contract section where you can set up contracts between the Payment Gateway Supplier, Payment Provider, and your own Company (Contract Company).

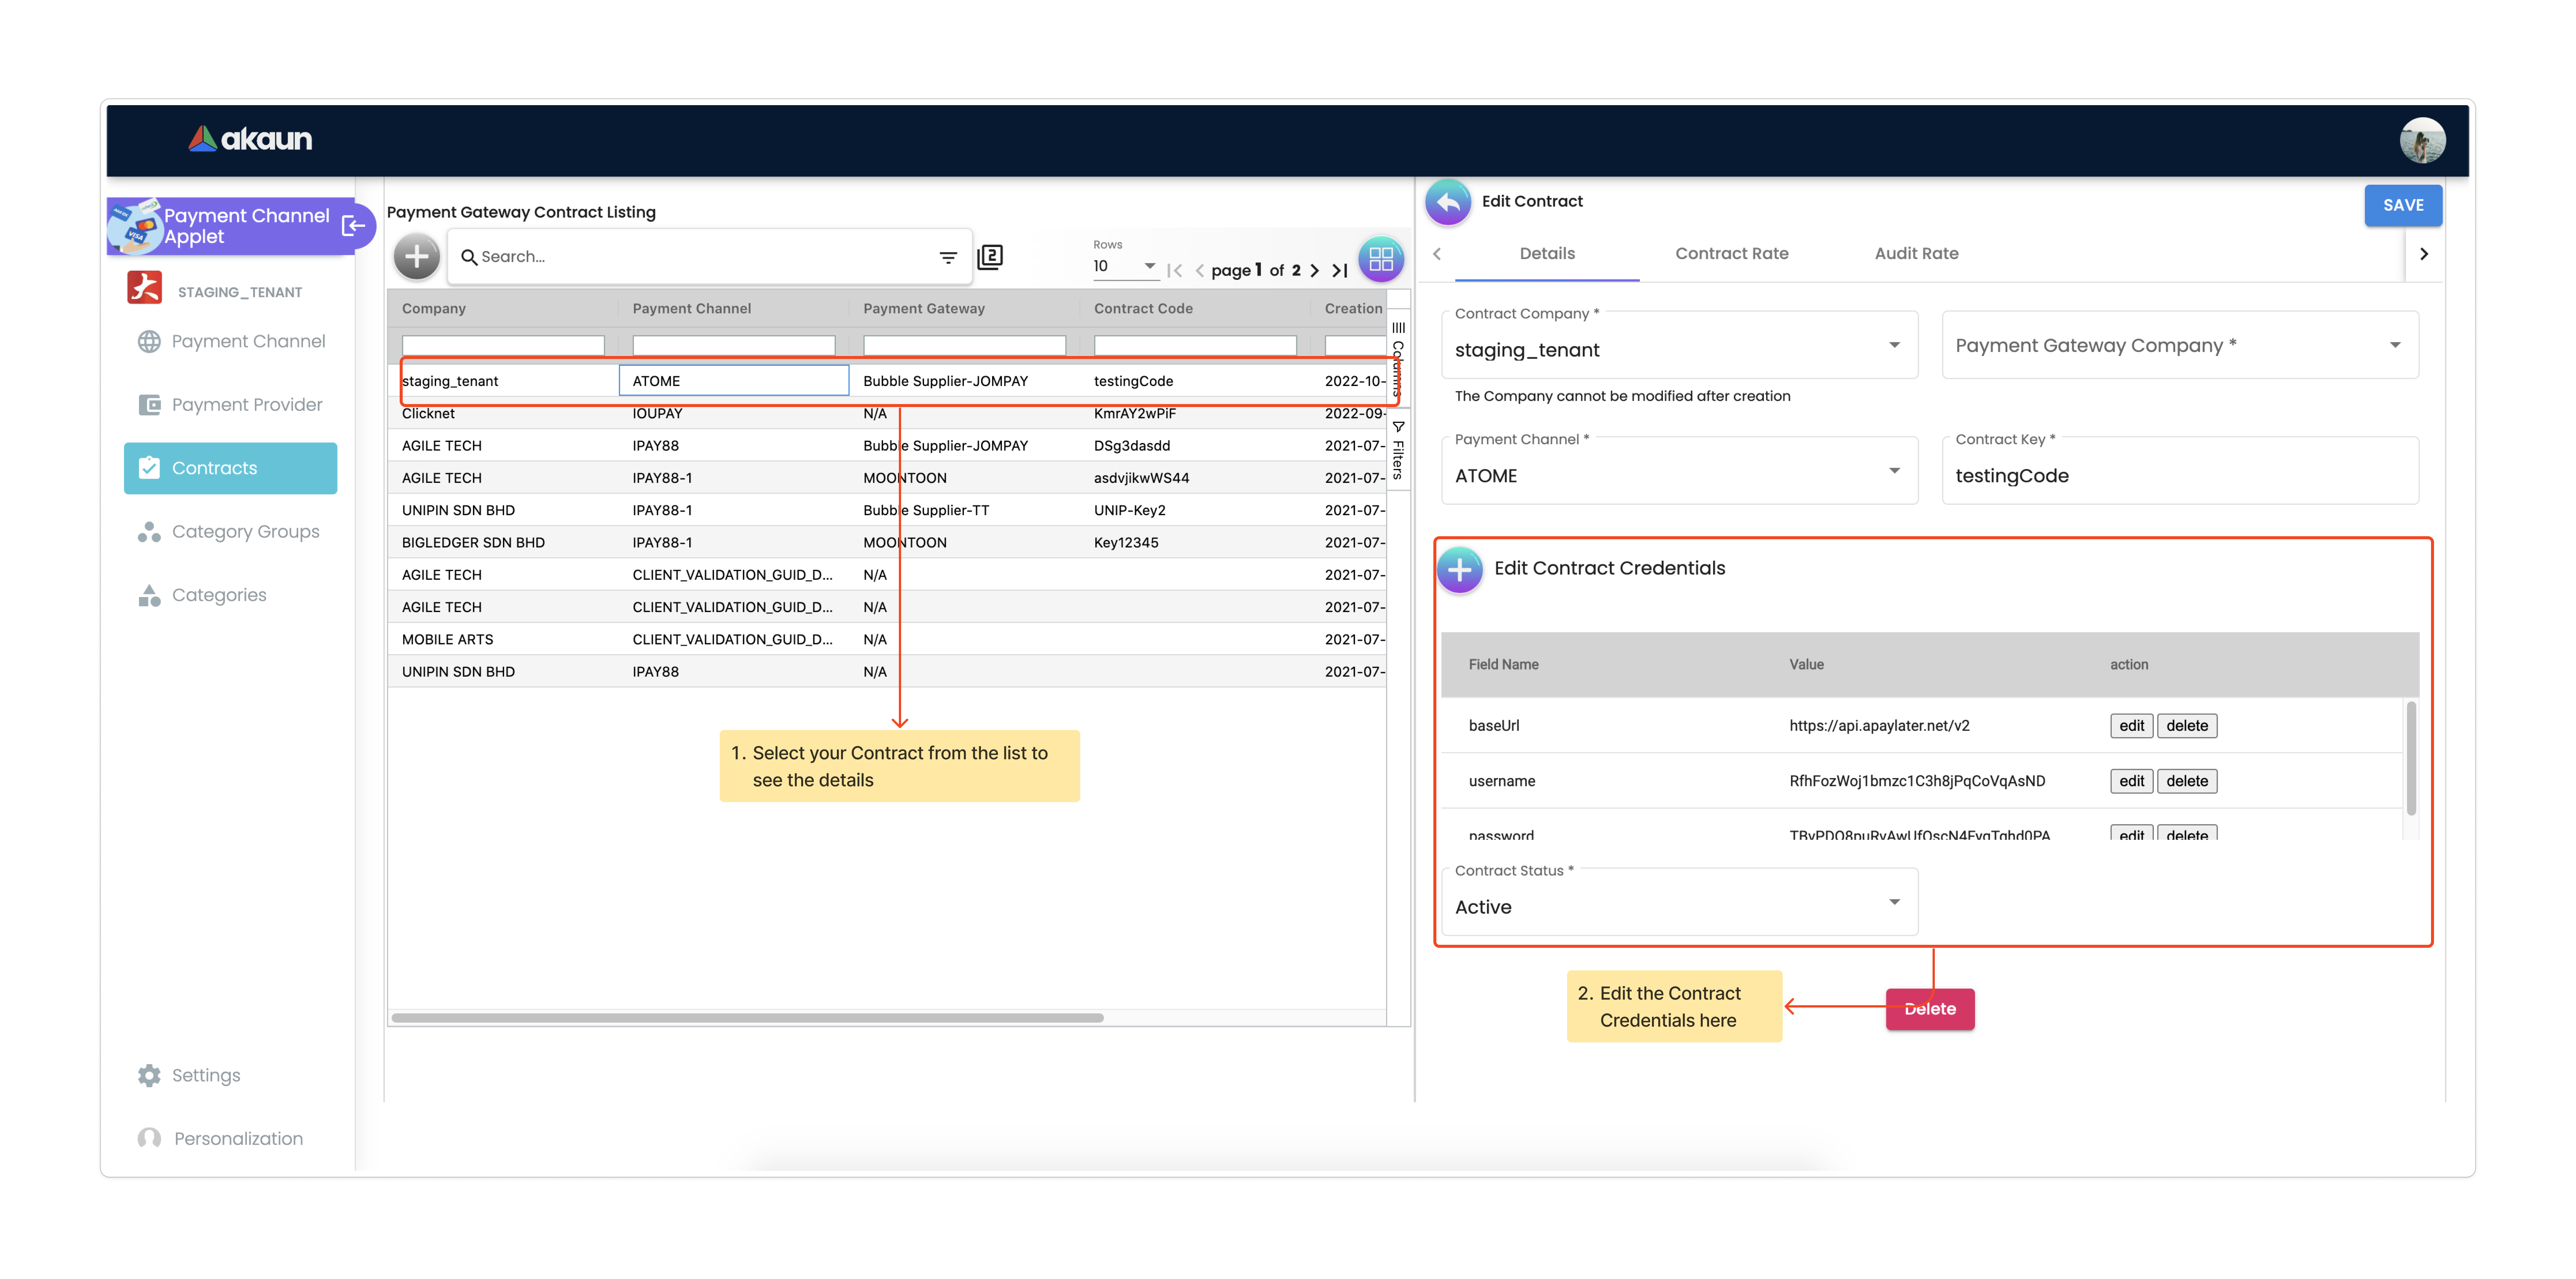
6.1 Edit Contract Credentials
After creating the contract, it will be shown on the contract listing page.
-
Click on the created contract to edit its details.
-
On the Details page, find the Edit Contract Credentials section.
-
These credentials are obtained from signing the physical contract with the Payment Gateway Company.
-
Create credentials by clicking the '+' button and make necessary edits.
-
Once saved, the credentials will be hidden, as we do not want the data to be exposed.
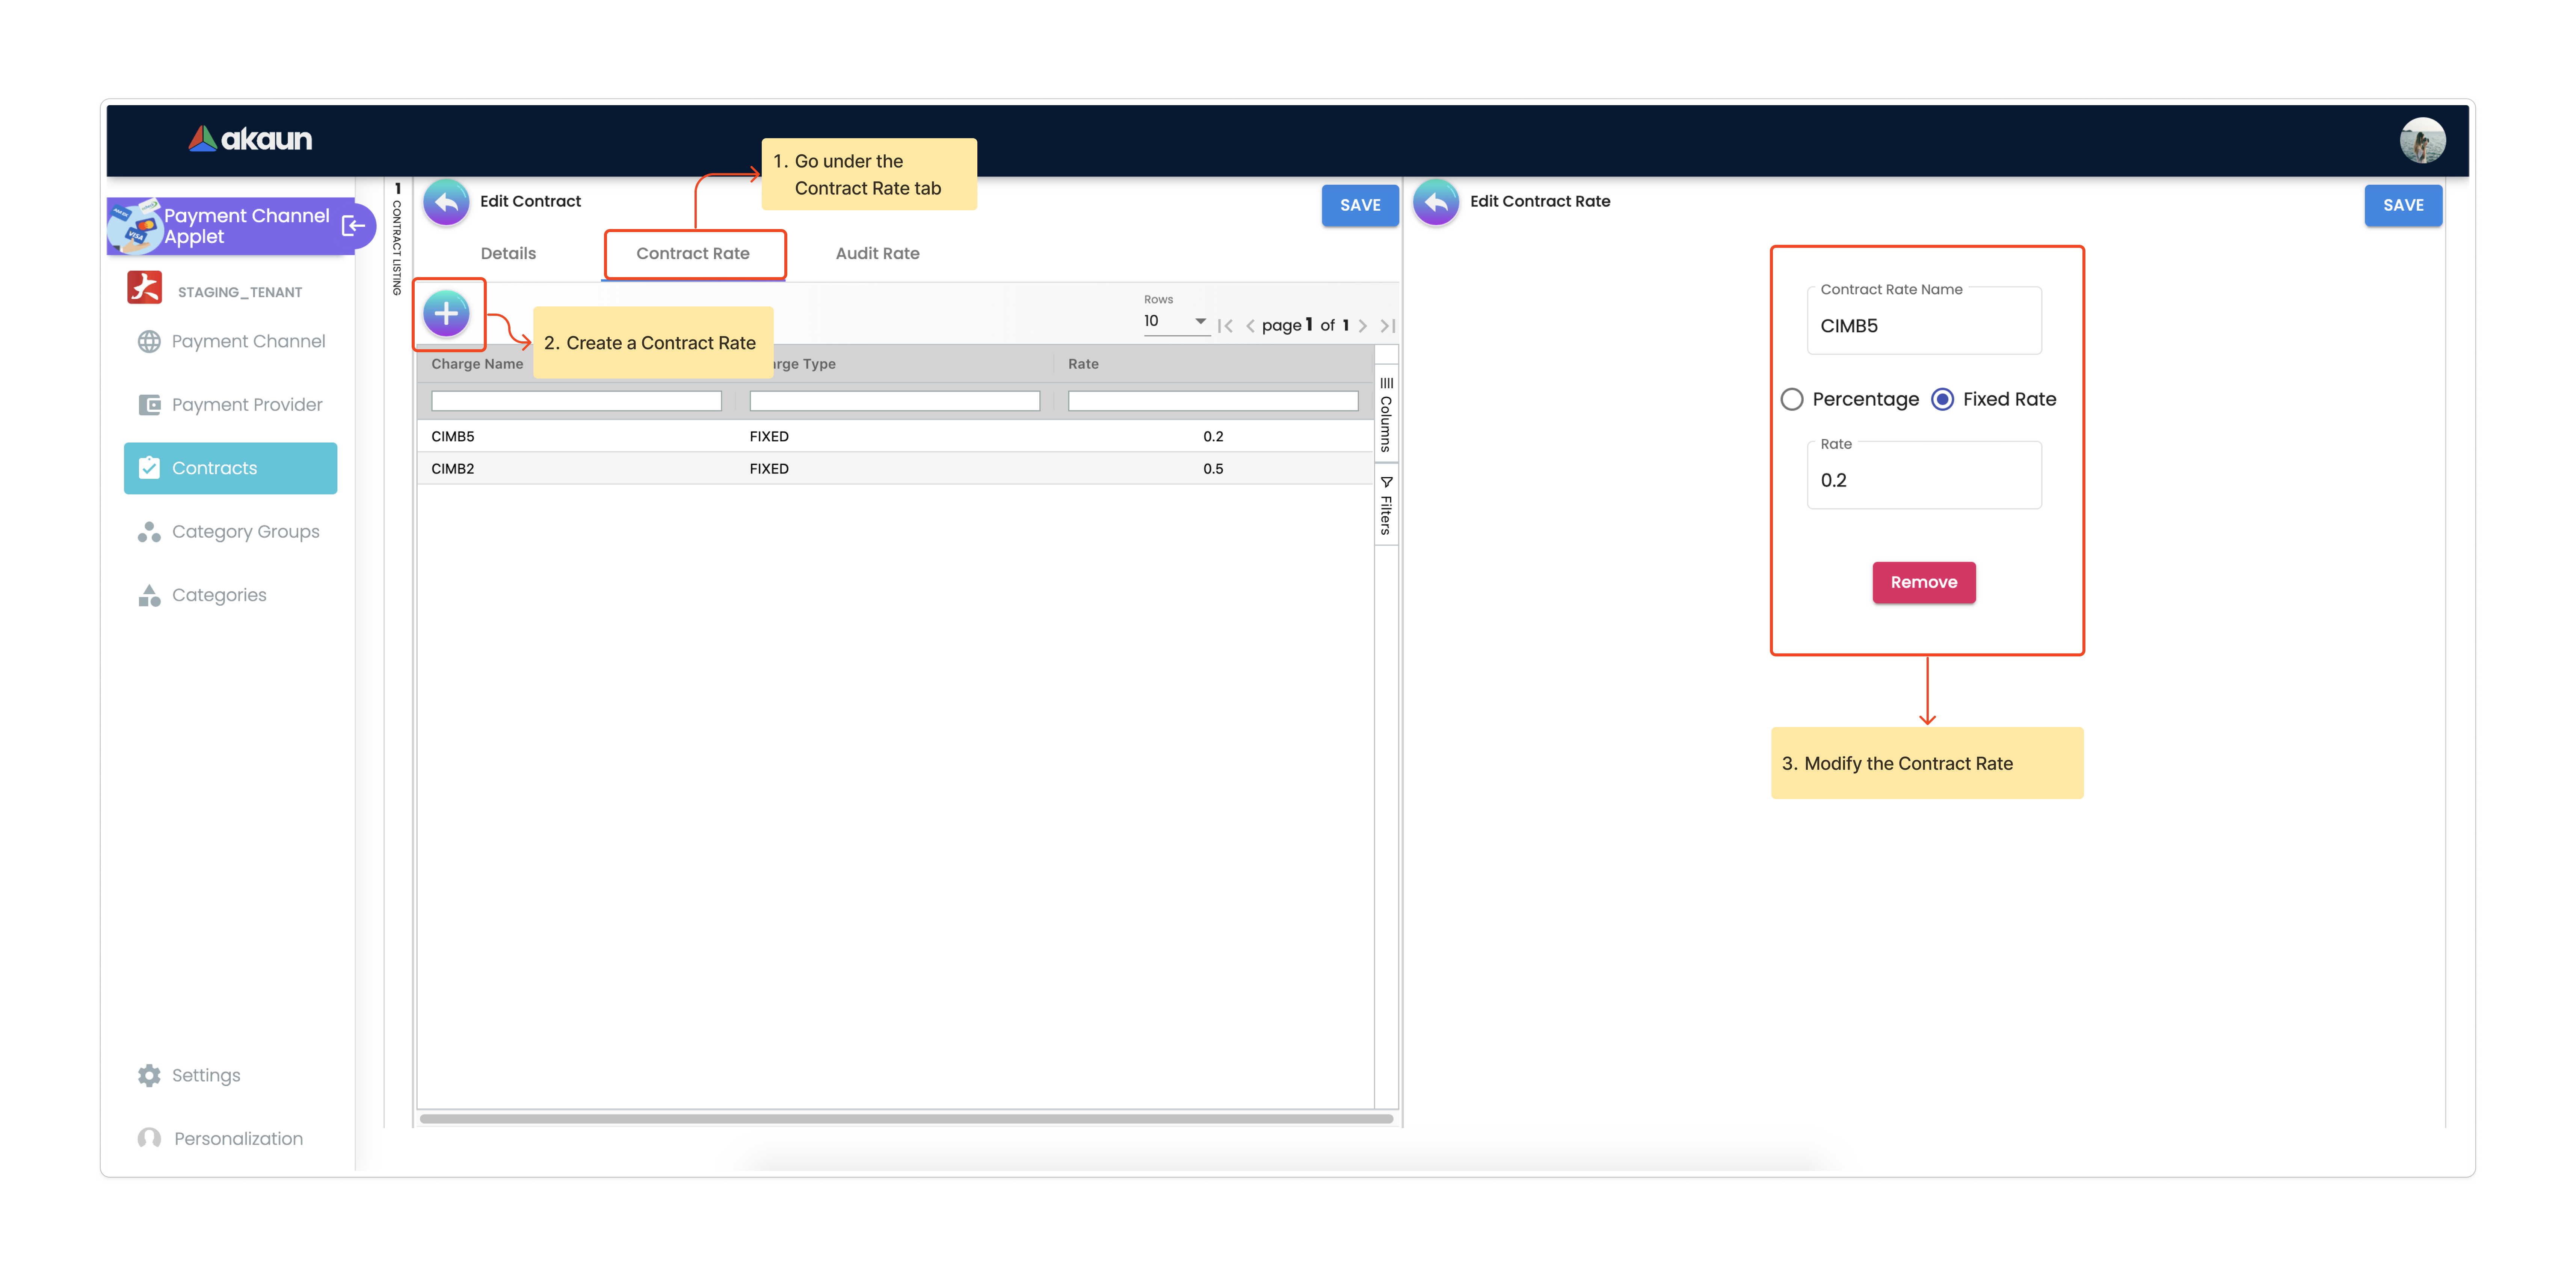
6.2 Create and Edit Contract Rate
Once the Contract is created, the user can create and edit the Contract Rate under the Contract Rate tab.
-
Click the “+” button on the Contract Rate page to add a contract rate.
-
Change the Rate Name and specify if it is a Percentage or Fixed Rate contract.
-
Fill in the rate amount accordingly.
-
Use the Audit Rate feature to track actions and identify users editing the contract.
7.0 Merchant Setup
To set up merchants, there are two applets: the Merchant Admin Applet for configuration and the Merchant Access Applet for merchants to use. The Merchant Admin Applet handles setup, while the Merchant Access Applet is for merchants to access and utilize the configured settings.
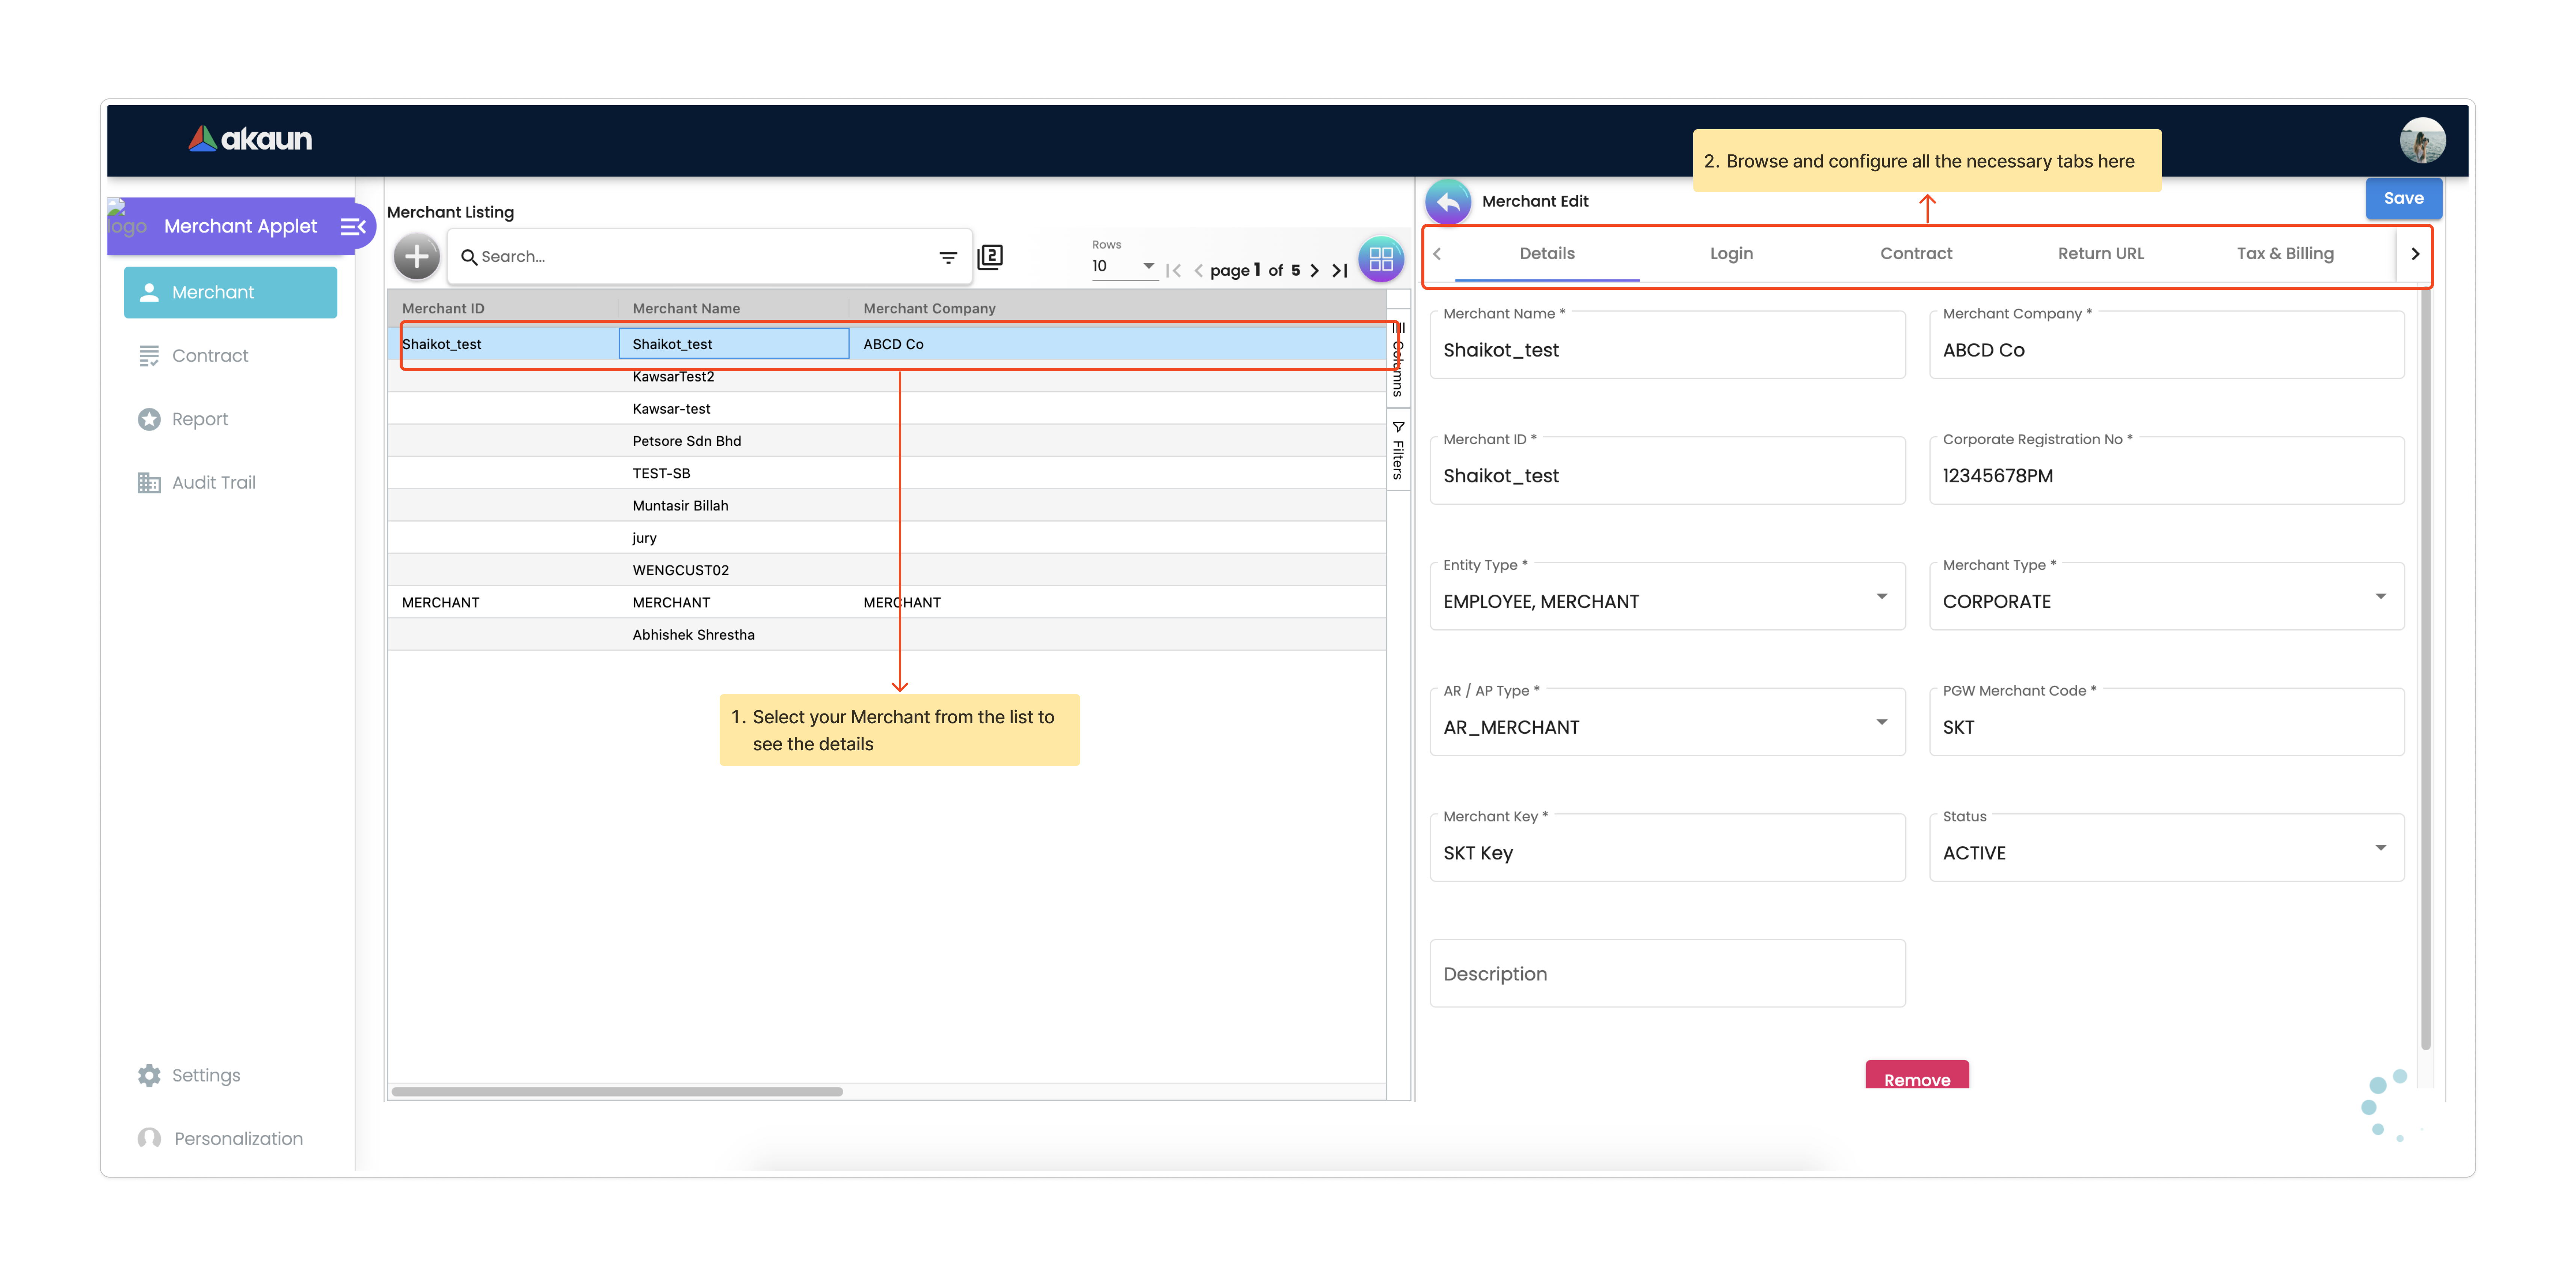
7.1 Create and Edit Merchant
The user can create the Merchant in the Merchant Admin Applet. You can click on the “+” button on the merchant listing page and create a new merchant by adding all the merchant details.
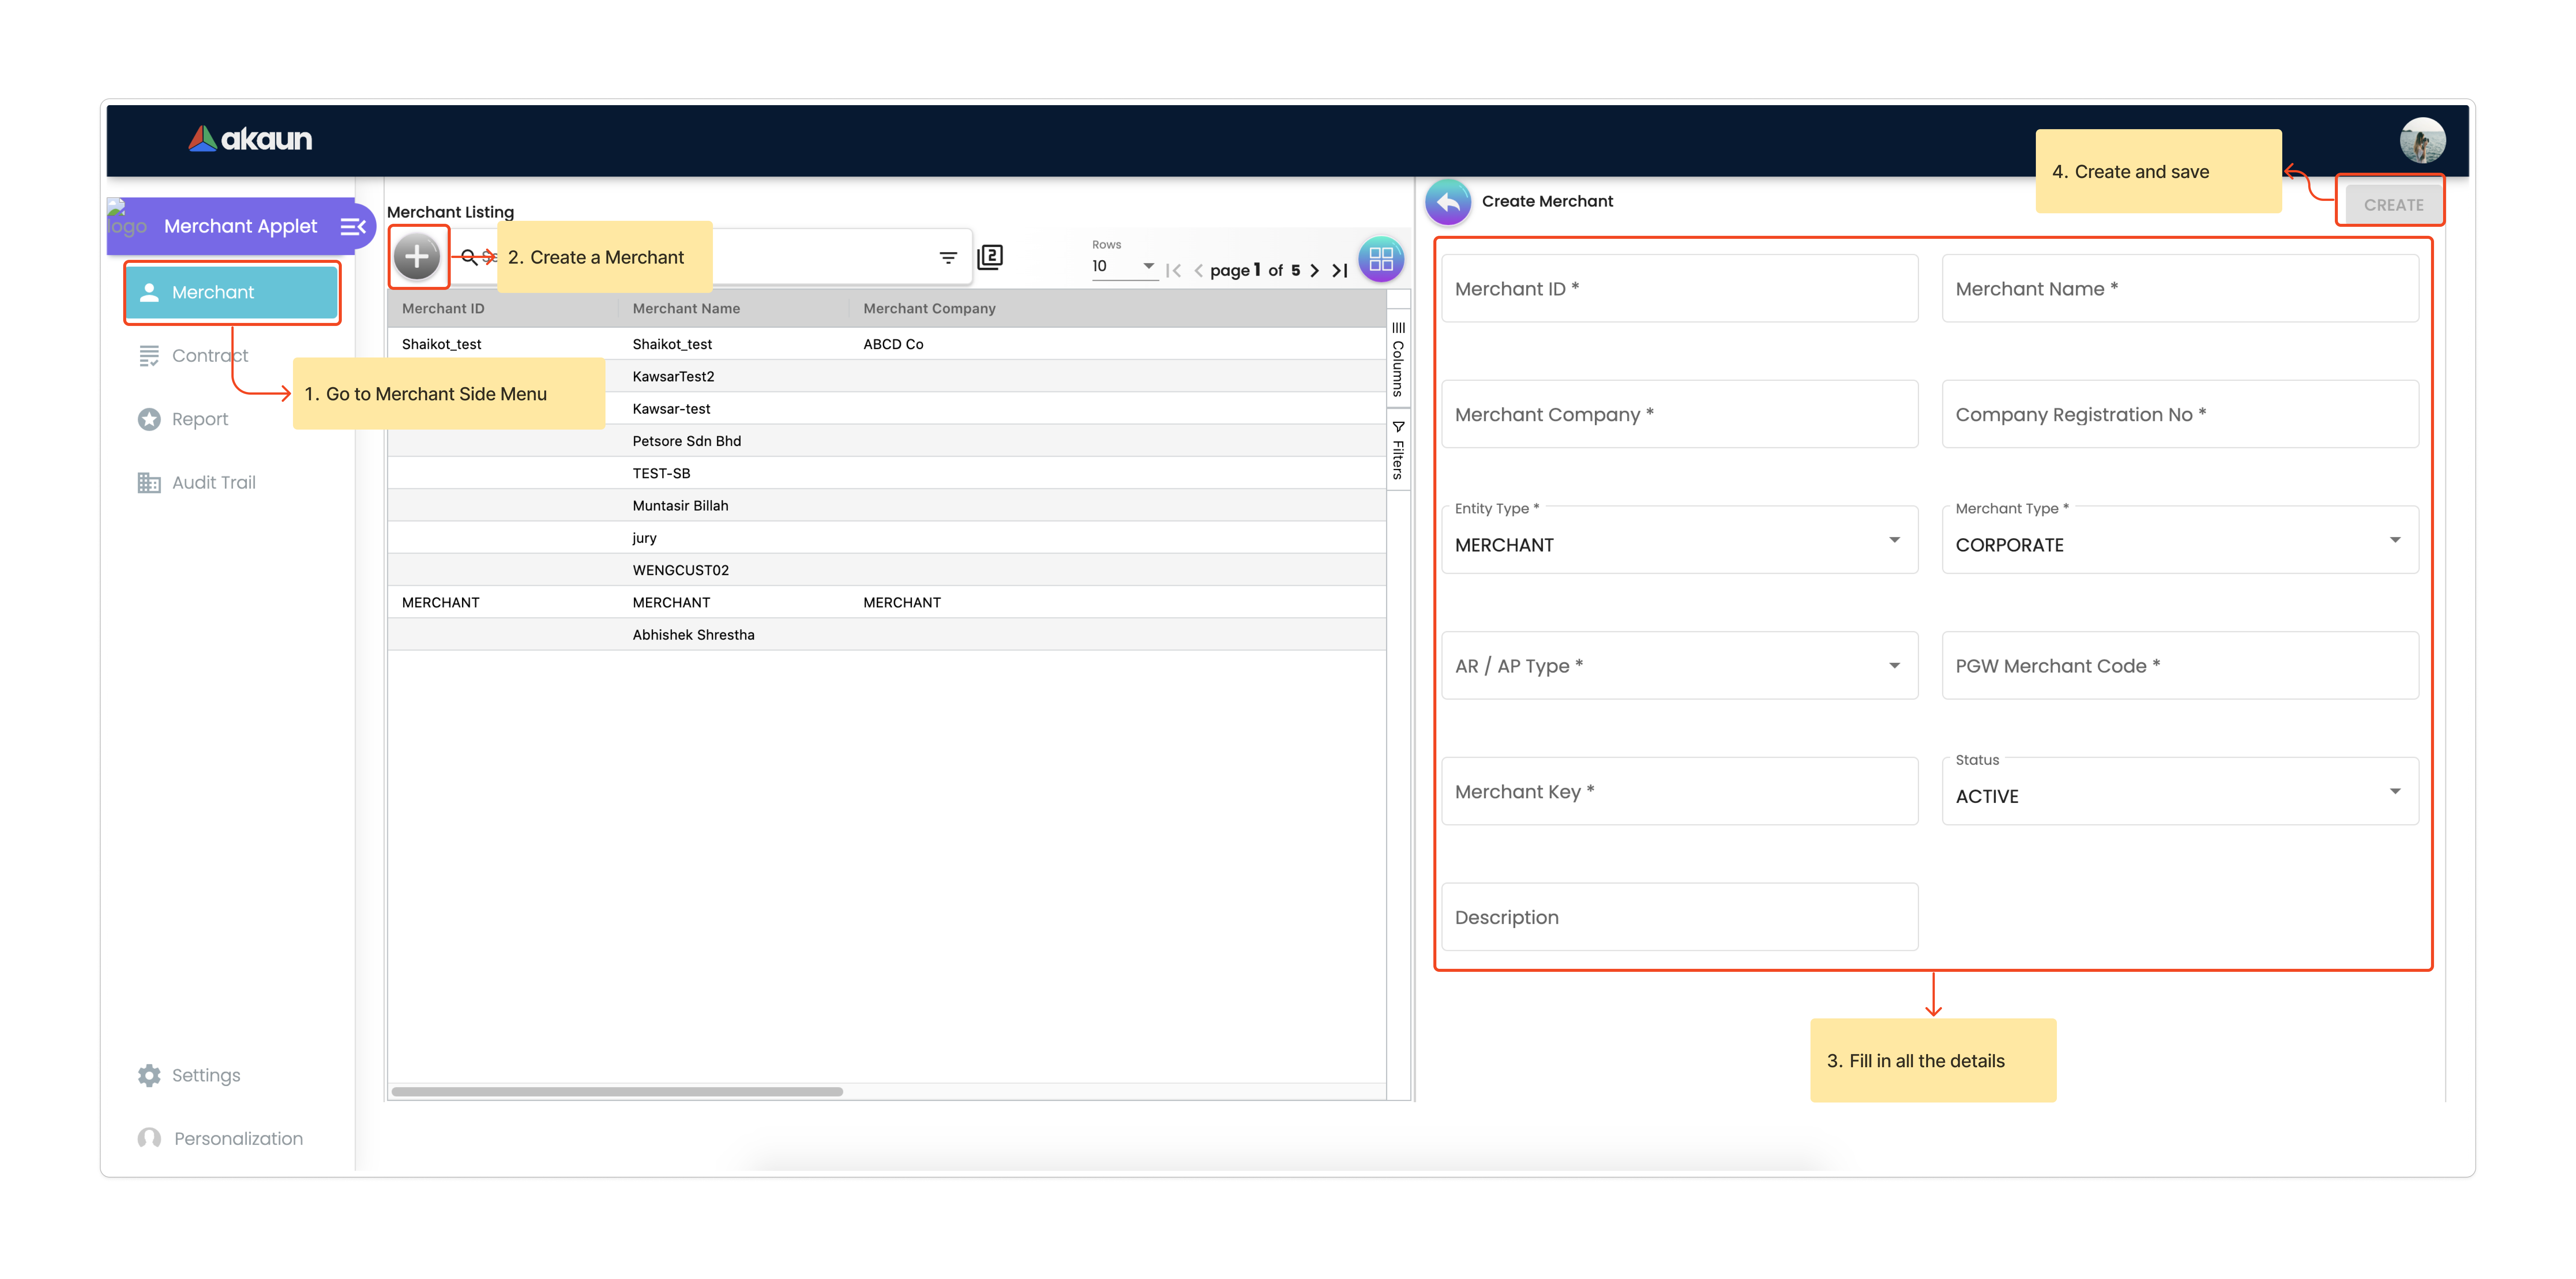
Once the new Merchant is created, the user can edit the setting by clicking on the Merchant in the Merchant Listing.
In the Merchant Edit page, the user can see a lot of tabs, but for this module, users only need to configure the following tabs:
-
Merchant Login
-
Merchant Contract
-
Return URL if necessary
-
Payment Configuration
-
Address
-
Credit limit and Terms
-
Logo
8.0 Merchant Contract Setup
The Merchant Contract can be set in the Contract section of the Merchant Admin Applet.
8.1 Create and Edit Merchant Contract
The user can create the Merchant Contract in the Merchant Admin Applet by clicking on the “+” button and add in all the details.
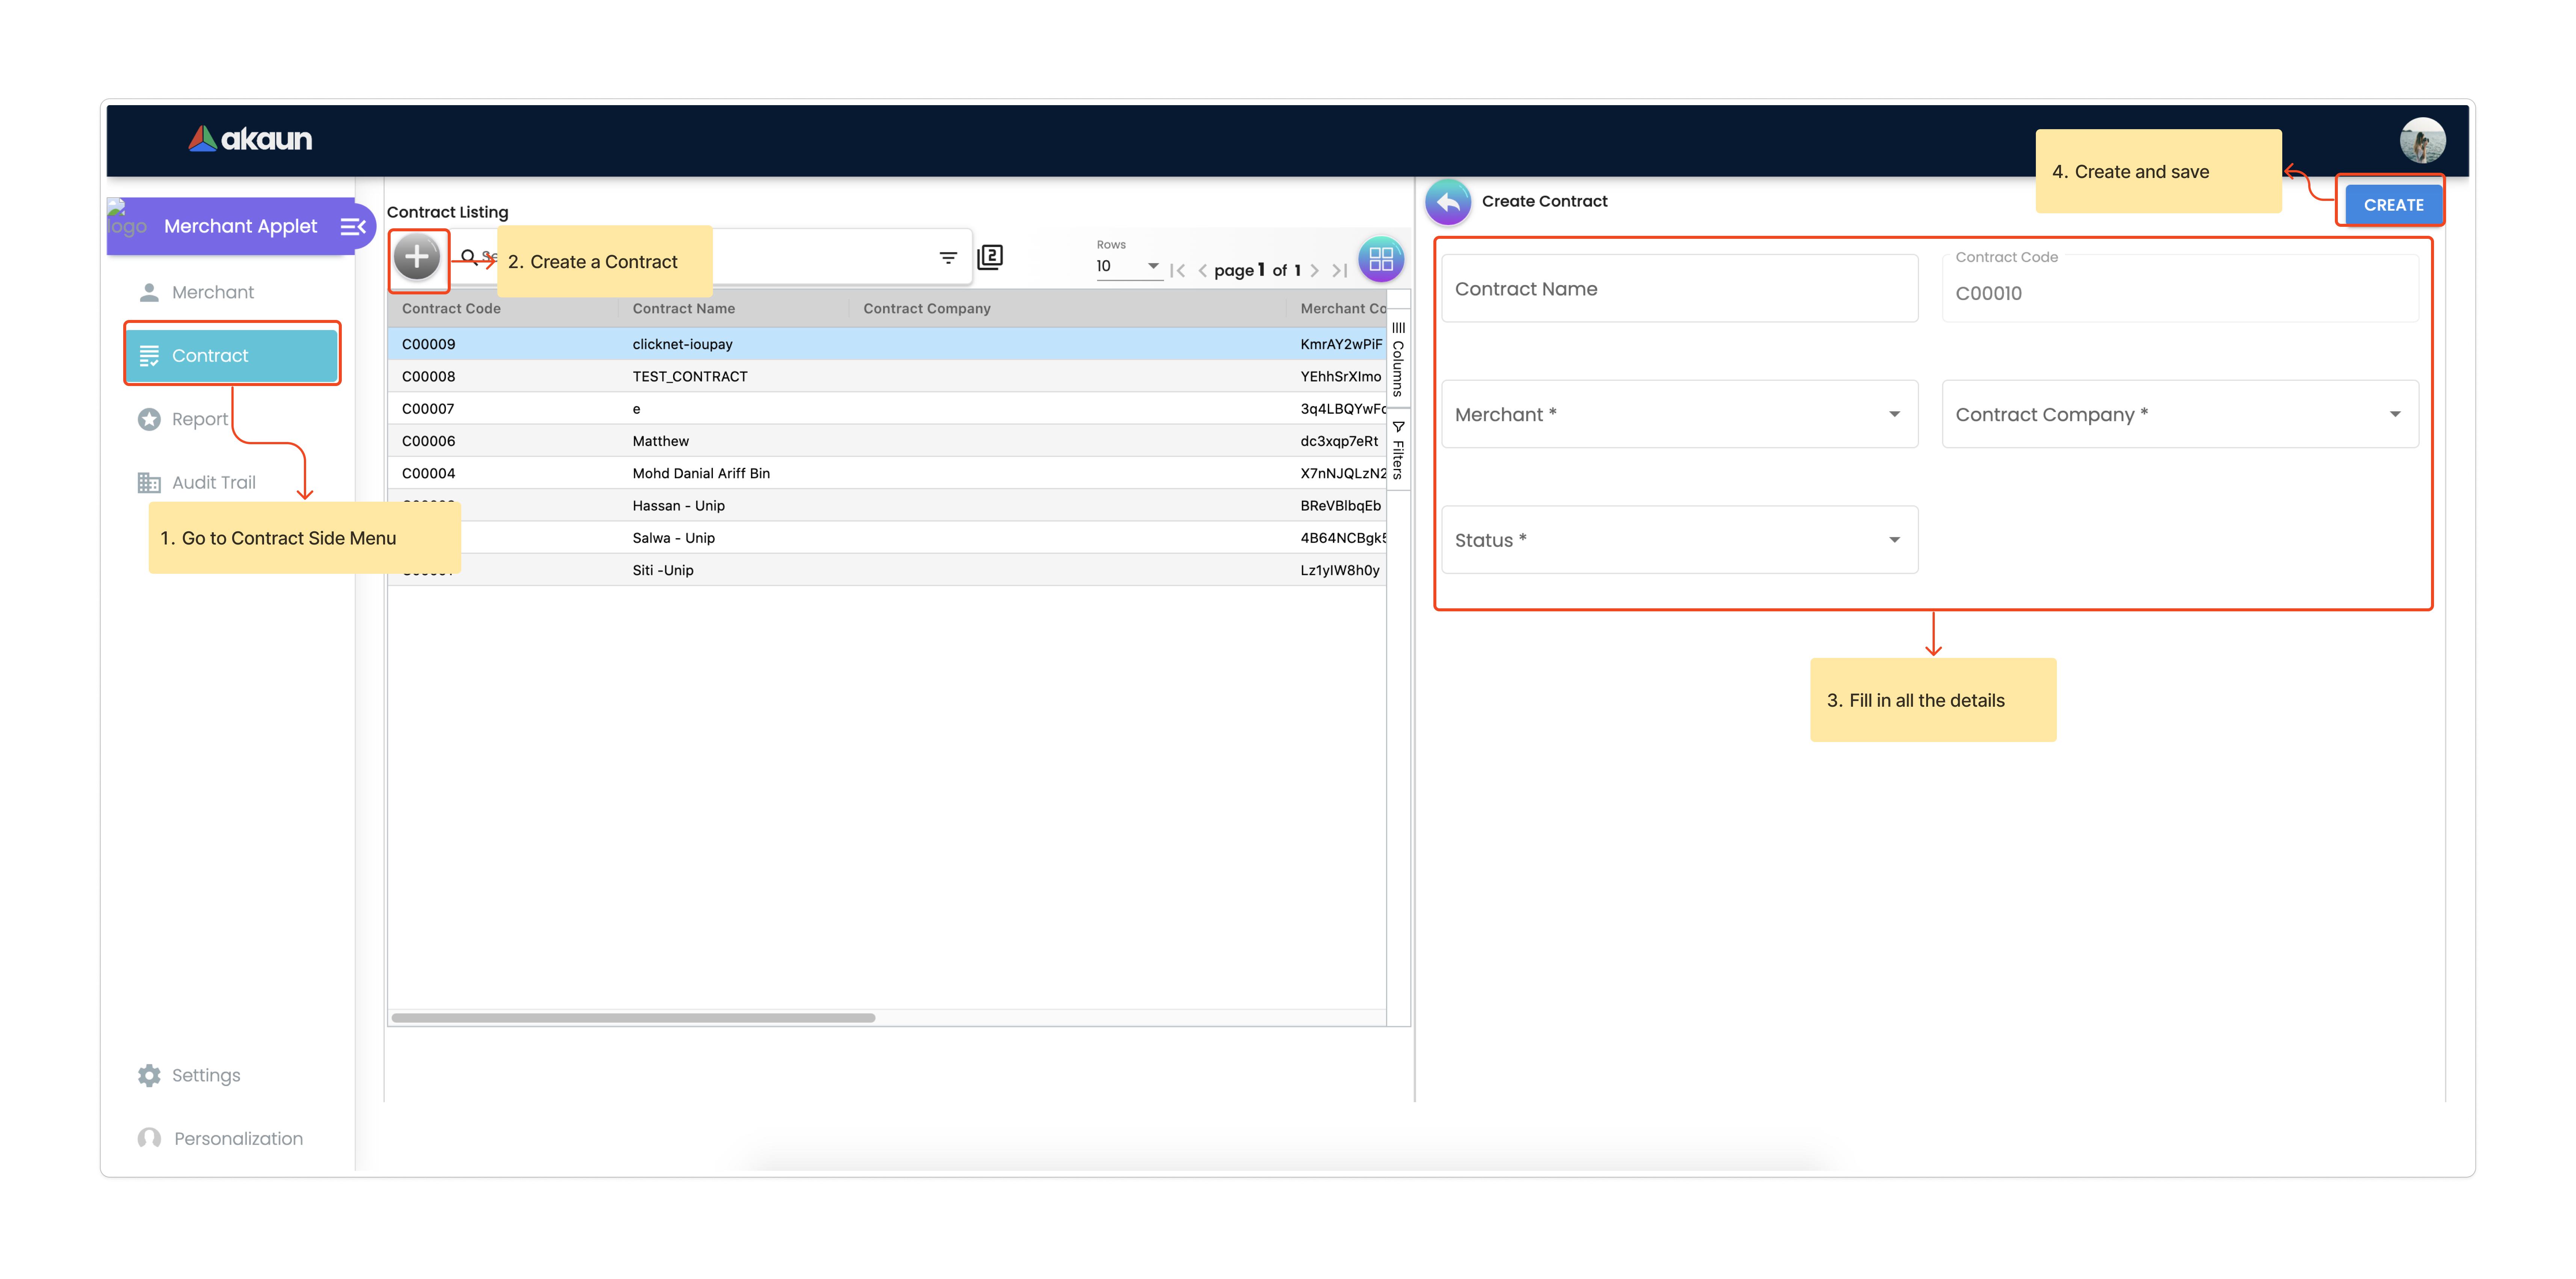
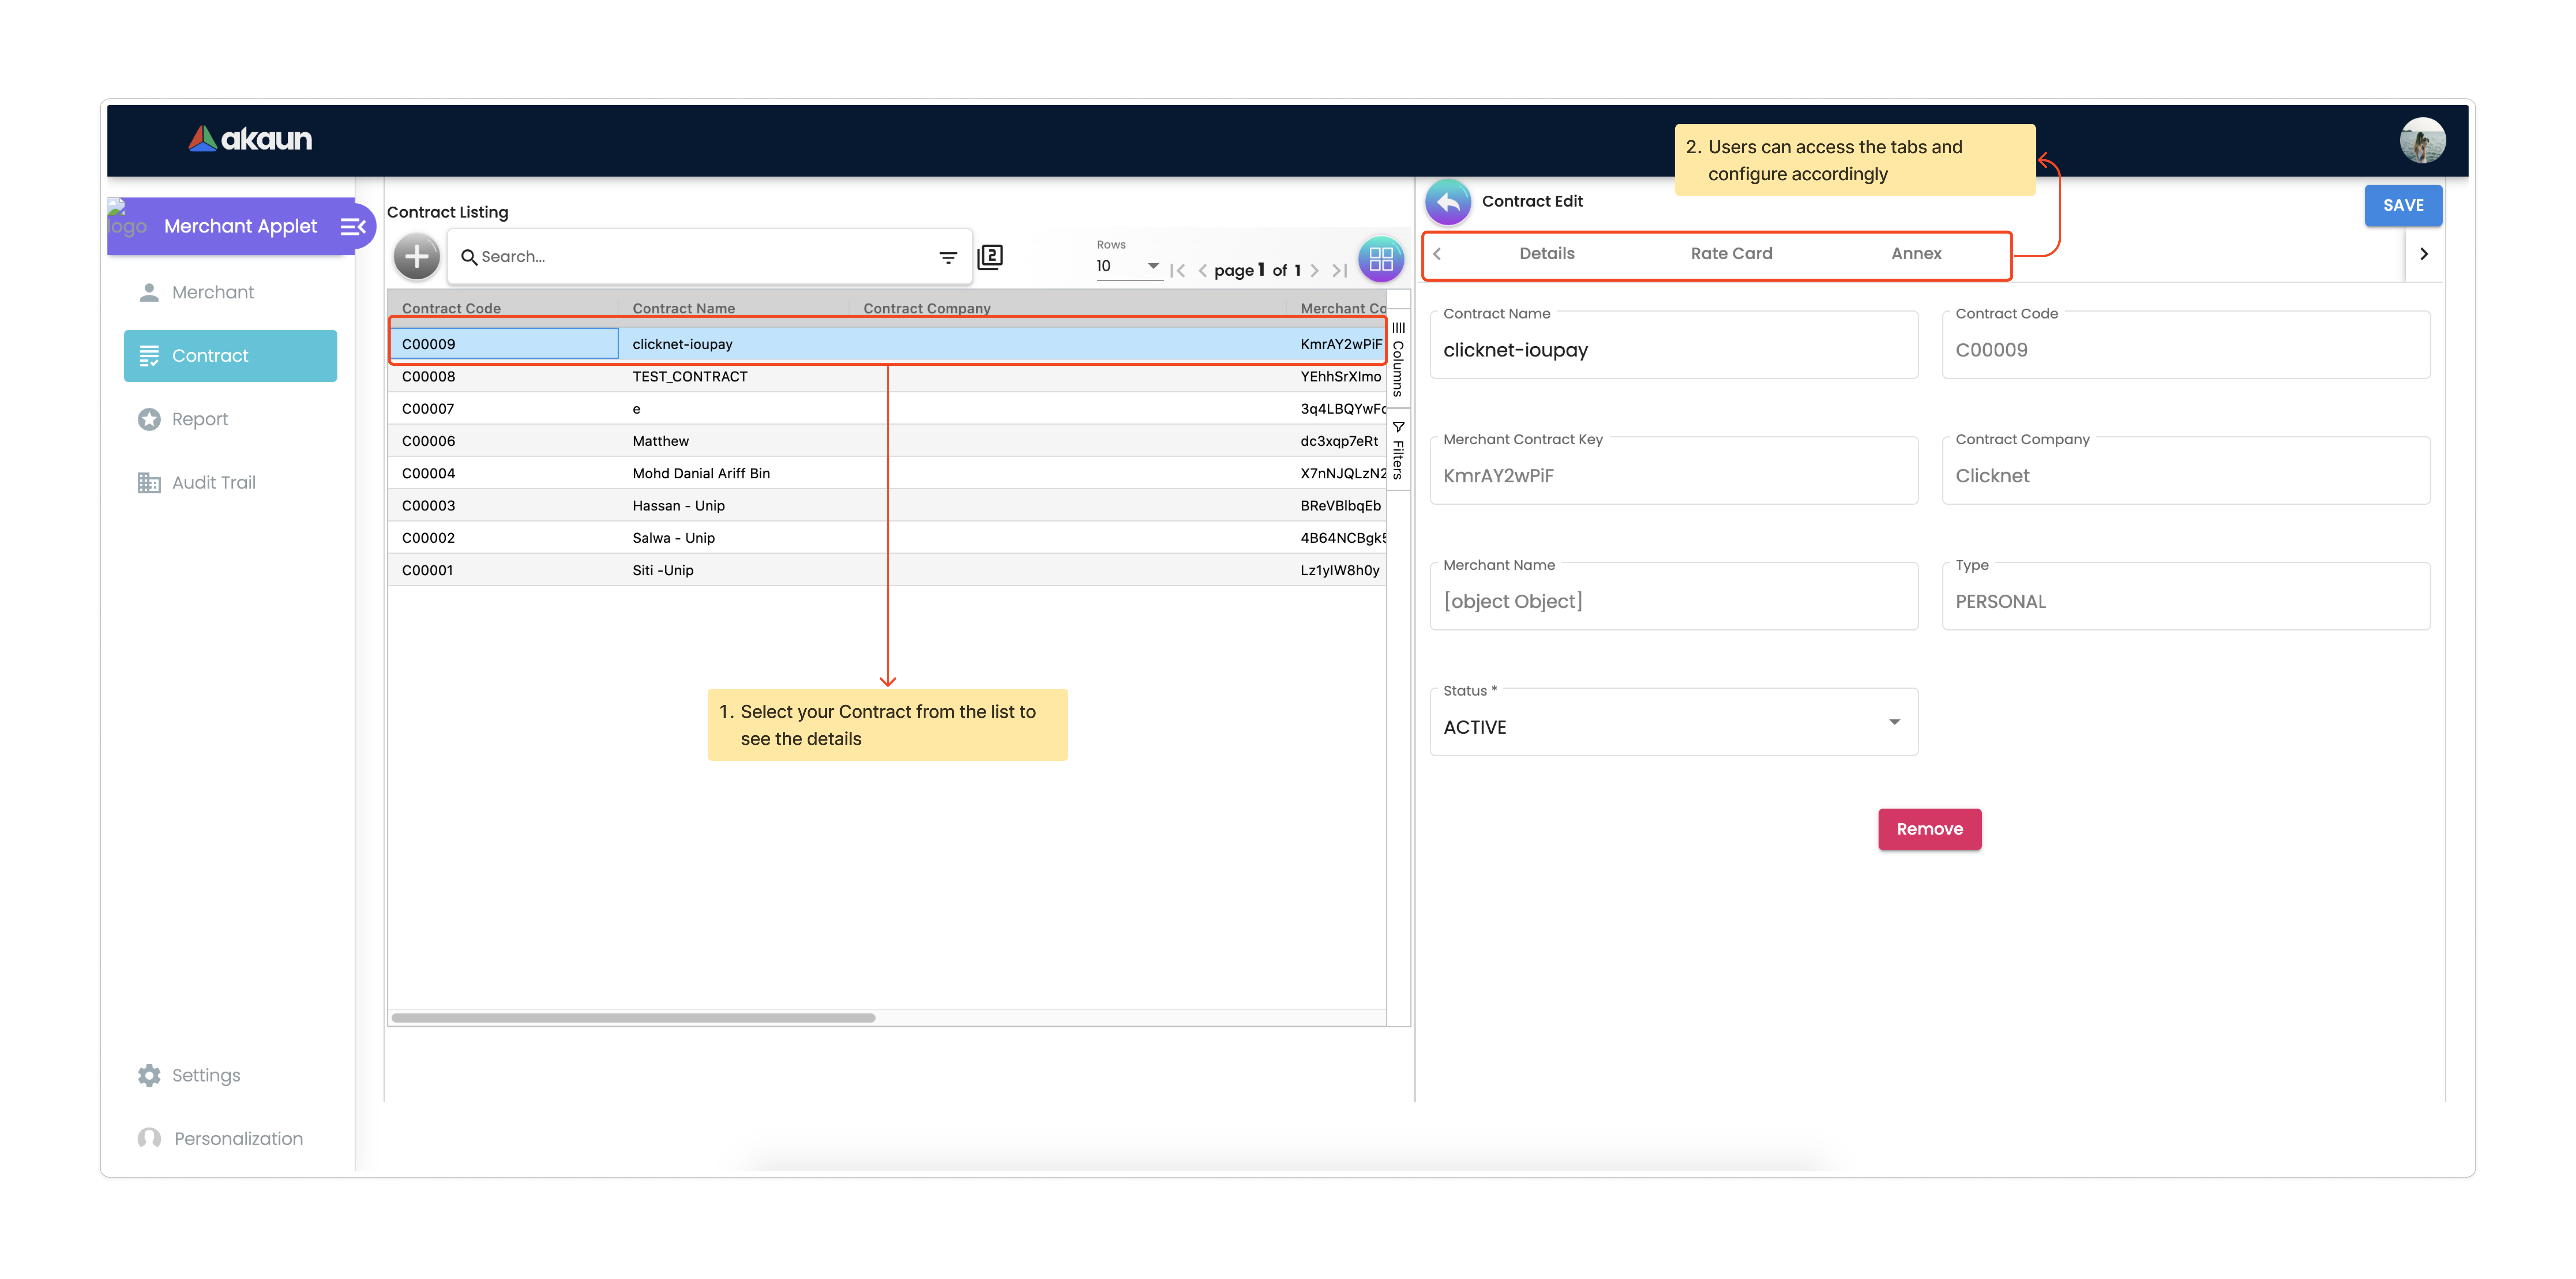
Once the new Contract is created, the user can edit the Contract by clicking on the Contract in the contract listing. In the Edit tab, the user can see the Details of the contract and access the Rate Card tab.
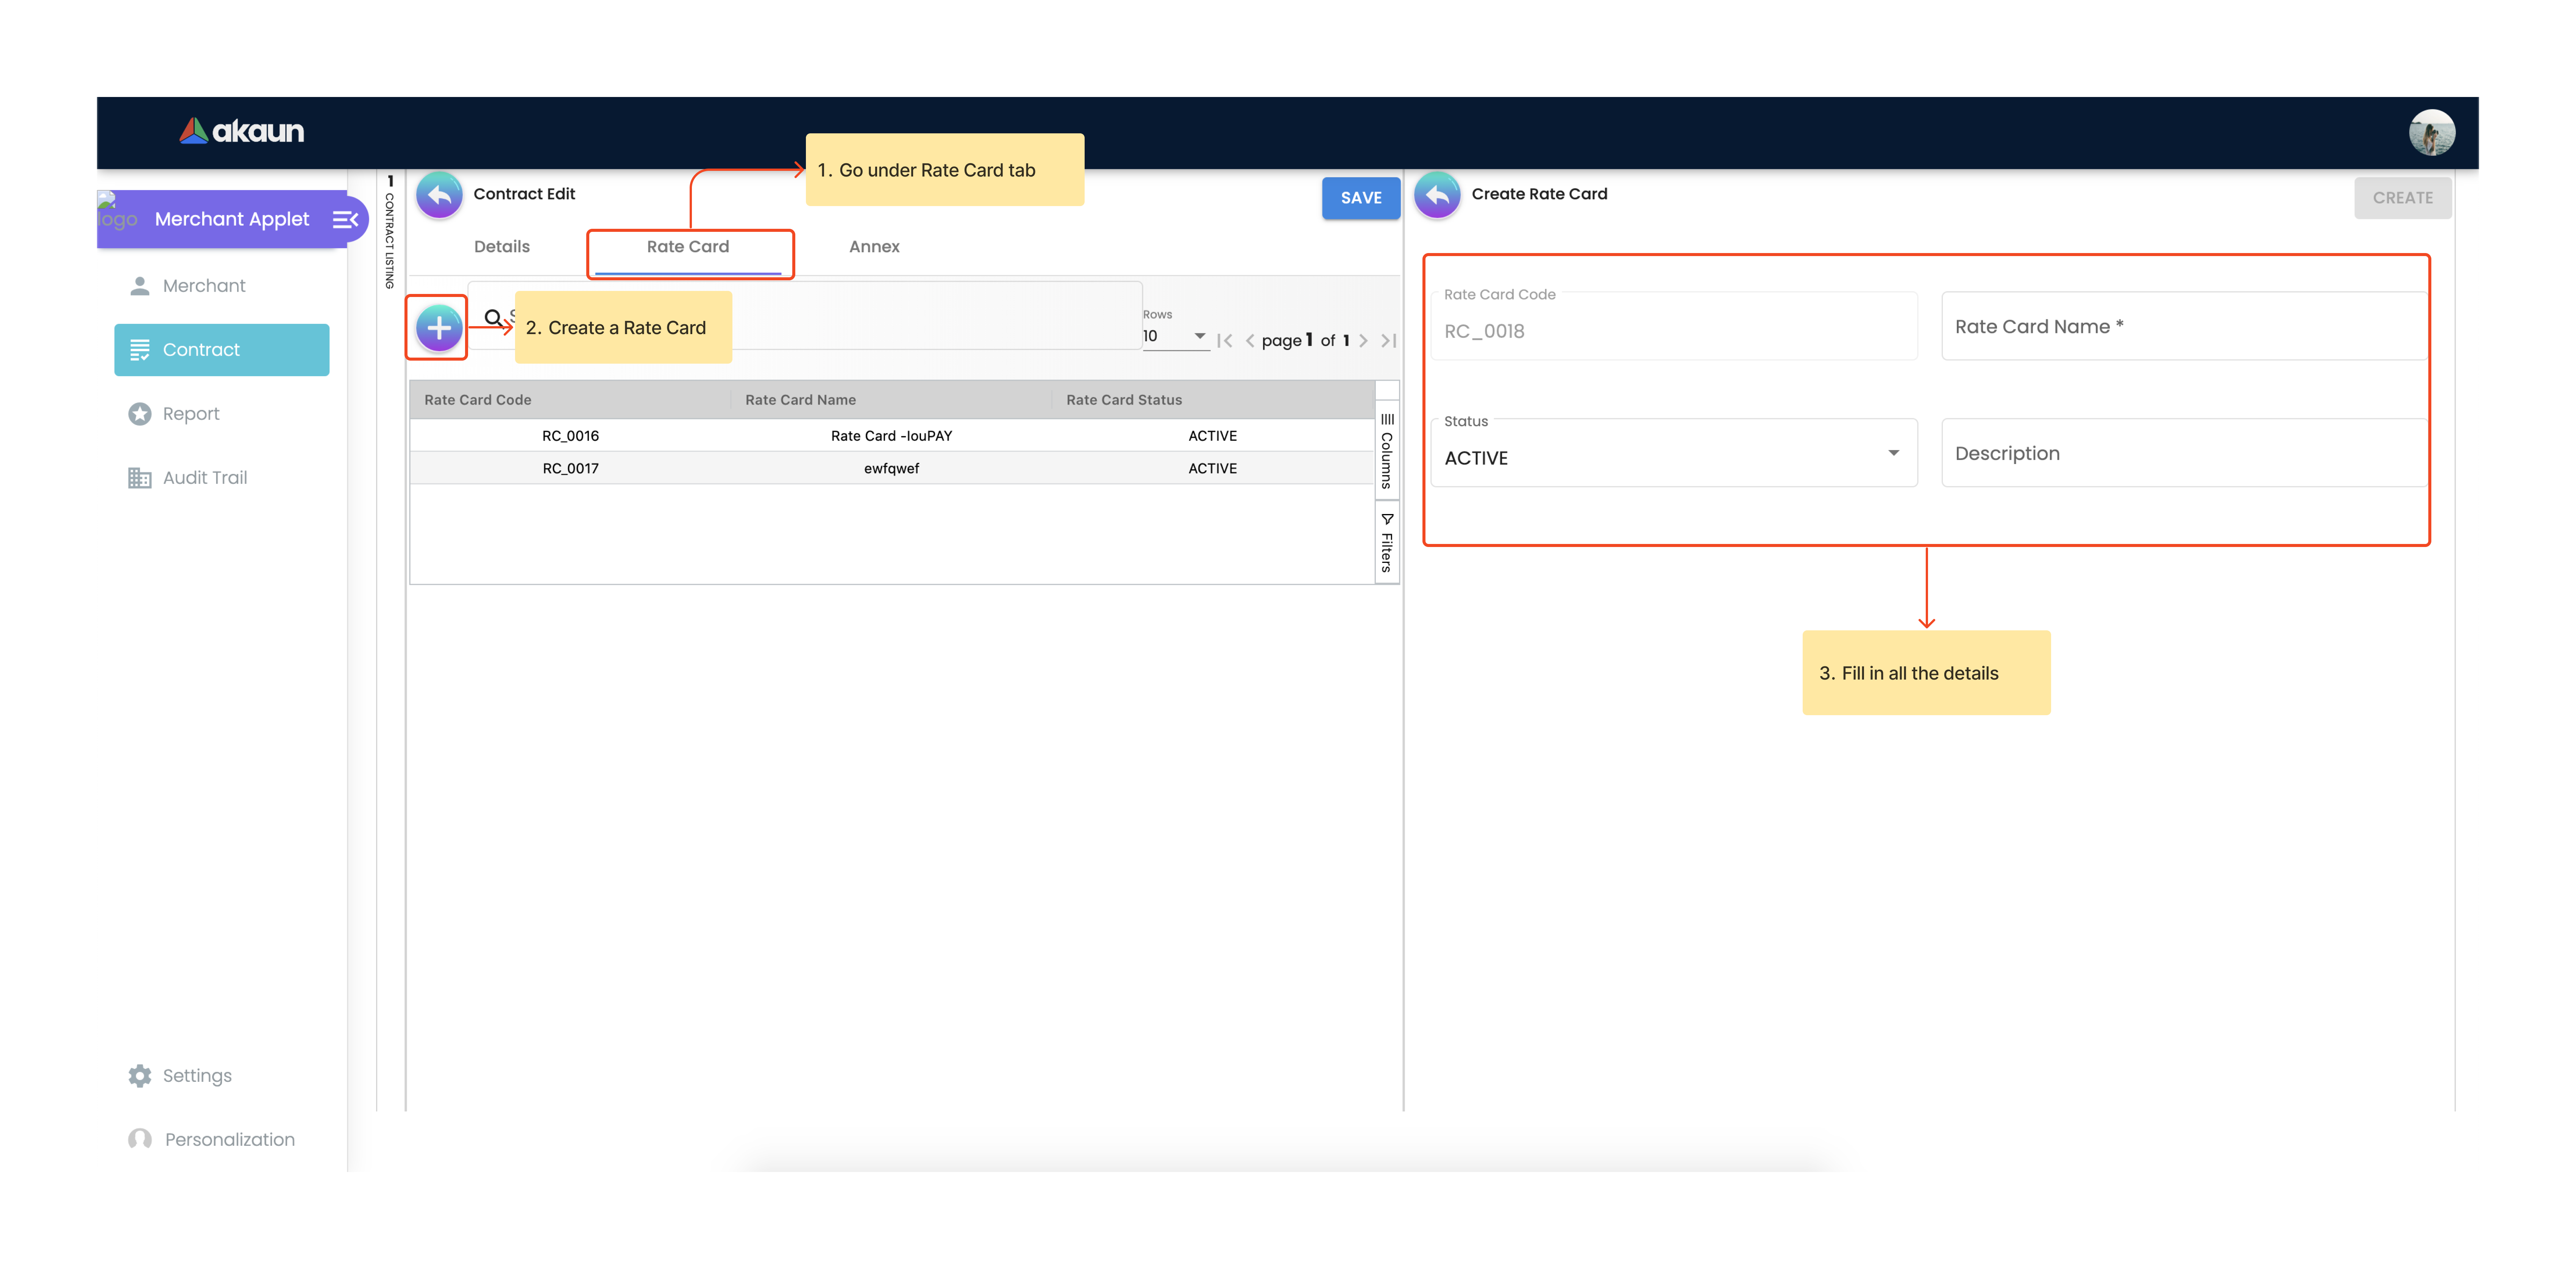
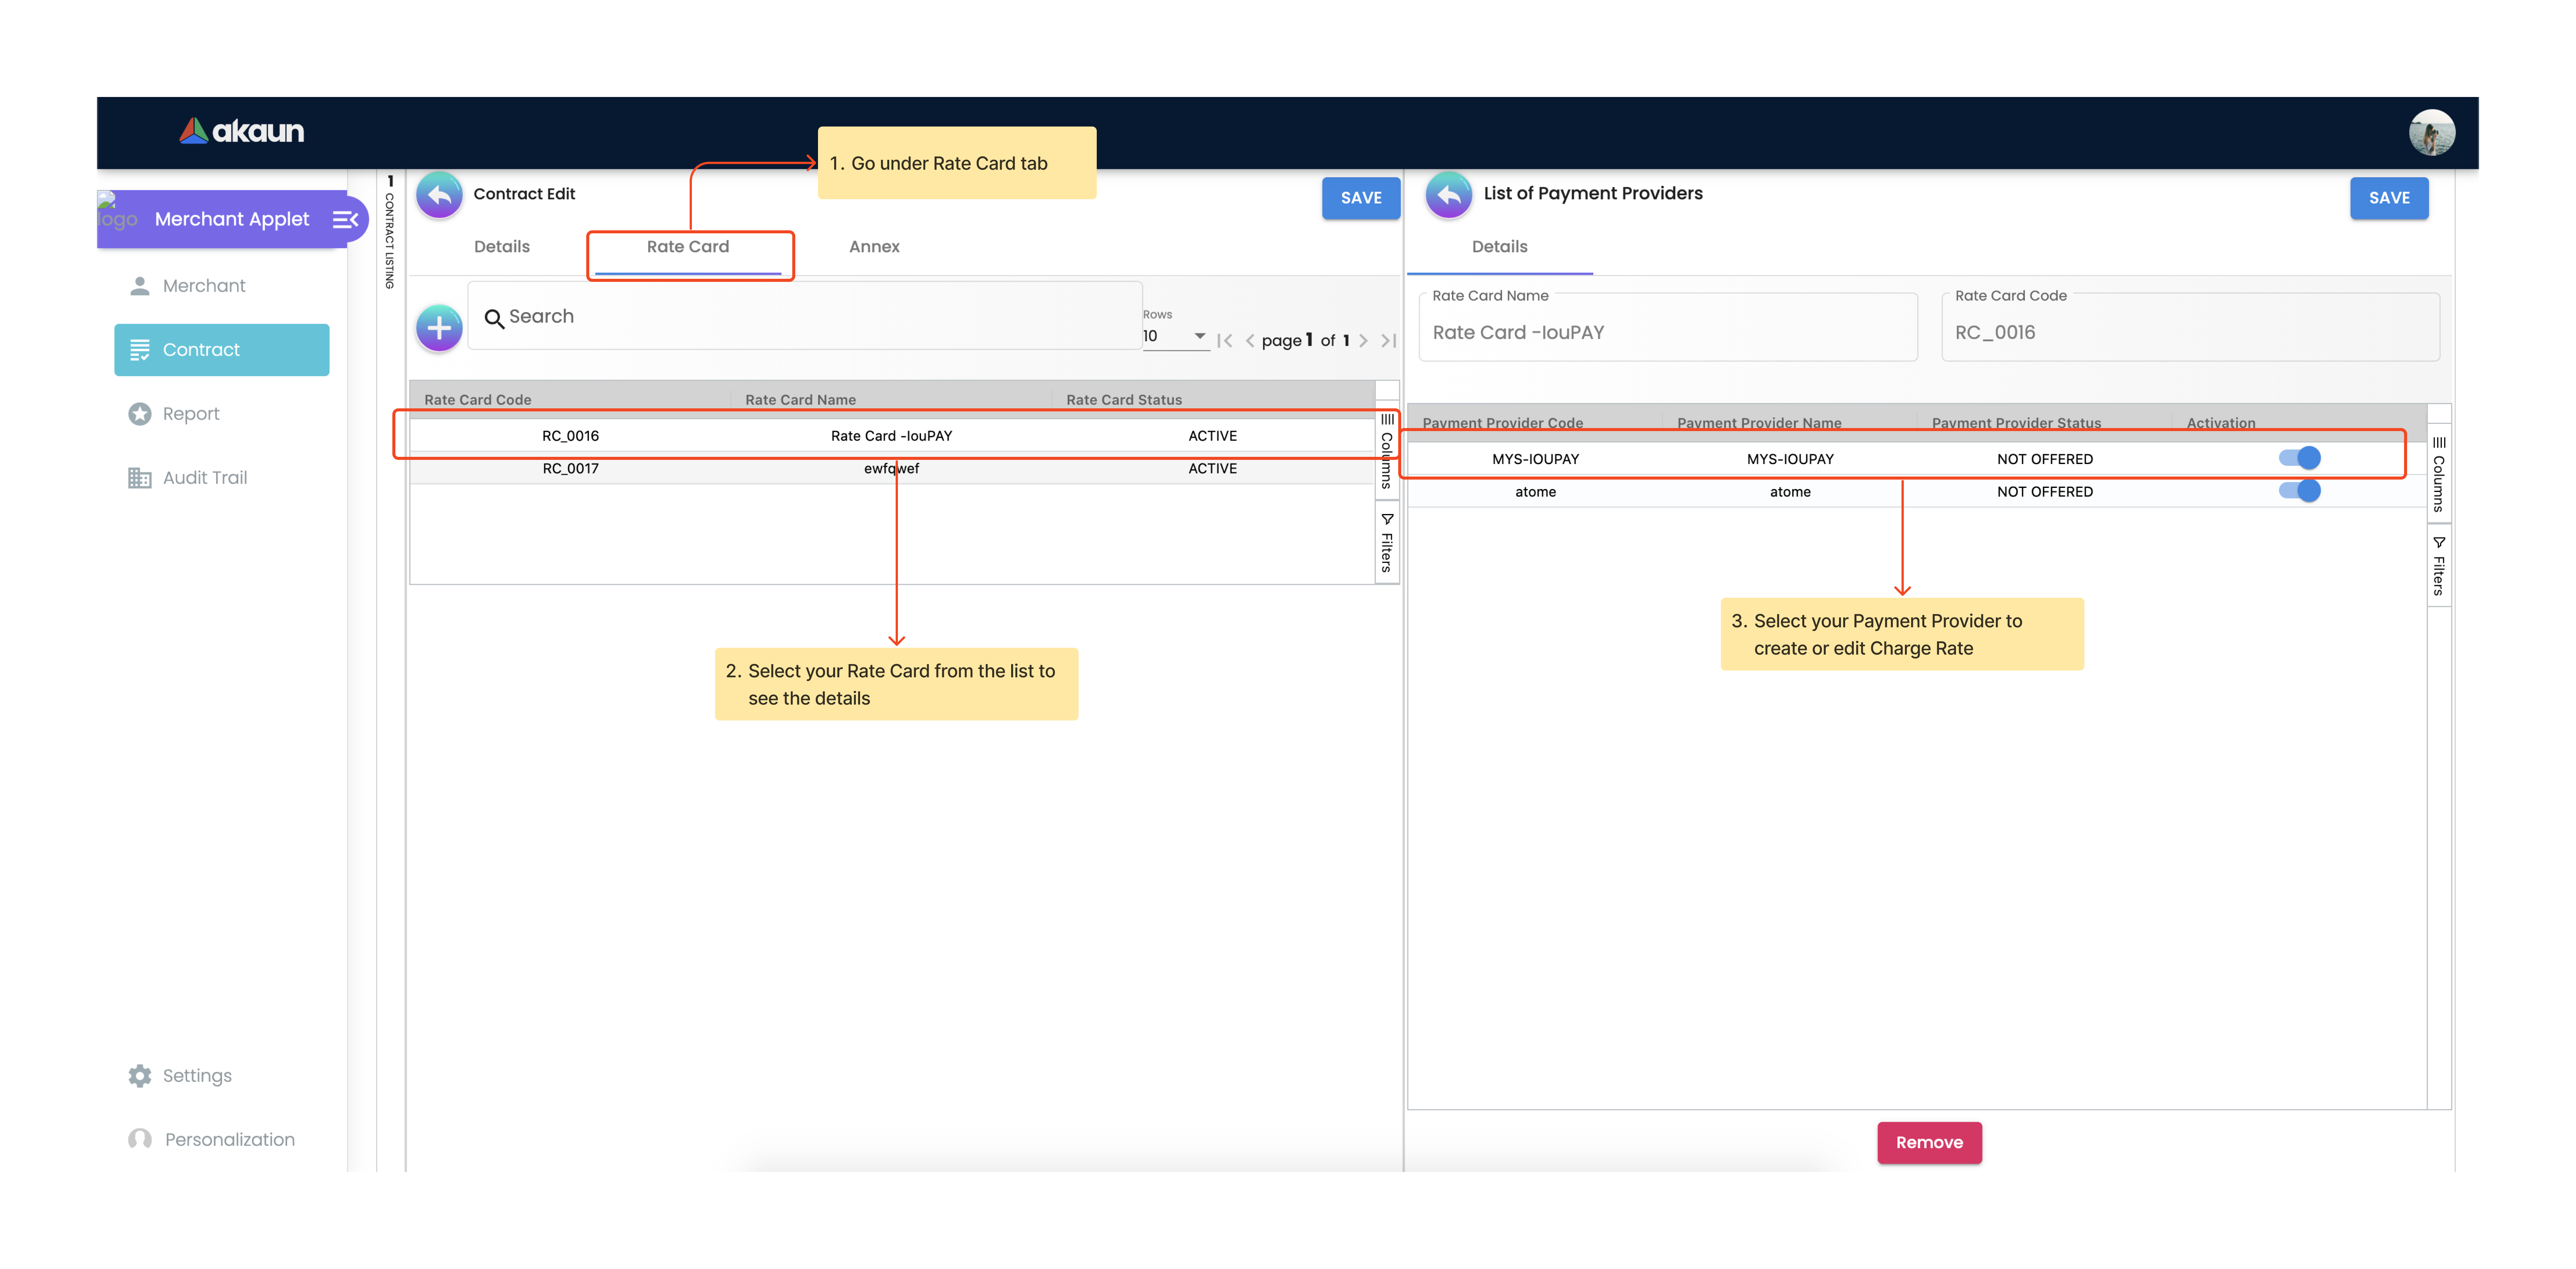
9.0 Merchant Rate Card Setup
The Merchant Rate Card setup is done in the Merchant Admin Applet. The user can go to the Contract listing and select the Contract. In the Rate Card tab, the user can create the rate card by selecting the payment provider from the listing.
To create one:
-
Select the desired Payment Provider.
-
Double-click on the Payment Provider to access the change rate listing.
-
On the change rate listing page, click the “+” button to add a change rate.
-
Change the Rate name, specify if it is a percentage or fixed rate contract, and fill in the rate field.
-
Once setup is complete, the payment provider status in the listing will change to "OFFERED"
-
This status change indicates that the merchant can now accept the access in the Merchant Access Applet.
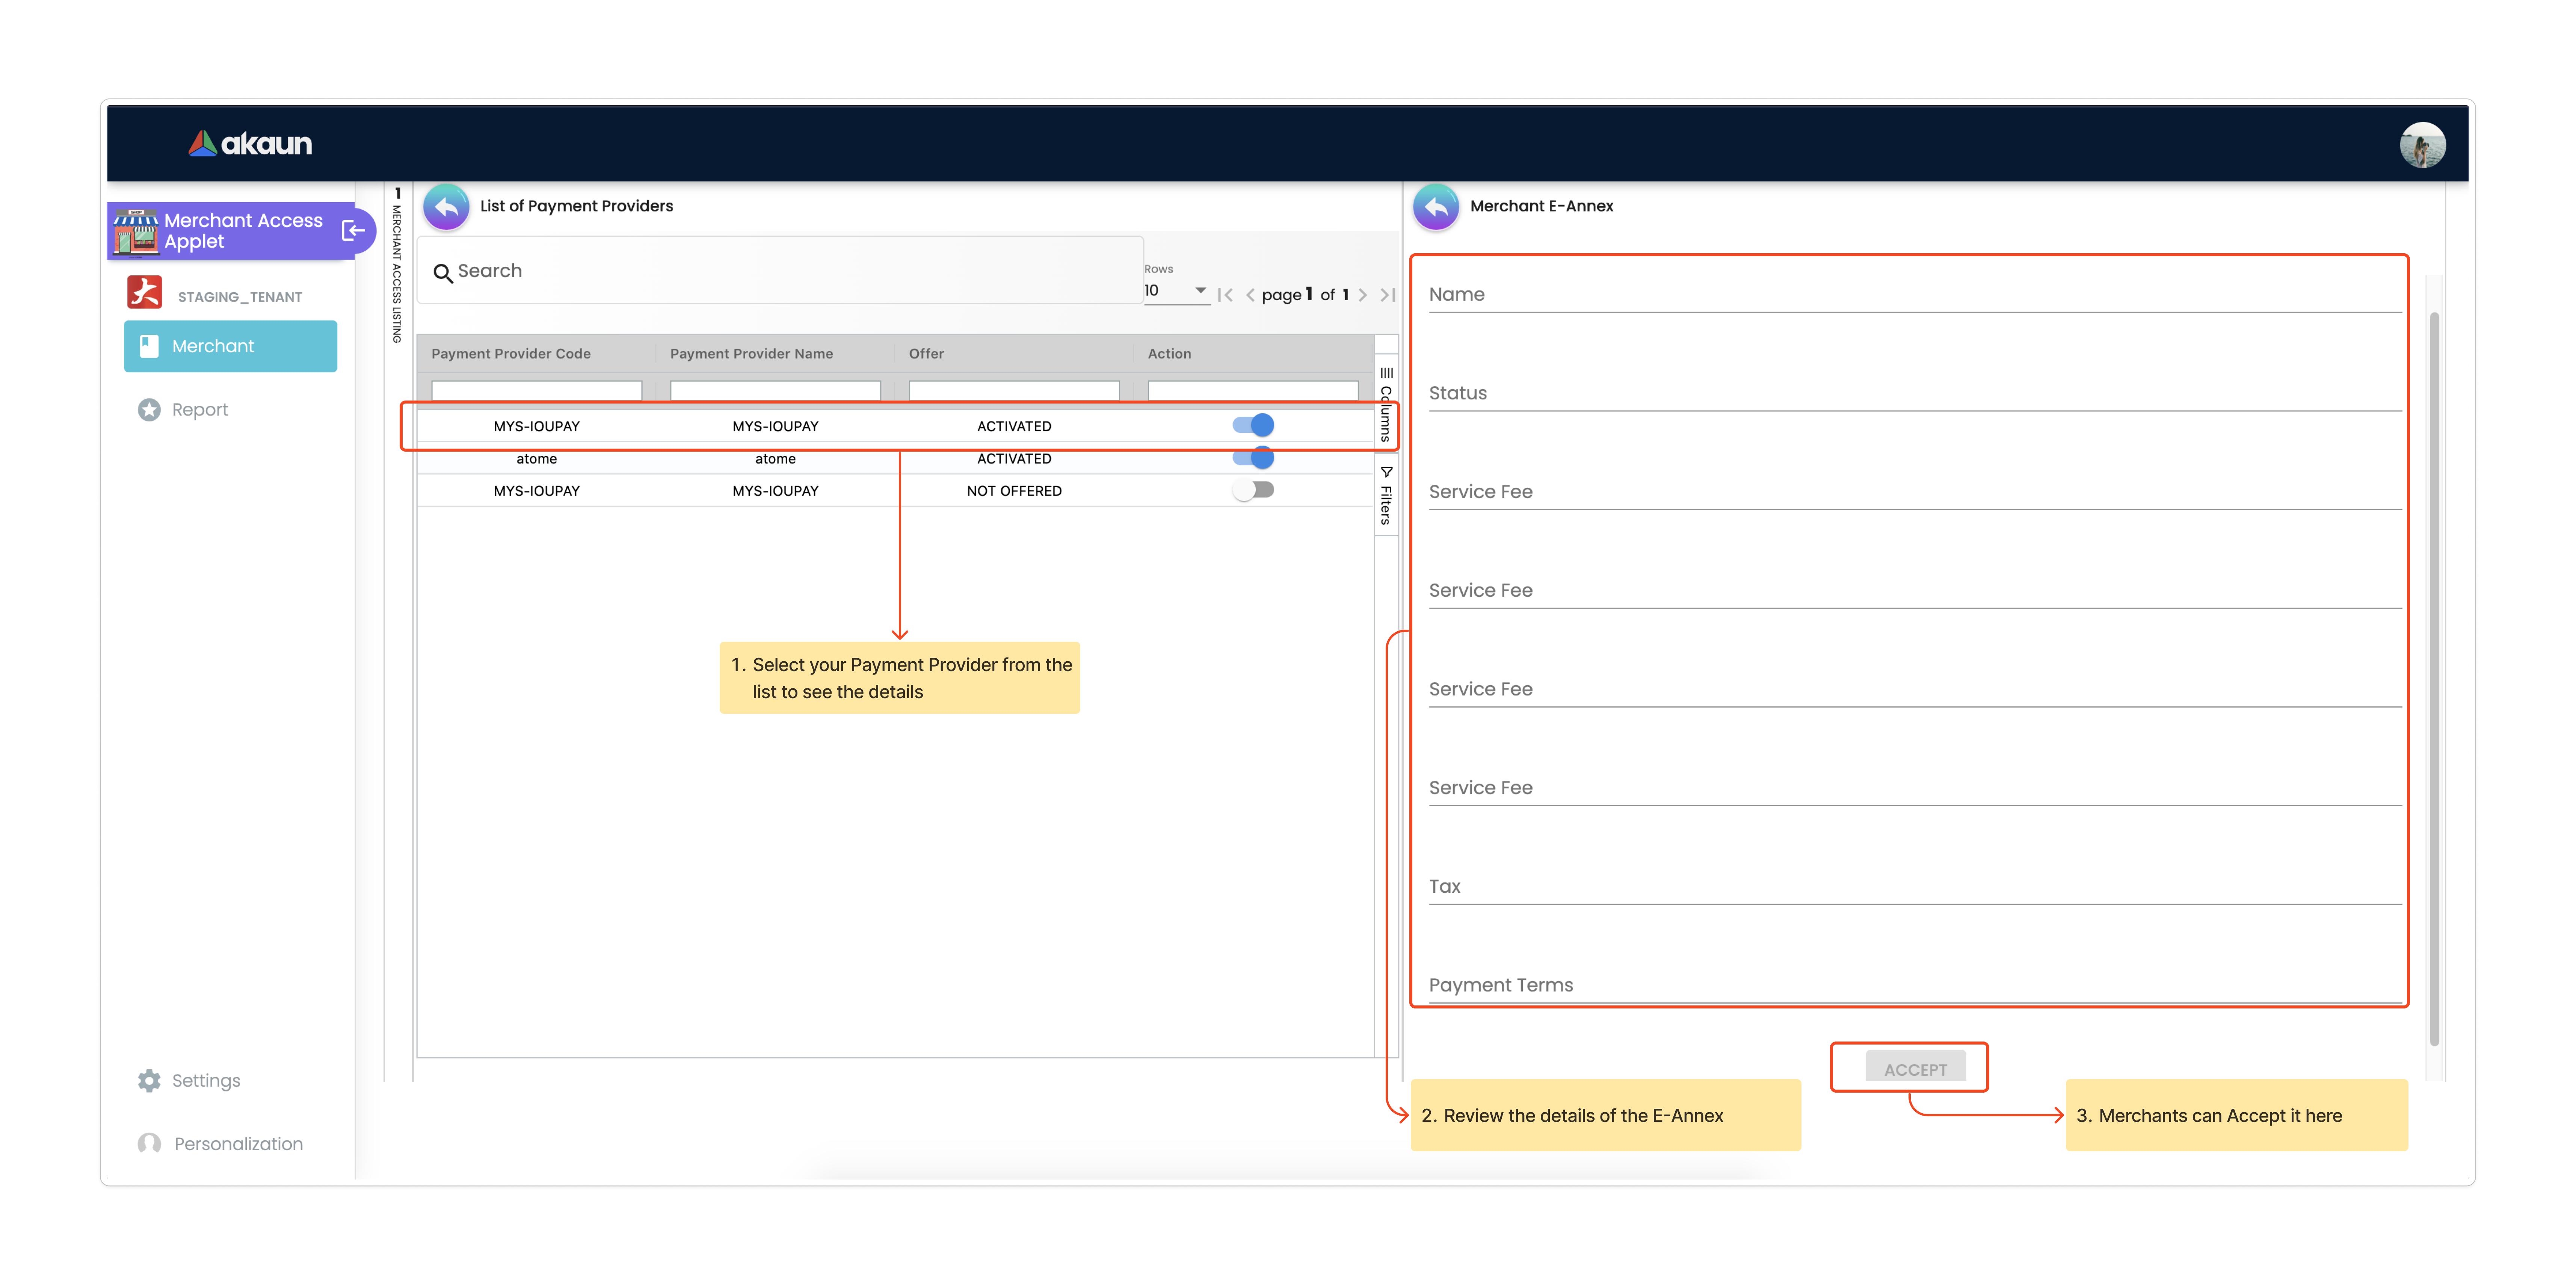
10.0 Merchant Rate Card Acceptance Workflow
Now that the Merchant setup is done in the Merchant Admin Applet, the Merchant can go to the Merchant Access Applet in order to accept the access.
10.1 Review and Approval Process
-
Merchants navigate to the Merchant Access listing.
-
They select their access listing.
-
Select the relevant payment provider.
-
Proceeding to the payment provider listing page, merchants select the relevant payment provider.
-
After reviewing details in the Merchant E Annex tab, merchants accept the access.
-
Access to the Rate card is granted only upon activation of the status in the Merchant Admin Applet within the payment provider listing.