Stoplight
Stoplight is an API design, development, and documentation platform for consistency, reusability, and quality, providing a simple and enjoyable developer experience.
We will be using Stoplight to write documentation of endpoints. We also can use Stoplight to test an API on different environment.
Prerequisite 1 : User Access
Please reach out to your senior programmer, providing your wavelet’s email address so that you could be granted the edit access to the organisation’s stoplight project and workspace.
Prerequisite 2 : Installation
You may access to Bigledger stoplight documentation via Stoplight Web at link:https://bigledger.stoplight.io/.
However, it is recommended to install the Stoplight Studio and clone the api repositories locally for speedier edit. You can download the Stoplight Studio by clicking here
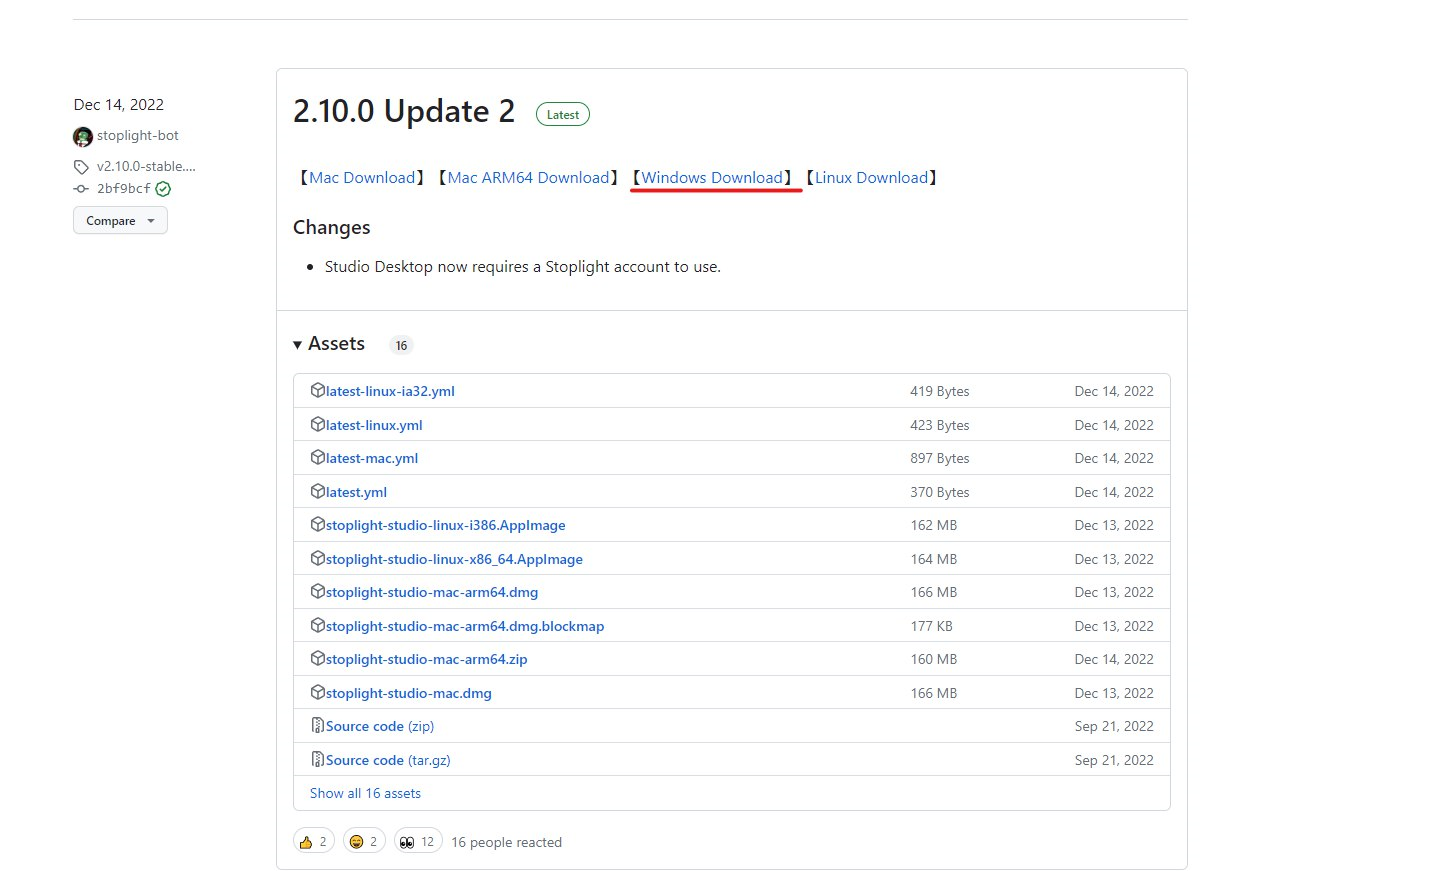
Please select the right installer suitable to your operating system.
Prerequisite 3 : Steps to Clone the Repositories
-
Login to Stoplight Studio usign your wavelet.net email credentials
-
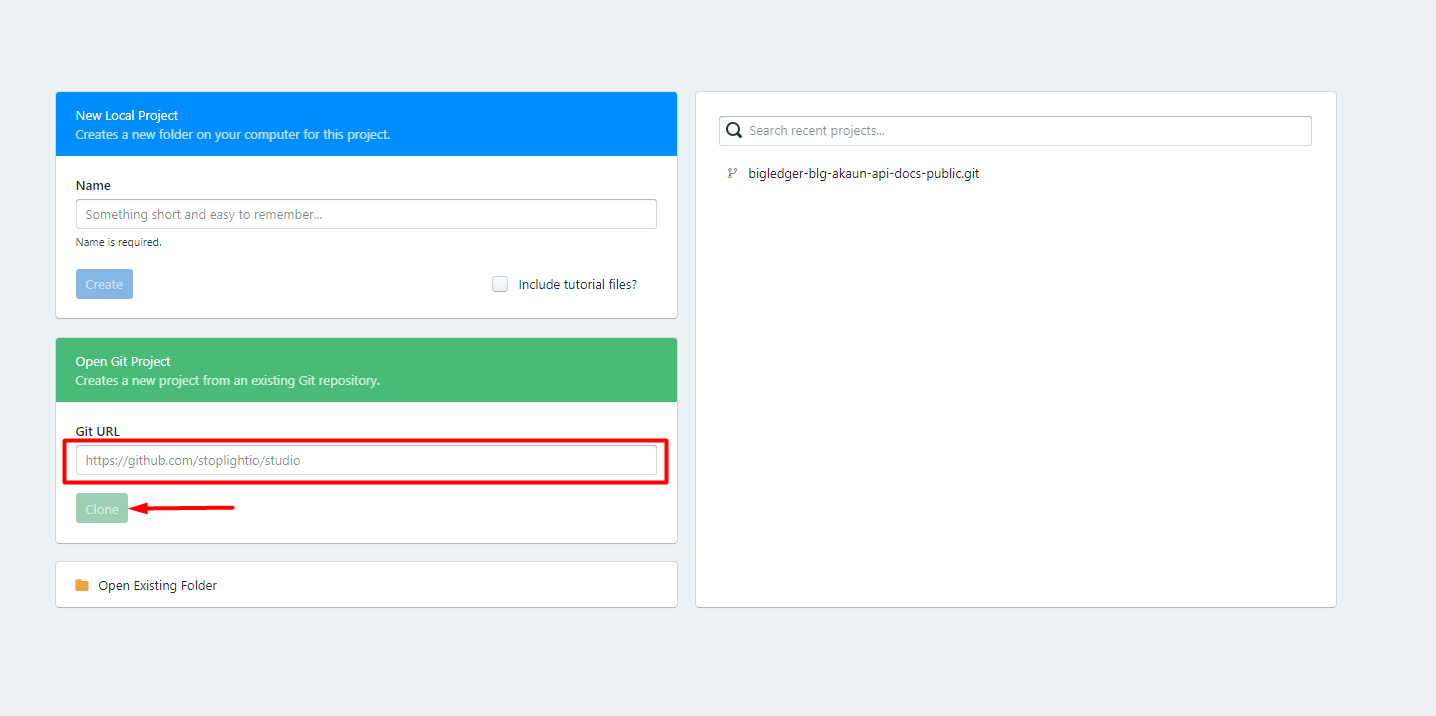
Clone the Repository:
-
Public Repository (To create the tenant level APIs documentation)
-
Private Repository (To create the documentation for platform level APIs)
-
Insert the URL of the repository and click the Clone button
-
Fill in your Username and App Password to clone the repositories (scroll down to see how to get the credentials).

-
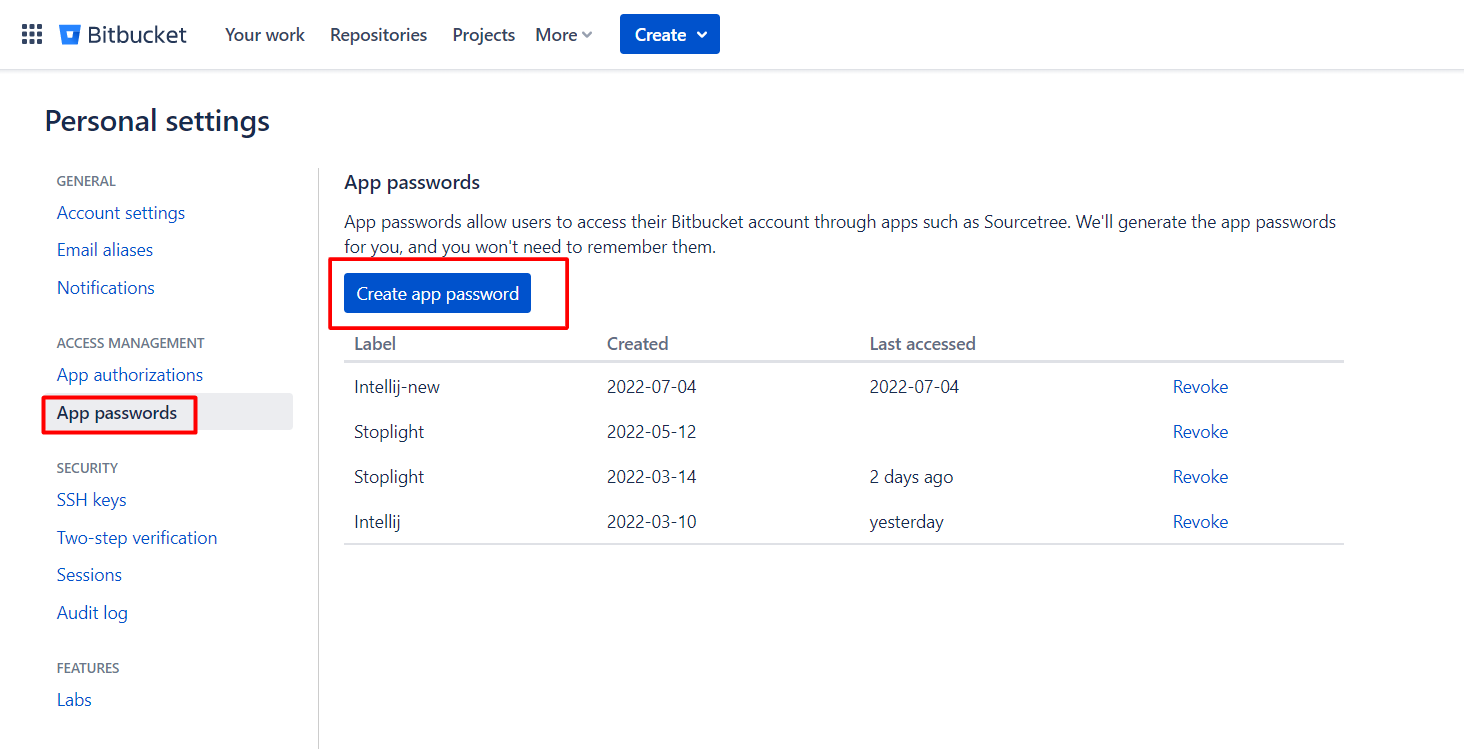
Use your username under Account Settings and create App Password under App Passwords.

-
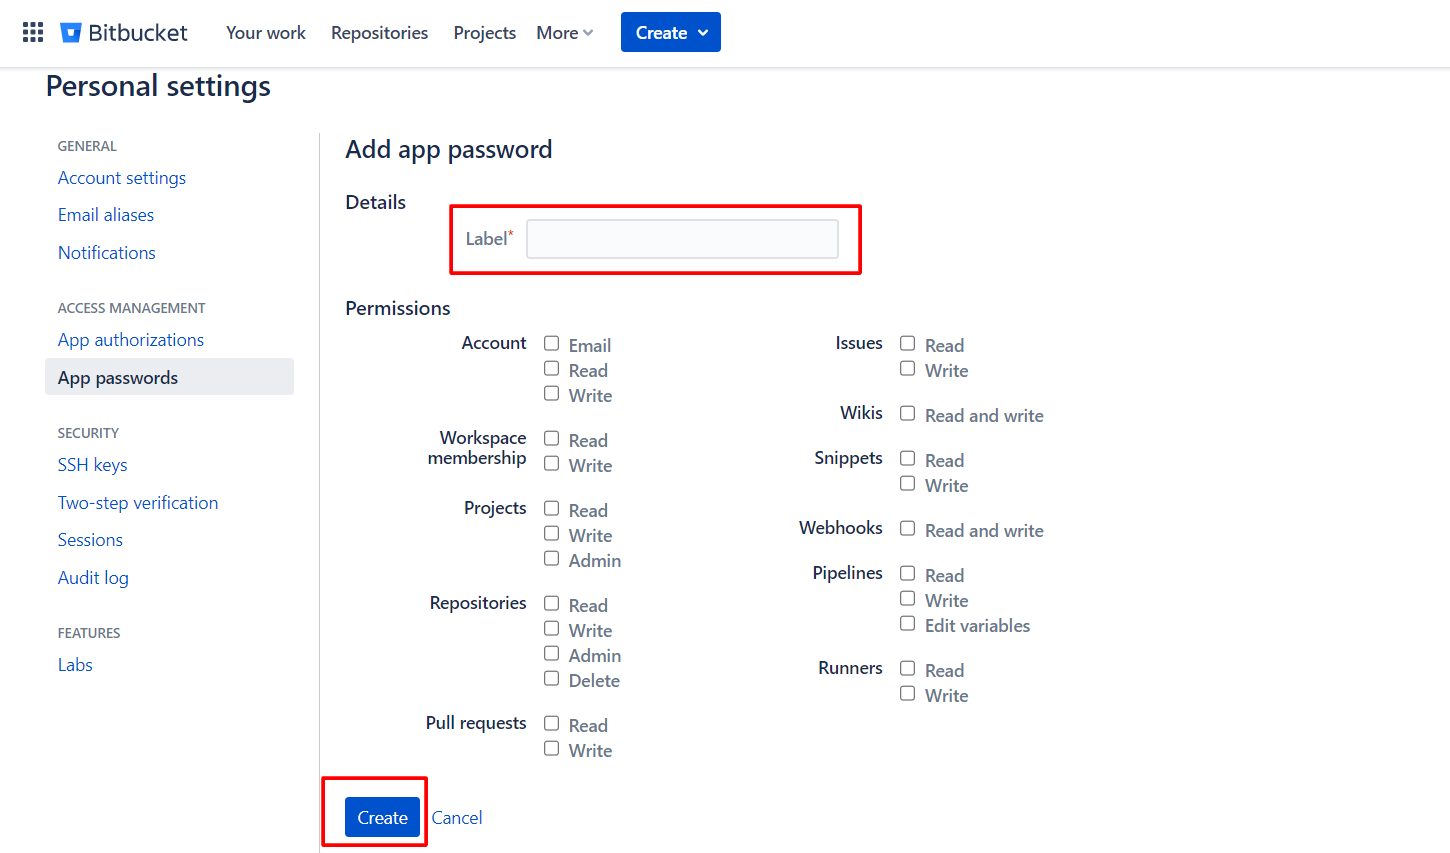
Click on Create app password
-
Write a label, check the required permissions and click the Create button.
-
Note: Remember to note down your credentials
-
-
-
-
Repositories are cloned and ready to create the API documentation.
Create API Documentation
-
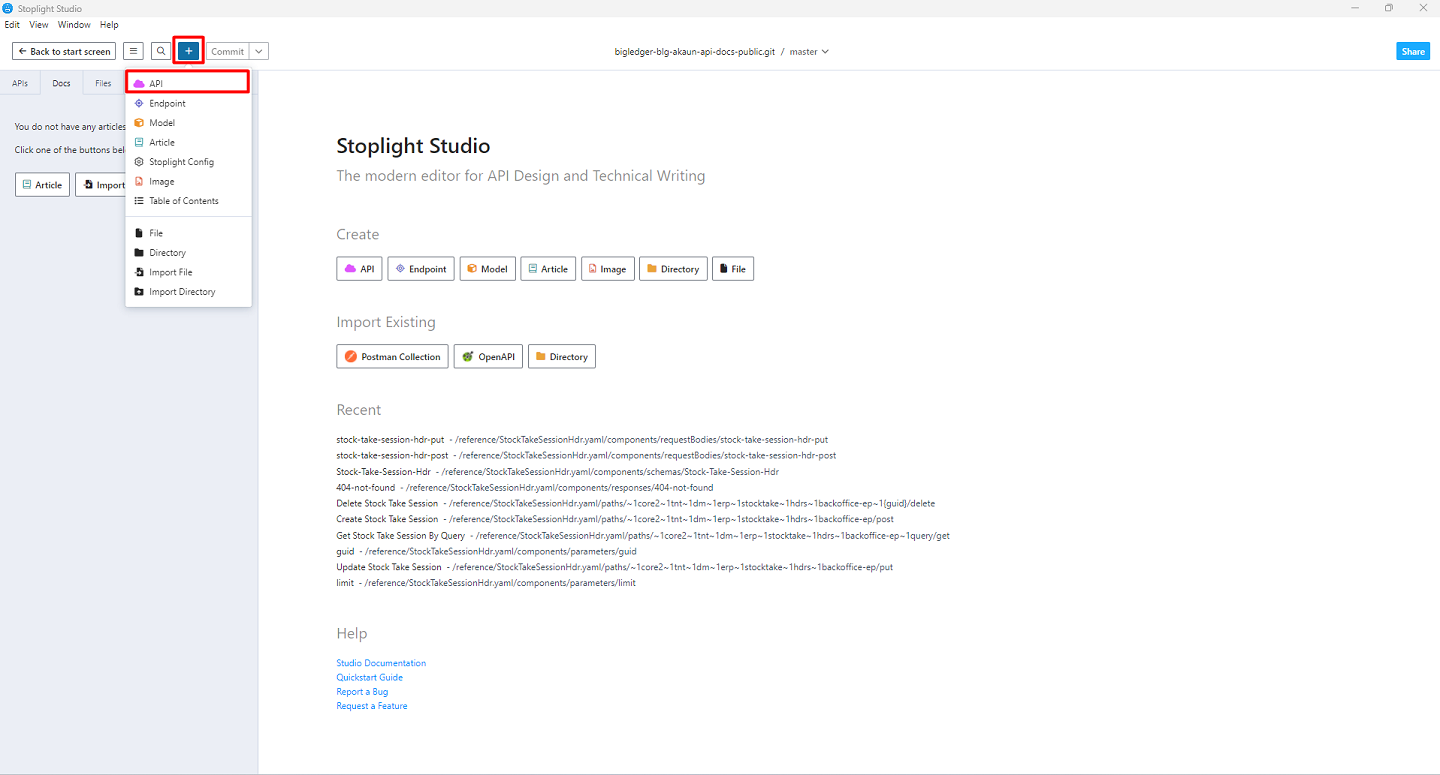
Click the '+' button and click on API
-
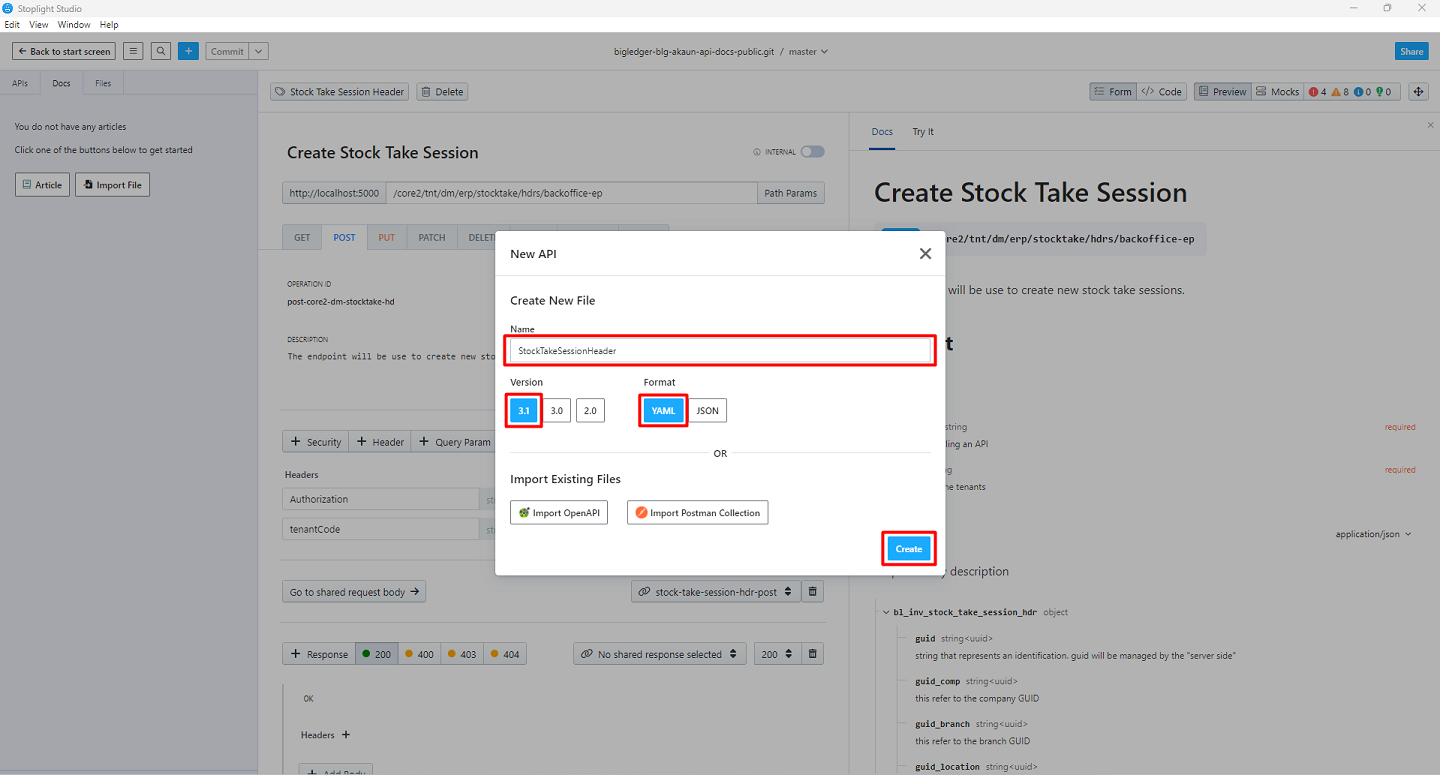
Type the File name and select the latest Version and choose the YAML format
-
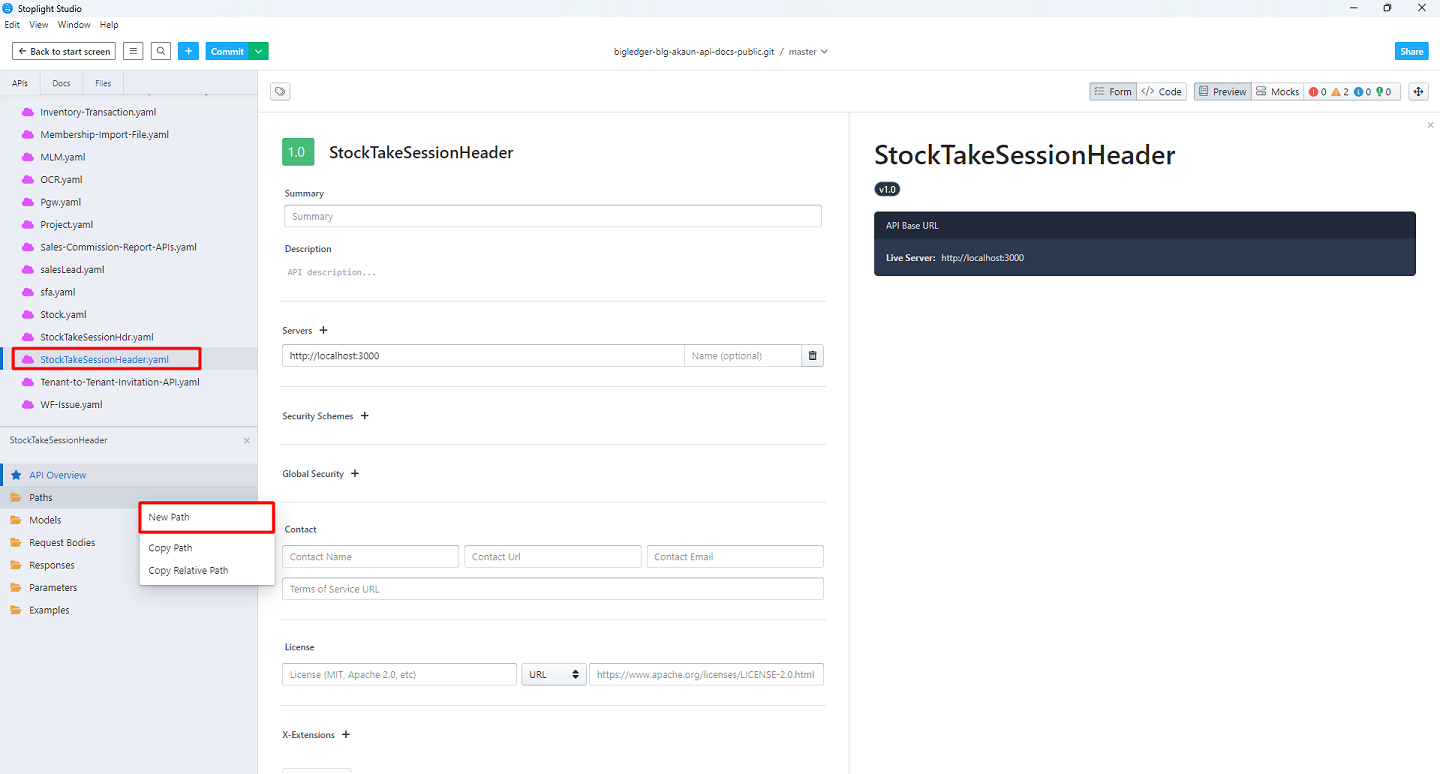
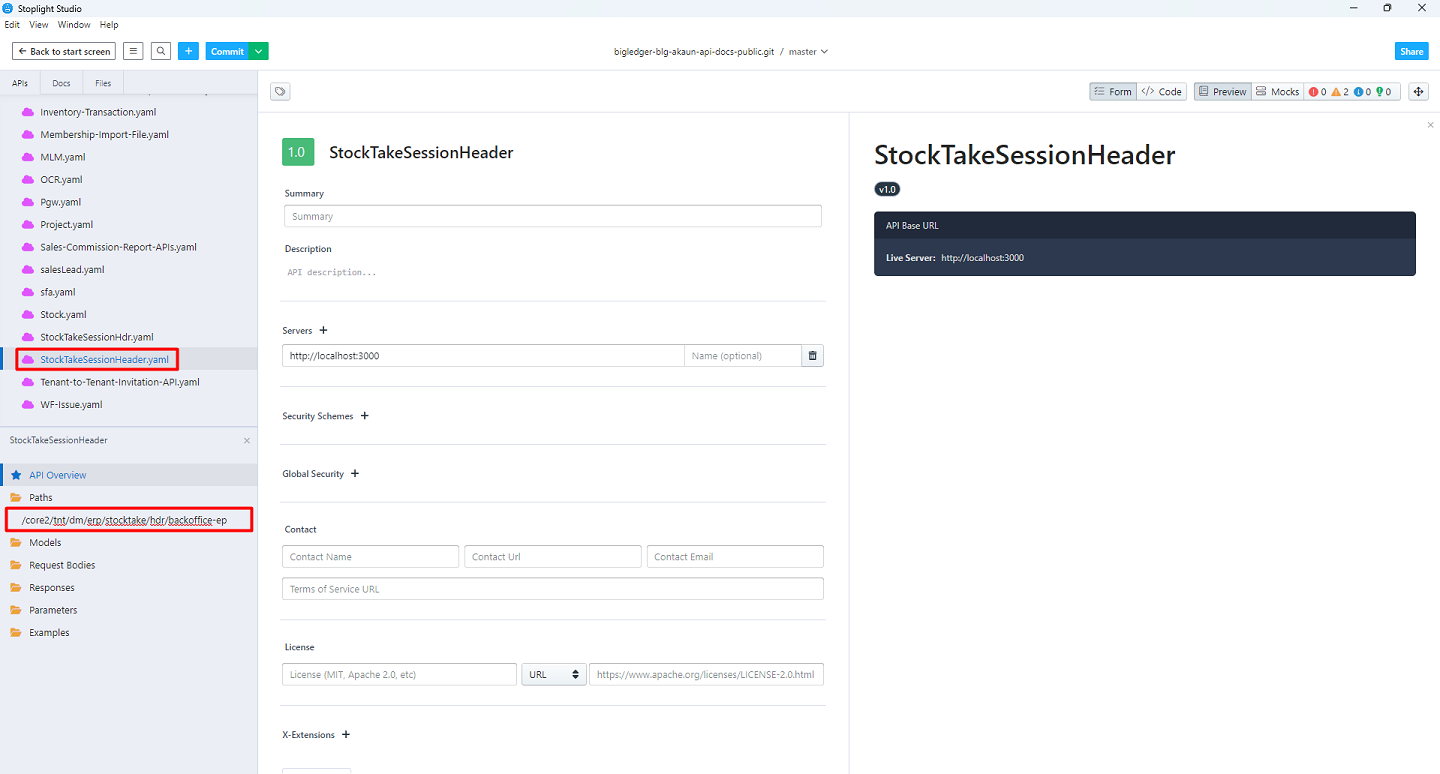
Right click on the Paths to create the new Path
-
Type the path/url of the API
-
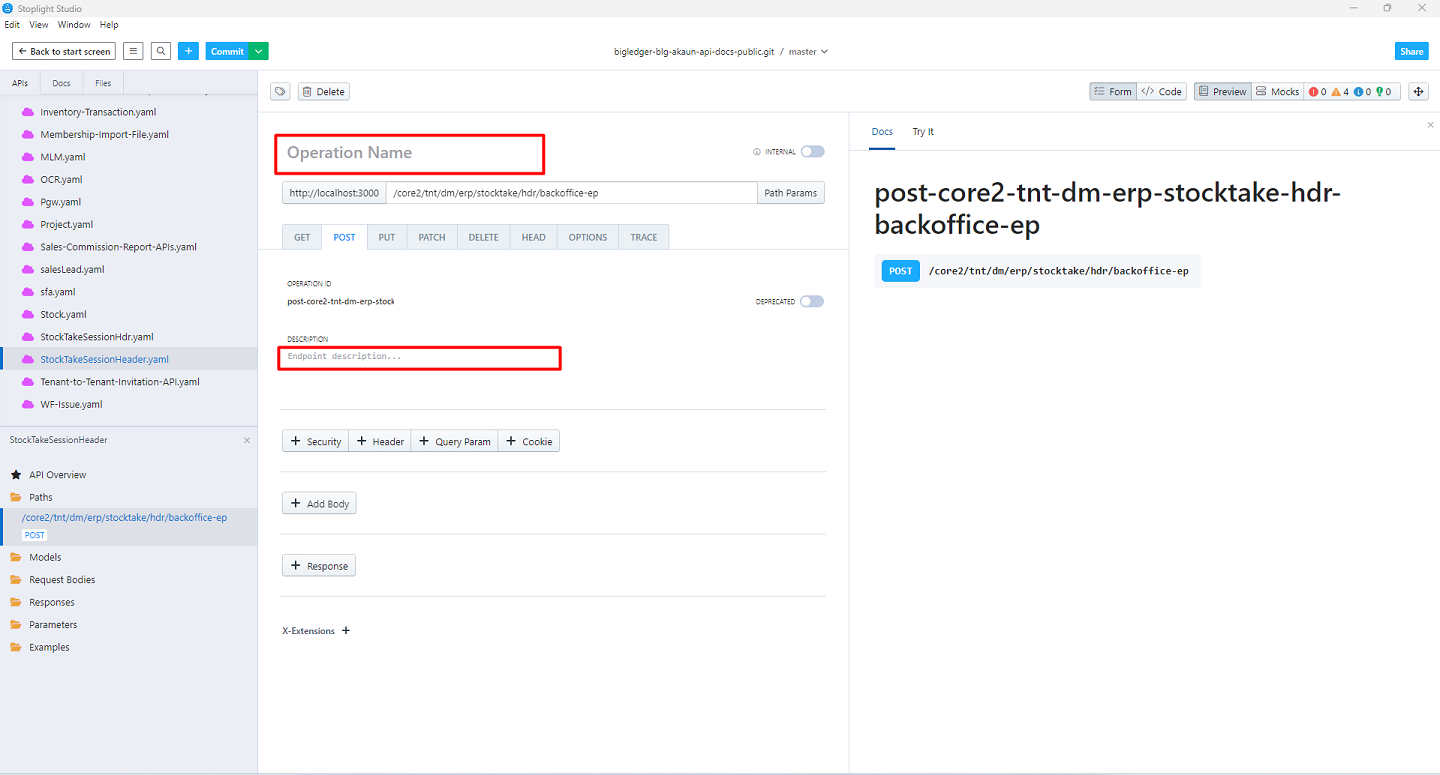
Type the Operation name and Description
-
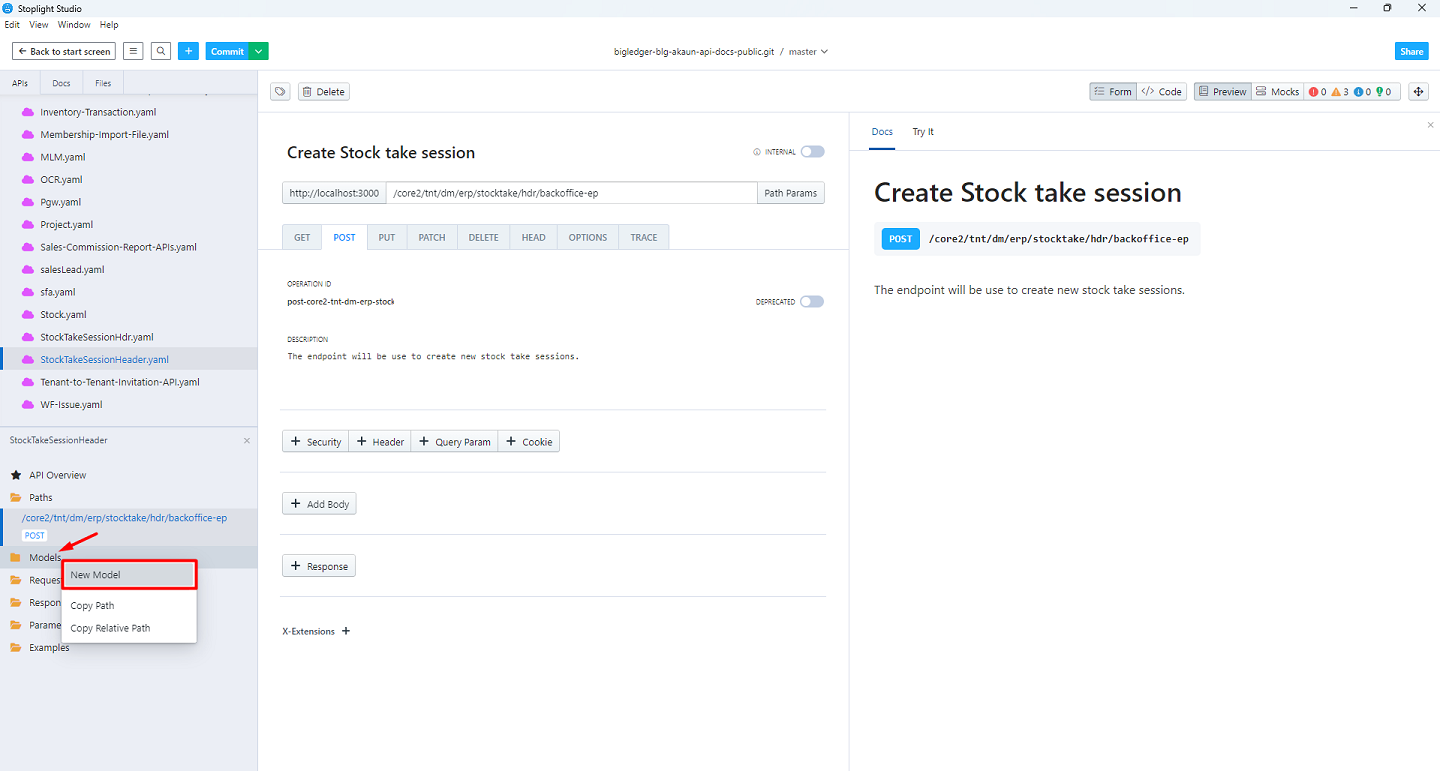
Right click on the Models to create the new Model
-
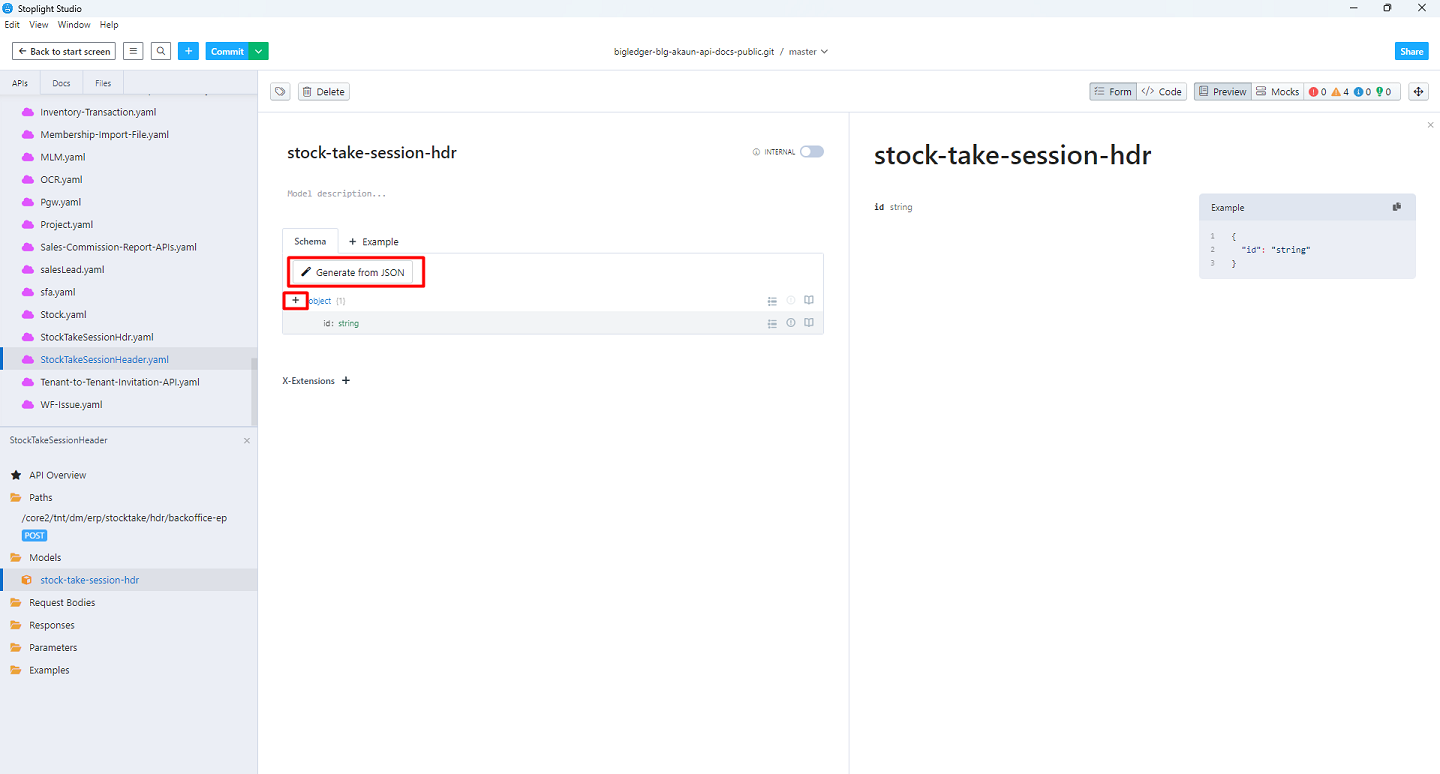
Click on Generate from JSON to create Model using JSON body OR click on '+' button to add manually
-
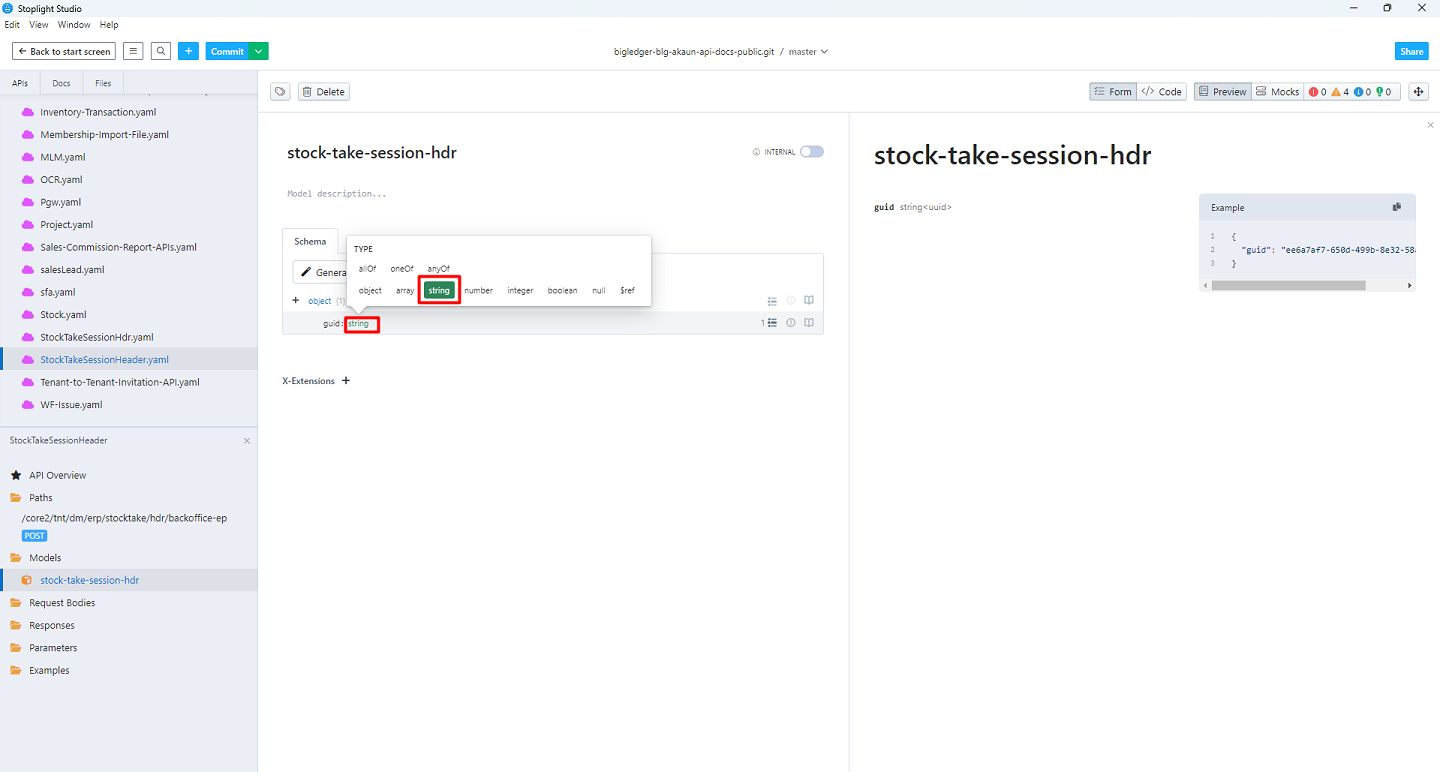
Click on the 'String' select the TYPE
-
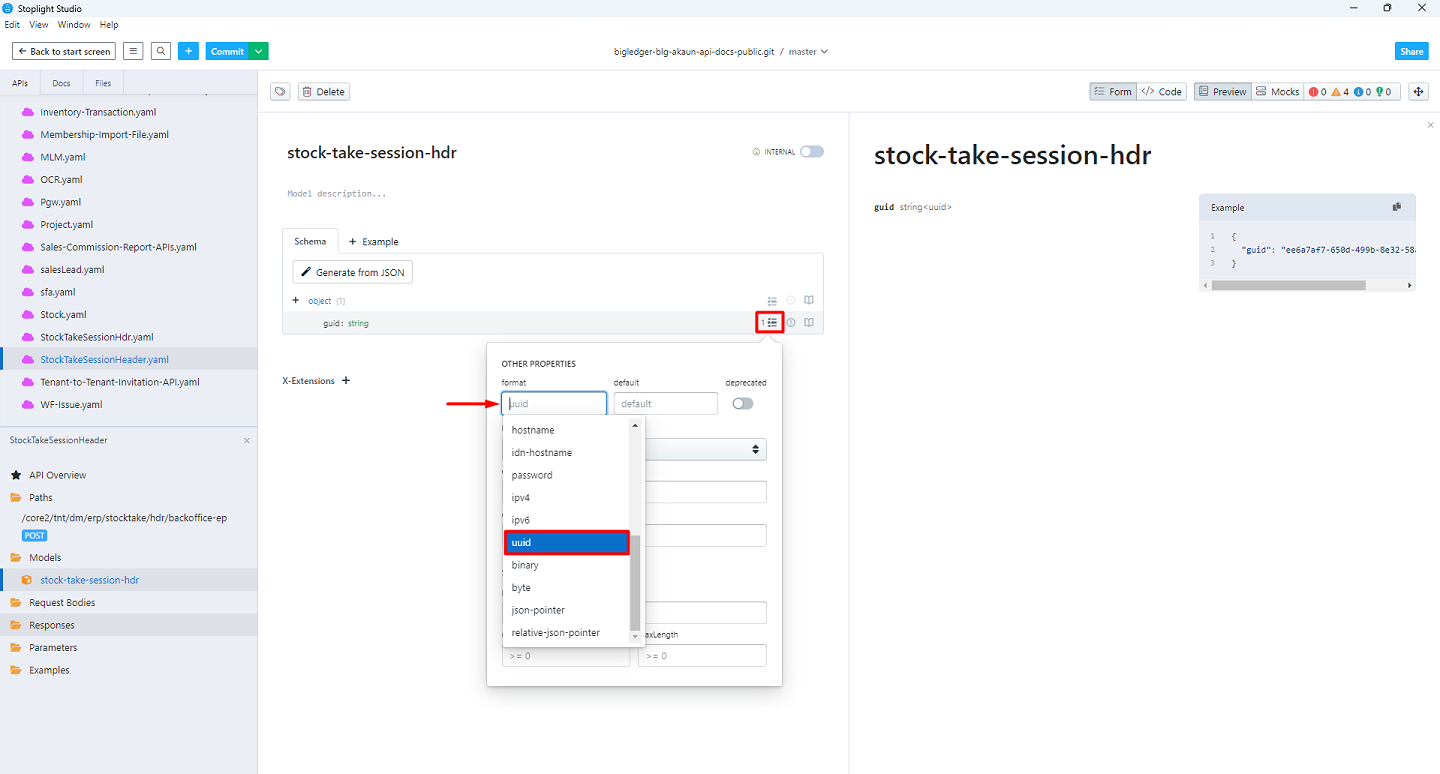
Click on the three dots to update the other Properties like format
-
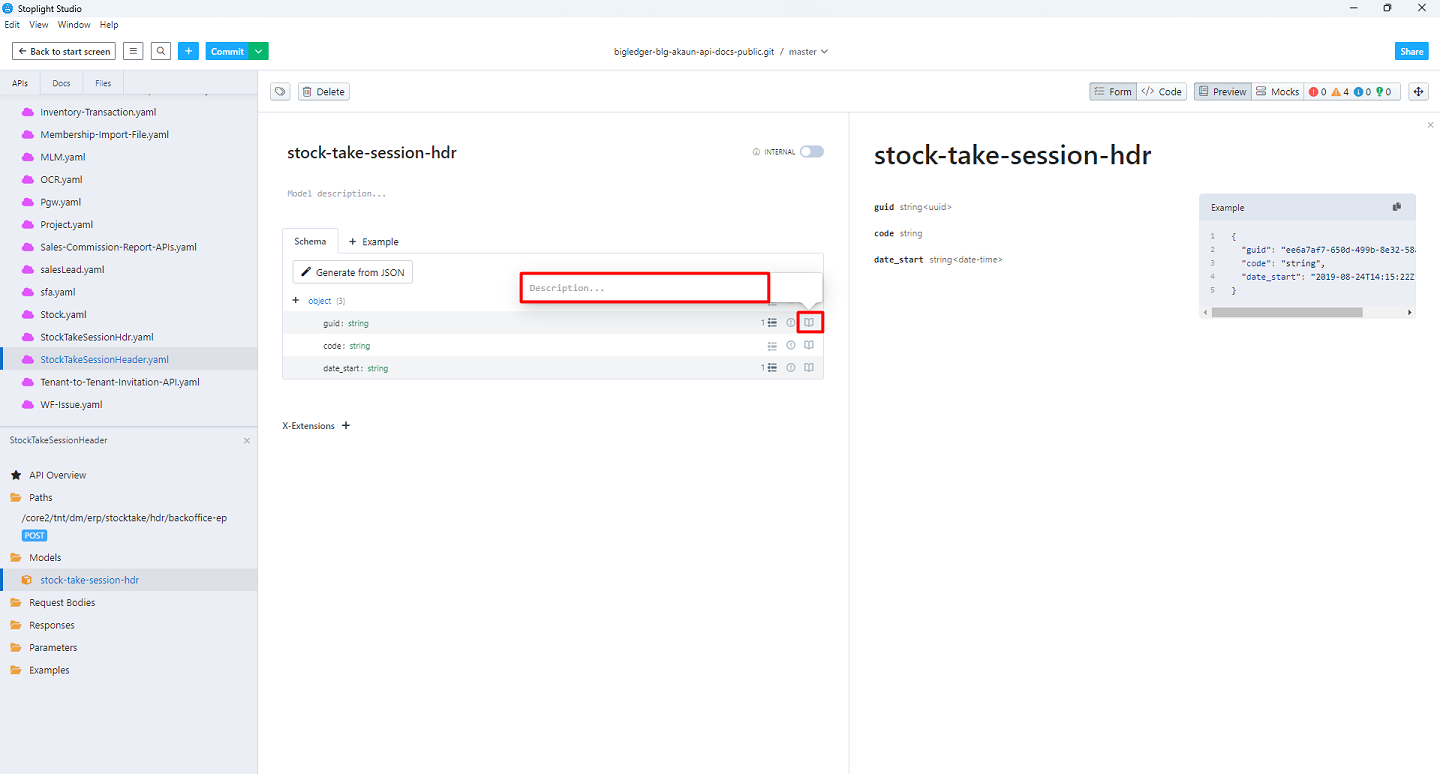
Click on the book icon to write the Description
-
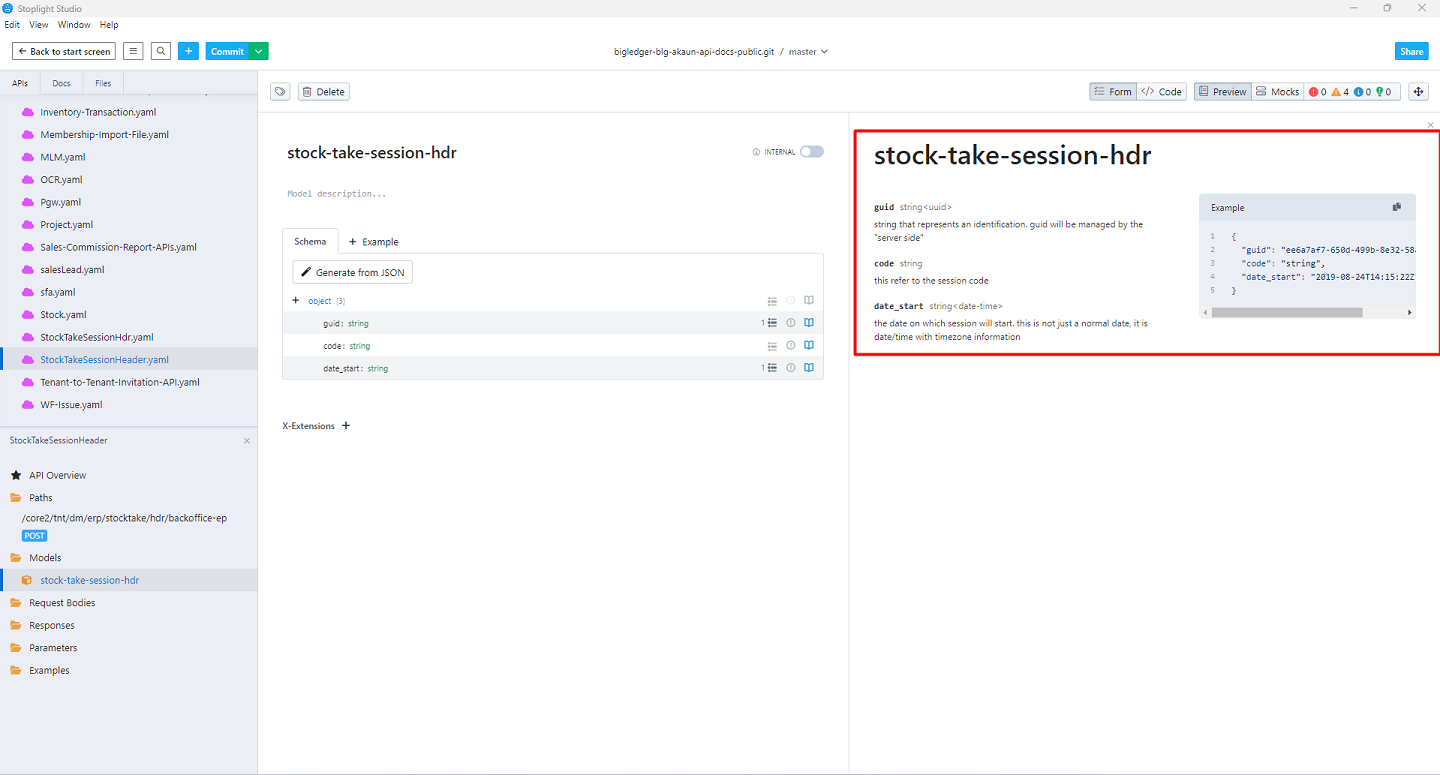
Click on the 'Preview' button to view the Model
-
Right Click on the Request Bodies to create New Request Body
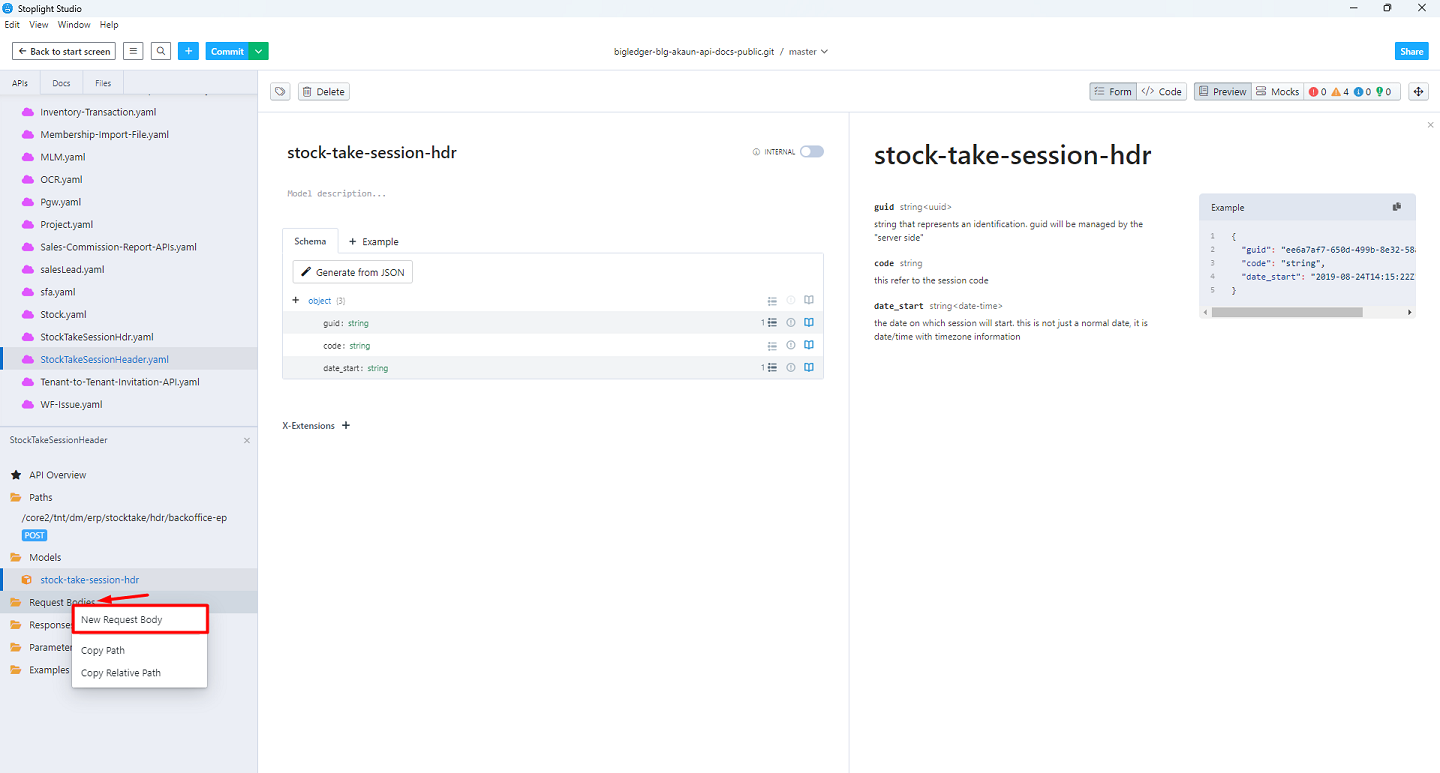
-
Write the Request Body Description
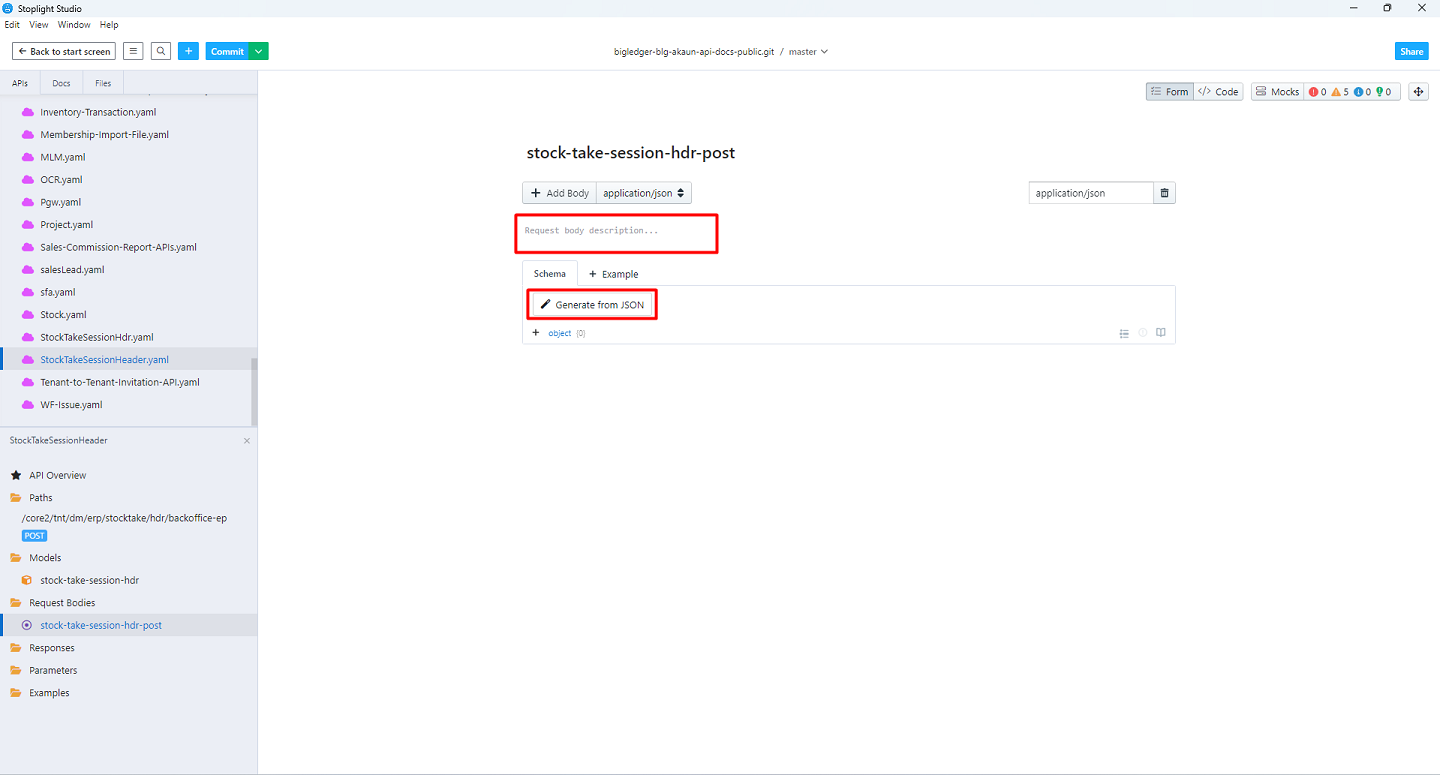
-
Click on 'Generate from JSON' to create new Request Body
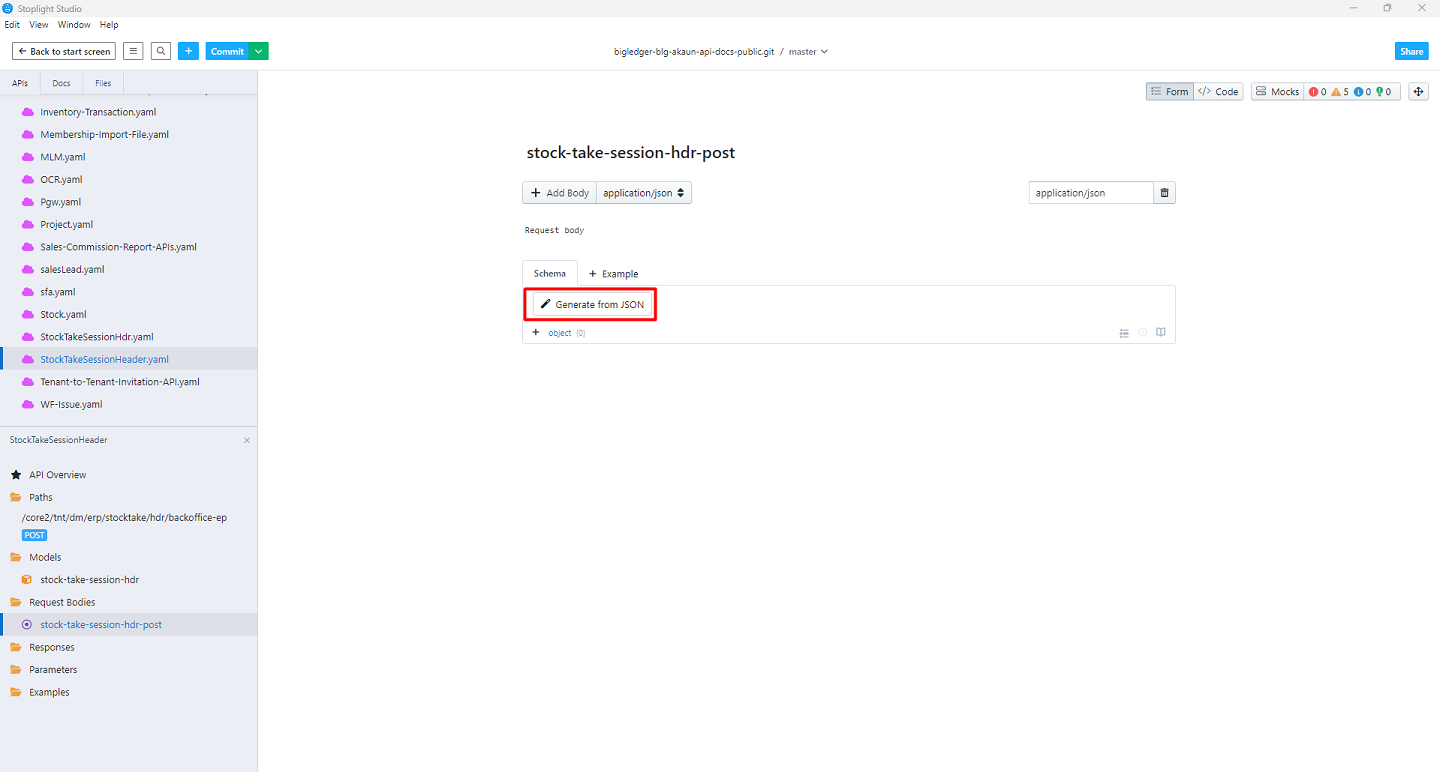
-
Paste or Write a JSON body, then click Generate to build a schema
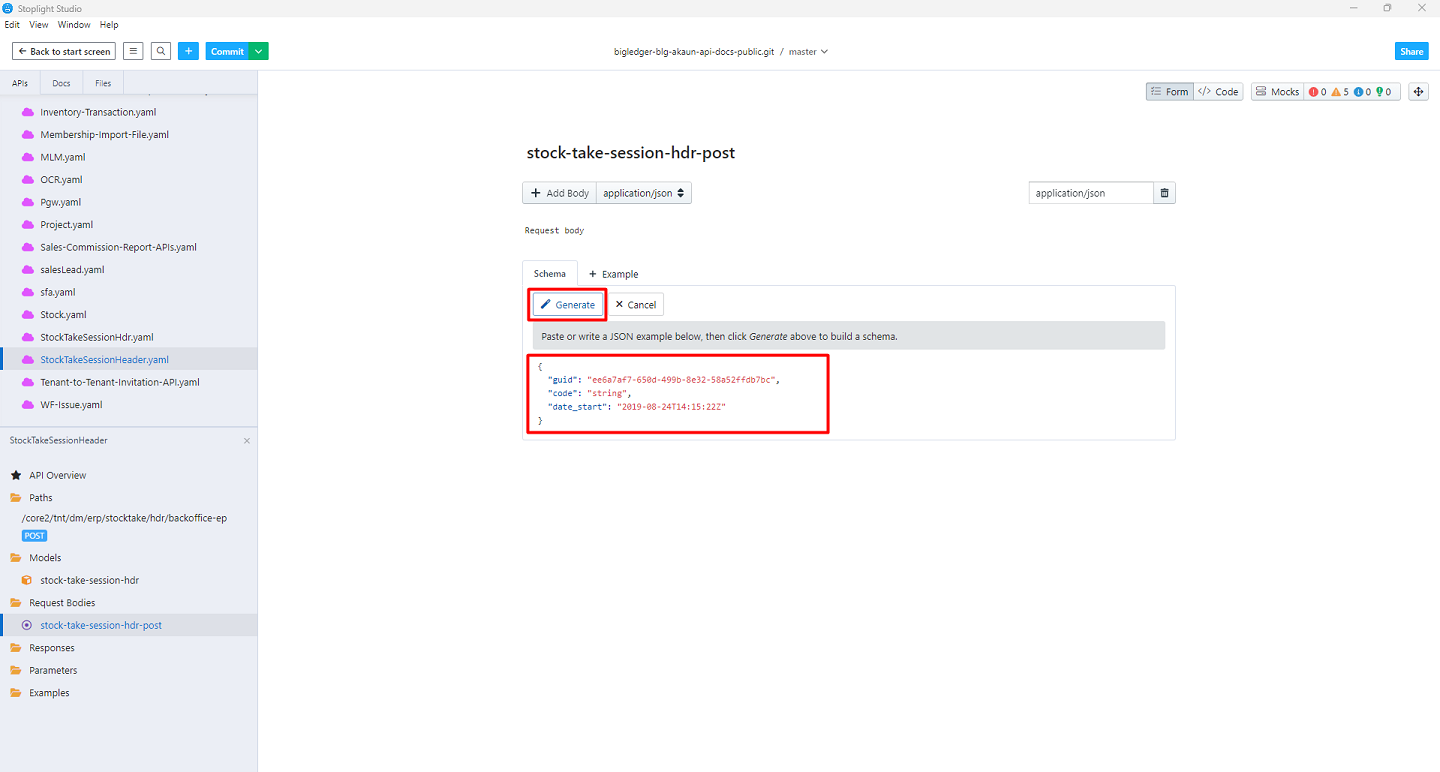
-
Click on the book icon to write the Description
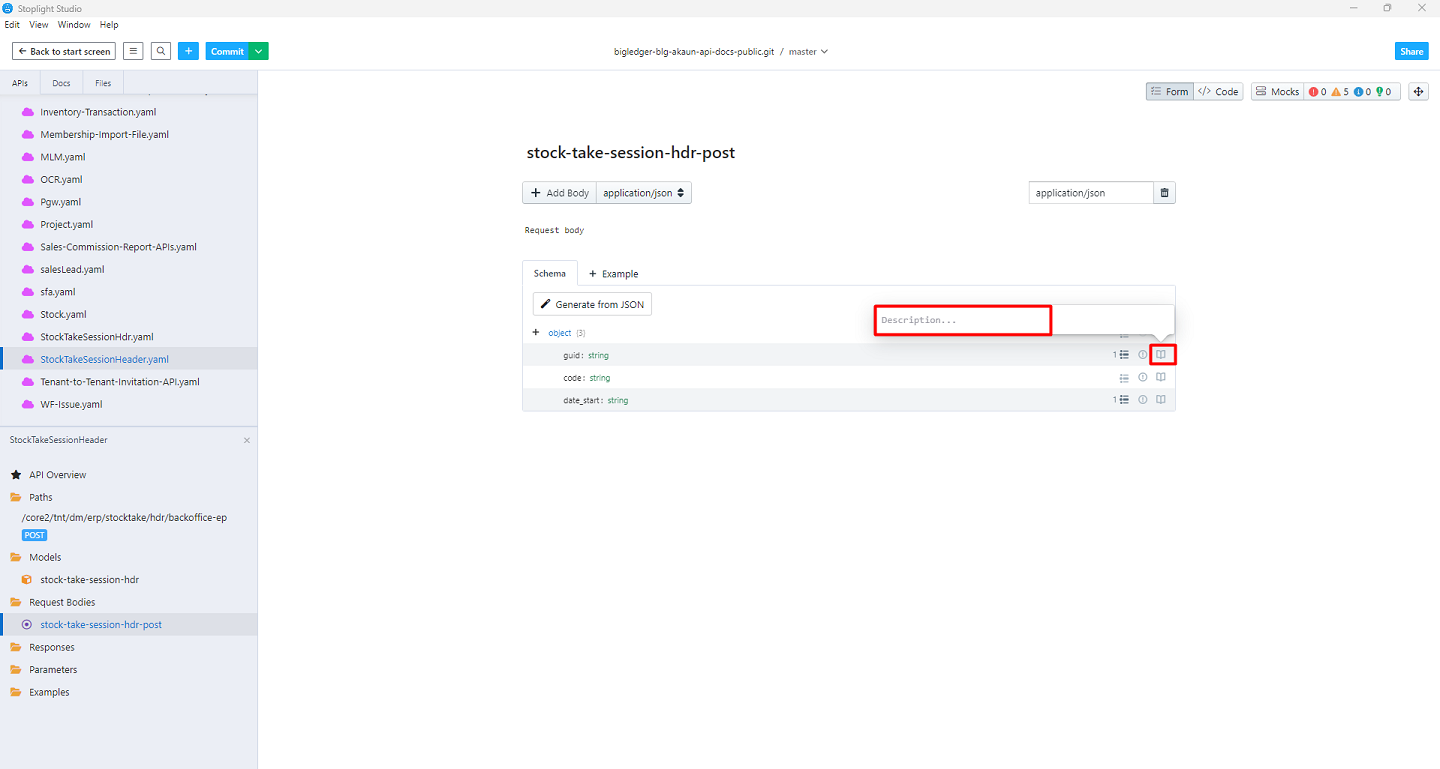
-
Click on the Example to create an Example body
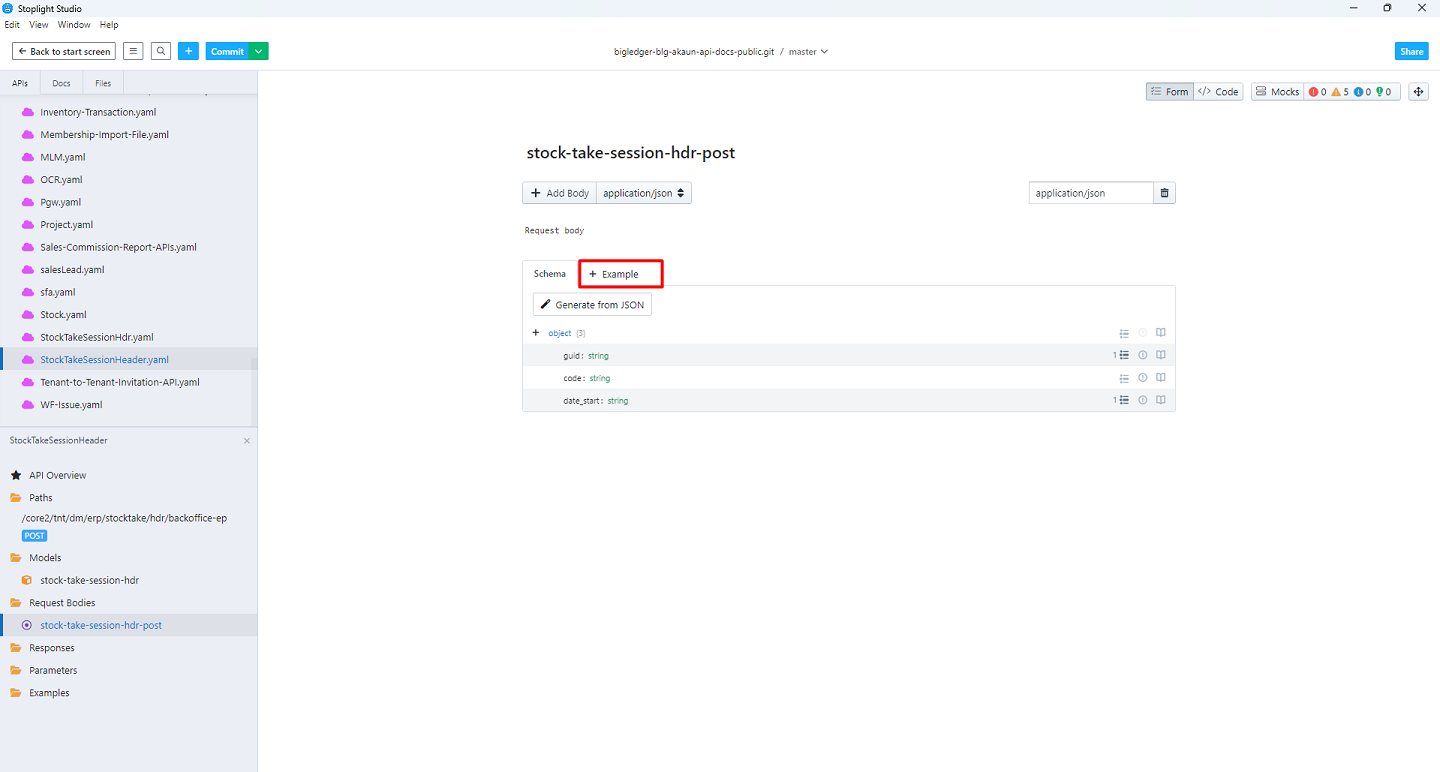
-
Write the name and body, then click on 'Add Body'

-
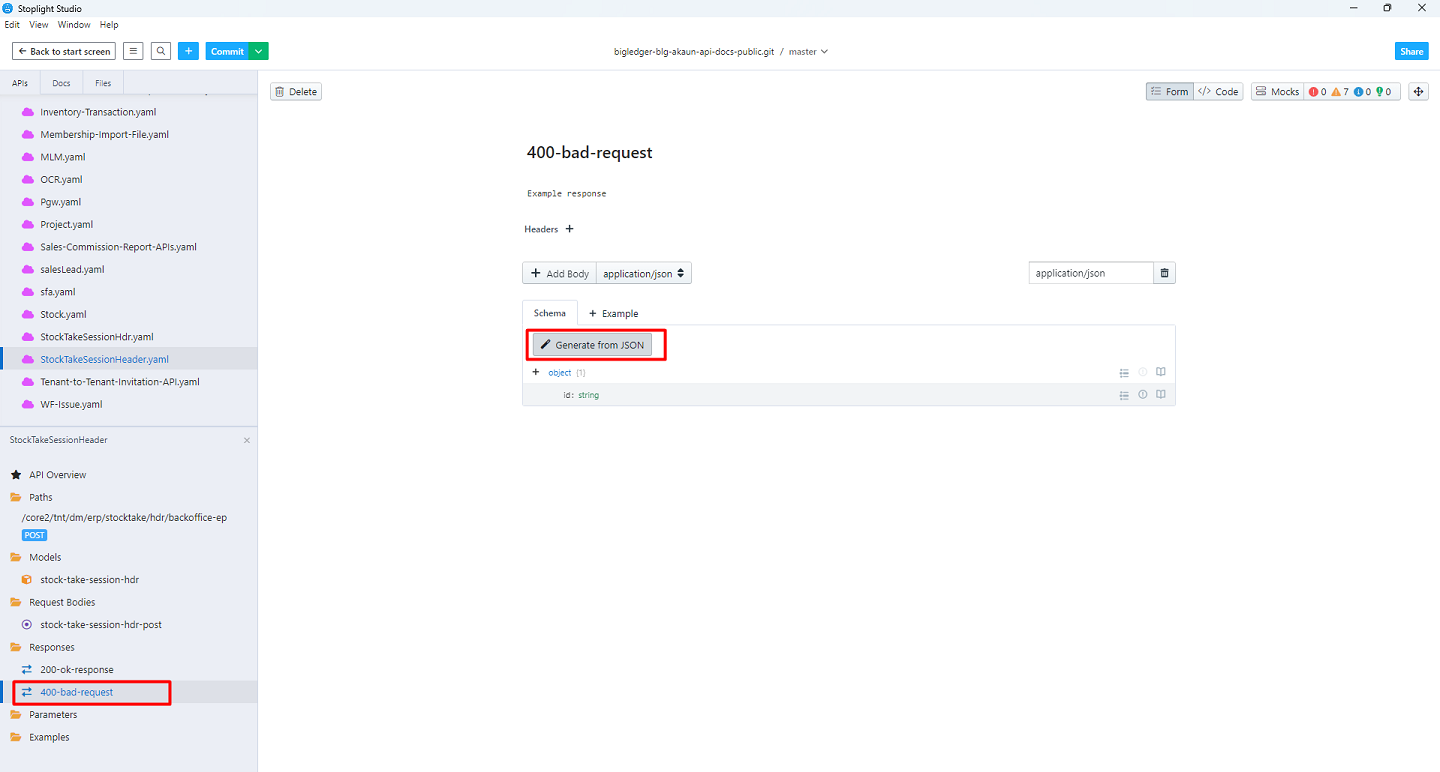
Right Click on the Responses to create New Response
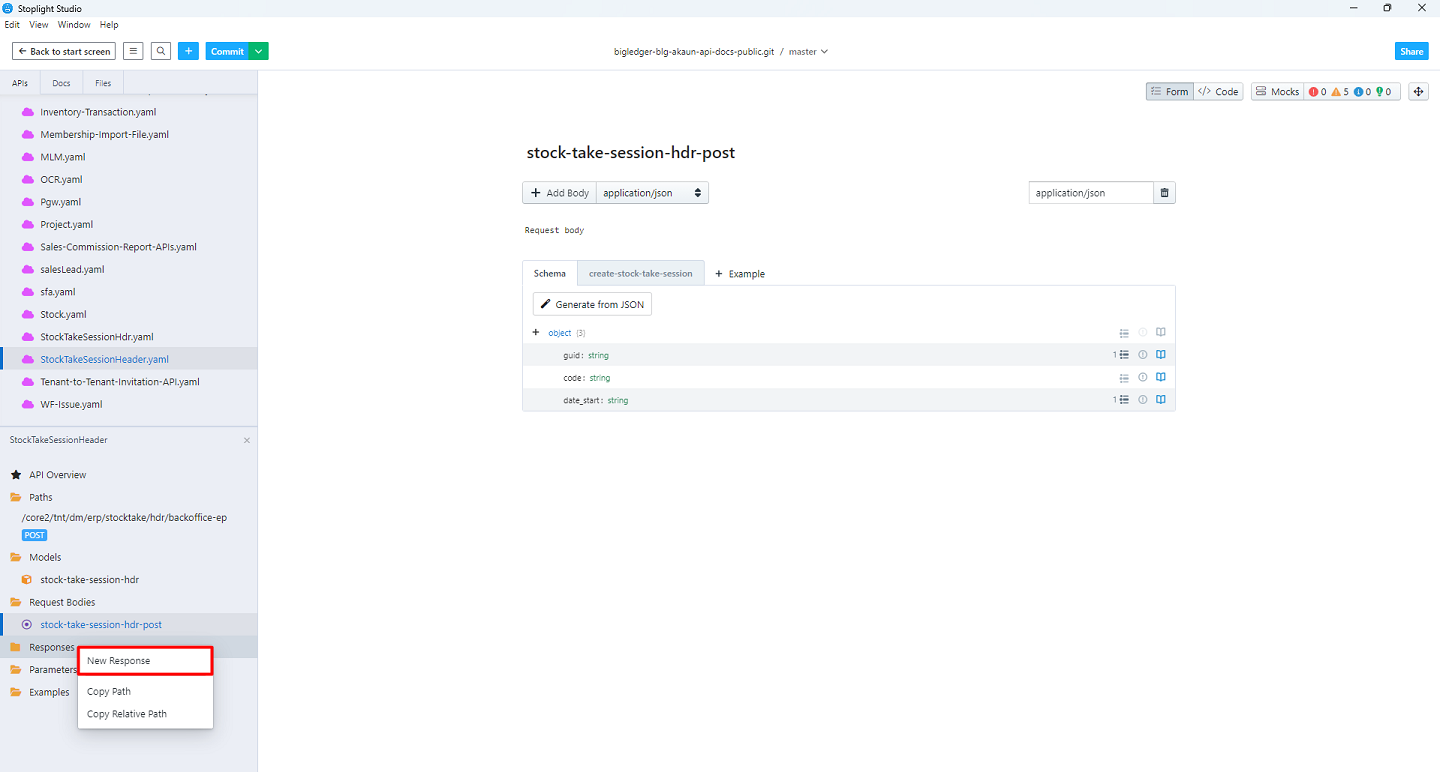
-
Select the Type then select the Target and component
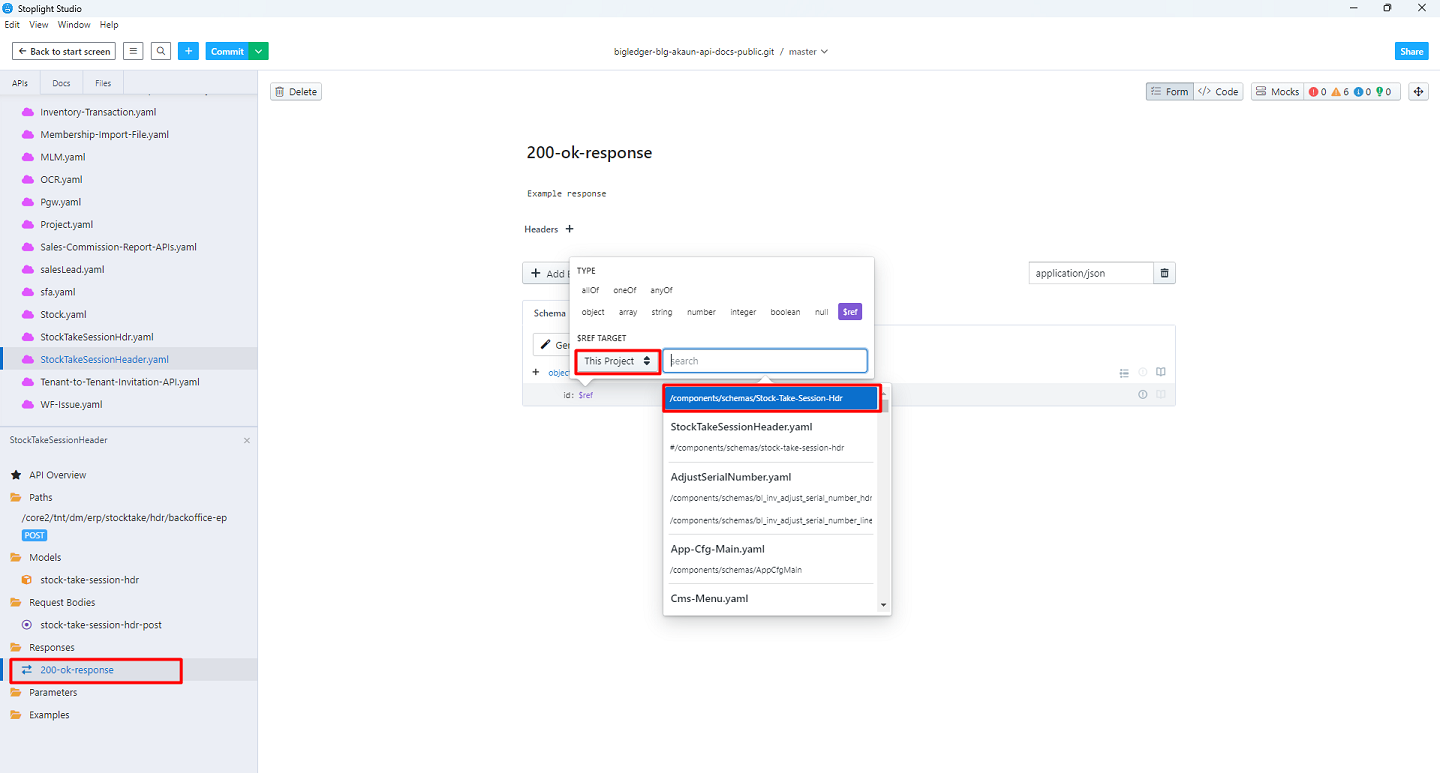
-
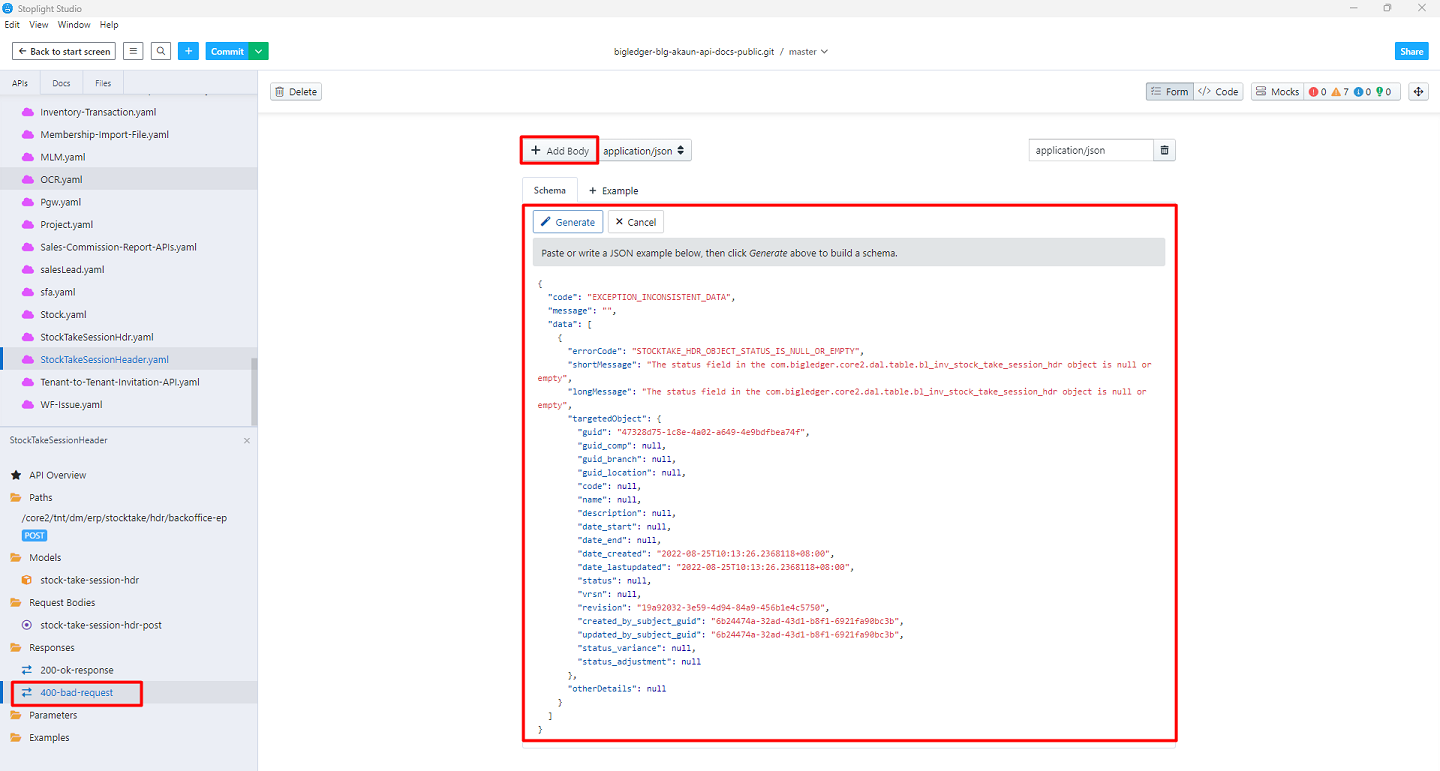
To Generate from JSON, Click on Generate from JSON
-
Write the Json body and click on 'Add Body'
-
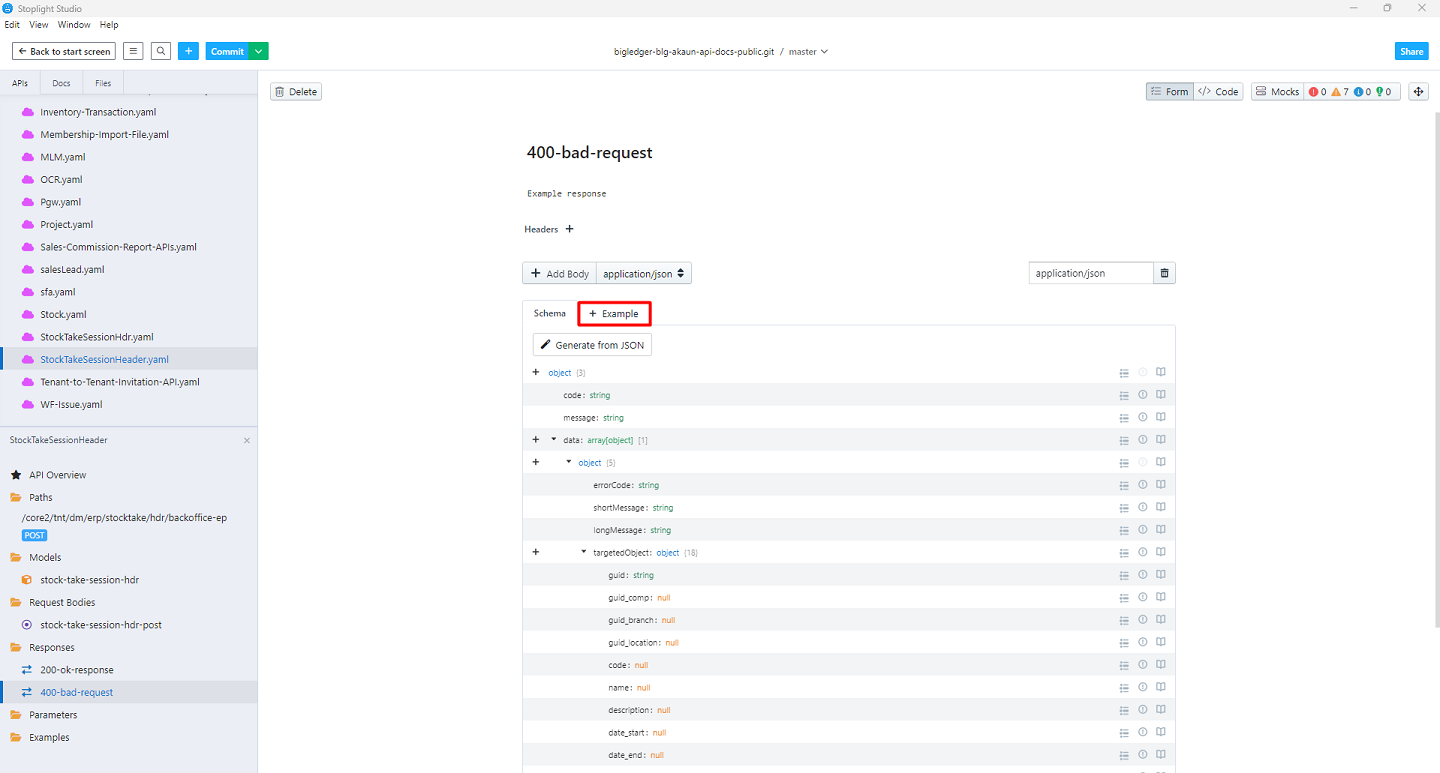
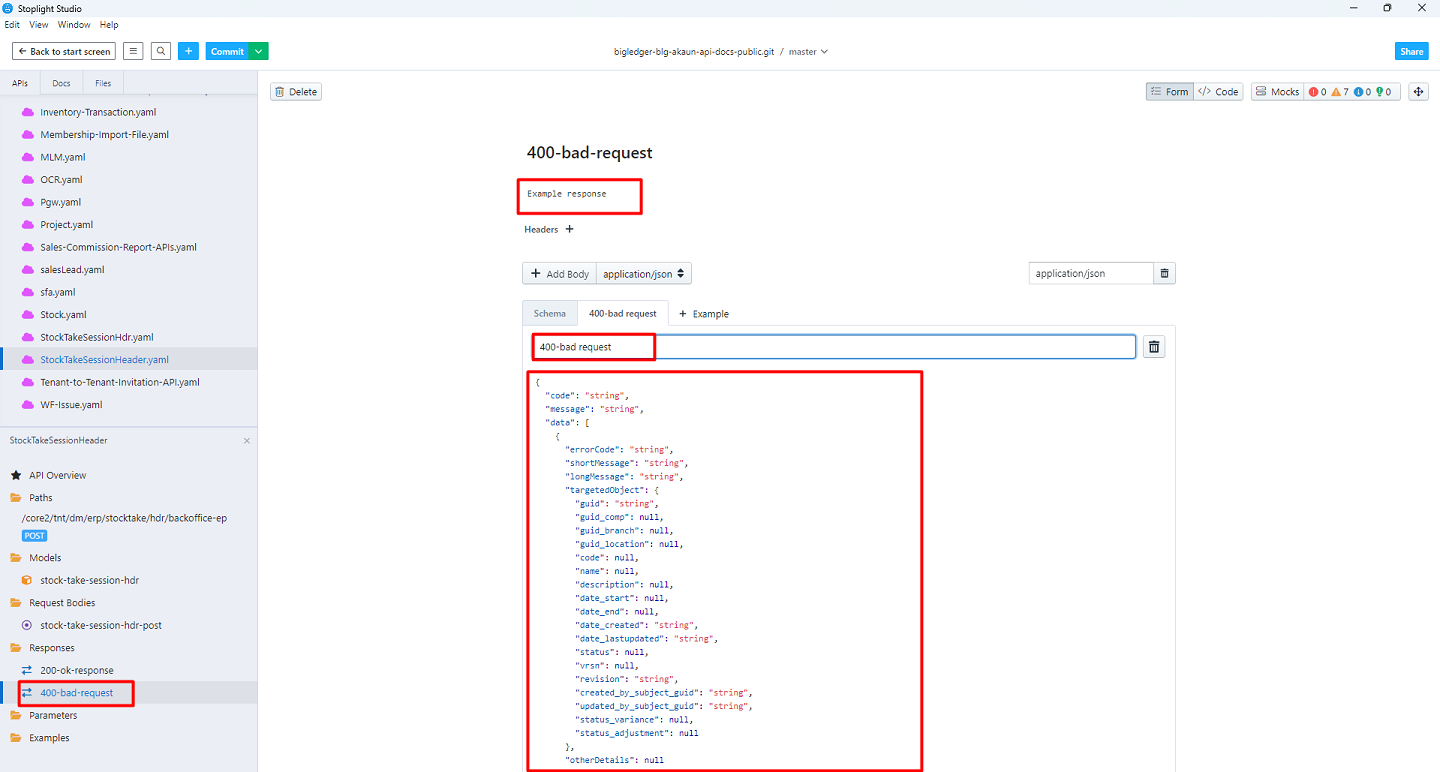
Click on the 'Example' to add an Example
-
Write the name and Example, then click 'Add Body'
-
Right Click on the Parameters to create New Parameter
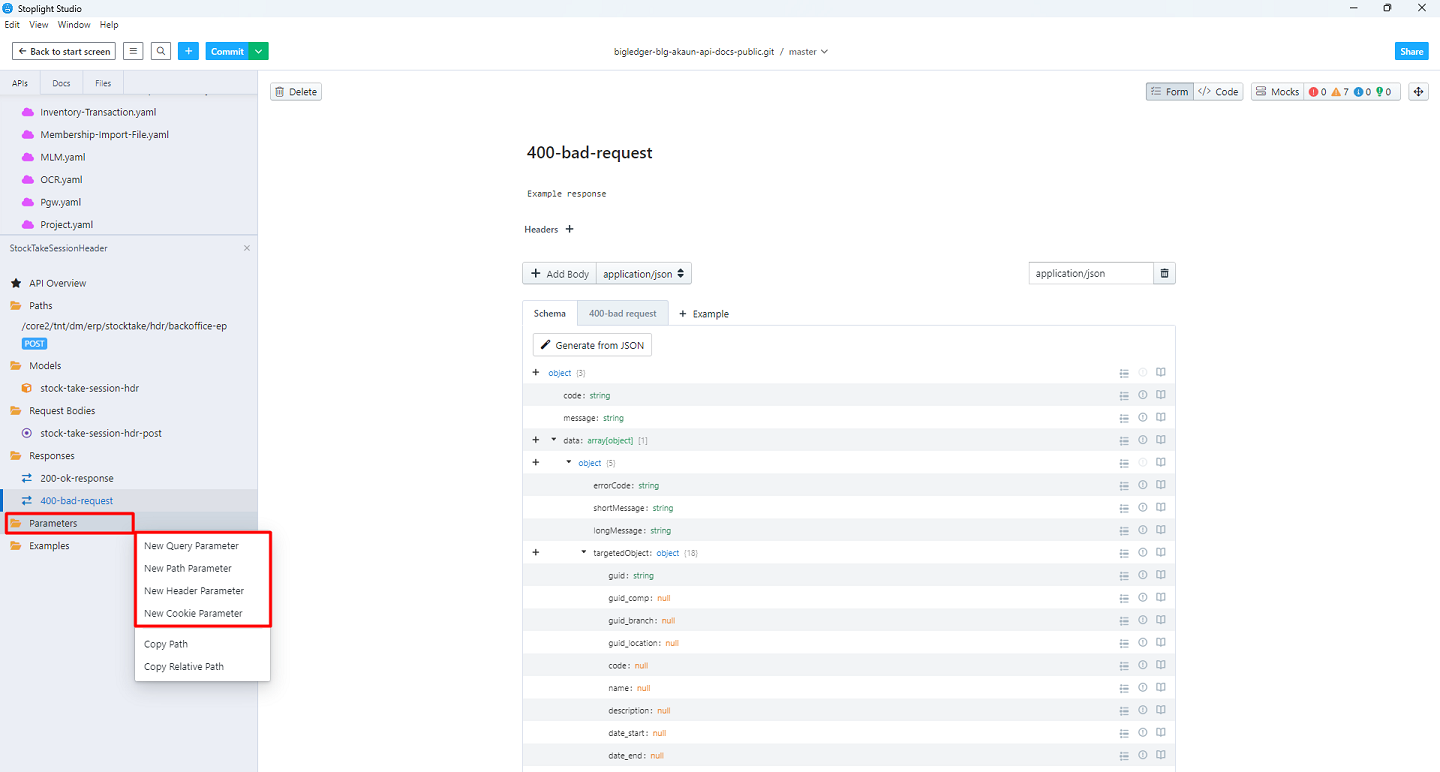
-
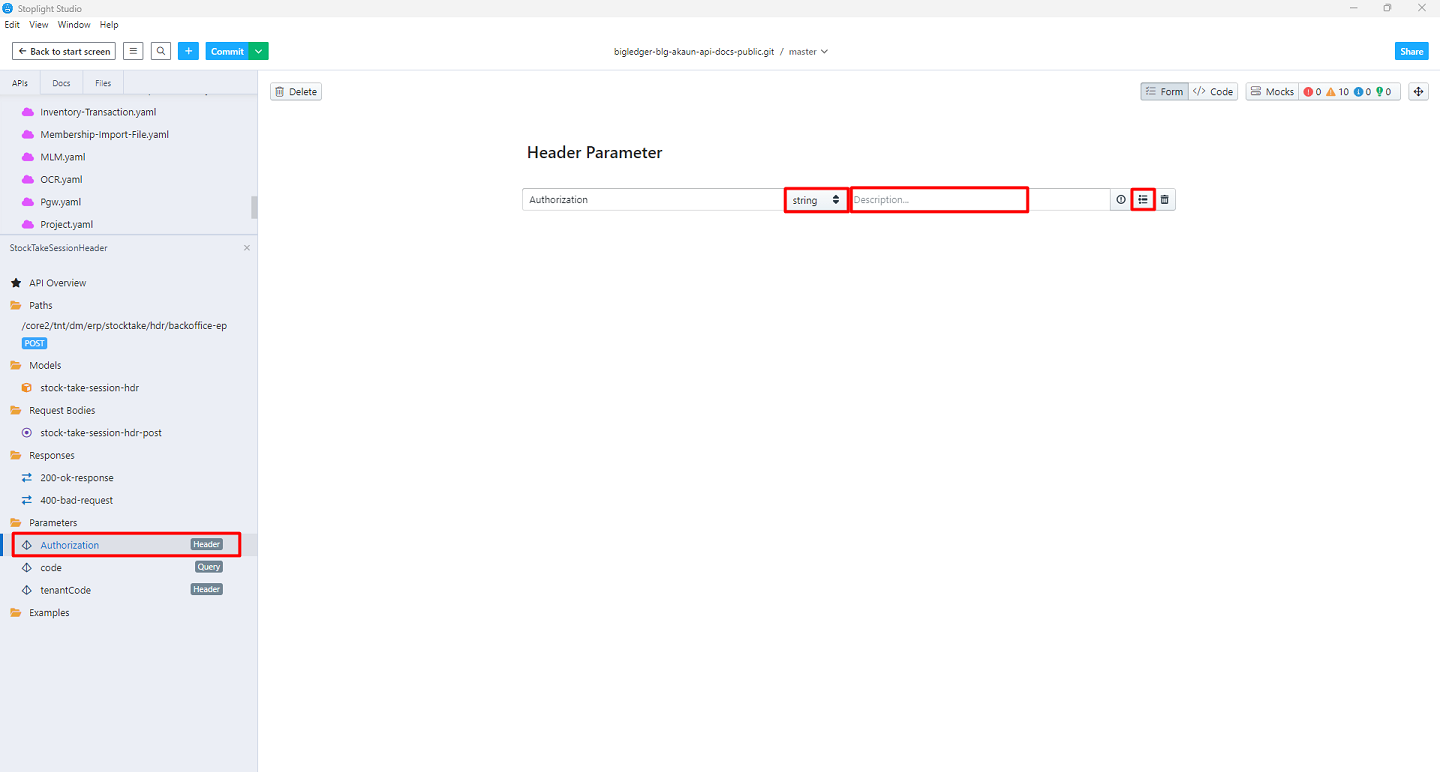
Write the Parameter name, select the Type, write the description and add the properties
-
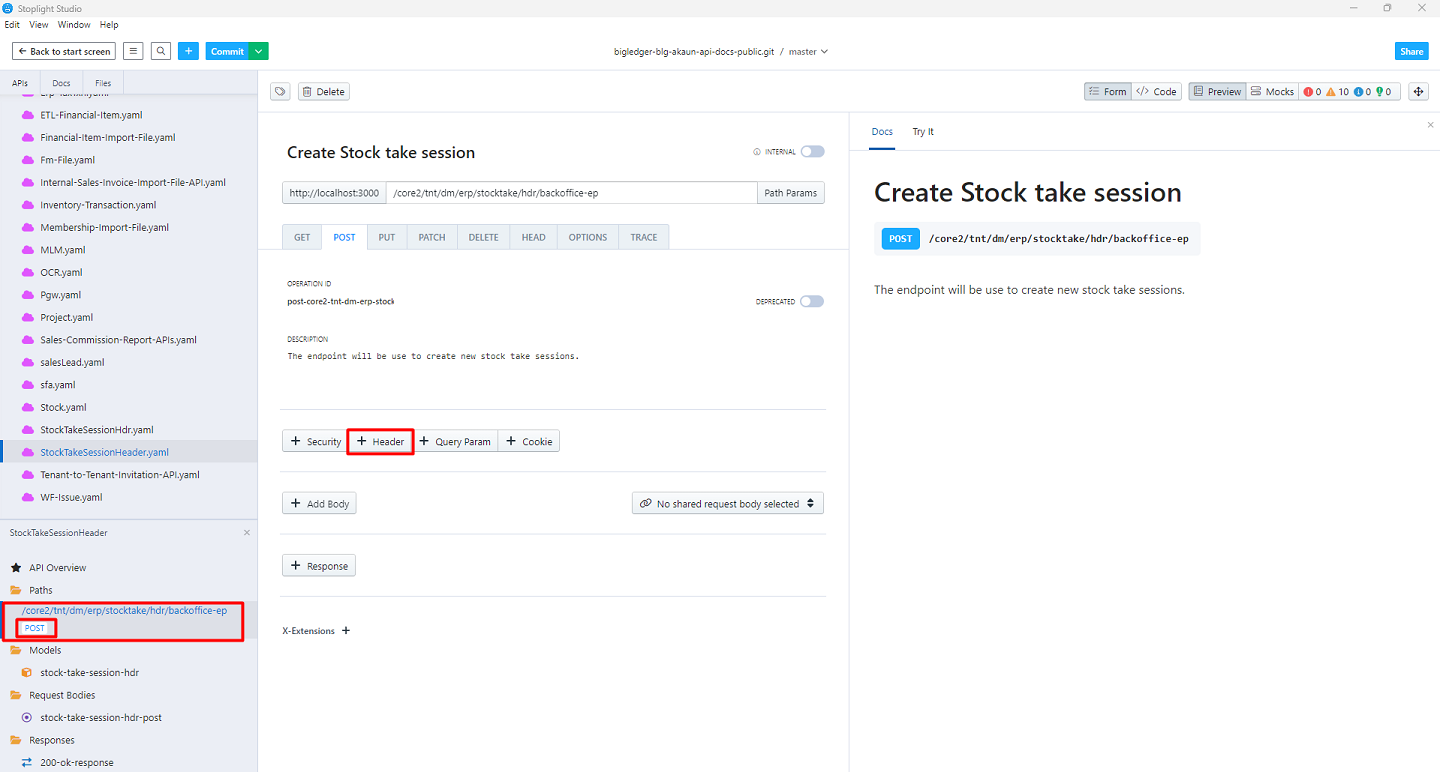
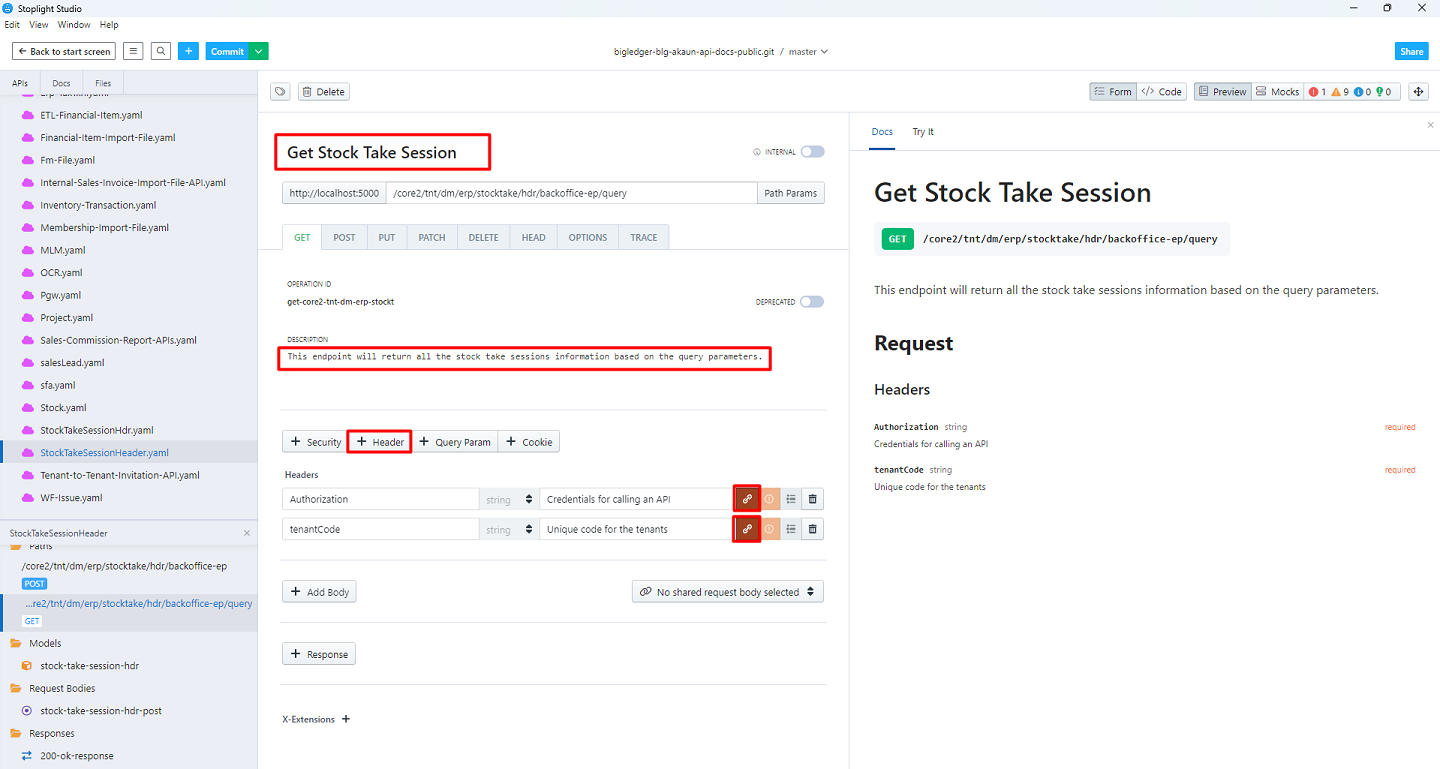
Click the Header to add the Header for an Operation under Paths
-
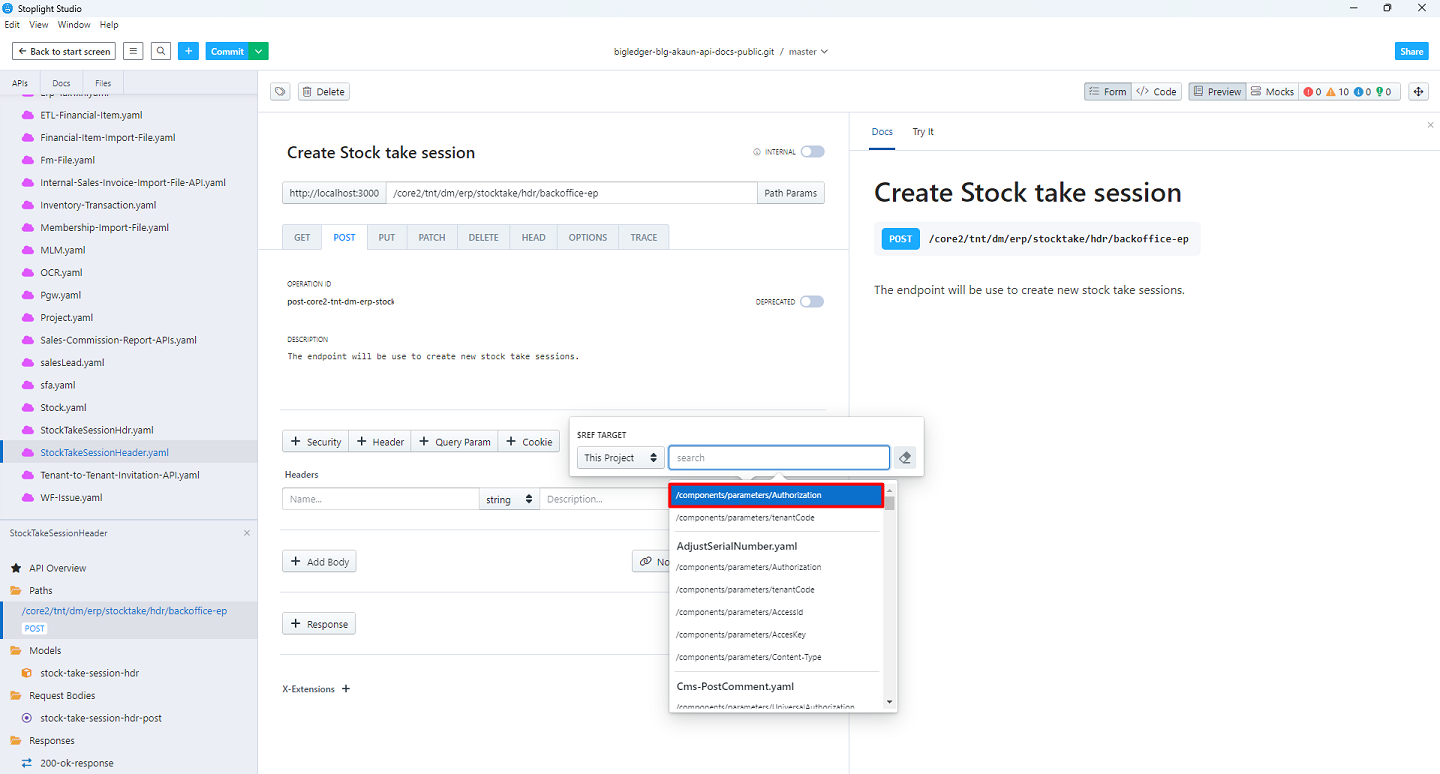
Select the Target and search for the relevant Header

-
Choose the headers
-
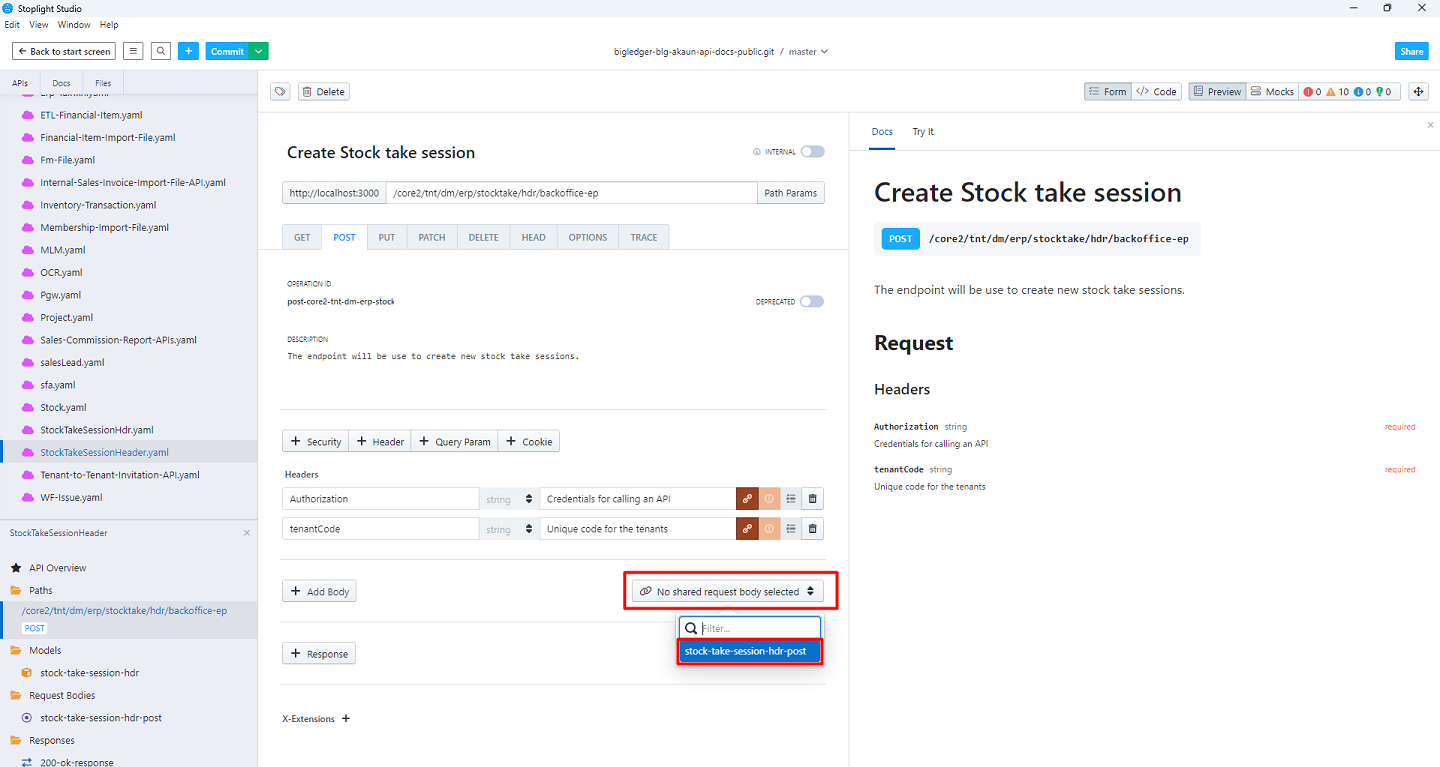
Select the Request Body
-
Click on Response to create a new response and choose the Response code and relevant response

-
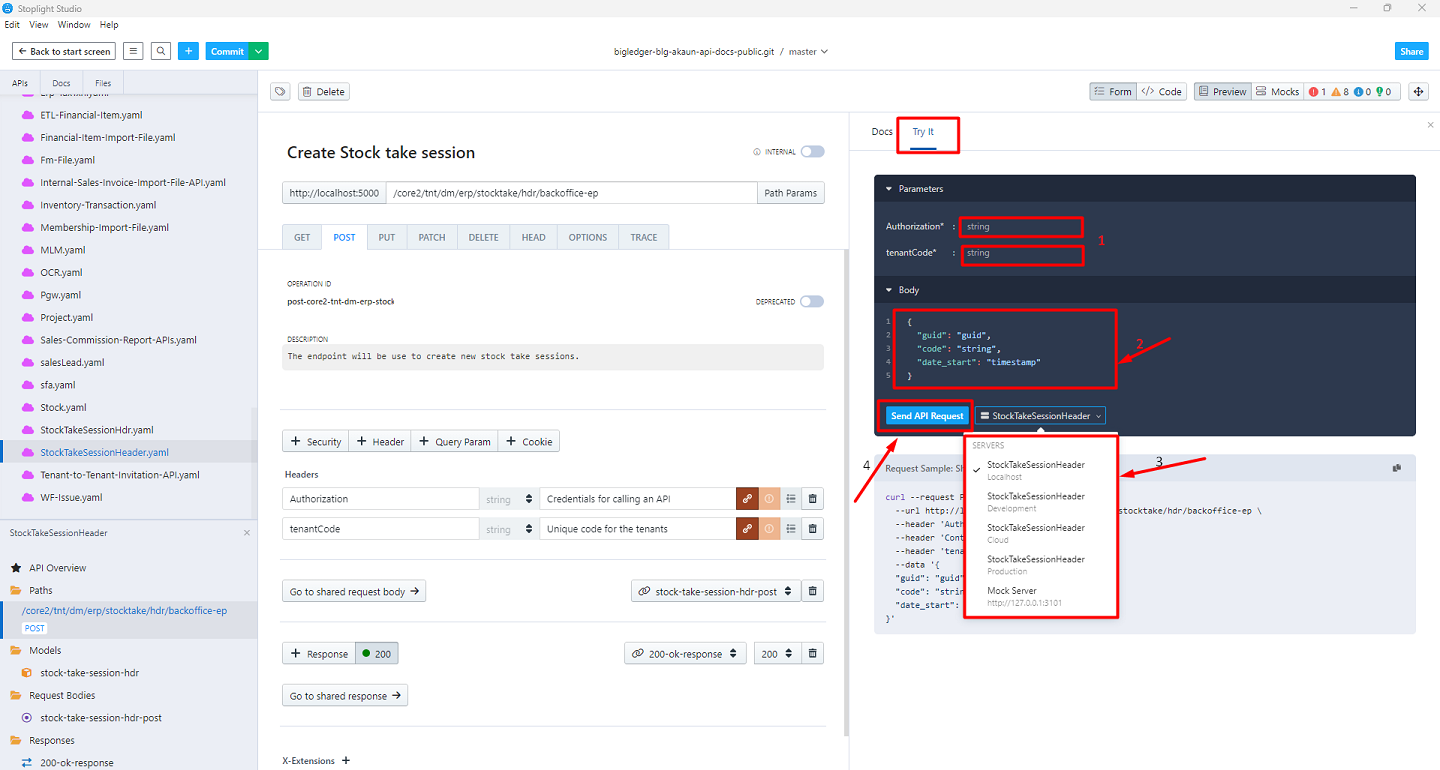
Click on 'Try It' to test the endpoint. Fill up the required data and choose the Server, then click on 'send API Request'
-
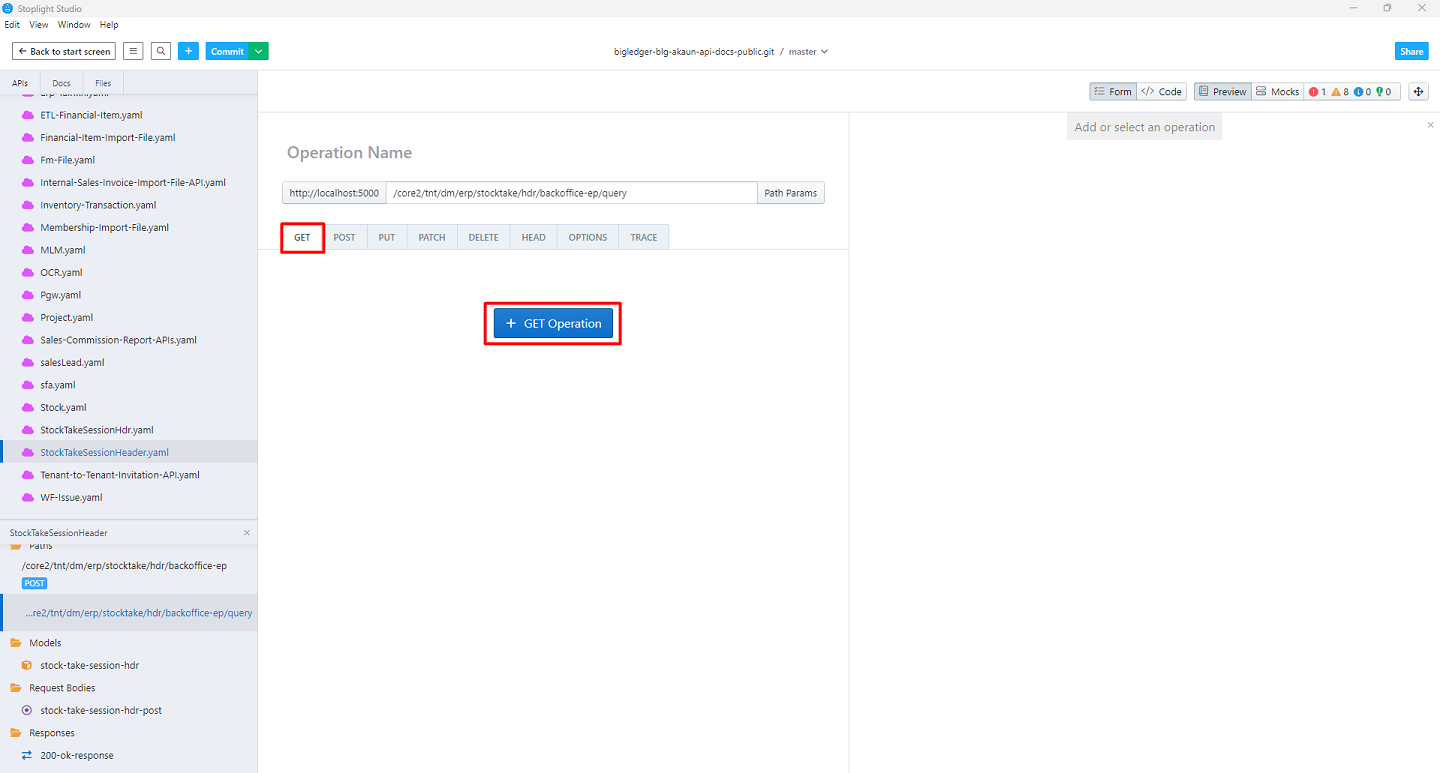
Click on the required operation to create a new Operation documentation
-
Write the details and add the required data
-
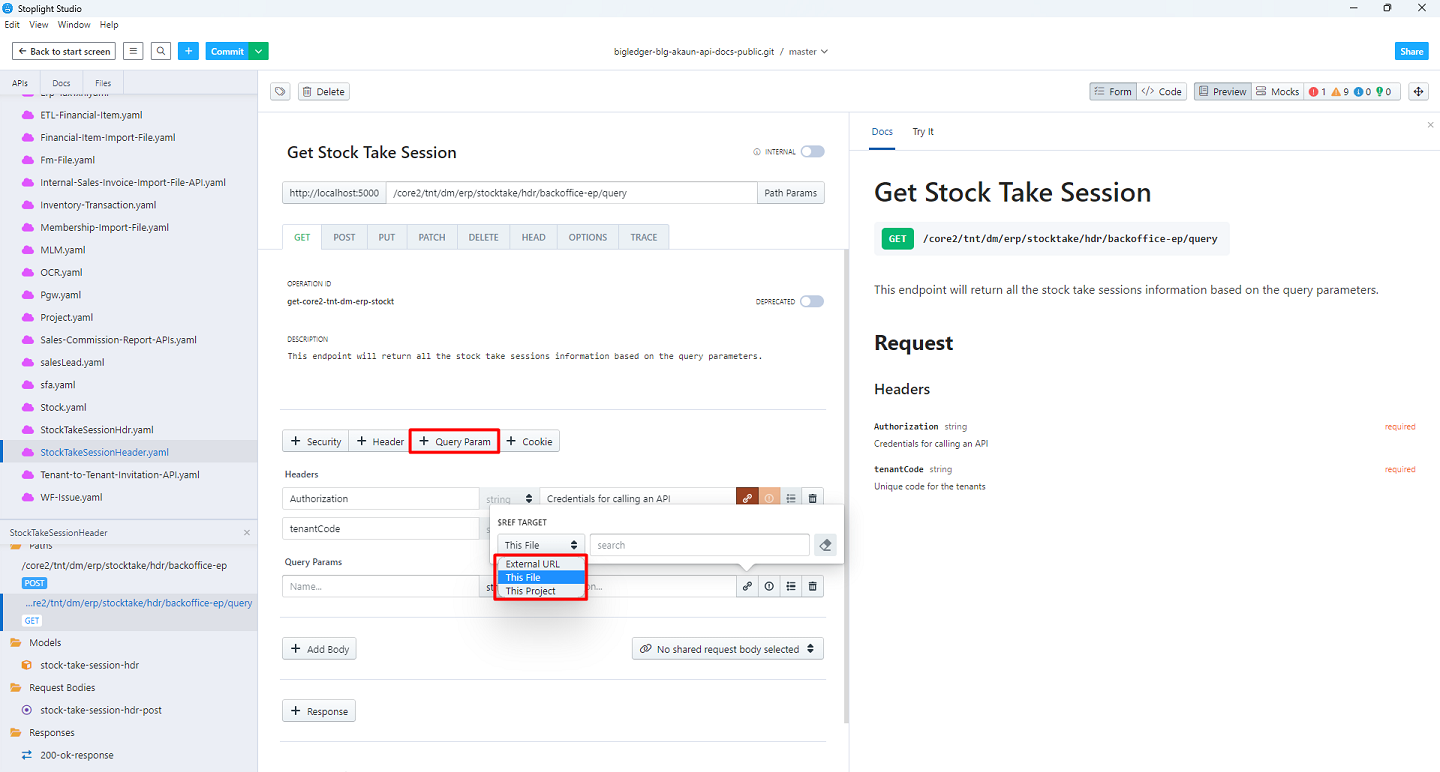
Click the Query Param to add the new Query Parameters
-
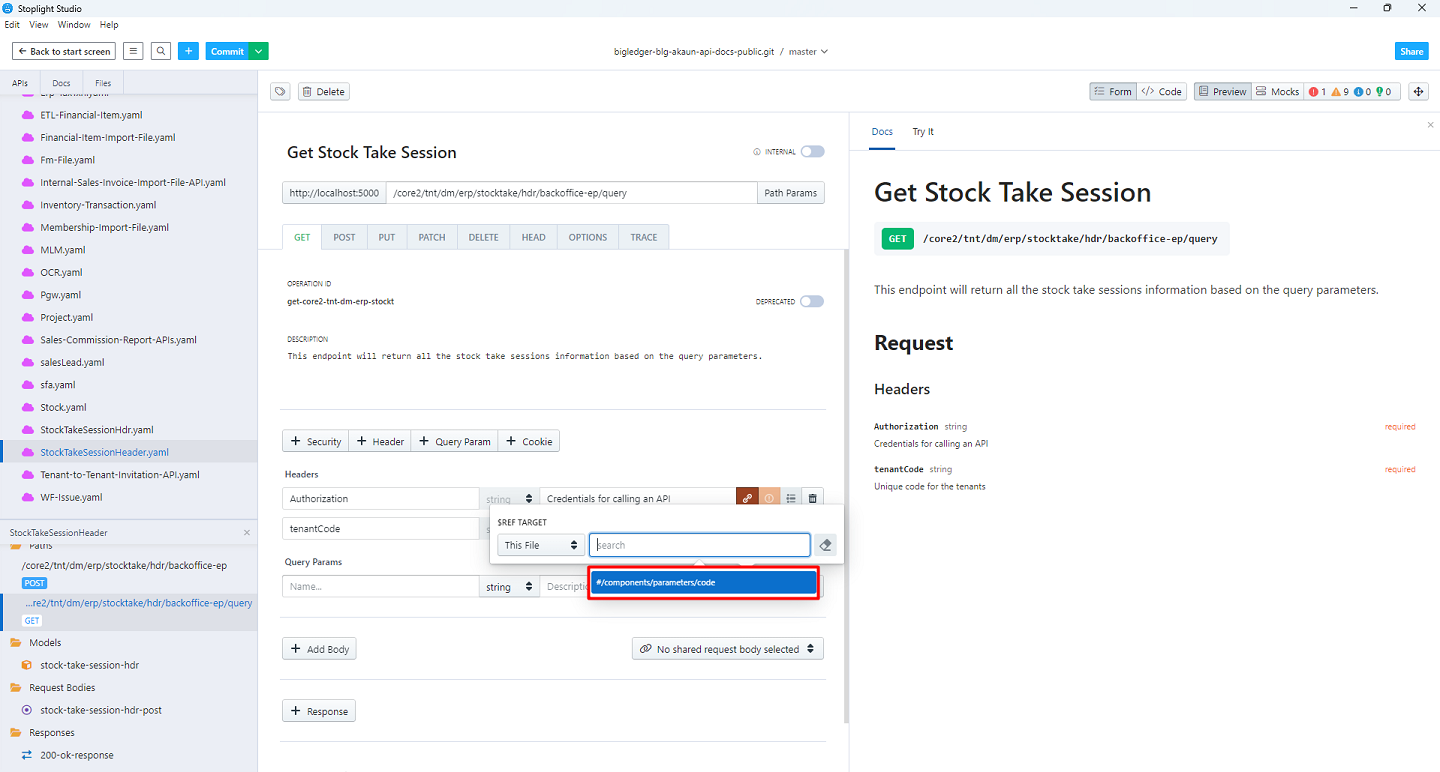
Set the Query Parameters from the reference target
-
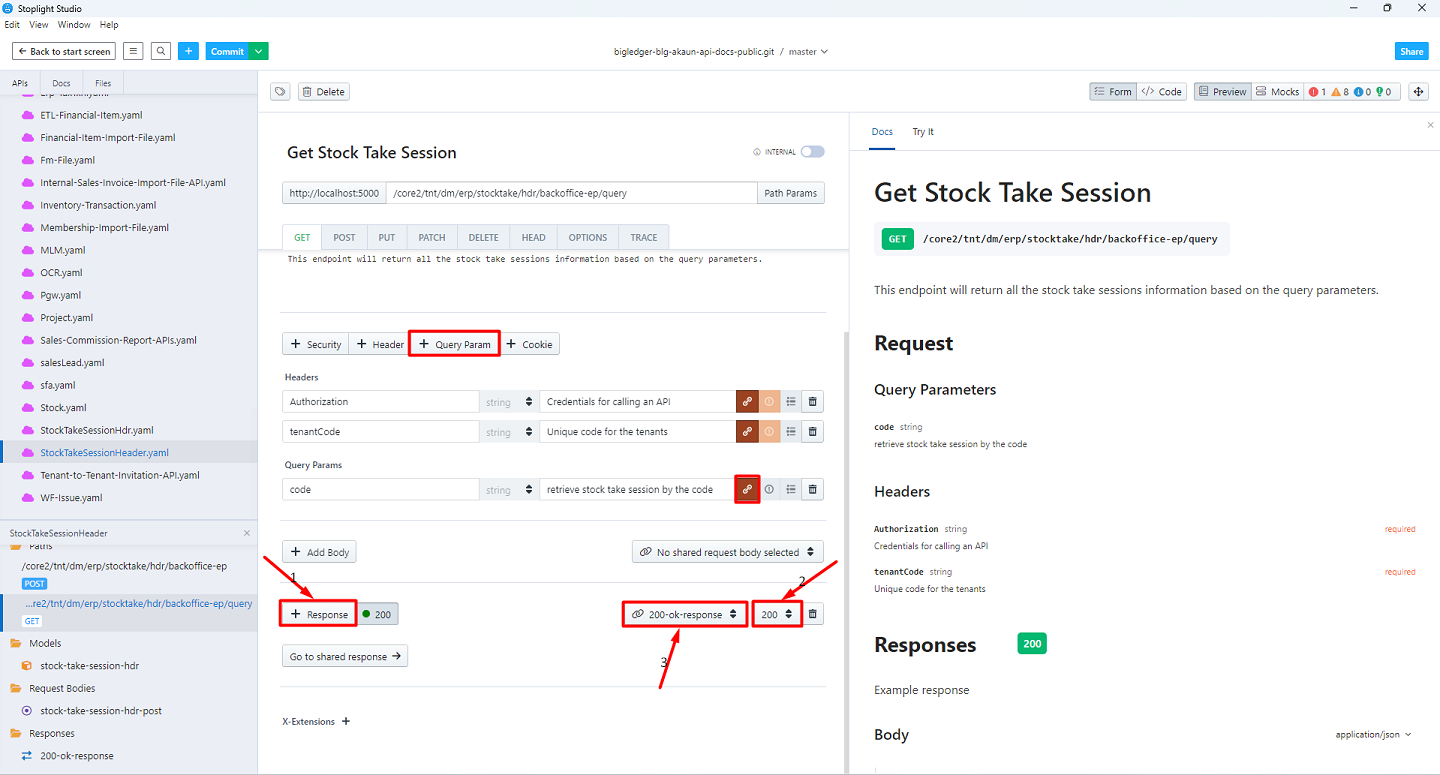
Add the Response for the new endpoint
-
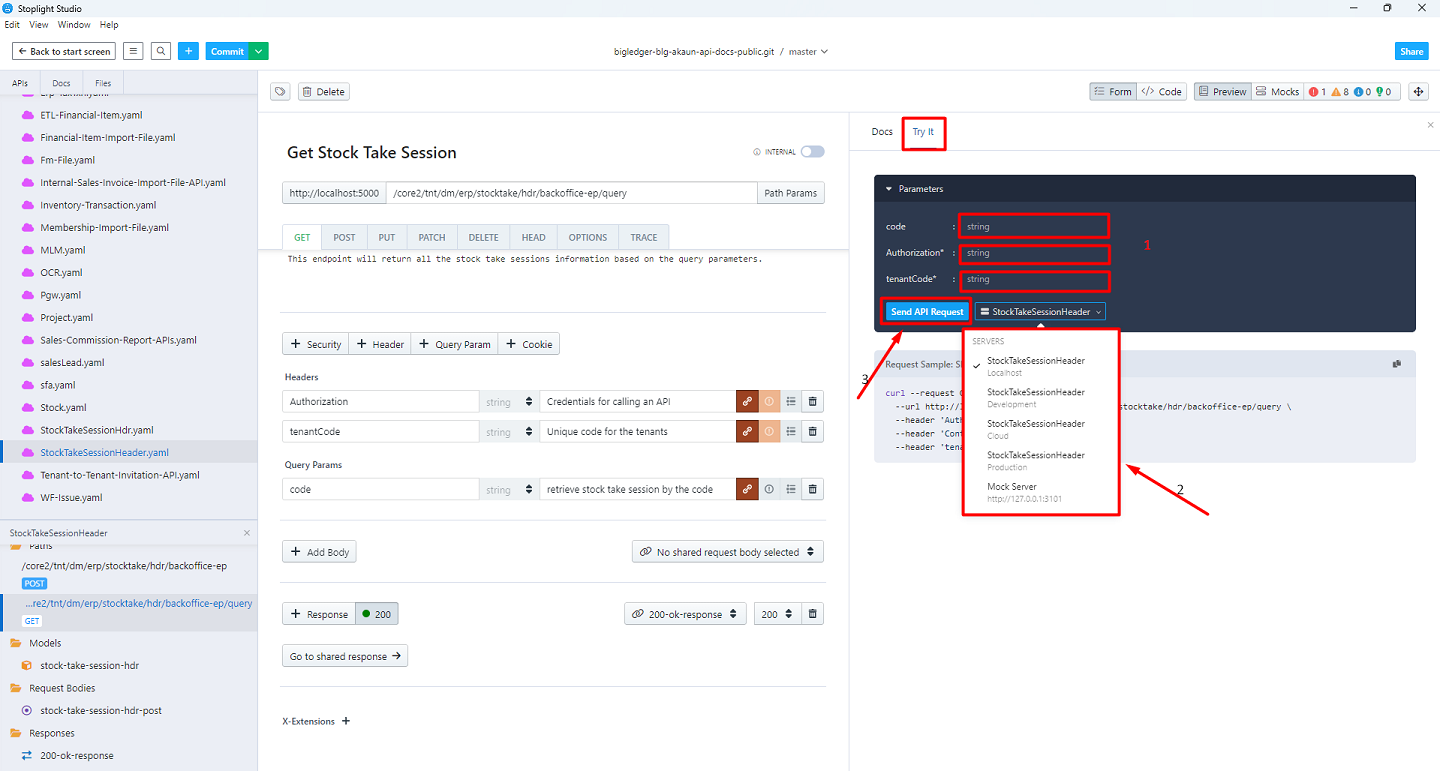
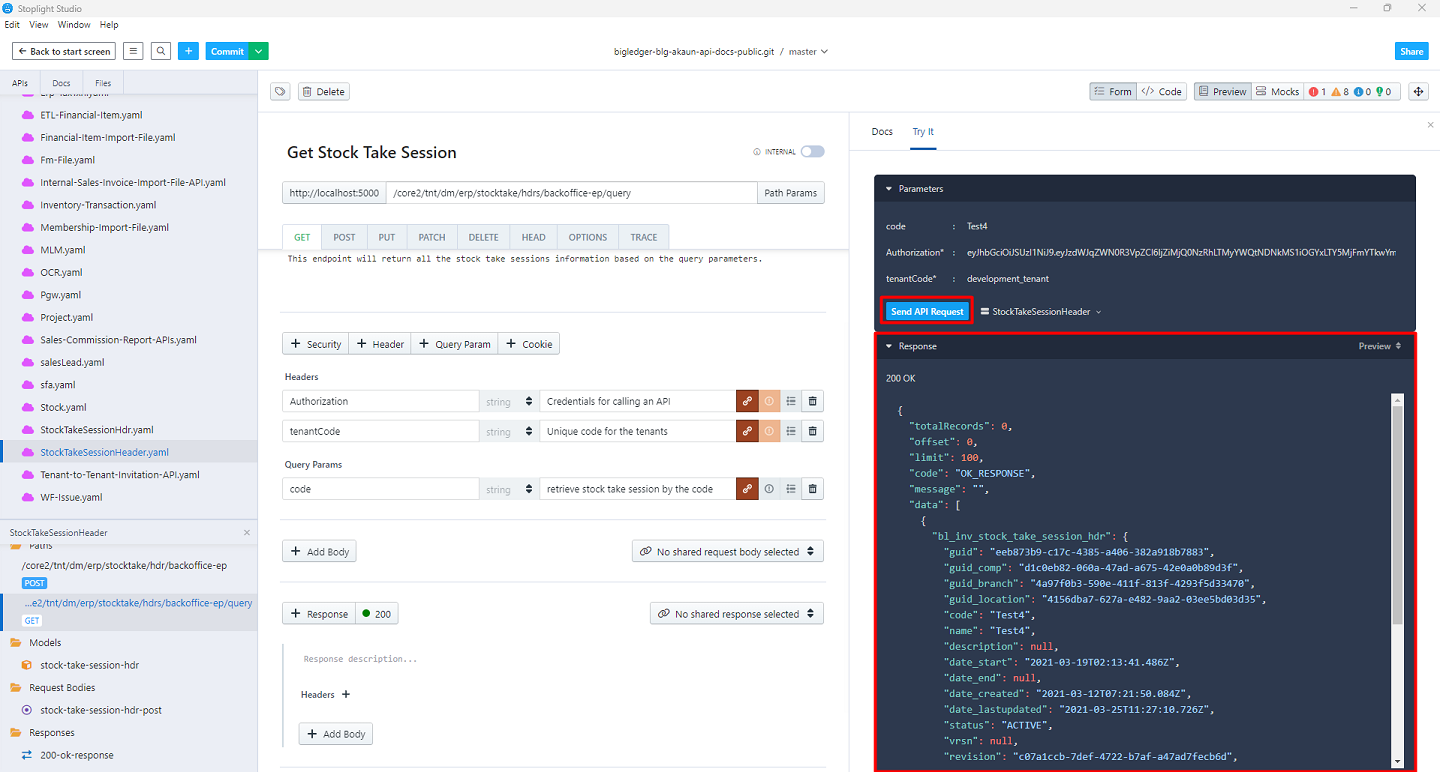
Click on 'Try It' to test the endpoint. Fill up the required data and choose the Server, then click on 'send API Request'
-
You will get the response
-
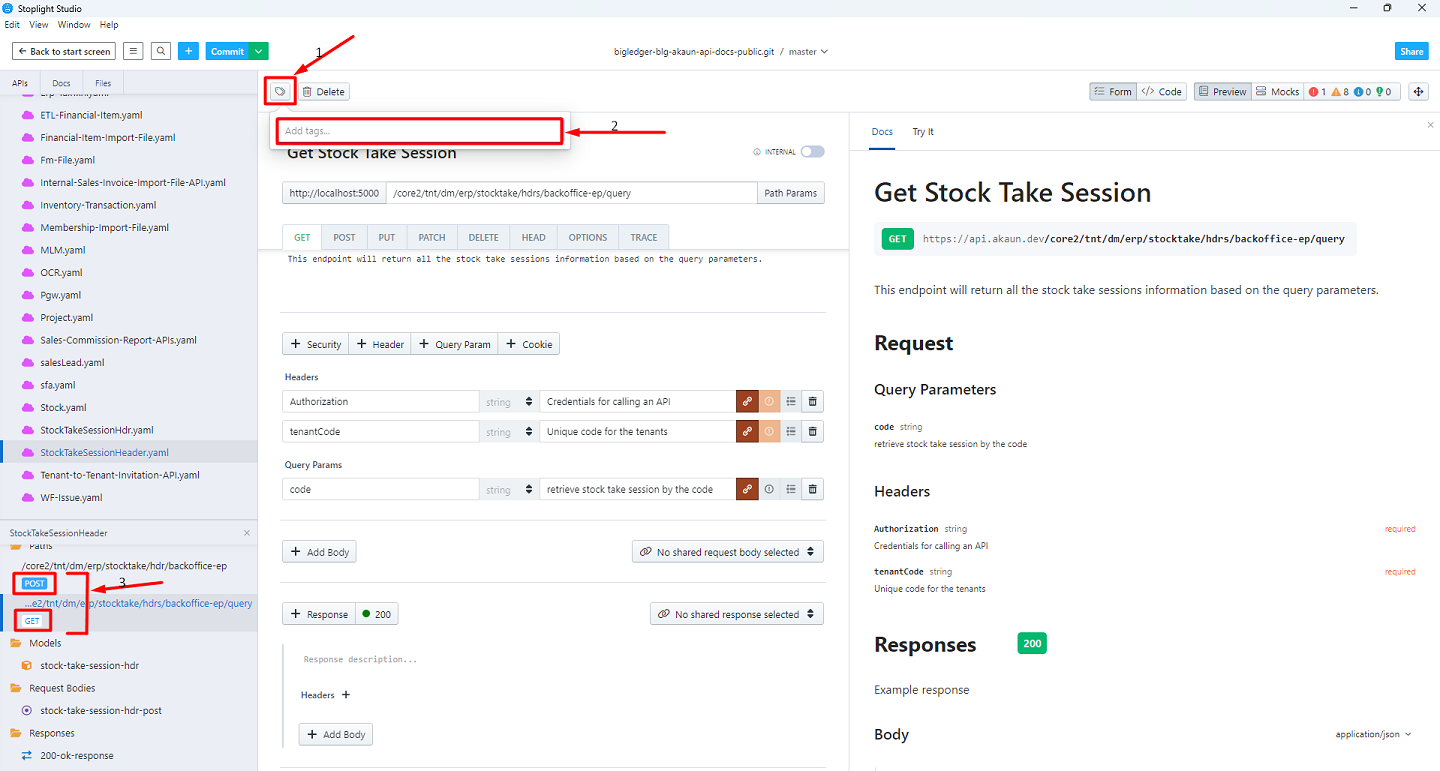
Click on the highlighted icon to add Tags. Create the same Tags for the Same Controller endpoints.