Linking tables in local databases
Now that you have understood everything from the previous steps, we will come to a very important part of the setup. This part of the setup includes having to understand parts of the BigLedger database schema and system design to some extent. It might be confusing at first, but when you really try to understand why it is this way, you will start getting it. This section basically fills up the created databases so that they can be linked to each other and have the correct details so that they can be used in testing just like normal databases. In other words this section will involve linking the two local databases (local master and local tenant) we created earlier using the database connection (either staging or development) between the local master and the local tenant databases. This section assumess you have basic database knowledge like tables, primary and foreign key constraints and more.
Throughout this section we will be using "local_master" and "local_tenant" as our database names and we will be doing the setup and linking of tables in this context.
Please follow the next following sections in sequential manner and try to grasp what we are trying to do and how it all maps logically. Before going through the table linking steps go through the tips and terminologies section.
Tips and Terminologies
-
GUID - GUID stands for Globally Unique Identifier. It’s a term used in computing to refer to a unique identifier that is generated in such a way that it is globally unique and highly improbable to be duplicated. GUIDs are often represented as a sequence of characters, typically numbers and letters, forming a 128-bit value. In our database system, all the tables use a GUID as a primary key.
-
GUID generation Dbeaver shortcut - When working with Dbeaver, it will be useful to know that when creating rows, you can generate a guid for a column using the shortcuts CTRL + SHIFT +ALT + U. You will need this shortcut later when following the steps to link the databases, so keep this in mind.
-
Login Subject - Login subject refers to the person who has logged in to the system. A login subject is created when someone creates and logs into the Akaun shell for the first time. The data for all the login subjects is stored in the app_login_subject table. The primary key column is guid, and we refer to this as the login subject guid or just the subject guid. This is also important, as it will be used to create the instances and links later. You can try going to the local database and finding yourself as a login subject in the app_login_subject table of the master database (local_master), provided you have previously logged in to the system linked to either the staging or development database. You can filter out the name, and you will get a row that matches, and you can get your respective login subject ID from there.
-
Common table columns - The following are some of the common table columns used almost in all the tables in the database schema that you will encounter. You can try to infer the meaning and use of all these columns as you explore the backend and work on issues. These are just some of them
-
guid
-
namespace
-
created_date
-
updated_date
-
created_by_subject_guid
-
updated_by_subject_guid
-
property_json
-
status
-
revision
-
vrsn
-
Table linking and creating instances
In local_master (master database)
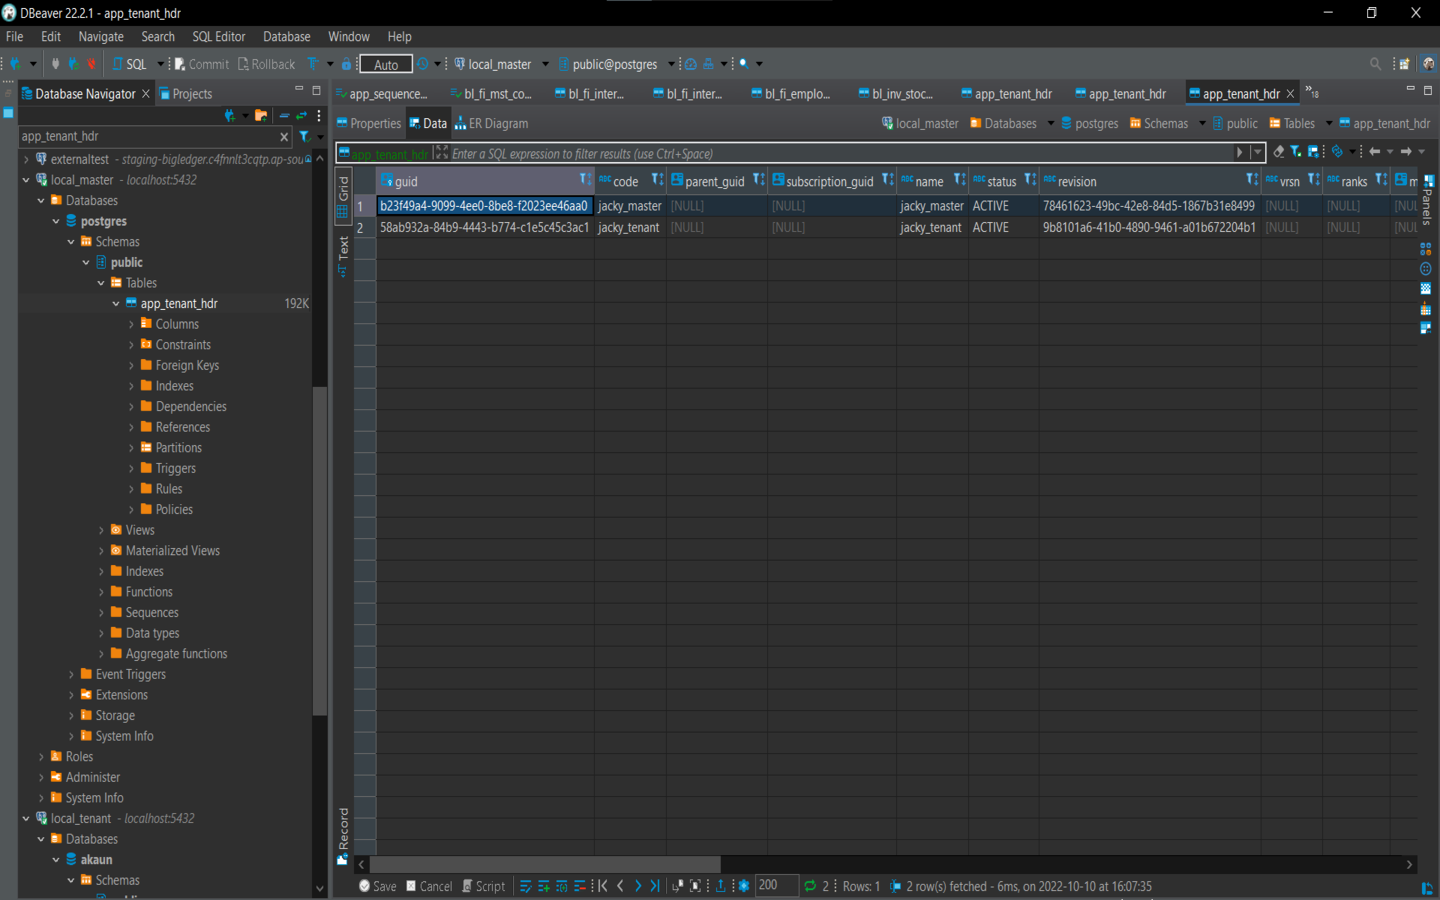
1) The first thing that needs to be done is to create new instances or rows in the app_tenant_hdr table of the master database. This table stores records (rows) of all the tenants the master database is linked to. Lean back to the discussion on master and tenant from earlier if the idea is still cloudy. The master database can itself be considered one of the tenants, so in total, you will have to create two new rows. One for the local_master database and the other for the local_tenant. For the columns, fill up the following (the rest of the columns can be left as NULL):
-
guid: Generate random guid using (CTRL + SHIFT +ALT + U)
-
code: Use the database name as the code. For example in our case it will be "local_master" for the master row and "local_tenant" for the tenant row.
-
name: Use the database name as the name. For example in our case it will be "local_master" for the master row and "local_tenant" for the tenant row.
-
status: Fill up "ACTIVE"
-
revision: Generate random guid using (CTRL + SHIFT +ALT + U)
-
date_created: You can automatically fill up the current time in this cell by using CTRL + Backspace.
-
date_updated: You can automatically fill up the current time in this cell by using CTRL + Backspace.
-
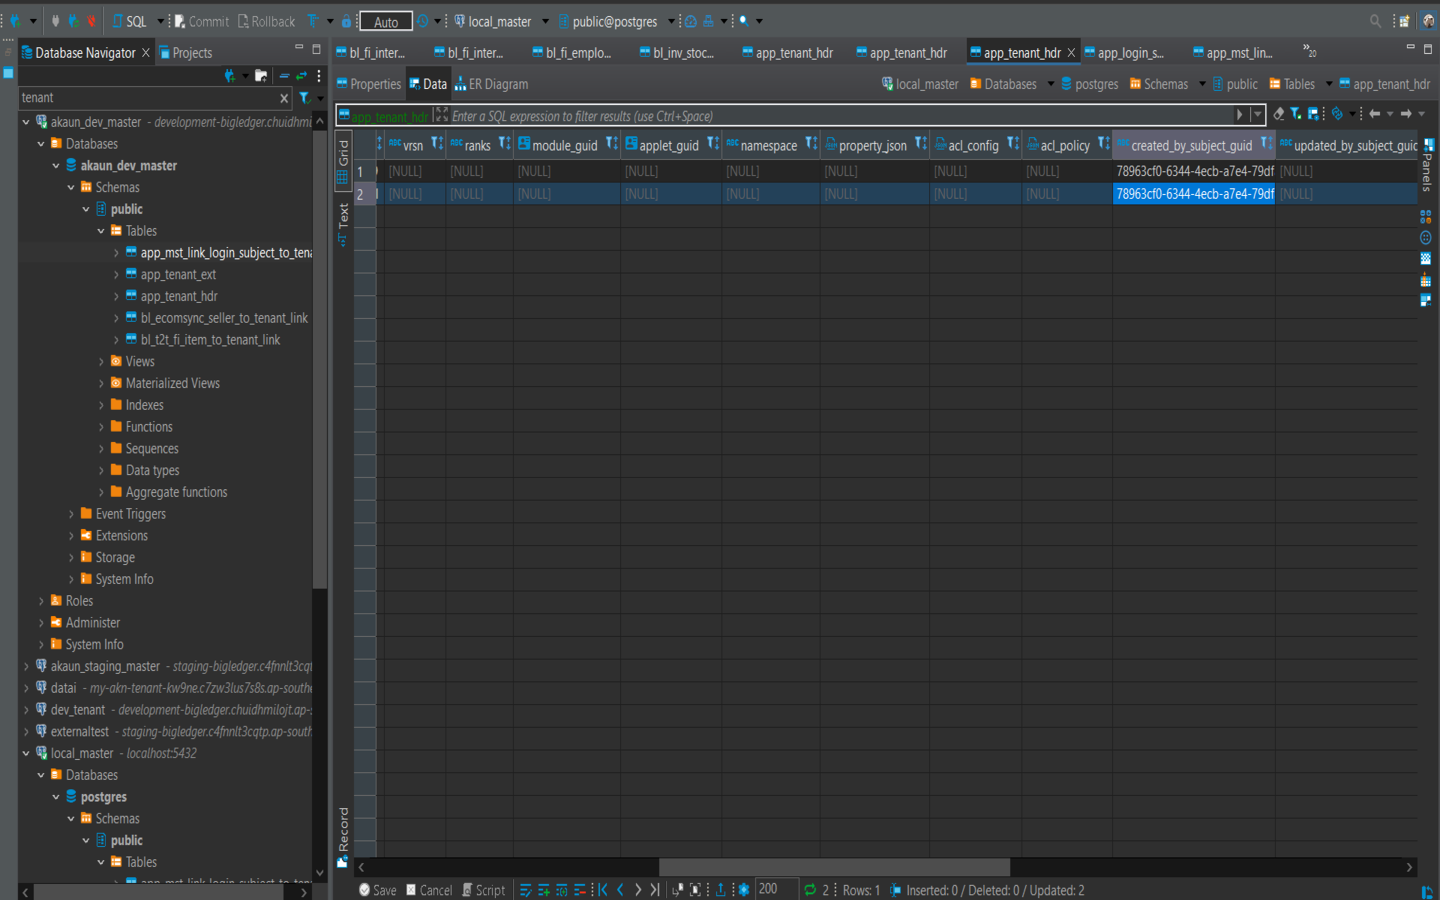
created_by_subject_guid: Use your own subject GUID from the app_login_subject table like mentioned earlier.
-
updated_by_subject_guid: Use your own subject GUID from the app_login_subject table like mentioned earlier.
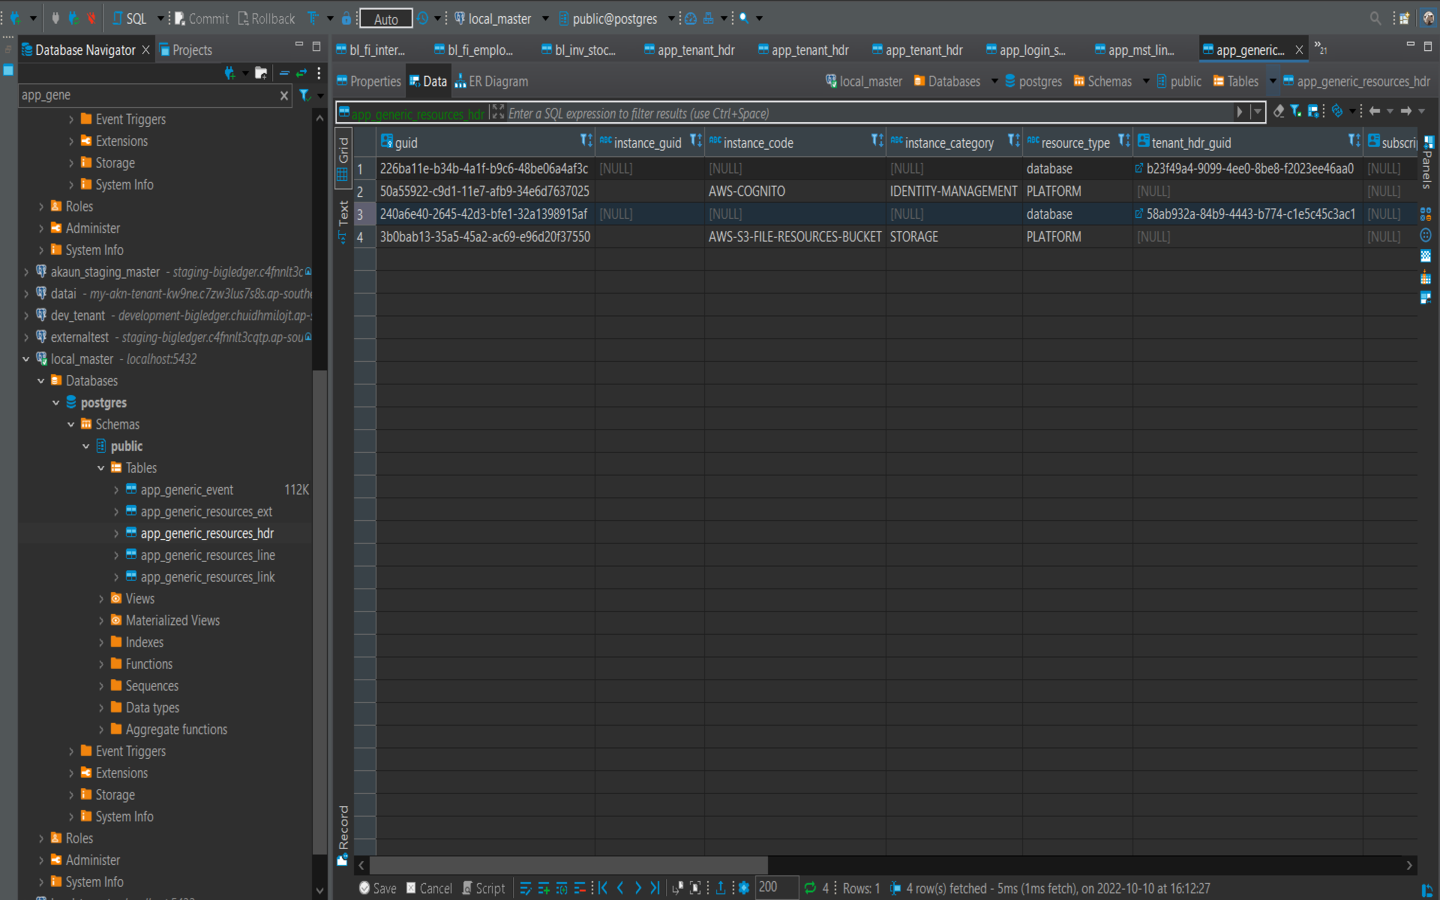
2) The next thing that needs to be done is to create new instances or rows in the app_generic_resources_hdr table of the master database. This table stores records (rows) of generic resources, like databases, for example. This will also require two rows, one for the local master database and another for the local tenant database. For this table, you will need to use the guids generated for the previous 2 rows in the app_tenant_hdr table as foreign keys. For the columns, fill up the following (the rest of the columns can be left as NULL):
-
guid: Generate random guid using (CTRL + SHIFT +ALT + U)
-
resource_type: Fill up "database".
-
tenant_hdr_guid: This is the foreign key you generated from the app_tenant_hdr. Fill up according to master and tenant.
-
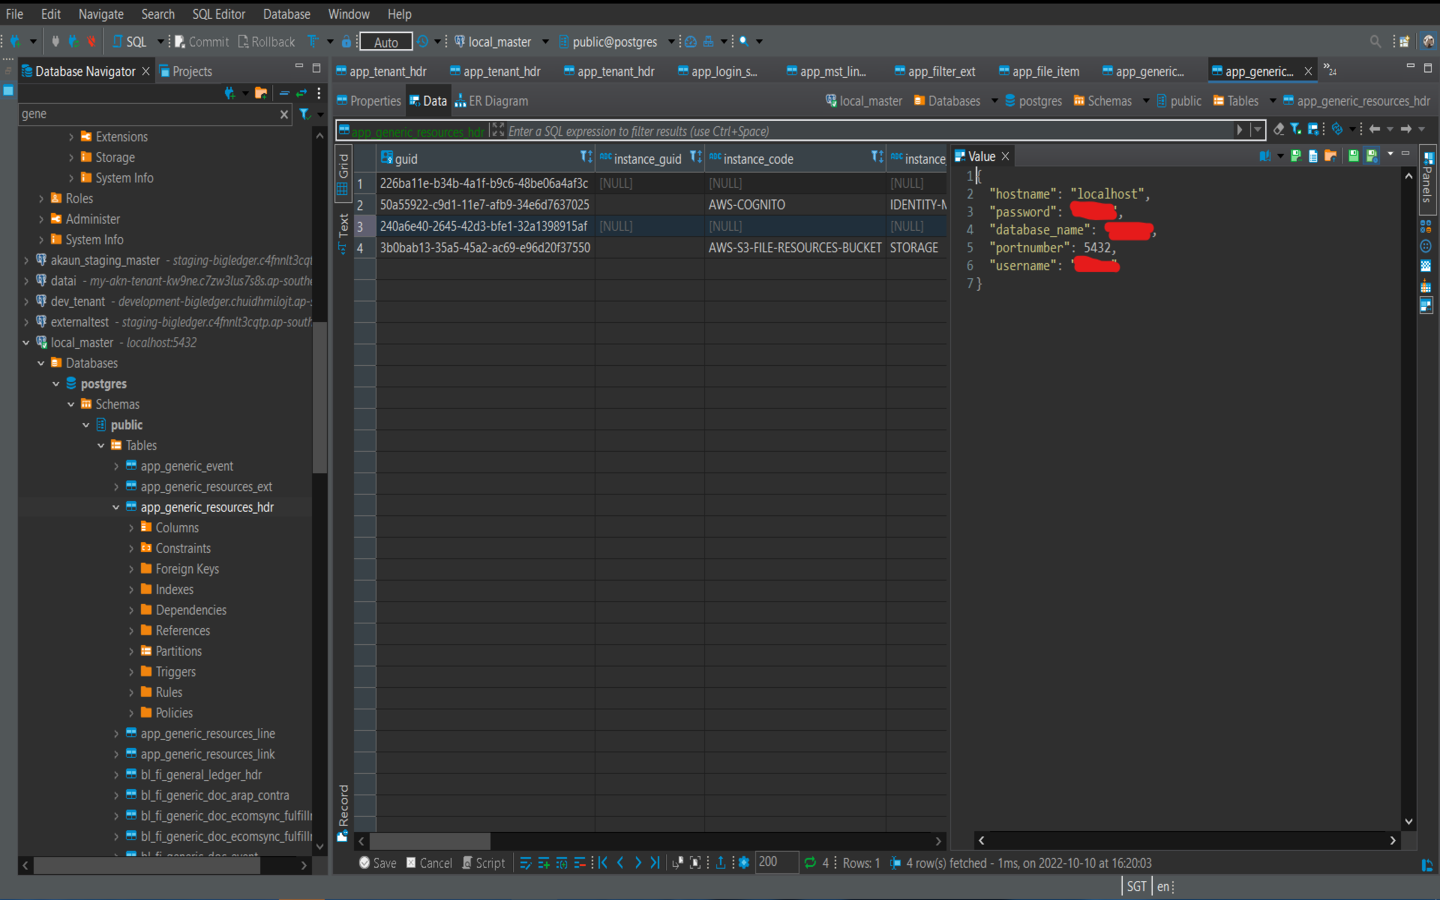
connection_json: These are the connection details to connect to the tenant in the row. This is the format using a local_master example for the connection_json:
{
"hostname" : "localhost",
"username" : "akaun",
"password" : "akaun",
"database_name" : "local_tenant",
"portnumber" : 5432
}-
status: Fill up "ACTIVE"
-
revision: Generate random guid using (CTRL + SHIFT +ALT + U)
-
date_created: You can automatically fill up the current time in this cell by using CTRL + Backspace.
-
date_updated: You can automatically fill up the current time in this cell by using CTRL + Backspace.
-
created_by_subject_guid: Use your own subject GUID from the app_login_subject table like mentioned earlier.
-
updated_by_subject_guid: Use your own subject GUID from the app_login_subject table like mentioned earlier.
3) The next thing that needs to be done is to create a new instance in the *app_mst_link_login_subject_to_tenant * table. As you can tell from the name of the table, it stores rows for links between a login subject (discussed earlier) and a tenant. Meaning to say that a login subject is part of a particular tenant. We need to create a row in this table to link ourselves to the local tenant, so we are part of it and we can test accordingly. For the columns, fill up the following (the rest of the columns can be left as NULL):
-
guid: Generate random guid using (CTRL + SHIFT +ALT + U)
-
tenant_hdr_guid: This is the foreign key you generated from the app_tenant_hdr. Since you want to be linked to the local_tenant database as part of the tenant use the guid of the local_tenant database form the app_tenant_hdr table.
-
login_subject_guid: Use your own subject GUID from the app_login_subject table like mentioned earlier.
-
status: Fill up "ACTIVE"
-
revision: Generate random guid using (CTRL + SHIFT +ALT + U)
-
date_created: You can automatically fill up the current time in this cell by using CTRL + Backspace.
-
date_updated: You can automatically fill up the current time in this cell by using CTRL + Backspace.
-
created_by_subject_guid: Use your own subject GUID from the app_login_subject table like mentioned earlier.
-
updated_by_subject_guid: Use your own subject GUID from the app_login_subject table like mentioned earlier.

In local_tenant (tenant database)
This section involves giving yourself permissions to access data in the tenant using the API calls you make later when testing. Different types of permissions are defined in the app_perm_dfn table. For our use case right now, we are only concerned with one permission. The code of the permission is "TNT_TENANT_ADMIN". This will give sufficient permission to work with data in the tenant and do different operations.
1) First you will have to locate the row in the app_perm_dfn table where the perm_code is "TNT_TENANT_DFN". You can use a filter or an SQL statement accordingly in an SQL script. This table stores all the possible permissions in the system. You do not have to fill up any row but just identify where the row is as we will need to use in the next step.

2) First you will have to locate the row in the app_perm_dfn table where the perm_code is "TNT_TENANT_DFN". You will have to create a new row in the app_perm_assignee_target_link table. This table stores the links between the permissions and a particular subject, indicating that the subject has that particular permission. For the columns, fill up the following (the rest of the columns can be left as NULL):
-
guid: Generate random guid using (CTRL + SHIFT +ALT + U)
-
perm_dfn_guid: This is the guid from the app_perm_dfn where the code is "TNT_TENANT_DFN".
-
assignee_hdr_table: Fill up "app_login_subject" without quotes.
-
assignee_hdr_guid: Use your own subject GUID from the app_login_subject table for this.
-
status: Fill up "ACTIVE"
-
revision: Generate random guid using (CTRL + SHIFT +ALT + U)
After completing this setup, you will have successfully set up the local databases for testing. After the next step, where you will have to setup run configurations in IntelliJ, you will be able to run the APIs and web service applications on the local database.