Test Controller
1.0 Introduction
Generally, back-end developers have to perform unit testing on the APIs that they create, refactor and modify in order to ensure all the APIs function as desired. Unit testing helps developers to discover the bugs early before the API endpoints are released for integration testing and UI testing by the front-end developers. This saves the time and maintenance cost of fixing the bugs in later stages.
Furthermore, developers only have to write the test cases for an API once and they can reuse the the test cases. By doing that, when the developers refactor the API endpoints in future, they can reuse the written test cases to test if the refactored endpoints still function as desired.
To begin with, we create two different classes, which are the Client class and Controller Test class to test an API. To better illustrate this, we will explain the concept of the unit testing by referring to the Cms Website Branch Link API in the big-akaun-platform-java repo as an example.
2.0 Client Class
2.1 Purpose of the Client Class
Firstly, before we write any test cases for API testing, we have to create the Client class for the API.
Client class is used to send the HTTP requests using the URL endpoints that are defined in the Controller class. The client class will be instantiated in the corresponding Controller Test class in order to perform the unit testing on the endpoints.
2.2 Extend the Big Ledger Client
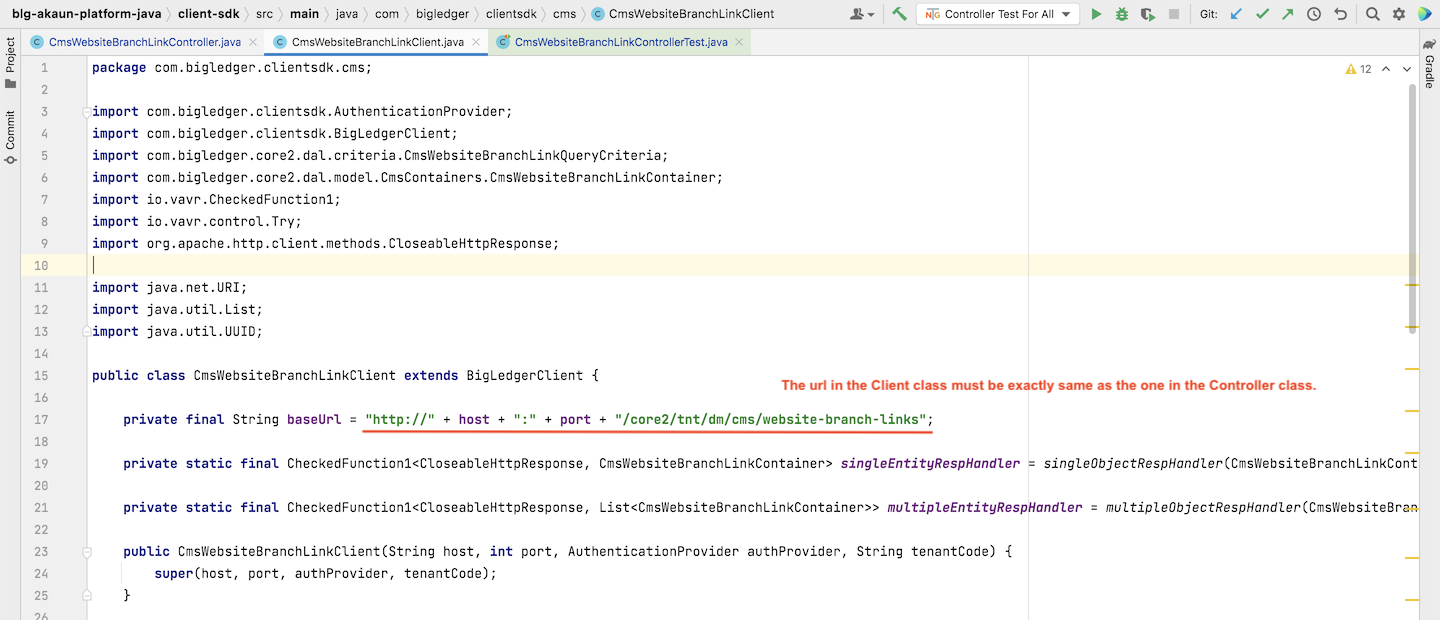
To begin with, we have to let the new Client class extend the BigLedgerClient class. By doing that, our client class can inherit and reuse all the created attributes and methods in the BigLedgerClient parent class.
2.3 Constructor of the Client
Next, we proceed by creating the constructor of the client class. The constructor takes in 4 important parameters which are described as below:
-
Host: Domain Name or IP Address that serve the API.
-
Port: Number that uniquely identifies a connection endpoint and directs data to a specific service.
-
Auth Provider: The authorization code of the provider.
-
Tenant Code: The tenant code of the connected database.
2.4 Entity Response Handler
Next, we need to create the entity response handler. The main function of the entity response handler is to read and convert a Json string into a corresponding Java Object.
In our case, the Java Object will typically be the Container object that stores the relevant API table data. While creating the handler, we need to specify the specific Container class as the input parameter for the constructor of the response handler.
The Single Object Response Handler is used to handle a single container object whereas the Multiple Object Response Handler is used to handle multiple container objects of same type.
2.5 CRUD Endpoints
Then, we have to create the methods that will send HTTP requests using the URL endpoints that are defined in the Controller class.
In general, we can have different permission settings for an API. Commonly, we have the backoffice-ep, login-entity-ep, public-ep and etl-ep permission endpoints for an API. For most of the permission endpoints, it verifies the user based on his authorization token. However, for the etl-ep endpoints, it verifies the users based on his access key and access ID.
2.5.1 POST and PUT
Both POST and PUT methods take the Container object as their input parameter.
For backoffice-ep, login-entity-ep and public-ep endpoints:
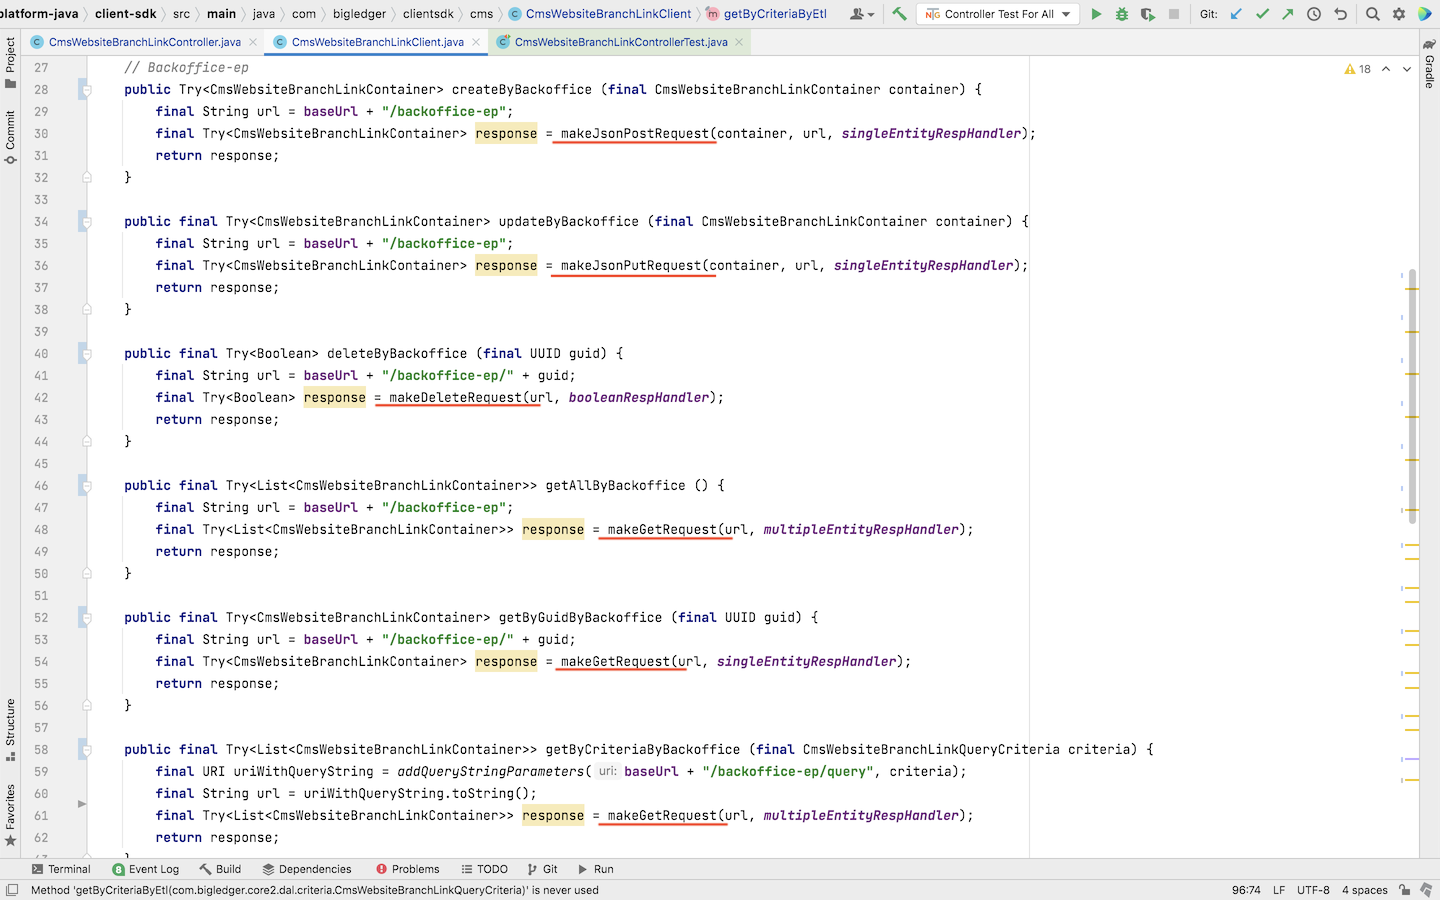
We use the makeJsonPostRequest method to send the POST request to the server to create a new record in the relevant table in the database.
We use the makeJsonPutRequest method to send the PUT request to the server to update an existing record in the relevant table in the database.
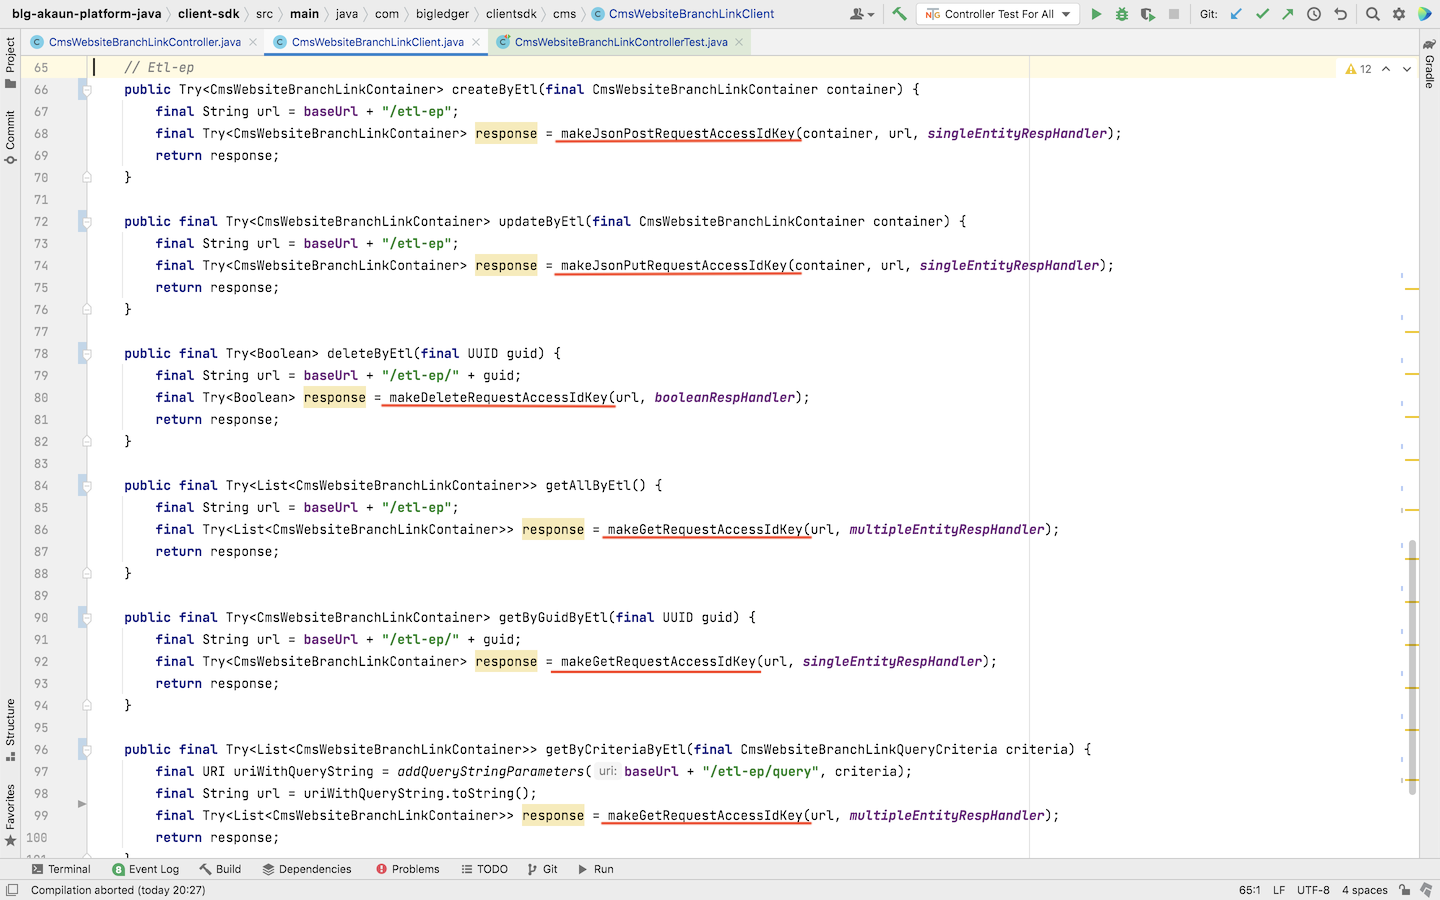
For etl-ep endpoints:
We use the makeJsonPostRequestAccessIdKey to send the POST request and we use the makeJsonPutRequestAccessIdKey to send the PUT request.
This is because the etl-ep endpoints verify the authorization of the users based on their access Key and access ID instead of the authorization tokens.
All the methods above take in 3 inputs, which are:
-
Container: A container object that holds the table records to be created or updated in the database.
-
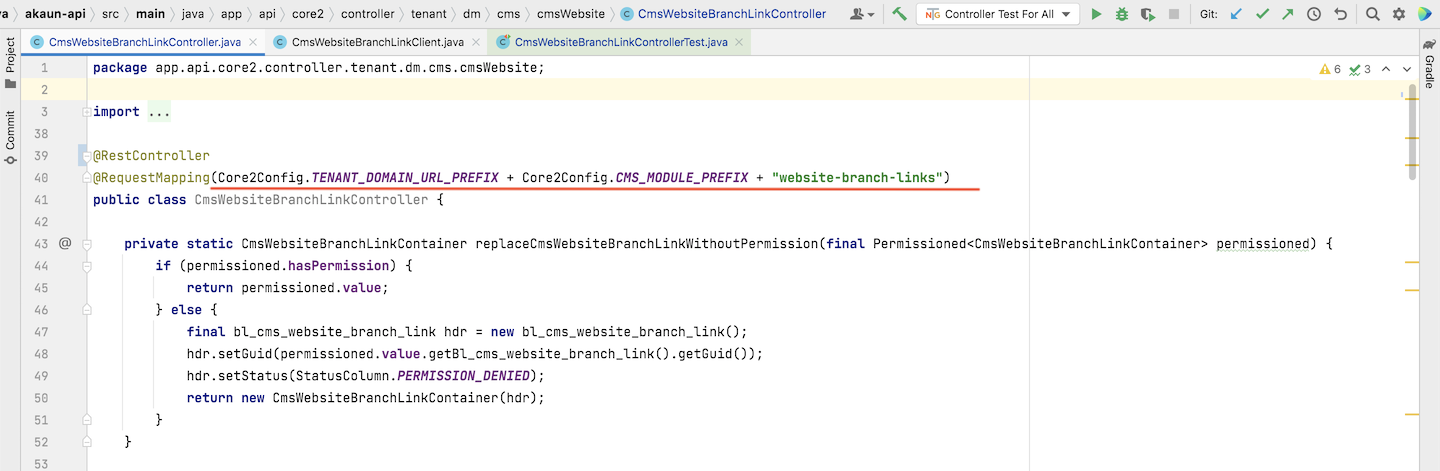
URL: The url must match the corresponding endpoint url in the Controller class.
-
Entity Response Handler: We normally use a Single Response Handler for each POST and PUT request because we usually create and update a single container for each POST and PUT request.
2.5.2 DELETE
The DELETE method takes the guid as its input parameter.
For backoffice-ep, login-entity-ep and public-ep endpoints:
We use the makeDeleteRequest method to send the DELETE request to the server to delete a record in a table based on the input guid.
For etl-ep endpoints:
We use the makeDeleteRequestAccessIdKey to send the DELETE request to the server to delete a record in a table based on the input guid.
Both methods take in 2 inputs:
-
URL: The url must match the corresponding endpoint url in the Controller class.
-
Boolean Response Handler: The result of deleting a record in a table is a boolean value, which is true if deleted and false if not deleted.
2.5.3 GET Request (Get All, Get By Guid, Get By Criteria)
The GET ALL method does not take in any input.
The GET BY GUID method takes in a guid as its input.
The GET BY CRITERIA method takes in a QueryCriteria object as its input.
For backoffice-ep, login-entity-ep and public-ep endpoints:
We use the makeGetRequest method to send the GET request to the server to retrieve records from the database.
For etl-ep endpoints:
We use the makeGetRequestAccessIdKey to send the GET request to the server to retrieve one or multiple records from the database.
These methods take in 2 inputs:
-
URL: The url must match the corresponding endpoint url in Controller class.
-
Entity Response Handler:
-
Single Entity Respond Handler - Get By Guid. It returns a single container.
-
Multiple Entity Respond Handler- Gel All and Get By Criteria. It returns a list of containers.
-
3.0 Controller Test Class
3.1 Purpose:
After creating the Client class, we proceed to create the Controller Test class.
The purpose of creating the Controller Test class is to write the test cases to test the functionalities of the API endpoints that are created in the corresponding Controller class. The normal API endpoints that we usually test in the Controller Test class are be the CRUD (Create, Read, Update and Delete) endpoints.
3.2 Setup Part
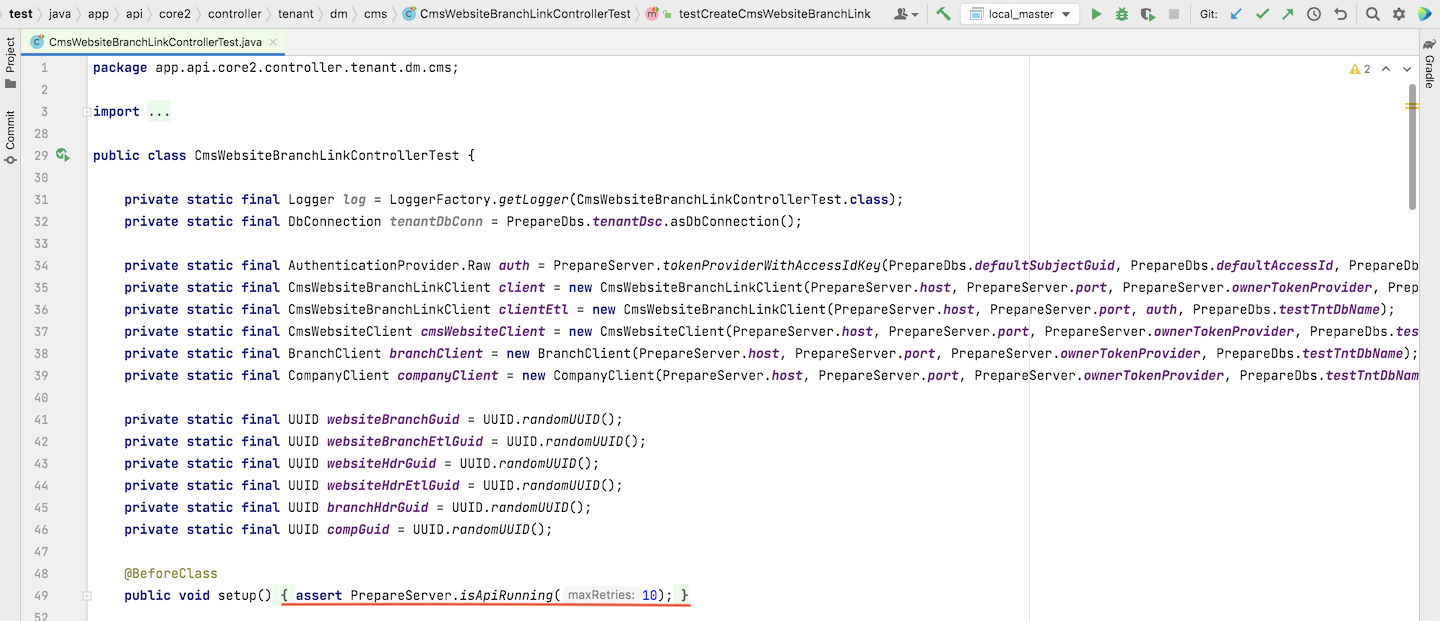
Firstly, we create the setUp class which is used to make a GET request to the root url to check if the server is running properly.
We set the default number of maximum tries of checking to 10. We can increase the value of maximum tries if the server cannot be started with a low number of maximum tries.
3.3 Instantiating Clients.
3.3.1 Create Client Instances Before we start testing the CRUD endpoints for an API, we need to first create the client classes.
Normally, for all types of endpoints (Except etl-endpoints), we will set the input parameters of the created clients as below:
-
Host: PrepareServer.host
-
Port: PrepareServer.port
-
Authentication Provider: PrepareServer.ownerTokenProvider
-
Tenant Code:
-
Endpoints in platform level: “akaun_master”
-
Endpoints in tenant level: PrepareDbs.testTntDbName
-
3.3.2 Settings of the Auth Provider in the Client instance for different Permission Endpoints
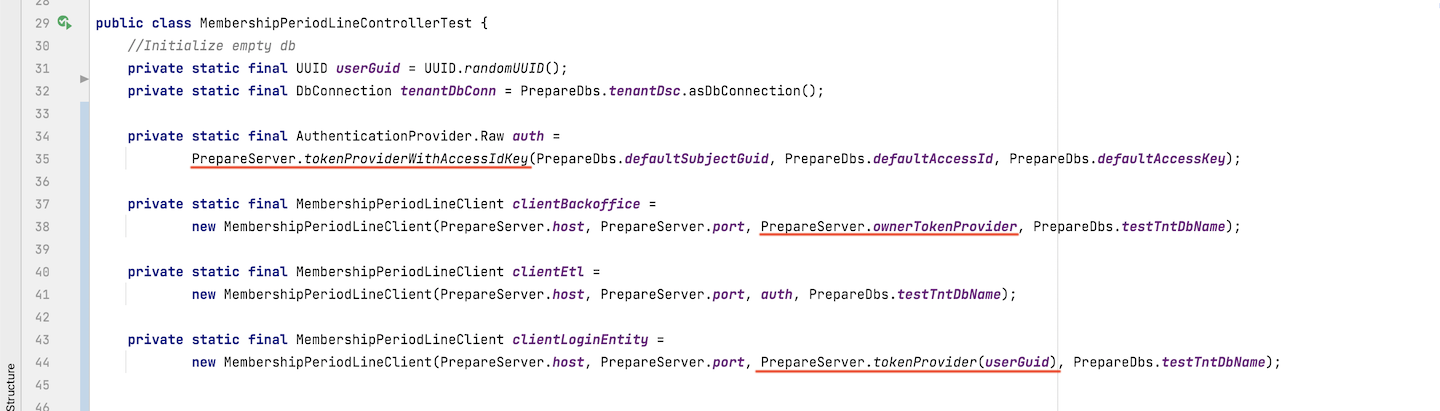
The settings for the Auth Provider parameter for the Client instance is shown as the screenshots above.
The etl-ep endpoints are verifying the authorization of the users based on their access Key and access ID instead of the authorization tokens. Thus, we need to create an Authentication Provider with the configuration of access ID and access Key.
The login-entity-ep verifies if the subject guid of the users who create the data is in the related tables. Thus, we need to set the Authentication Provider with the configuration of the user subject guid.
Other than the setup part, the CRUD test cases that will be explained later will be similar for the API with different permission settings.
3.3.3 NOTES: The Controller Test will create some random databases in our PC in order to run the test cases. Thus, we have to regularly delete those databases in our PC to free up the storage after running the controller test a number of times.
3.4 Test for Create.
We always start by creating the test case for the POST request endpoint of an API. This is the most important test case because it is creating the table data that will be used by other test cases.
While creating the test case for POST request endpoint, we have to first consider if the API is of tenant level or master level. This is crucial because it determines if we should use the master database connection ("akaun_master") or the tenant database connection (PrepareDbs.testTntDbName) when we instantiate the client classes and create the data.
3.4.1 Take note of foreign key constraints
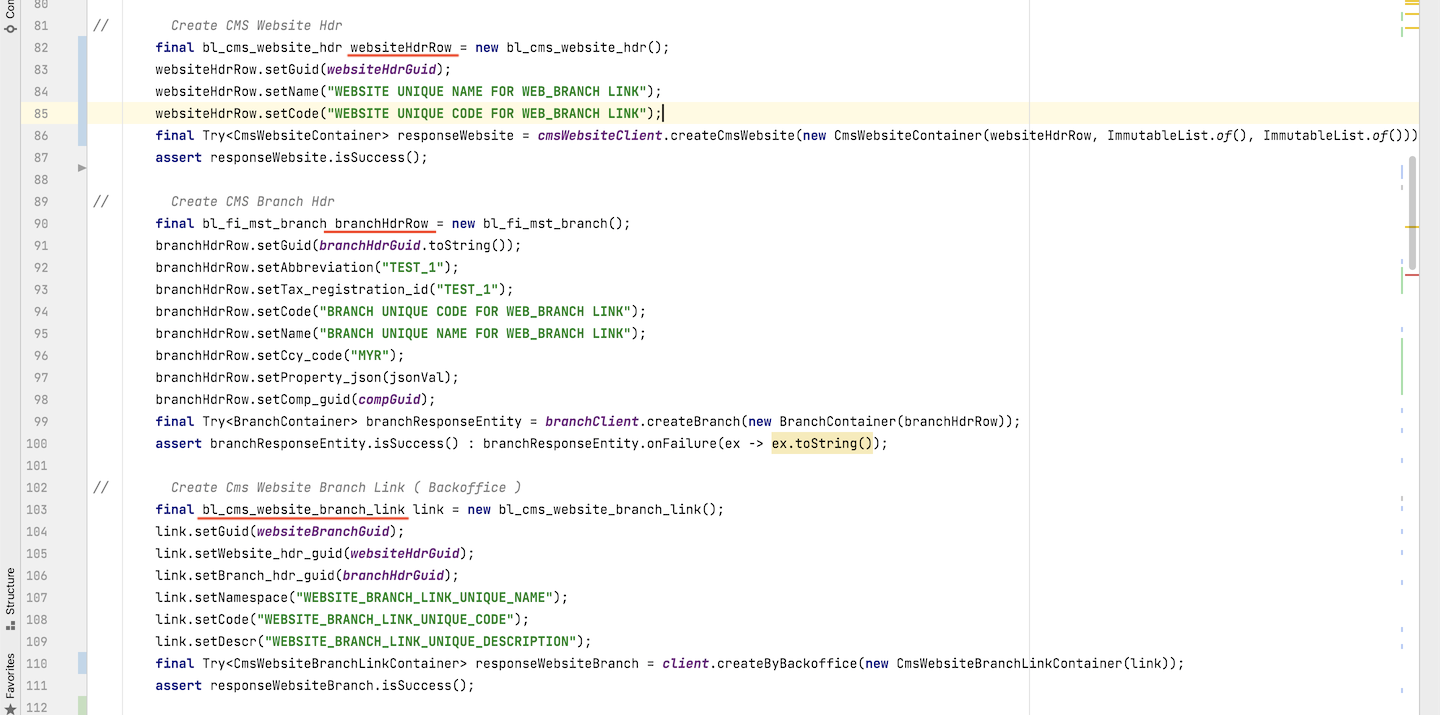
To begin with, we test the POST request endpoint for the API. Before we create the Container that stores the table data that we are testing, we have to first consider if any column in the table has the Non-Null constraints and acts as a foreign key that points to another existing table. If that is the case, we have to first create the table that is referenced by the foreign key column to avoid the violation of foreign key constraints error.
For example, based on the screenshots above, we are testing the creation of the bl_cms_website_branch_link table.
This table contains 2 columns:
-
website_hdr_guid: Non-null foreign key referencing bl_cms_website_hdr table.
-
branch_hdr_guid: Non-null foreign key referencing bl_fi_mst_branch table.
Thus, we have to first create the bl_cms_website_hdr and bl_fi_mst_branch data. Then, we will use the guid of the records from these 2 tables to create our target bl_cms_website_branch_link table.
3.4.2 Do not have to fill up certain columns while creating tables.
While creating the record for the table, we must set valid values for the columns that have the Non-Null constraints in the table.
However, we do not have to fill up the values for certain columns even though they are having Non-Null constraints. These columns are
-
guid
-
created_by_subject_guid
-
updated_by_subject_guid
-
status
-
revision
-
created_date
-
updated_date
This is because all these columns are auto-filled with valid values by the codes in the corresponding Controller class and Data Consistency Object class.
3.4.3 Take note of the master and tenant level API
After creating the table record, we proceed to create a container that stores the table record. Then, we will proceed to use the client class to send POST requests to the server in order to create the record in the database.
If the target API that we are testing is of tenant level, we can create all the relevant tables using their corresponding client classes.
If the target API that we are testing is of master level, we have to first consider the level of API for all the relevant tables that we are creating. If the other tables are of master level too, we can create them using their client classes.
However, if the other APIs are of tenant level, we have to create them using their UOW classes. By doing that, we have to set a value for all the Non-Null columns in the table, including the columns that are mentioned in section 3.4.2 above. This is because we are not calling the POST request endpoints to create these tables. Thus, the codes of the Service and Data Consistency Object class which will auto-fill these columns with valid values will not be executed. Instead, we have to manually set the values for these columns.
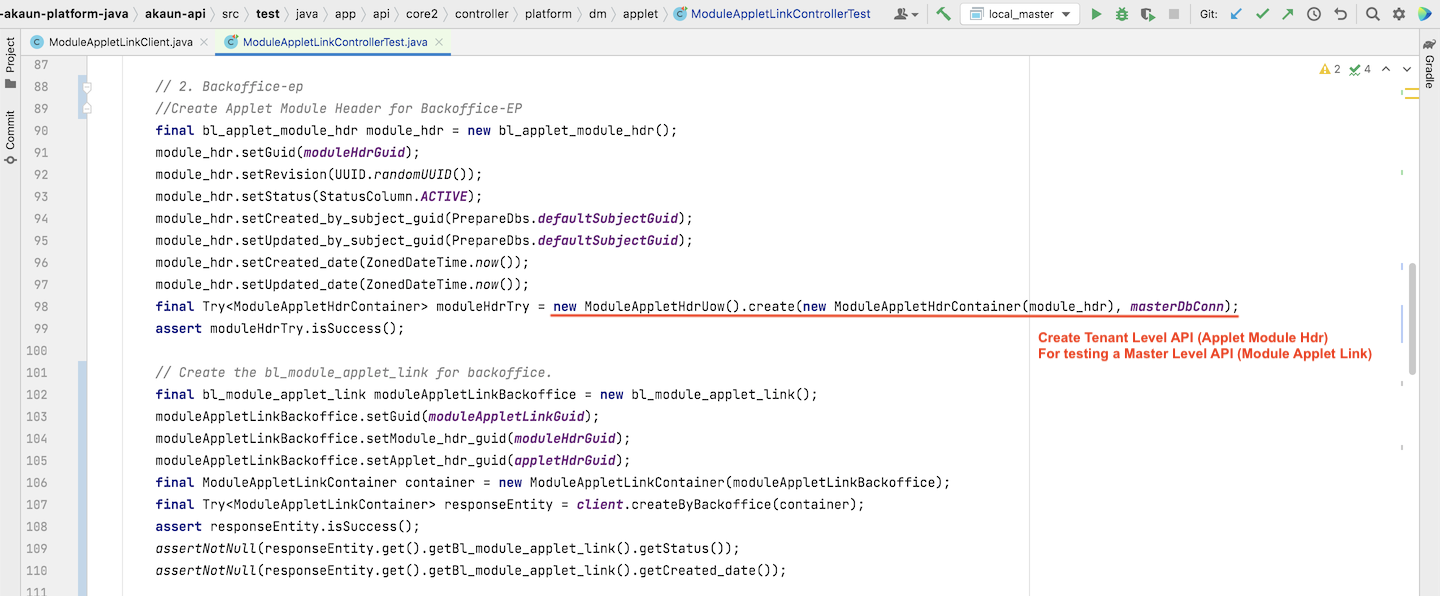
We will look at the ModuleAppletLinkControllerTest class as an example. Based on the screenshot above, the Module Applet Link API is of master level API. It dependds on the bl_applet_module_hdr table which is of tenant level API.
Thus, we do not create the bl_applet_module_hdr table record using it client class. Instead, we use the Uow class that takes in the master level database connection (masterDbConn) to create the bl_applet_module_hdr table record. Meanwhile, we have to manually fill up all the columns with the Non-Null constraints in the bl_applet_module_hdr table.
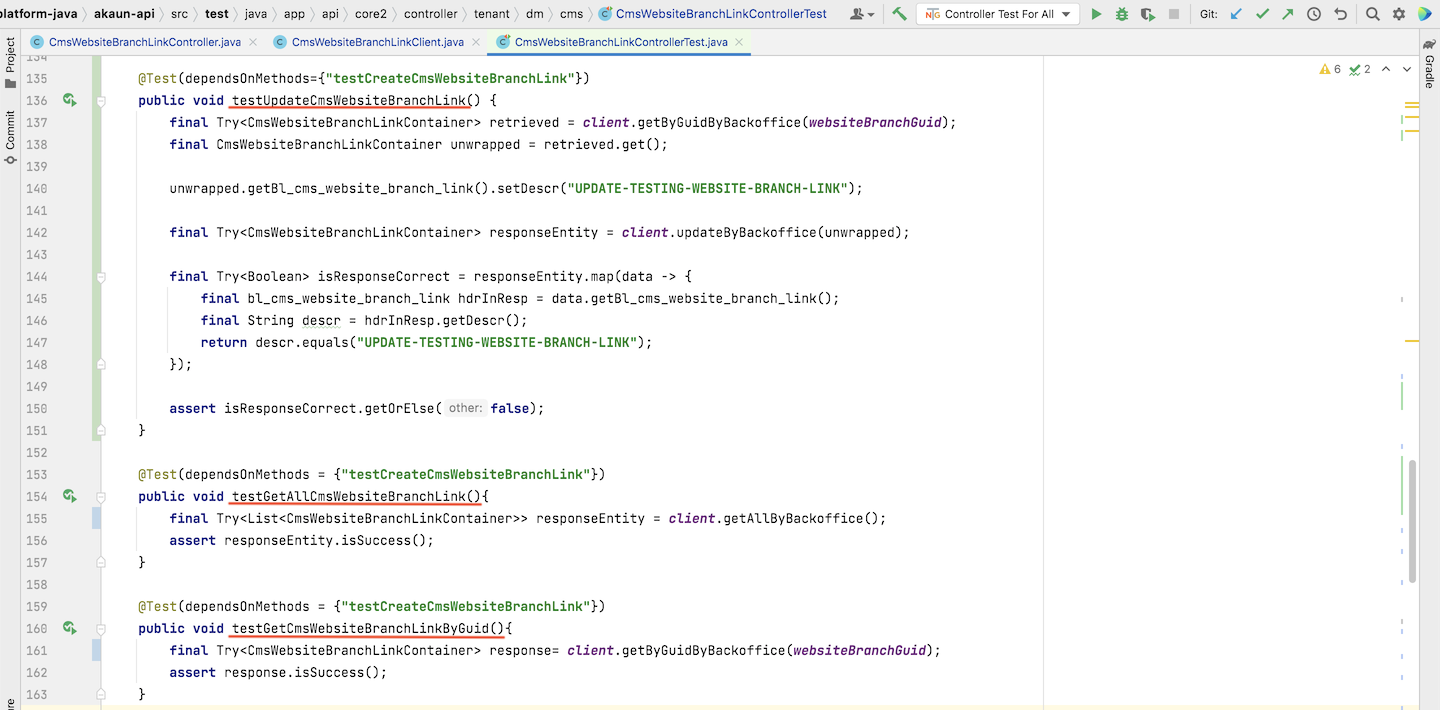
3.5 Test for PUT.
The test case for PUT request should be placed and executed after the test case to create the table. It depends on the test case which creates the table.
Inside this test case, we will retrieve the table that was previously created based on its guid. Then, we will set a new valid value for one of the columns in the table. Then, we call the client class to send the PUT request to the server in order to update the record in the database.
After that, we will retrieve the updated record and check if the value of the related column has been updated to the new value.
3.6 Test for Get.
The test cases for the GET requests should be placed and executed after the test cases to create or update the table. It usually depends on the test case that creates the table.
For the Get All and Get By Guid requests, we call the client classes to send these GET requests respectively to the server to retrieve the records from the database. Then, we check if there is any successful returned response.
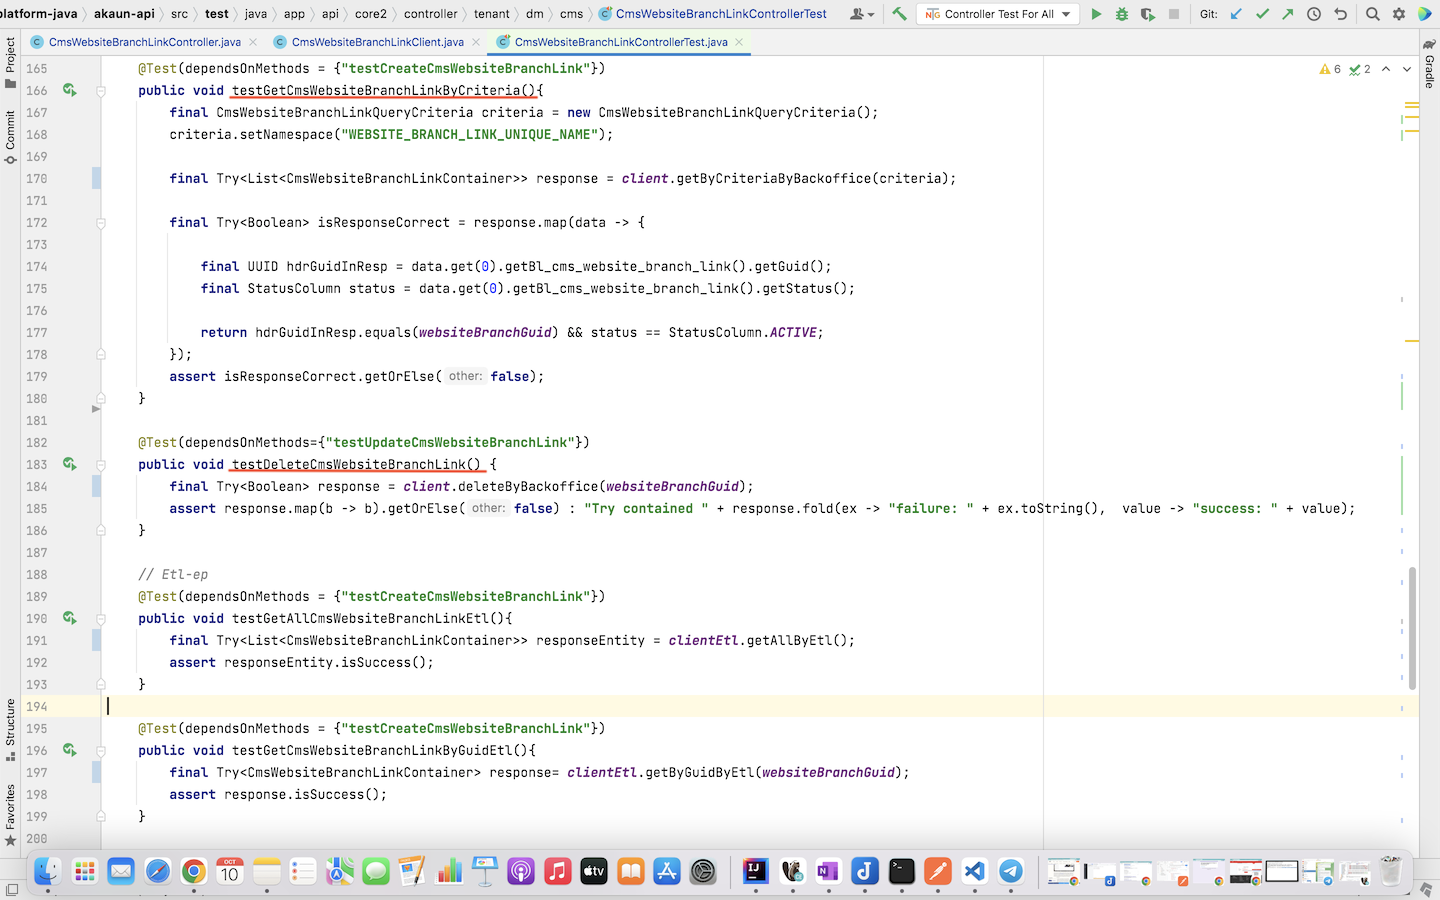
For the Get By Criteria request, we first create a Query Criteria instance for the corresponding table. Then, we will set some valid criterias using the Query Criteria instance. We then call the client class to send the GET request to the server in order to retrieve the records that match those criterias from the database.
Then, we will perform some basic checking on the returned records. For example, we will check if the number of returned records are correct. We also check if the guid of the returned record represents the record that matches the criterias and check if it has an ACTIVE status.
3.7 Test for Delete.
The test cases for the DELETE requests should be placed and executed after all other test cases. It usually depends on the test cases that get the table records.
Basically, we will call the client class to send the DELETE request with the guid of the record that we want to delete to the server in order to delete the particular record.
4.0 Troubleshoot the Failed Controller Tests
4.1 Permission Errors
4.1.1 Duplicate Guids for Permission Definitions
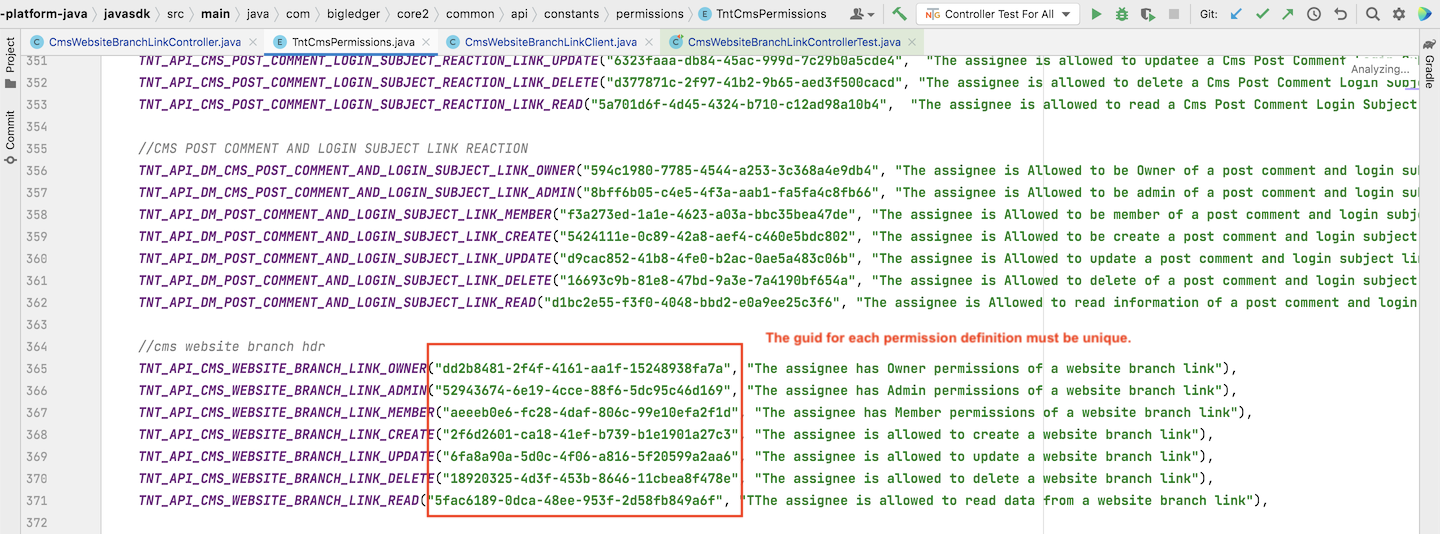
One of the common mistakes that are made by the developers is that they do not set an unique GUID for each permission definition.
4.1.2 Tenant and Master Level Database Connection.
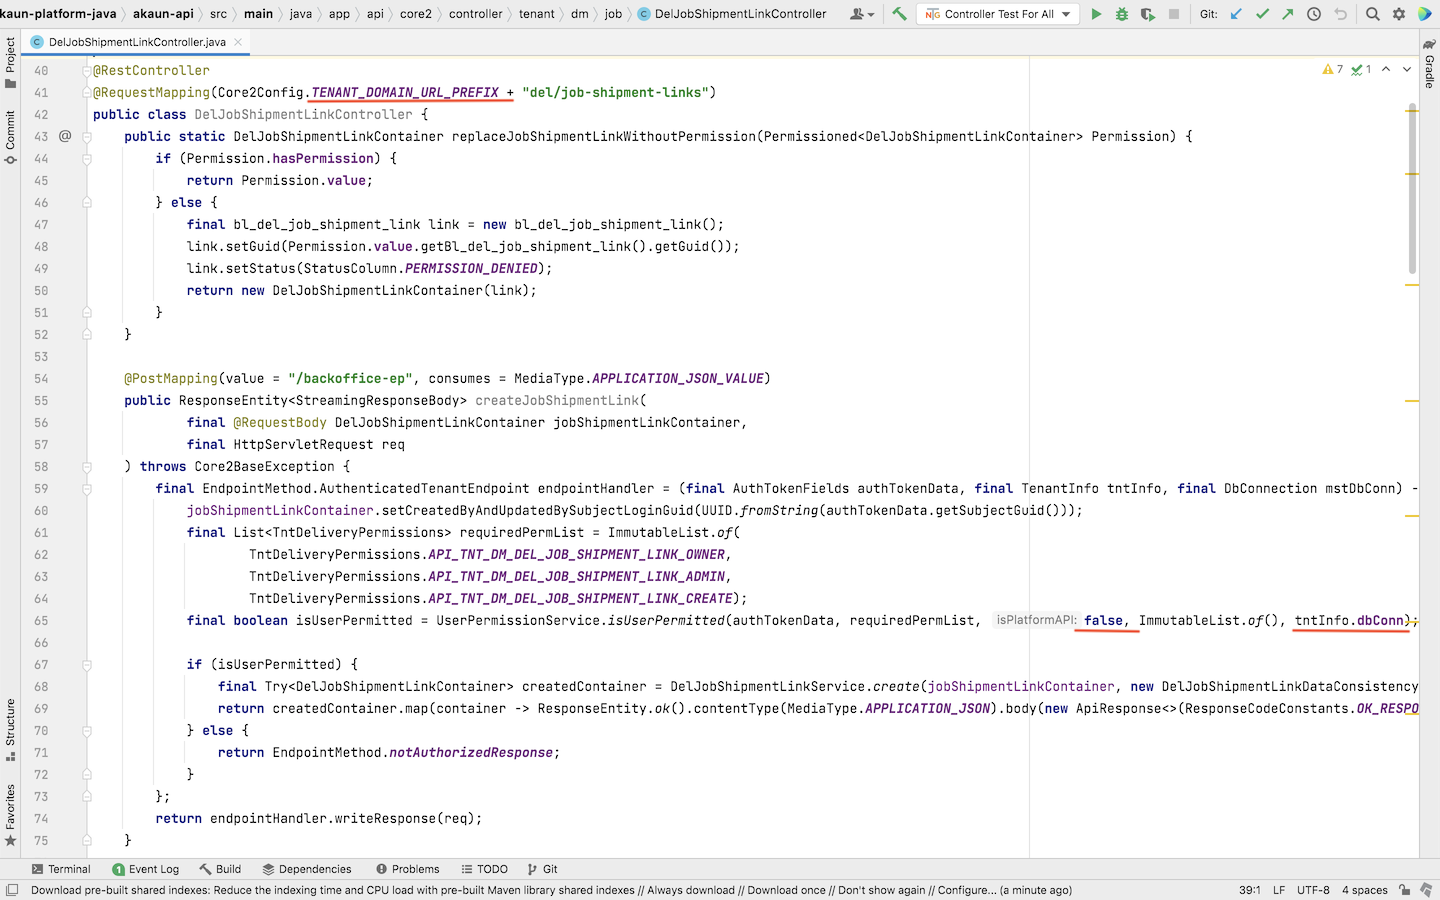
Next, another common mistake is that the developers use the wrong database connection for the API in the Controller class.
For instance, based on the screenshot shown above, the Del Job Shipment Link API is of tenant level. Thus, when the developers are checking the permission of the subject guid using the isUserPermitted function, they must use the tntInfo.dbConnection instead of the mstDbConn connection.
4.2 Query Criteria
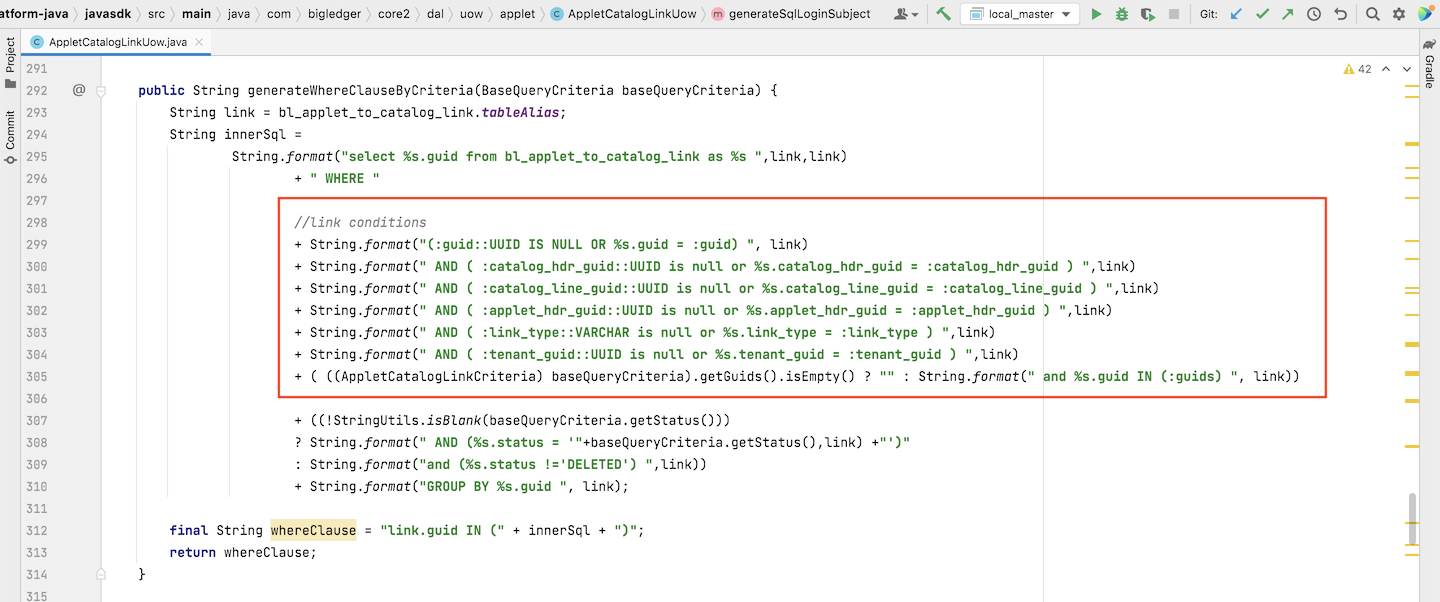

Next, inside the Uow class, the generateWhereClauseByCriteria method is used to generate the SQL that filters the records in a table by certain specified columns (also known as criteria) of the table.
While computing the generateWhereClauseByCriteria method, developers must make sure that the SQL computed is free of syntax error. For instance, they must make sure they combine the multiple conditions with keyword AND. They also have to check on the spacing between keywords in the SQL query to avoid syntax error. As a suggestion, developers can always test the SQL script using Dbeaver to make sure that the SQL query is free of syntax error and it returns the correct output.
Next, developers have to make sure that the columns that are used in filtering the records in the target table (conditions specified in the SQL query in generateWhereClauseByCriteria method) must be specified in the QueryCriteria class of the corresponding table.
4.3 Table Structure
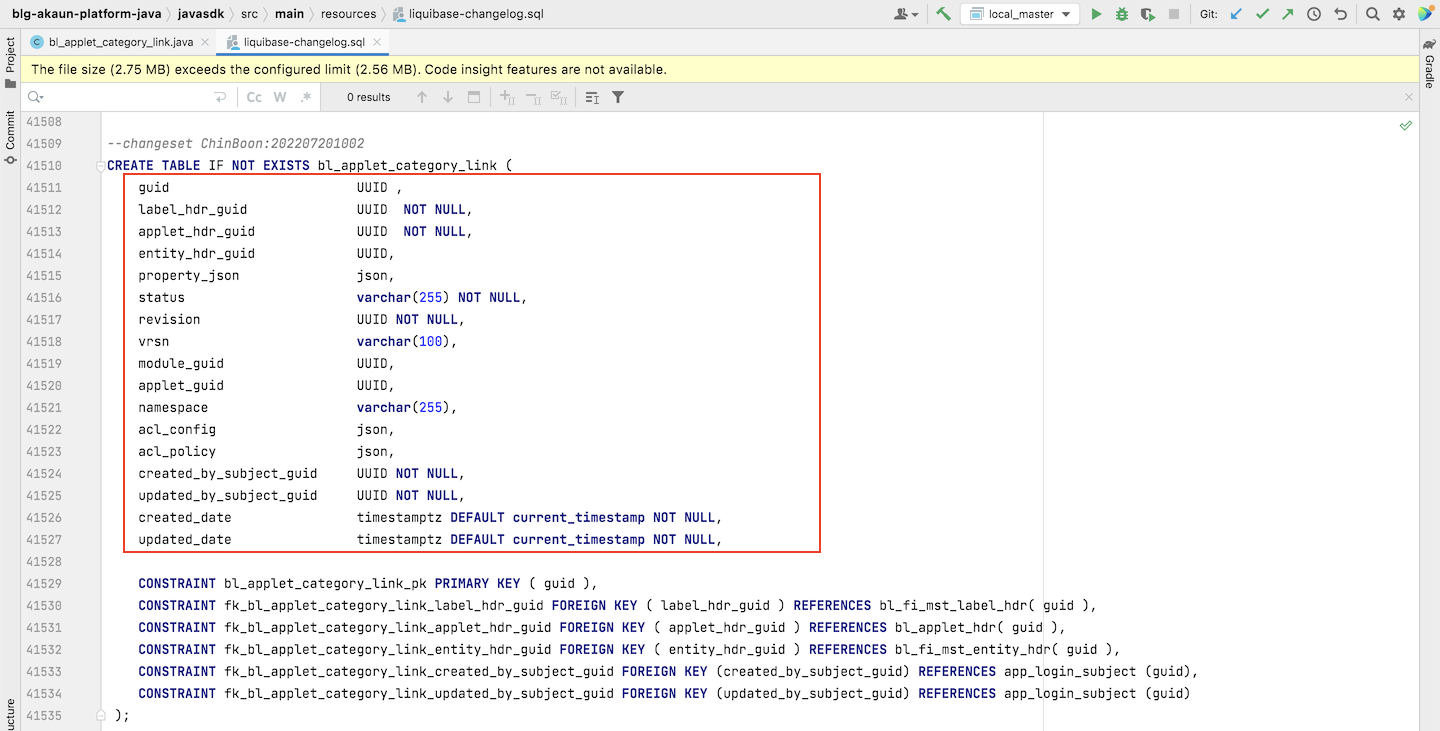
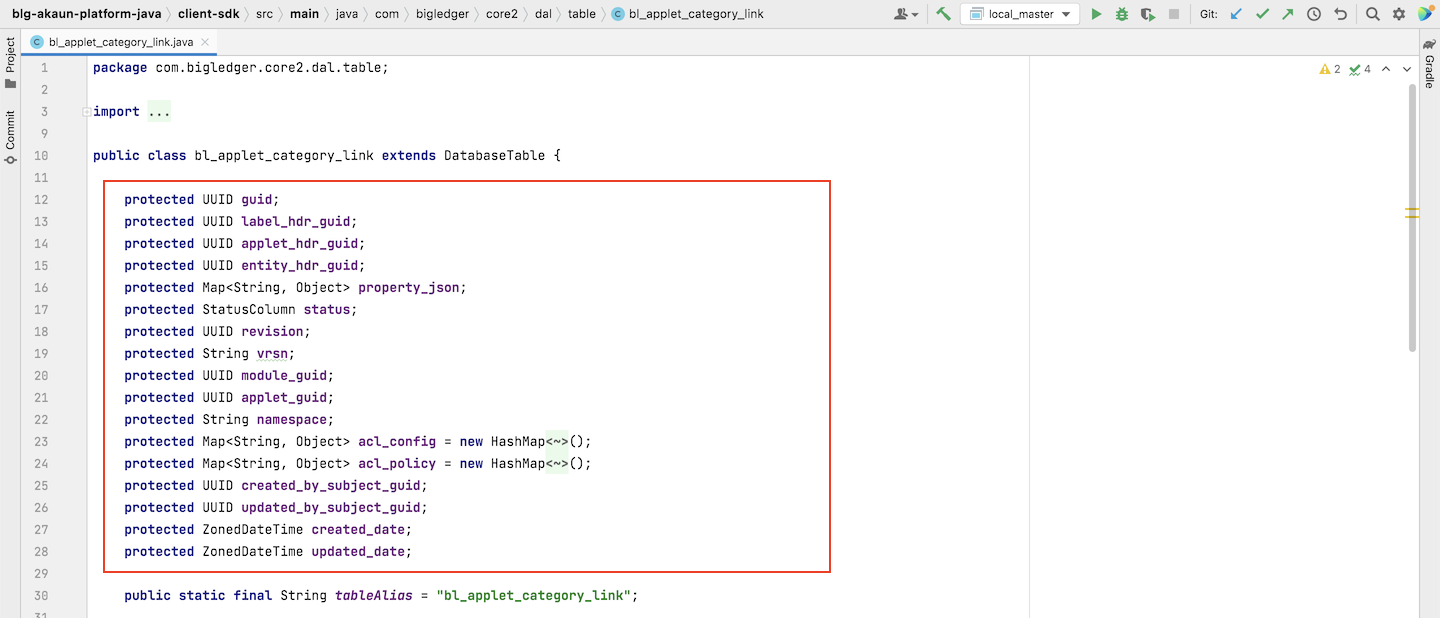
Next, developers must make sure that the number of columns and column names of the table that are specified in the liquibase class must match with the one that are specified in the Java table class.