Intellij configuration for build and run
In the context of software development, "Run Configuration" refers to a set of settings that dictate how an application should be executed. This includes defining runtime parameters, specifying environment settings, and configuring various options crucial for launching the application effectively.
After following all the steps so far and having the local databases prepared it is time to prepare a run configuration and run the backend web service application to get the APIs running.
Importance of Run Configuration
-
Customized Execution:
-
Different scenarios may require varying runtime parameters or environment setups. Run Configuration allows tailoring the execution according to specific needs.
-
-
Efficiency and Accuracy:
-
Proper configuration ensures the application runs with the right parameters, reducing errors and guaranteeing a more accurate testing and debugging process.
-
-
Easy Adaptability:
-
As projects evolve, configurations can be easily adapted to reflect changes, enabling smooth transitions and updates.
-
Components of Run Configuration
The following are the components required for setting up a run configuration.
-
Main Class:
-
Specifies the entry point of the application, typically the class containing the main() method. For our backend repo this main class will be the WebServiceApplication class.
-
-
Class Path:
-
The classpath is an environment variable used by the Java Virtual Machine (JVM) to locate and load classes when running a Java program. It specifies a list of directories, JAR files, and ZIP files where the JVM should look to find and load class files. In our case since we are running the main backend applicatoin the class path will be blg-akaun-platform-java.akaun-api.main. This is where all the classes are for running the program. Kindly ensure that you have selected the appropriate java version next to the class path.
-
-
Environment Variables:
-
Provides a way to pass environment-specific configurations to the application. In our case there are usually 6 environment variables that we need to provide for the run configuration. They are:
-
AWS_PROFILE: It is the AWS profile you want to use when running the application. The aws setup must have already been done earlier. Contact platform services if not so.
-
DB_HOST: It is the host of the database your application will run on.
-
DB_NAME: It is the name of the database your application will run on. (The root/master database)
-
DB_PASS: It is the password of the database. For example when you want to run the application on staging database you will need to provide the password for it similar to how you used the password when creating a connection to staging database in DBeaver.
-
DB_PORT: It is the port of the database. Similar to connection in DBeaver.
-
DB_USER: It is the user of the database. Similar to connection in DBeaver.
-
-
Steps to Configure Run
-
Open IntelliJ IDEA:
-
Launch IntelliJ IDEA and open your backend project.
-
-
Creating a Run Configuration:
-
Navigate to "Run" button on the top menu, then next to it there is a dropdown. Click on it then select "Edit Configurations…"
-
Click the "+" icon and choose the appropriate configuration type, since we are trying to run the application select the "Application" configuration type.
-
-
Setting Configuration Details:
-
Name the configuration appropriately. Define the main class, class path and environment variables based on your application’s requirements.
-
-
Saving the Configuration:
-
Save the configuration for future use by clicking "Appy" and "Ok".
-
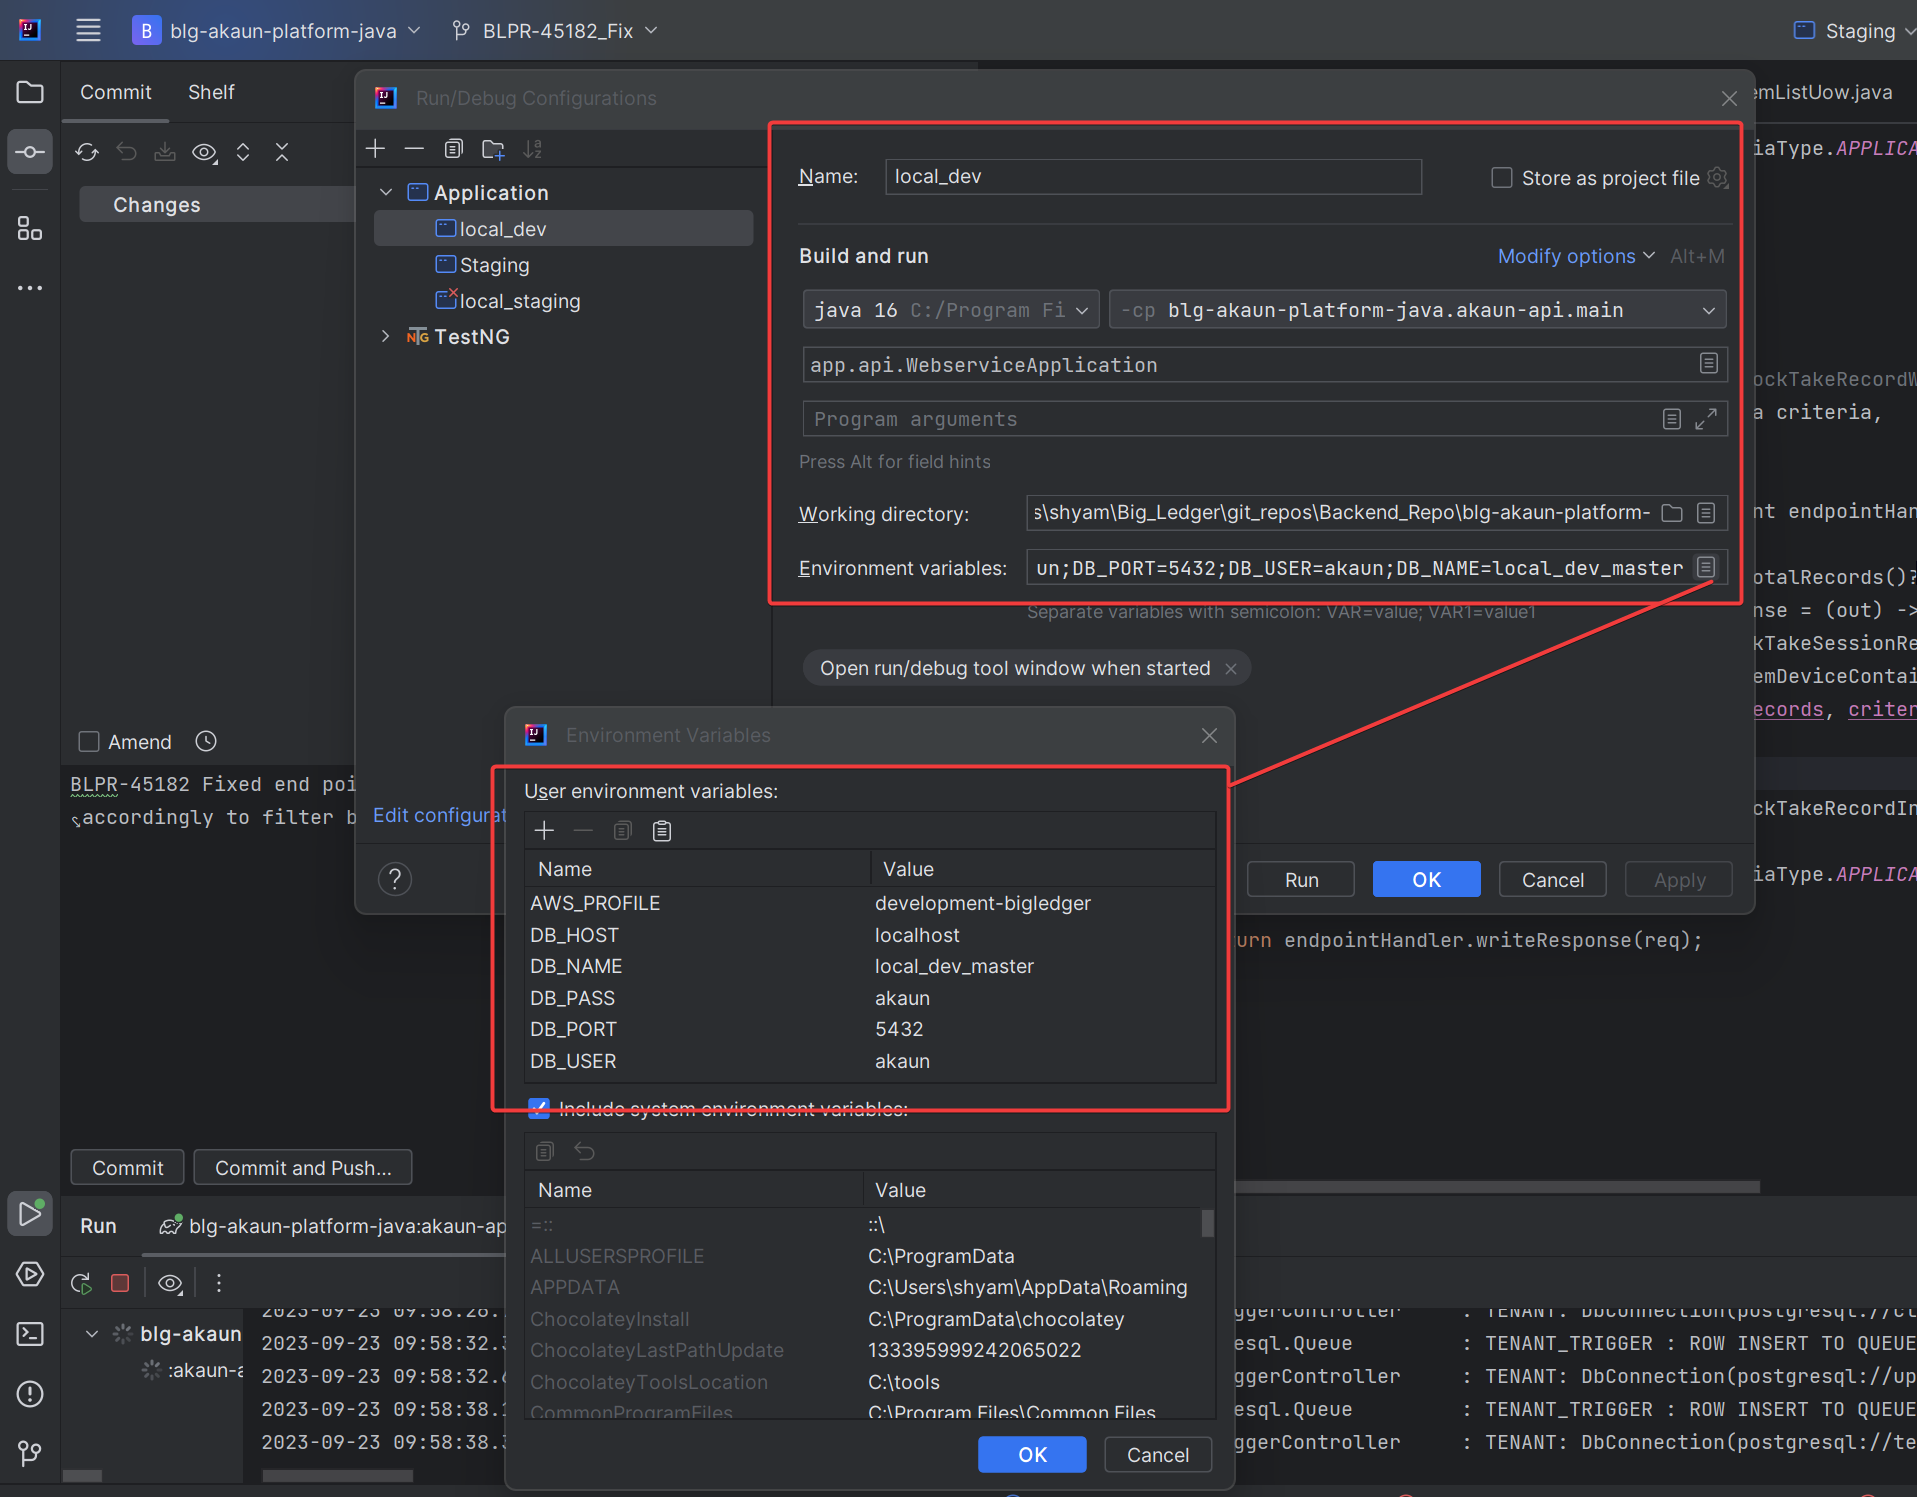
Example Run Configuration
Consider a scenario where we want to run the application for our local database. The name of the database is local_akaun_master.
These are the example configuration specifics:
-
Main Class: com.example.project.WebServiceApplication
-
Class Path (-cp): blg-akaun-platform-java.akaun-api.main
-
Environment Variables:
-
AWS_PROFILE = 0825205782952_wavelet-interns
-
DB_HOST = localhost
-
DB_NAME = local_akaun_master
-
DB_PASS = akaun
-
DB_PORT = 5432
-
DB_USER = akaun
-
Expected Outcome
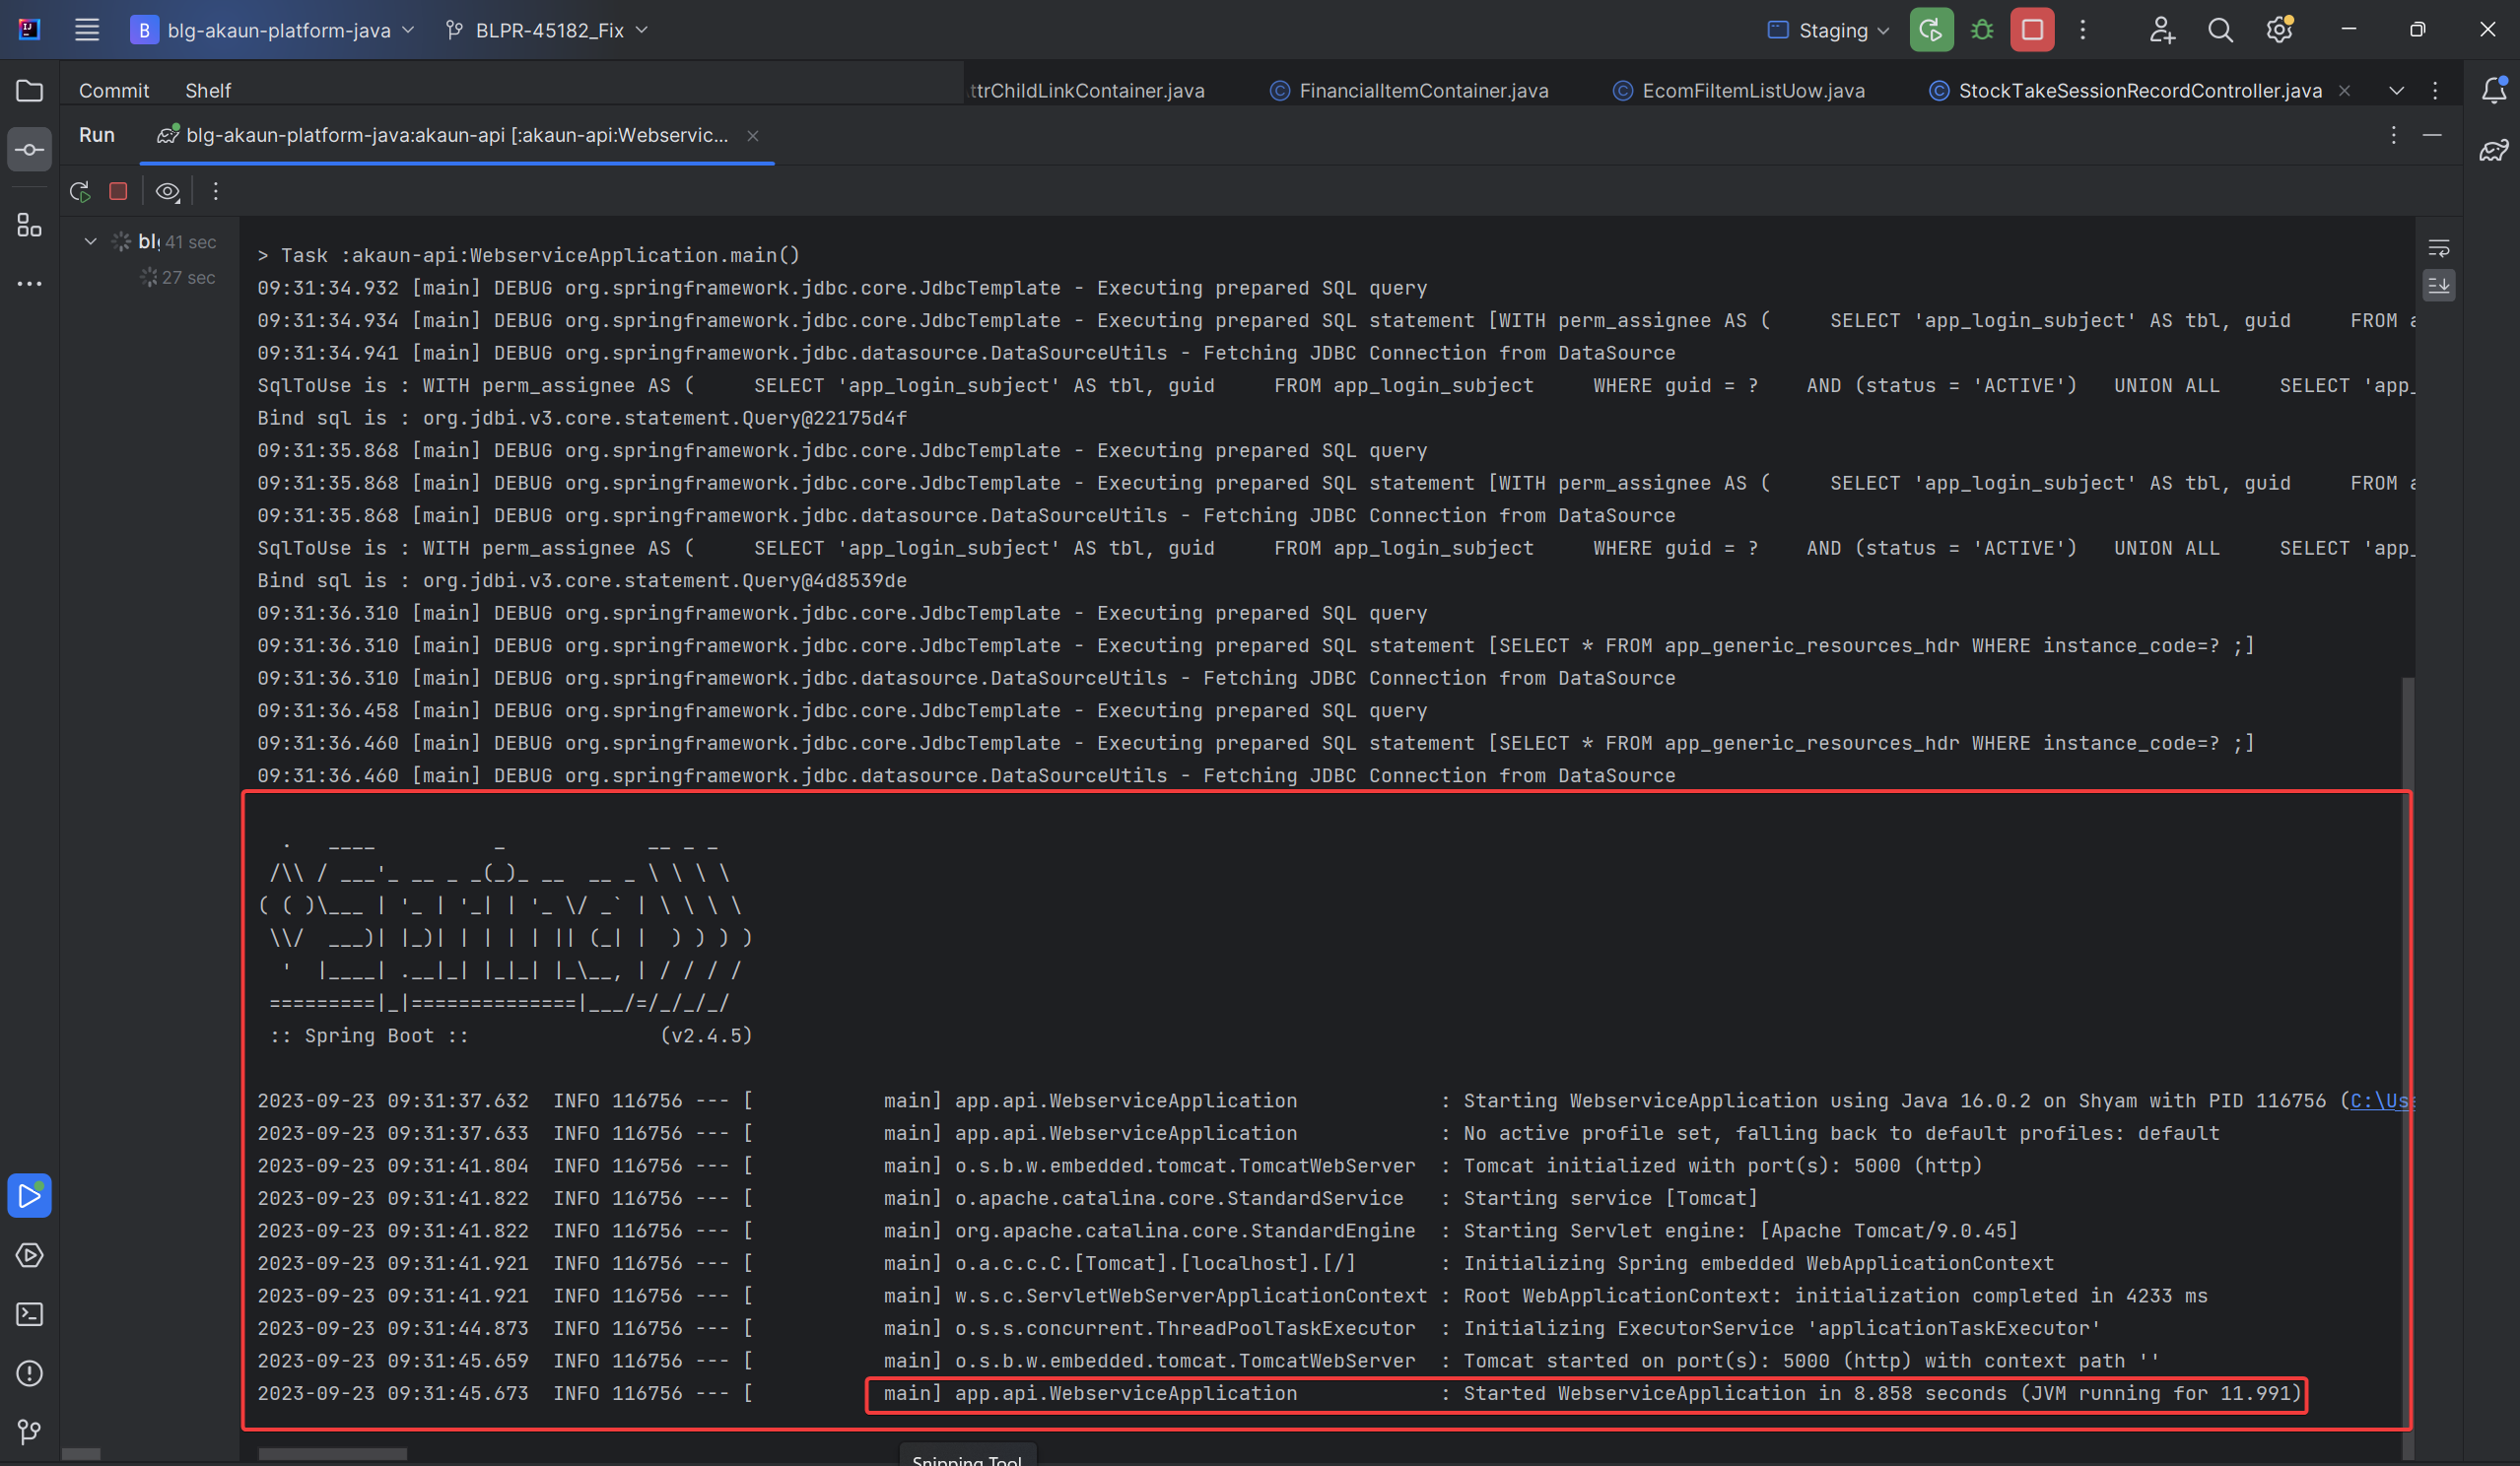
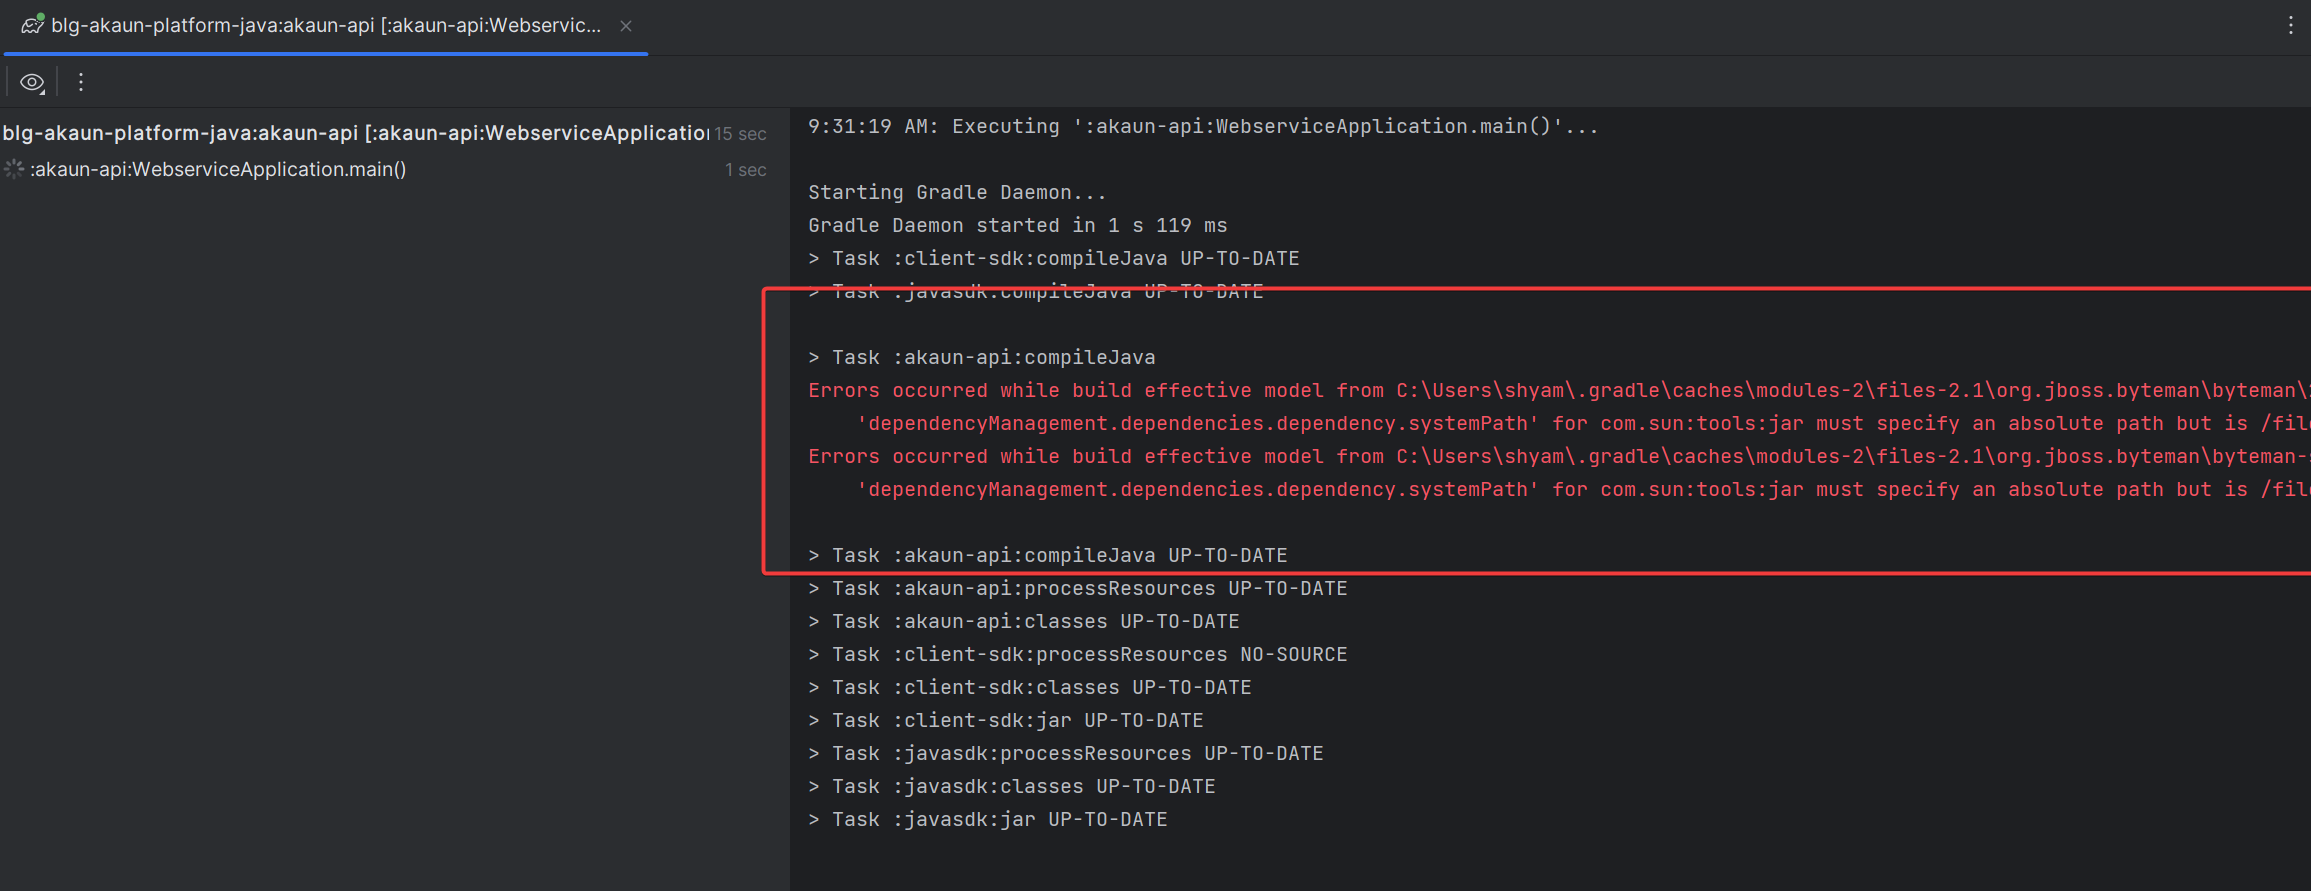
After setting up the run configuration, select the run configuration and click the play button to run the application. Once the play button is clicked, you will see a number of Gradle tasks being run along with other things. If you see any red marks or warnings in the console, do not be alarmed; they are normal.
You will know once the application is running successfully once there is a giant "Spring" logo printed onto the console and one of the very last lines will say WebServiceApplication started at so and so time.