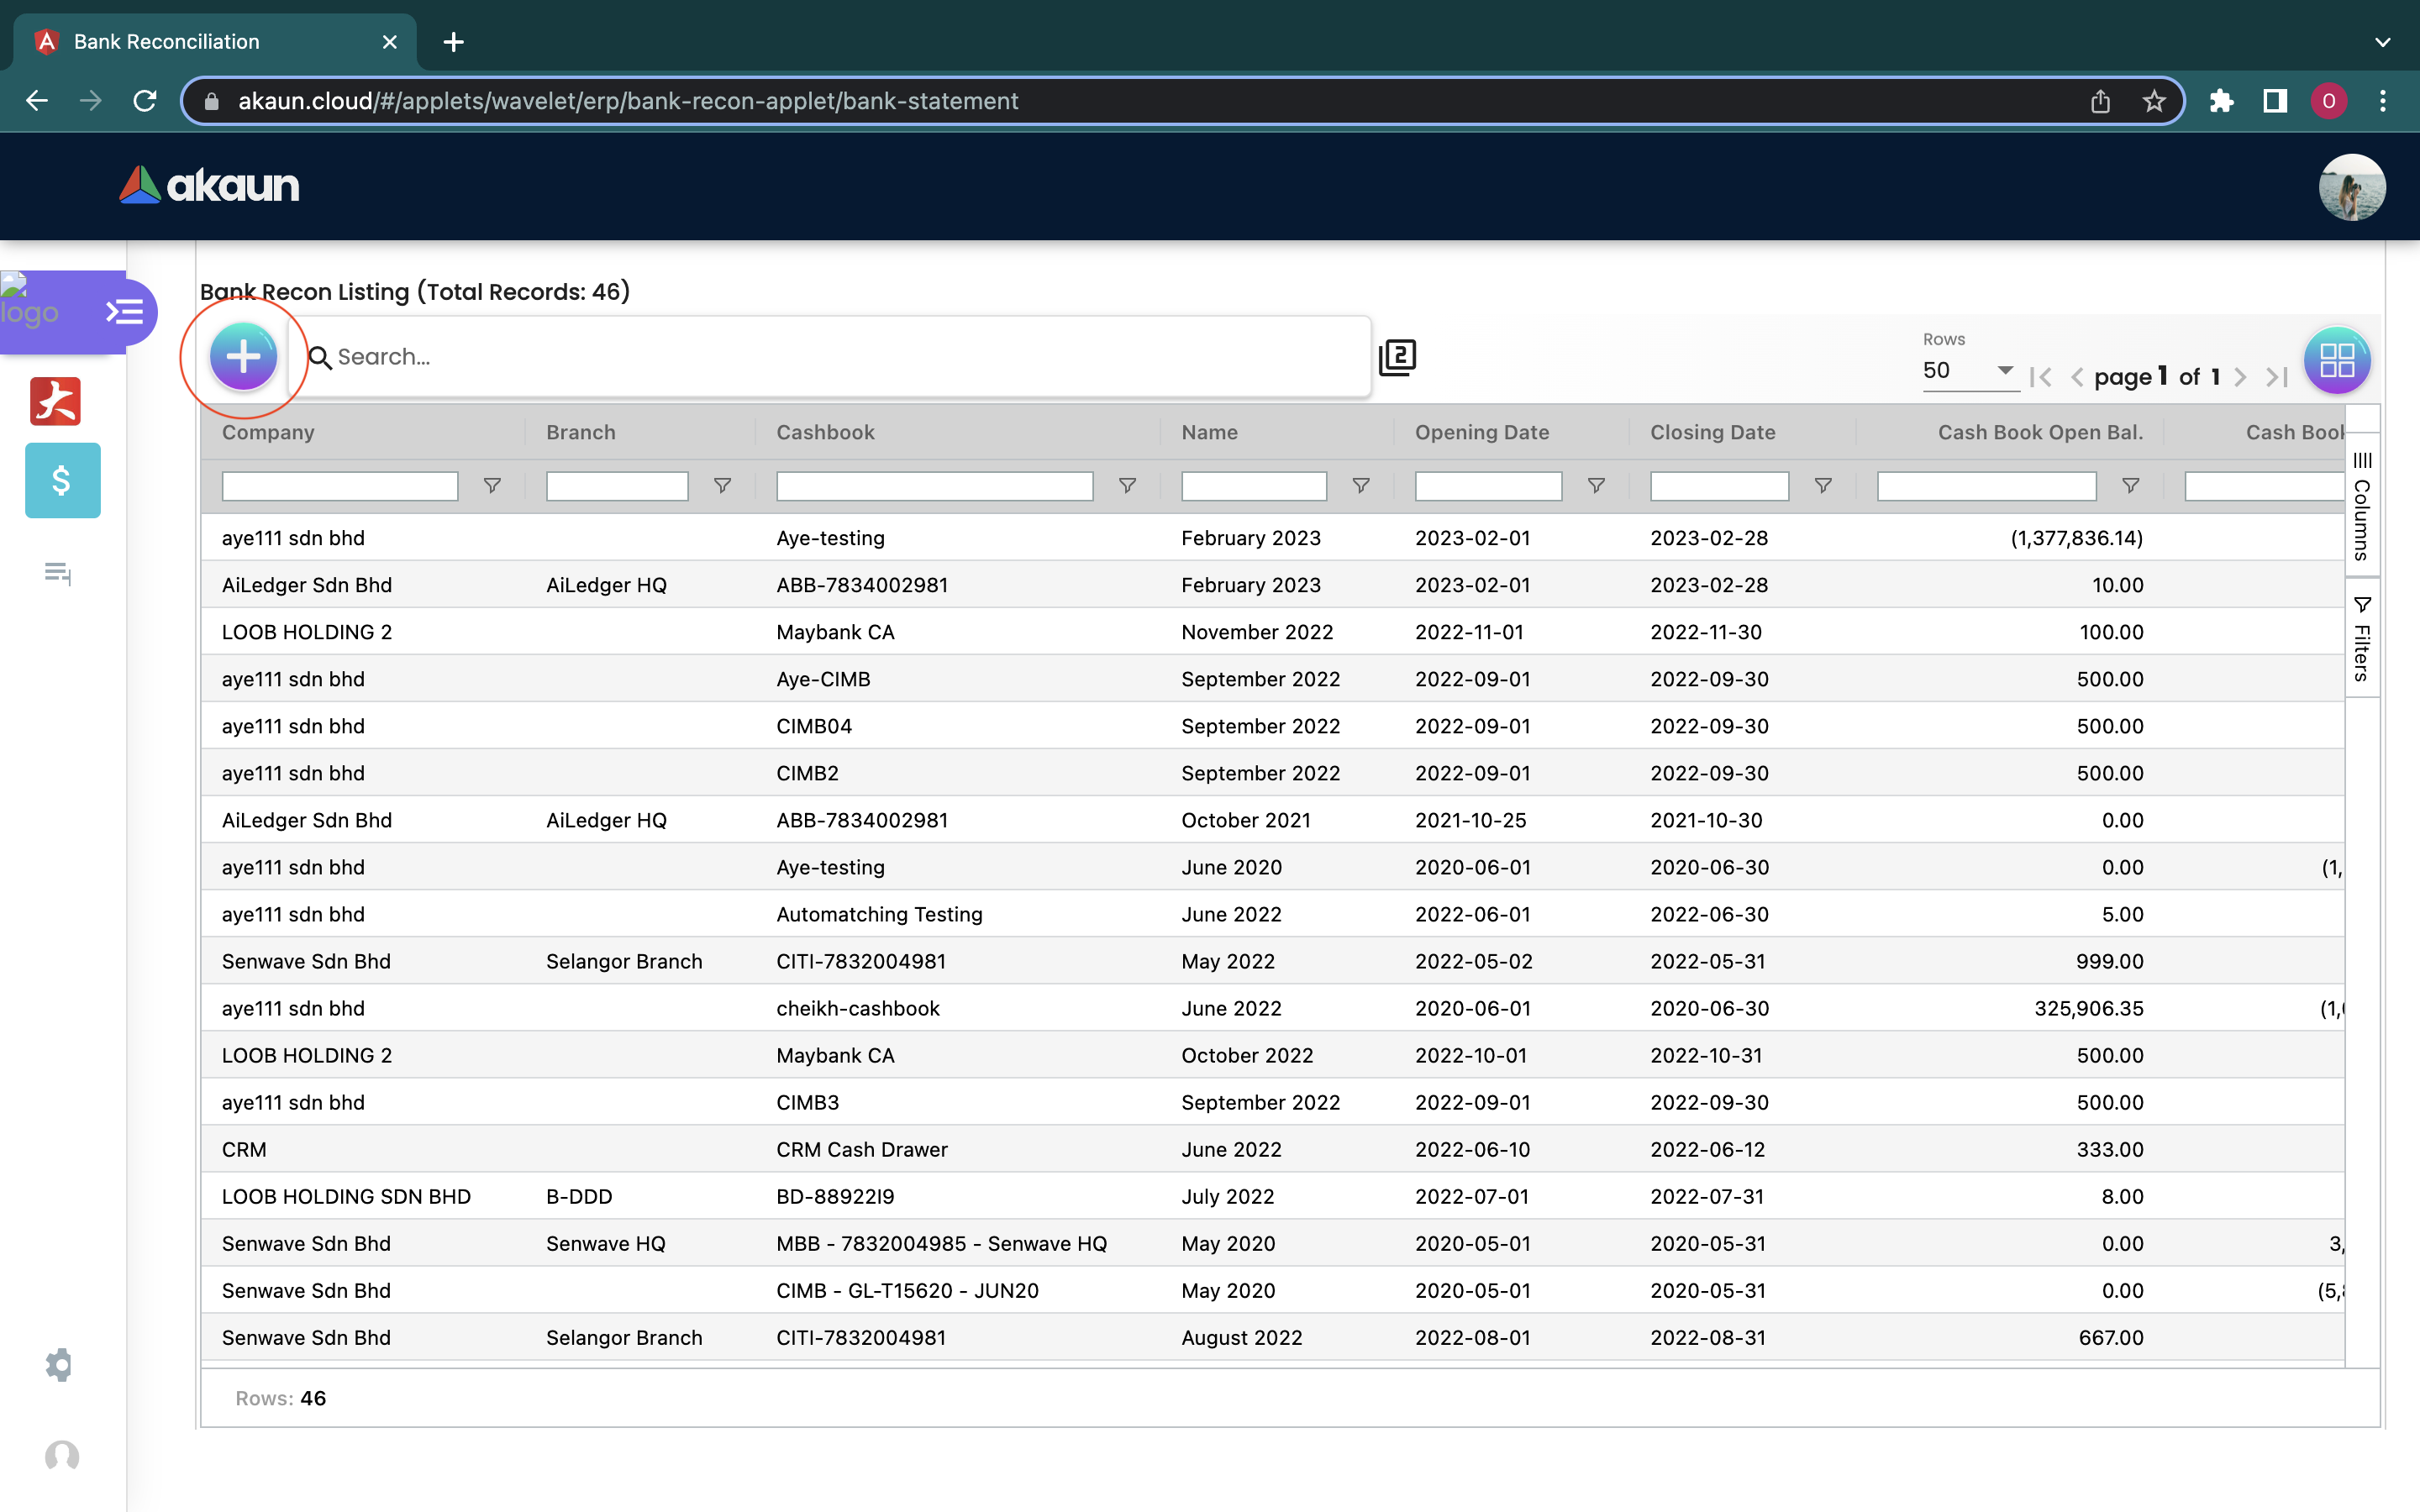
3.0 Bank Recon Listing
When logging in into the Bank Reconciliation Applet, this is the first page that will be shown to the user, which is the Bank Recon Listing page. Then, users could proceed to press the ‘+’ button placed at the top left corner to start creating a bank recon.
3.1 Details
Users then could fill in the necessary information on each column. Please be noted that if there is a * sign on the column, users must fill in relevant information in that column as it could not be modified later.
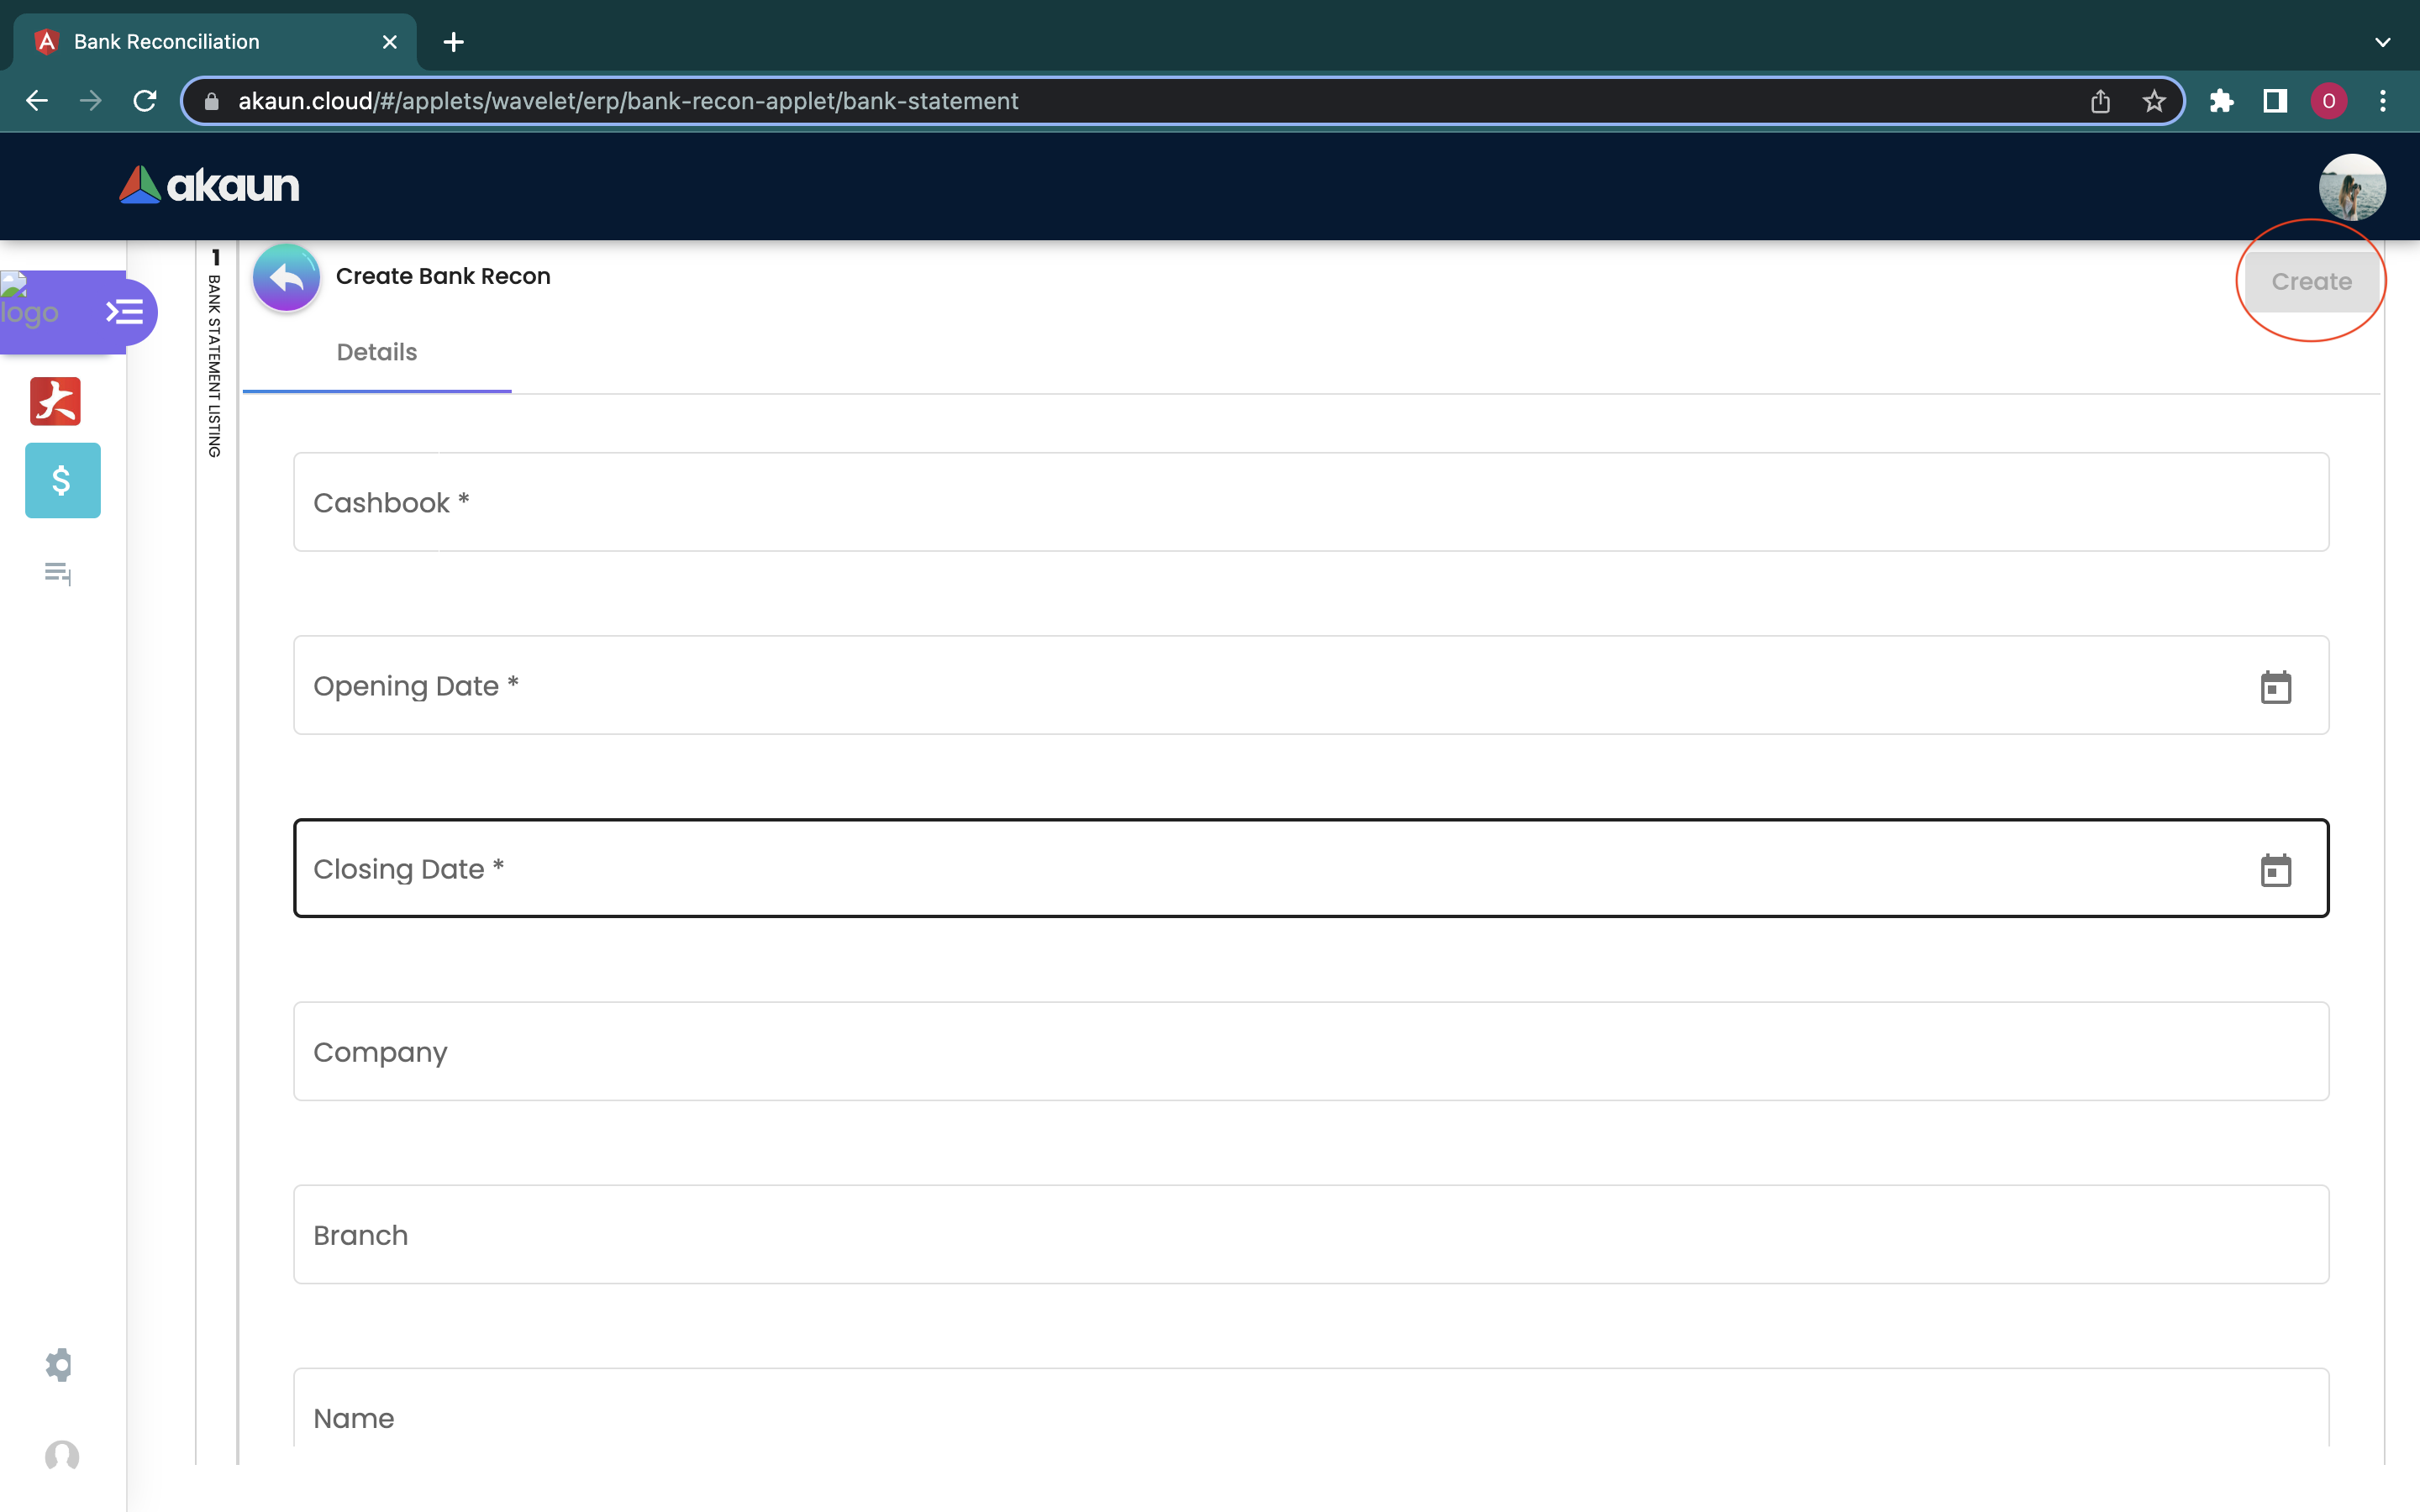
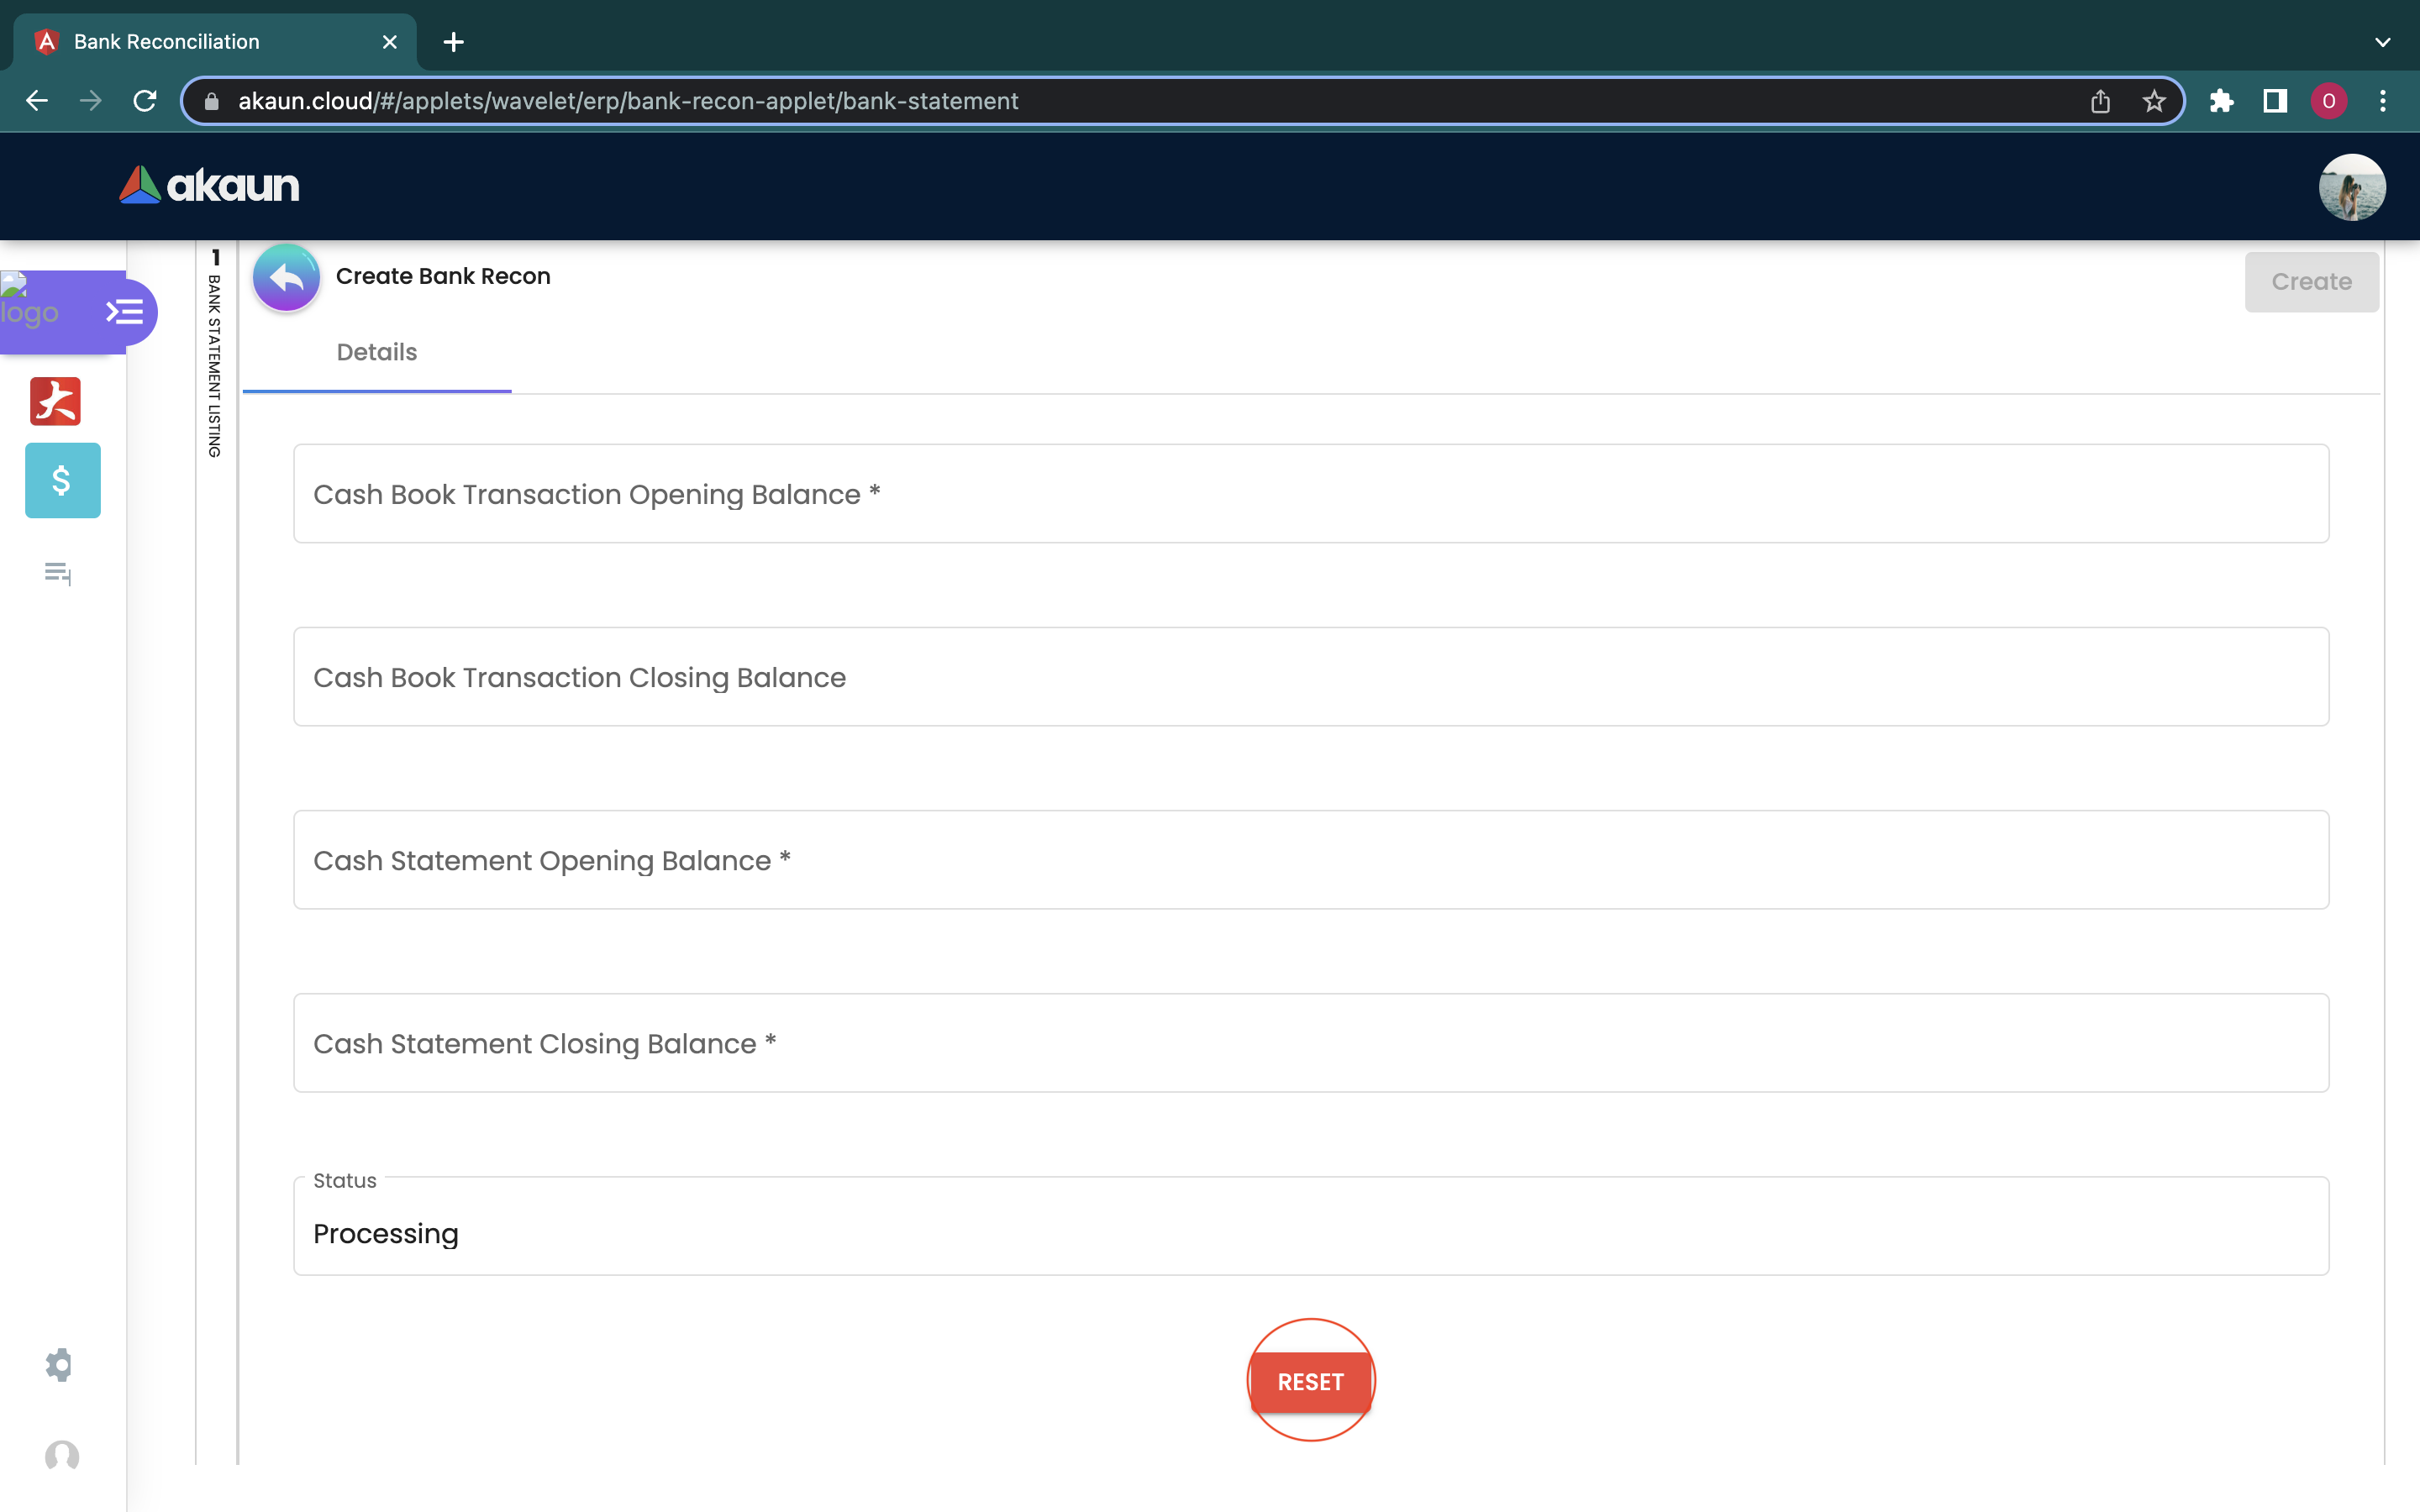
The fields that are needed to be filled in are:
-
Cashbook: Users can choose the cashbook they have created in Cashbook Applet
-
Opening Date
-
Closing Date
-
Company: Users can choose the company they have created in Organisation Applet
-
Branch: Users can choose the branch they have created in Organisation Applet
-
Name
-
Cash Book Transaction Opening Balance
-
Cash Book Transaction Closing Balance
-
Cash Statement Opening Balance
-
Cash Statement Closing Balance
-
Status: Processing
After creating the bank recon, the created bank recon will be listed in the main page. Users could click on the name of the company to make further changes.
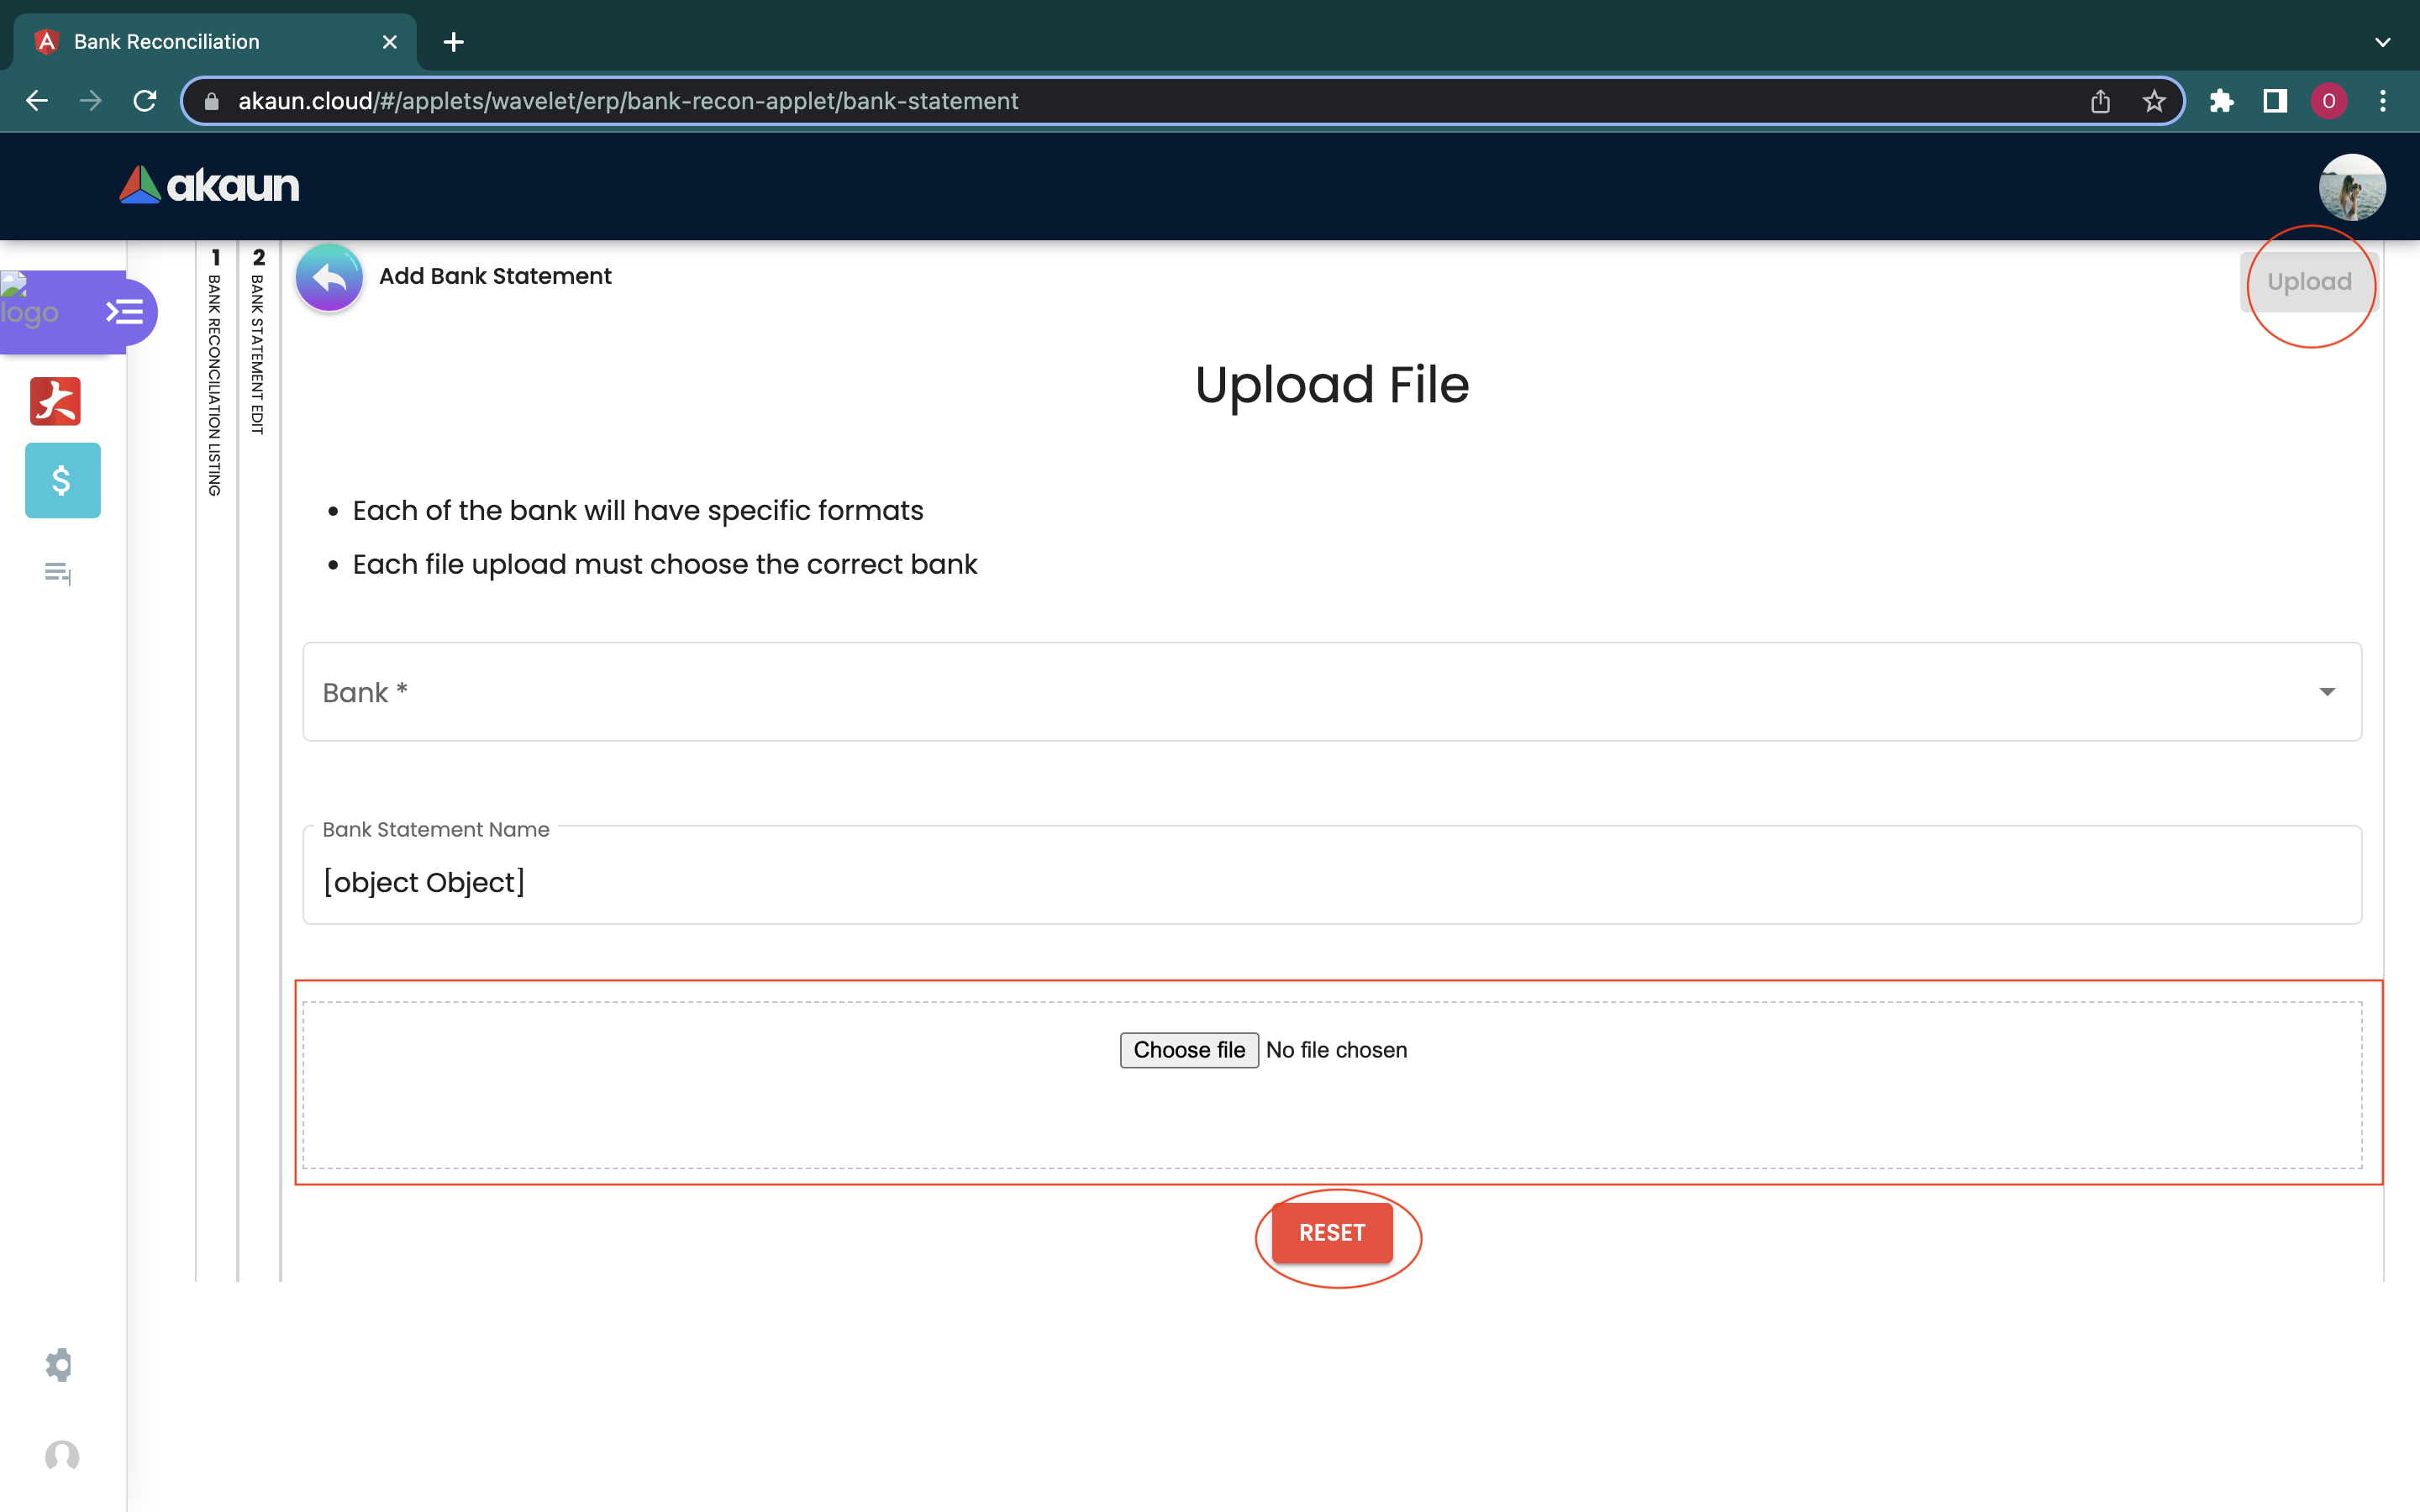
3.2 Upload Statement
In the Upload Statement tab, users can upload the bank statements that they wish to do bank recon for. Users just need to go to the “+” button, to start uploading the bank statement. Before uploading, users have to choose the type of bank from the drop down list, and enter the Bank Statement Name. Please be reminded that the file has to be in csv.format. After uploading the statements, users can click the “upload” button to save the details.