3.0 Customer
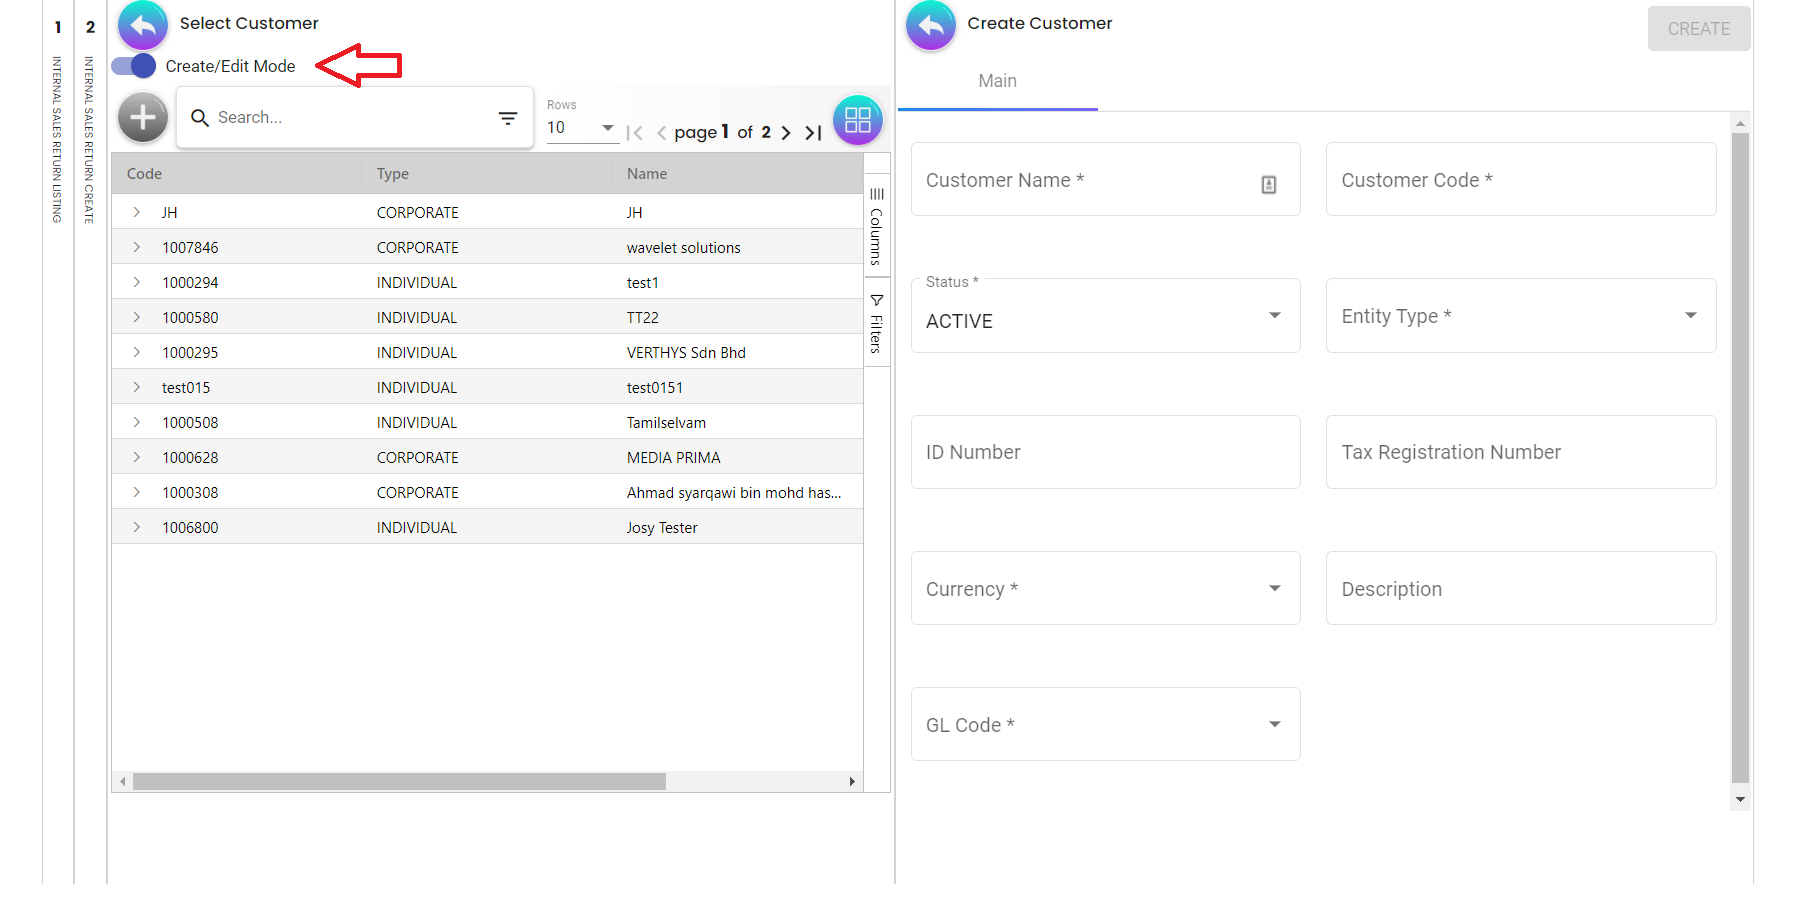
Please change to “Create/Edit Mode” to add a new customer/edit customer.
3.1 Create a new Customer
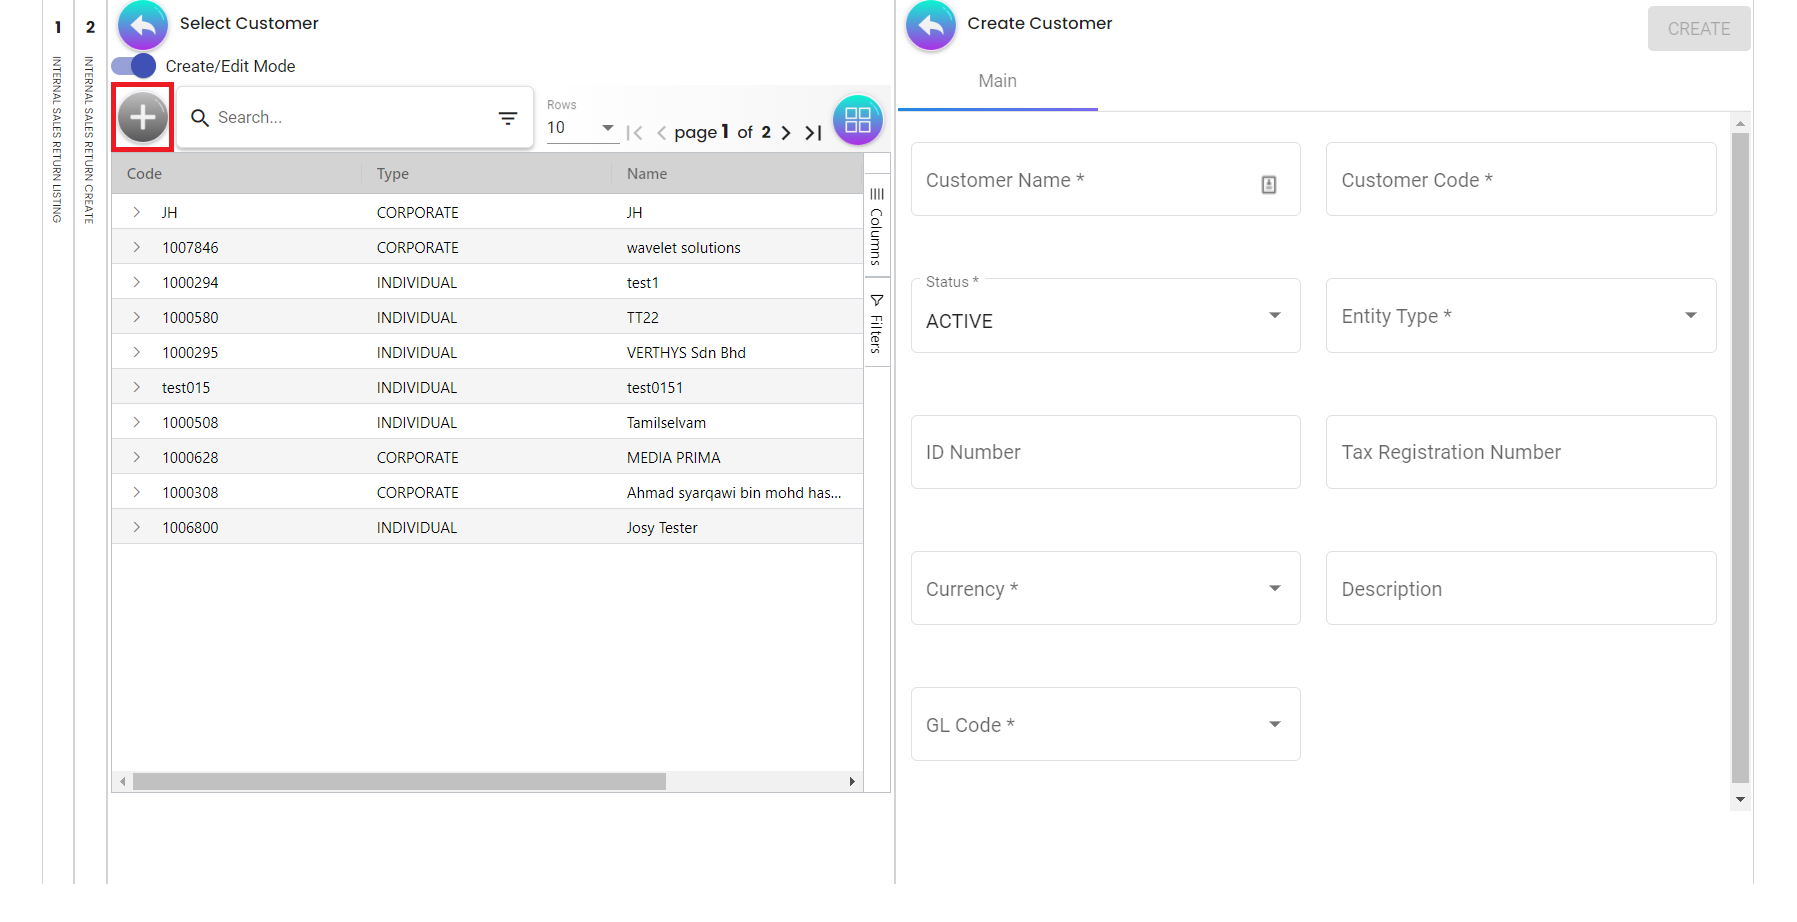
Please click the ‘+’ button to add a new customer.
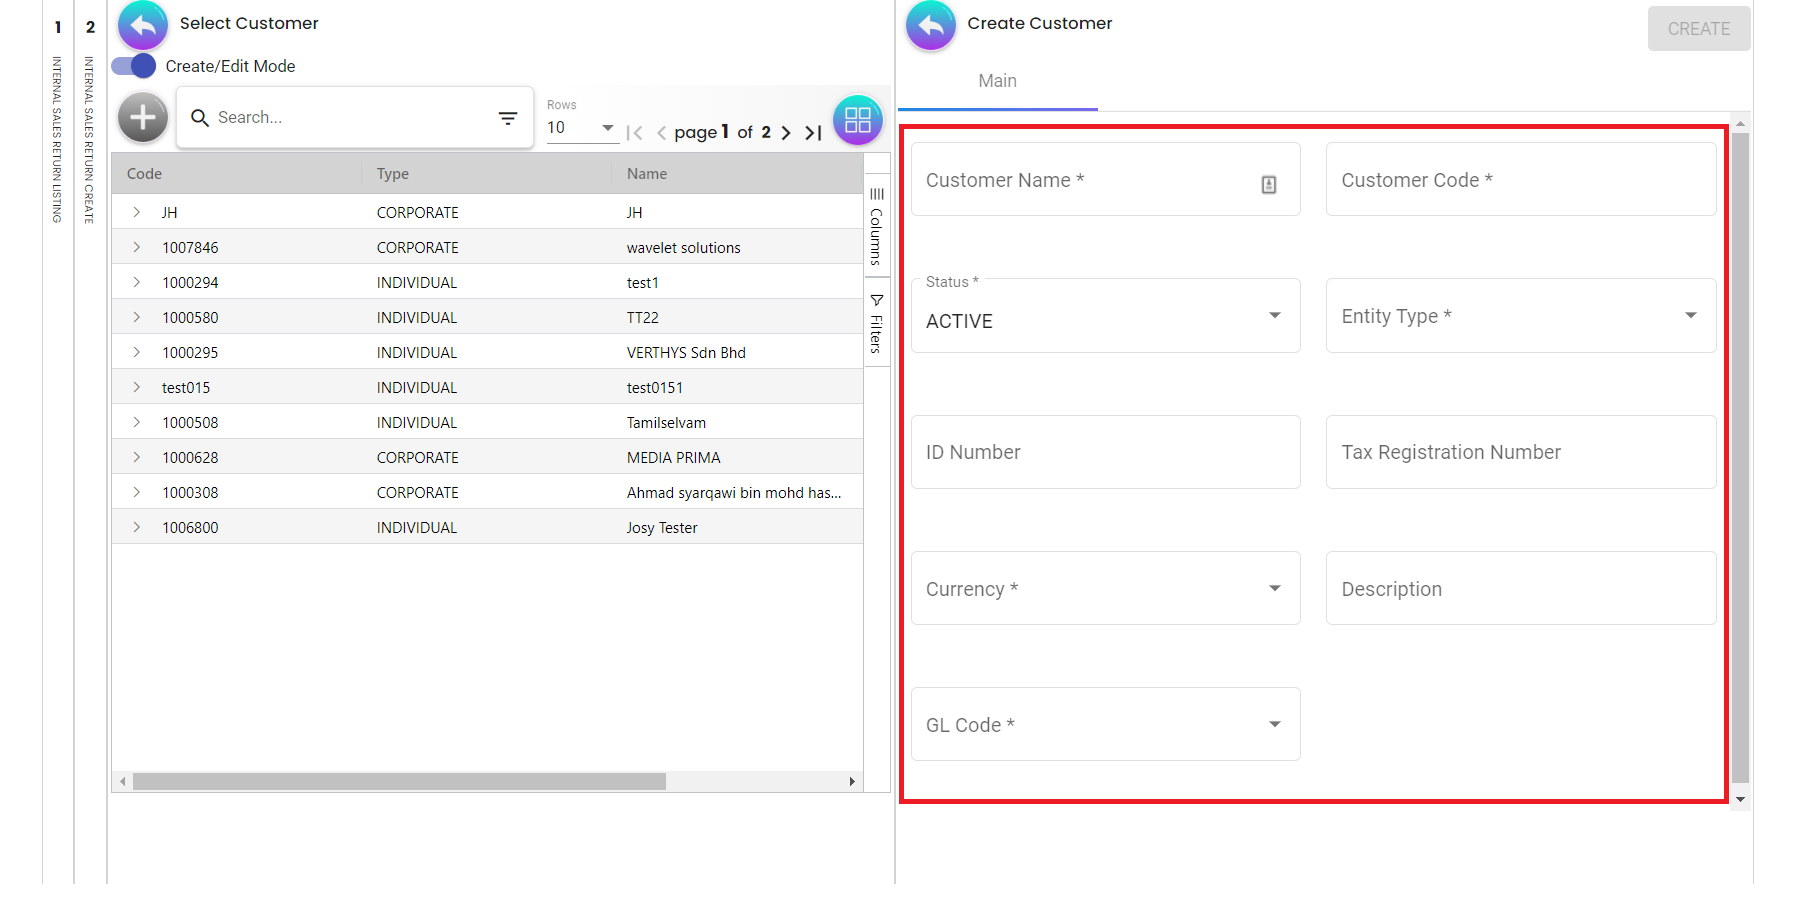
3.1.1 In the Main Details Tab of Create Customer
Please fill up the compulsory (*) information for creating the customer. After filling up the compulsory information, please click Create to add a new customer. There are 9 components which allow the user to make changes respectively:
-
Customer Name
-
Customer Code
-
Status
-
Entity Type
-
ID Number
-
Tax Registration Number
-
Currency
-
Description
-
GL Code
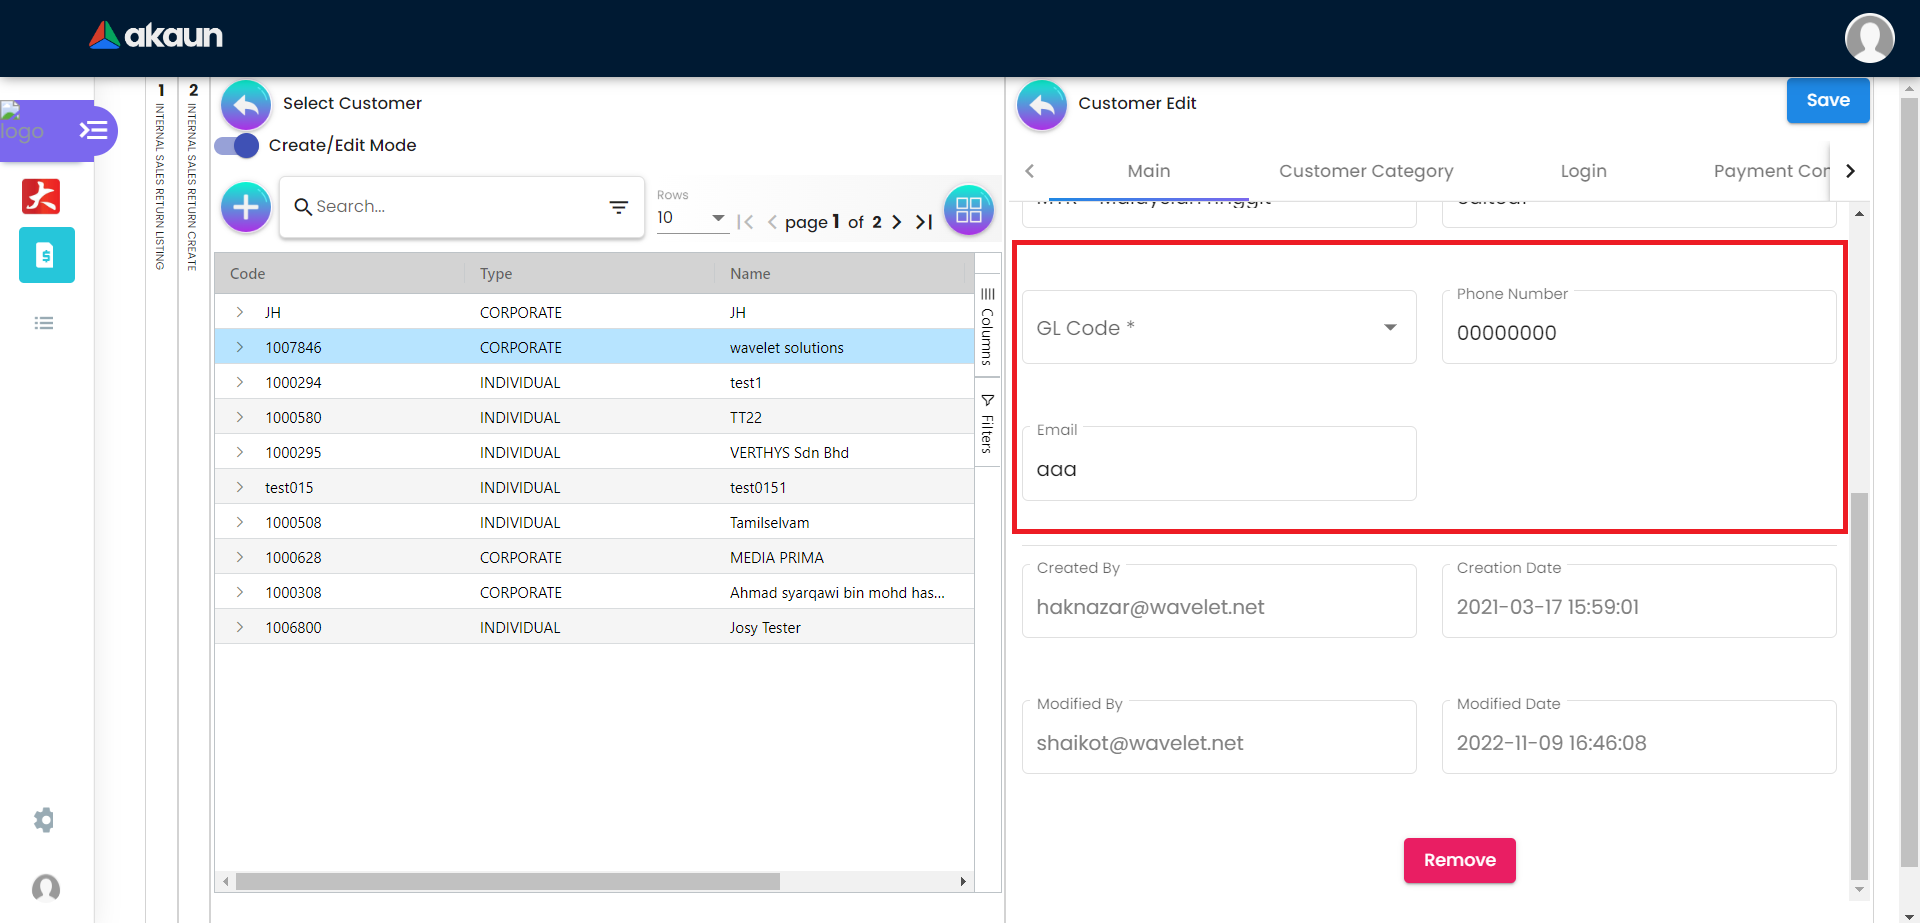
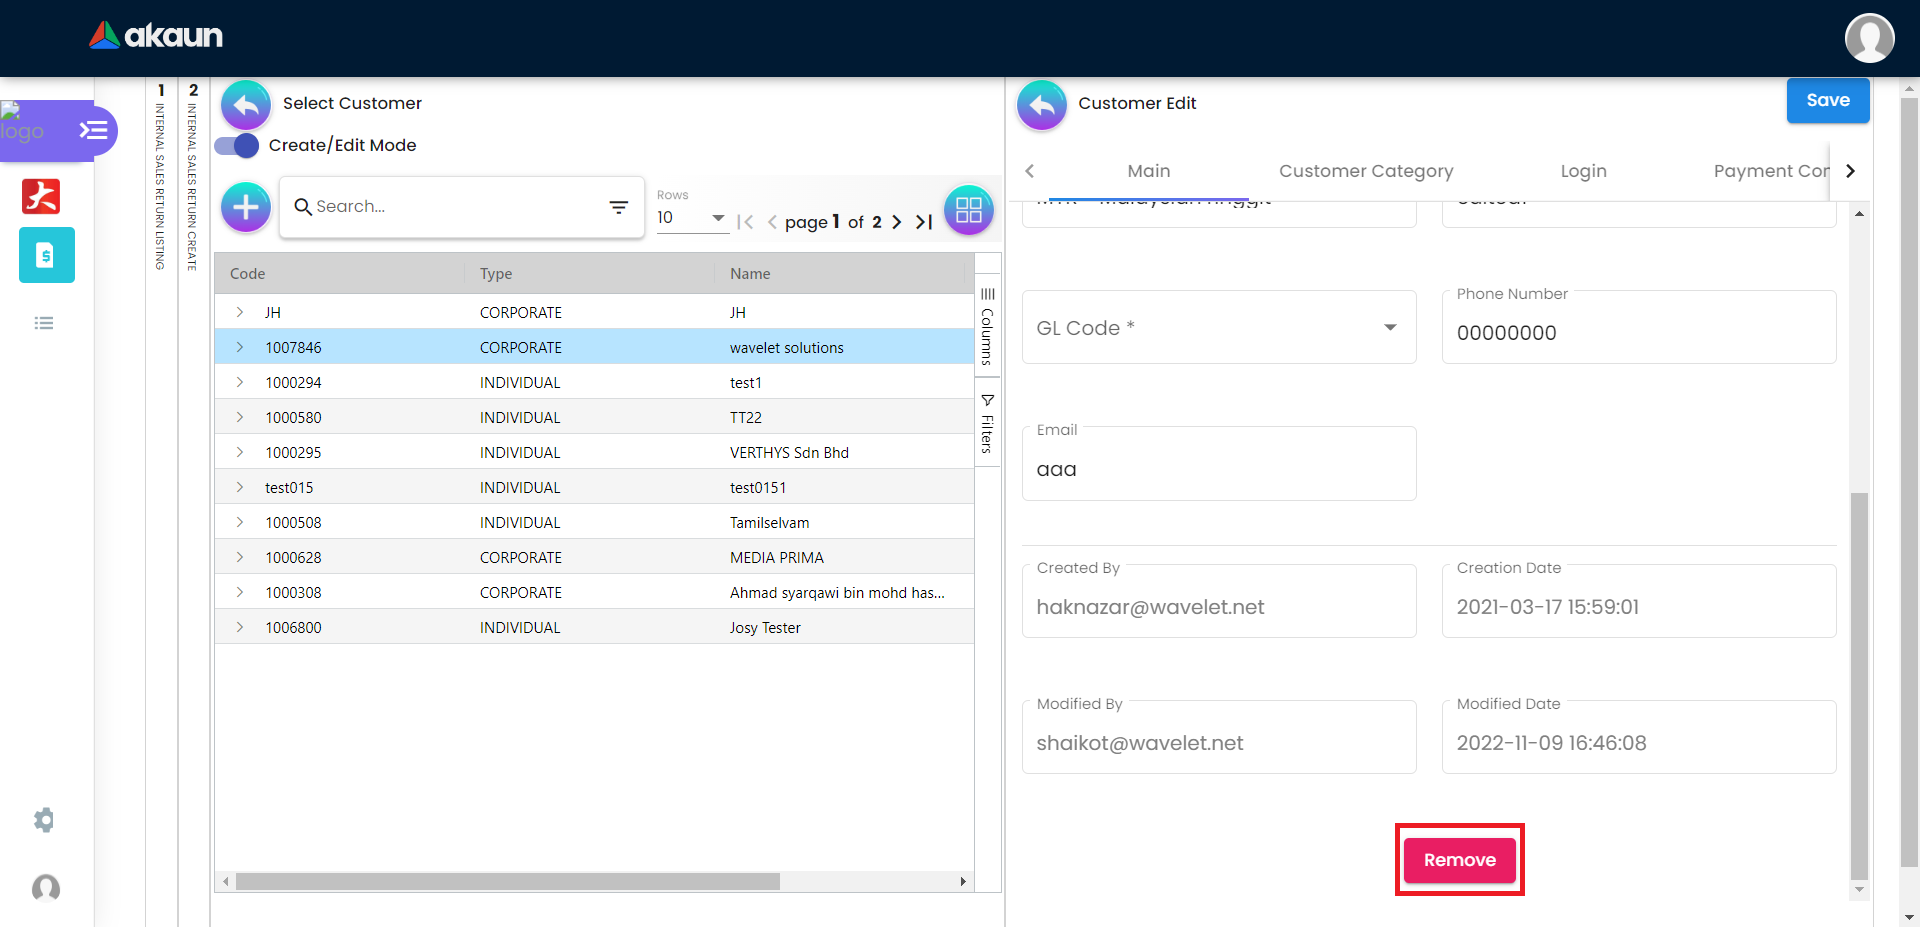
3.1.2 After adding the Customer, it will be listed in the customer page. Please click on the Customer to edit it.
Only the Customer Name, Status, Type, ID Number, Tax Registration Number, Currency, Description, GL Code, Phone Number and Email can be edited. After updating it, please click “Save”.
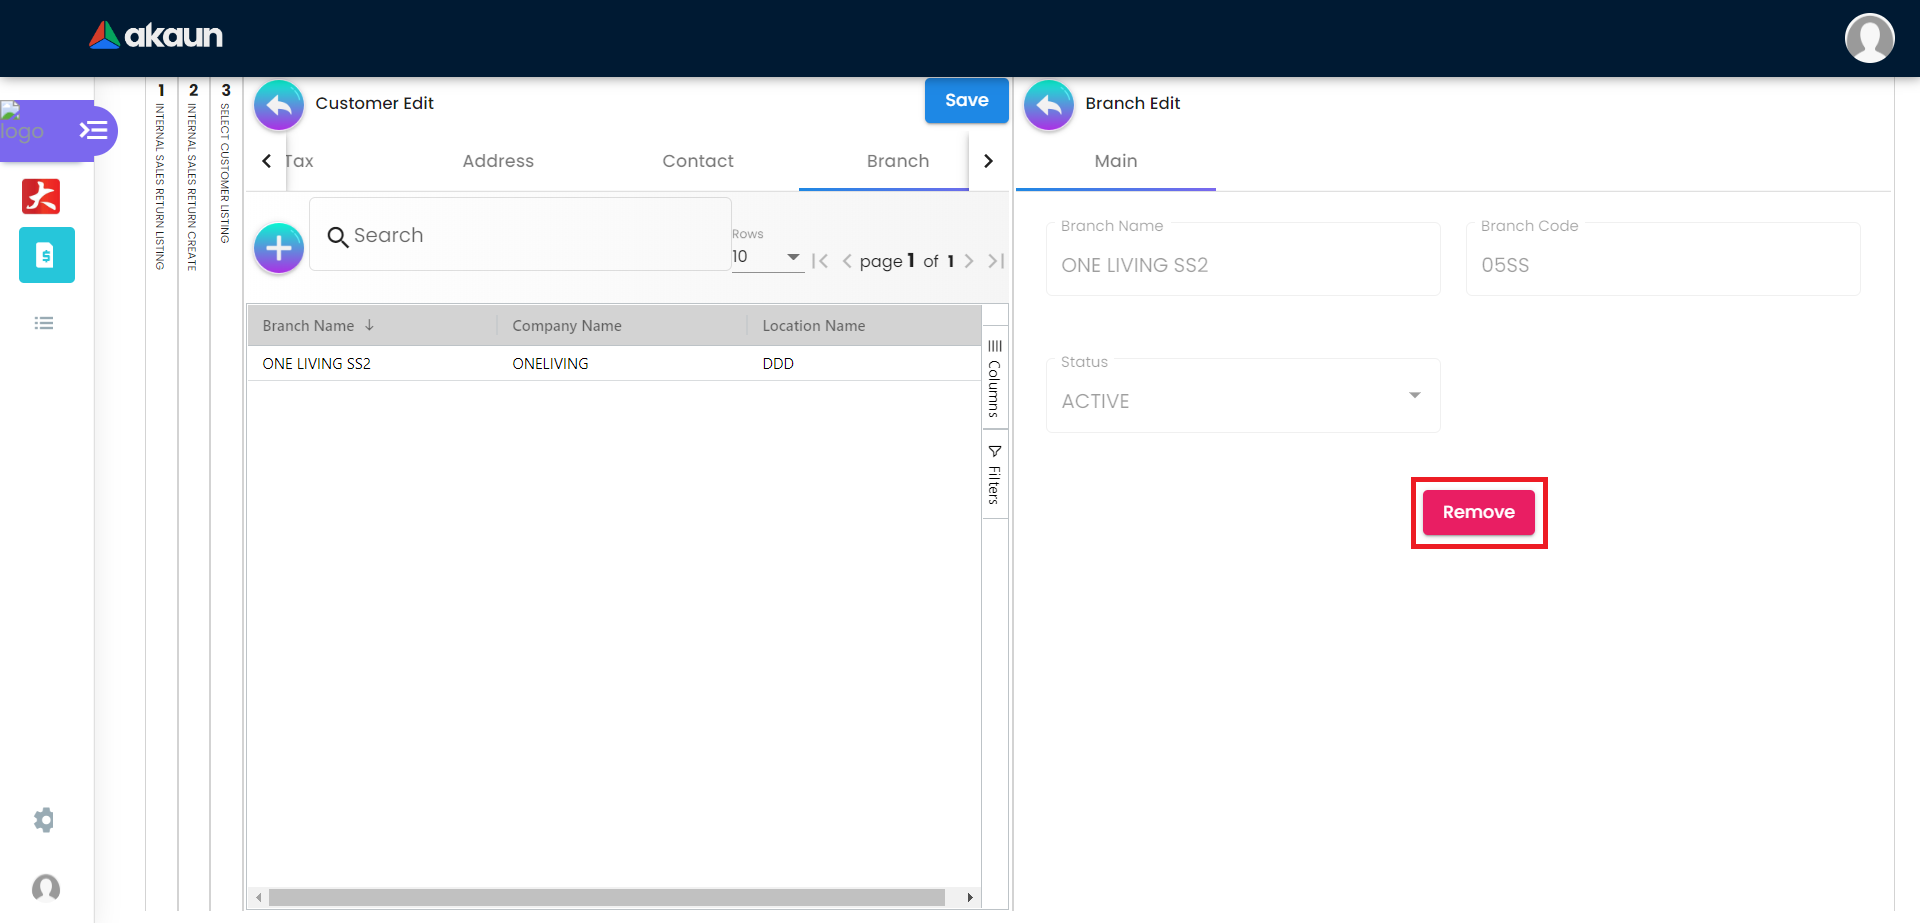
You can click on the “Remove” button to remove the Customer from the Customer Listing.

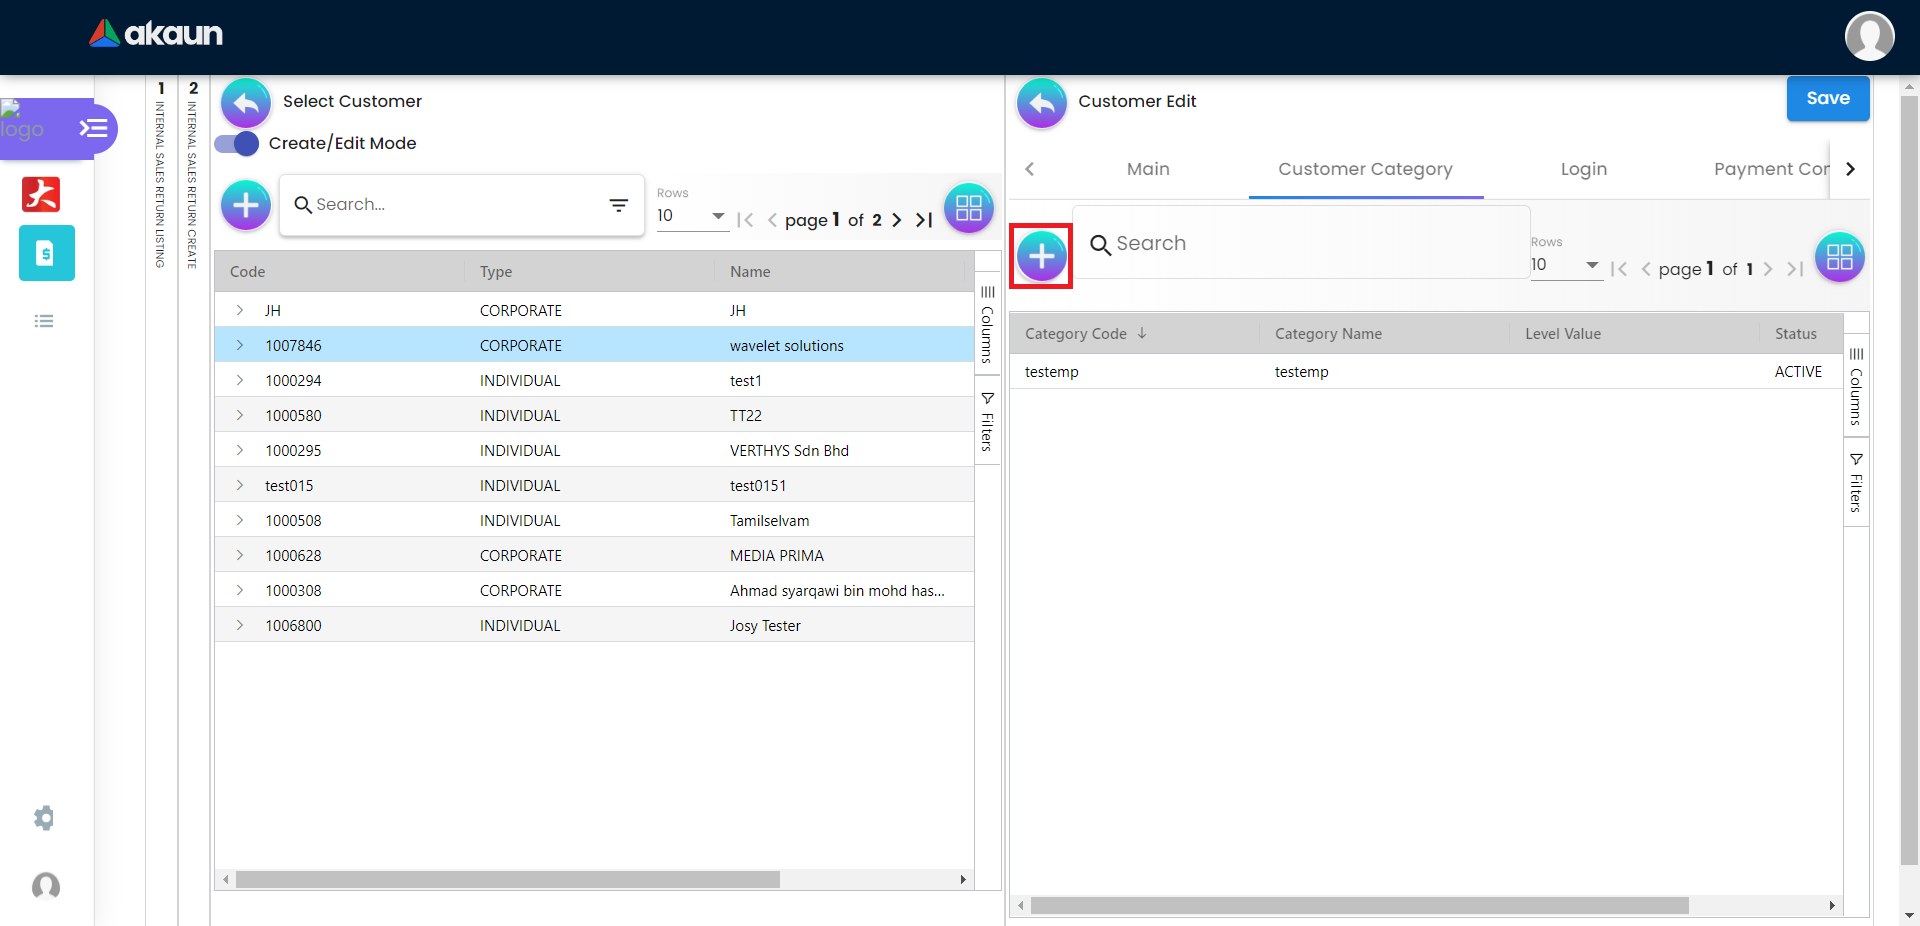
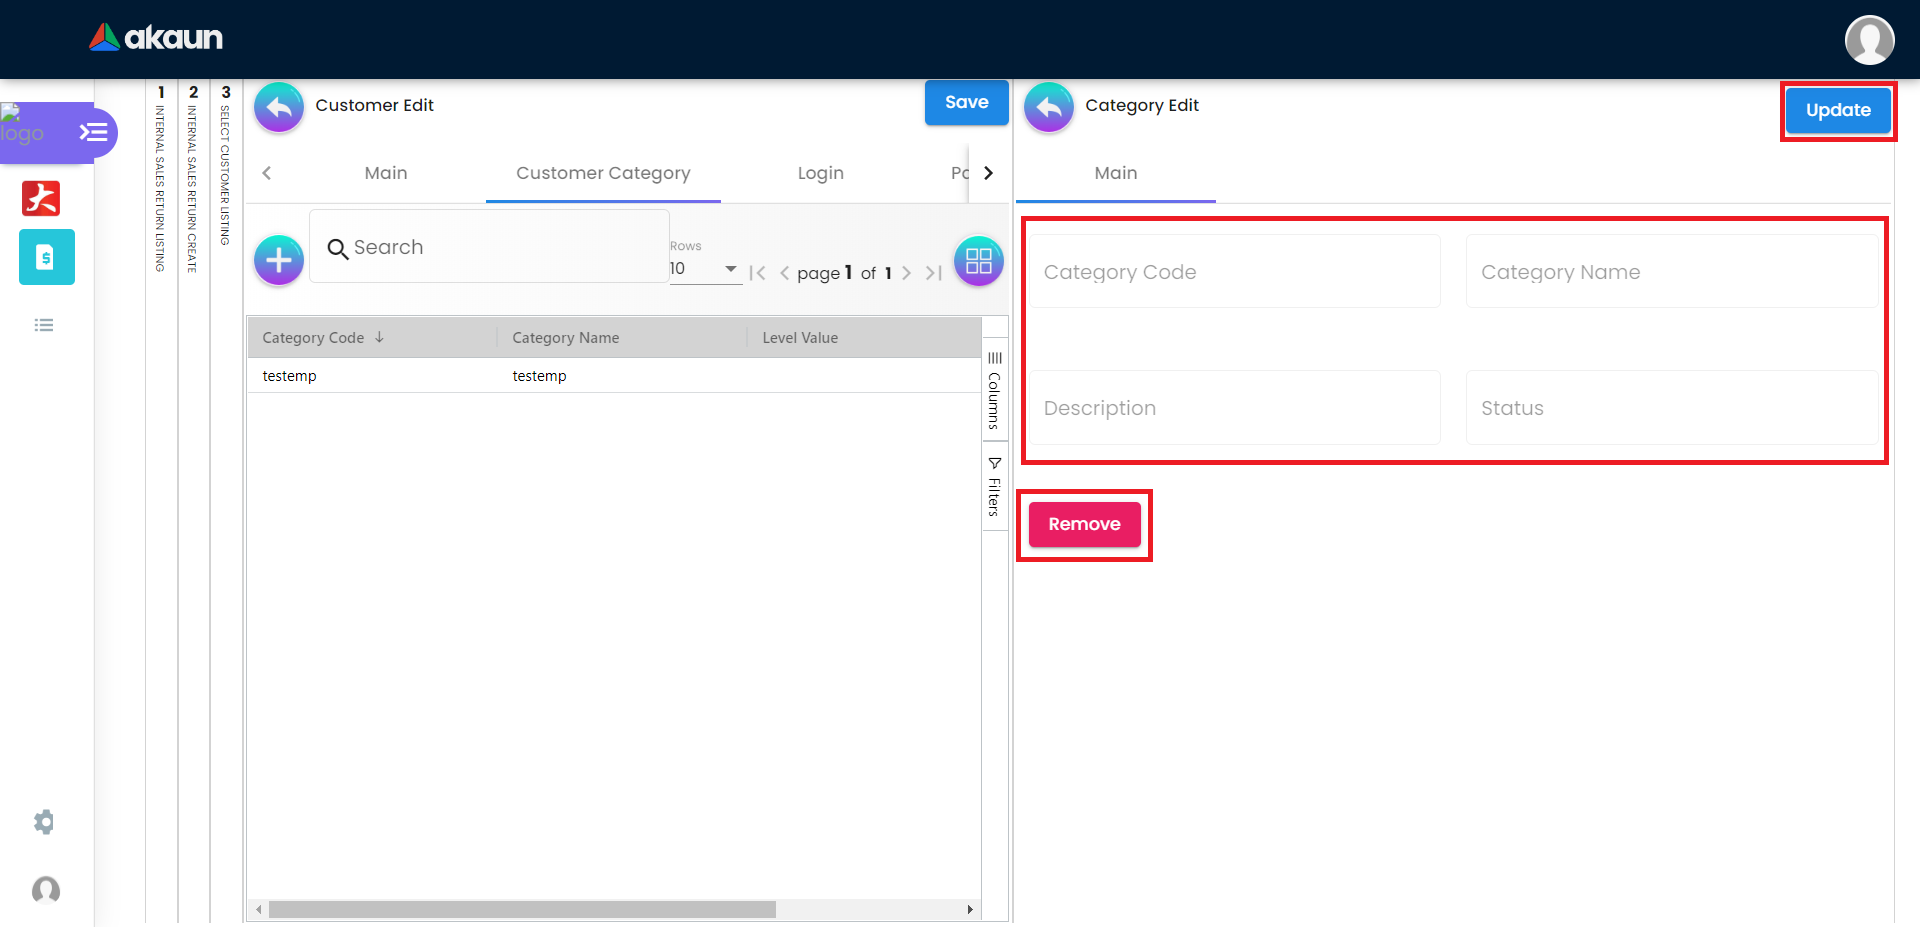
3.2 Category Tab

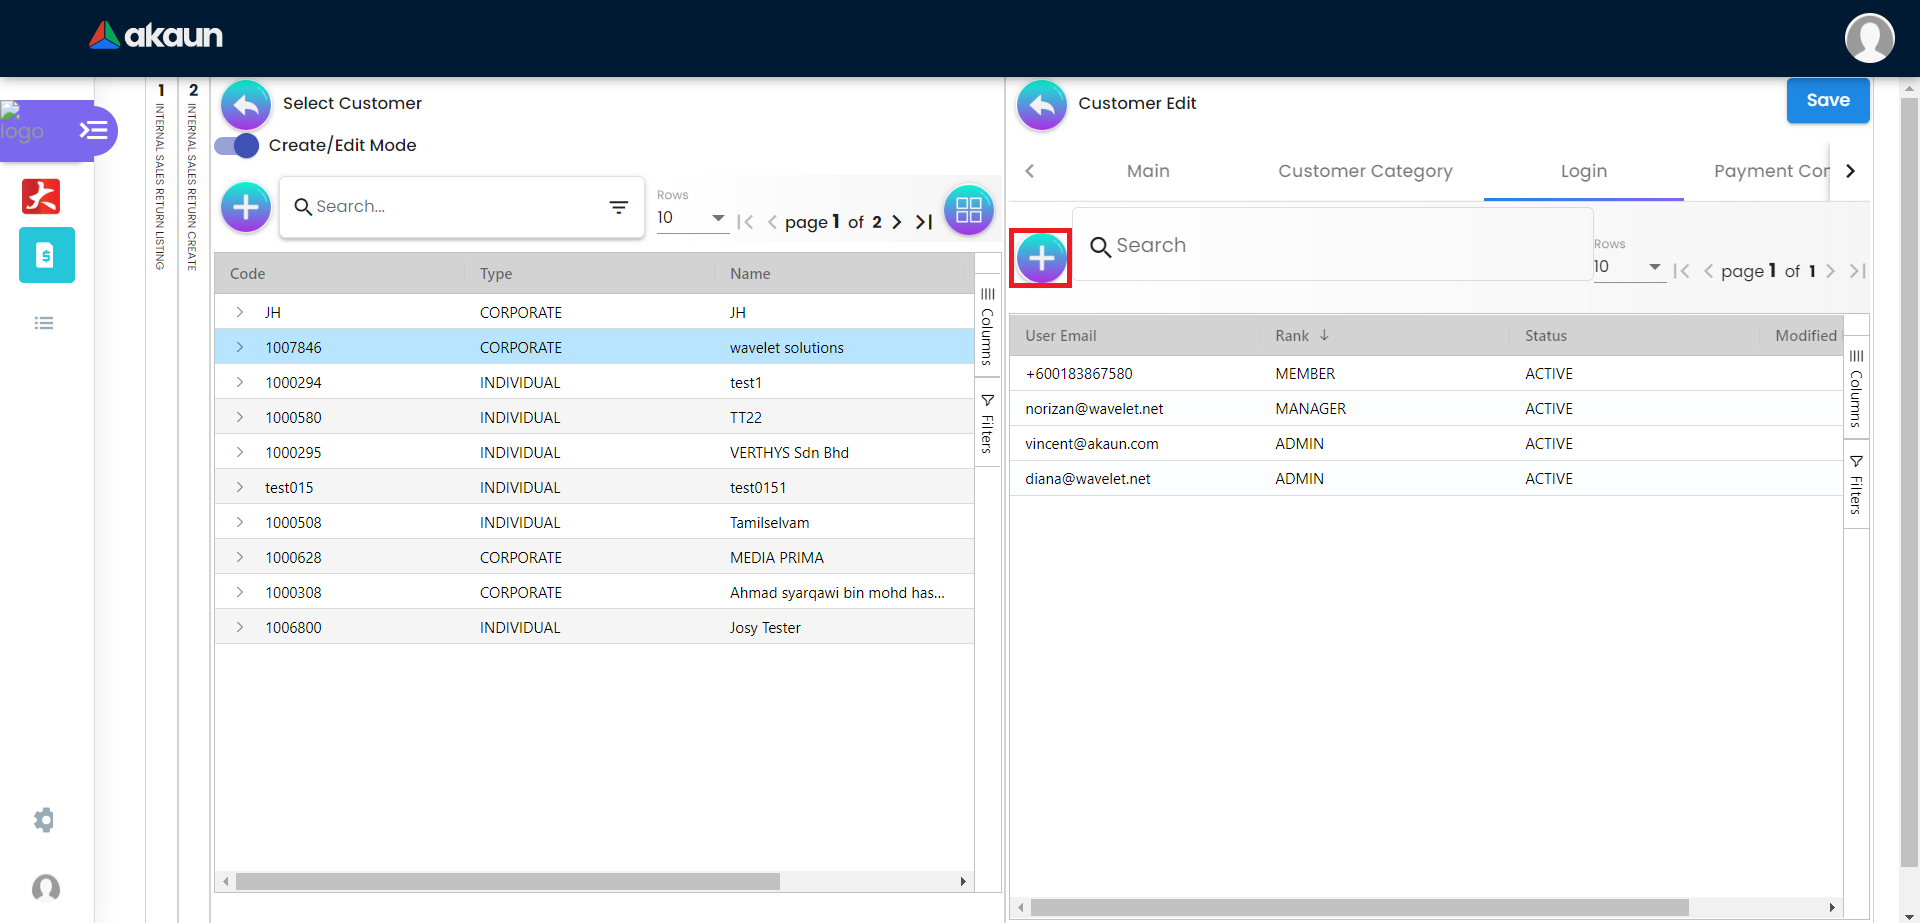
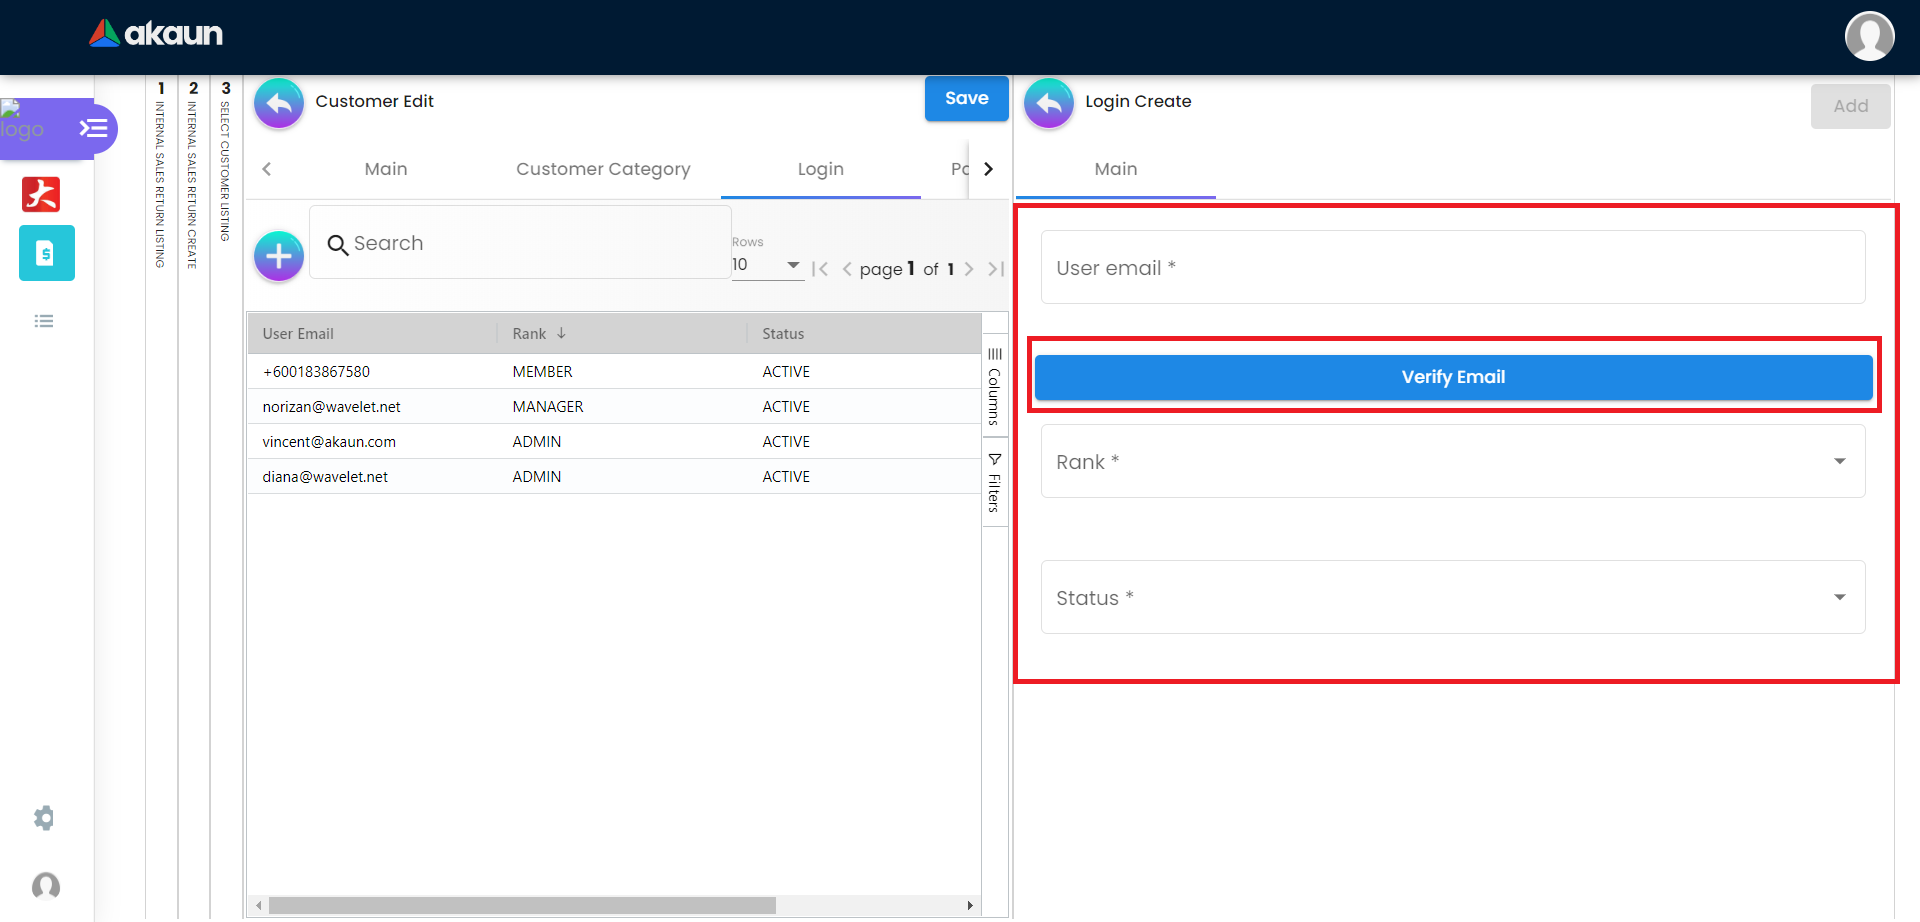
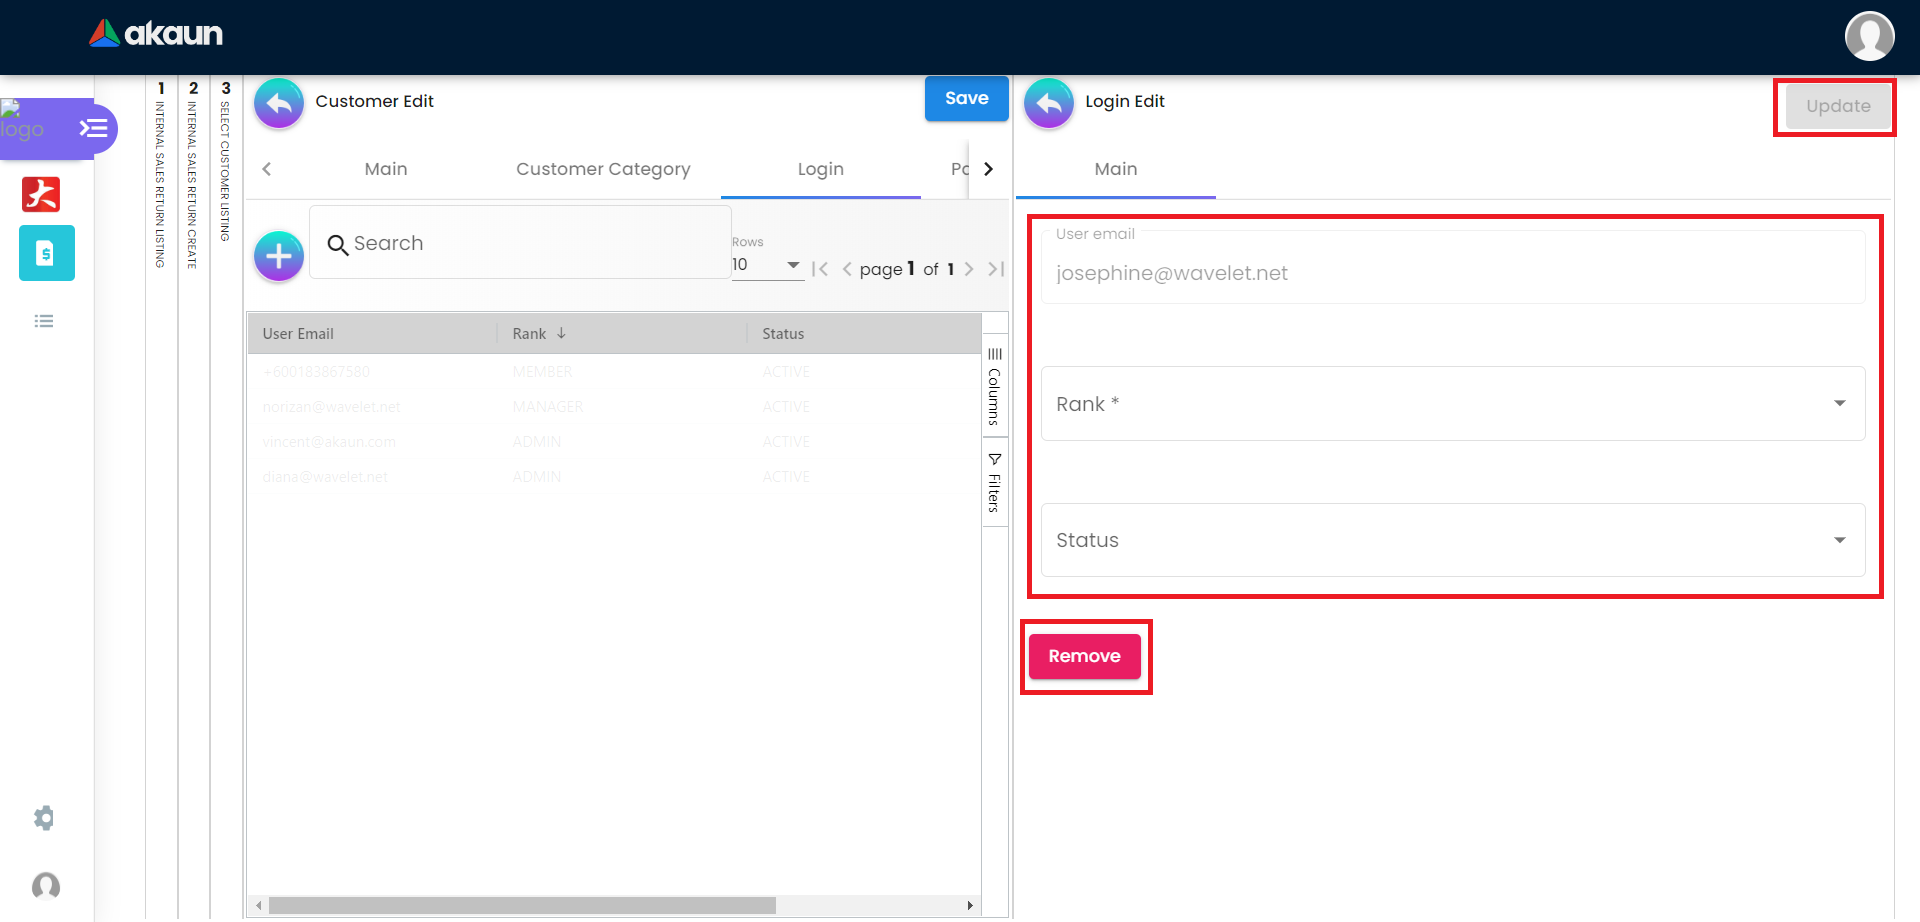
3.3 Login Tab
Please click the ‘+’ button to add login.
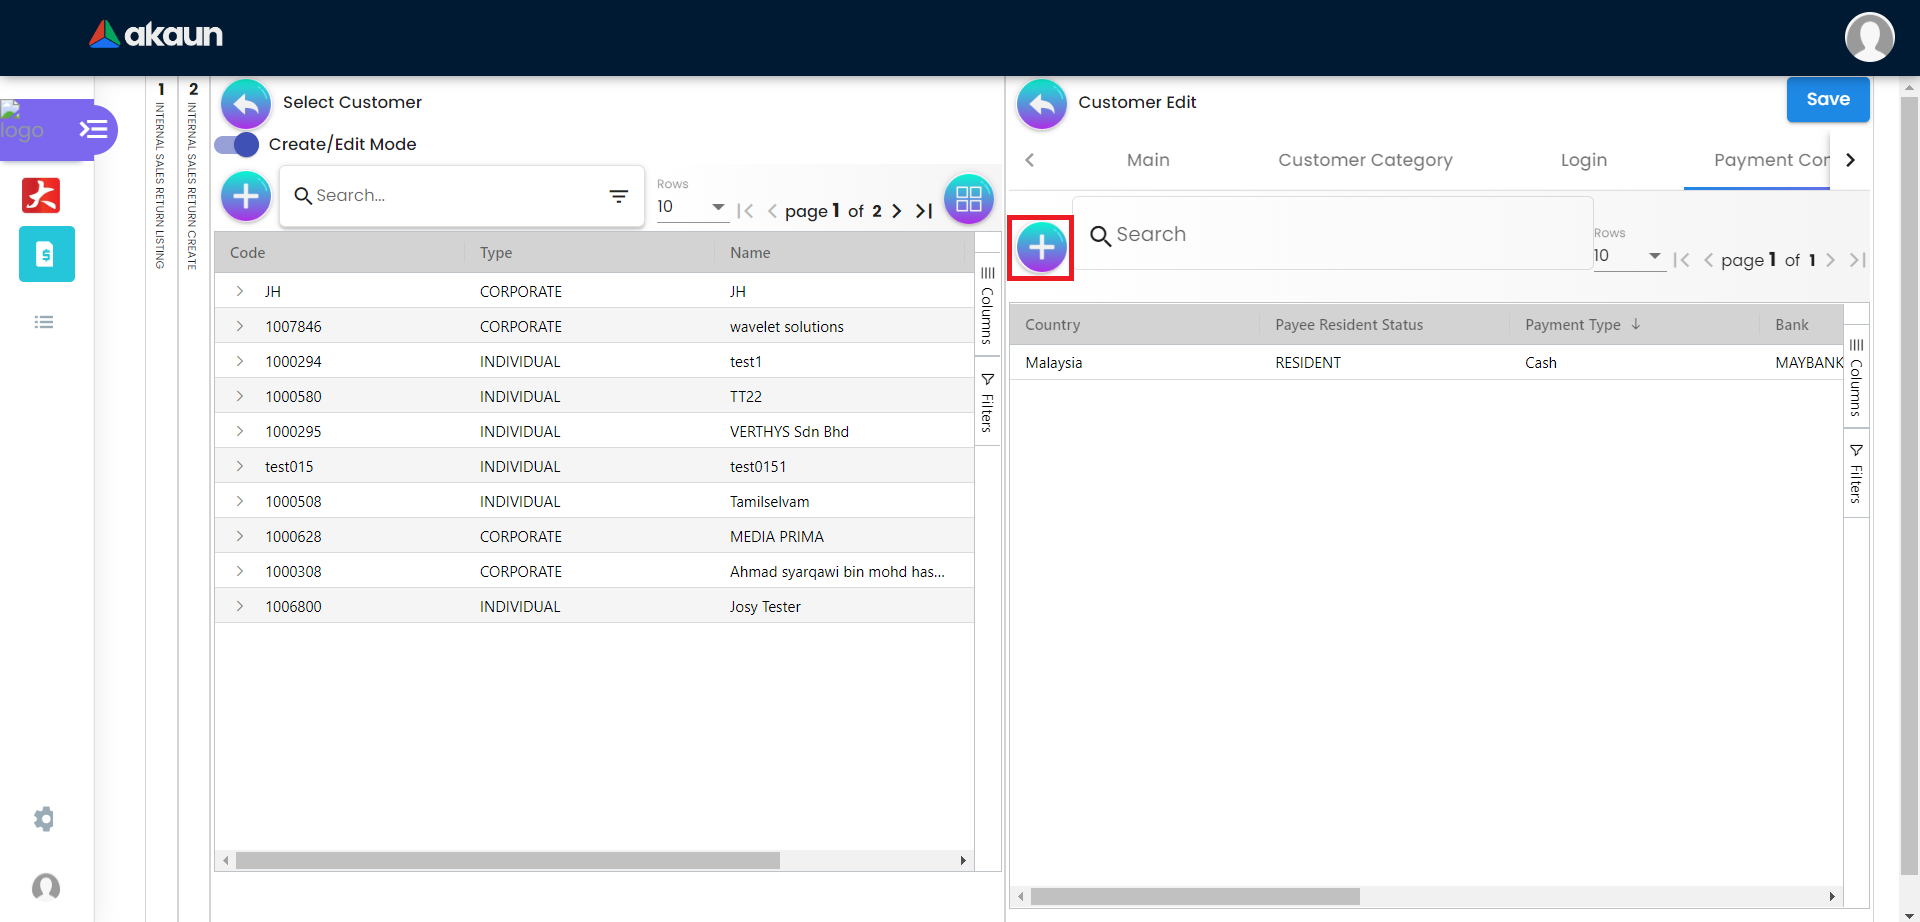
3.4 Payment Config Tab
Please click the ‘+’ button to add payment config.
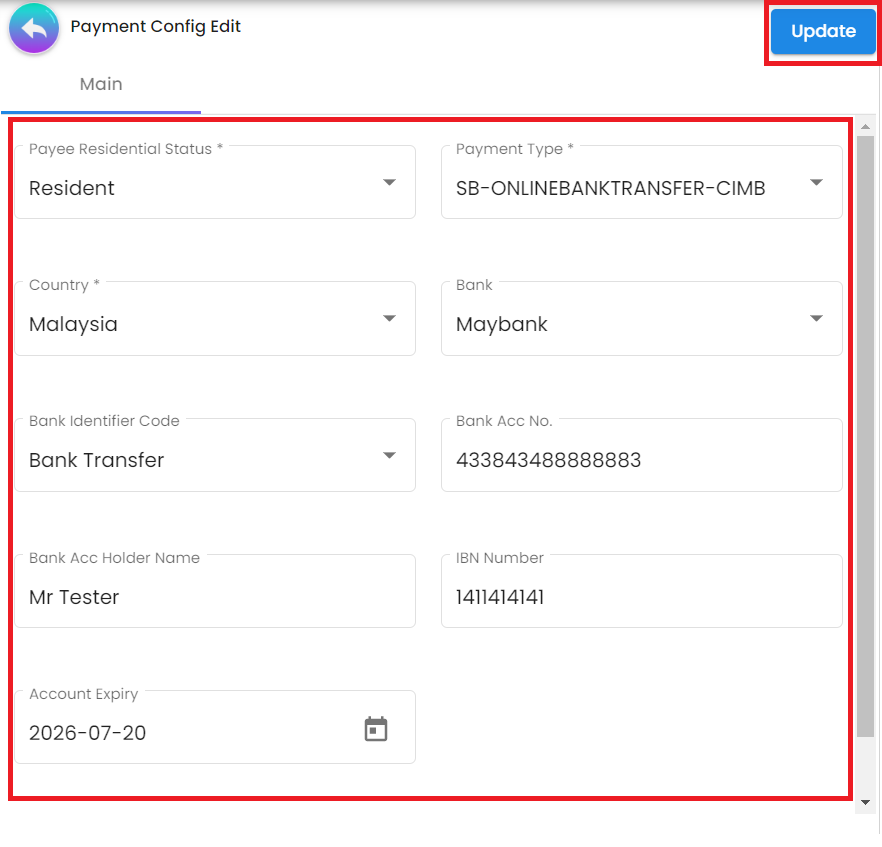
3.4.1 Create new Payment Config
Please fill up the compulsory (*) information for creating the payment config. After filling up the compulsory information, please click Add to add a new payment config. Compulsory Information:
-
Payee Residential Status-Only have Resident or Non-Resident
-
Payment Type-Can Add Payment Type in Cashbook Applet
-
Country
-
Other fields are optional

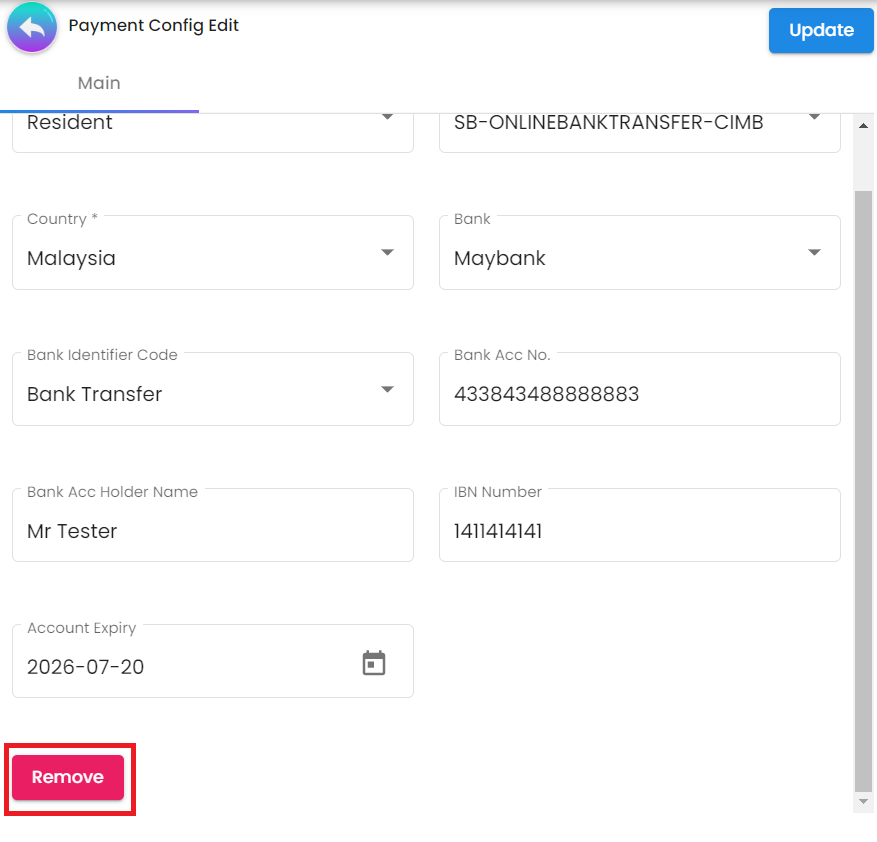
3.4.2 Edit Payment Config
Edit on every field of the Payment Config that was selected from the list of Payment Configs. Compulsory field (Cannot be empty):
-
Payee Residential Status
-
Payment Type
-
Country
After making the changes, please click on the ‘Update’.
Click on the Remove button to remove the payment config.
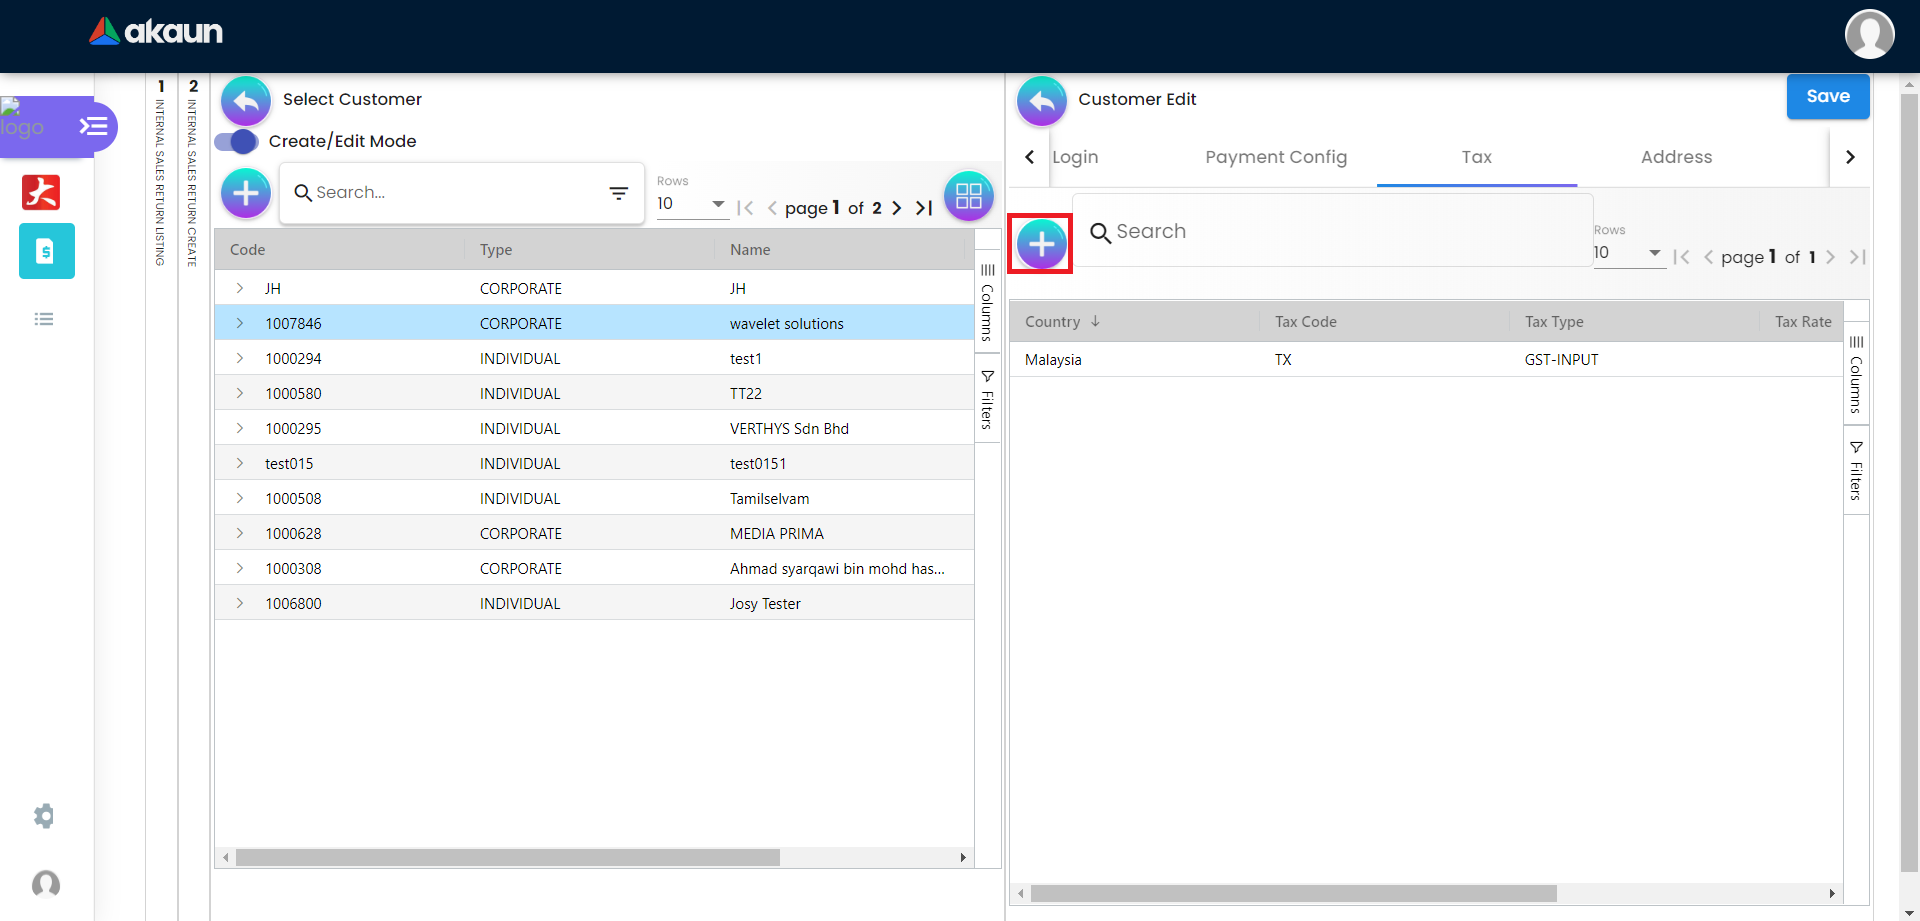
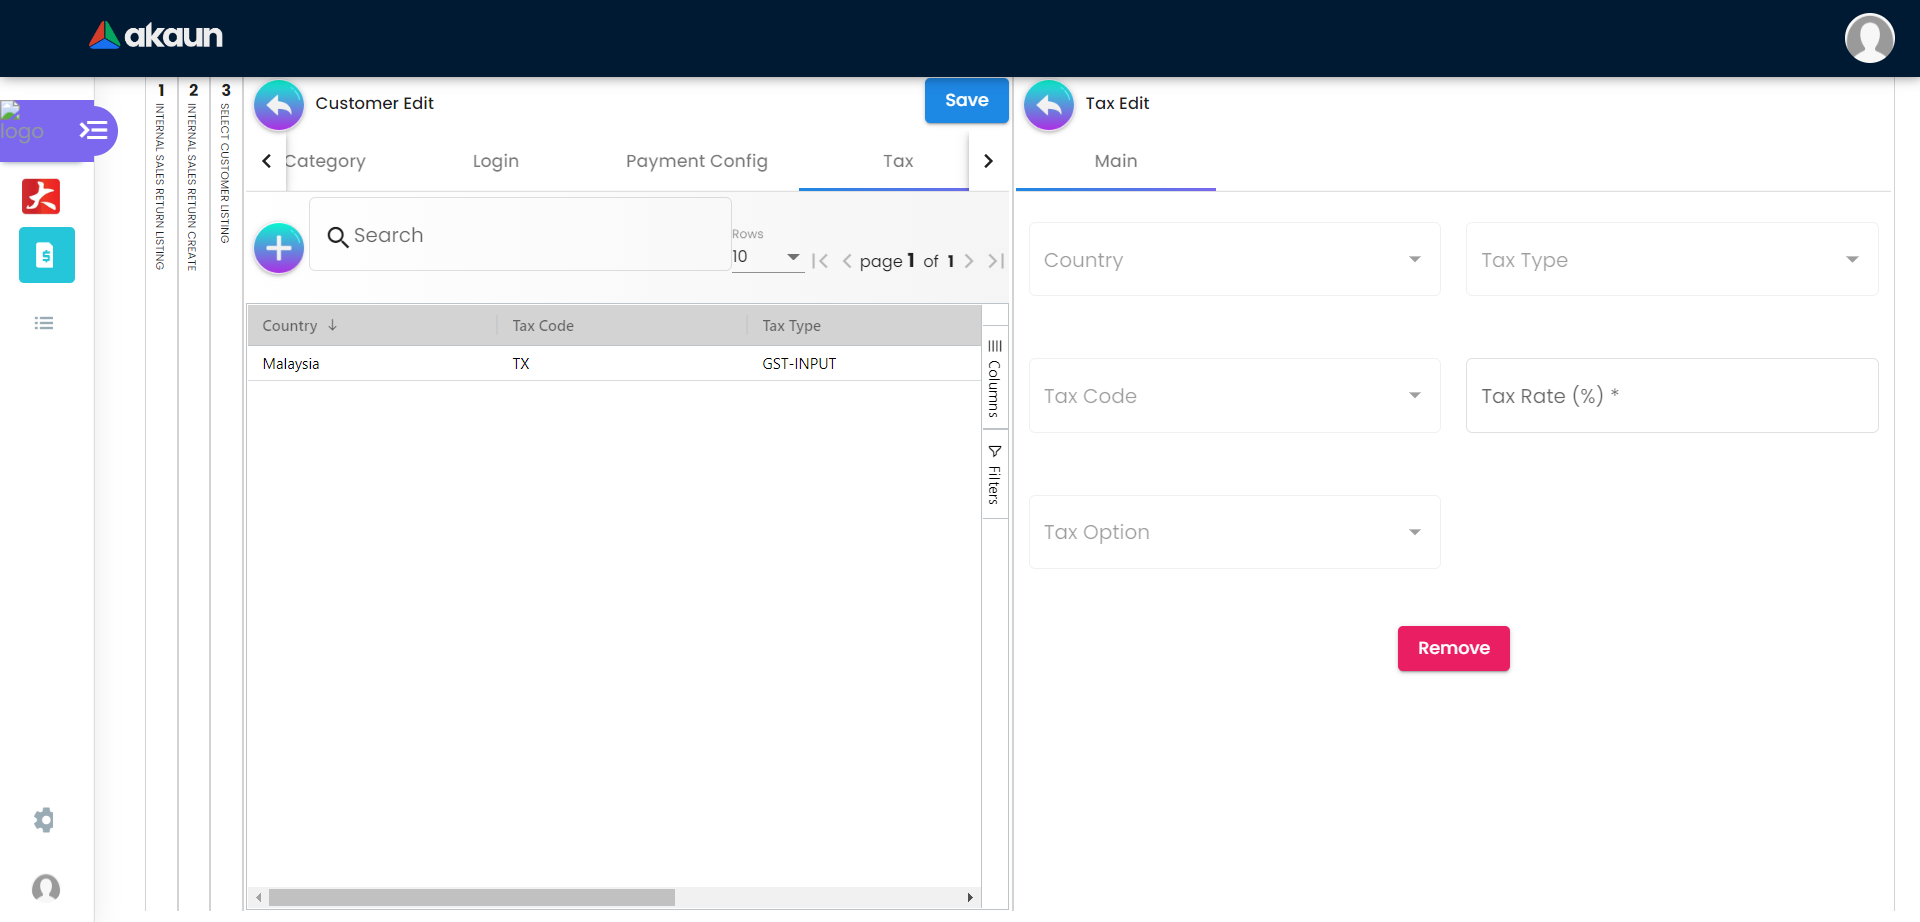
3.5 Tax Tab
Please click the ‘+’ button to add tax.
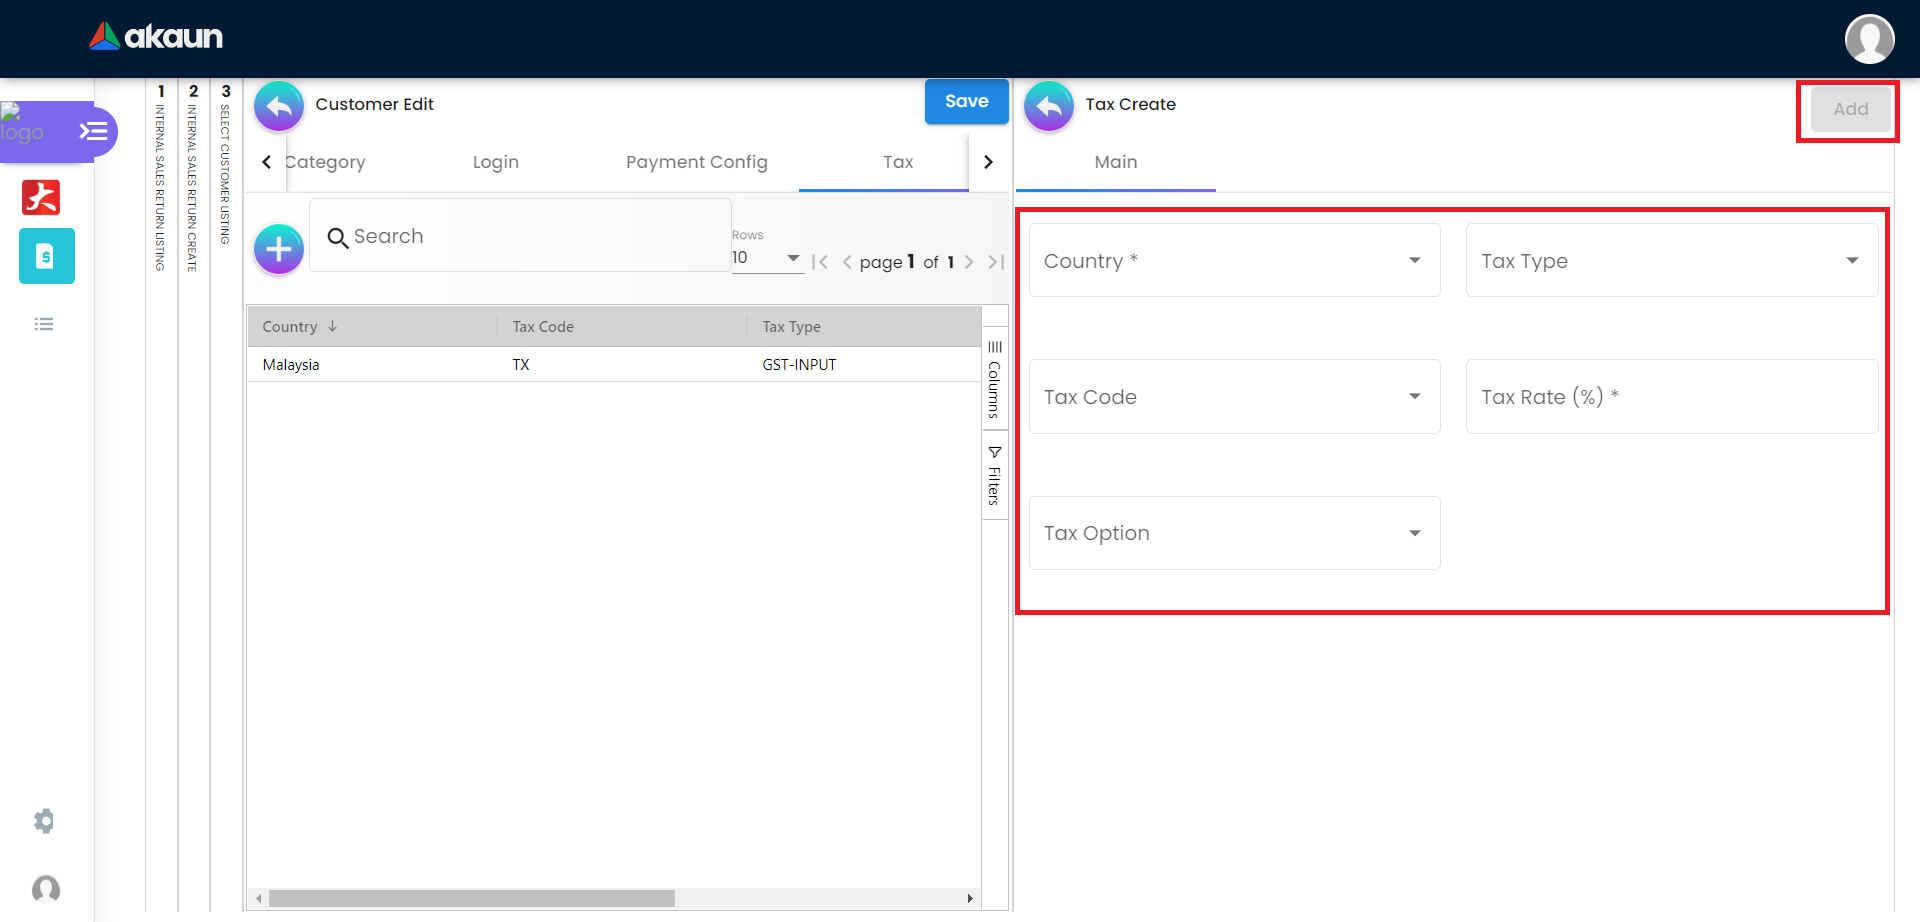
3.5.1 Create new Tax
Please fill up all the information for creating the tax. After filling up all the information, please click Add to add a new tax. Compulsory Information:
-
Country
-
Tax Type-Show based on the Country selected
-
Tax Code-Show based on the Tax Type selected
-
Tax Rate-Auto show based on the Tax Code selected
-
Tax Option-Have Include Tax and Exclude Tax Options
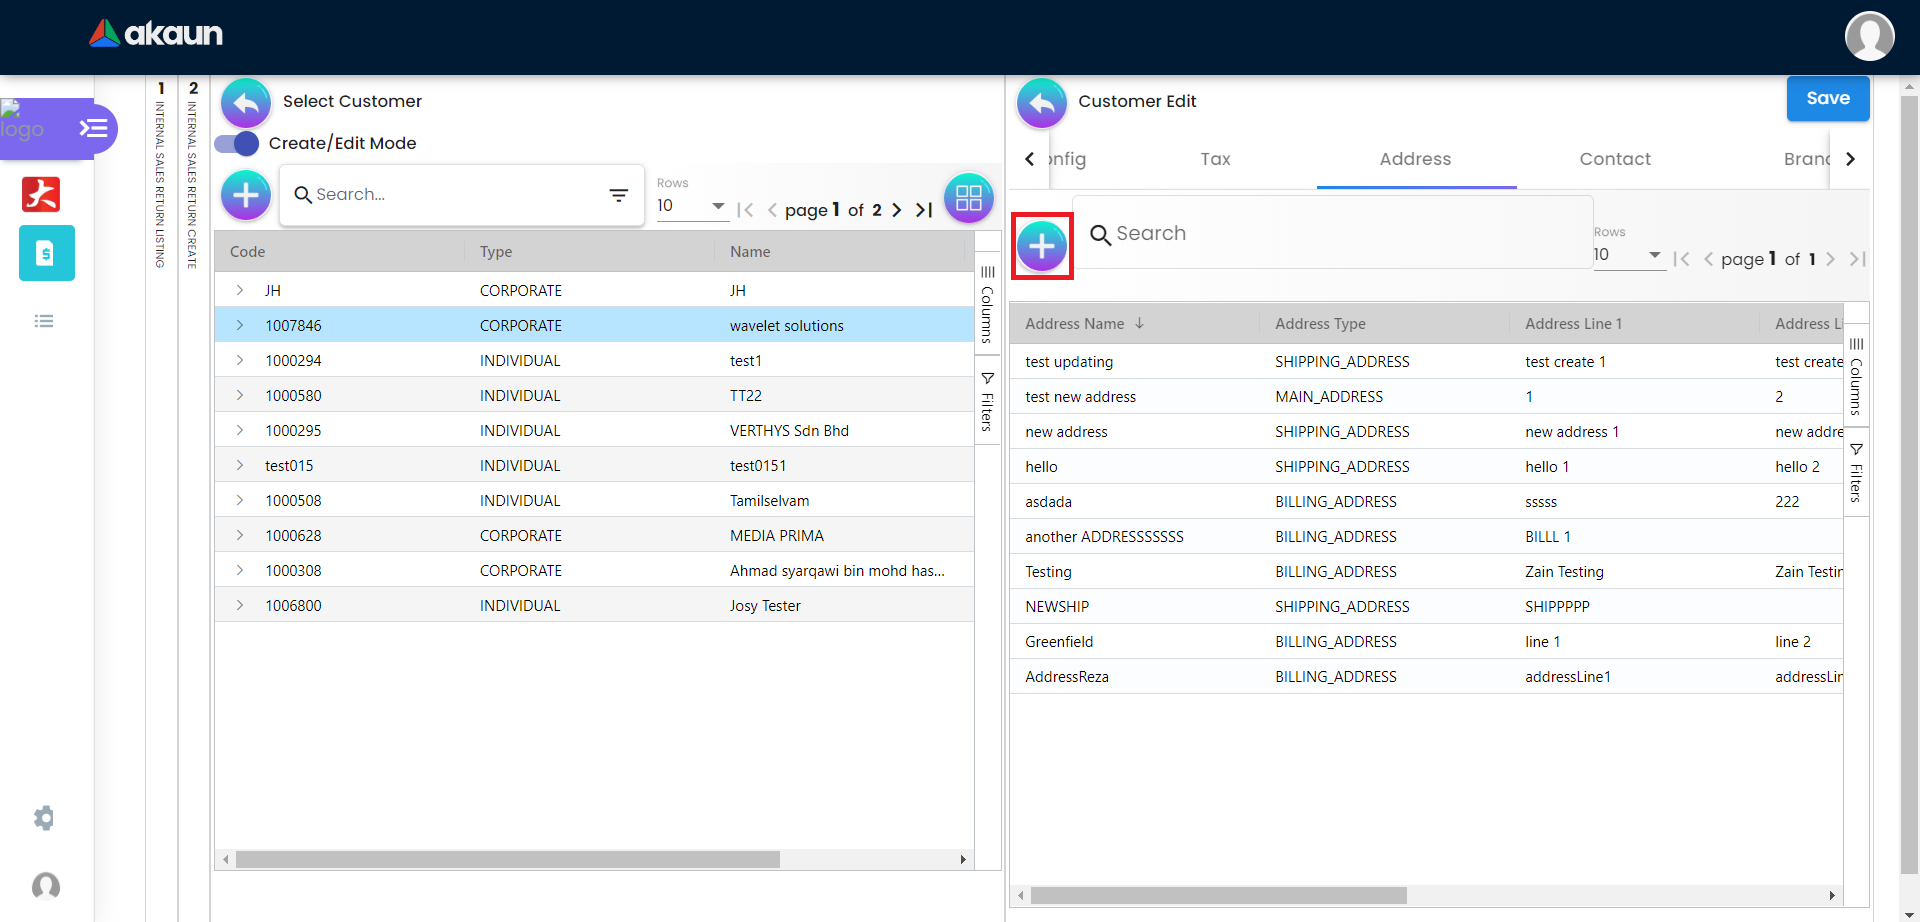
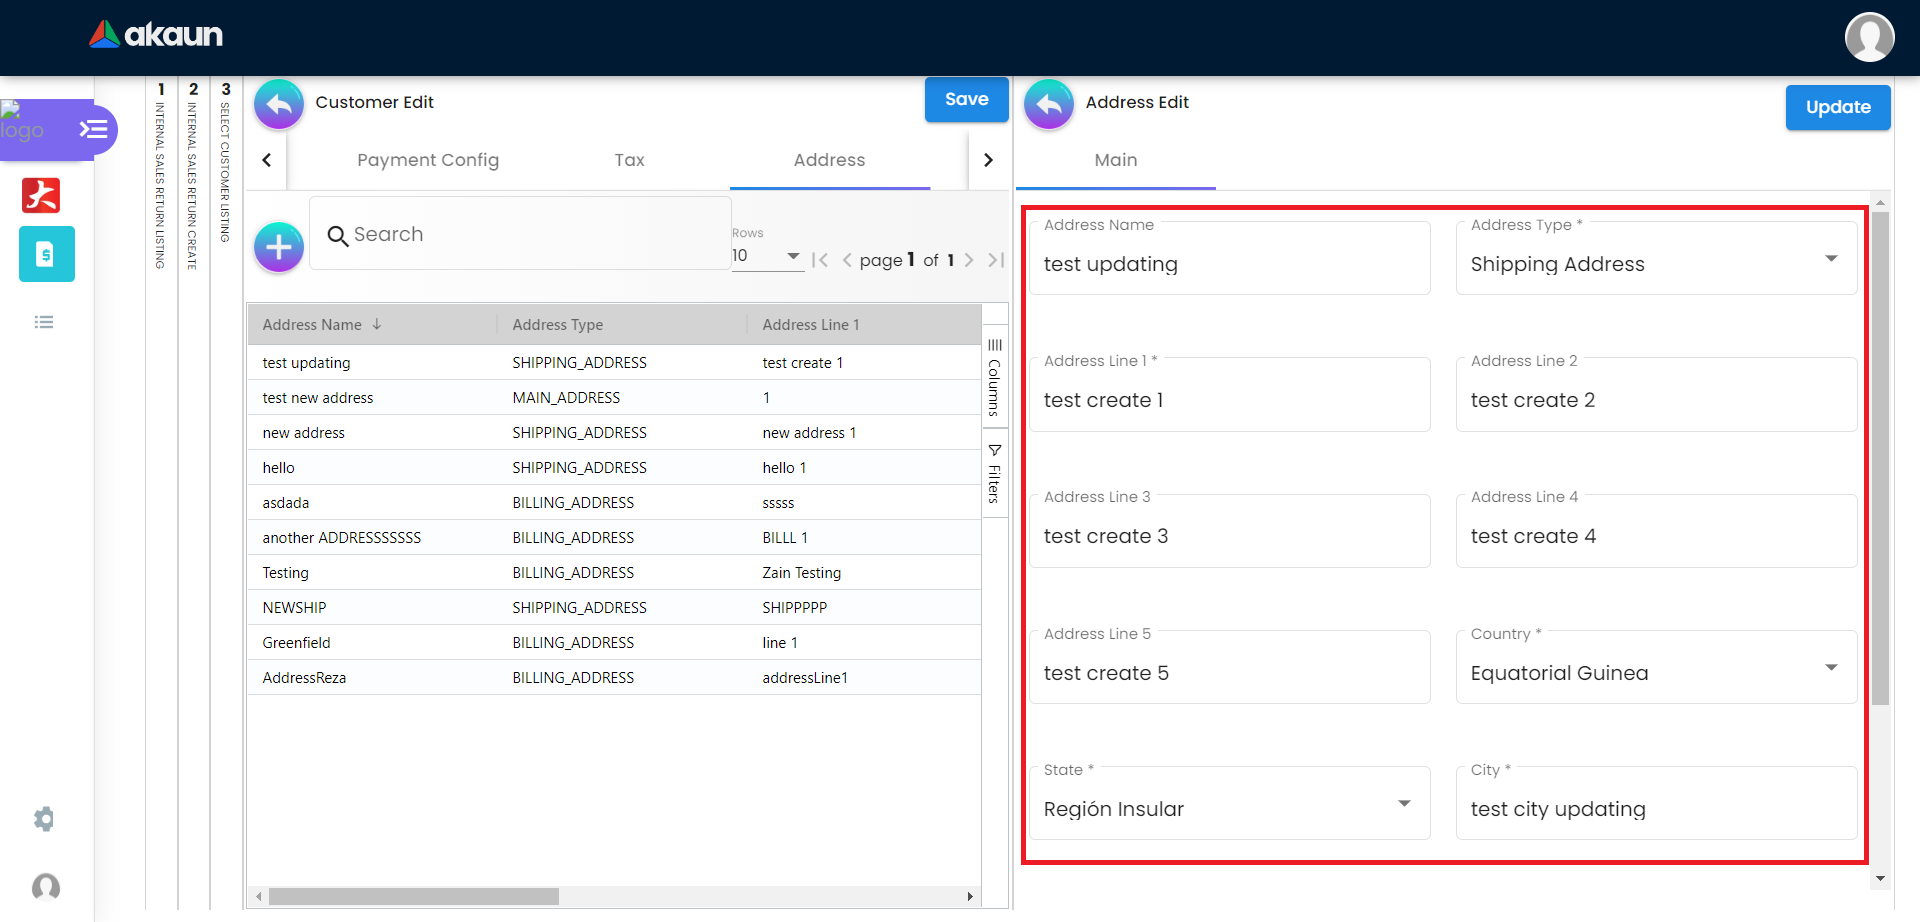
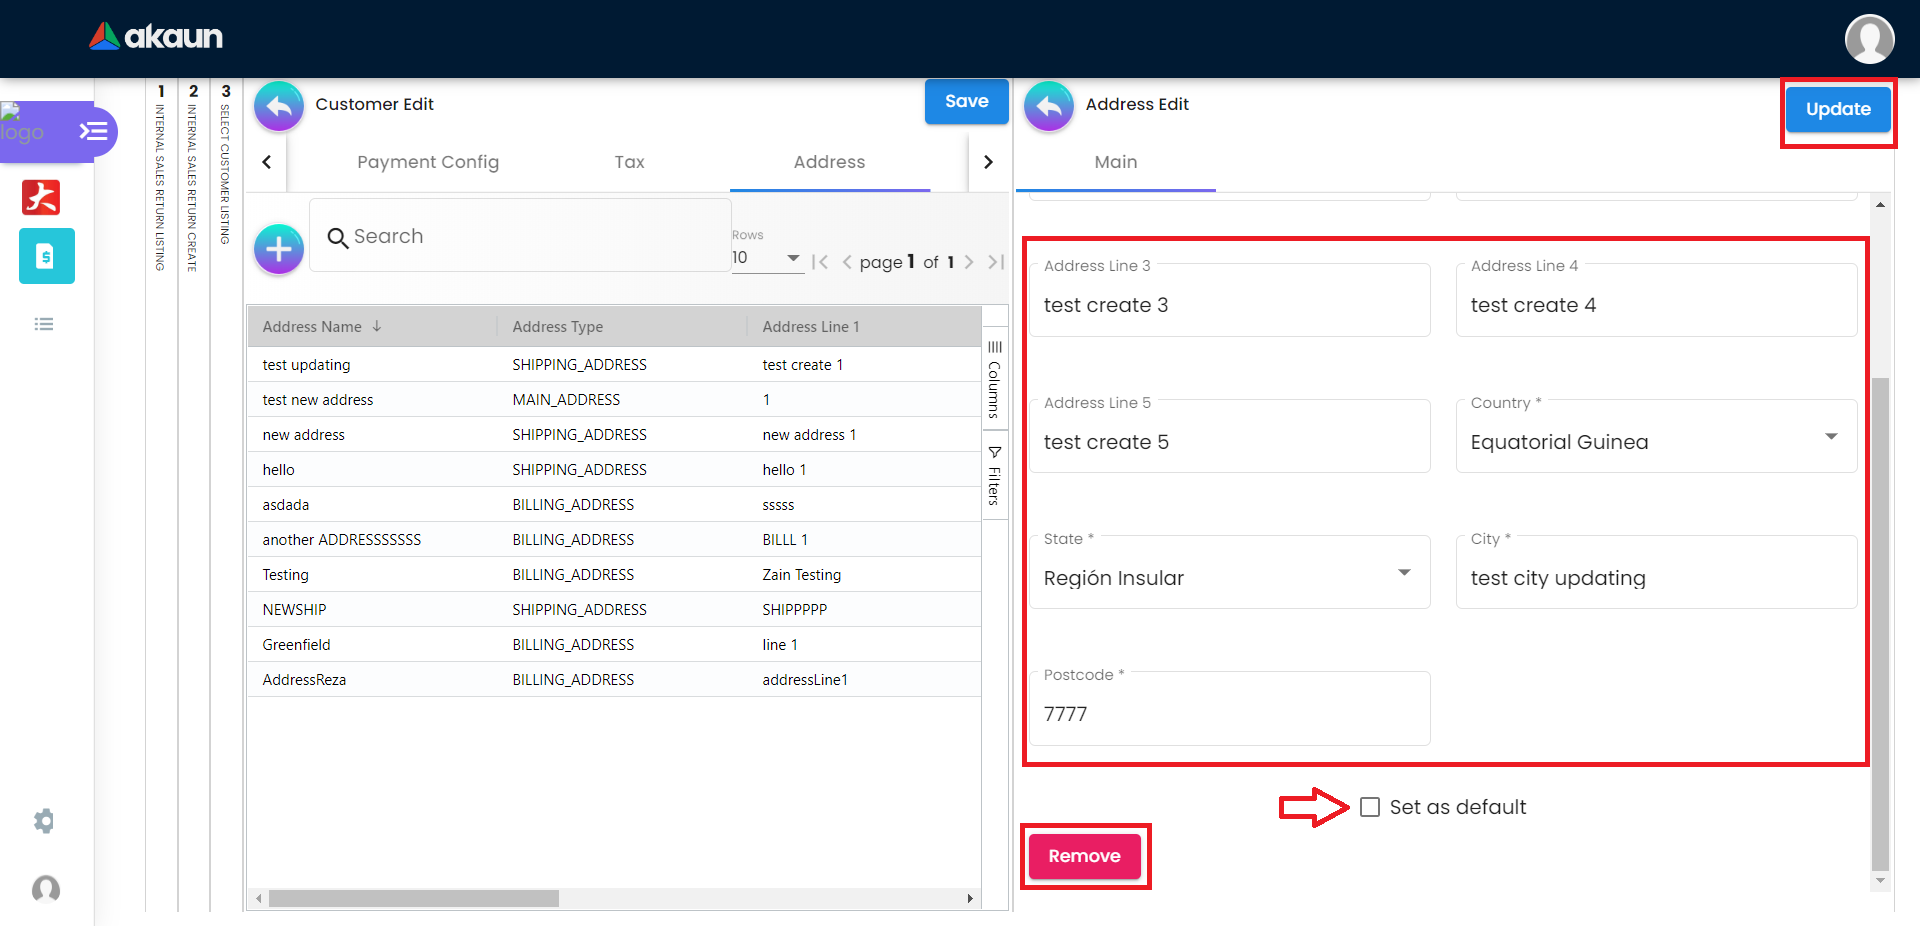
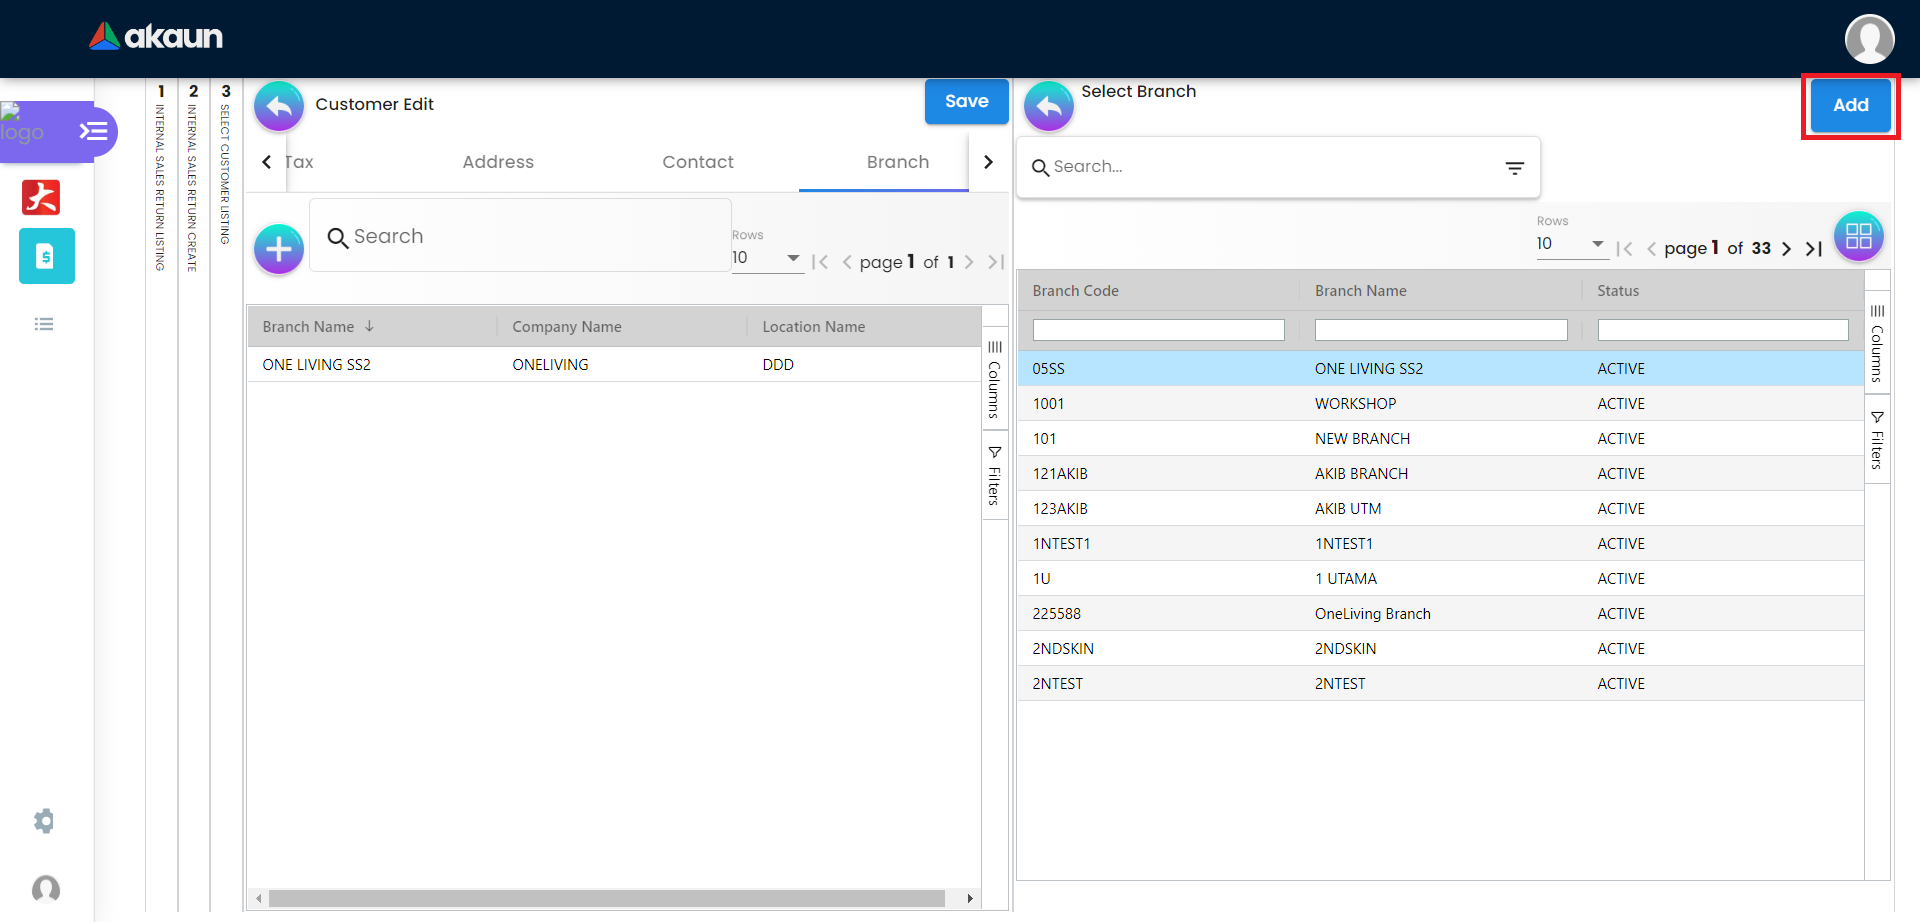
3.6 Address Tab
Please click the ‘+’ button to add Address.
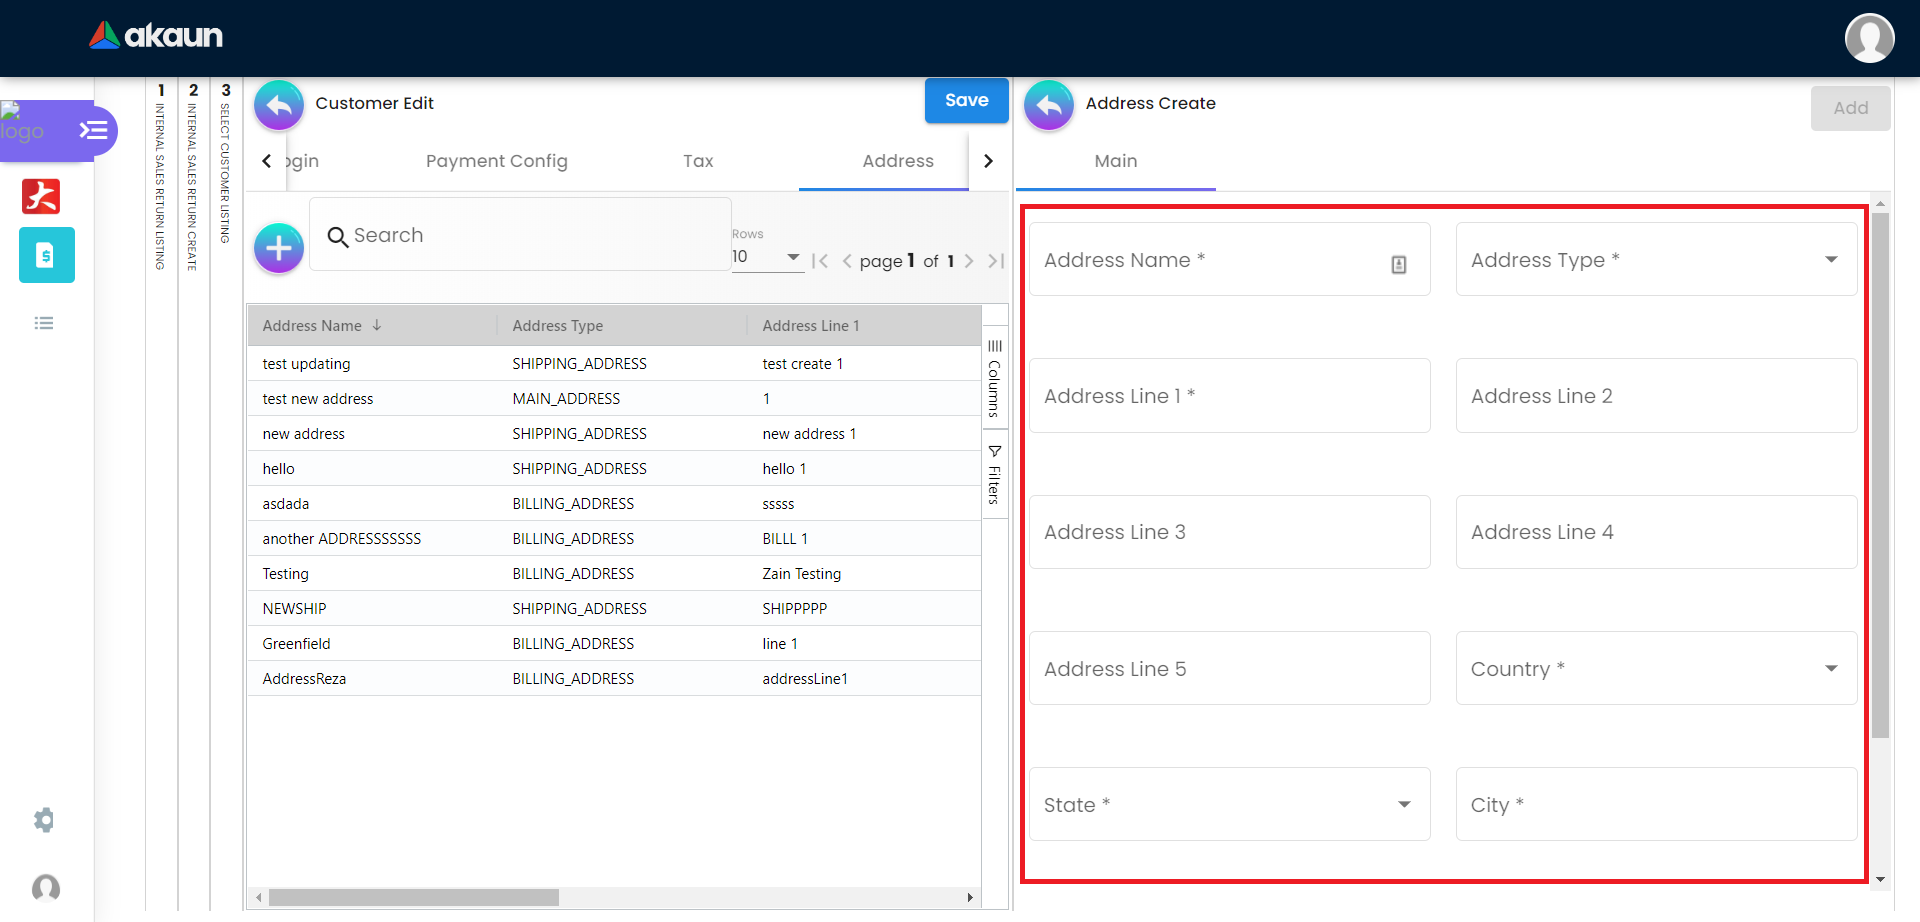
3.6.1 Create new Address
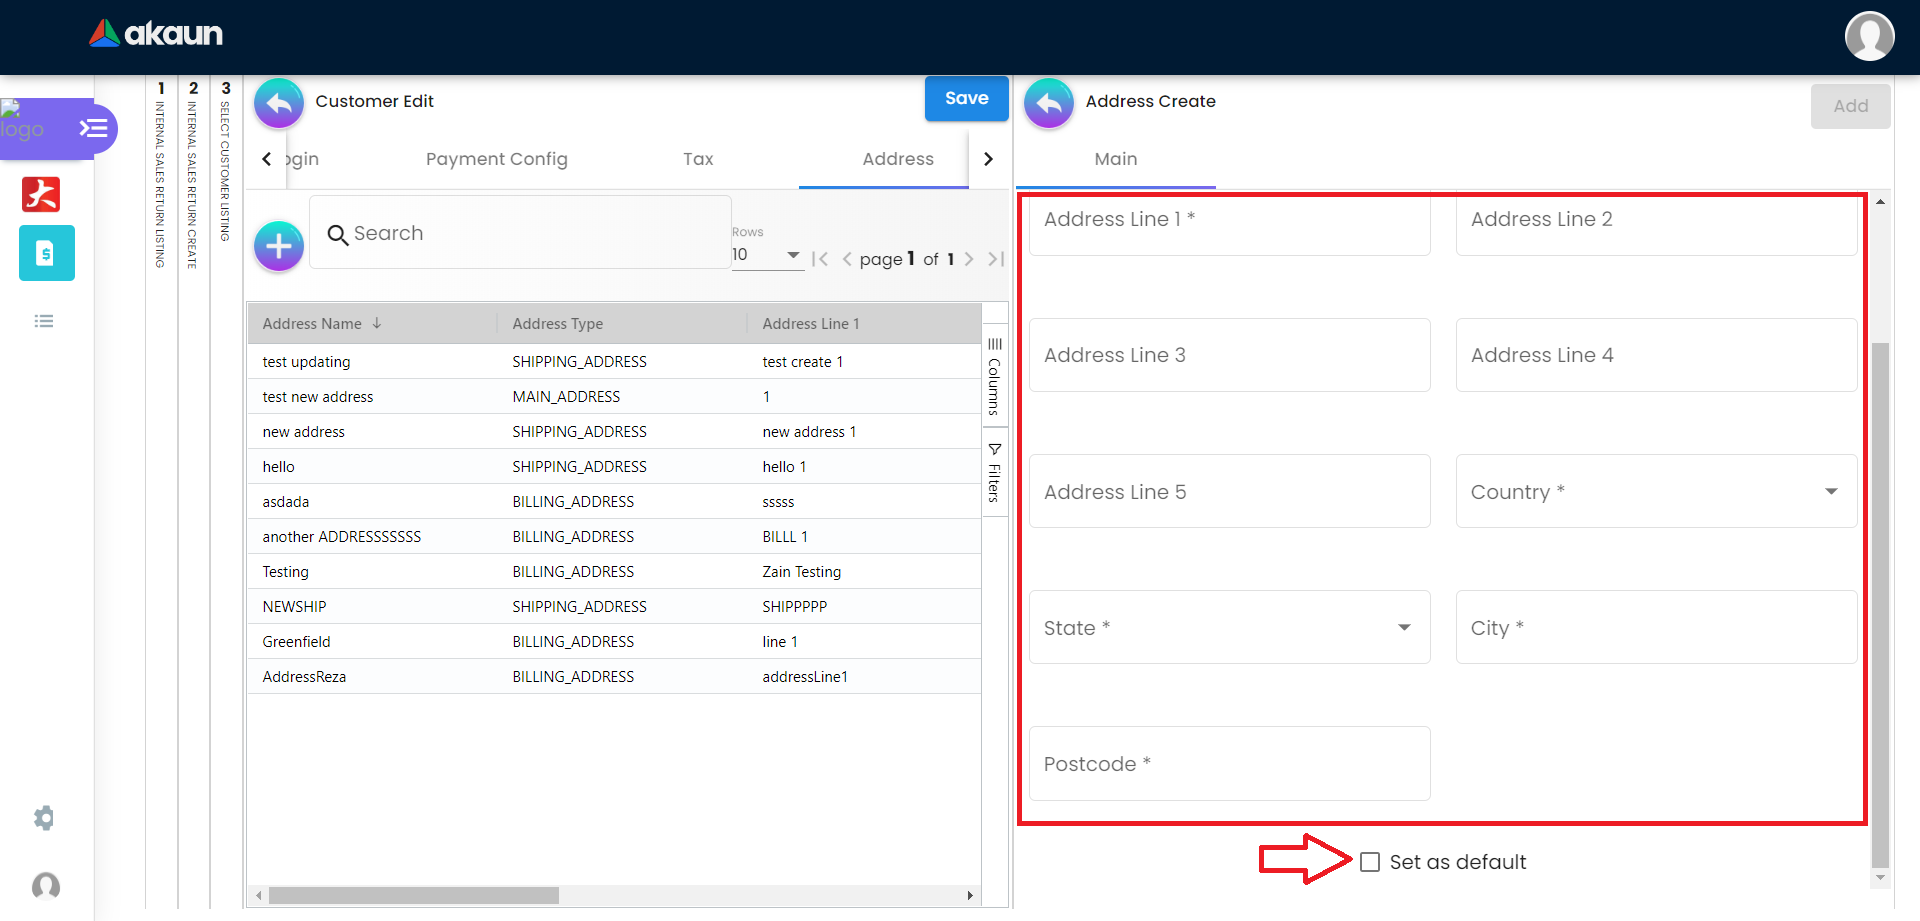
Please fill up the compulsory() information for creating the Address. After filling up the compulsory() information, please click Add to add a new Address. There are 11 components which allow the user to make changes respectively:
-
Address Name
-
Address Type
-
Address Line 1
-
Address Line 2
-
Address Line 3
-
Address Line 4
-
Address Line 5
-
ountry
-
State
-
ity
-
Postcode
Tick on ‘Set as default’ for future default use.
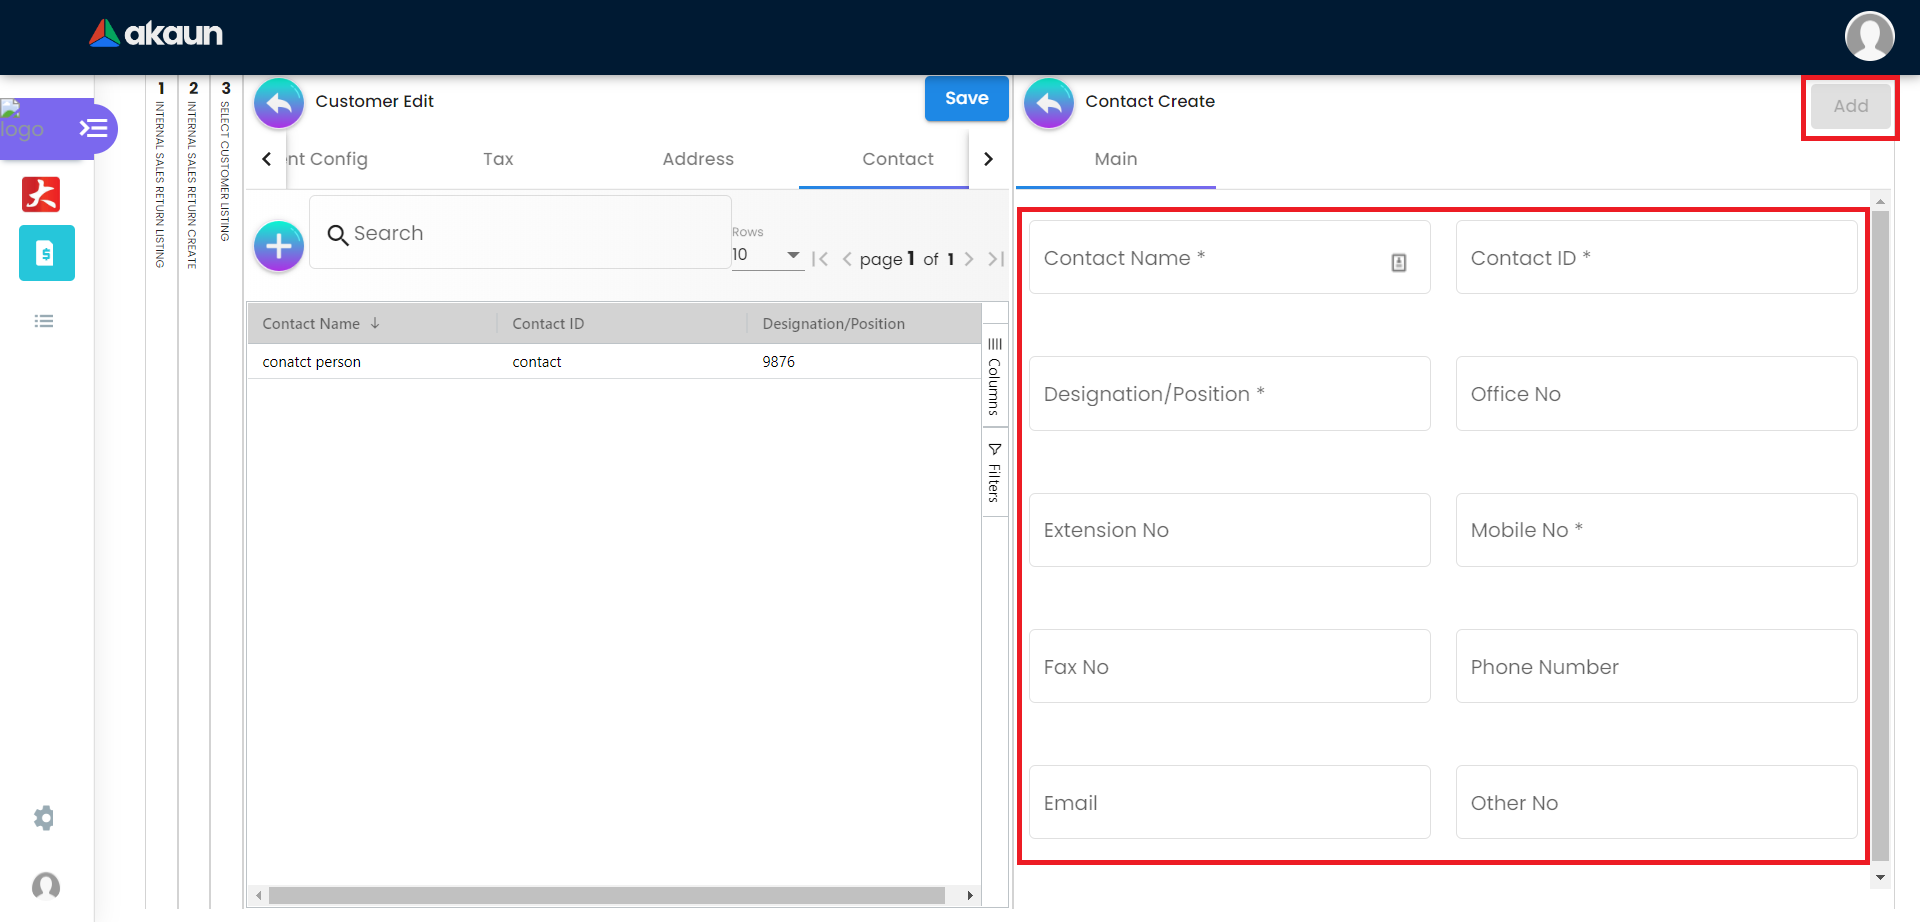
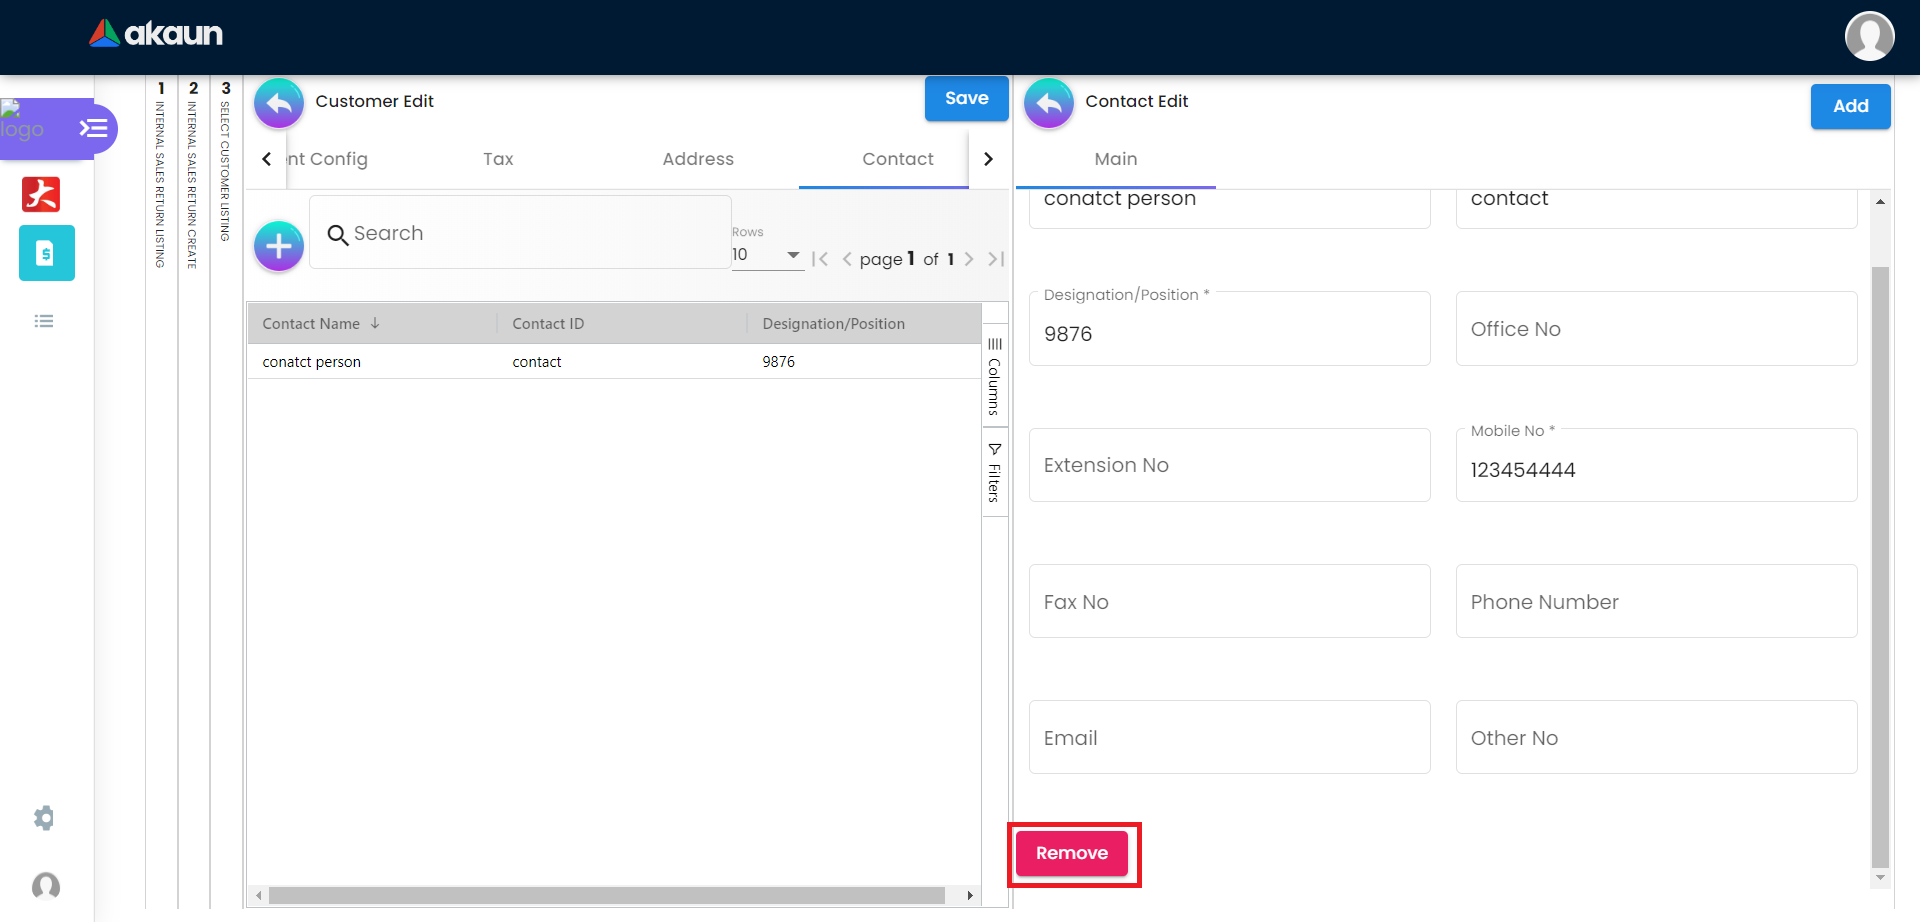
2.7 Contact Tab
Please click the ‘+’ button to add Contact.
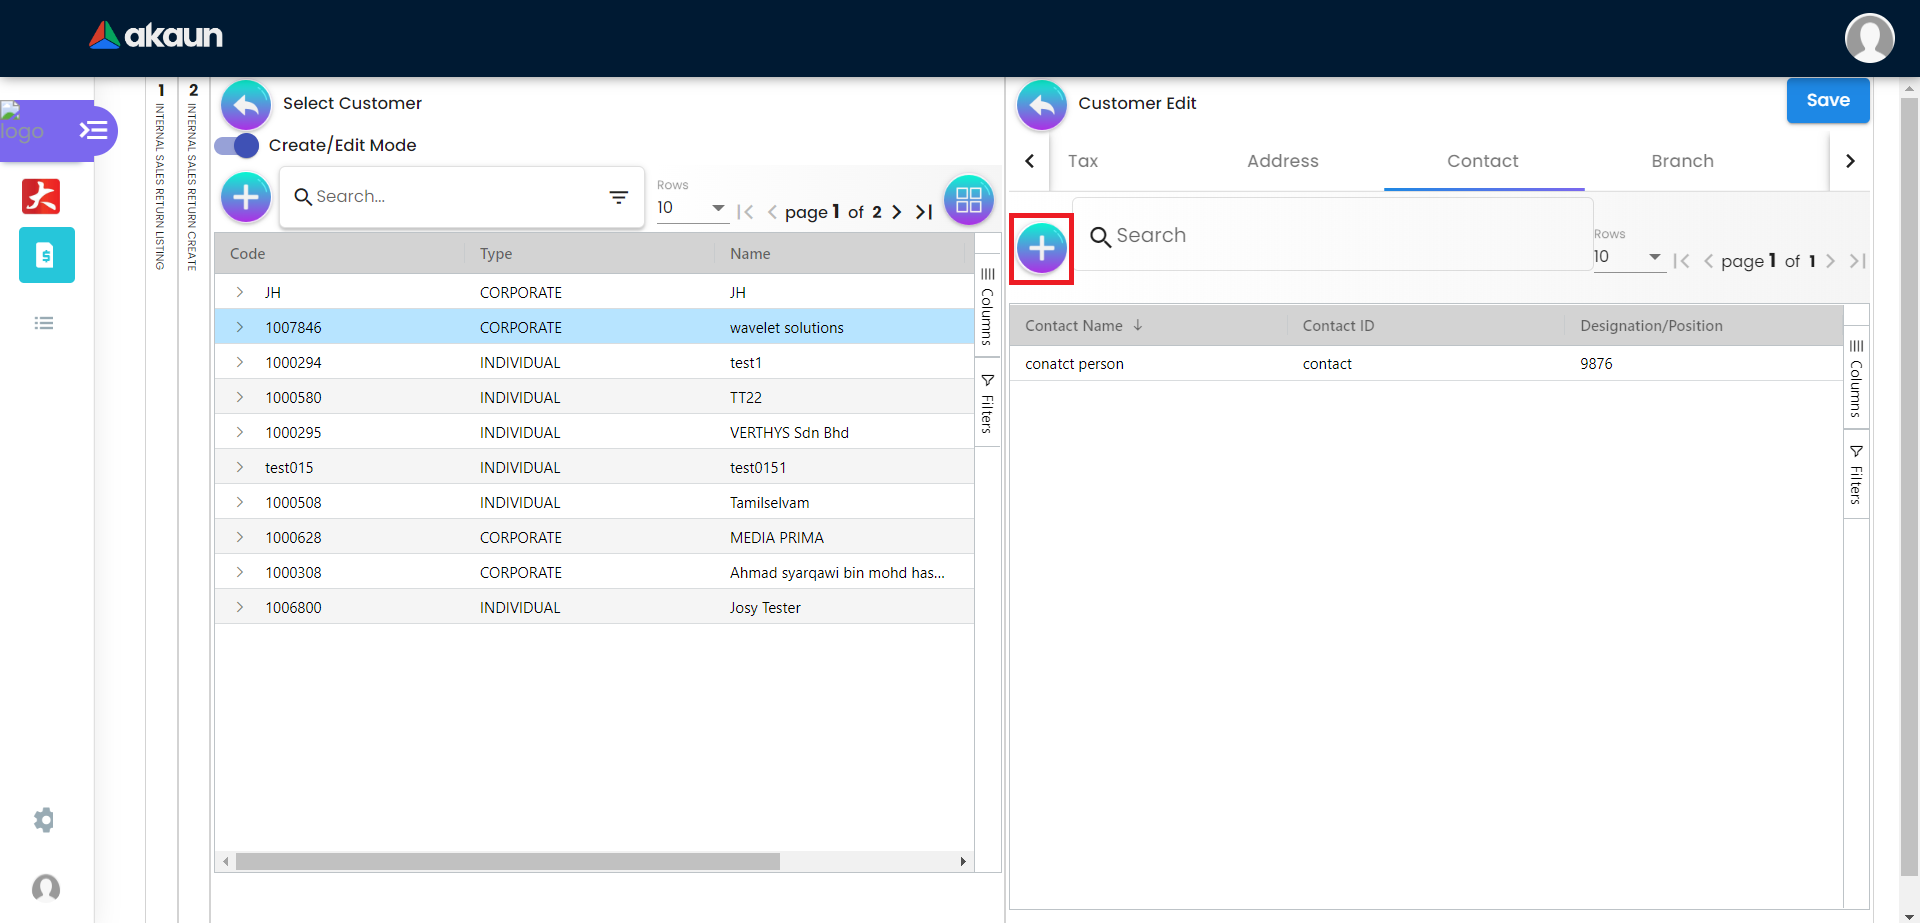
2.7.1 Create new Contact
Please fill up the compulsory() information for creating the Contact. After filling up the compulsory() information, please click Add to add a new Contact. There are 11 components which allow the user to make changes respectively:
-
Contact Name
-
Contact ID
-
Designation/Position
-
Office No
-
Extension No
-
Mobile No
-
Fax No
-
Phone Number
-
Email
-
Other No


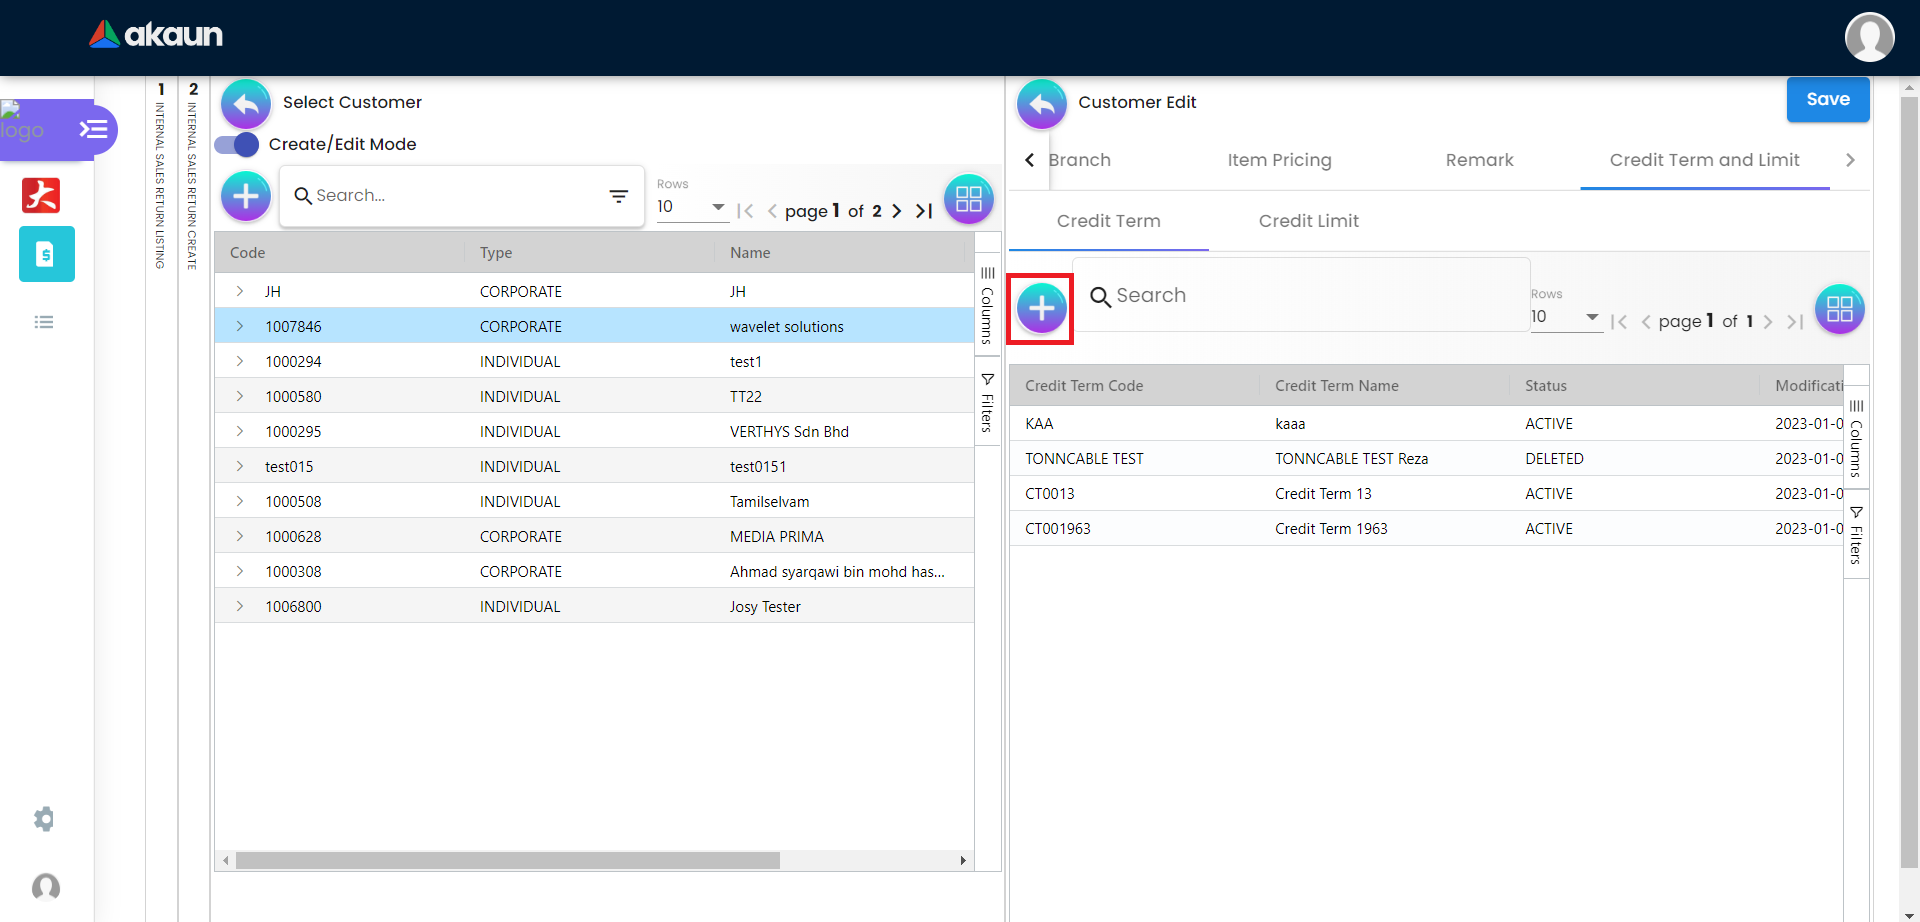
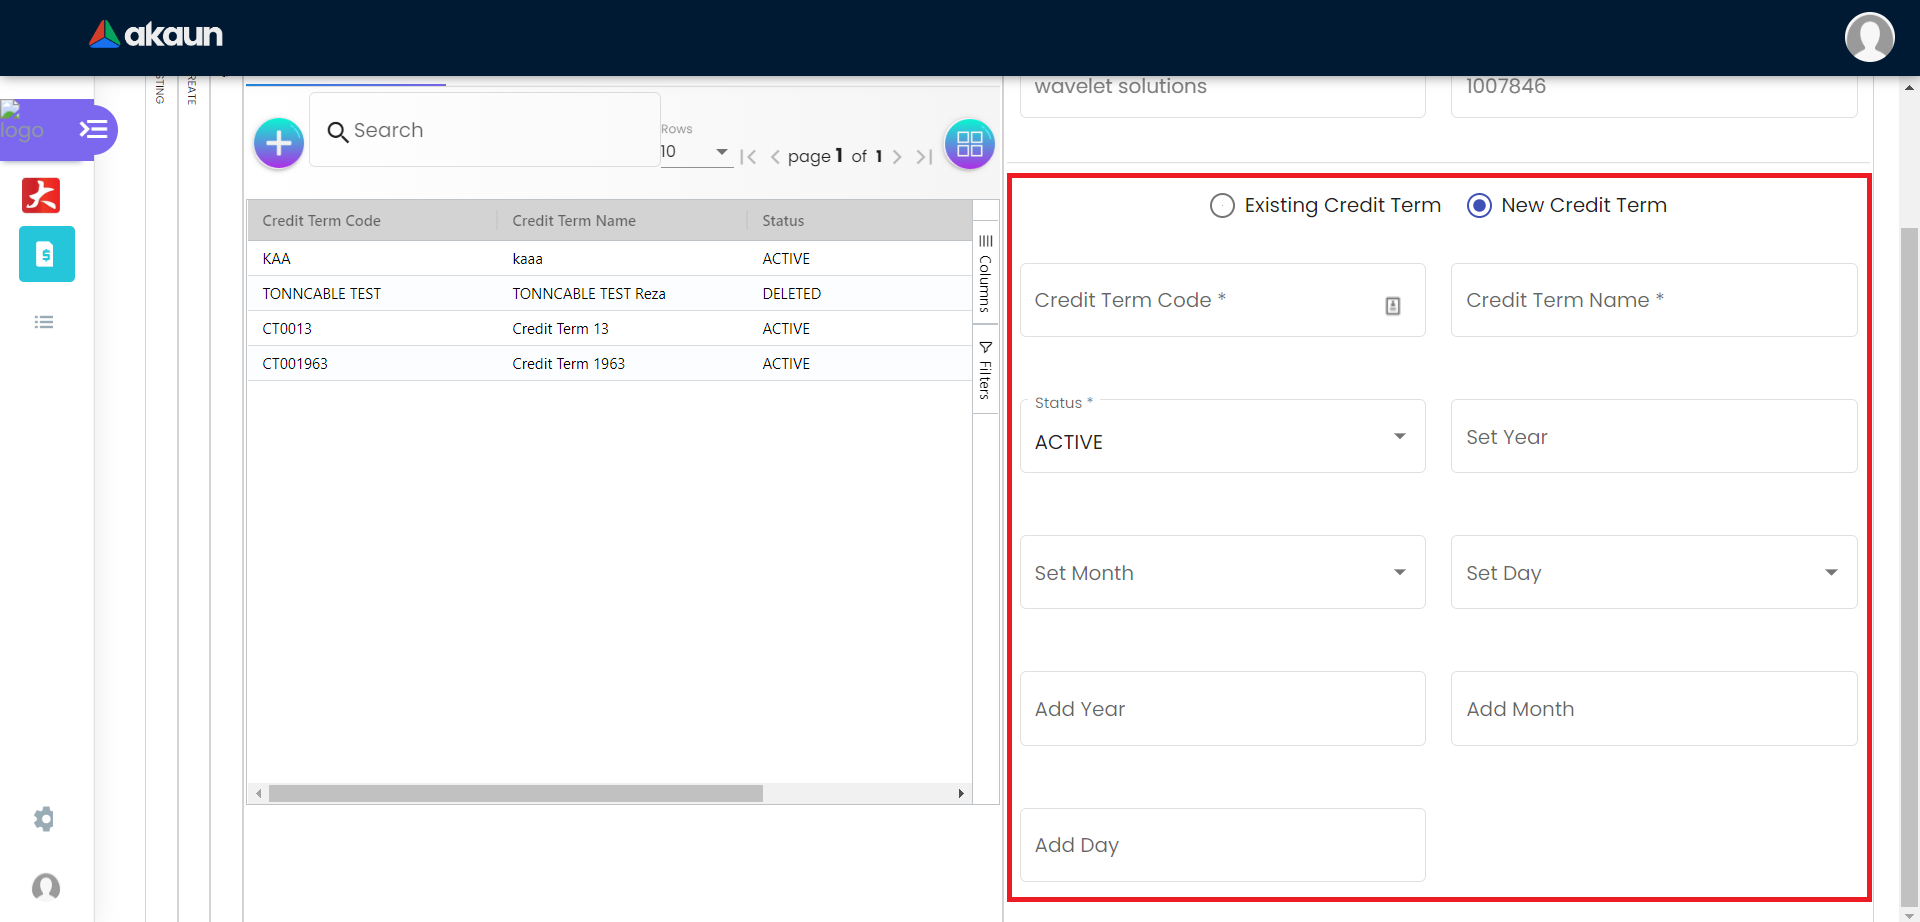
2.11 Credit Term and Limit
Please click the ‘+’ button to add Credit Term and Credit Limit.
2.11.1 Credit Term
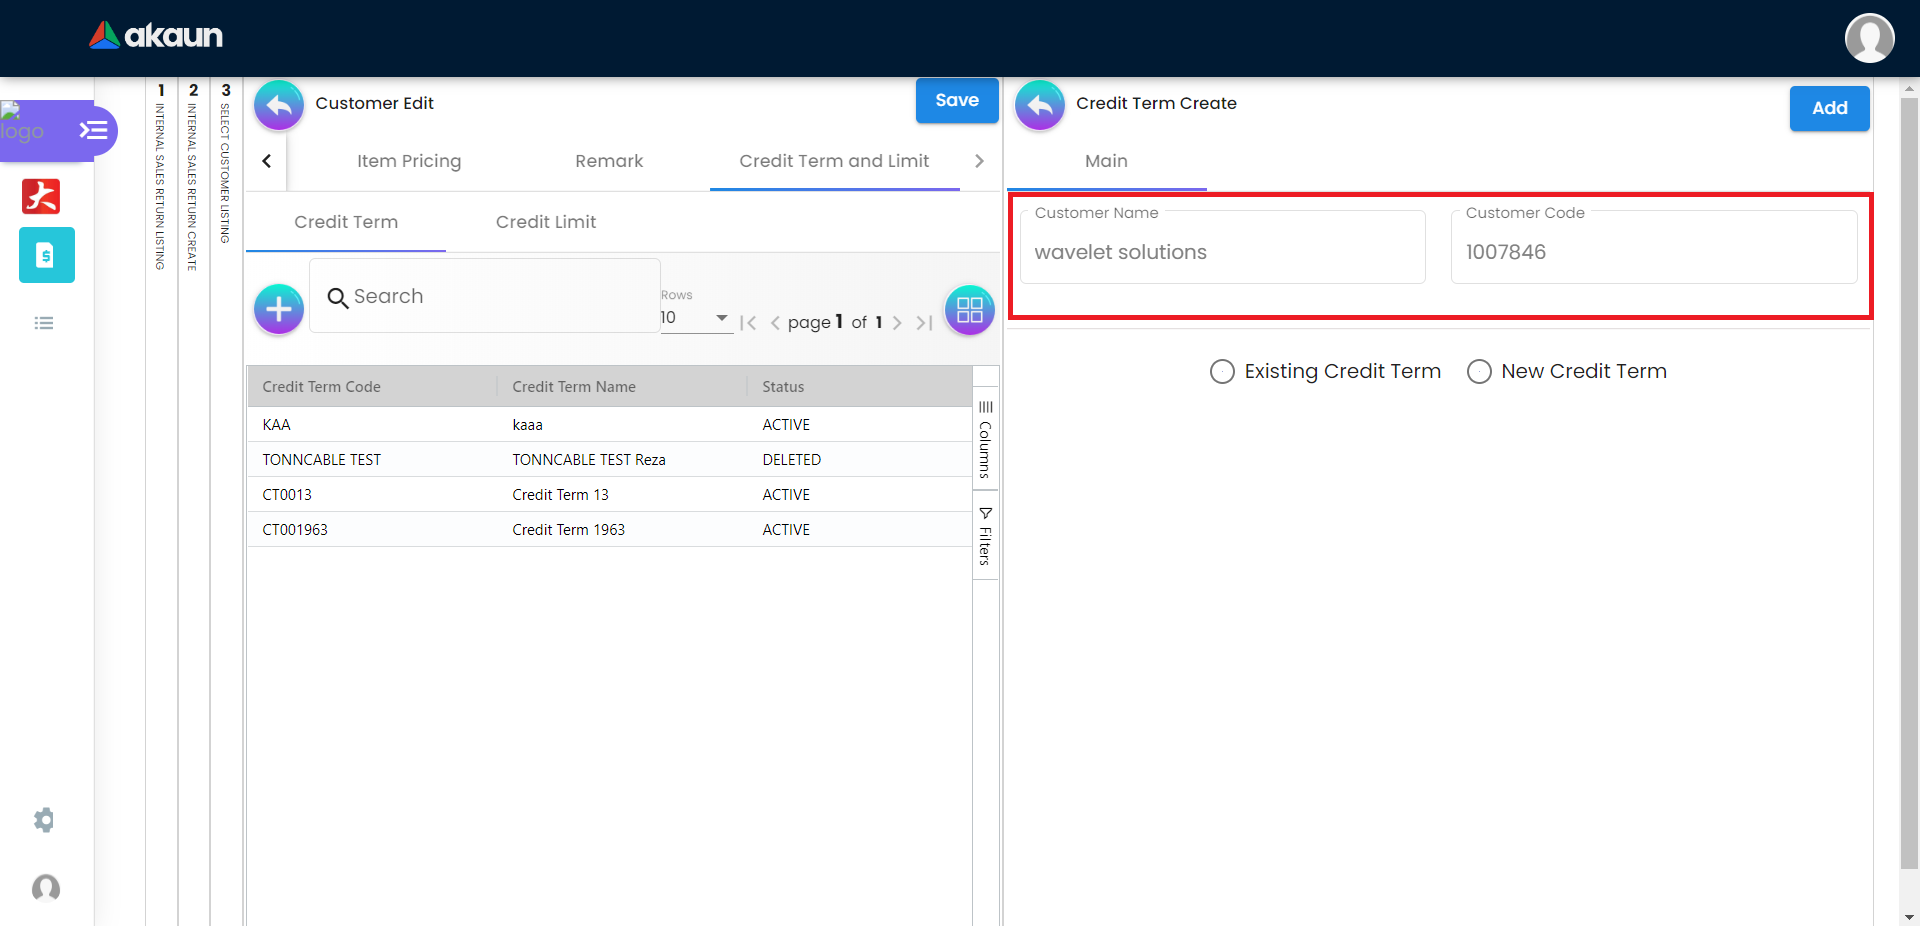
2.11.1.1 Create new Credit Term
Display the Customer Name and Customer Code.
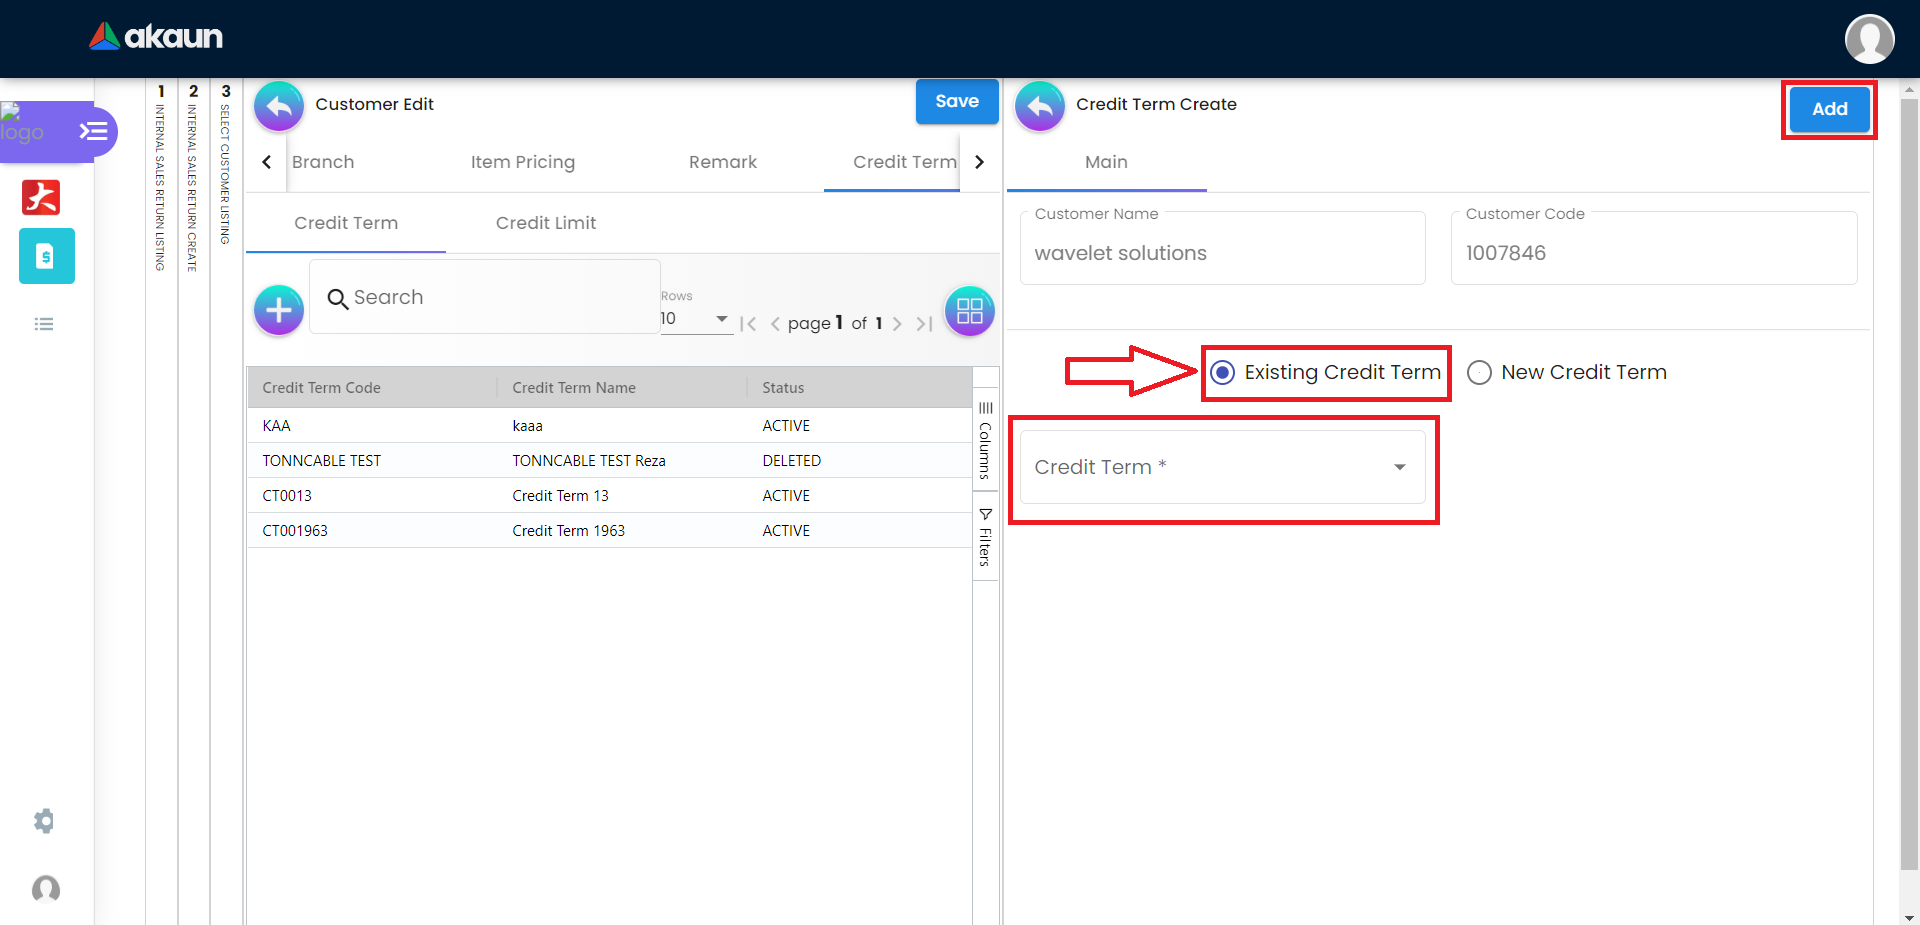
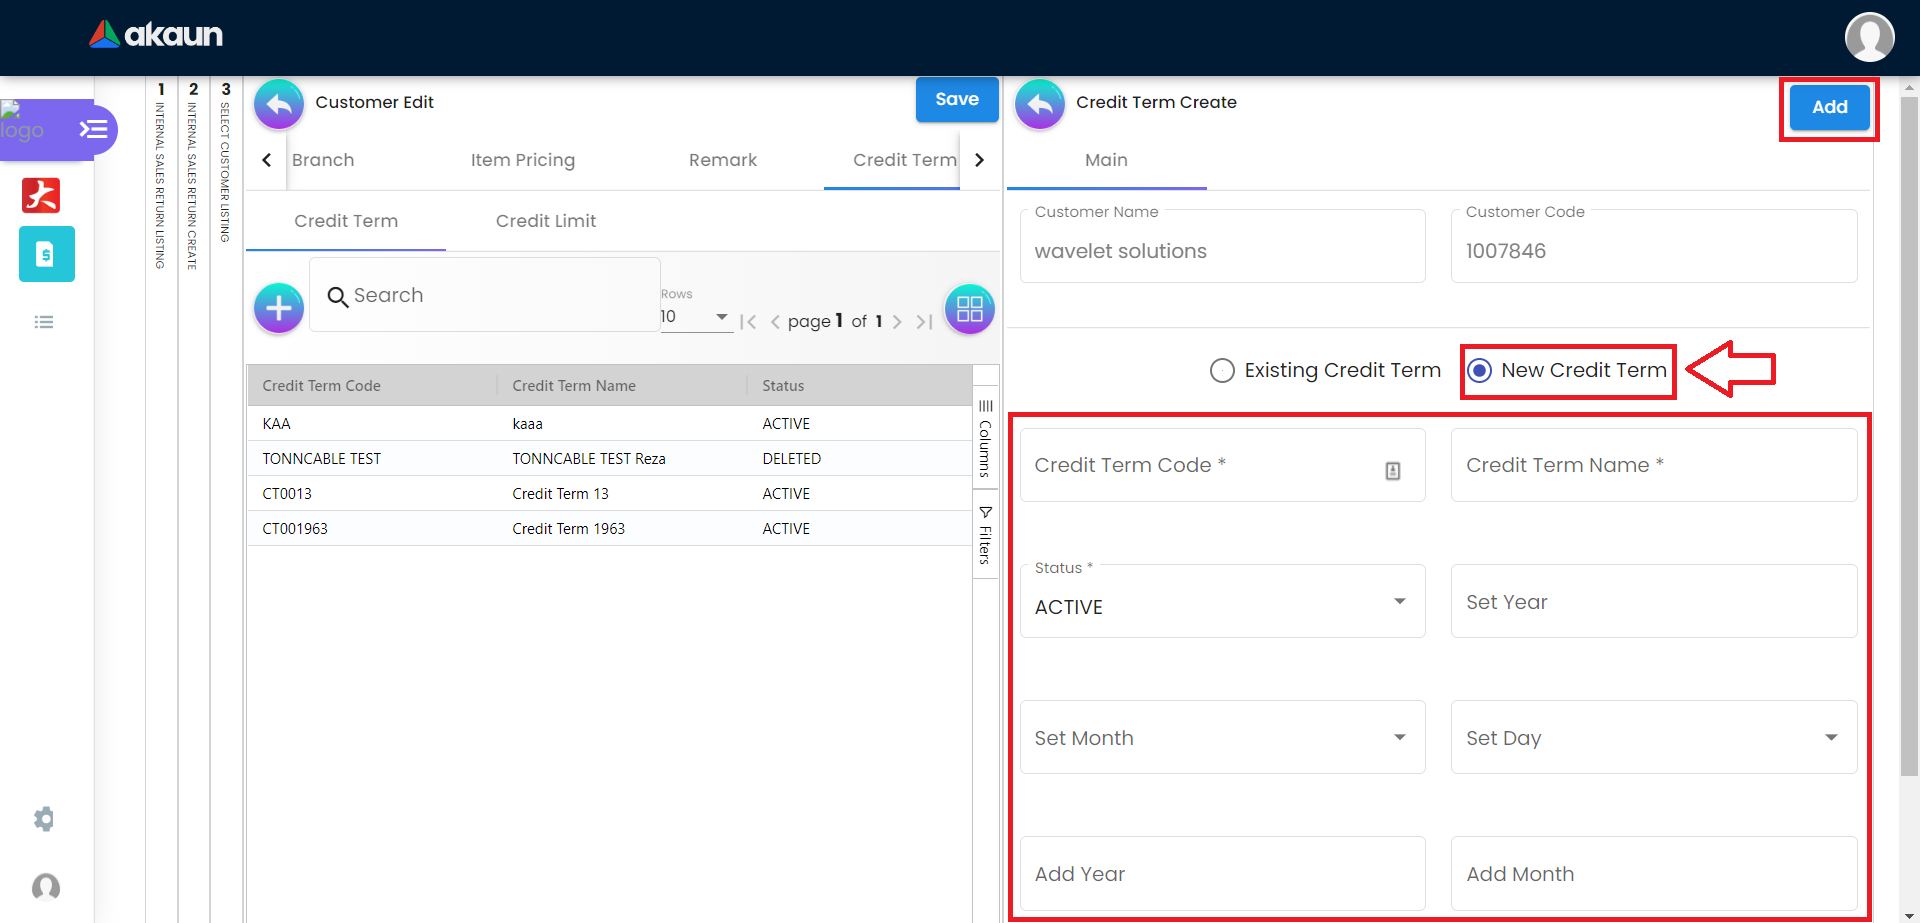
Select the Existing Credit Term or New Credit Term.
Please fill up the compulsory( * ) information for creating the Credit Term. After filling up the compulsory ( * ) information in Existing Credit Term or New Credit Term, please click Add to add a new Credit Term.
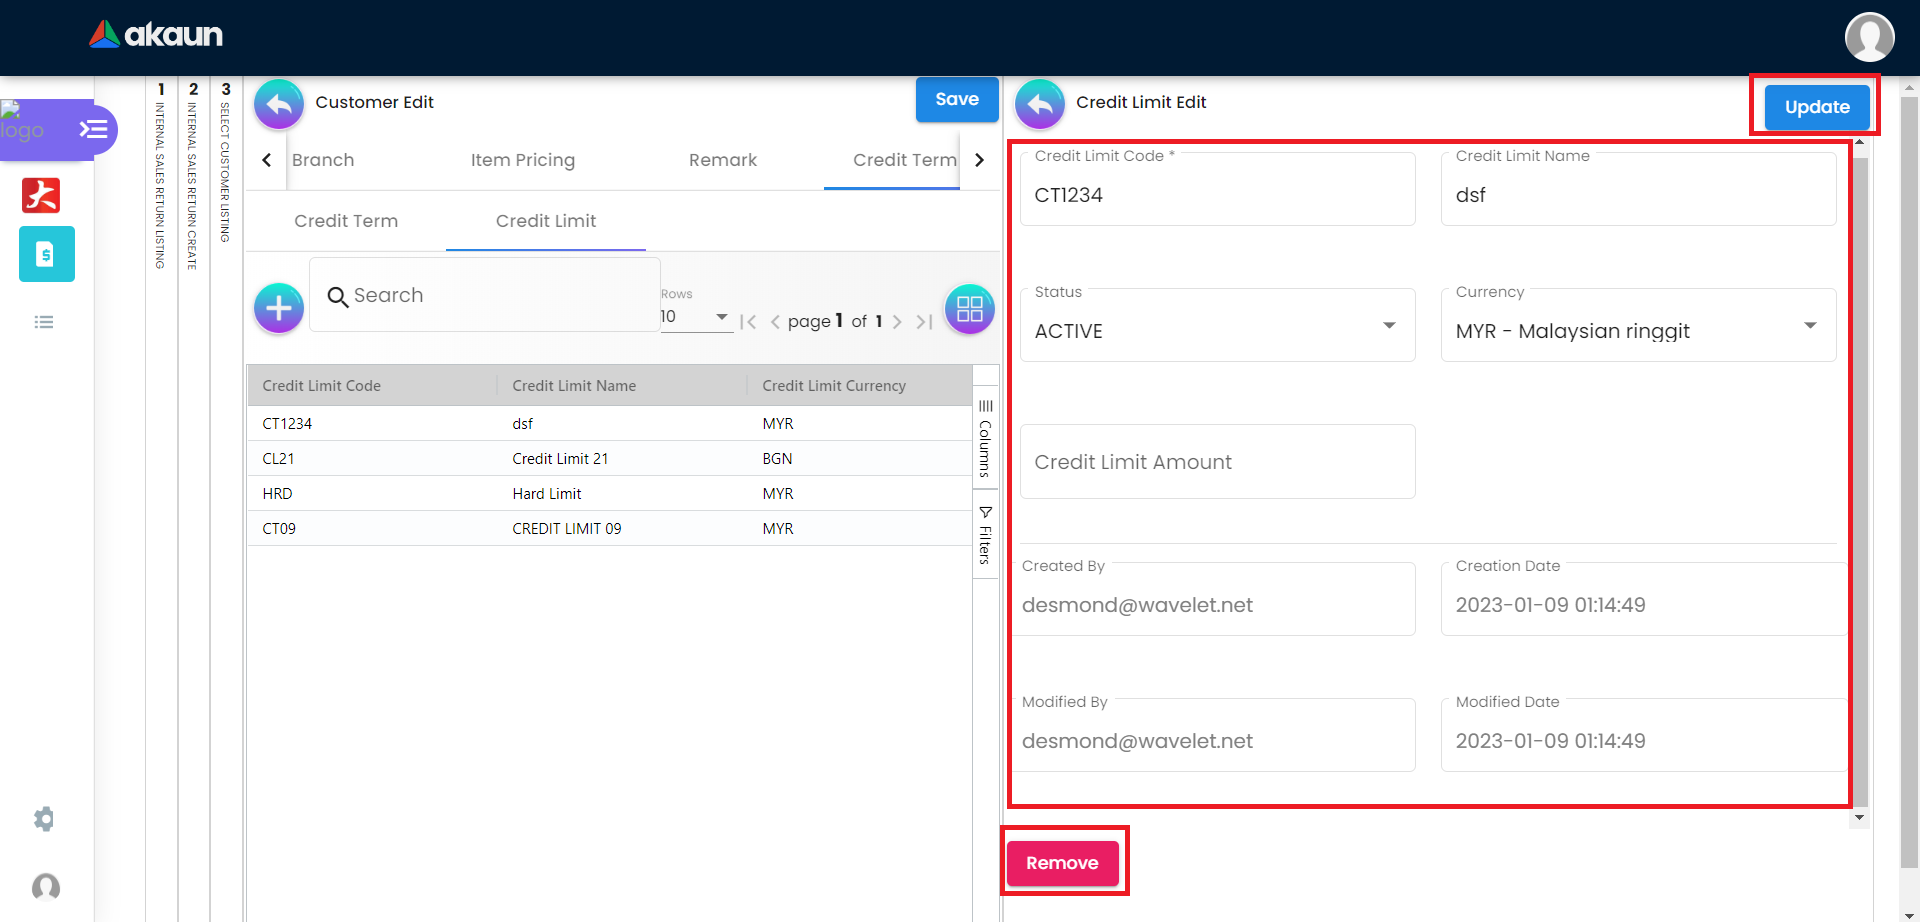
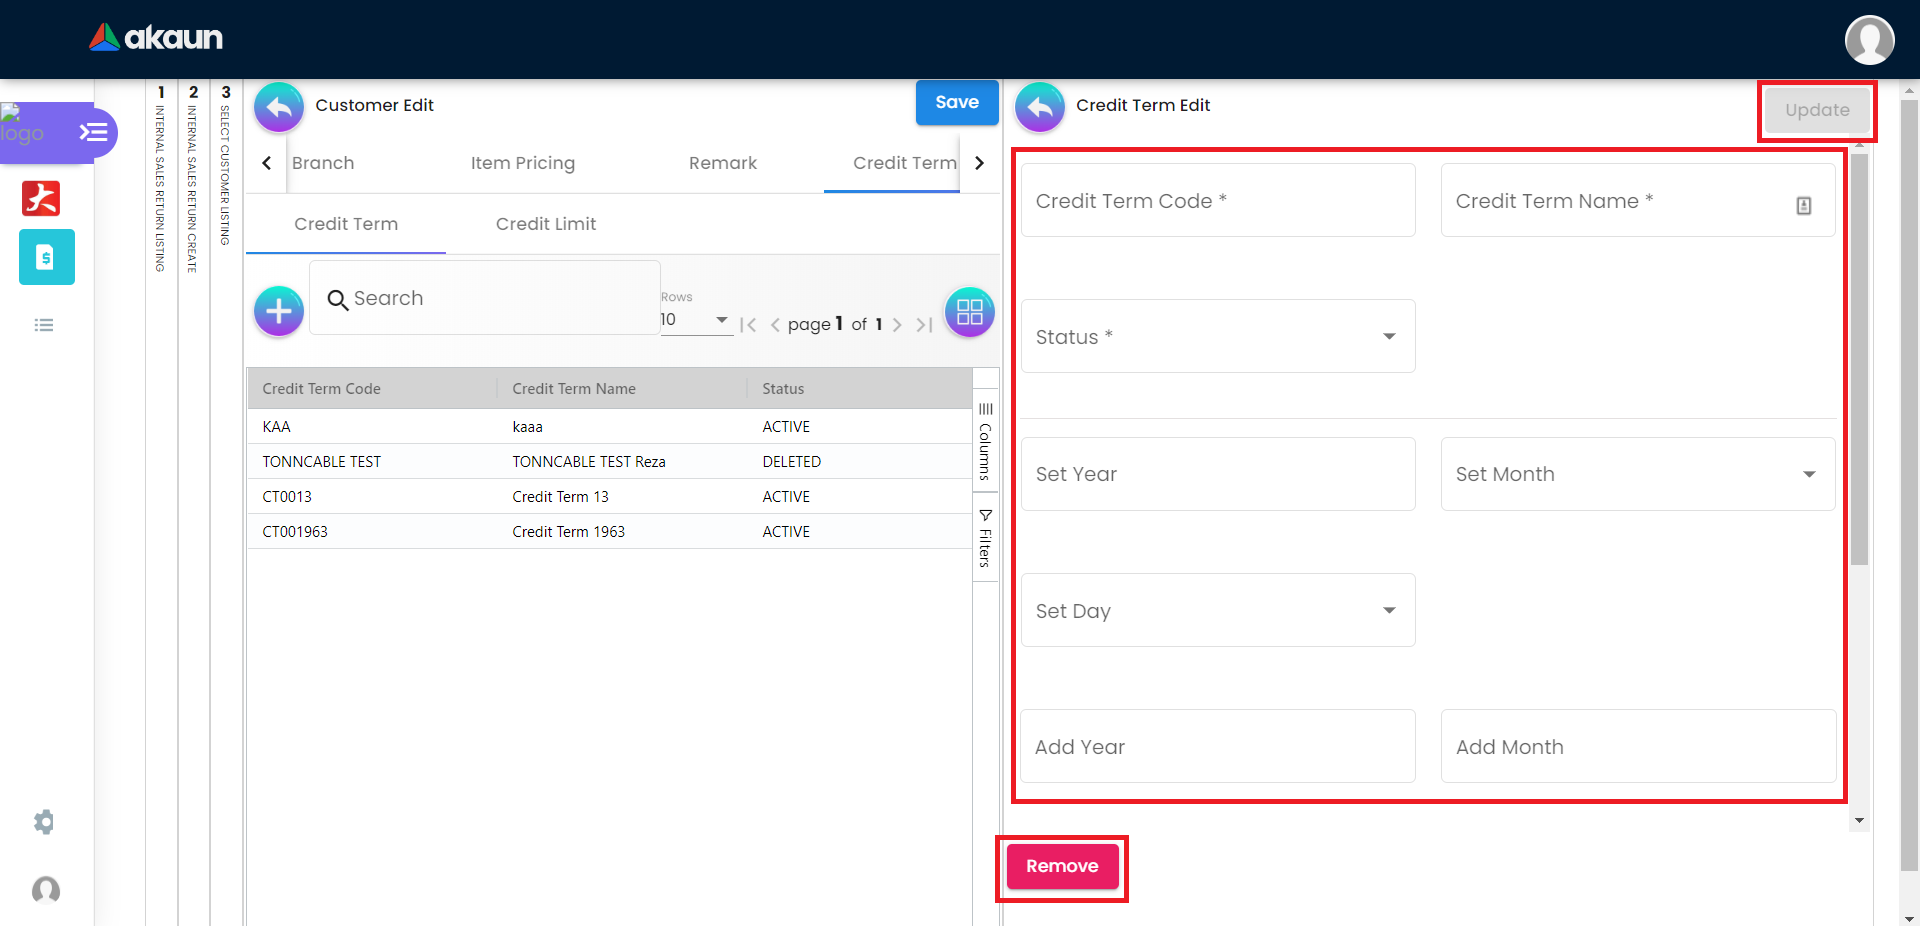
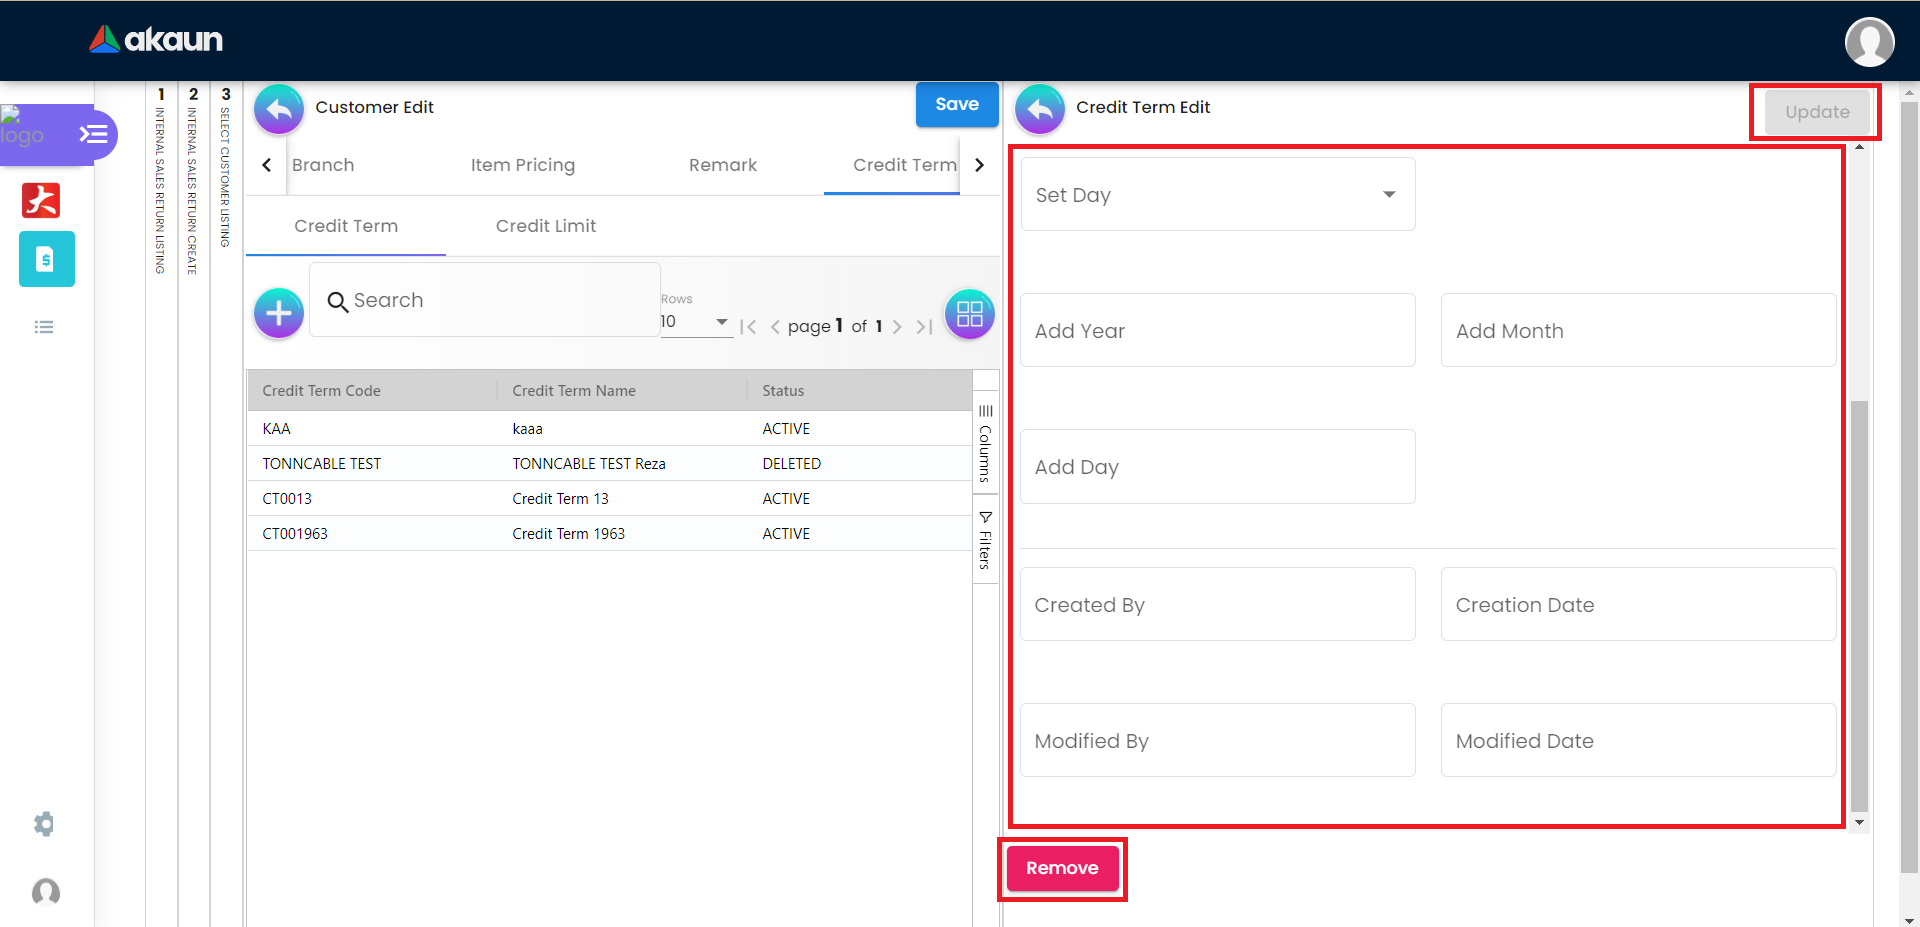
2.11.2 Edit Credit Term
Edit on every field of the Credit Term that was selected from the list of Credit Term.
After making the changes, please click on the ‘Update’.
Click on the Remove button to remove the Credit Term.
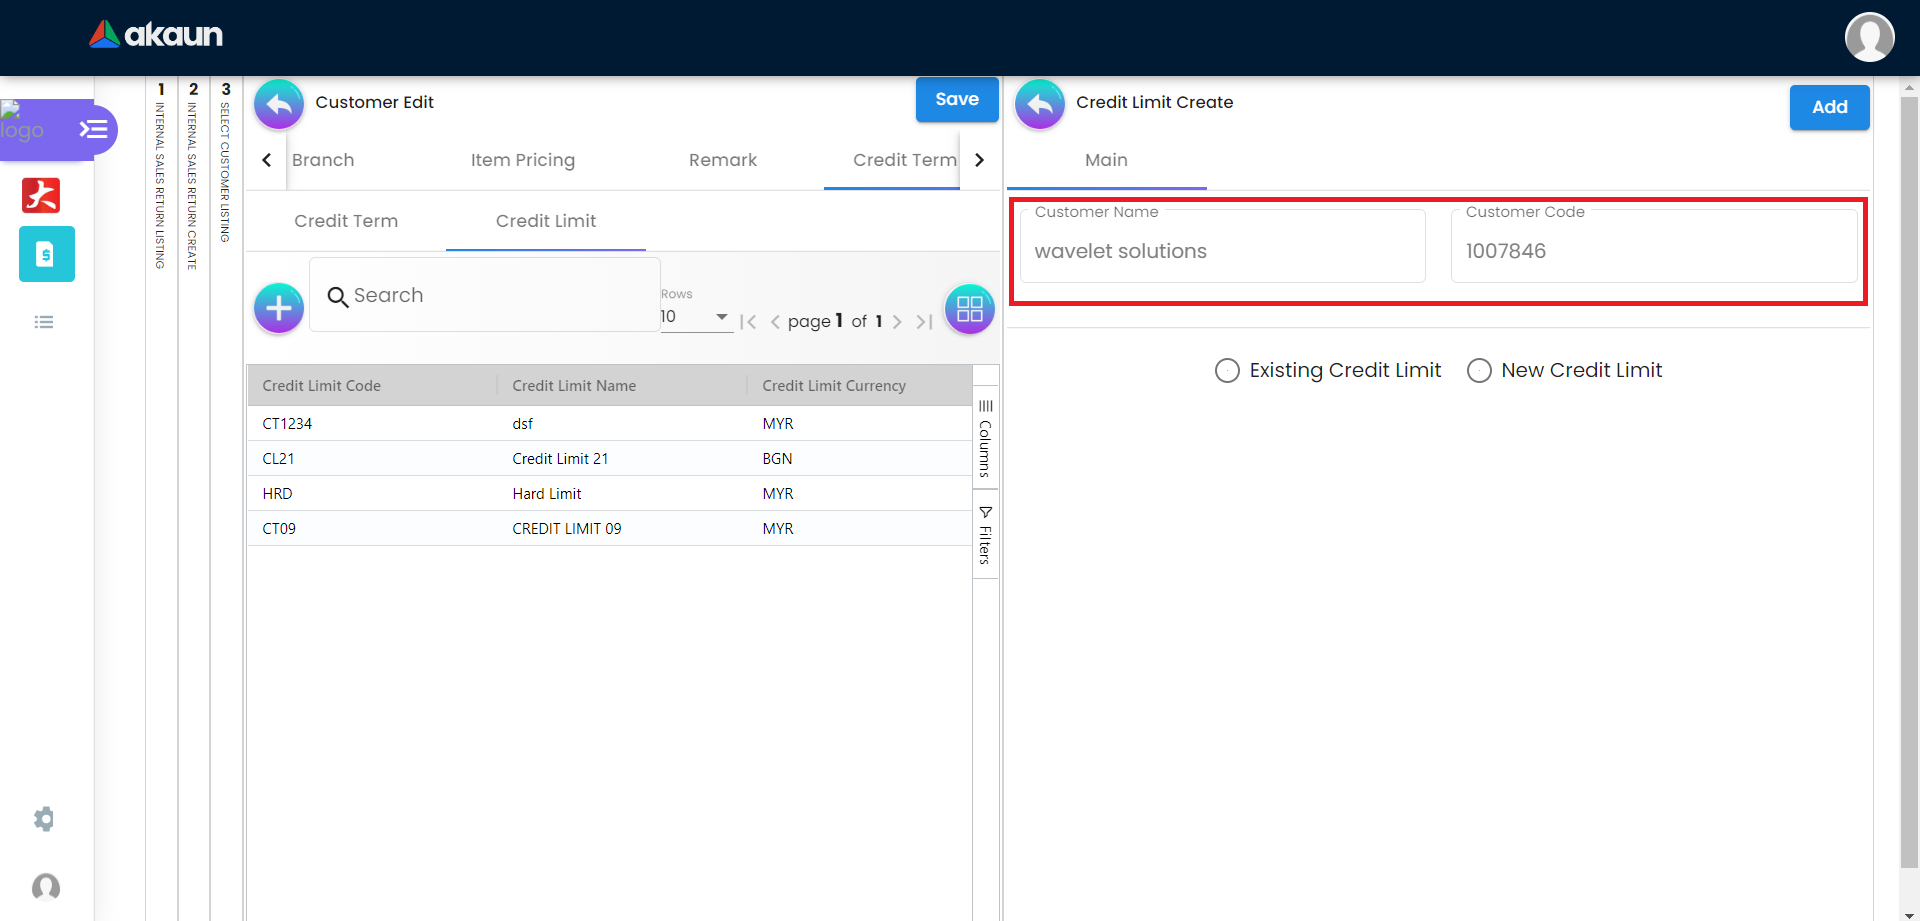
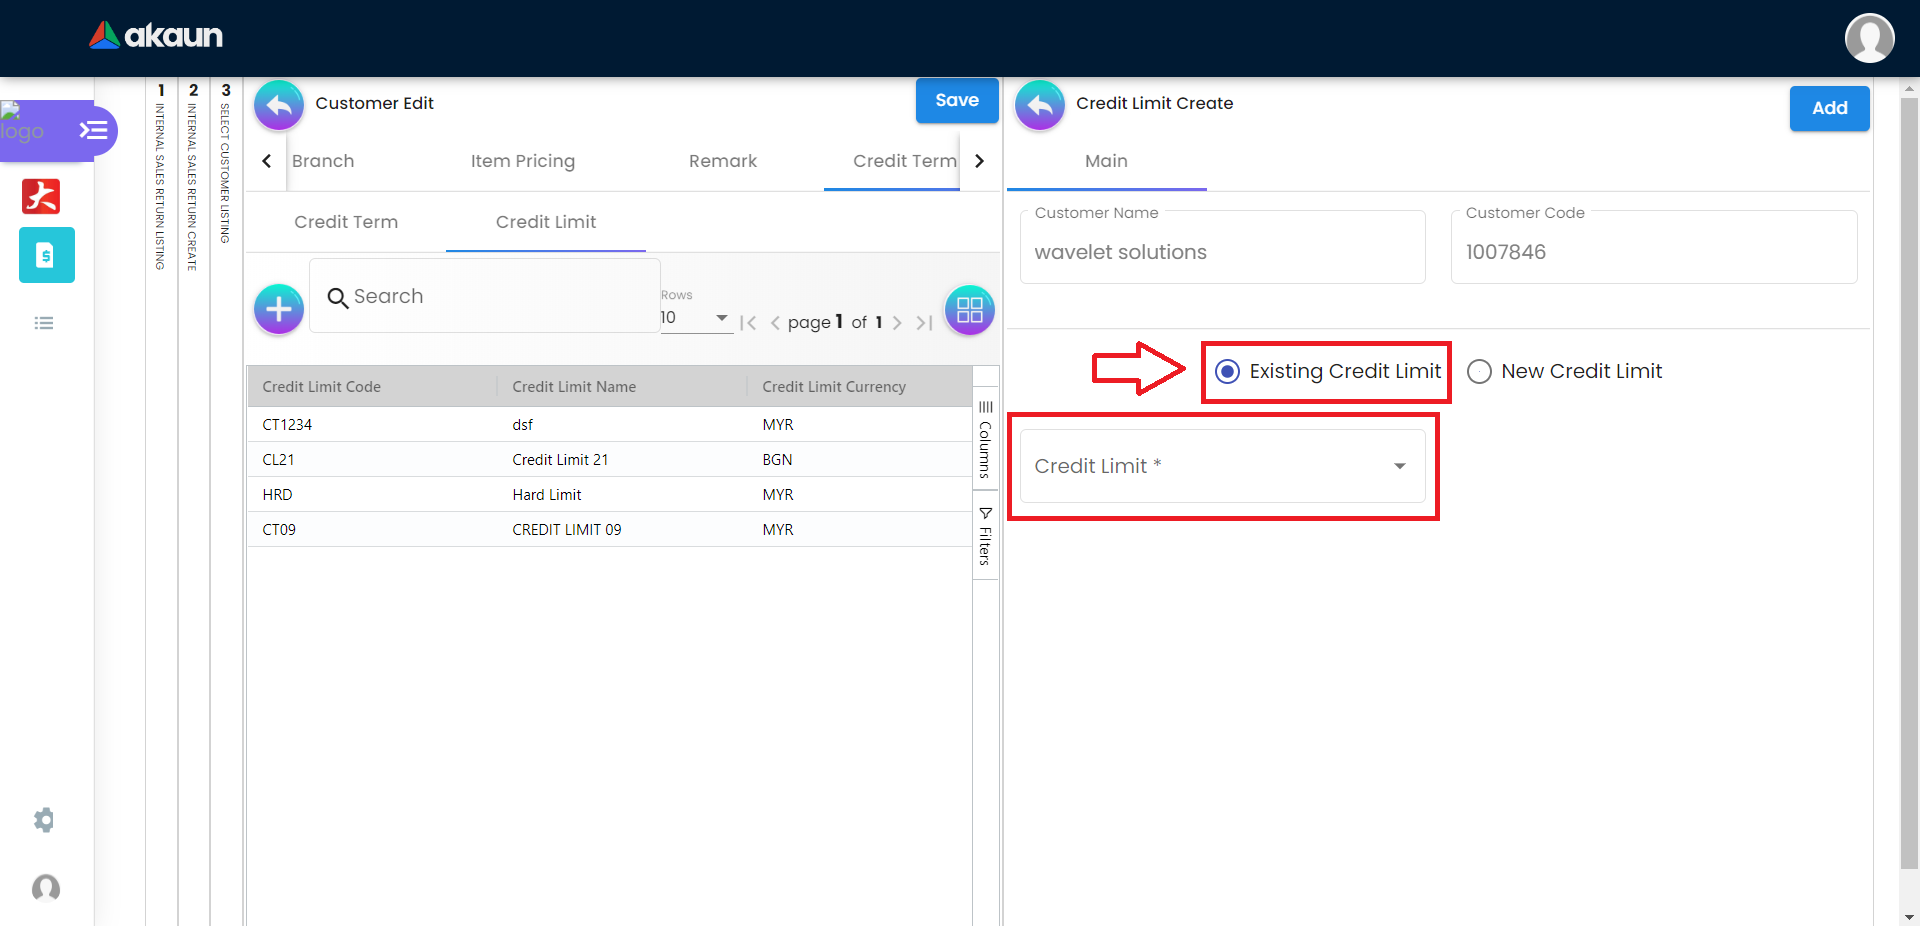
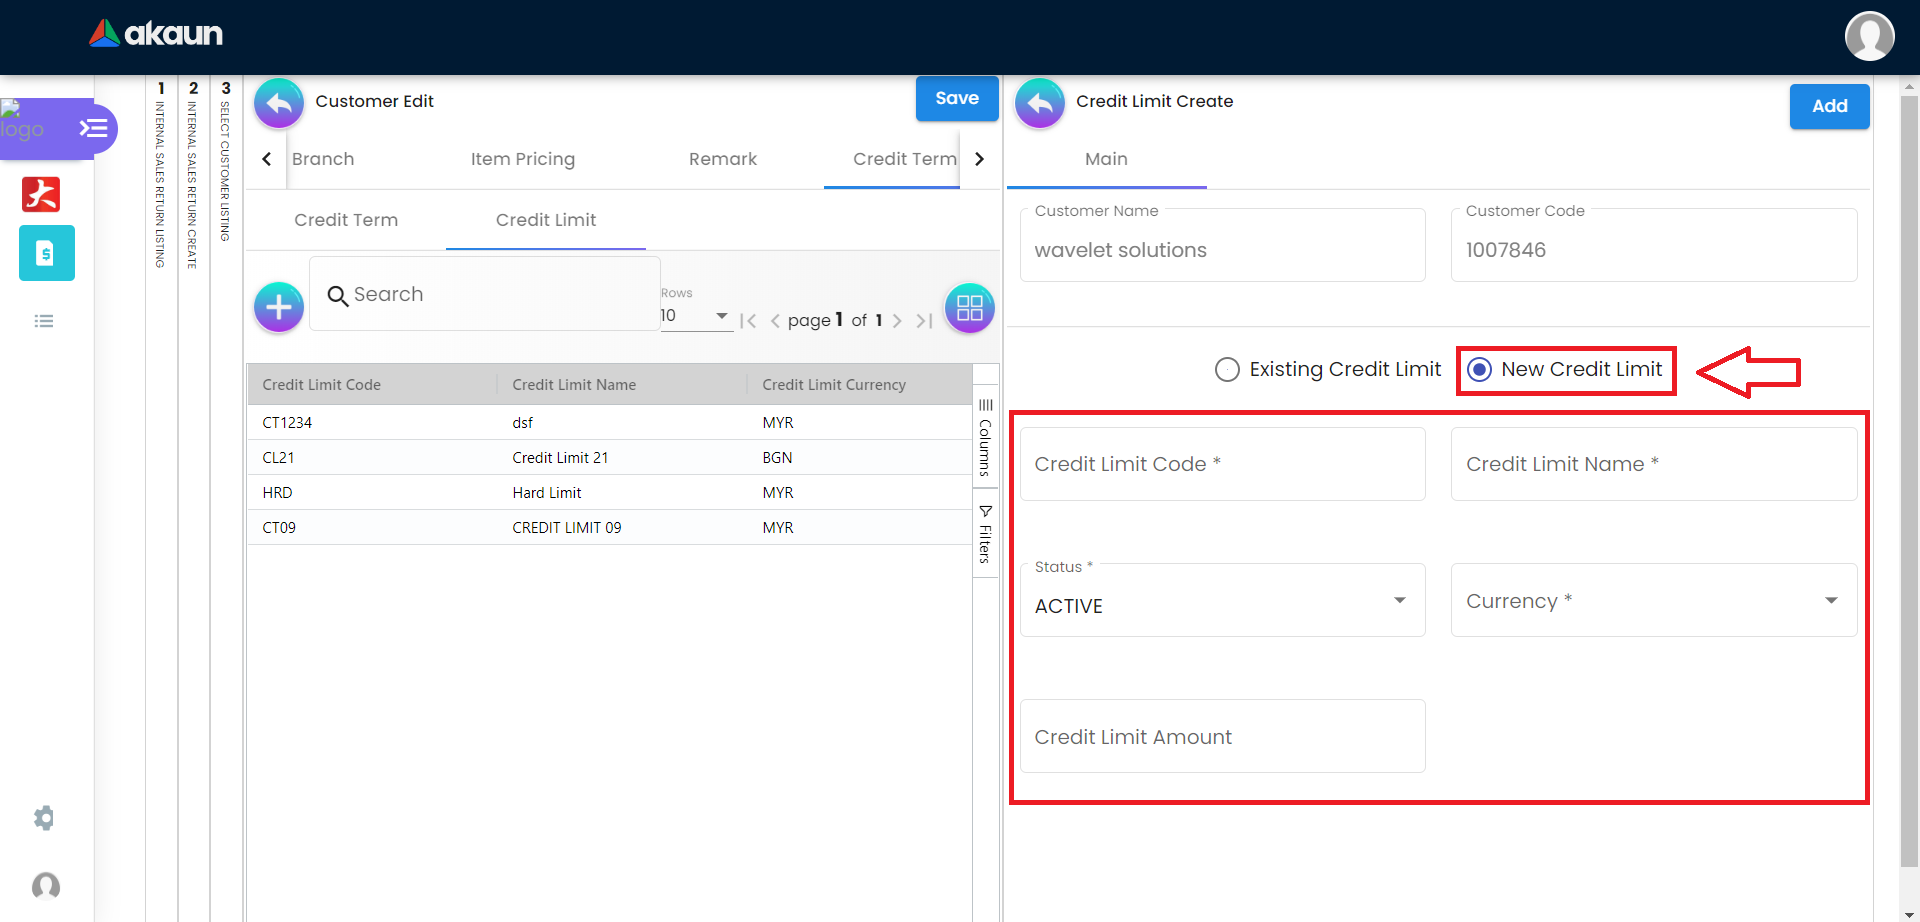
2.11.3 Credit Limit
2.11.3.1 Create new Credit Limit
Display the Customer Name and Customer Code.
Select the Existing Credit Limit or New Credit Limit.
Please fill up the compulsory(*) information for creating the Credit Limit. After filling up the compulsory( * ) information in Existing Credit Limit or New Credit Limit, please click Add to add a new Credit Limit.