1.0 Requirements Before Creating a Website
Before you can begin website creation in the CP-Commerce Admin Applet, you will first need to create a pricing scheme in the Doc Item Maintenance Applet (Step 1), then create a company in the Organization Applet (Step 2), and lastly, create a member class in the Membership Admin Applet (Step 3). You have to link the information above in the CP-Commerce Admin Applet when you create your website, so each step is compulsory. This guide will provide you with step-by-step instructions to perfect your website creation. Let us get started!
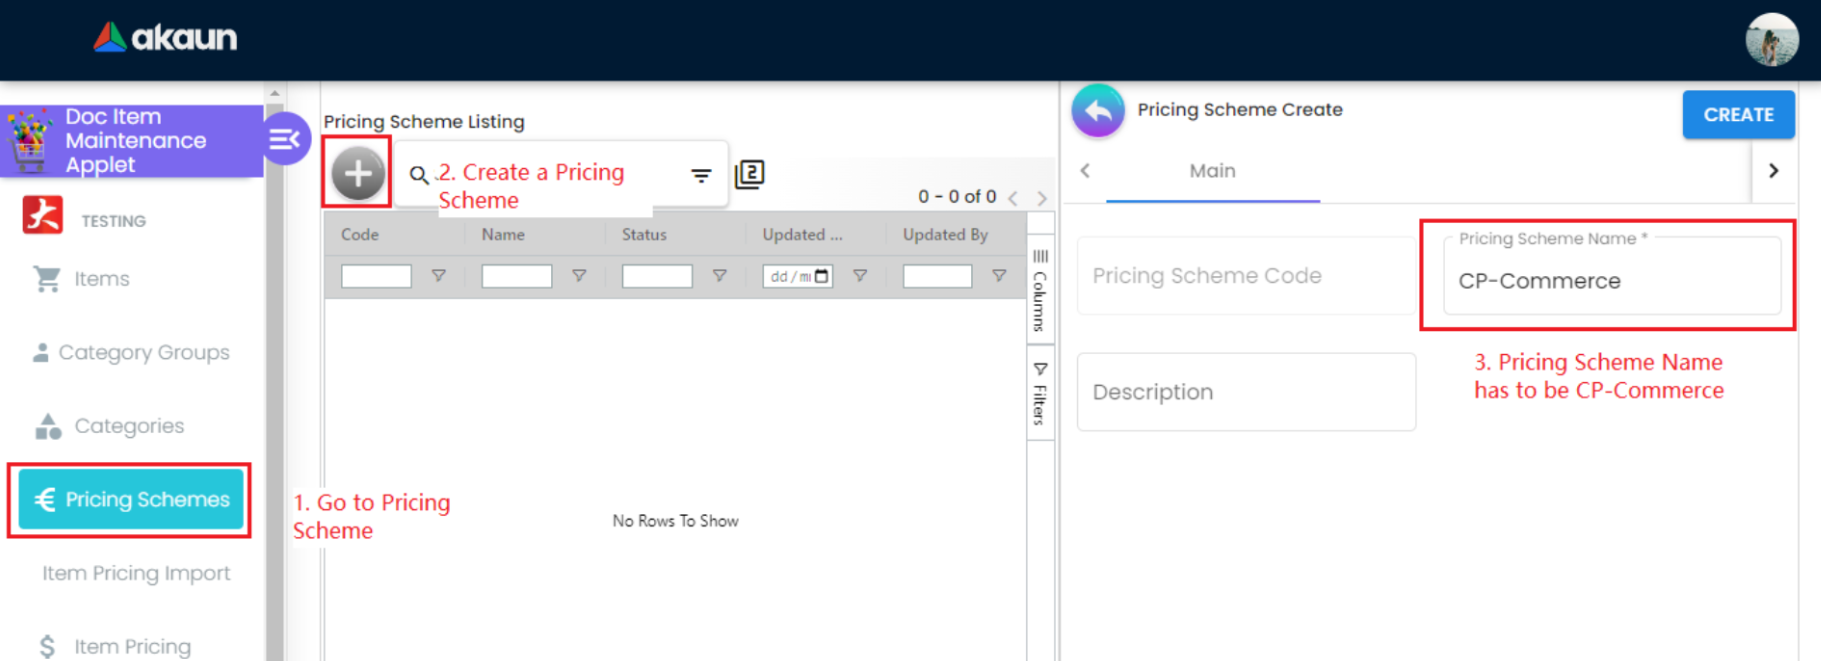
Step 1: Create a Pricing Scheme in the Doc Item Maintenance Applet
-
Go to the Pricing Scheme menu and create a new pricing scheme.
-
In the tab, you will have to insert “CP-COMMERCE” in the Pricing Scheme Name field and then create.
-
The pricing scheme code will be auto-generated and this code is important during website creation in the CP-Commerce Admin Applet.
-
Do note that you have to ensure that the pricing scheme code in the CP-Commerce Applet is the same as your auto-generated pricing scheme code.
-
Now let us move on to Step 2.
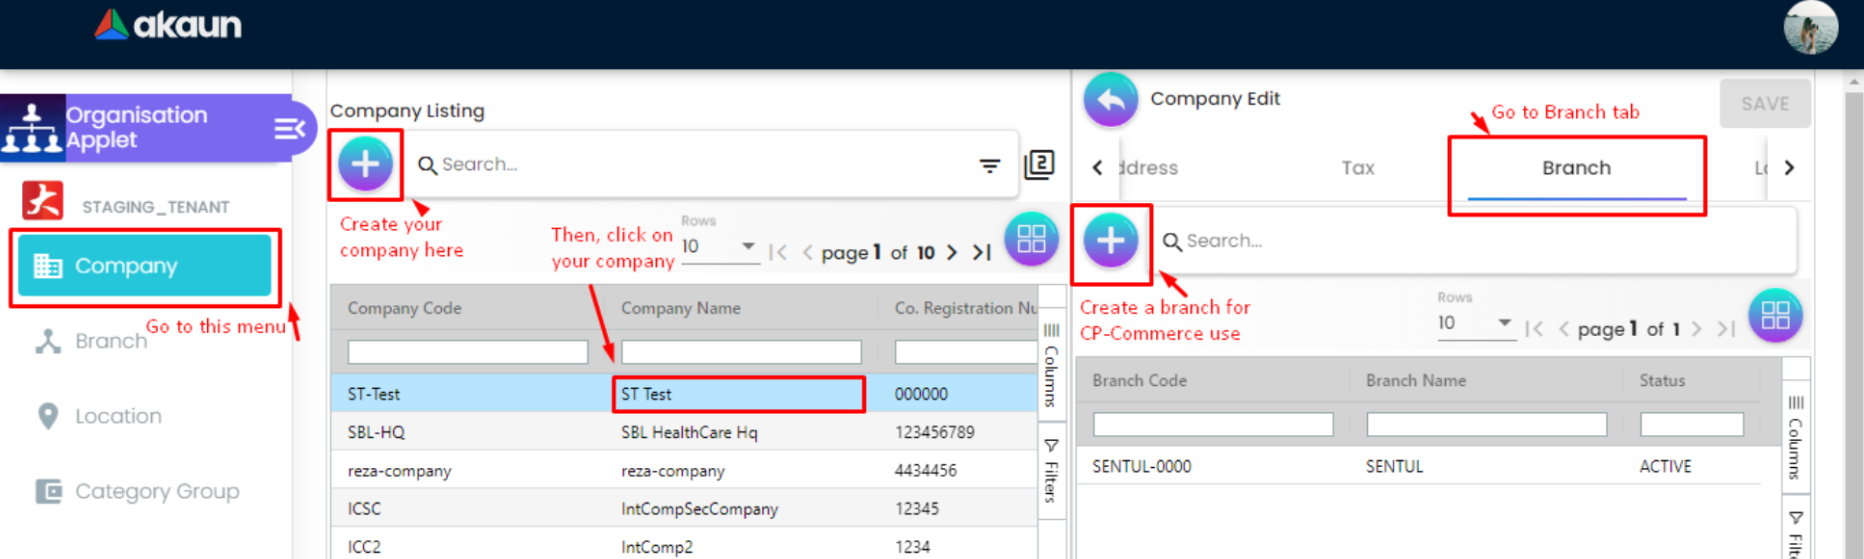
Step 2: Create a Company in the Organisation Applet
-
You will have to access the Organisation Applet and click on the Company menu. On that page, click on the + Button, which will bring you to a tab where you can create your company.
-
Fill in the necessary information and save.
-
After creating a company, click on the Co. Registration Number in the table, which will bring you to a tab where you can create your company’s branch.
-
Click on the Branch tab and create a branch for your company.
-
Do note that creating the branch is compulsory, as you will need it to link your company to your CP-Commerce marketplace website.
-
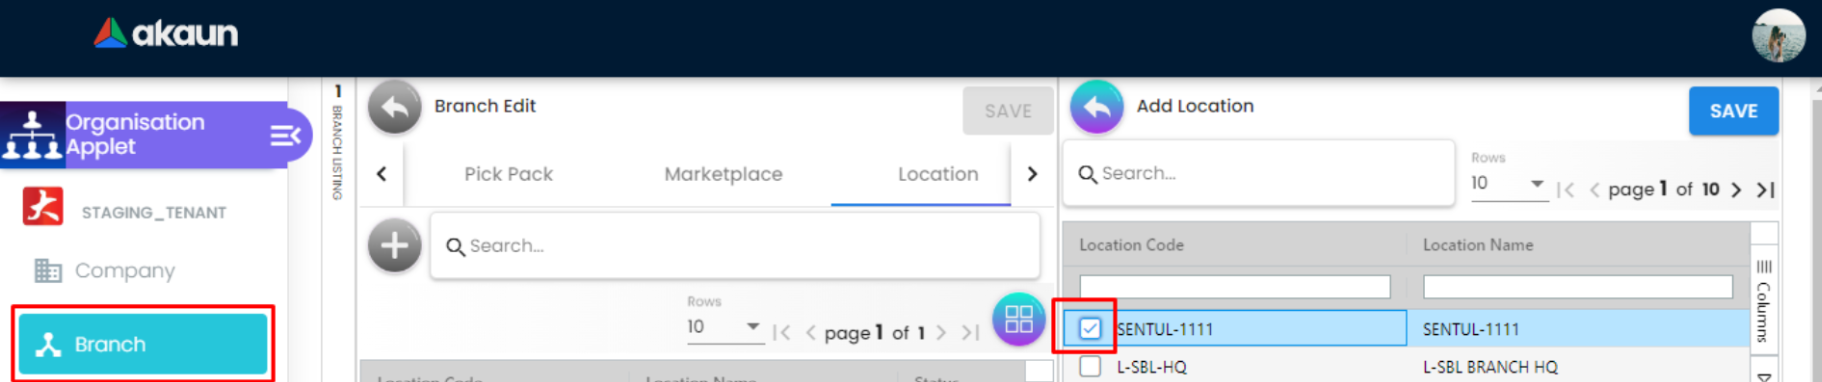
When the branch has been created, go to the Location tab and create a location for your company. Do not forget to check the box after creating the location.
-
If you skip this step, the system will not let you save your information in Step 1—Number 12.
-
Link the location to your company. Then, go to the Branch menu.
-
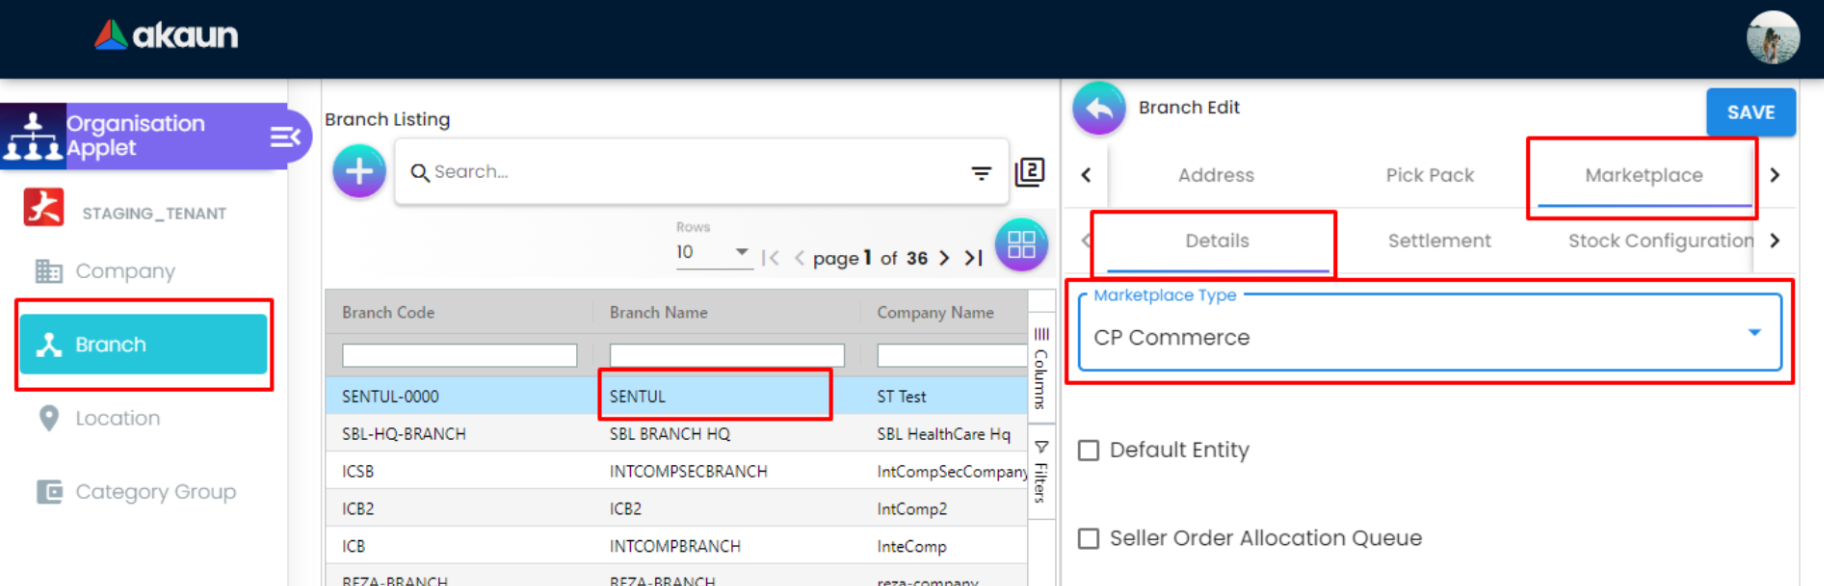
Click on your branch name and go to the Marketplace tab.
-
Choose CP Commerce in the marketplace type and fill in the rest with the necessary information, then save.
-
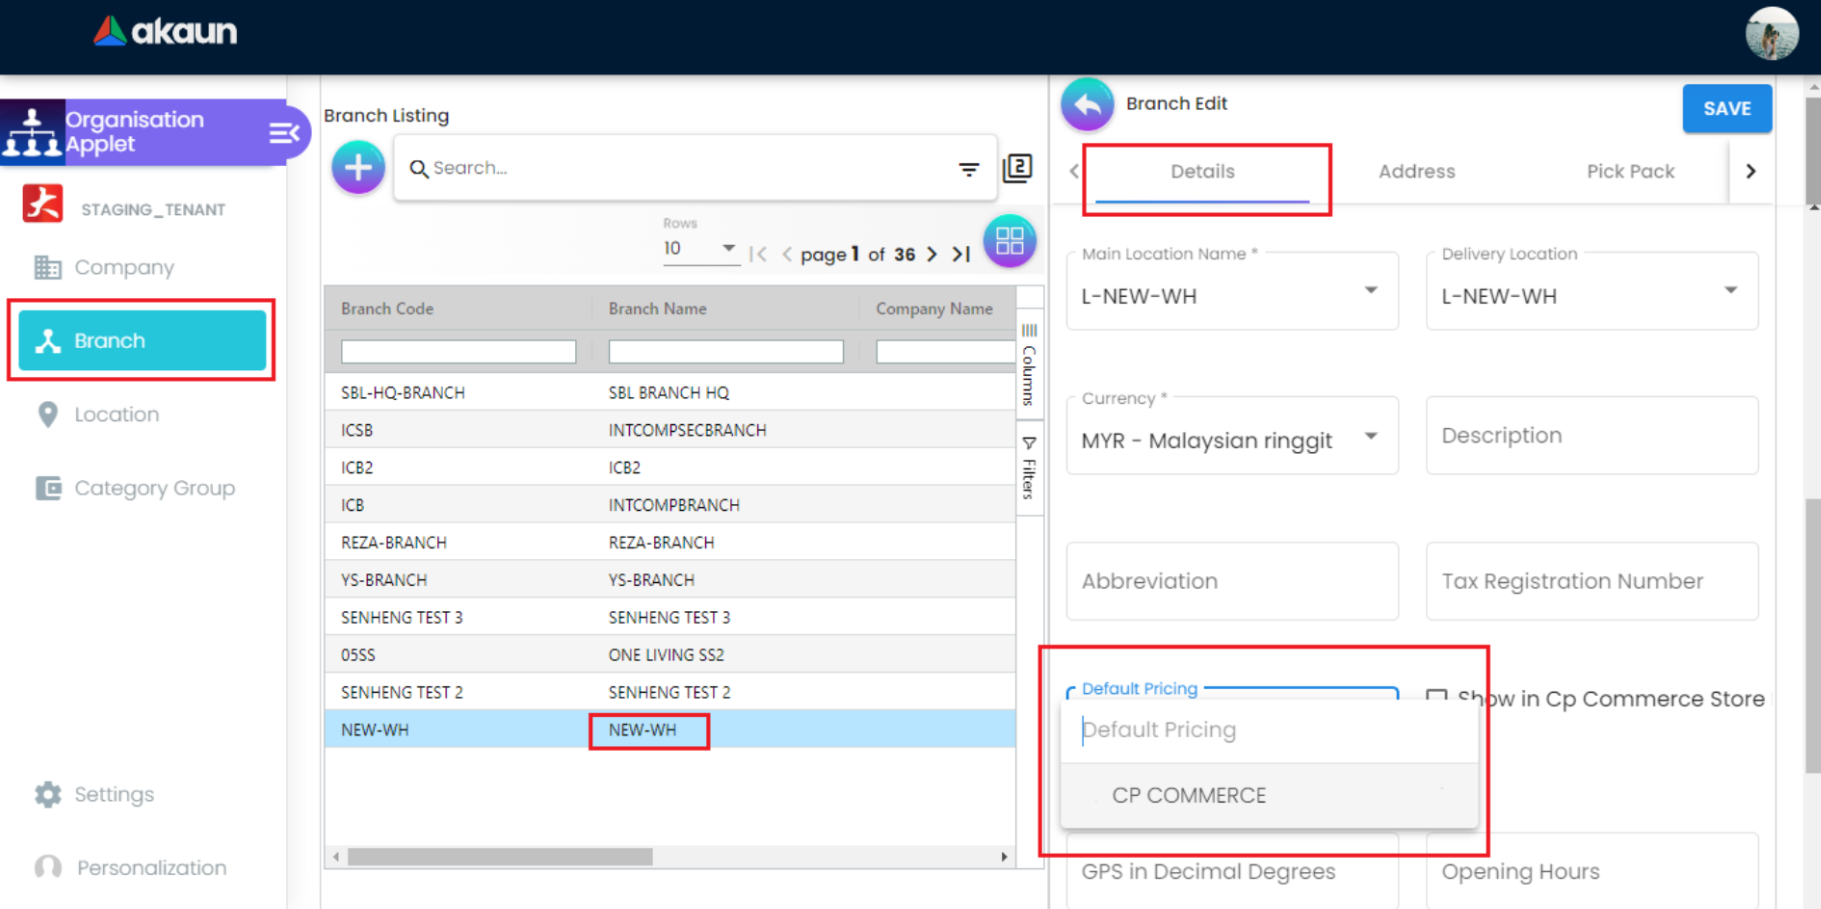
Go to Branch Edit > Details. You will have to choose CP-COMMERCE as your default pricing, and then save.
-
You are done with linking your pricing scheme to your branch; now let’s move on to Step 3.
Step 3: Create a Member Class in the Membership Admin Applet
-
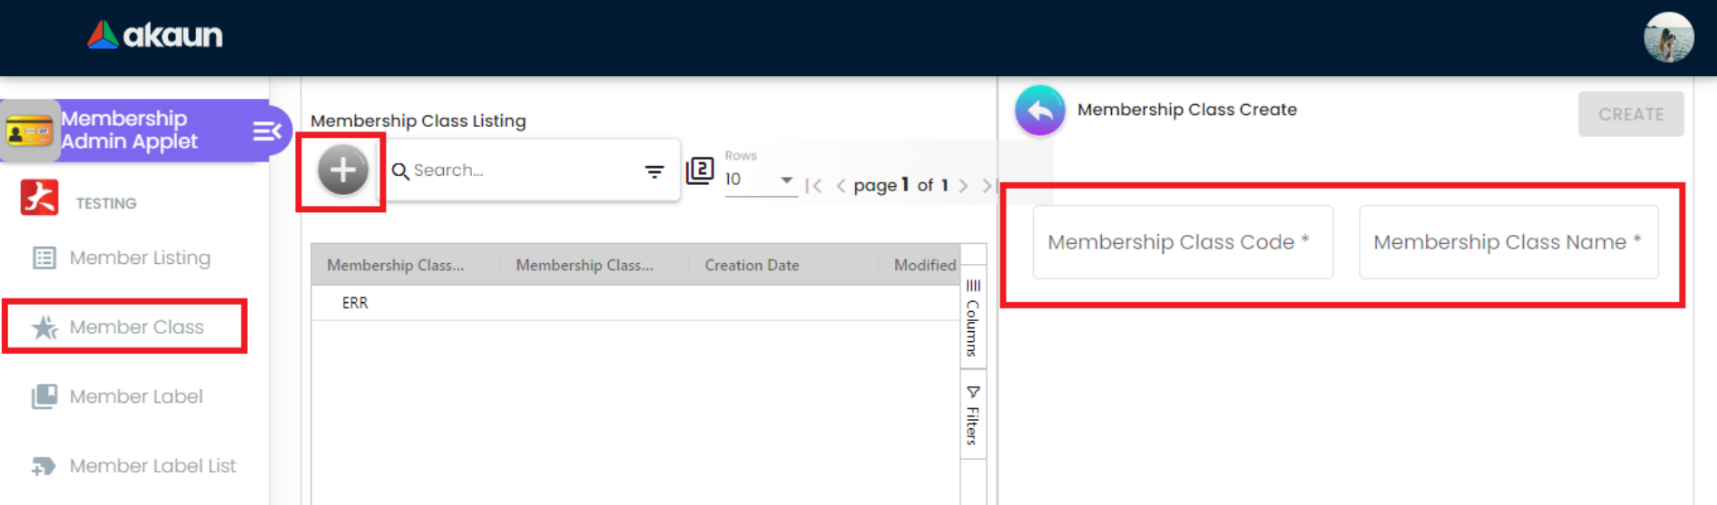
This step is quite simple. First, click on the Member Class menu, and then create a membership class.
-
Fill in the blank fields with a code and a name you would like to call your members, and then create. The membership class code has to be named the same as the membership class name.
-
The member class code is later needed during website creation in the CP-Commerce Admin Applet. This is so that you can assign your customers to different ranks or reward them with membership points when they purchase from your website.
-
After completing the creation of the member class and fulfilling all requirements, let us proceed to the website creation process.