2.0 Internal Purchase GIN Applet
The Internal Purchase GIN Listing page has a search bar to search for Purchase GIN in the listing below. The table has columns that are:
-
Purchase GIN No
-
Posting Status
-
Branch
-
Supplier Name
-
Purchase
-
Upload Date
-
Created Date
-
Transaction Date
-
Created By
2.1 In the Main Details Tab
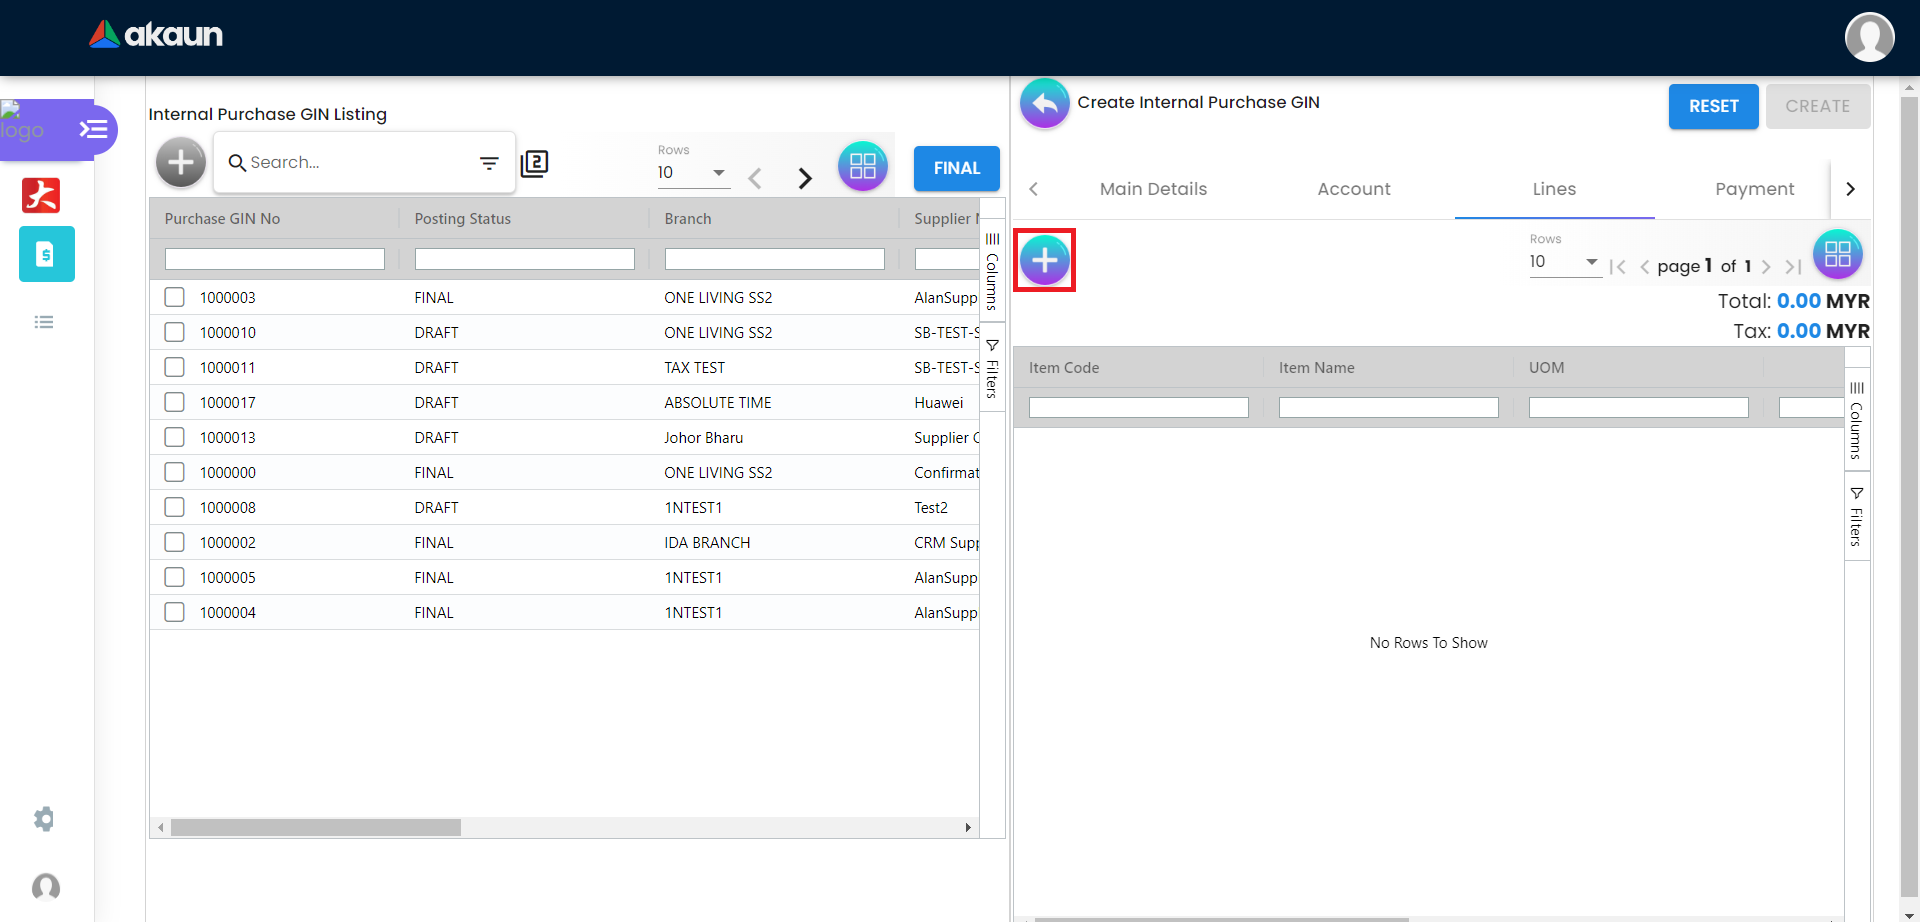
Please click the ‘+’ button to add a new GIN.
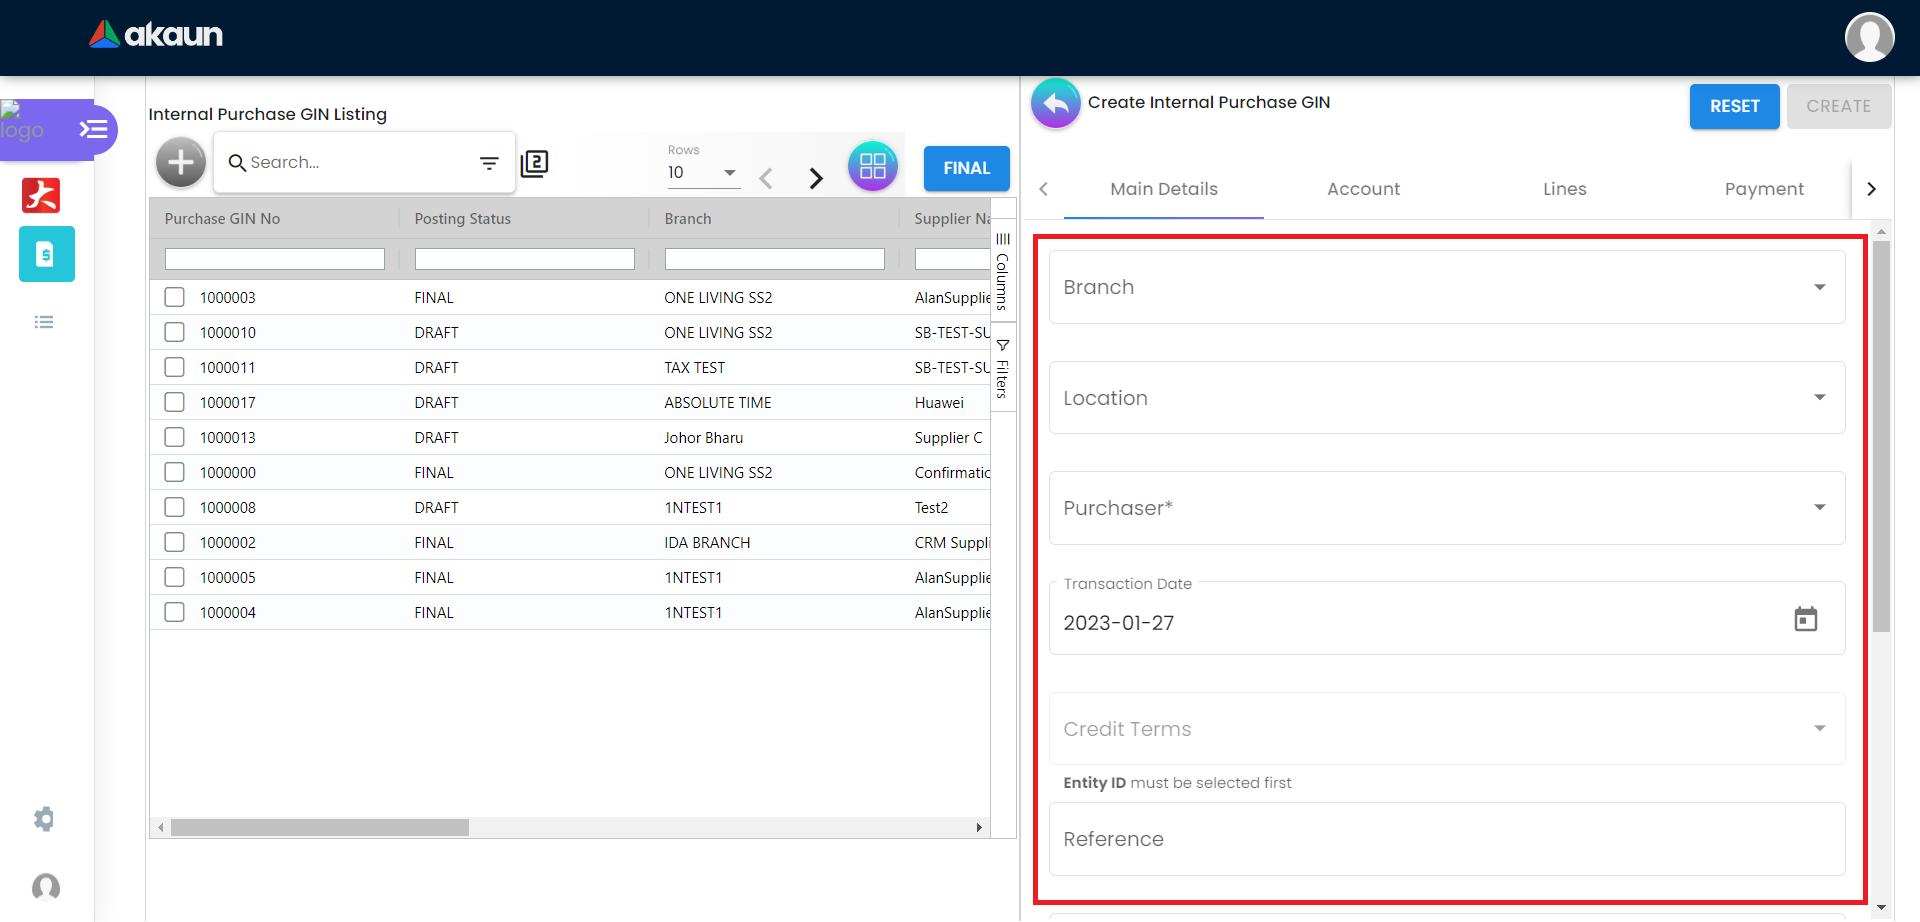
2.1.1 In the Main Details Tab
Please fill up the compulsory (*) information for creating the purchase GIN.
There are 10 components which allow the user to make changes respectively:
-
Branch - Will populate default branch according to the branch selected in the setting
-
Location - Will populate default location if branch according to the branch selected in the setting
-
Purchaser- Add new purchaser in Customer Maintenance Applet
-
Transaction Date - Default to the current date
-
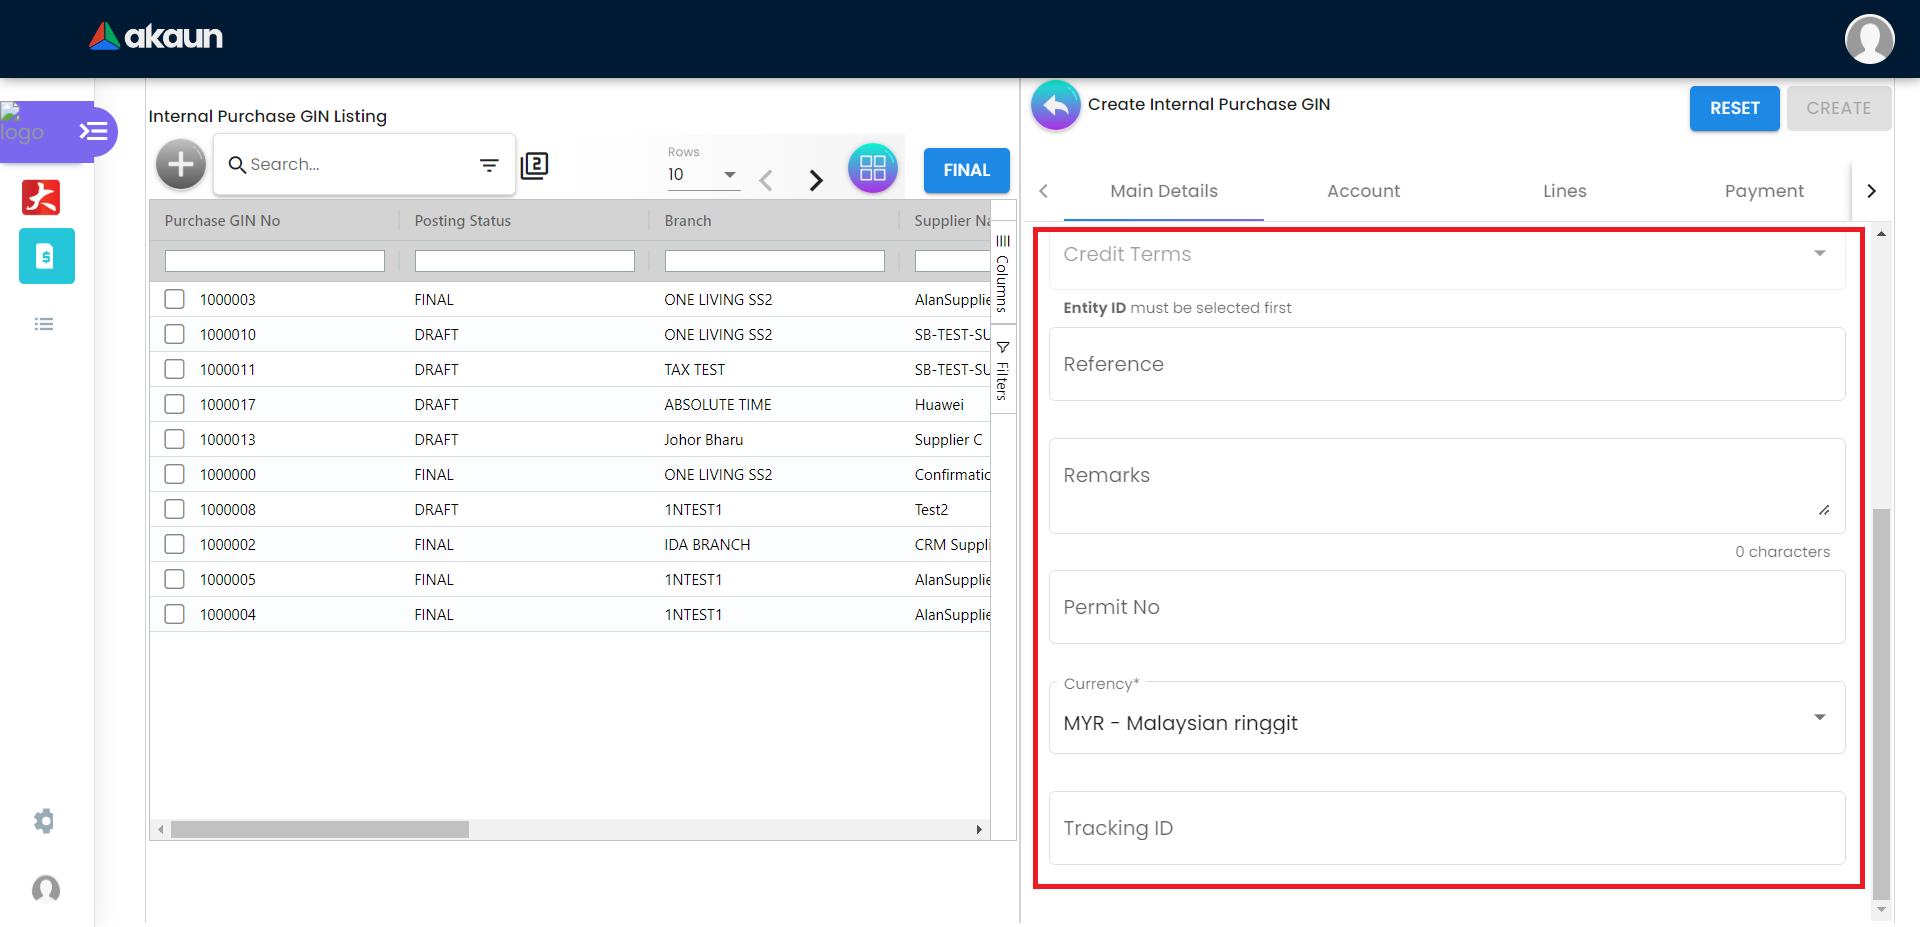
Credit Terms - Entity ID must be selected first
-
Reference
-
Remarks
-
Permit No
-
Currency
-
Tracking ID
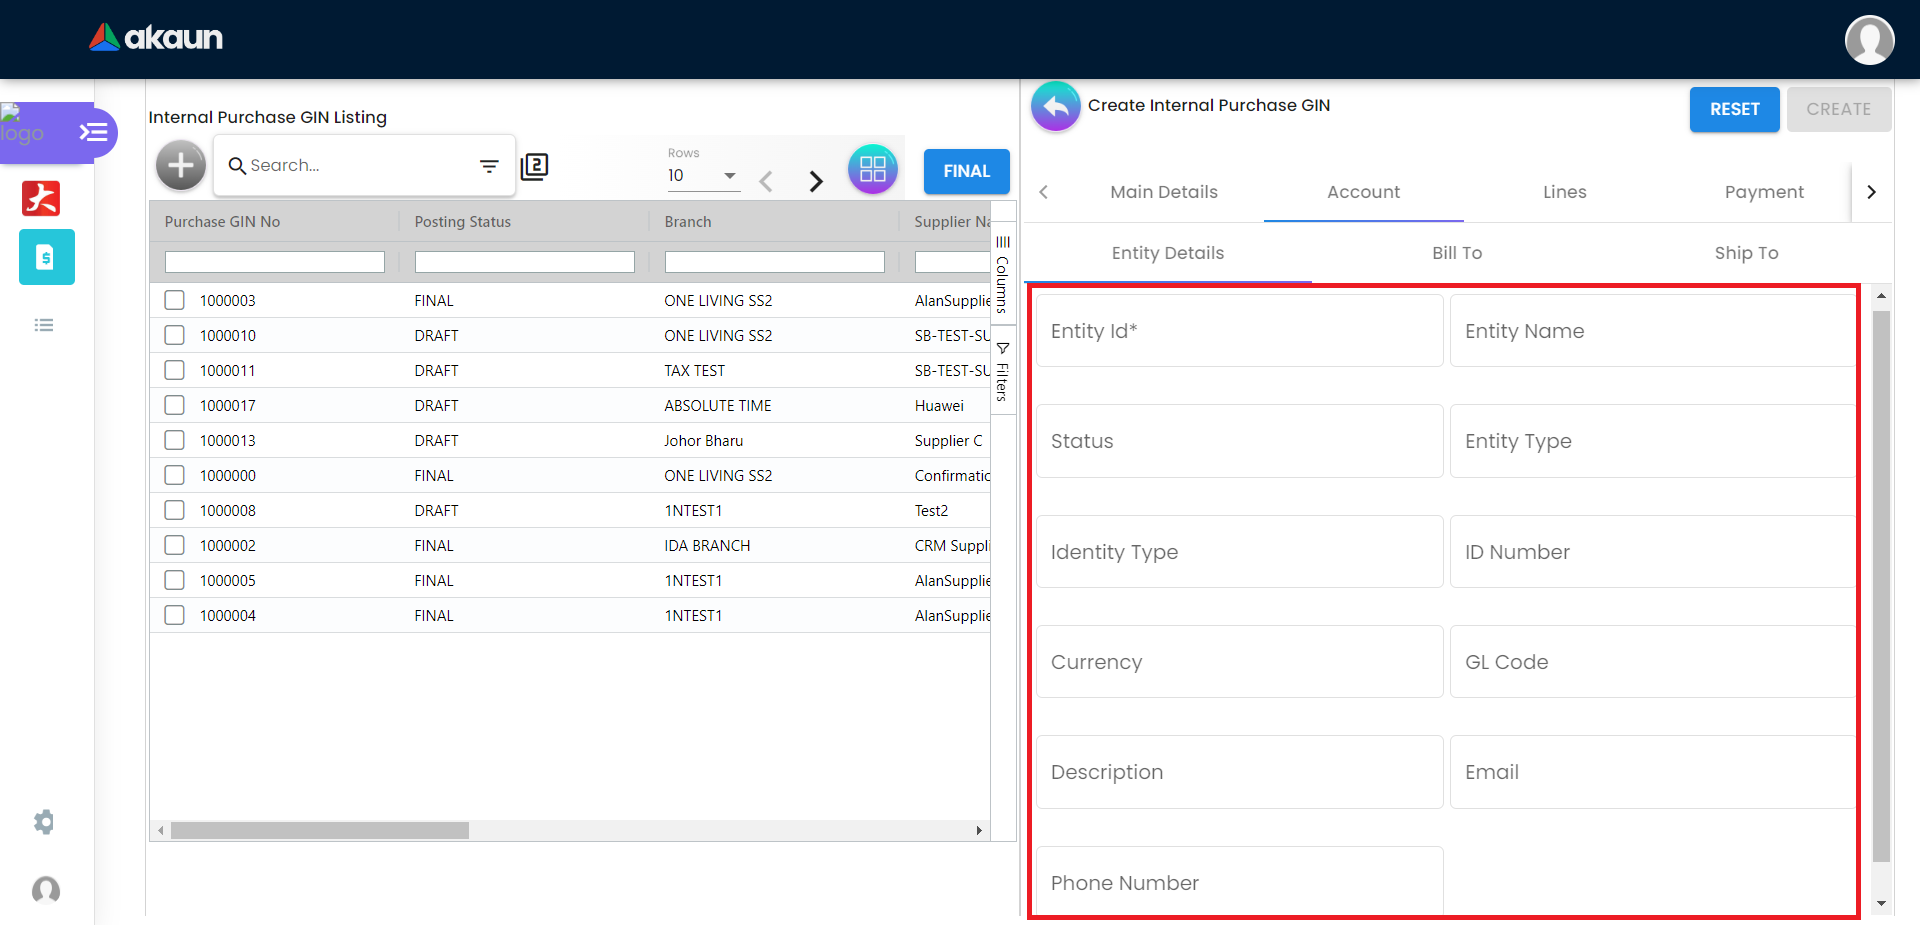
2.2 In the Account Tab
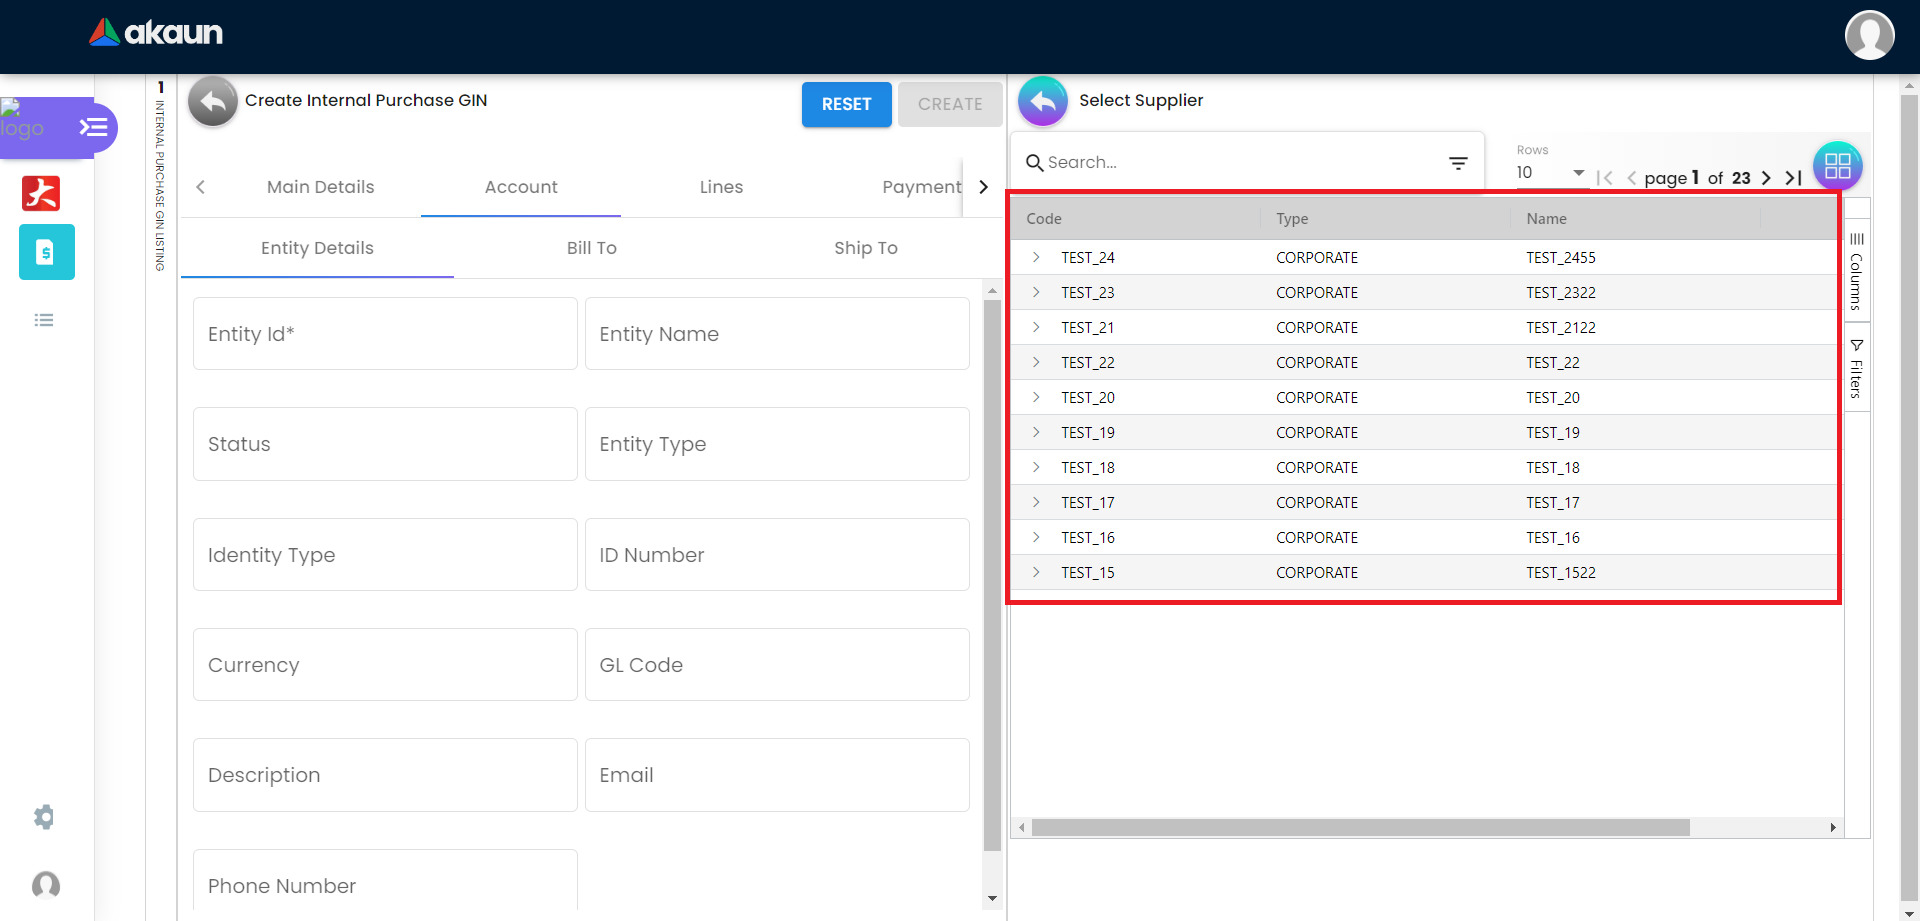
2.2.1 Entity Details Tab
Compulsory Information:
-
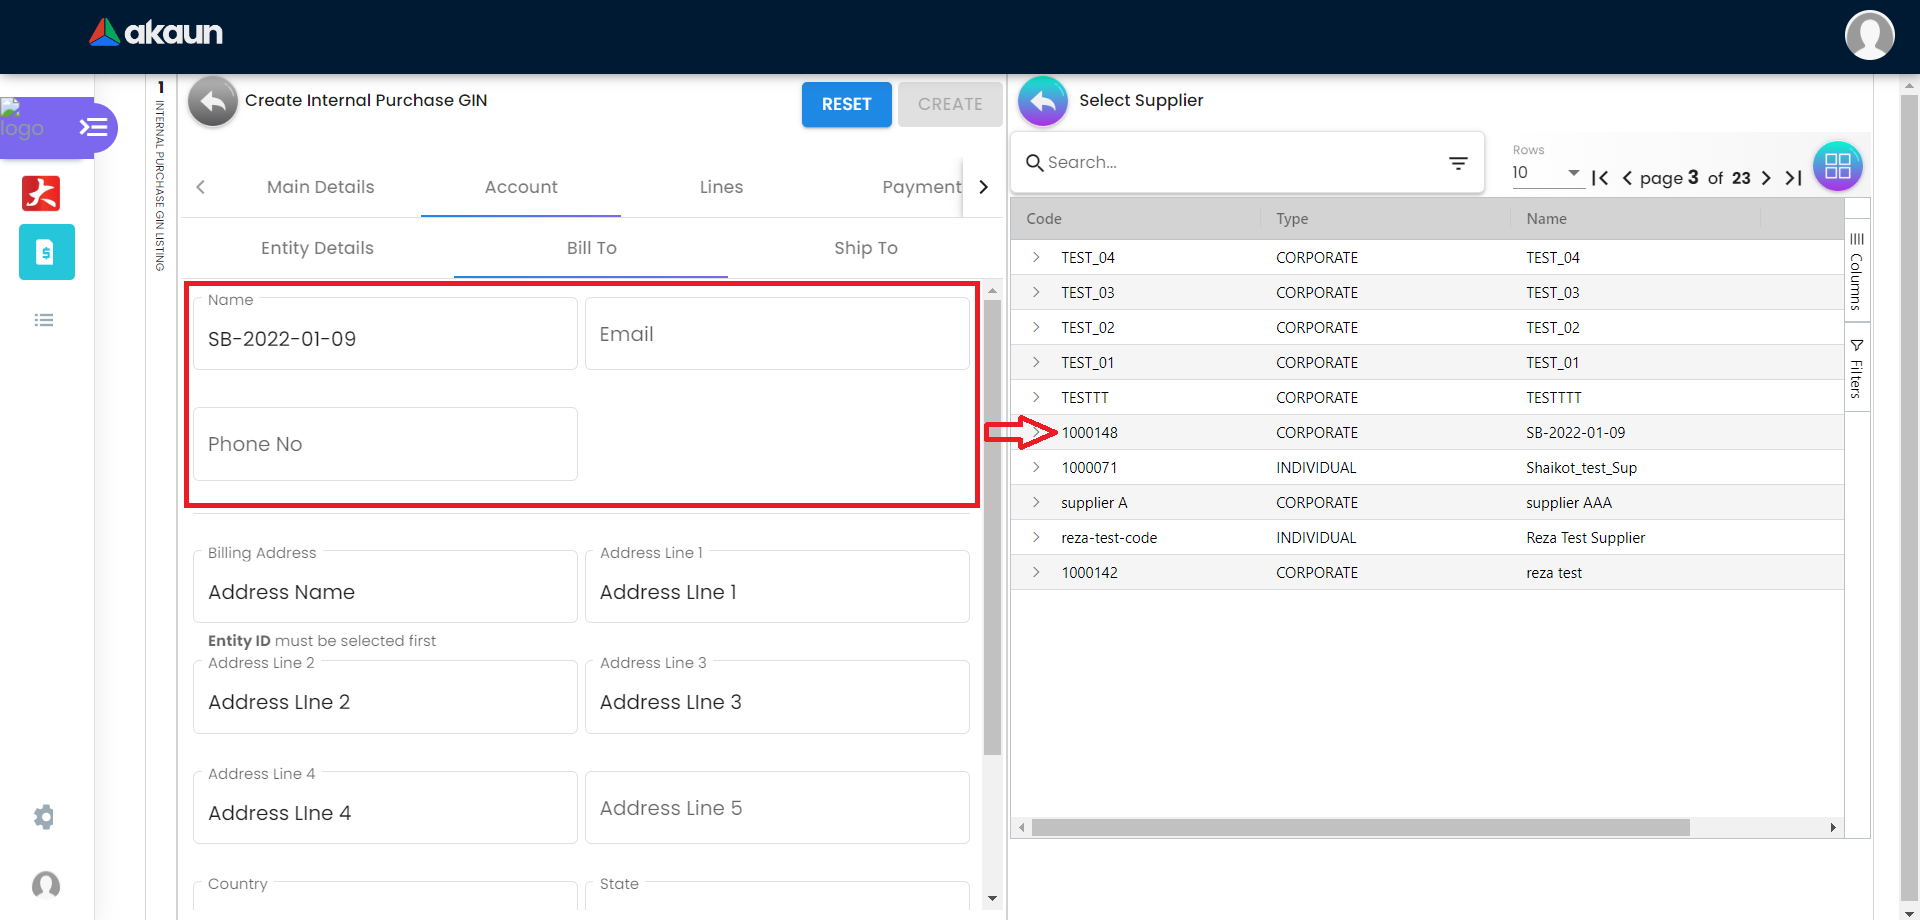
Entity ID: Supplier Code, auto-filled when a Supplier entity is selected.
-
Entity Name: Supplier Name, auto-filled when a Supplier entity is selected.
-
Status: Active or Inactive. Auto-filled when a Supplier entity is selected.
-
Entity Type: Corporate or Individual. Auto-filled when a Supplier entity is selected.
-
Identity Type: IC or Passport, auto-filled when Supplier entity is selected.
-
ID Number: IC or Passport number, auto-filled when a Supplier entity is selected.
-
Currency: To determine based on the pricing condition what you are maintaining. Auto-filled when a Supplier entity is selected.
-
GL Code: A number used to record business transactions in the general ledger. Auto-filled when a Supplier entity is selected.
-
Description: Additional notes. Auto-filled when a Supplier entity is selected.
-
Email: A central email through which the Supplier wants to communicate. Auto-filled when a Supplier entity is selected.
-
Phone Number: A central phone number through which Supplier wants to communicate. Auto-filled when a Supplier entity is selected.
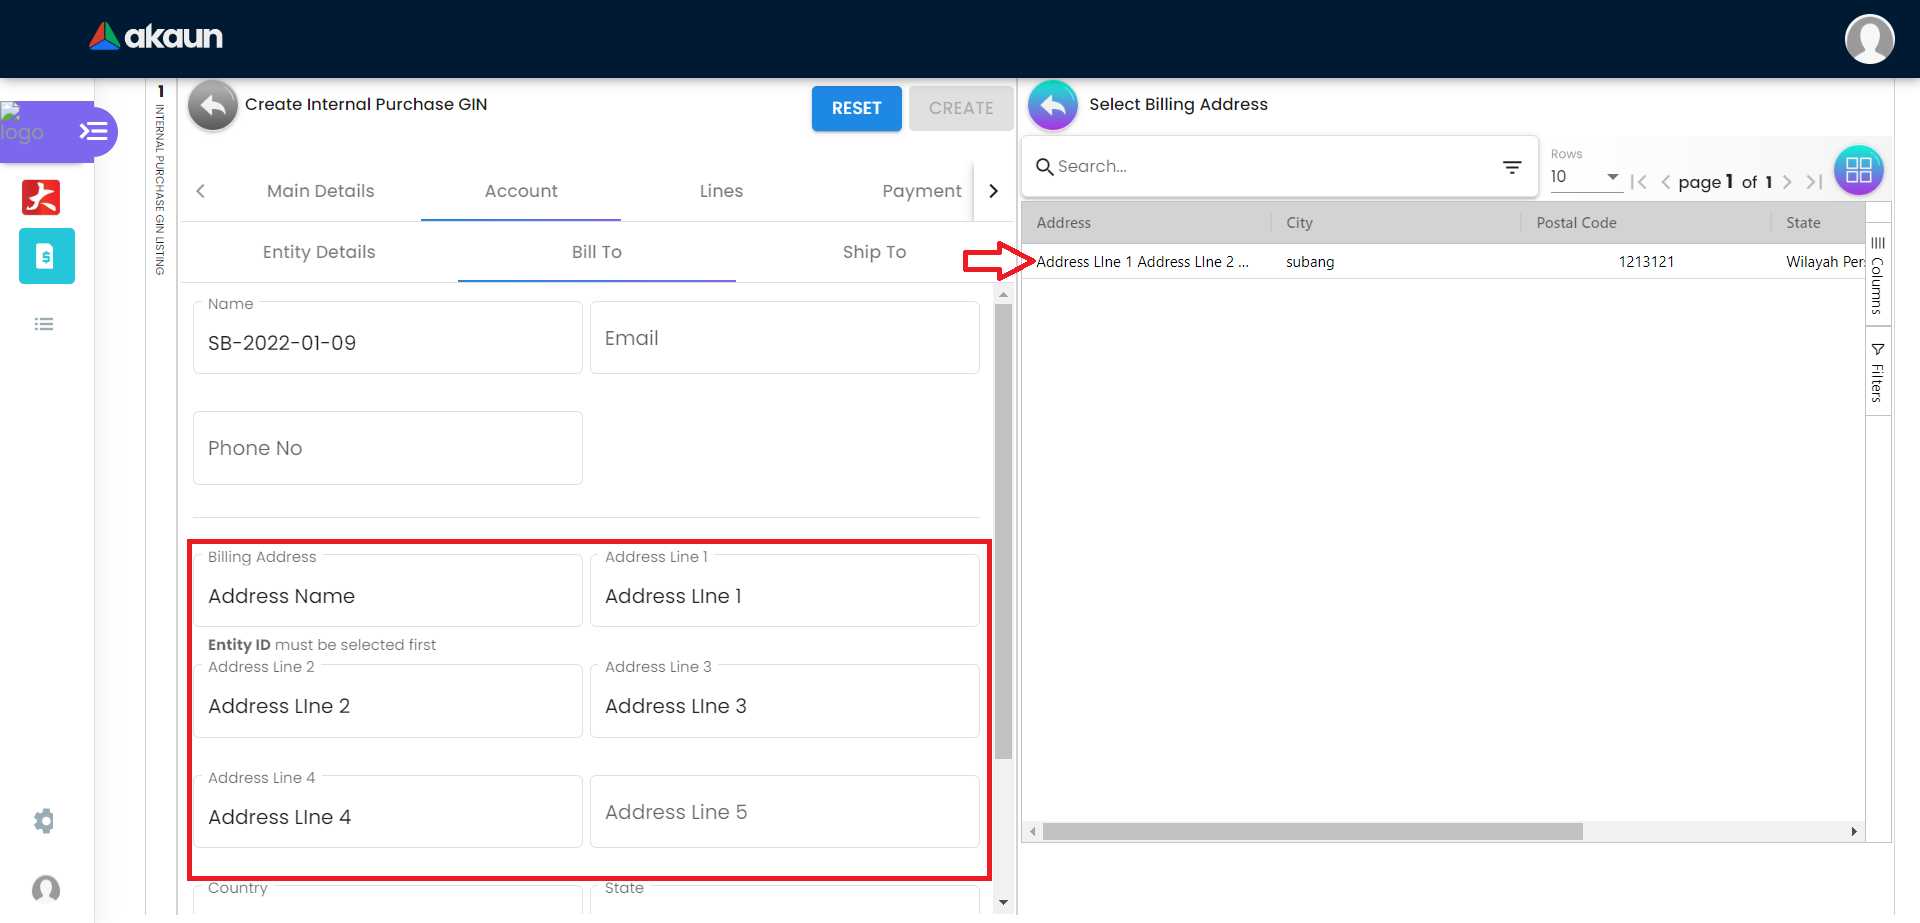
2.2.2 Bill To Tab
Name, Email and Phone No will be Autofill after have select the Entity ID.
If only 1 Billing Address exists in that Entity ID, the Billing Address will auto-populate after selecting the Entity ID.
List of Billing Addresses will be displayed on the right side for selection after clicking on the Billing Address.
2.2.3 Ship To Tab
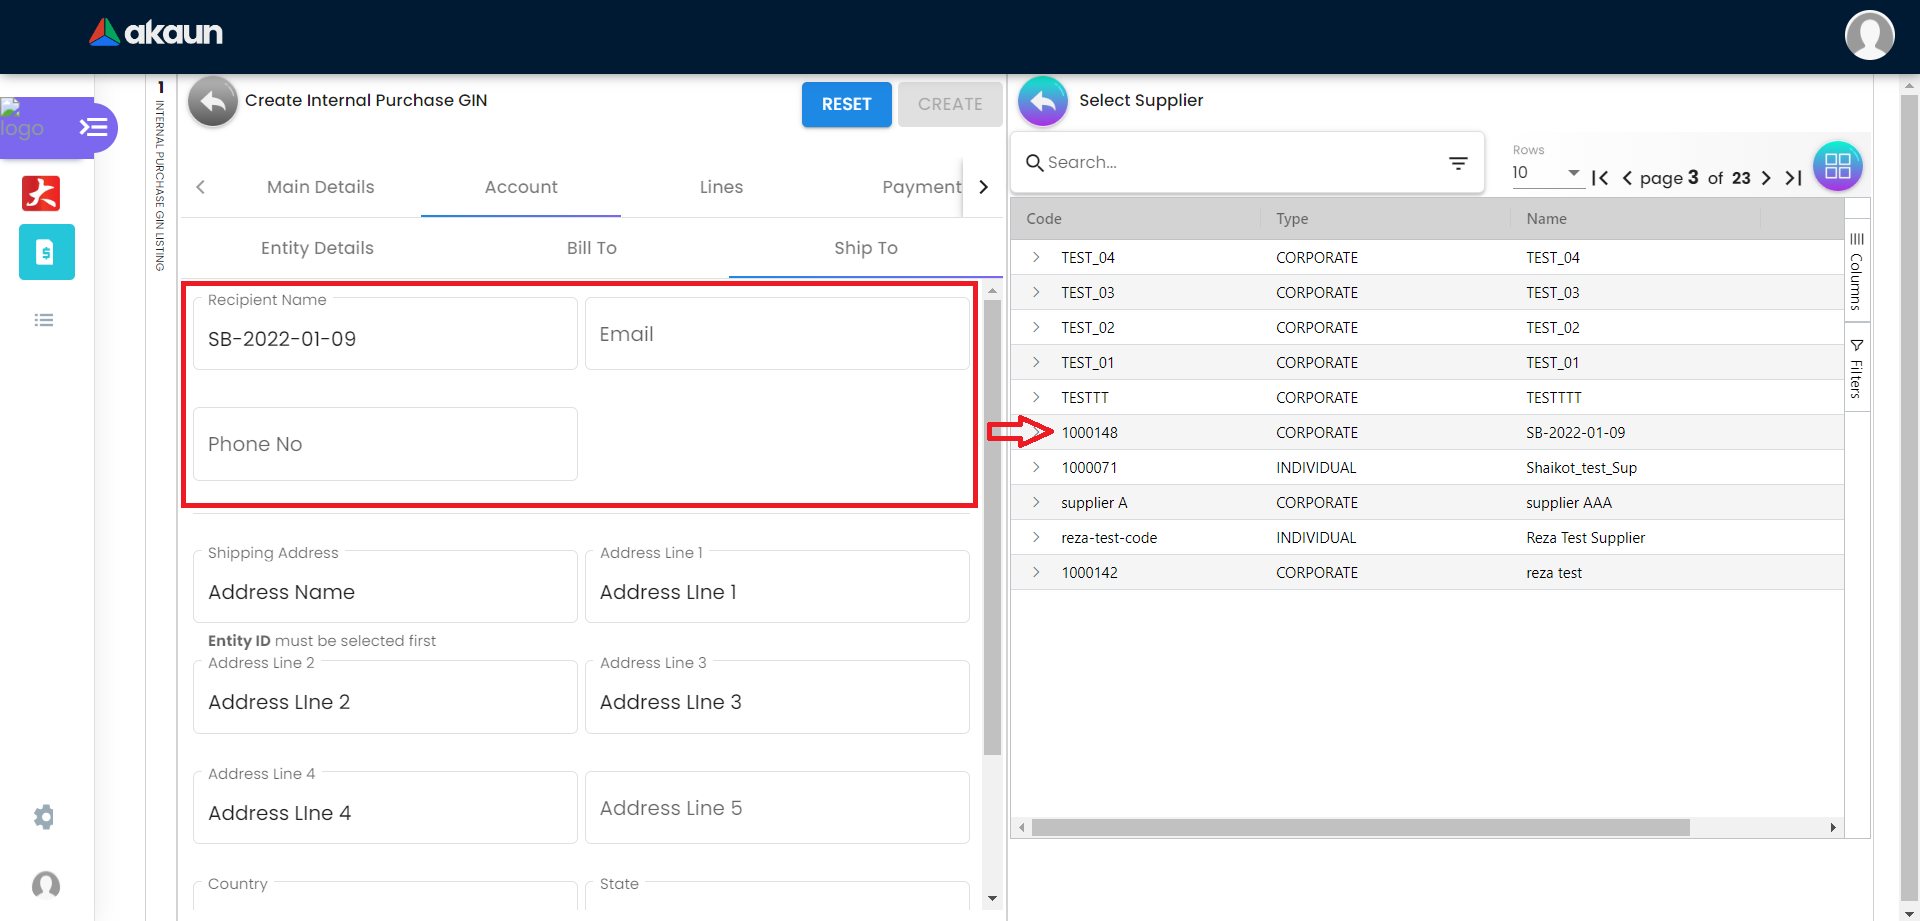
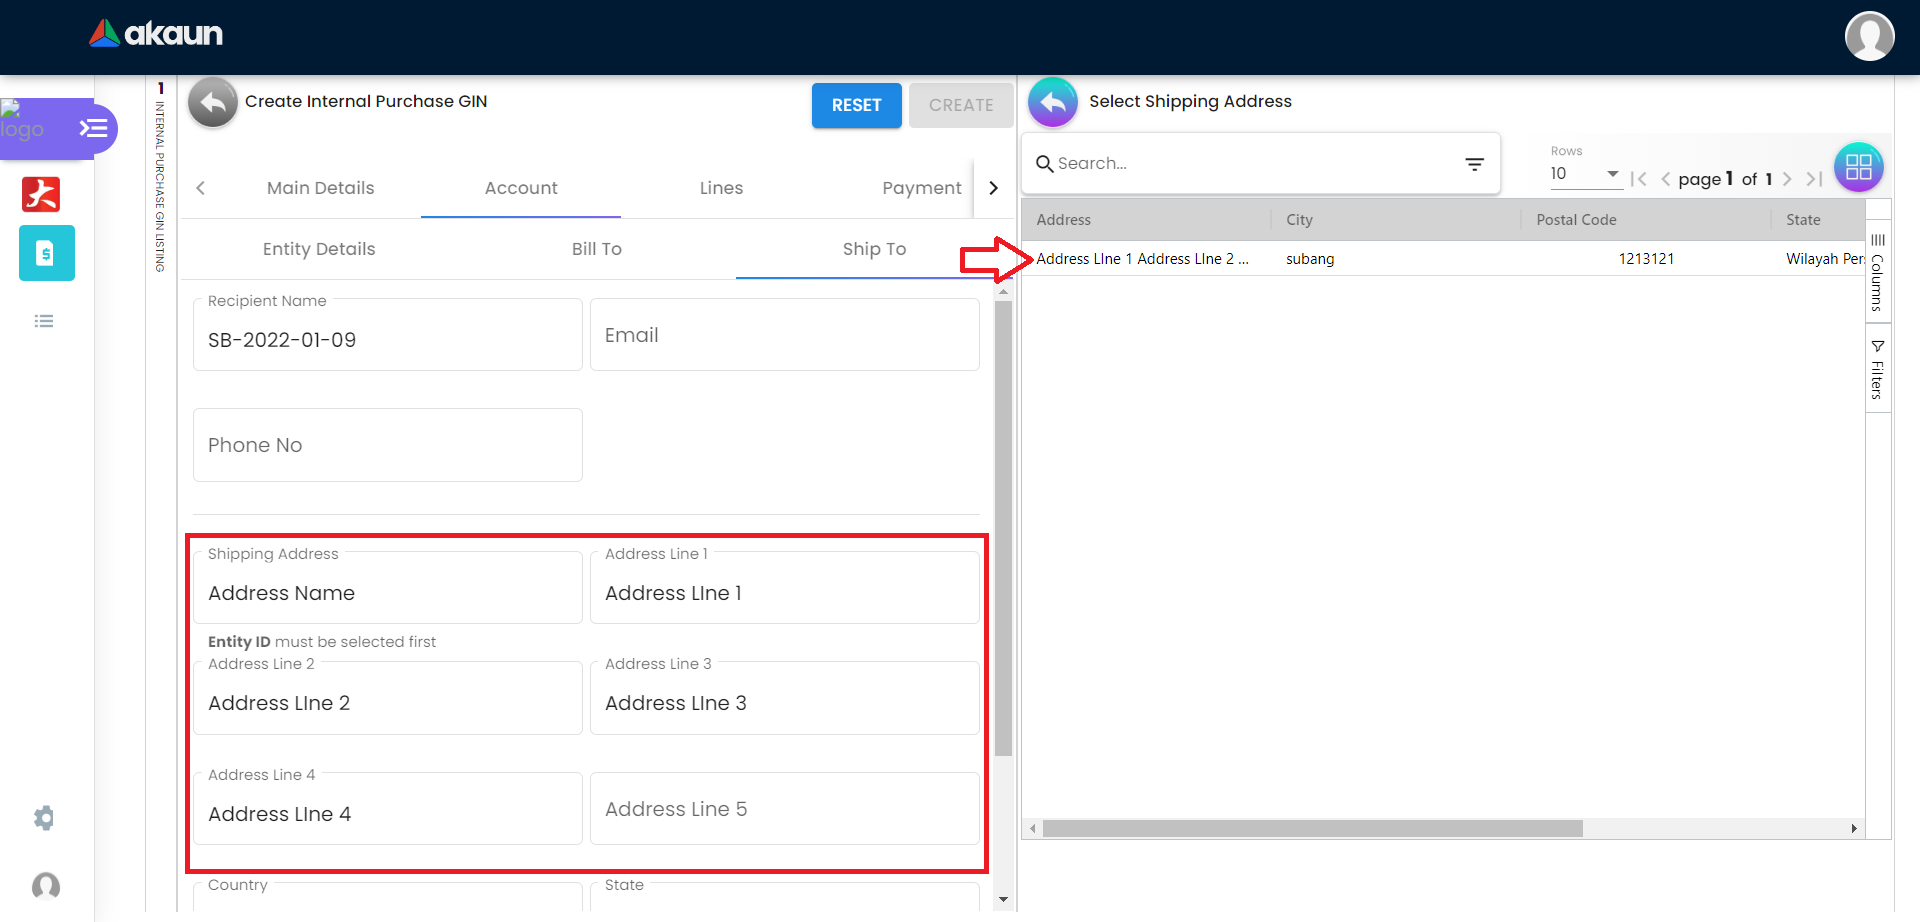
Name, Email and Phone No will be Autofill after have select the Entity ID.
If only 1 Shipping Address exists in that Entity ID, the Shipping Address will auto-populate after selecting the Entity ID.
List of Shipping Addresses will be displayed on the right side for selection after clicking on the Shipping Address.
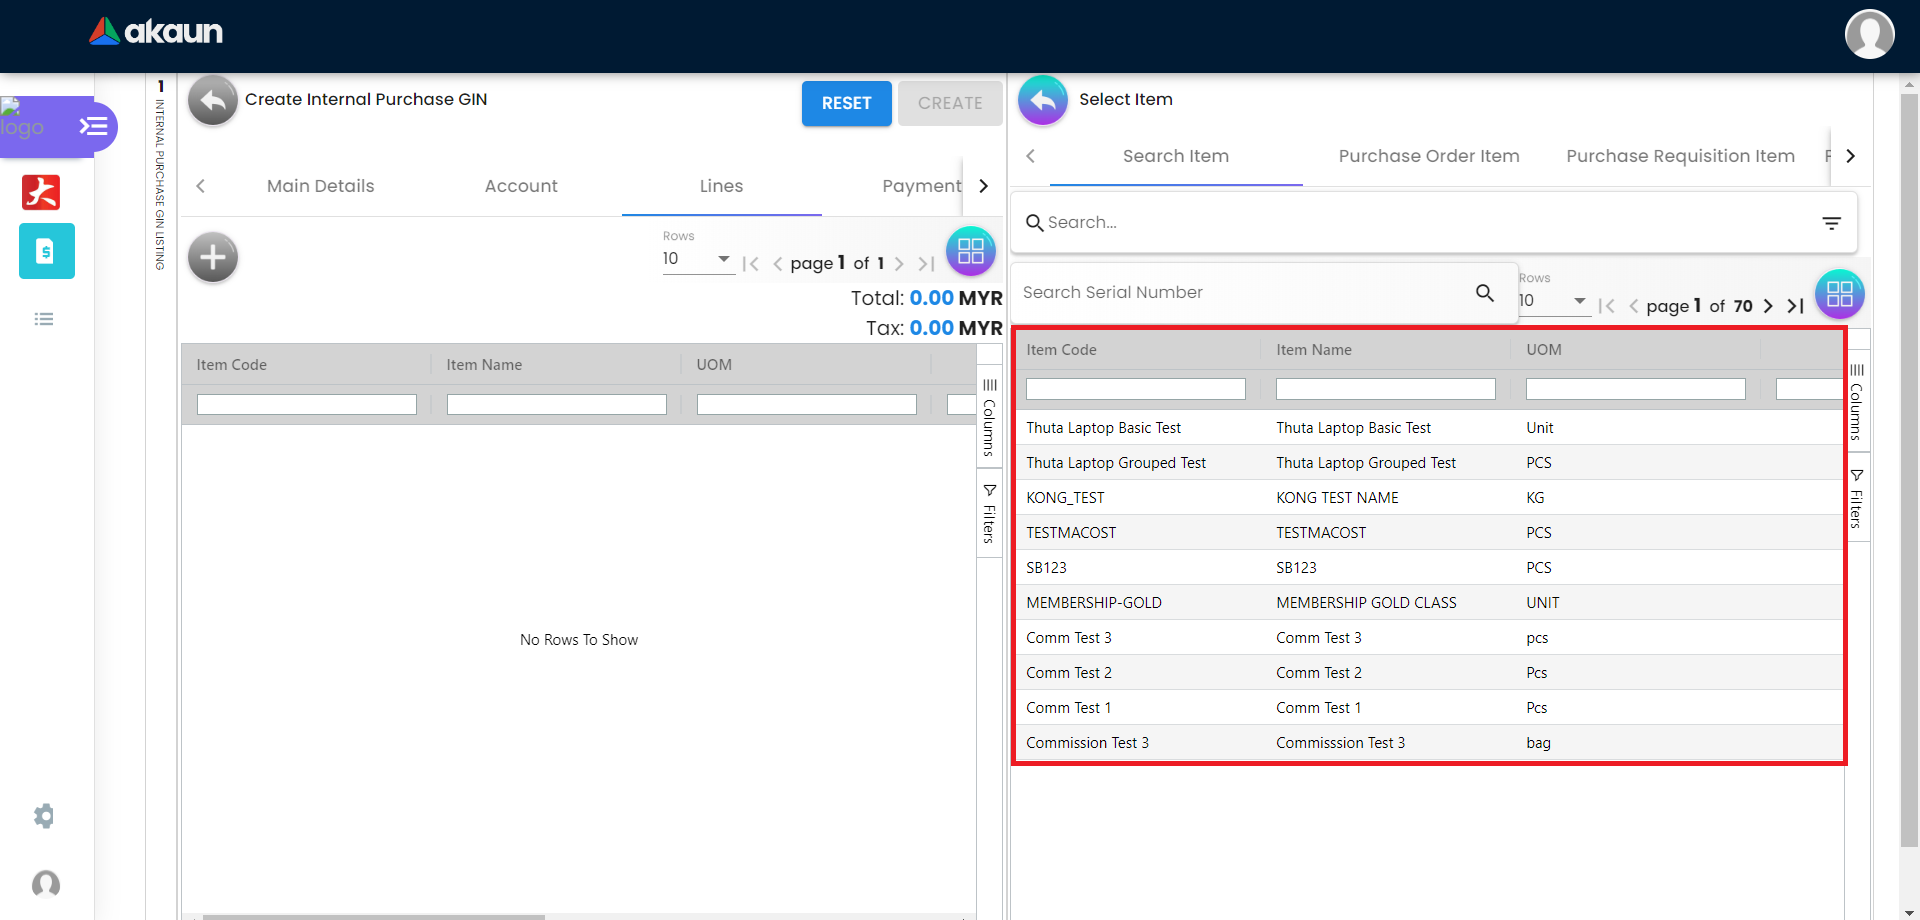
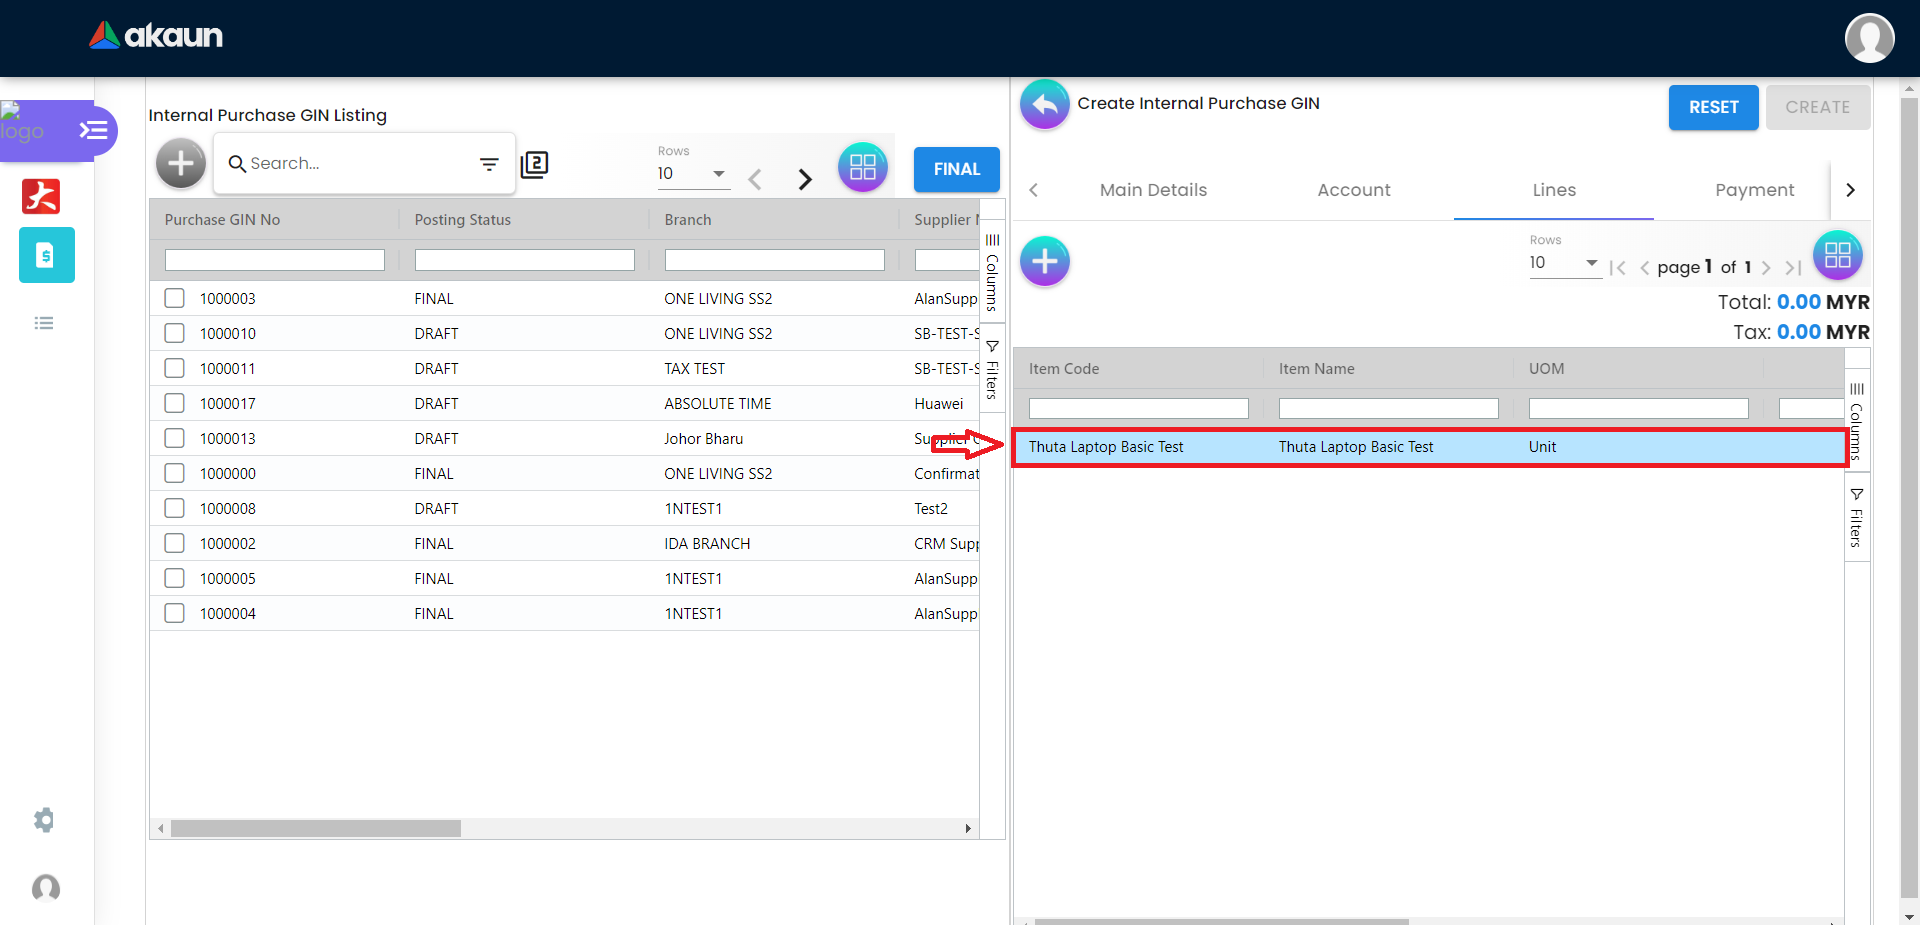
2.3 In the Line Items Tab
Please click the ‘+’ button to add new line items.
A list of items will be displayed on the right side based on its purchased item type.
The purchased item types are Purchase Order Item, Purchase Requisition Item, Purchase Quotation Item, Purchase Invoice Item and Purchase Return Item.
A new column of Add Items will be displayed on the right side when one of the items is clicked and the changes can be saved by clicking on the Add button.
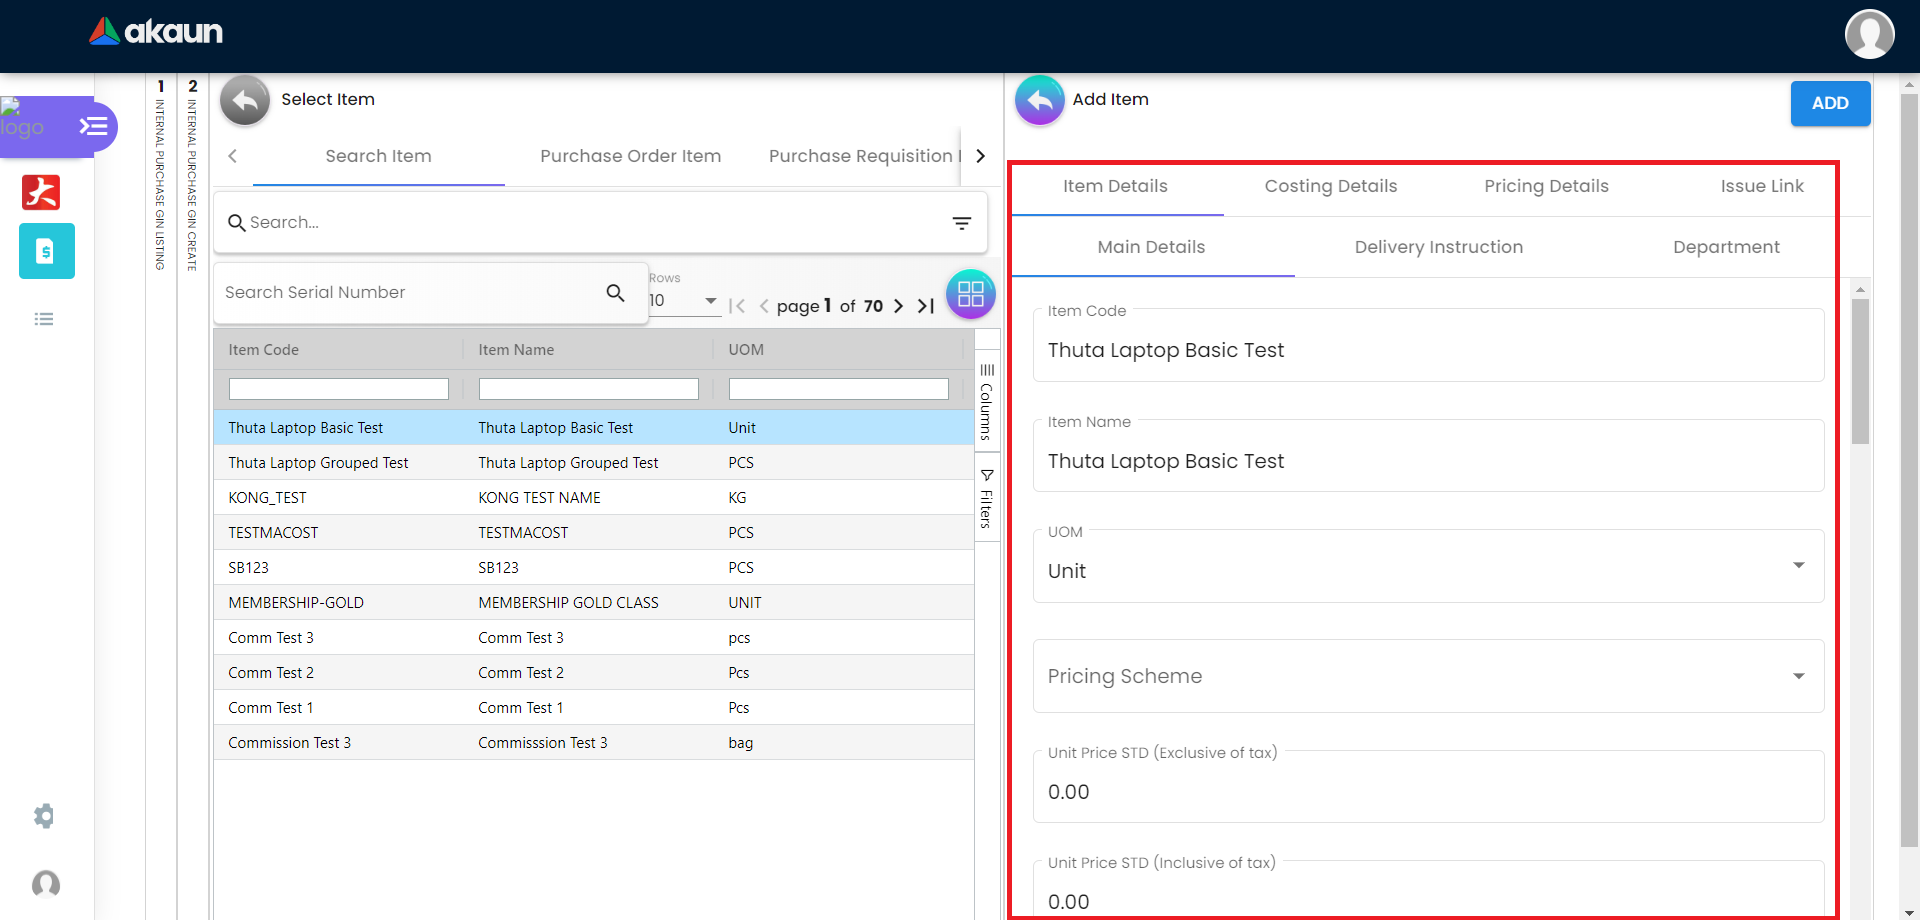
2.3.1 Item Details Tab
2.3.1.1 Main Details Tab
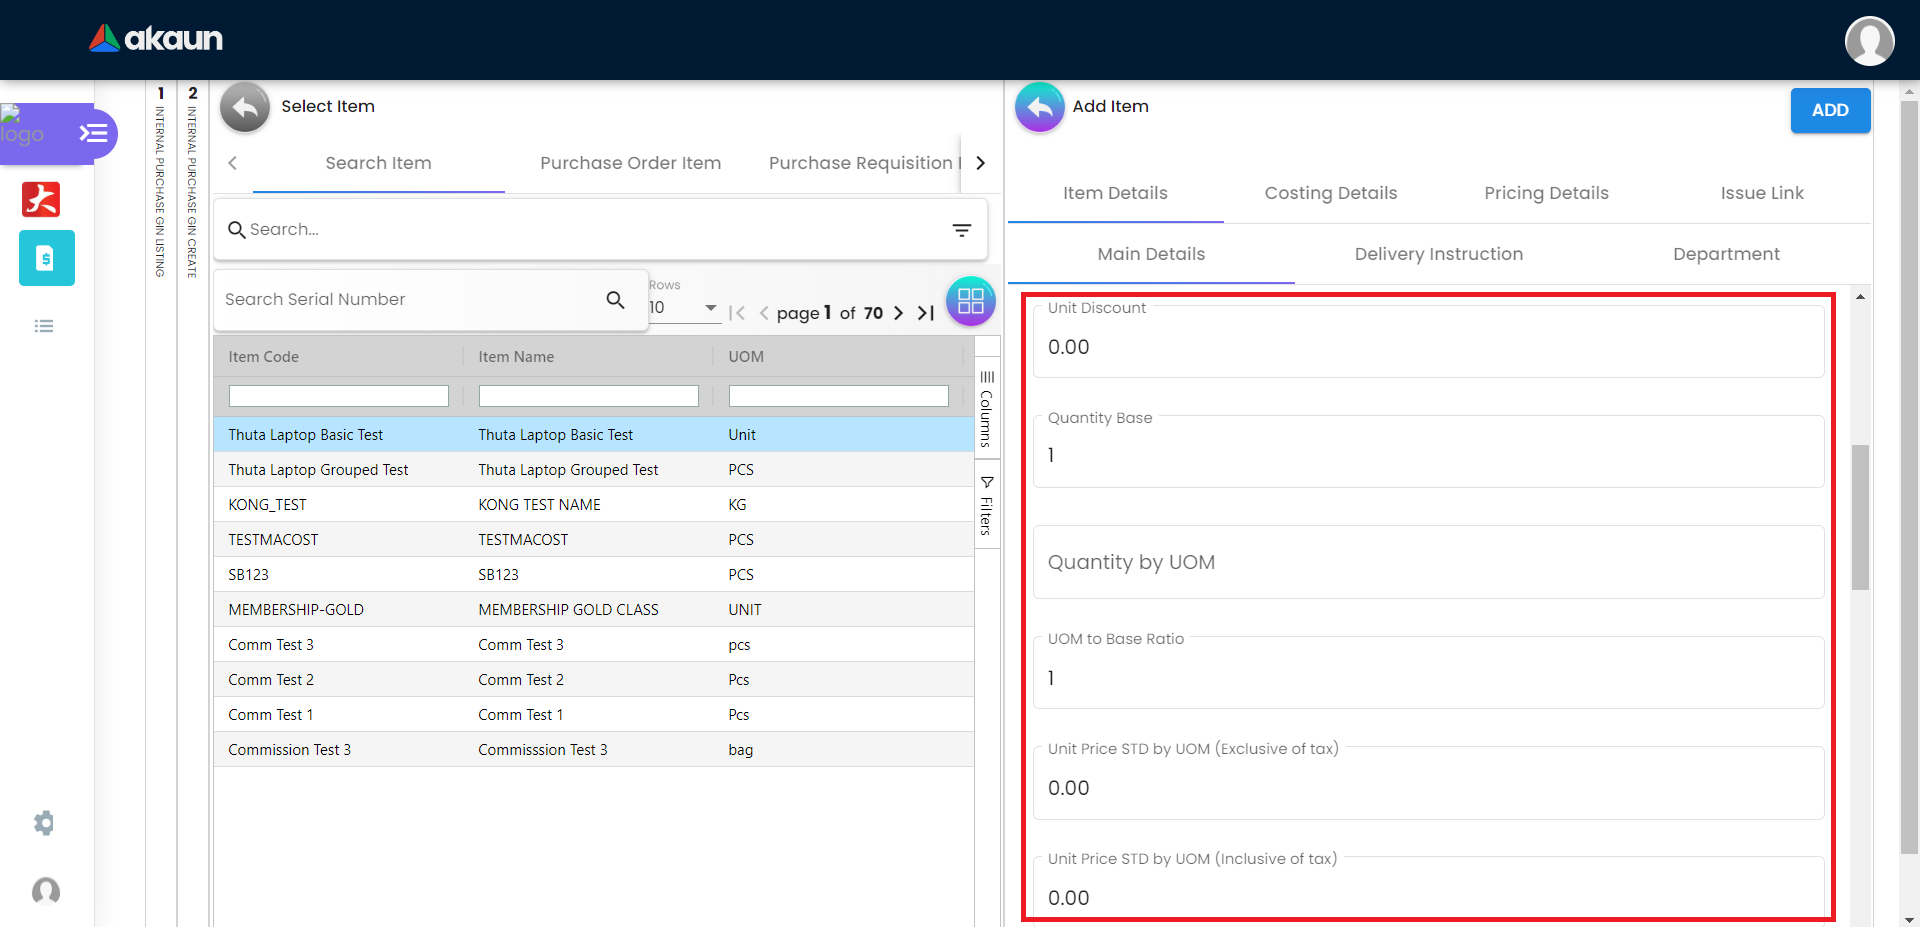
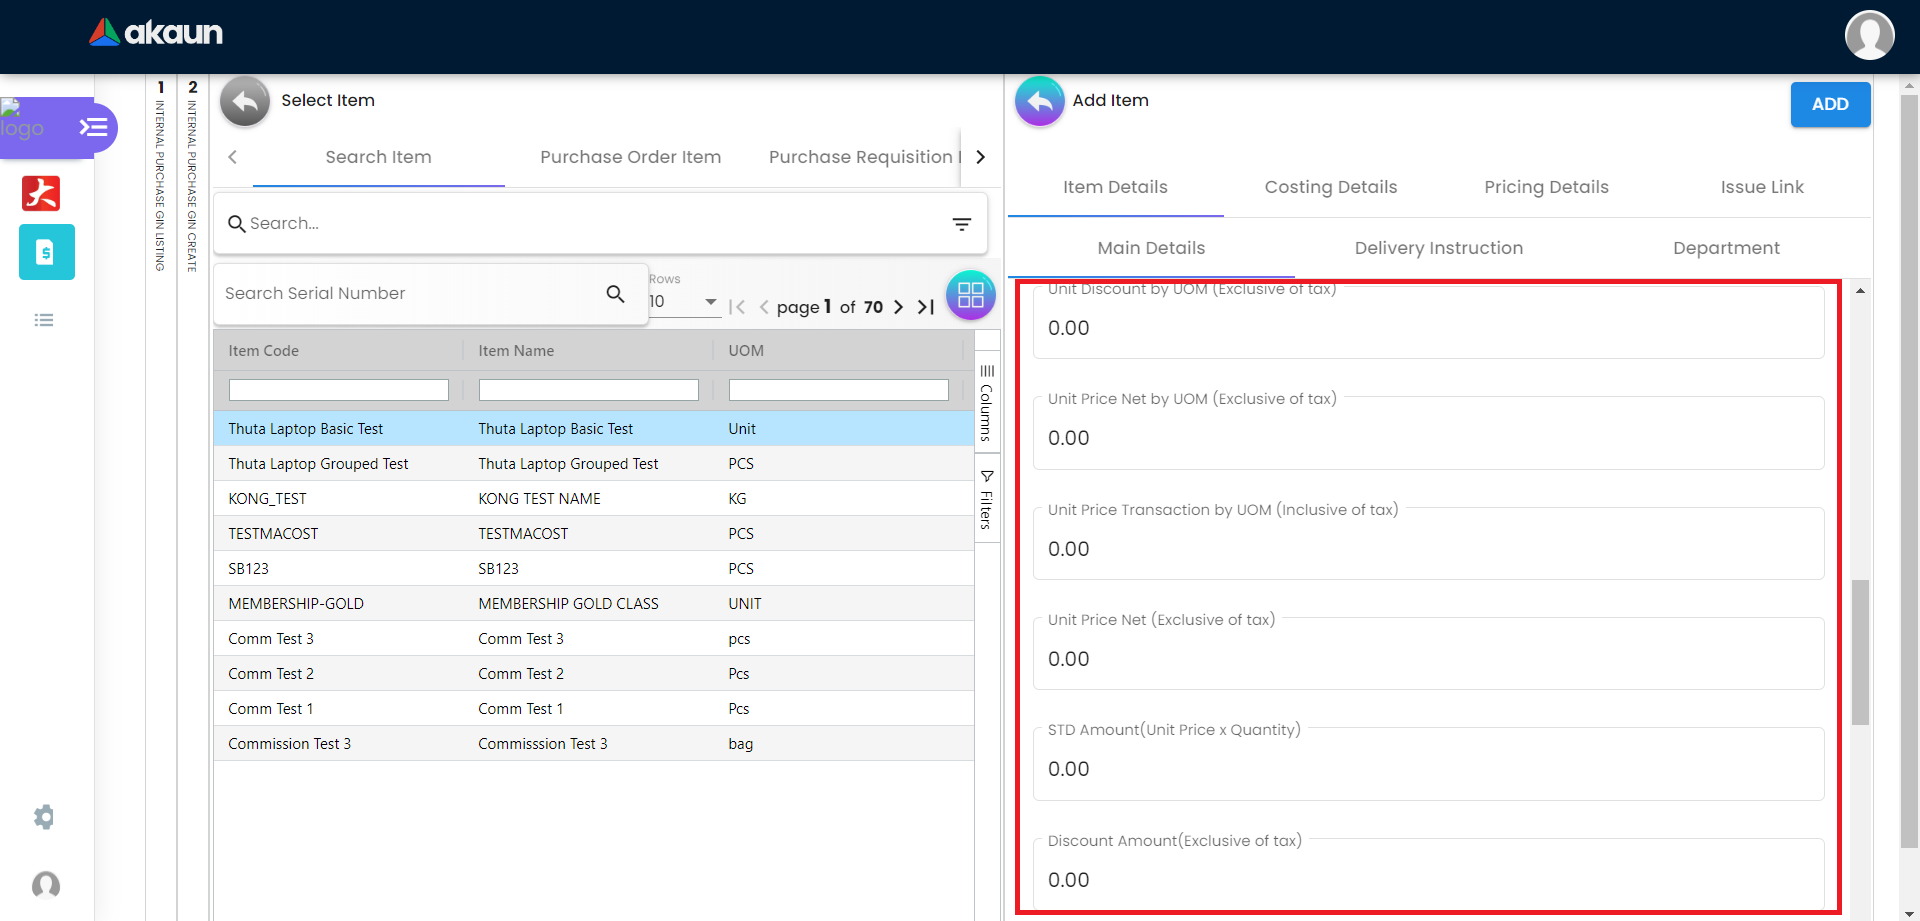
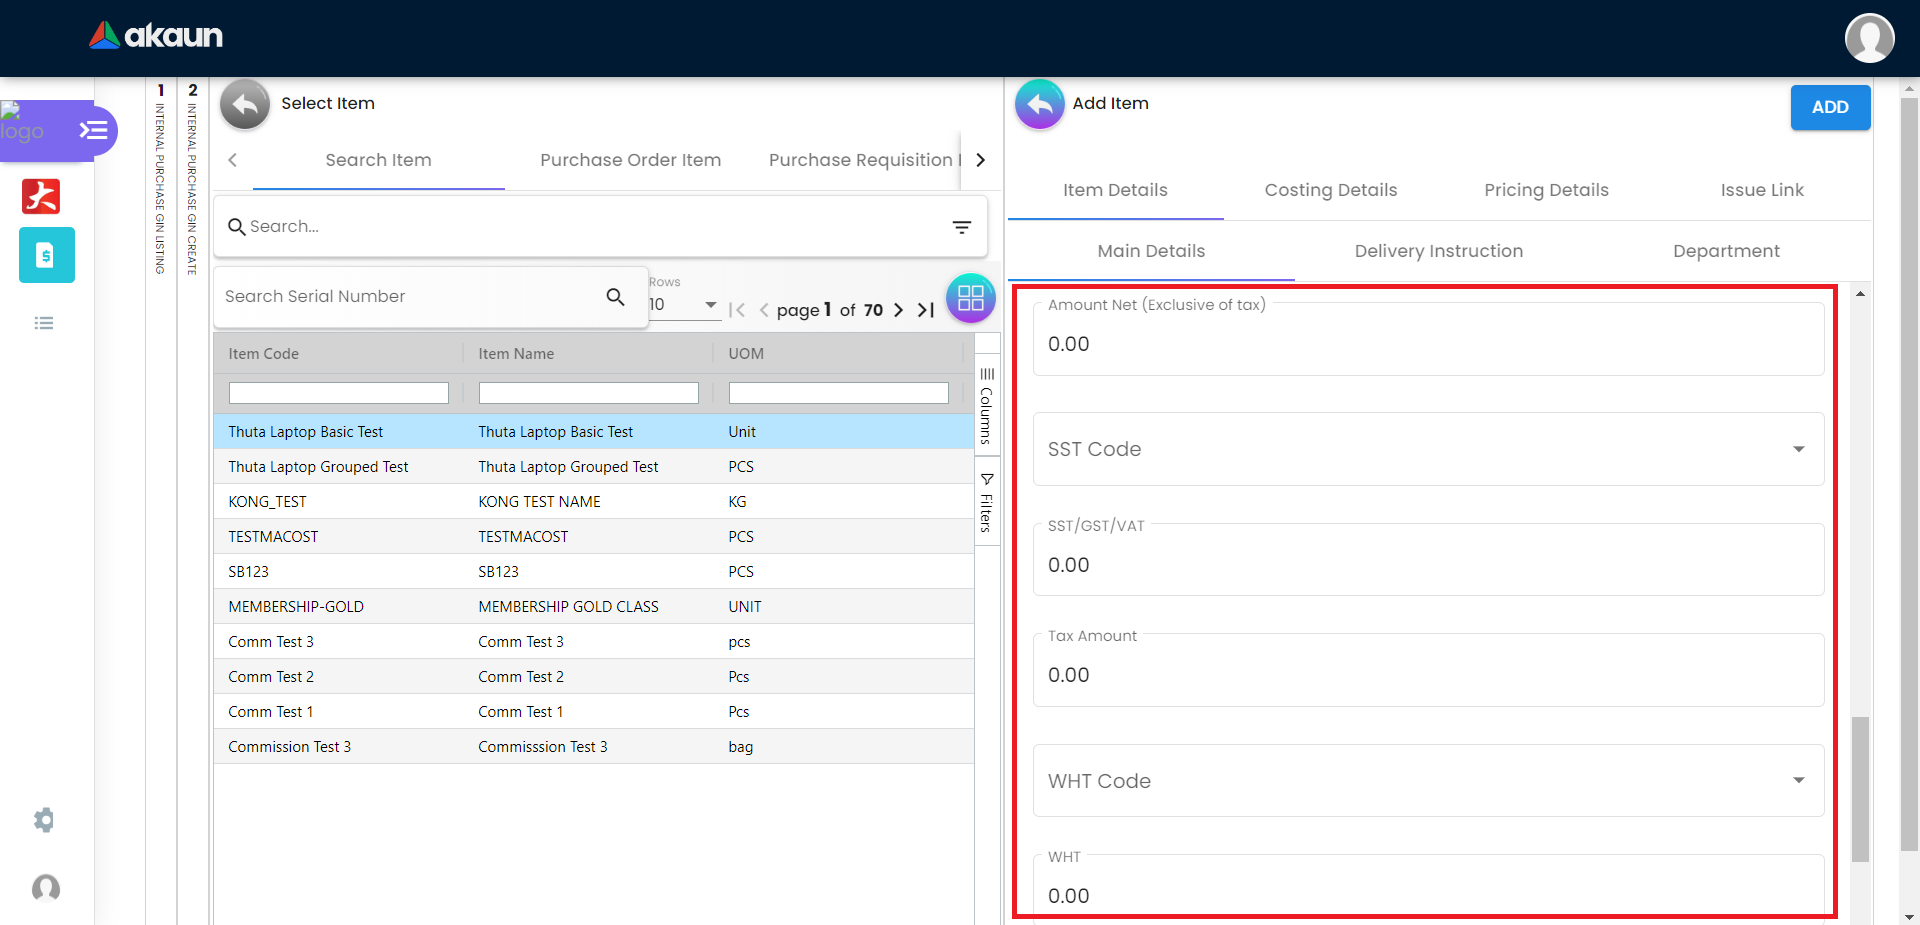
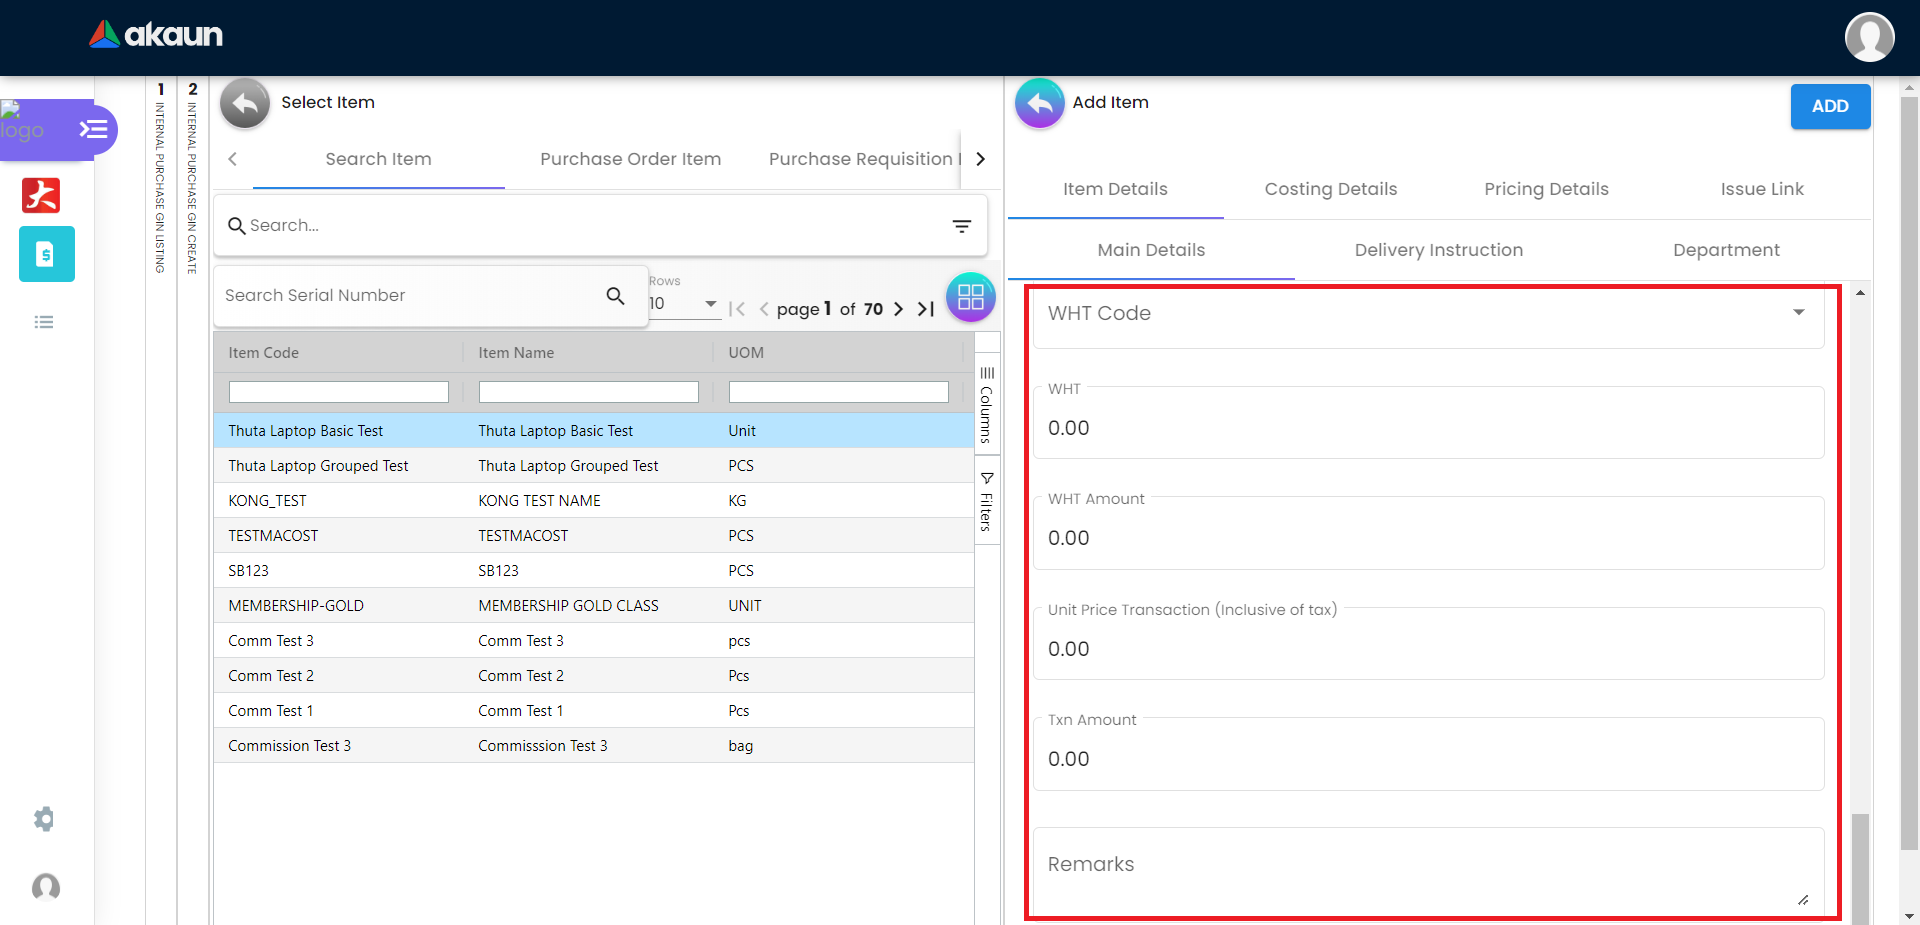
You can edit the item that you have selected.
Number fields such as Unit Price, Quantity Base etc are editable and it will affect other fields automatically.
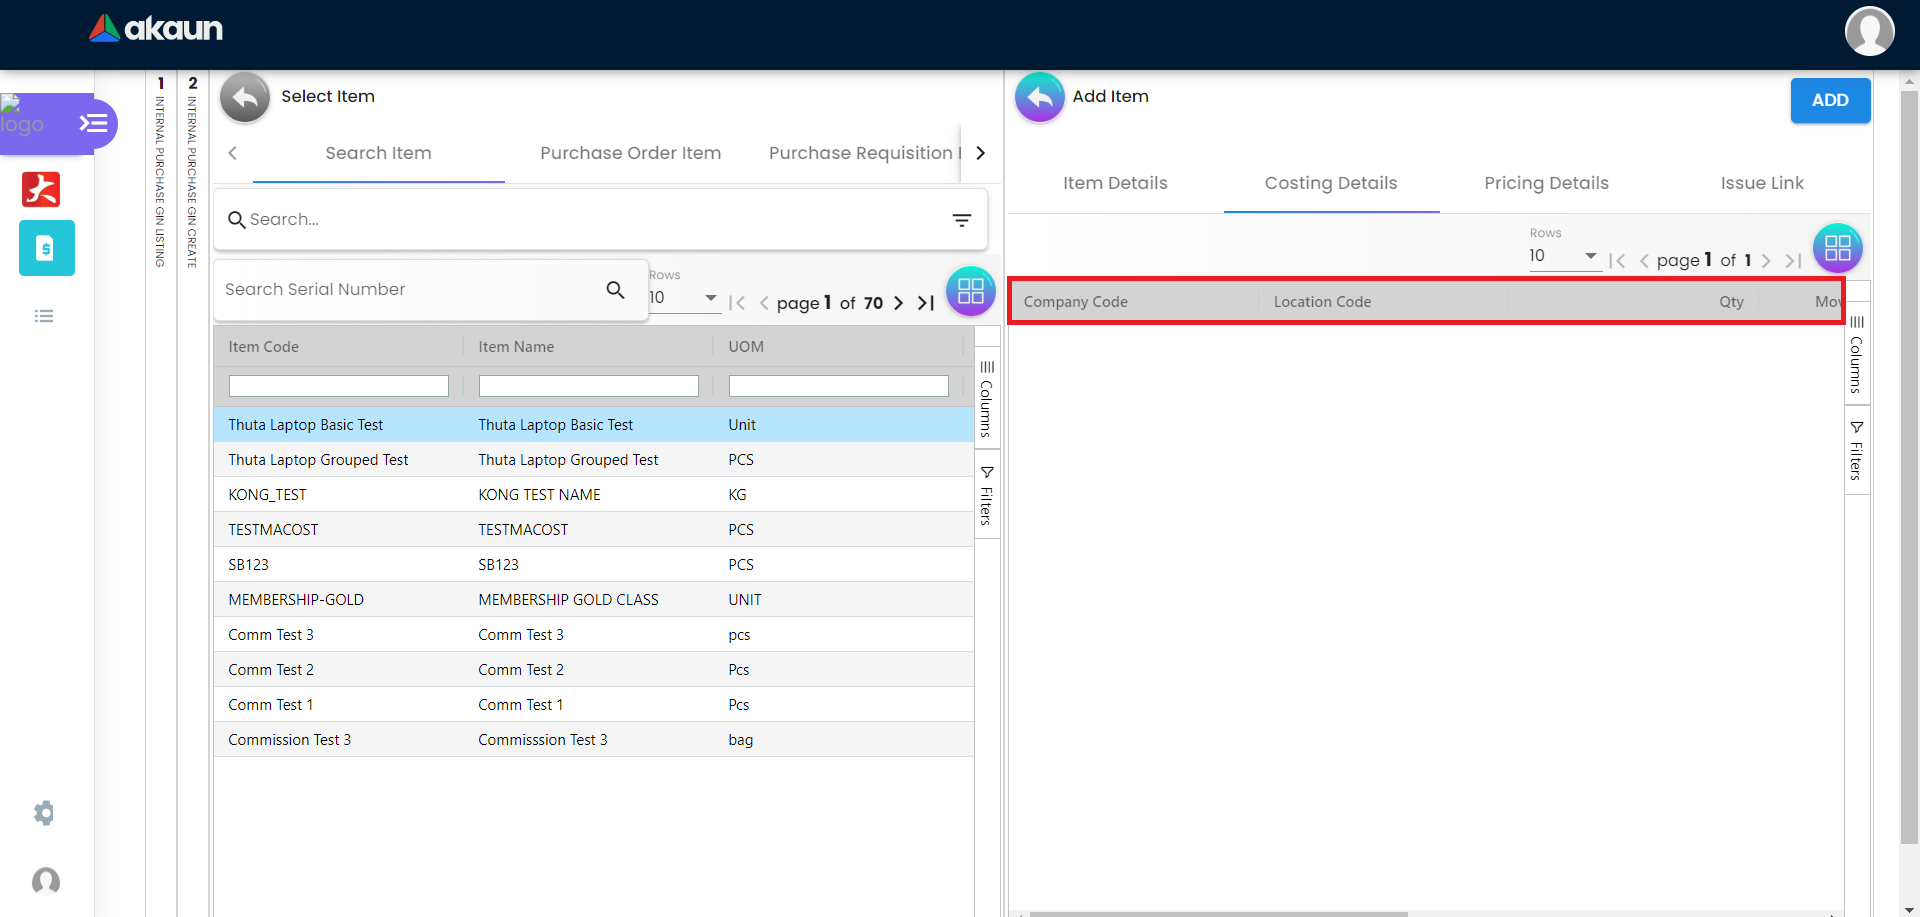
2.3.2 Costing Details Tab
Showing all the costing details about the selected item:
-
Company Code
-
Location Code
-
Quantity
-
Moving Average Unit Cost
-
FIFO Unit Cost
-
Manual Unit Cost
-
Last Purchase Unit Cost
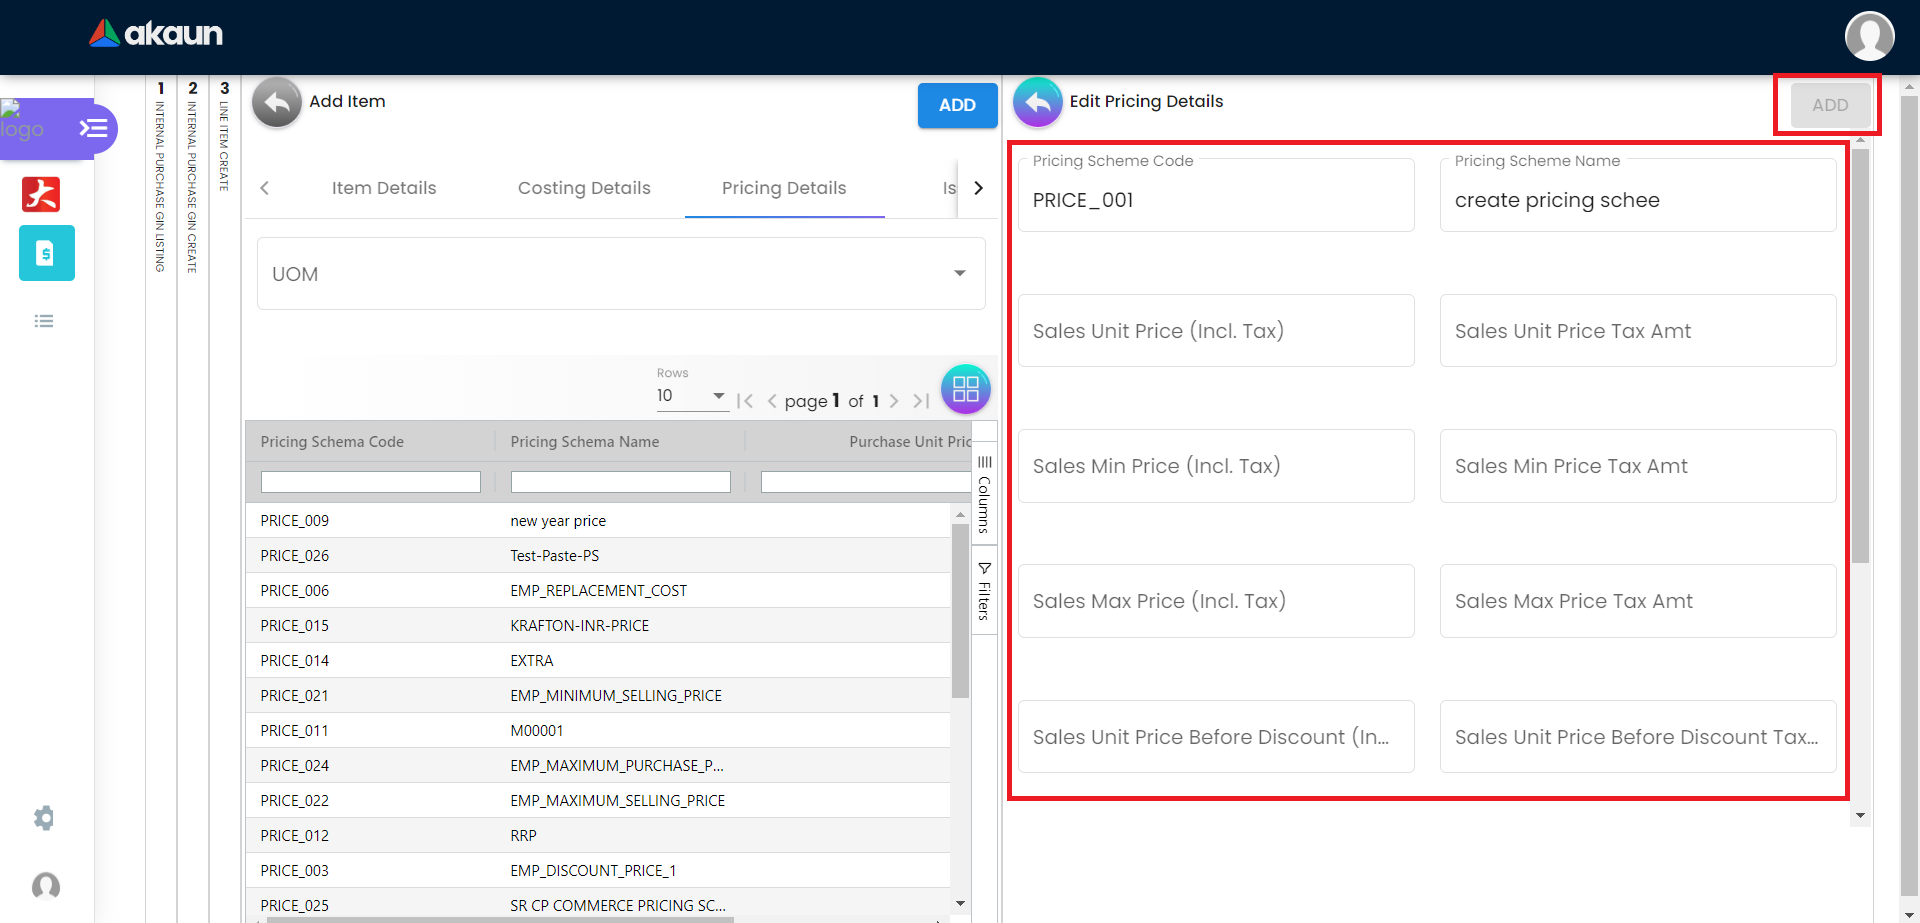
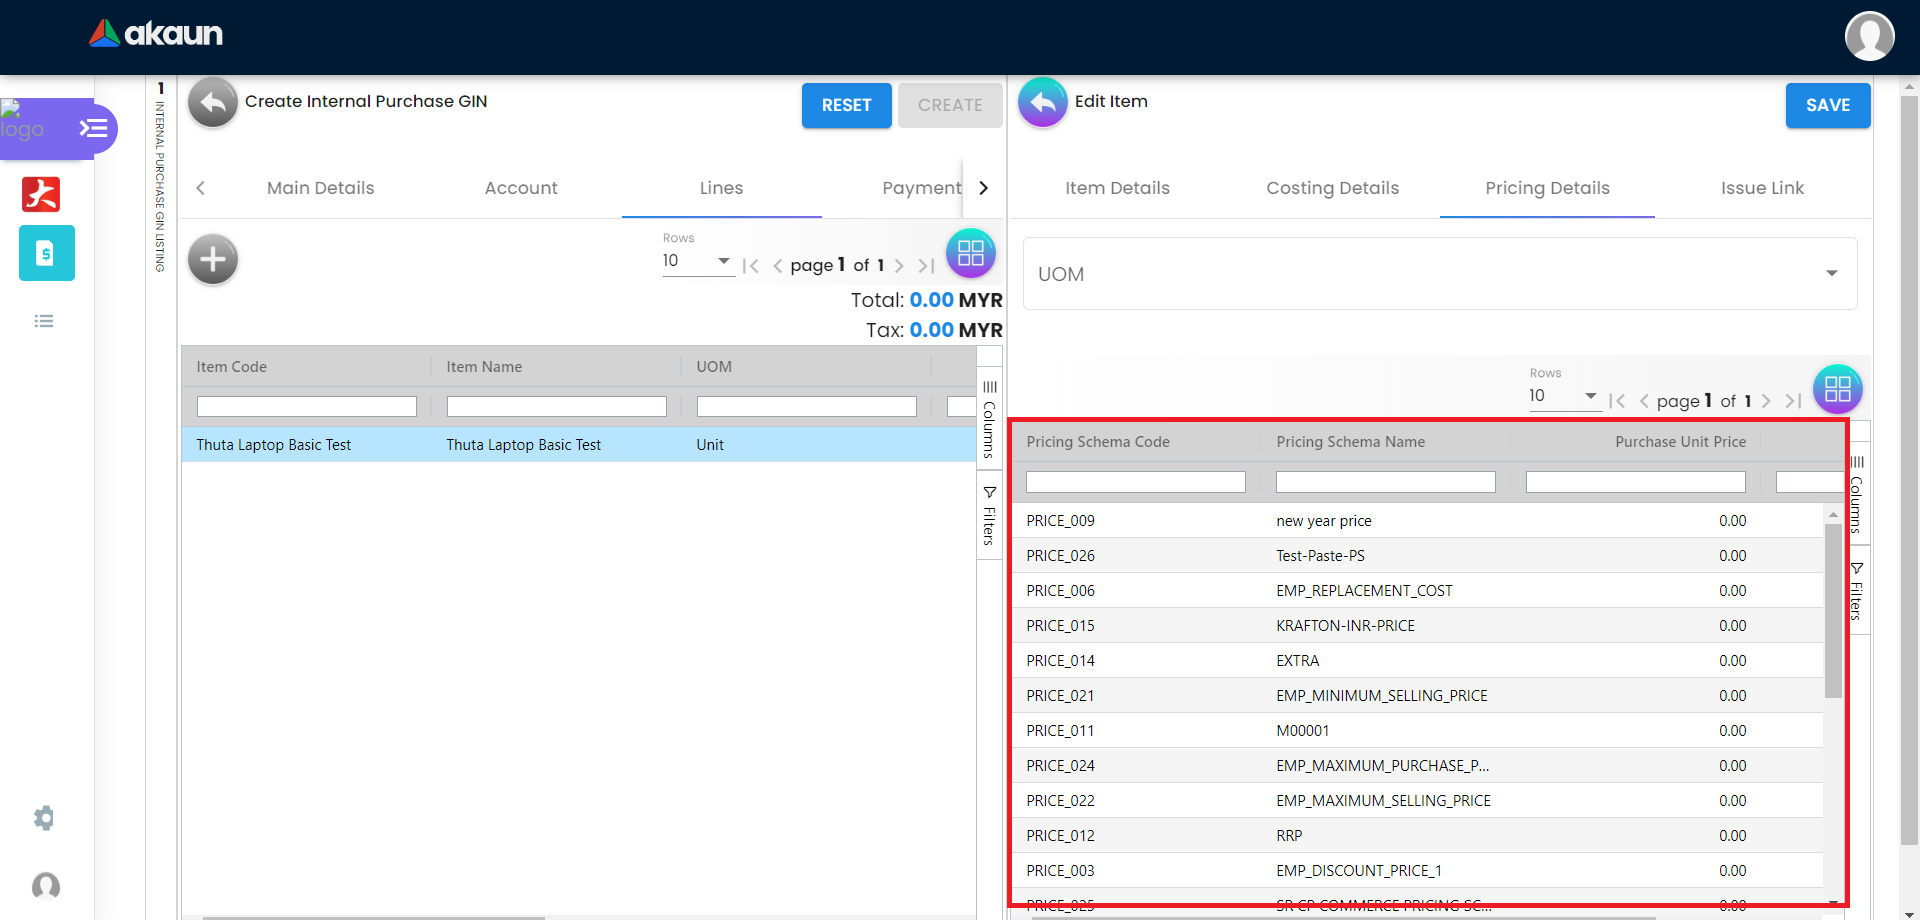
2.3.3 Pricing Details Tab
Showing all the pricing details:
-
Pricing Scheme Code
-
Pricing Schema Name
-
Purchase Unit Price
-
Modified Date
A new column of Edit Pricing Details will be displayed on the right side when one of the pricing details is clicked and the changes can be saved by clicking on the Add button.

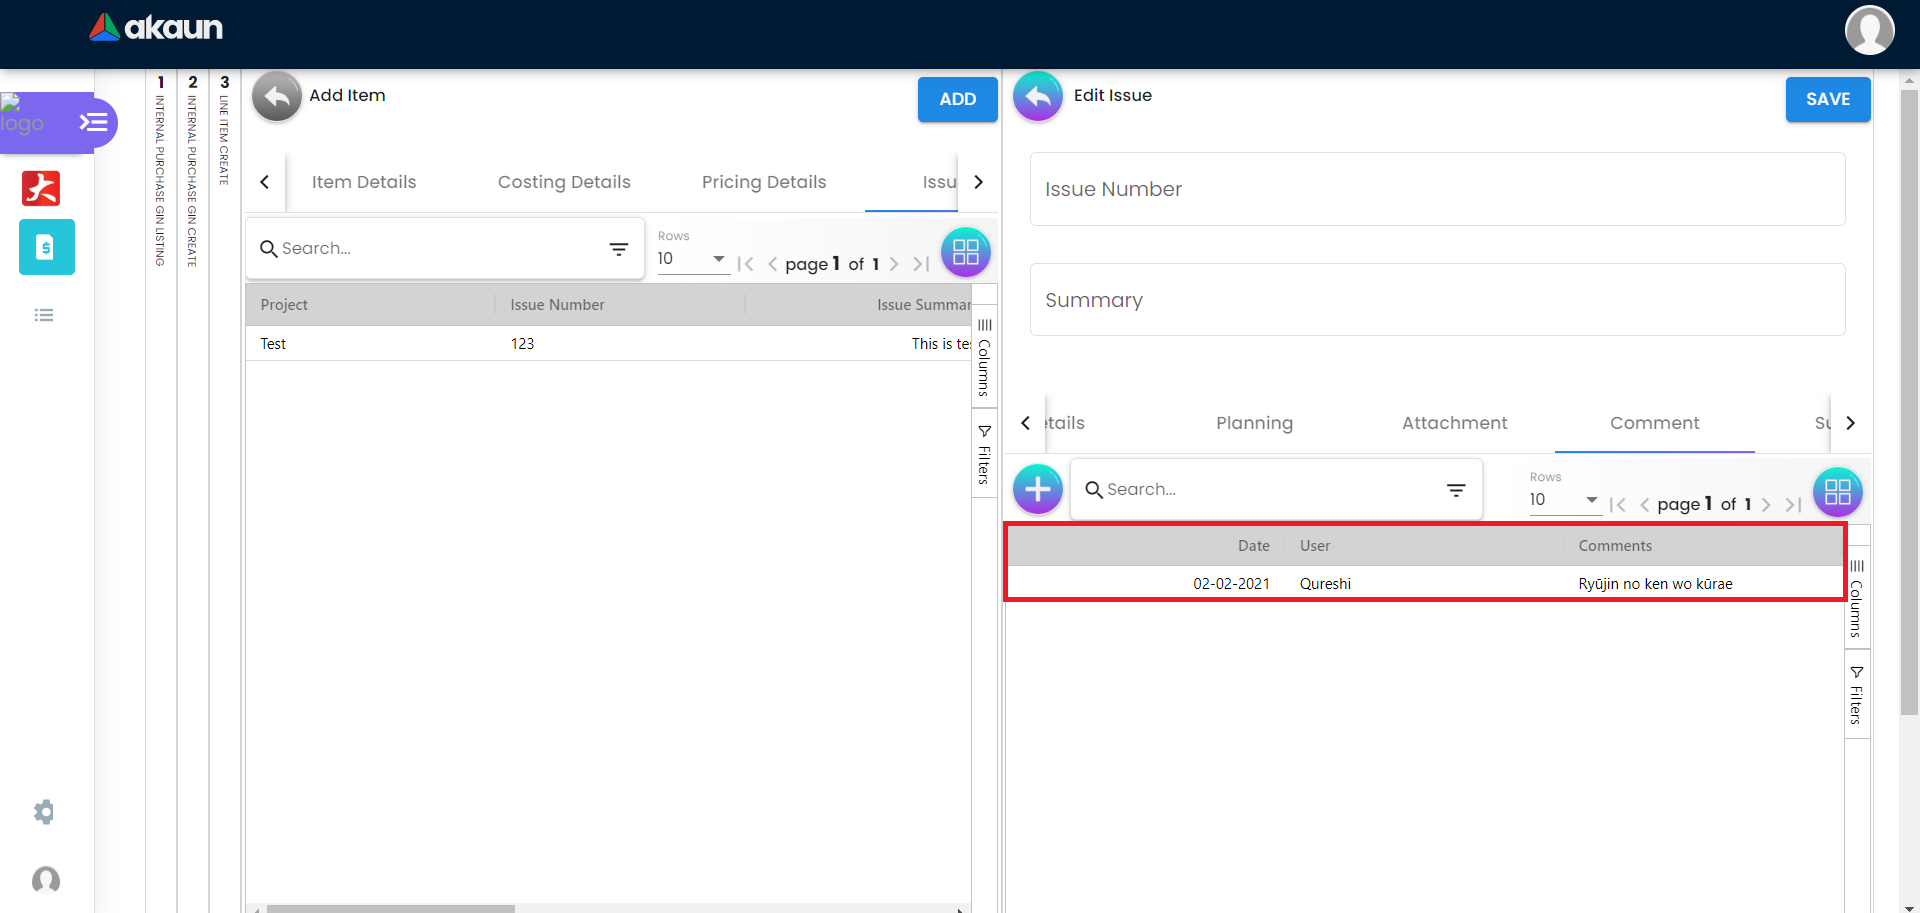
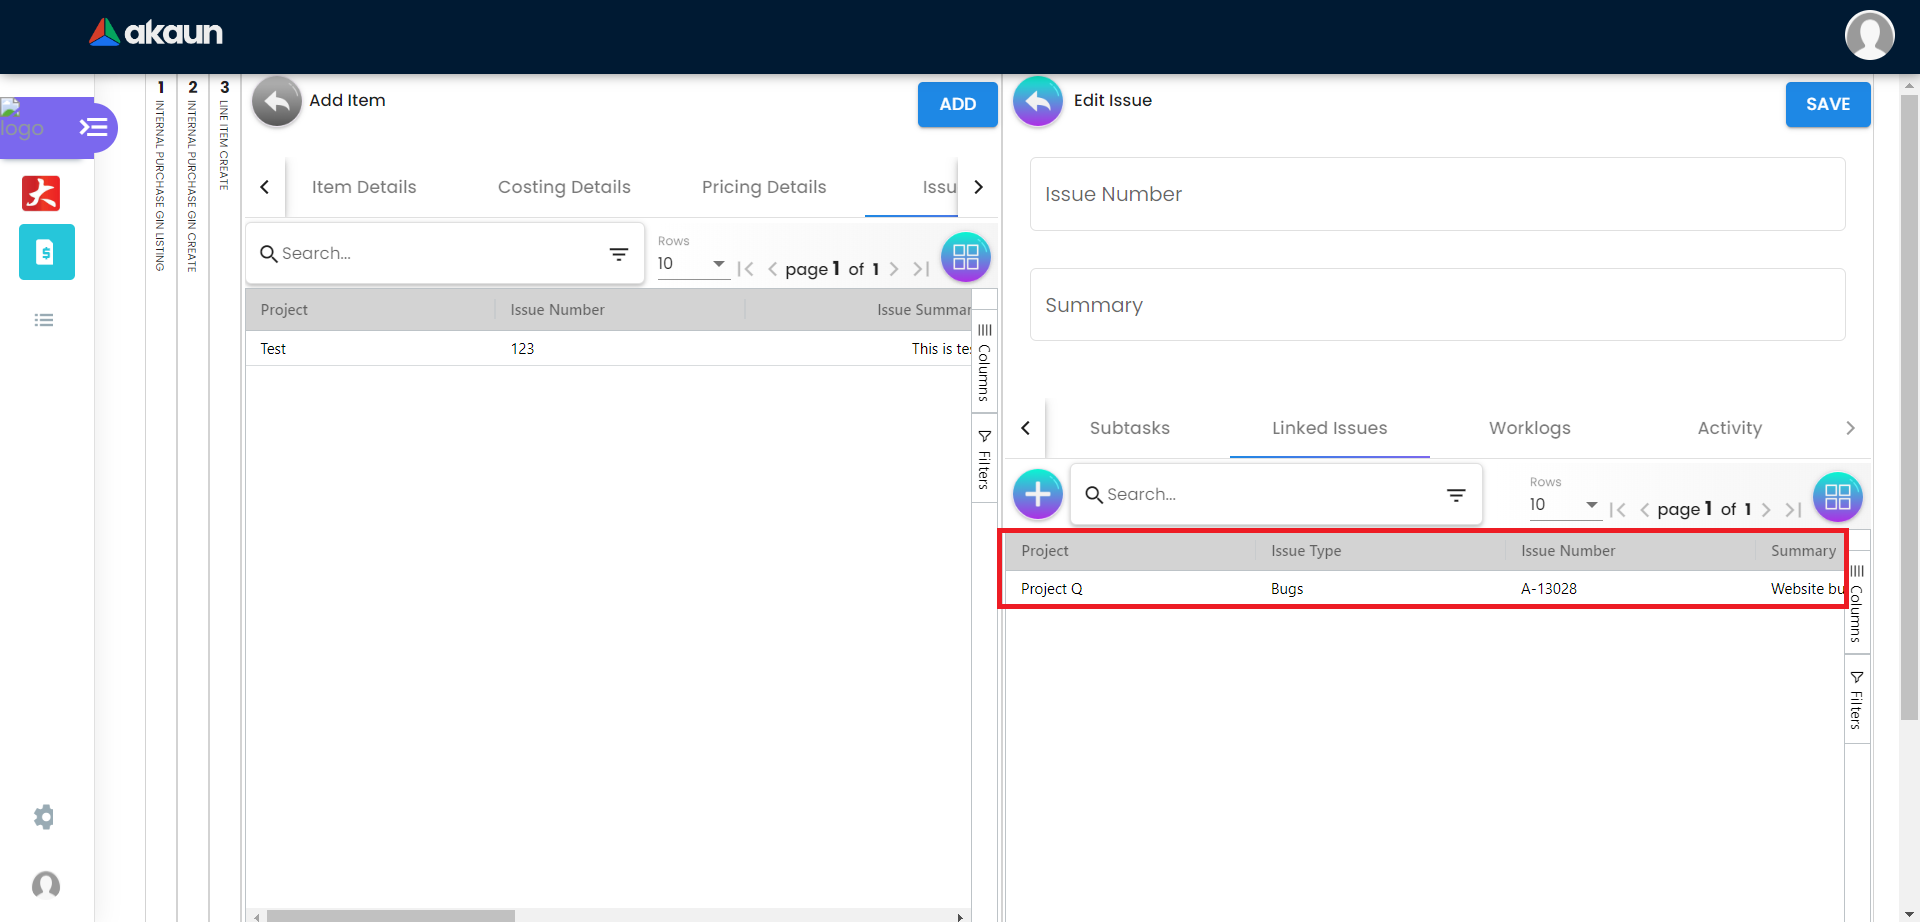
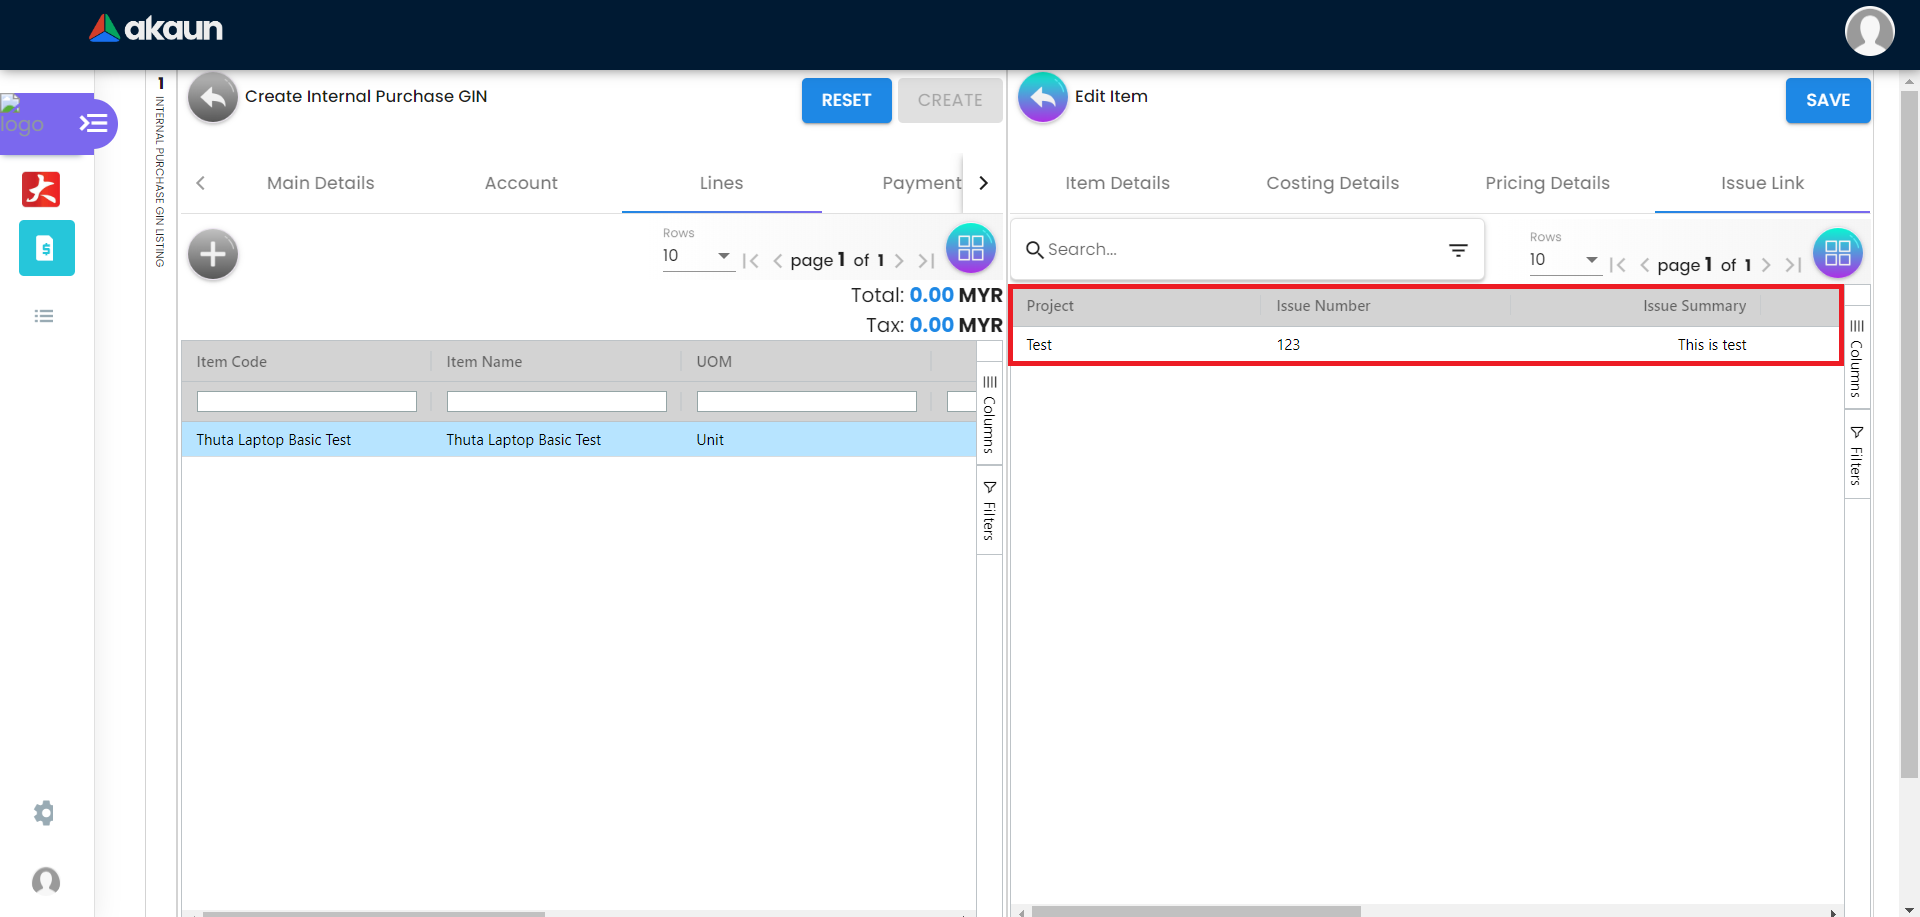
2.3.4 Issue Link Tab
Showing list of issue link.
Contain project name, issue number and issue summary.
A new Edit Issue column will be displayed on the right side when one of the issue link is clicked.

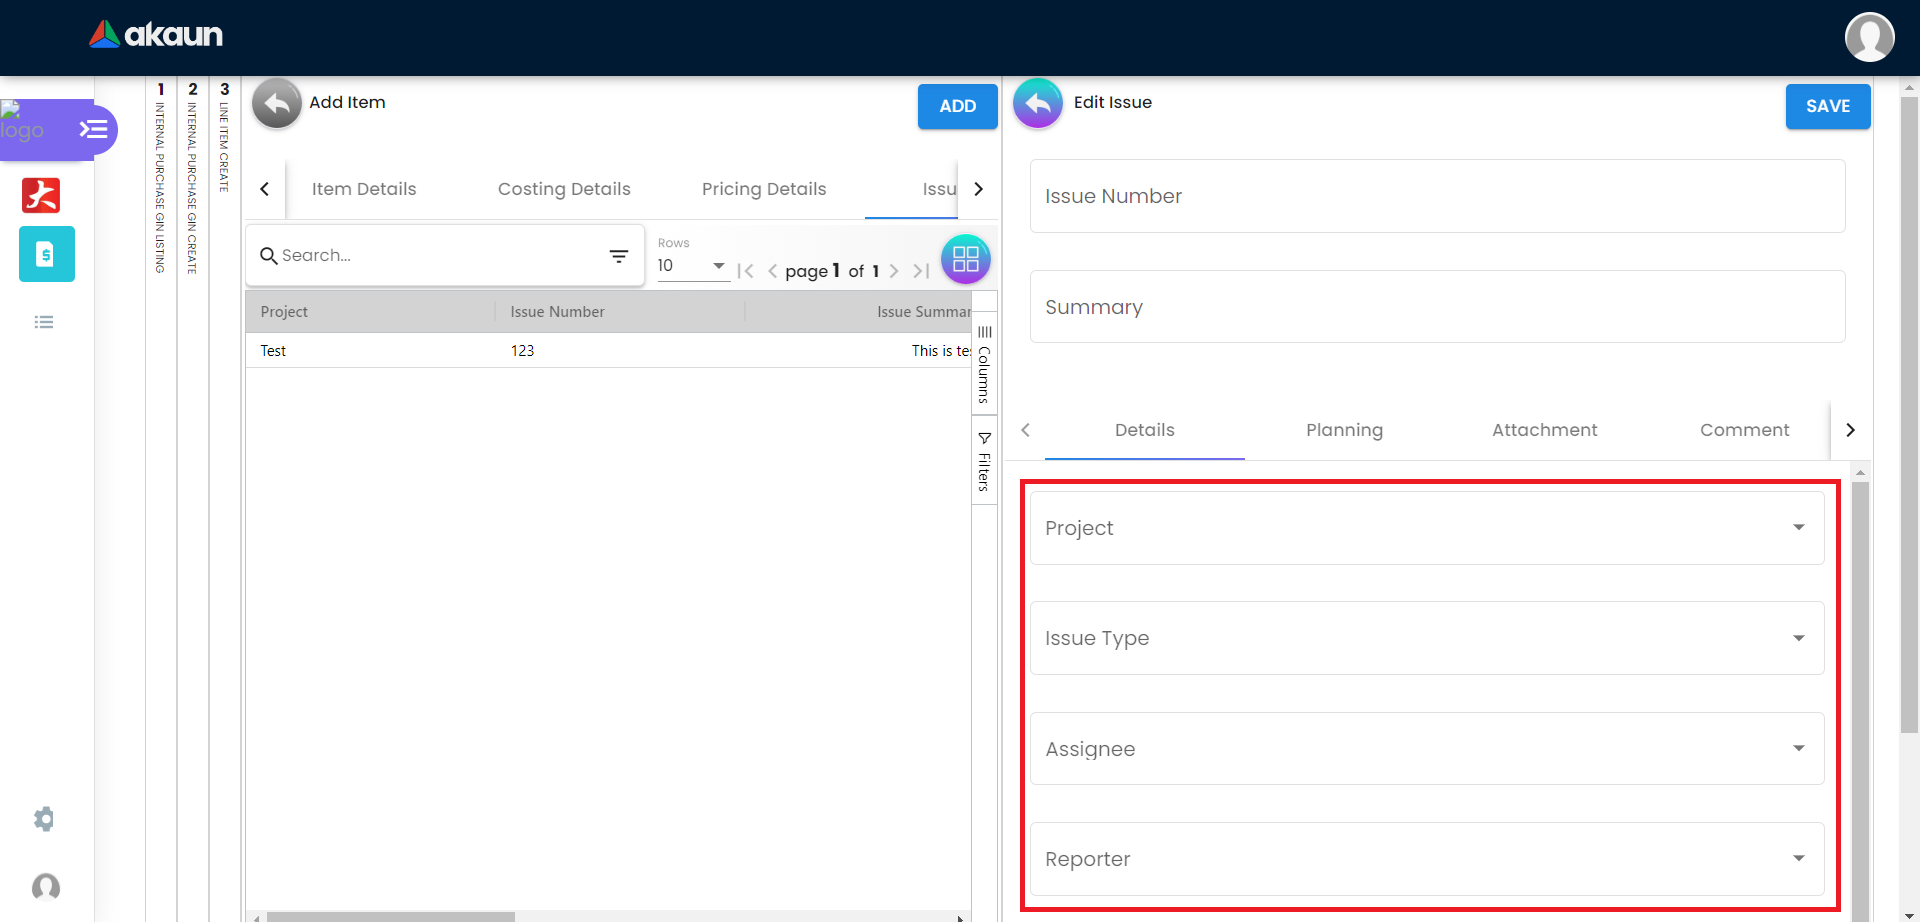
2.3.4.1 Edit Issue
In the Edit Issue, users can fill in fields of Issue Number and Summary.
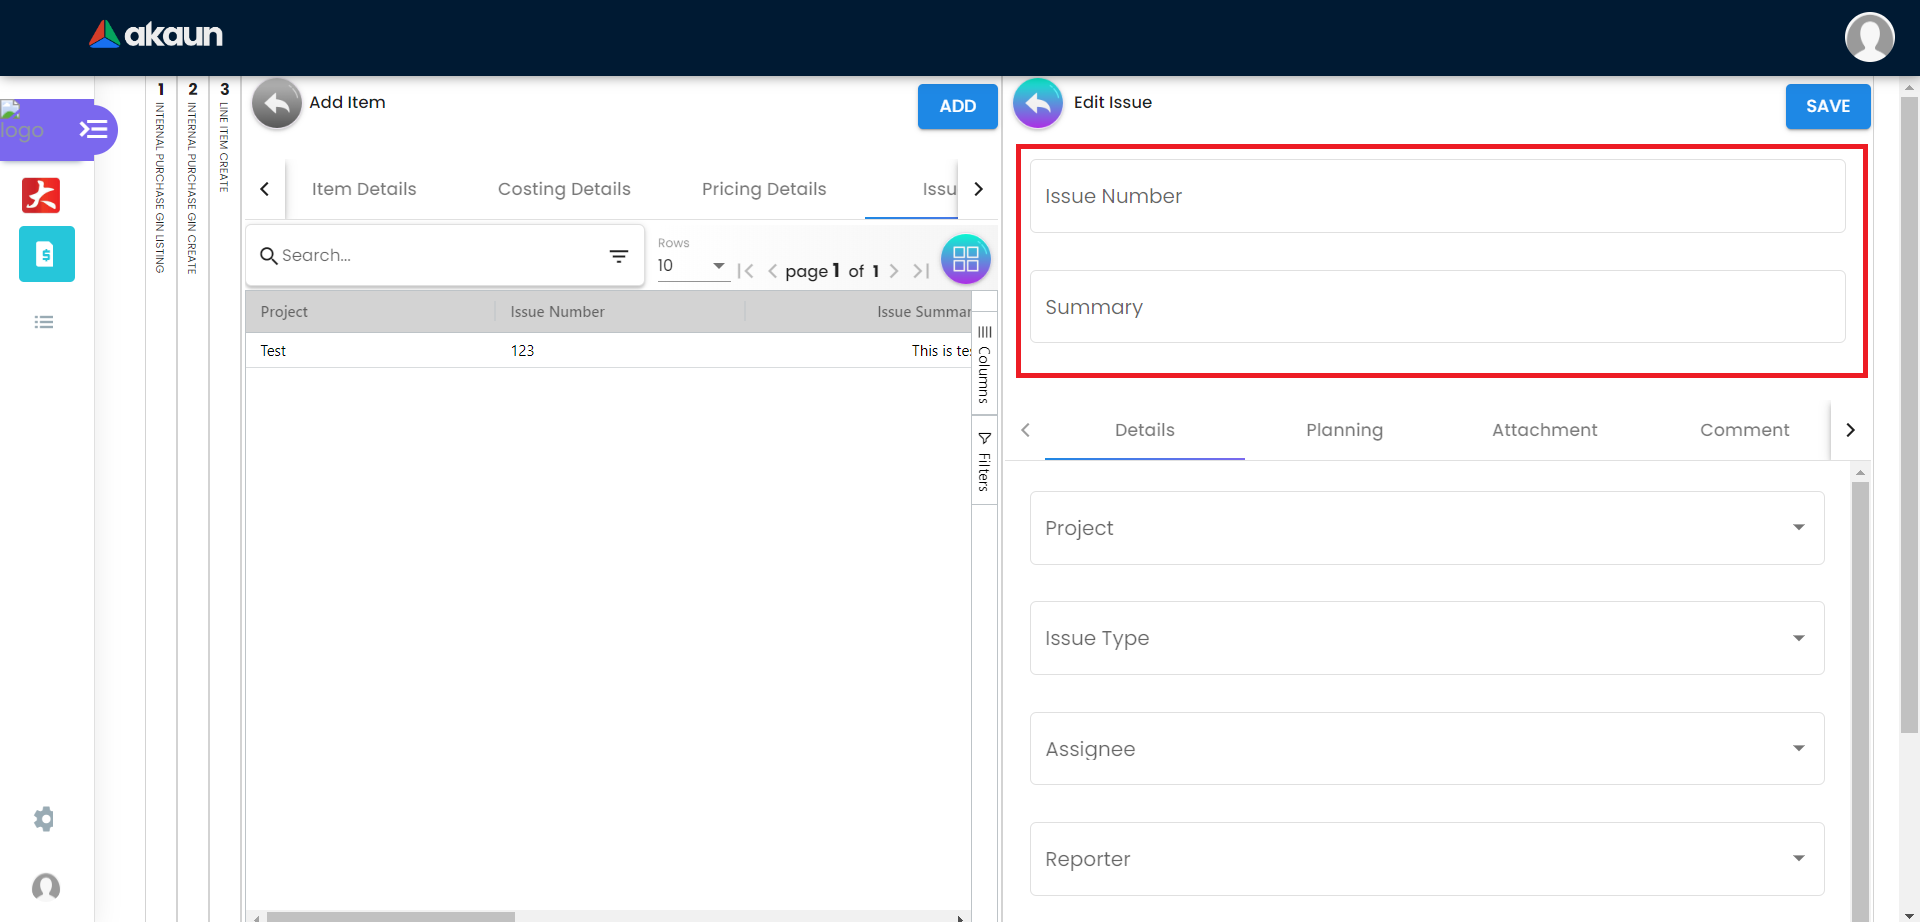
2.3.4.1.1 Details tab
Drop down field like Project. Issue Type, Assignee, Reporter, Summary, Description, Parent and Created Date are selectable.

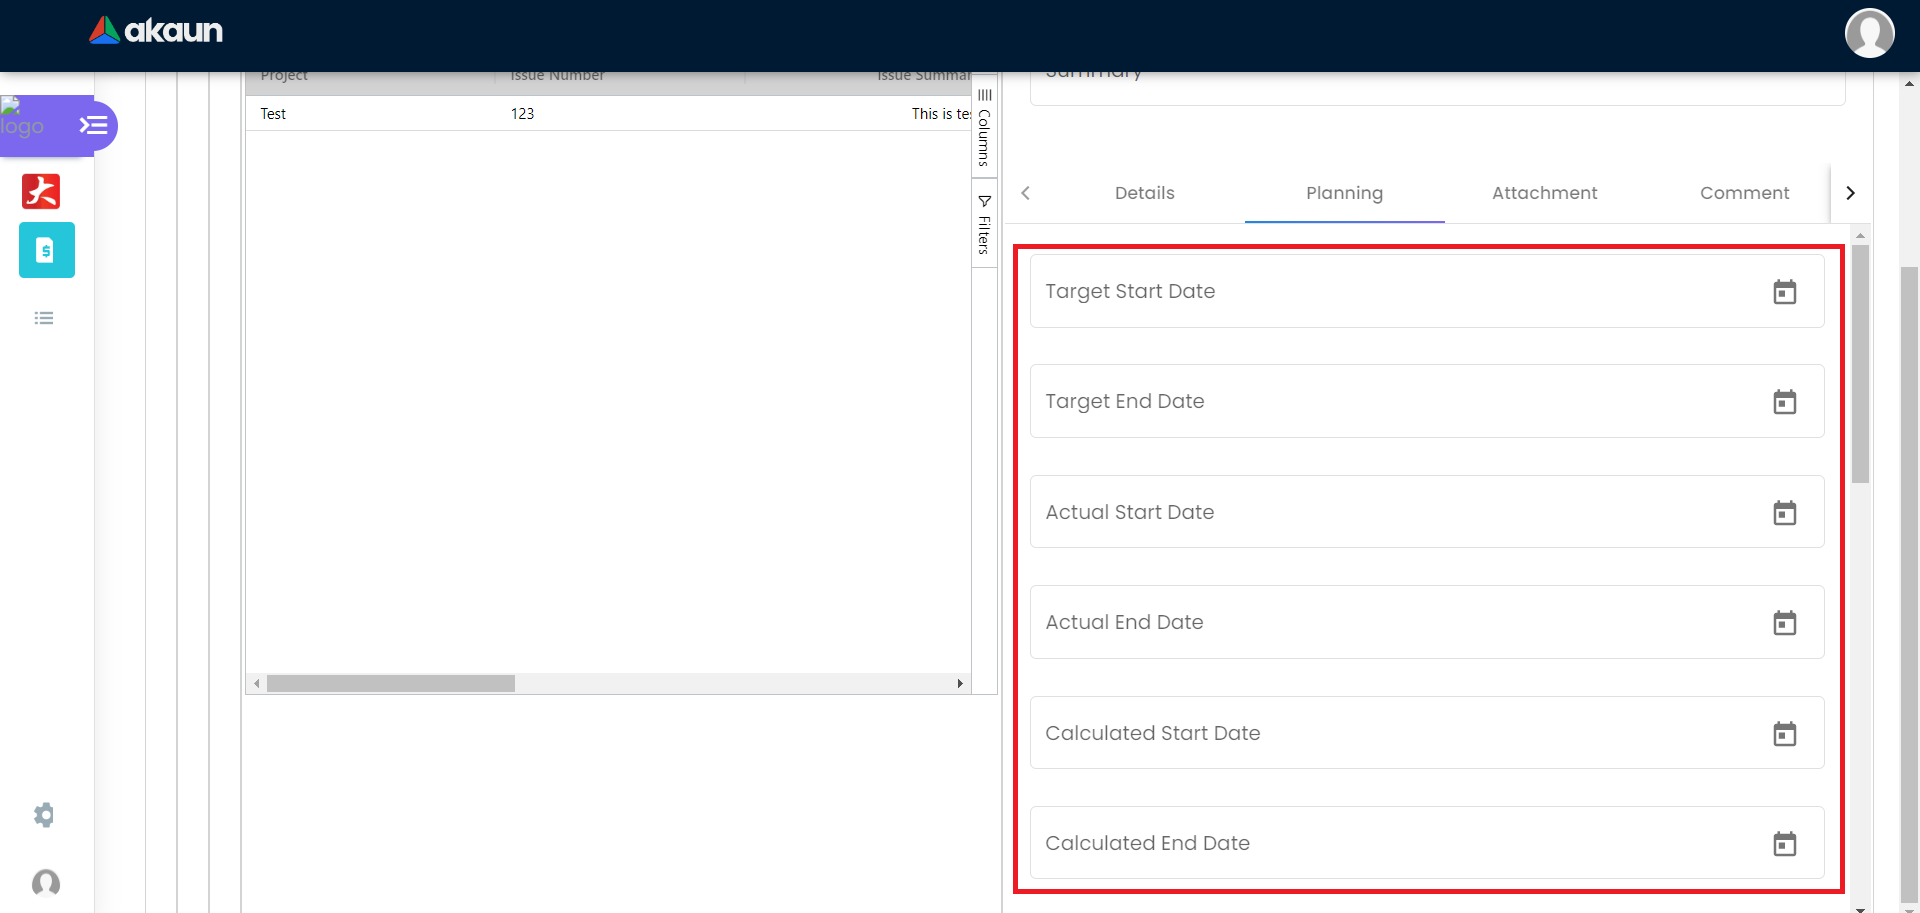
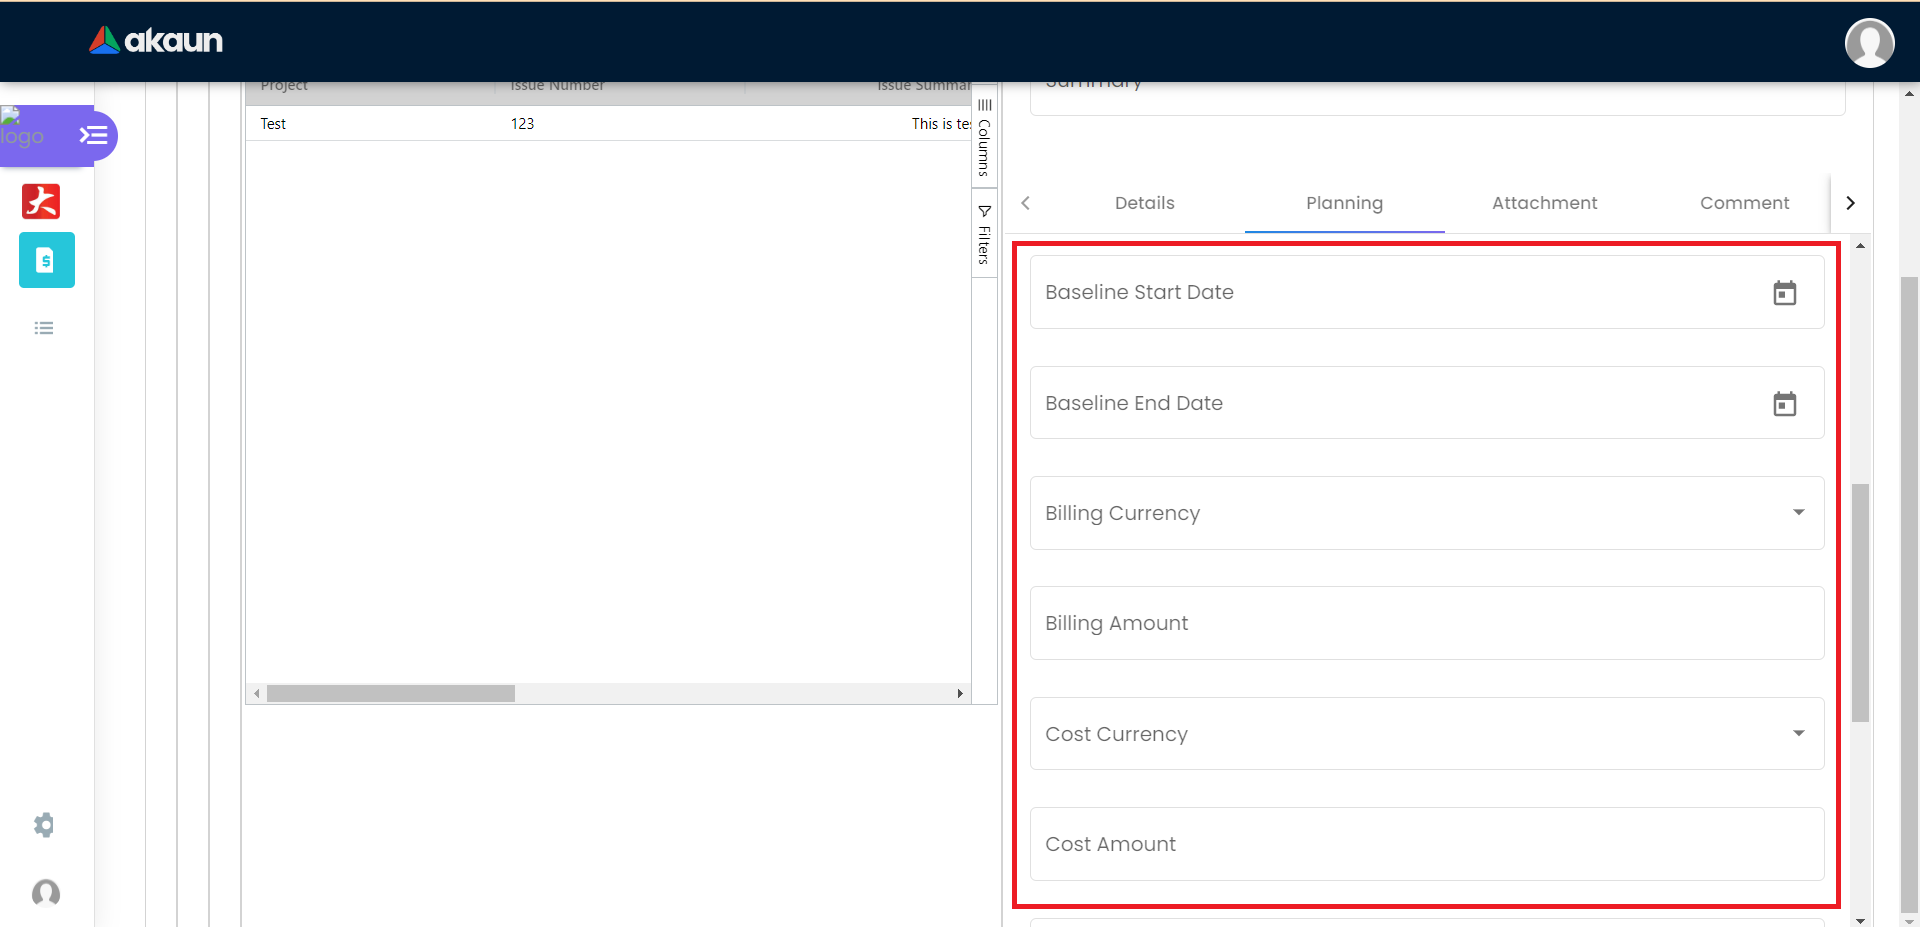
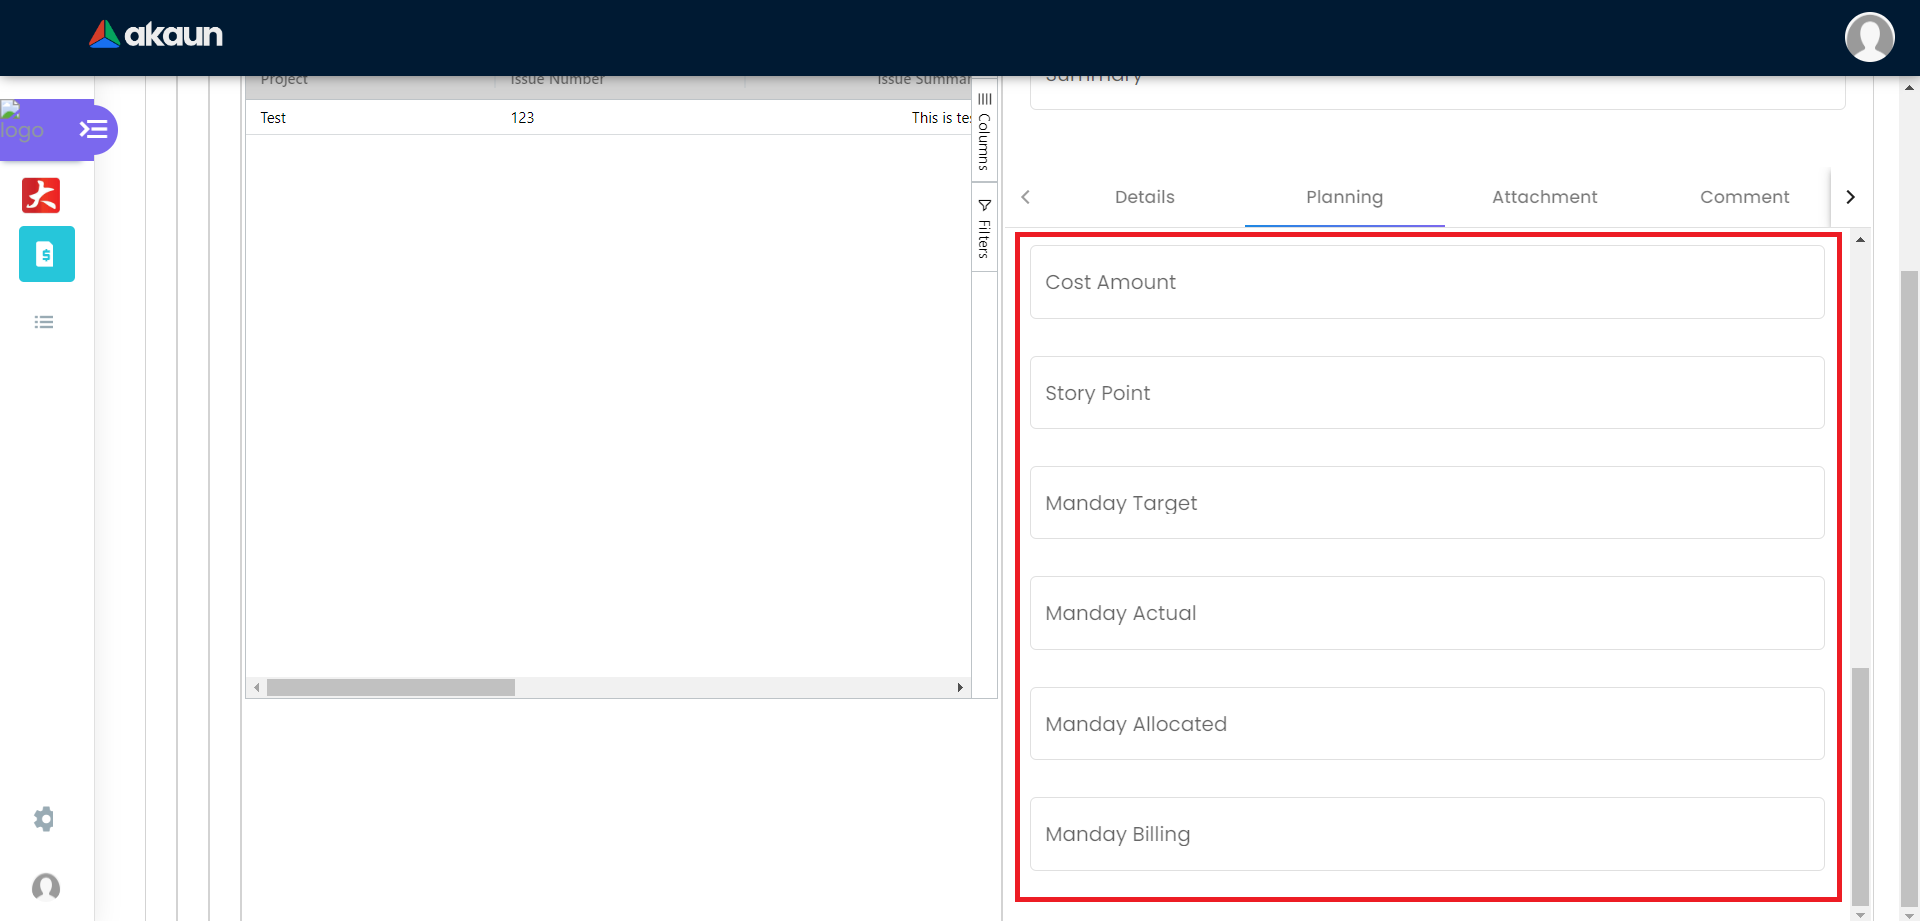
2.3.4.1.2 Planning tab
The fields such as Target Start Date, Target End Date, Actual Start Date, Actual End Date, Calculated Start Date, Calculated End Date, Baseline Start Date, Baseline End Date, Billing Currency, Billing Amount, Cost Currency, Cost Amount, Story Point, Manday Target, Manday Allocated and Manday Billing can be filled.
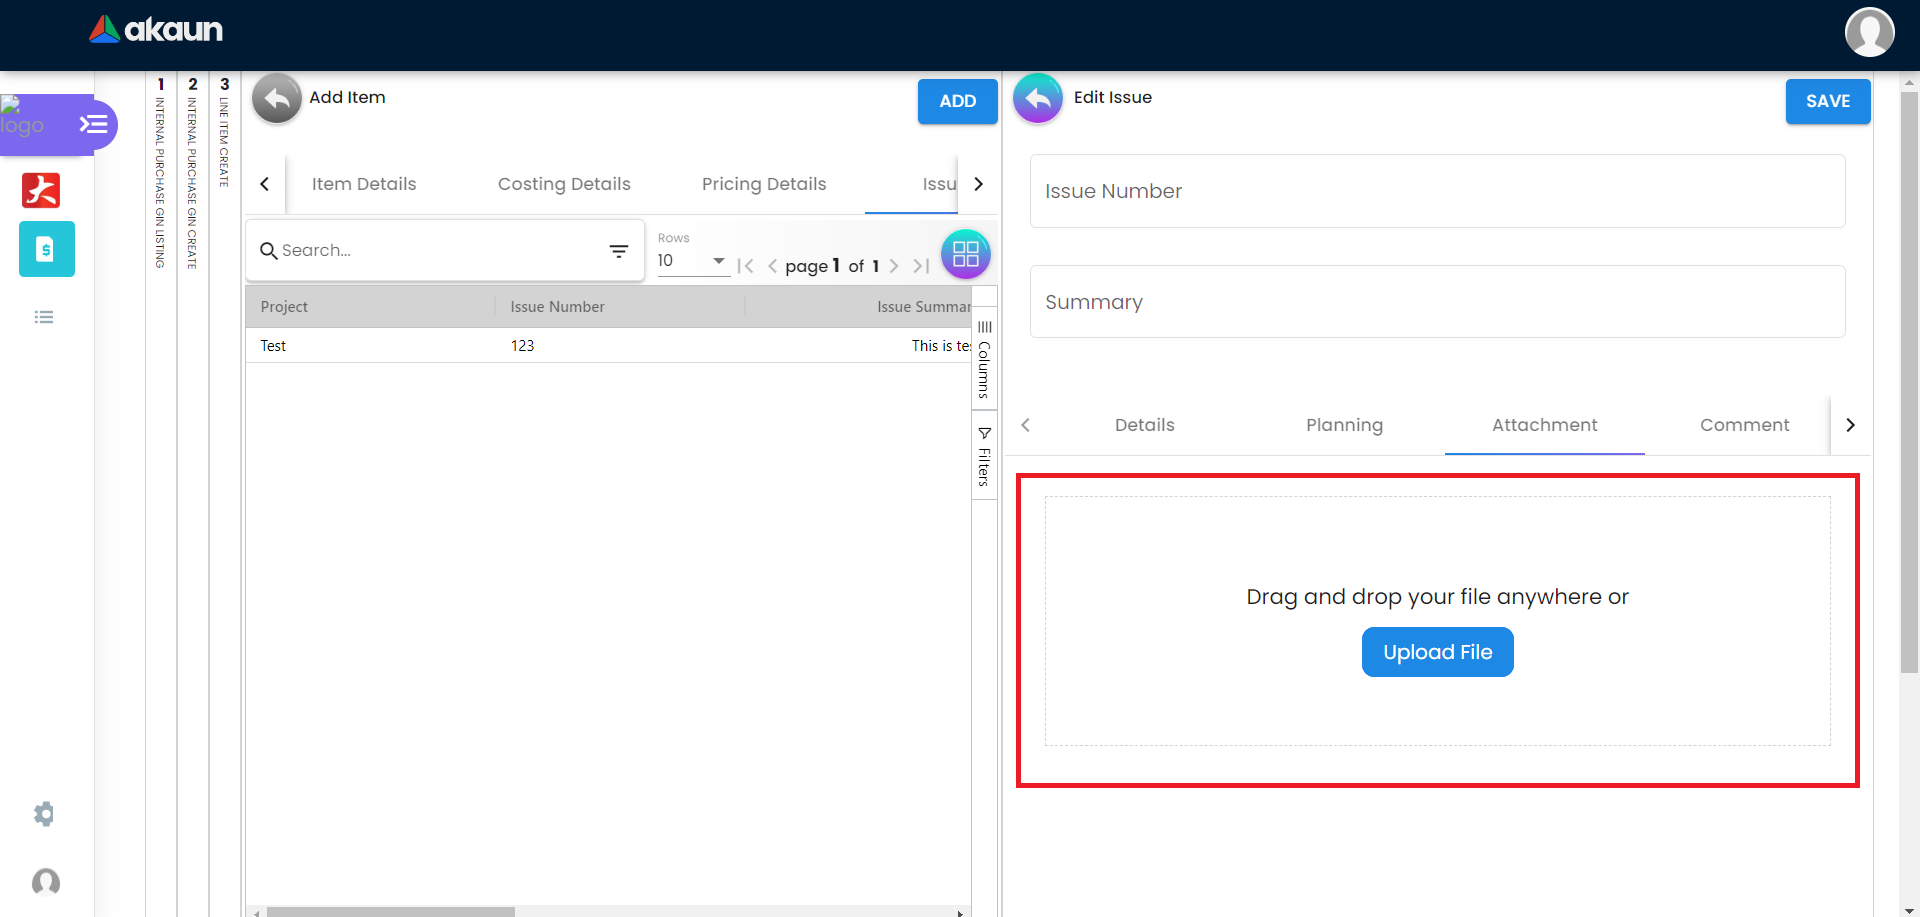
2.3.4.1.3 Attachment tab
Upload file from local device by dragging and dropping your file on the field or clicking the Upload File button.


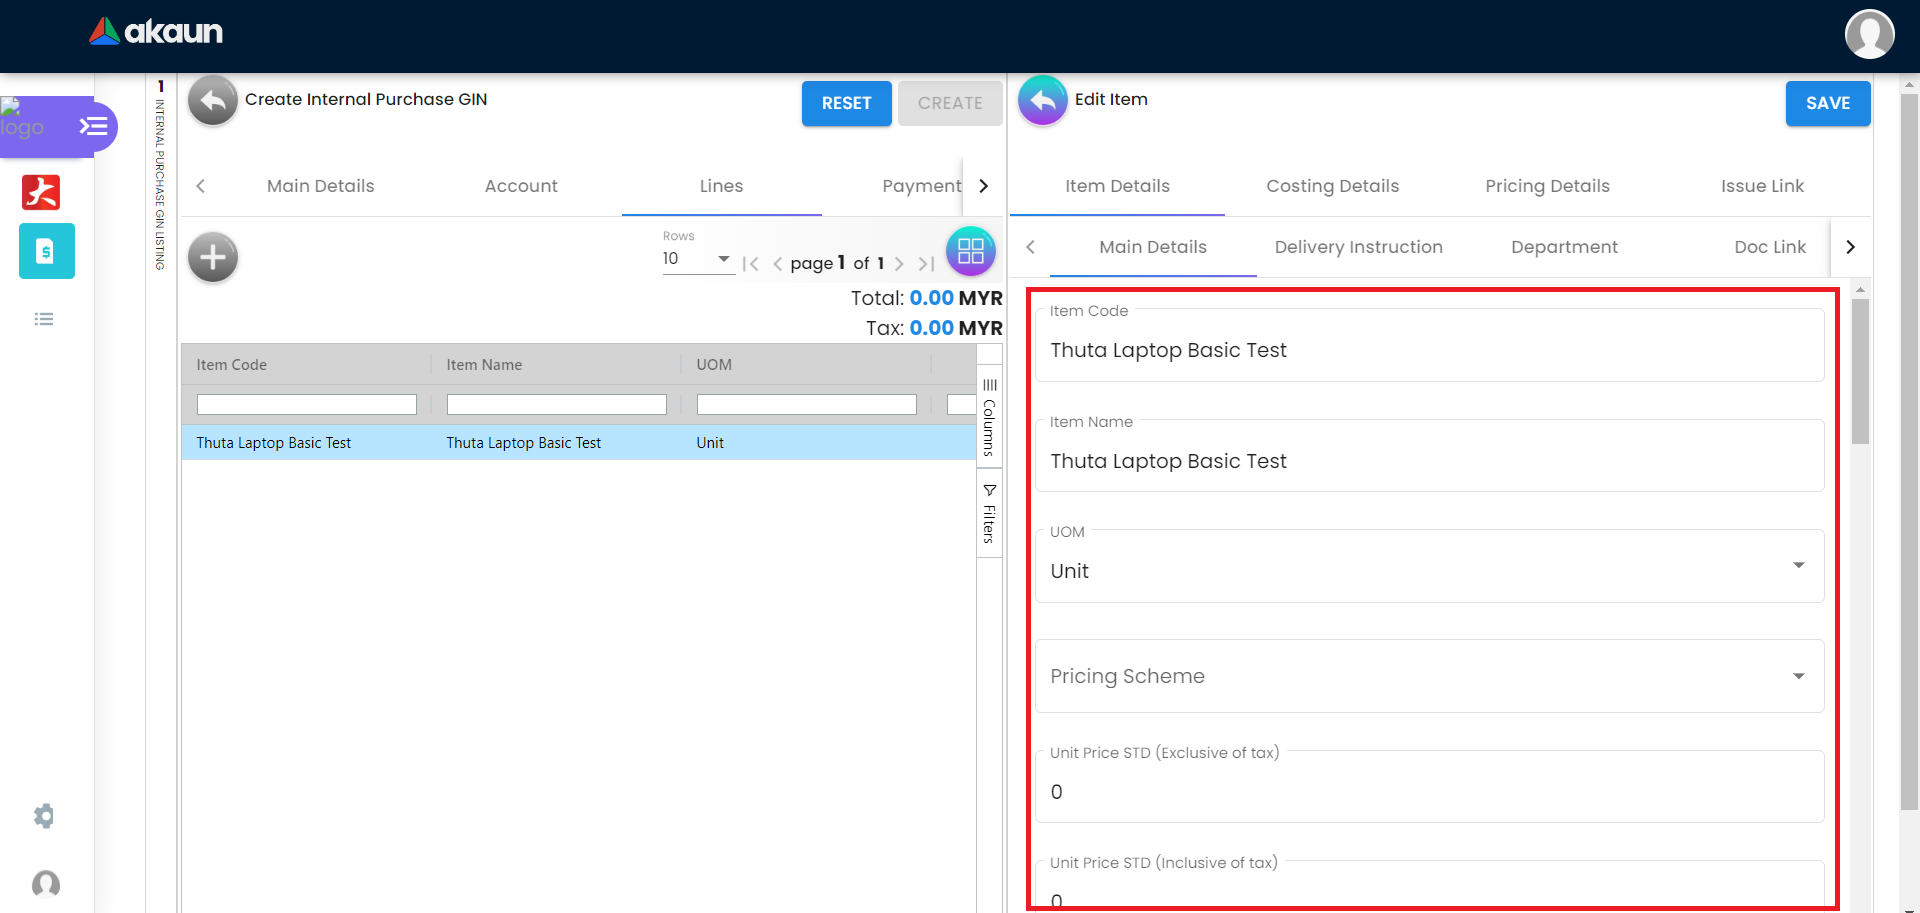
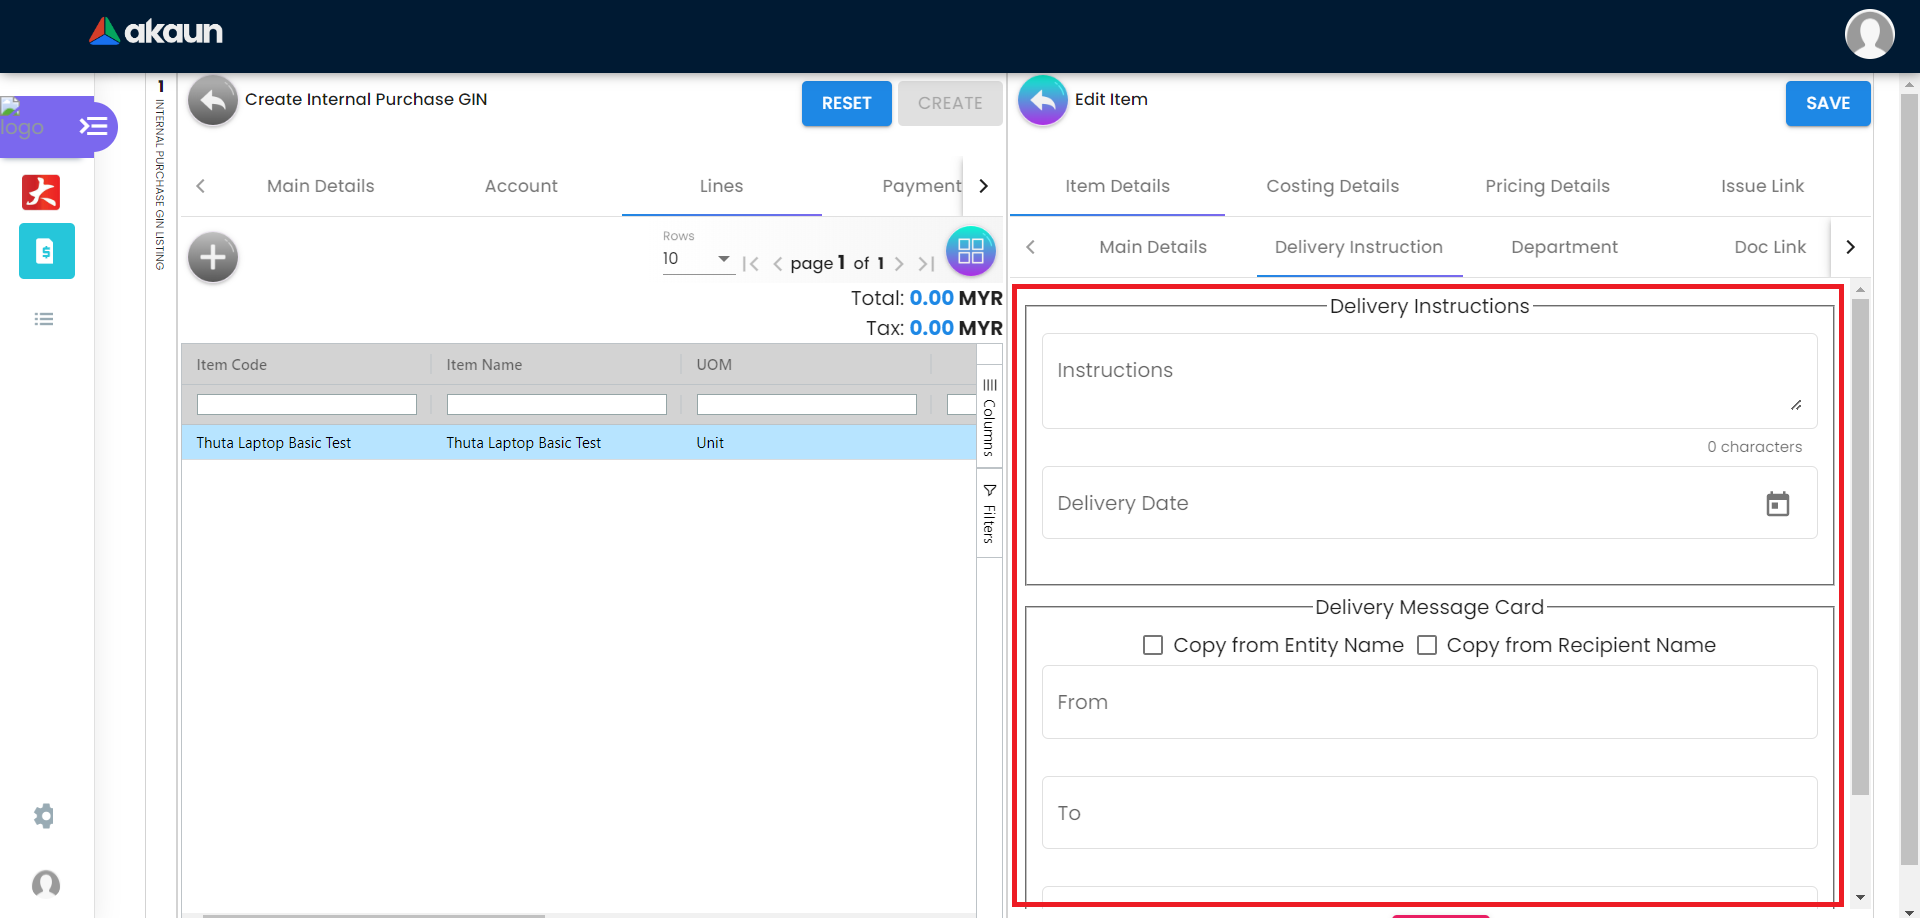
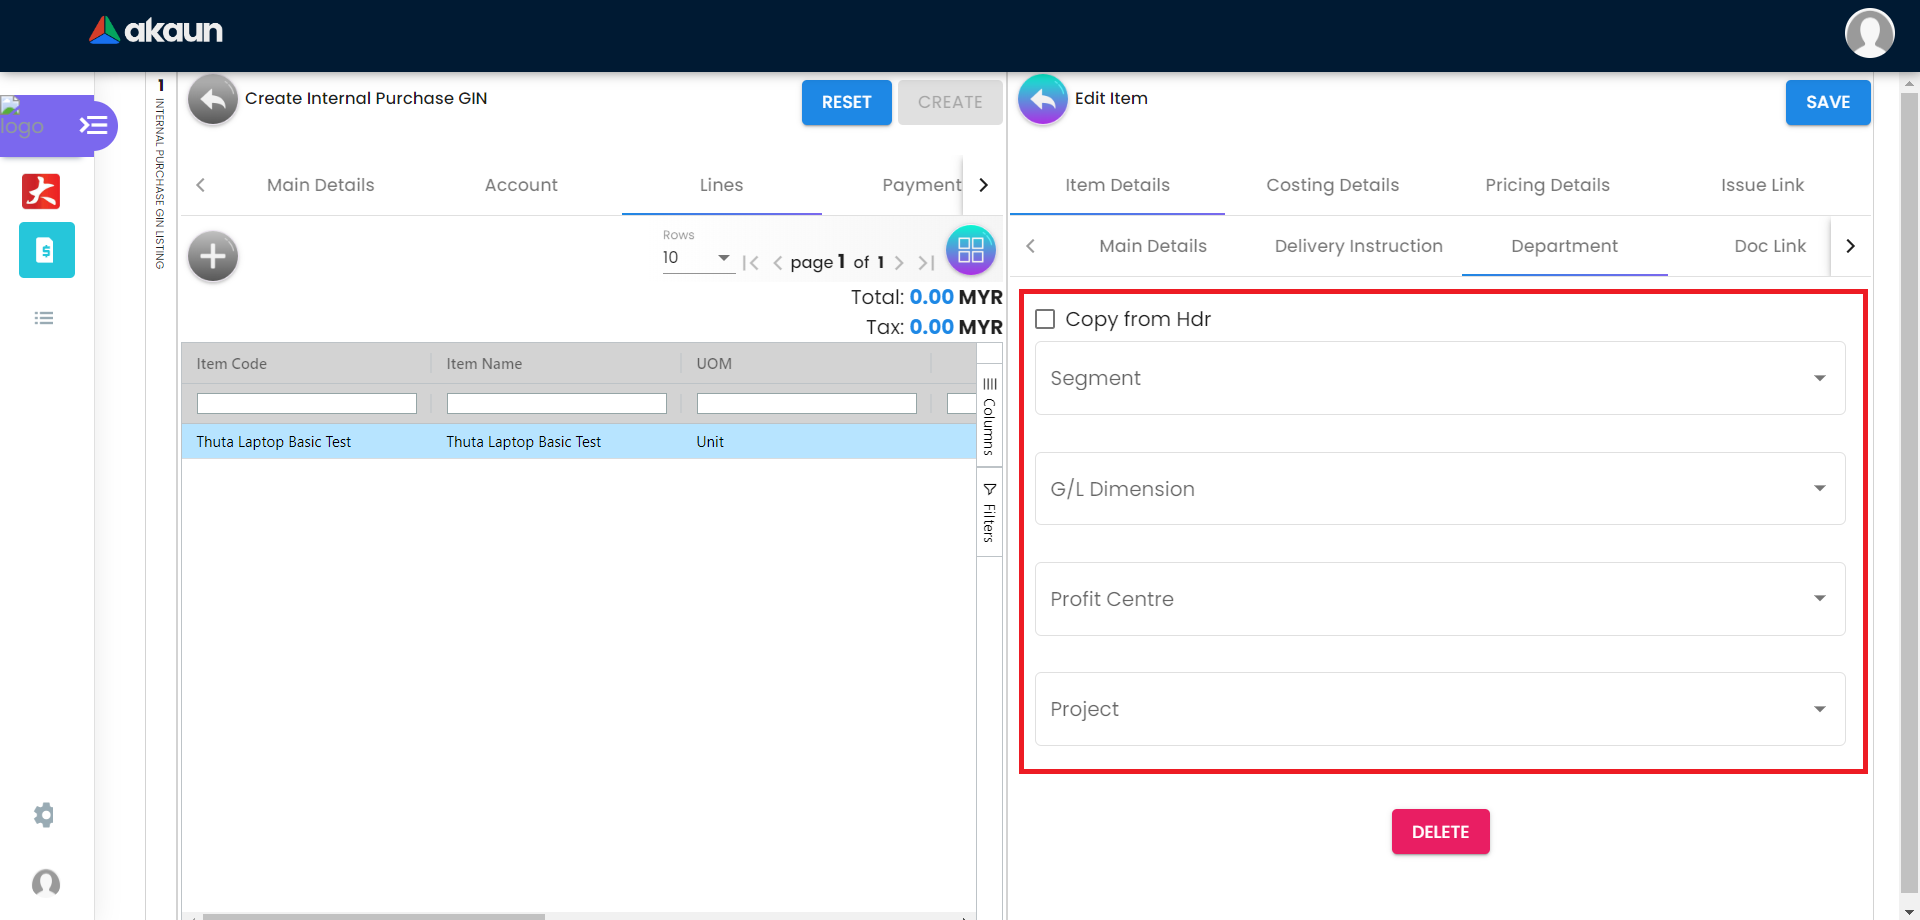
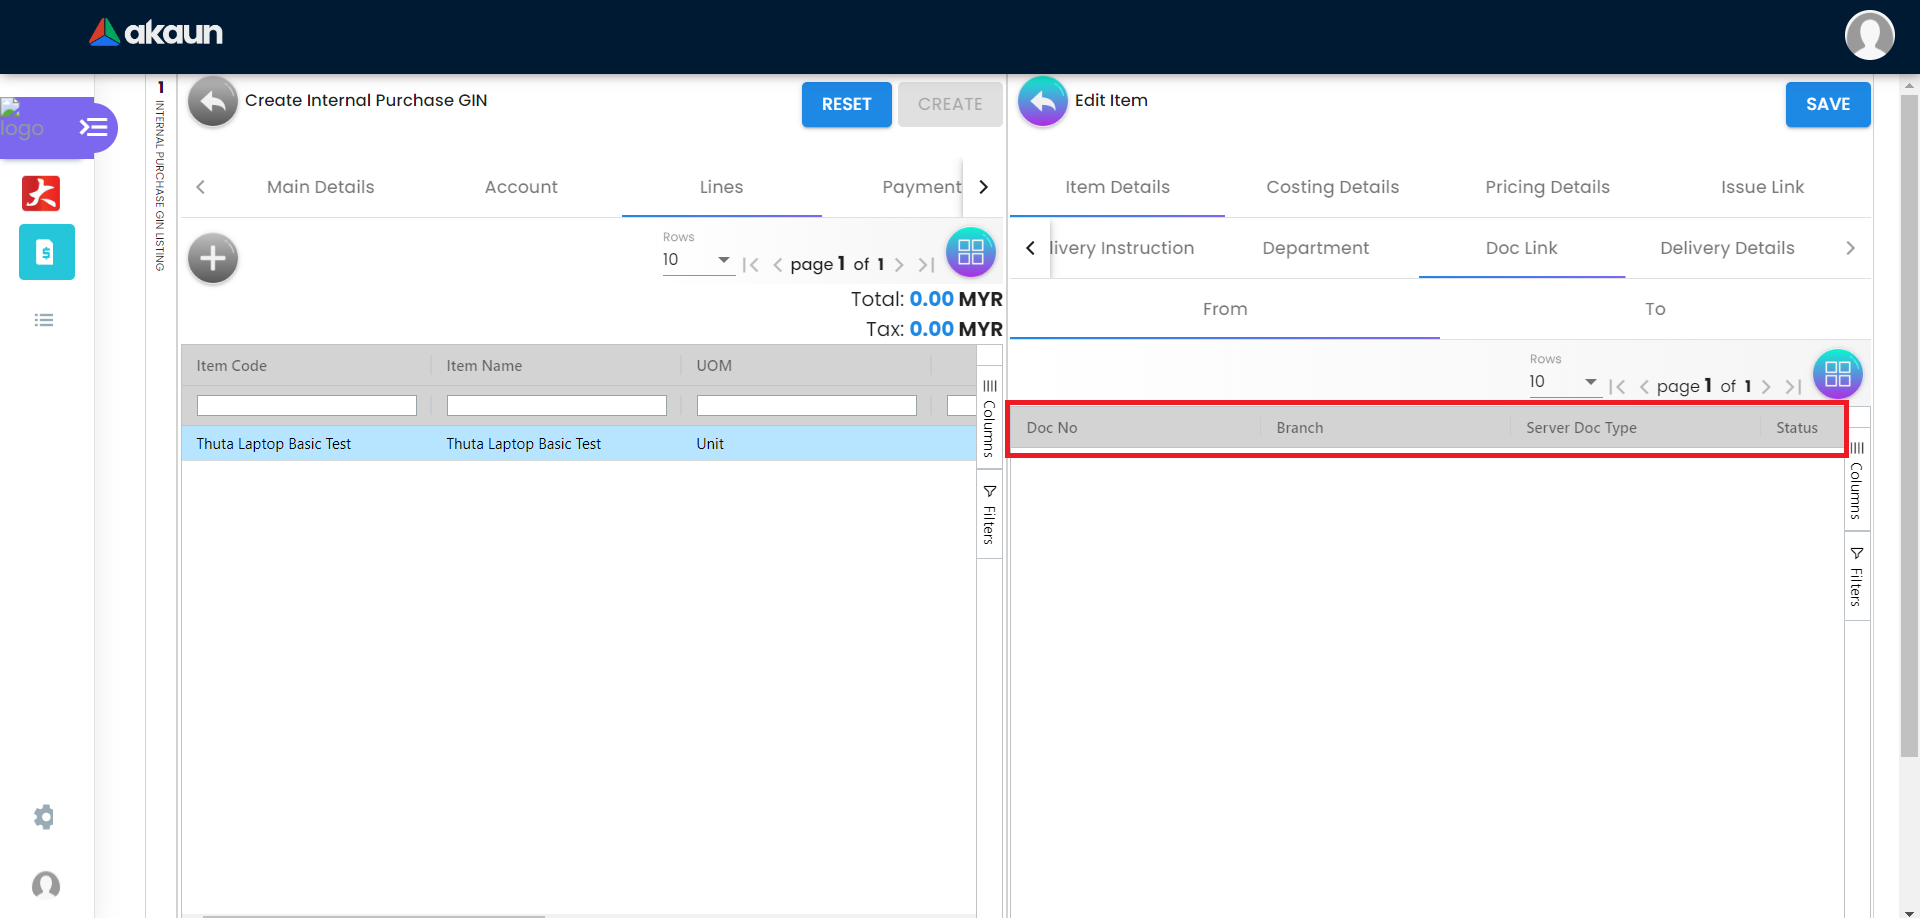
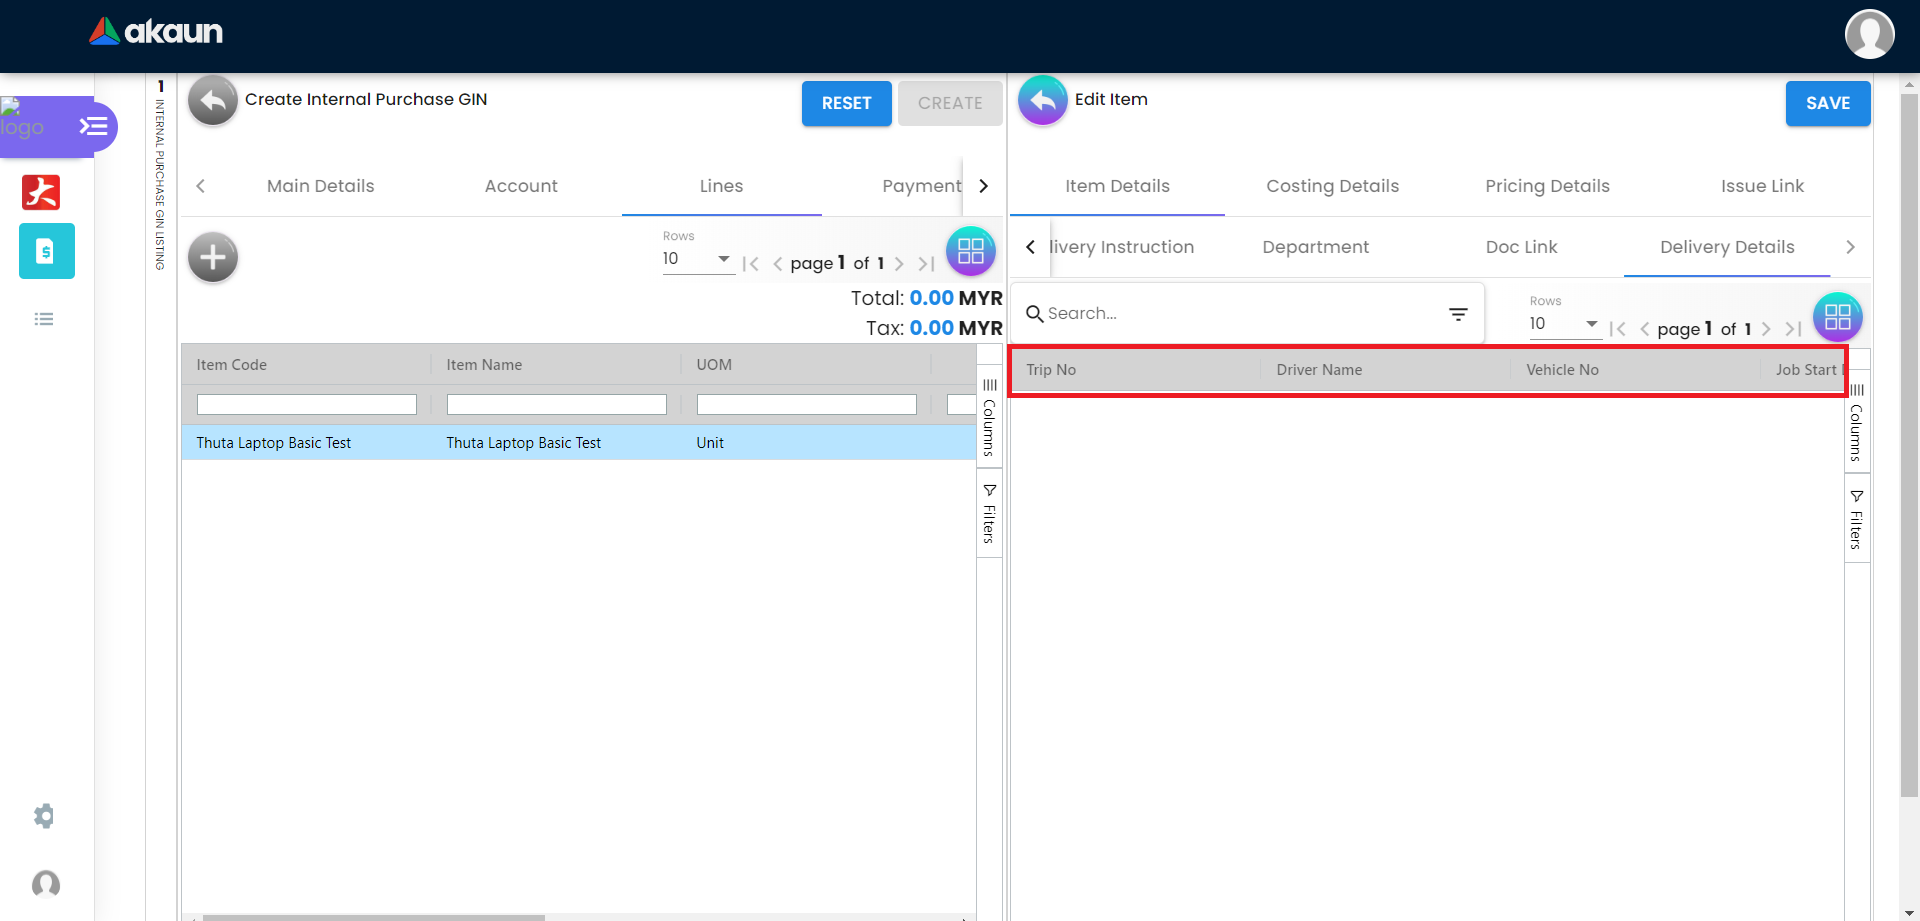
2.4 Edit Item
Please click on the line item that wants to make changes.
All the fields are the same as the steps of adding items, and are editable.
In the Doc Link Tab, will show the Doc No that copy from and copy to.
Other tabs are the same as Adding Line items.
Please click on “Save” after making the changes.

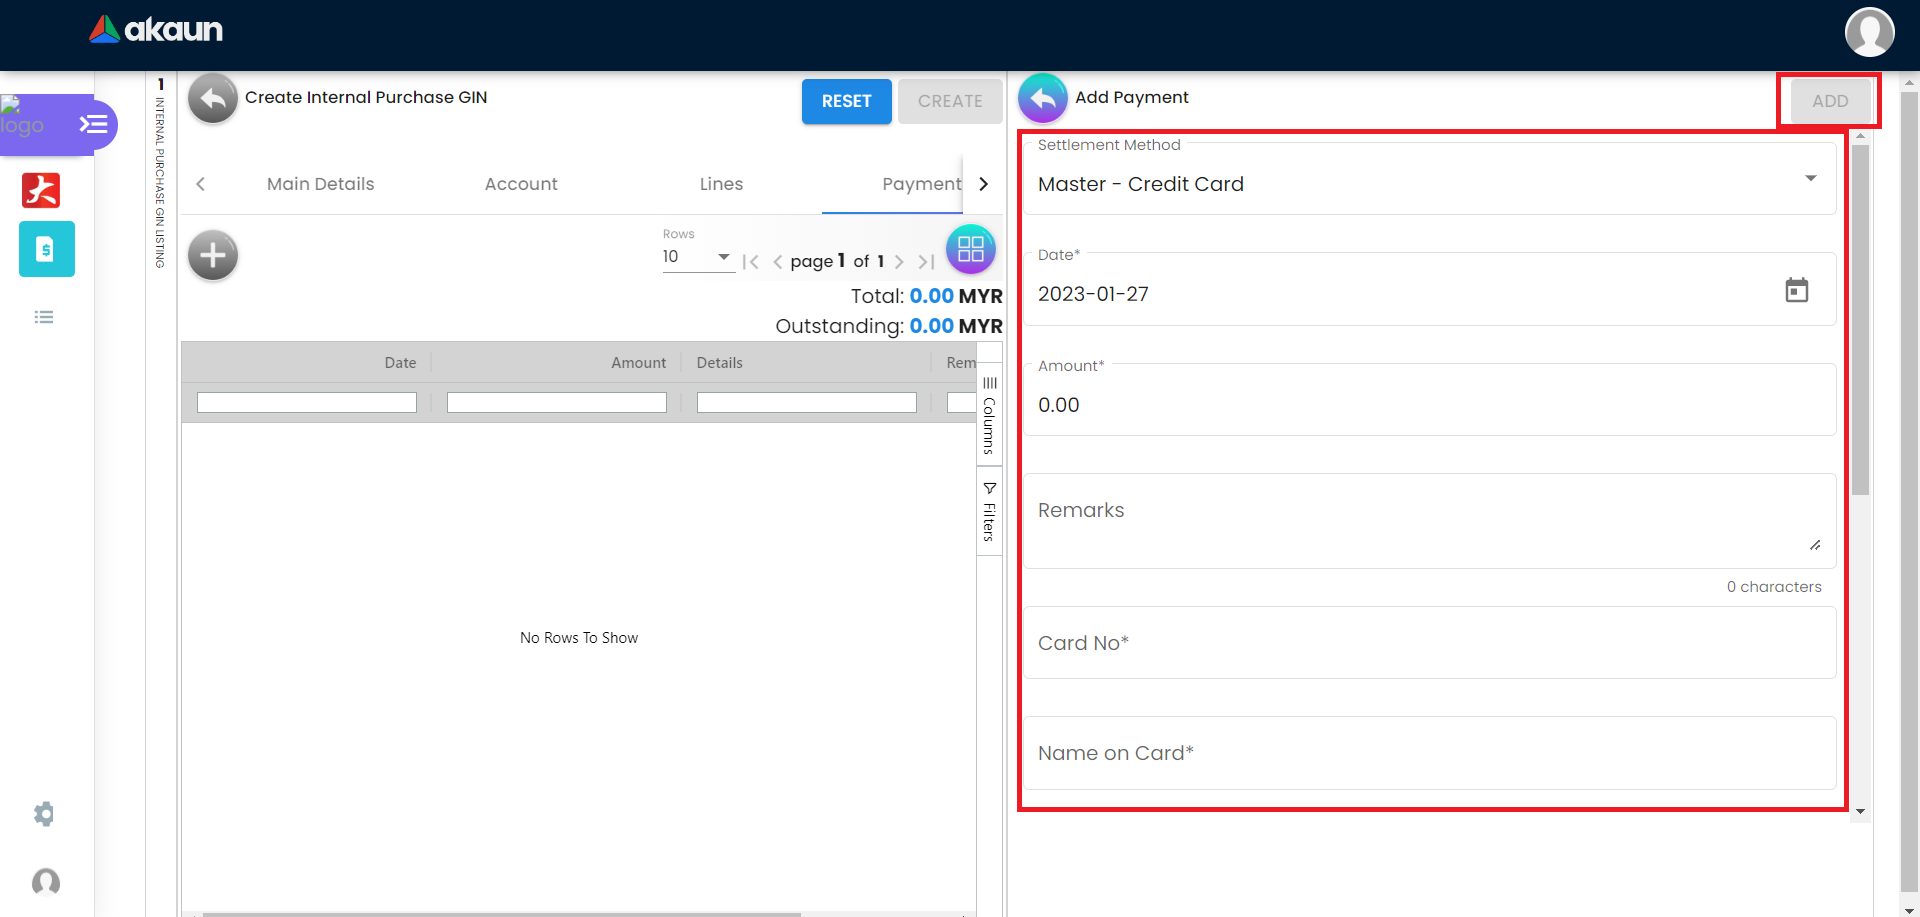
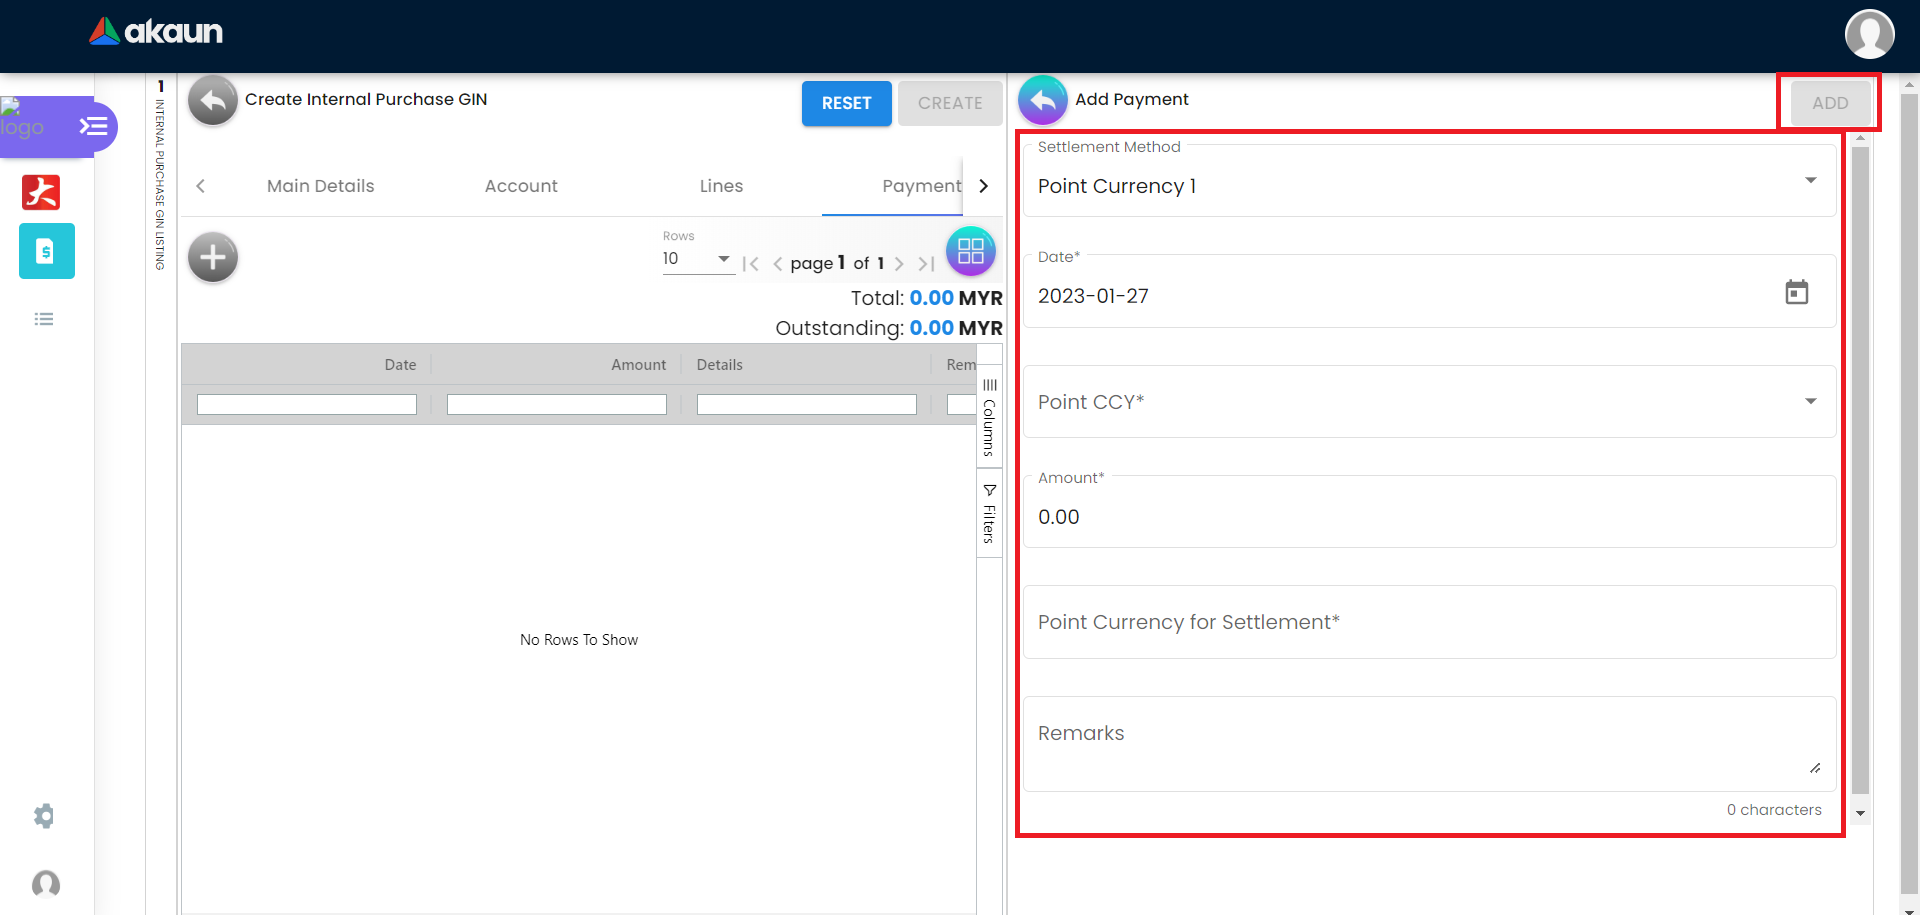
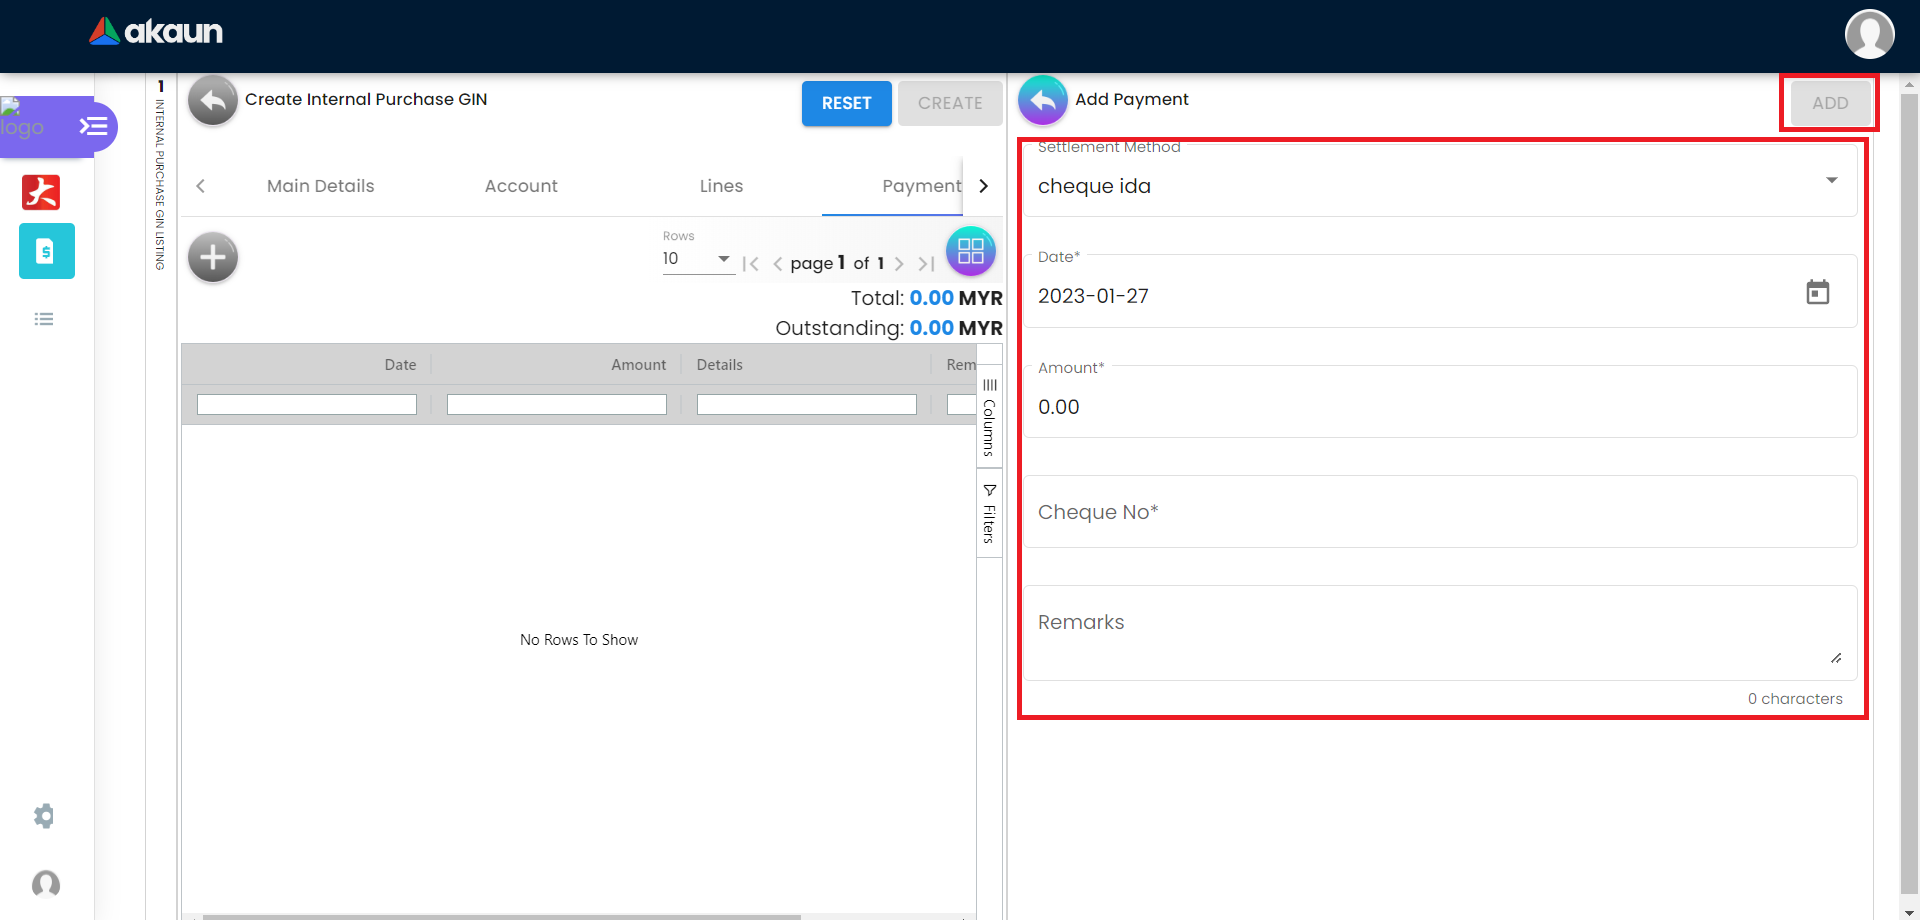
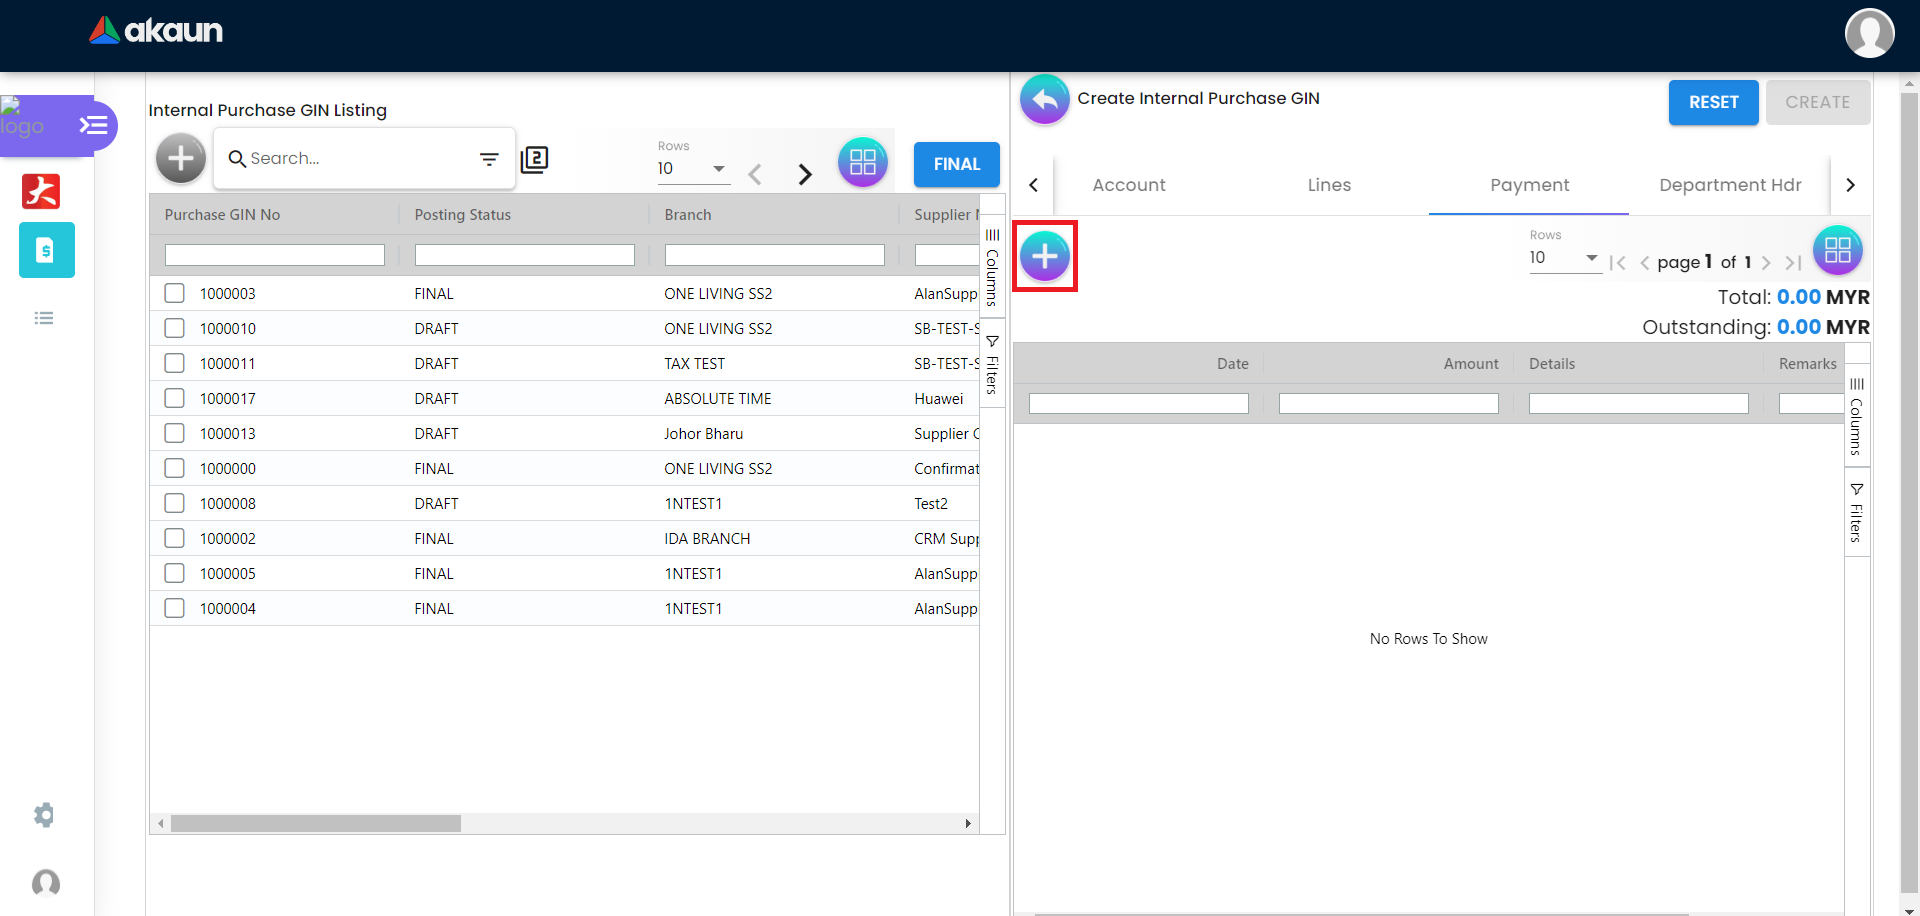
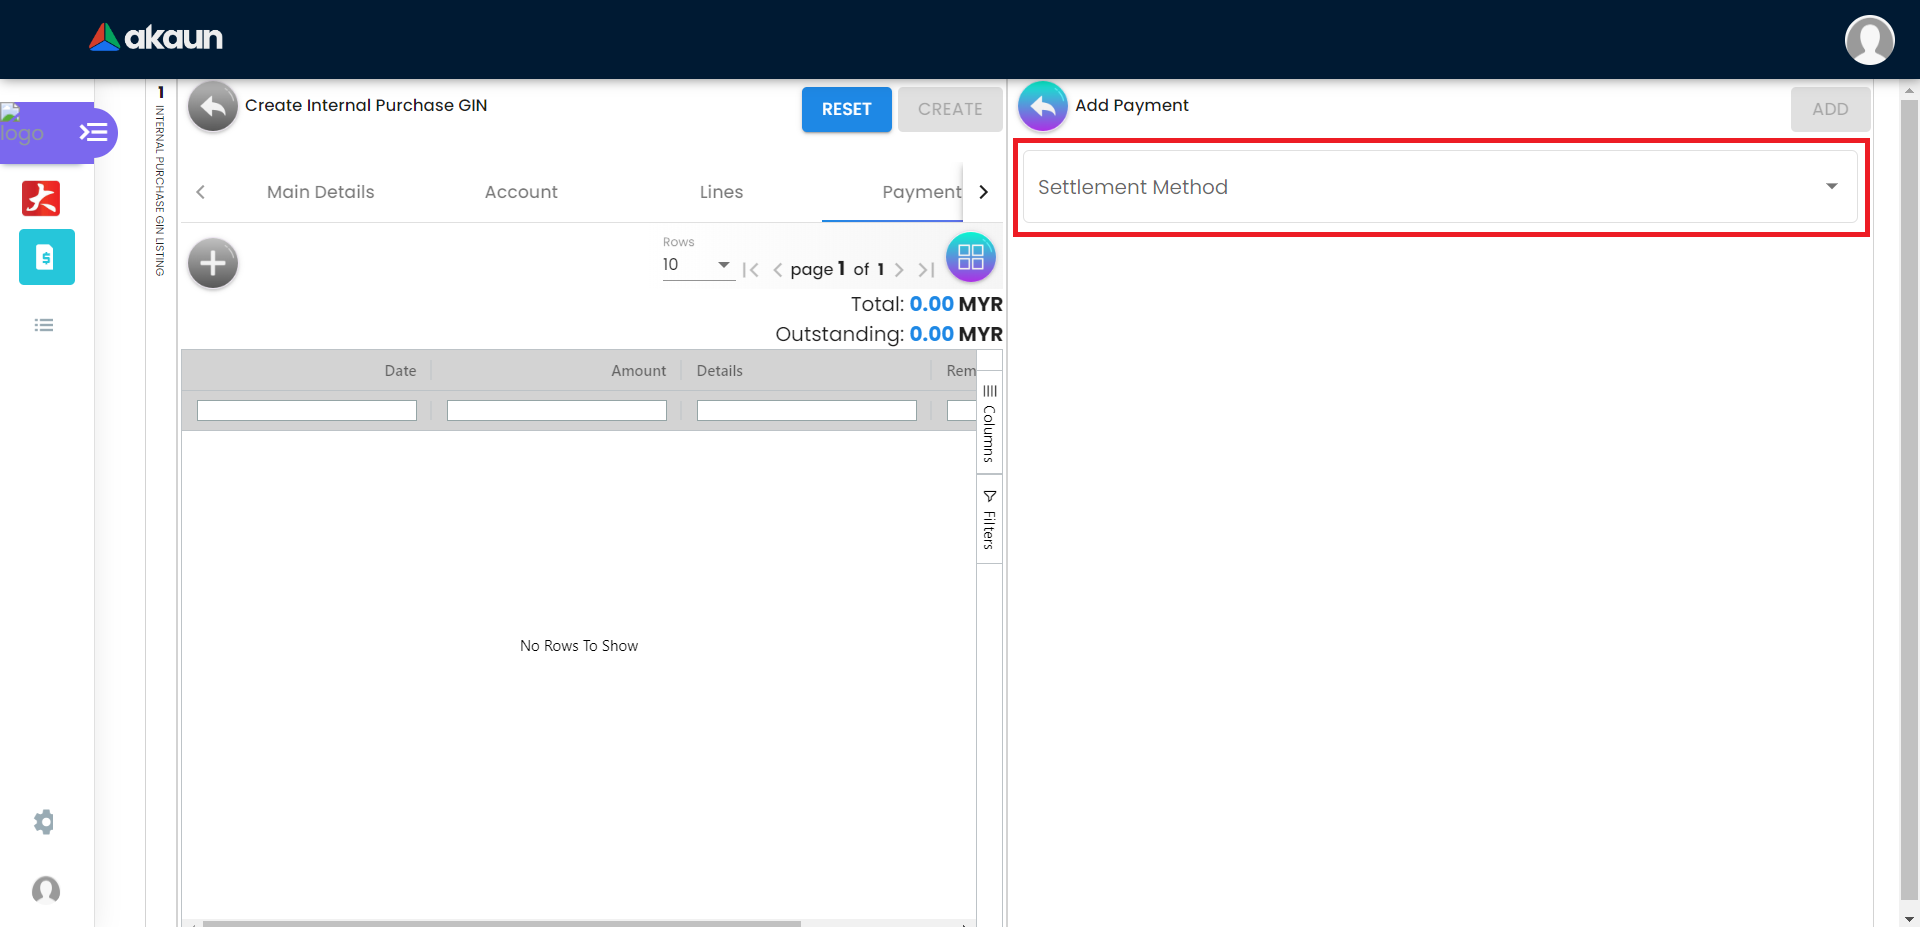
2.5 Payment Tab
Please click the ‘+’ button to add a new payment.
Can add different payment method such as Cash, Credit Card, Membership Point Currency, Voucher and Cheque.
Can add a new settlement method in the Cashbook Applet.
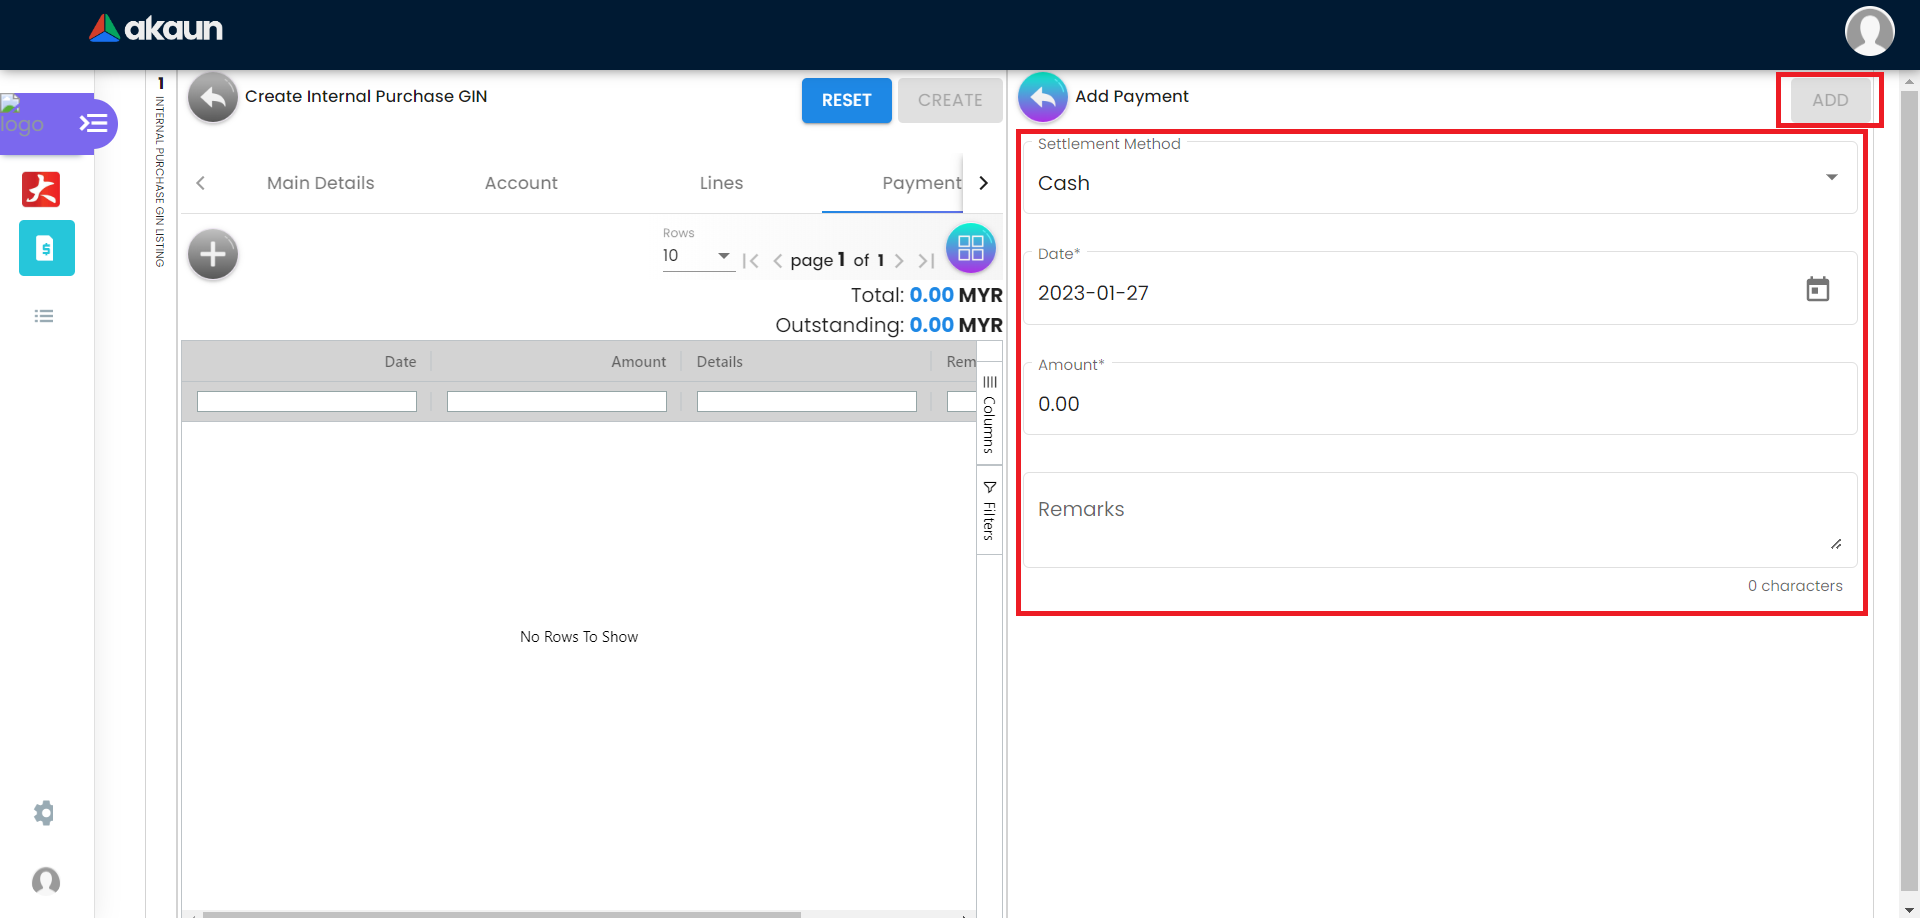
2.5.1 Cash
Please fill in the compulsory fields such as Date, Amount.
Click on the ‘Add’ to add the settlement.
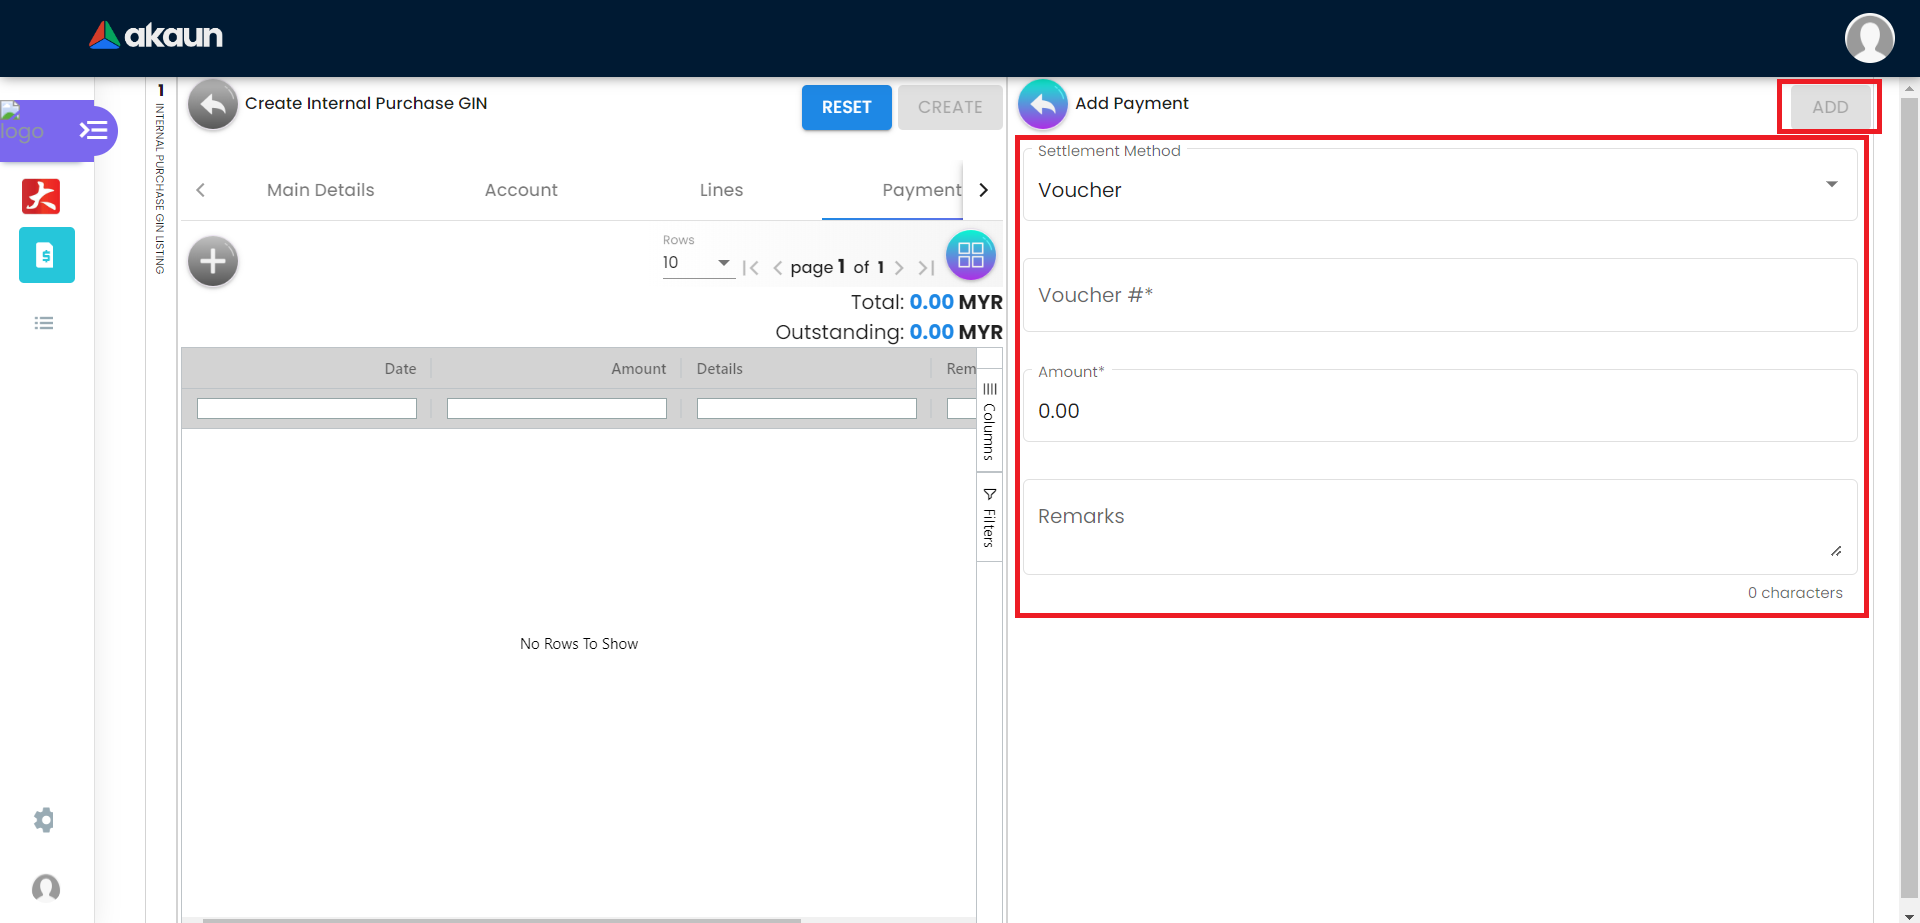
2.5.2 Voucher
Please fill in the compulsory fields such as Voucher # and Amount.
Click on the ‘Add’ to add the settlement.
2.5.3 Credit Card
Please fill in the compulsory fields such as Date, Amount, Credit Card No and Name on Card.
Click on the ‘Add’ to add the settlement.