2.0 Merchant
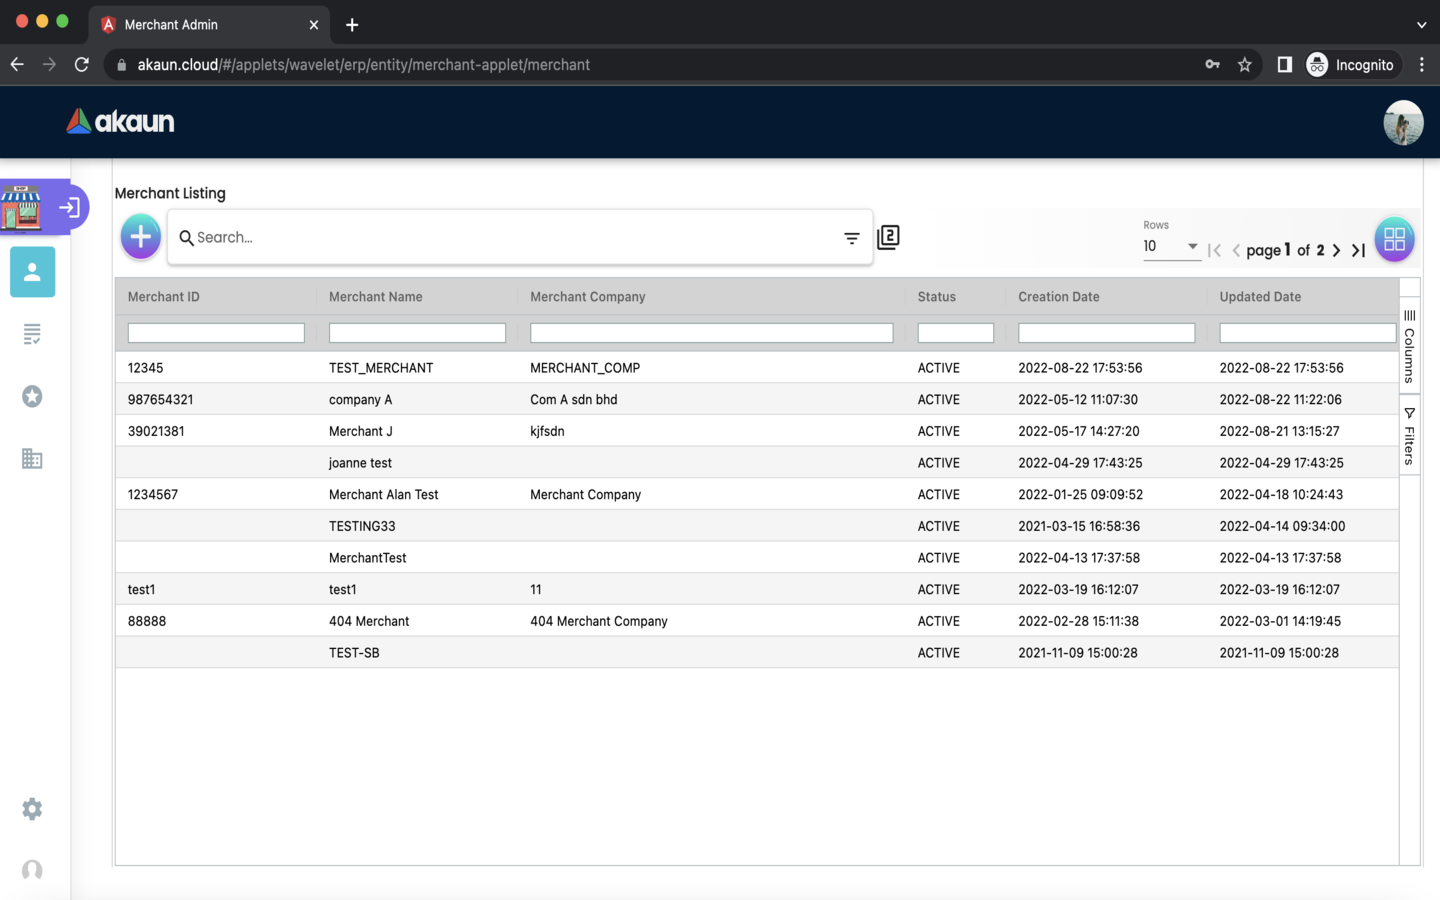
2.2 Create Merchant
Please click the ‘+’ button to create a new Merchant.
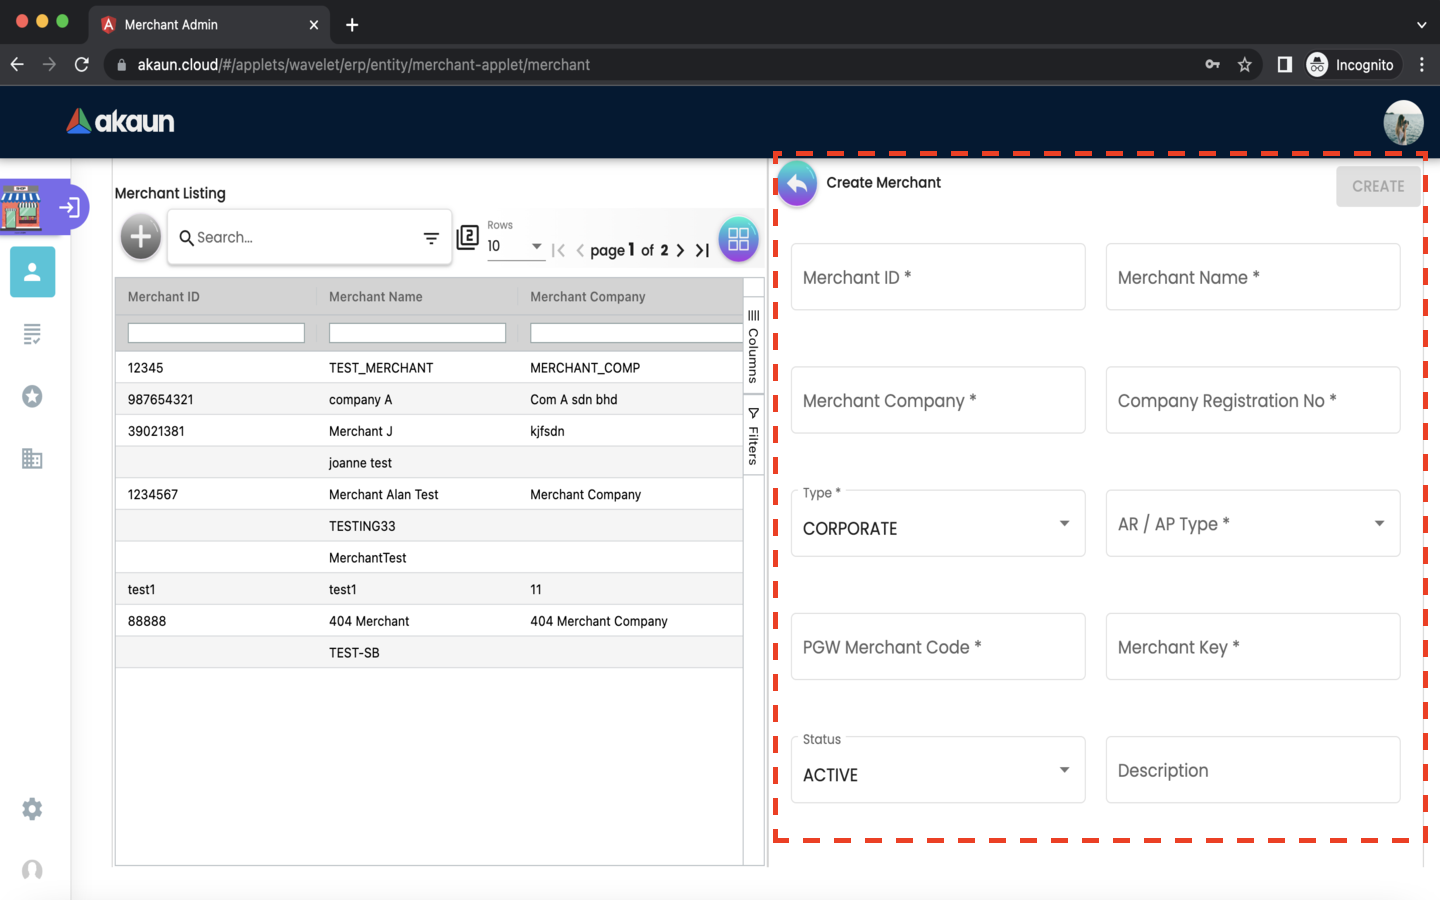
Please fill up the compulsory information for creating the Merchant. After filling up all compulsory information, Please click ‘CREATE’ to add a new Merchant. Compulsory information:
-
Merchant ID
-
Merchant Company
-
Merchant Name
-
Corporate Registration No
-
Type
-
AR/AP Type
-
PGW Merchant Code
-
Merchant Key
2.3 Edit Merchant
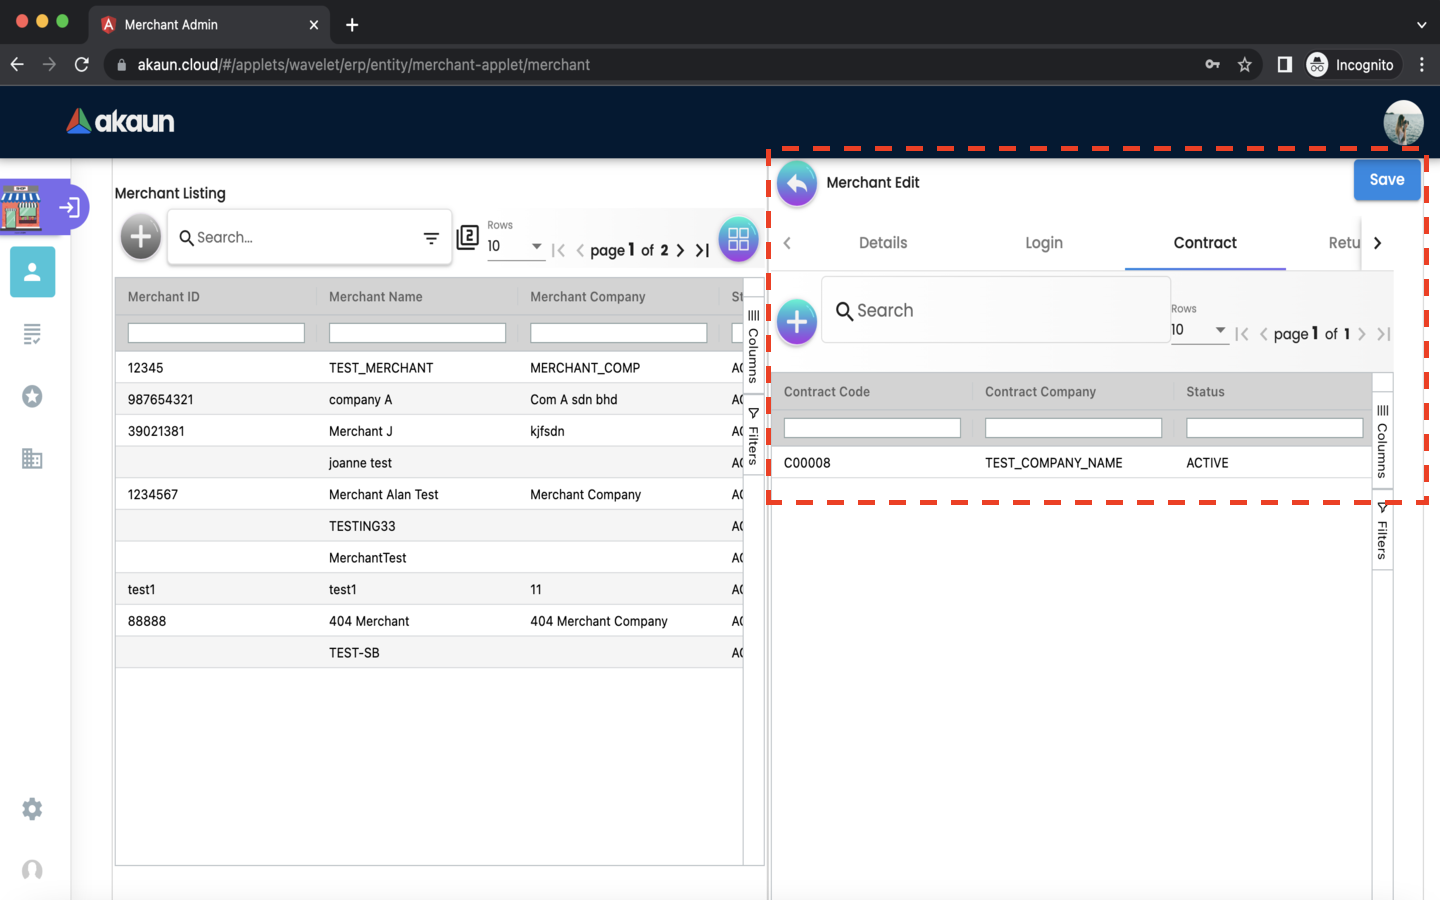
After adding the Merchant, it will be listed on the main page. Please click on the Merchant to edit it.
2.3.1 Details Tab

In the details tab, the following information can be edited
-
Merchant name
-
Merchant Company
-
Merchant ID
-
Corporate Registration No
-
Type
-
AR/AP Type
-
PGW Merchant Code
-
Merchant Key
After updating any fields, please click ‘SAVE’.
If you would like to remove the merchant, please click ‘REMOVE’.
2.3.2 Login Tab
In the login tab, you can add logins to the merchant.
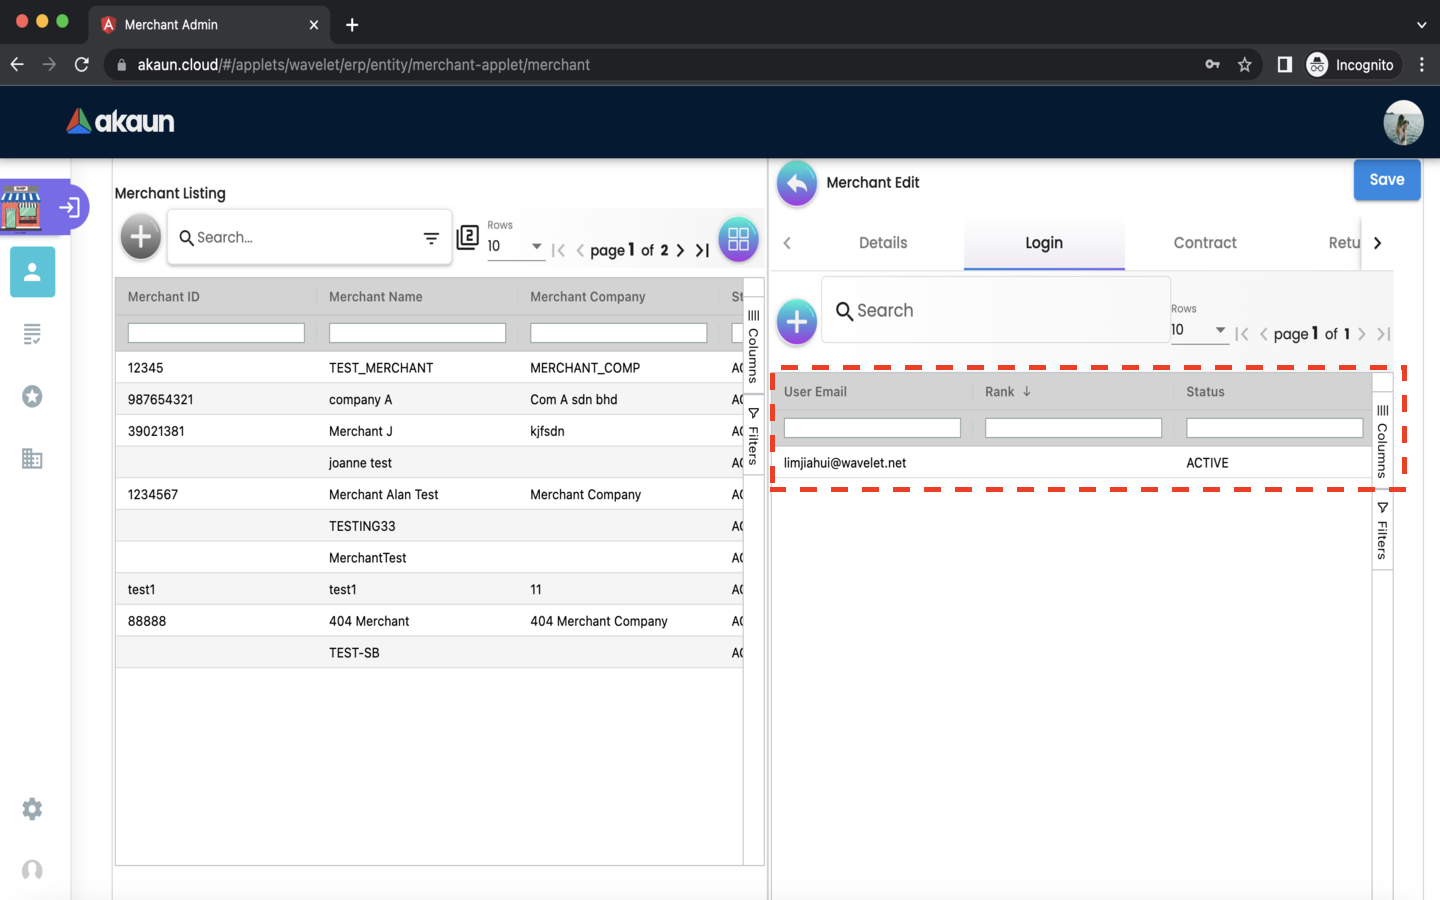
-
Please click the ‘+’ button to add a login to the merchant.

The following fields are compulsory:
-
User Email - registered akaun account
-
Rank - owner, admin, manager, member, guest, visitor, anonymous
-
Status - active or inactive
-
Please click the ‘verify email’ button to verify your email address.
-
Your email must be verified before you can add the login to the merchant.
-
-
Please click the ‘add’ button to add the login to the merchant.
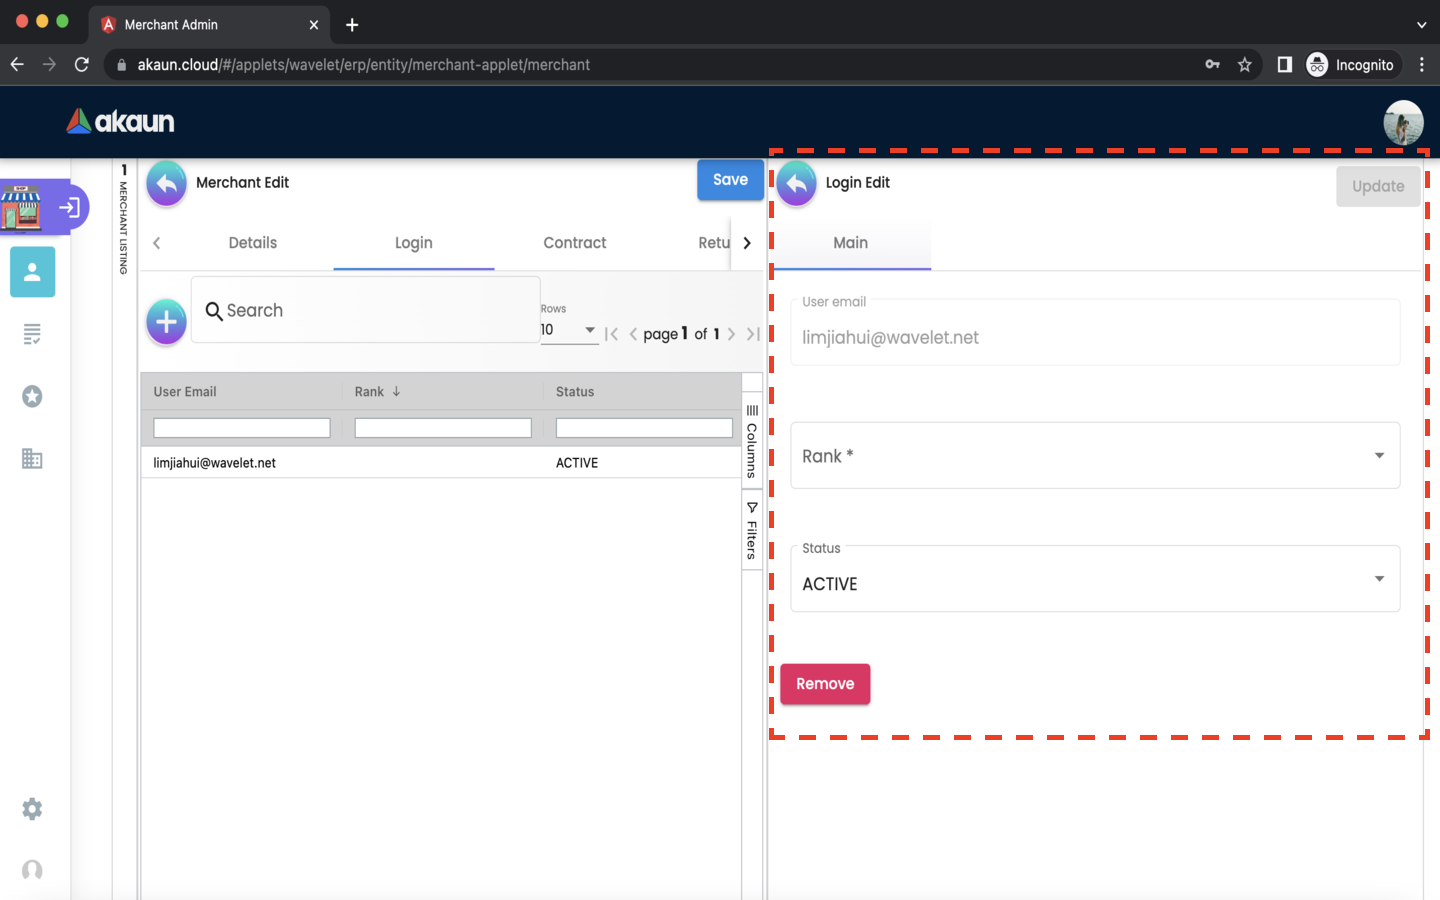
After adding the login to the merchant, it will be listed on the Login tab. Please click on the login to edit it.
-
The rank and status can only be edited. After updating rank or status or both, please click ‘update’.
-
Please click ‘remove’ to remove the login from the merchant.
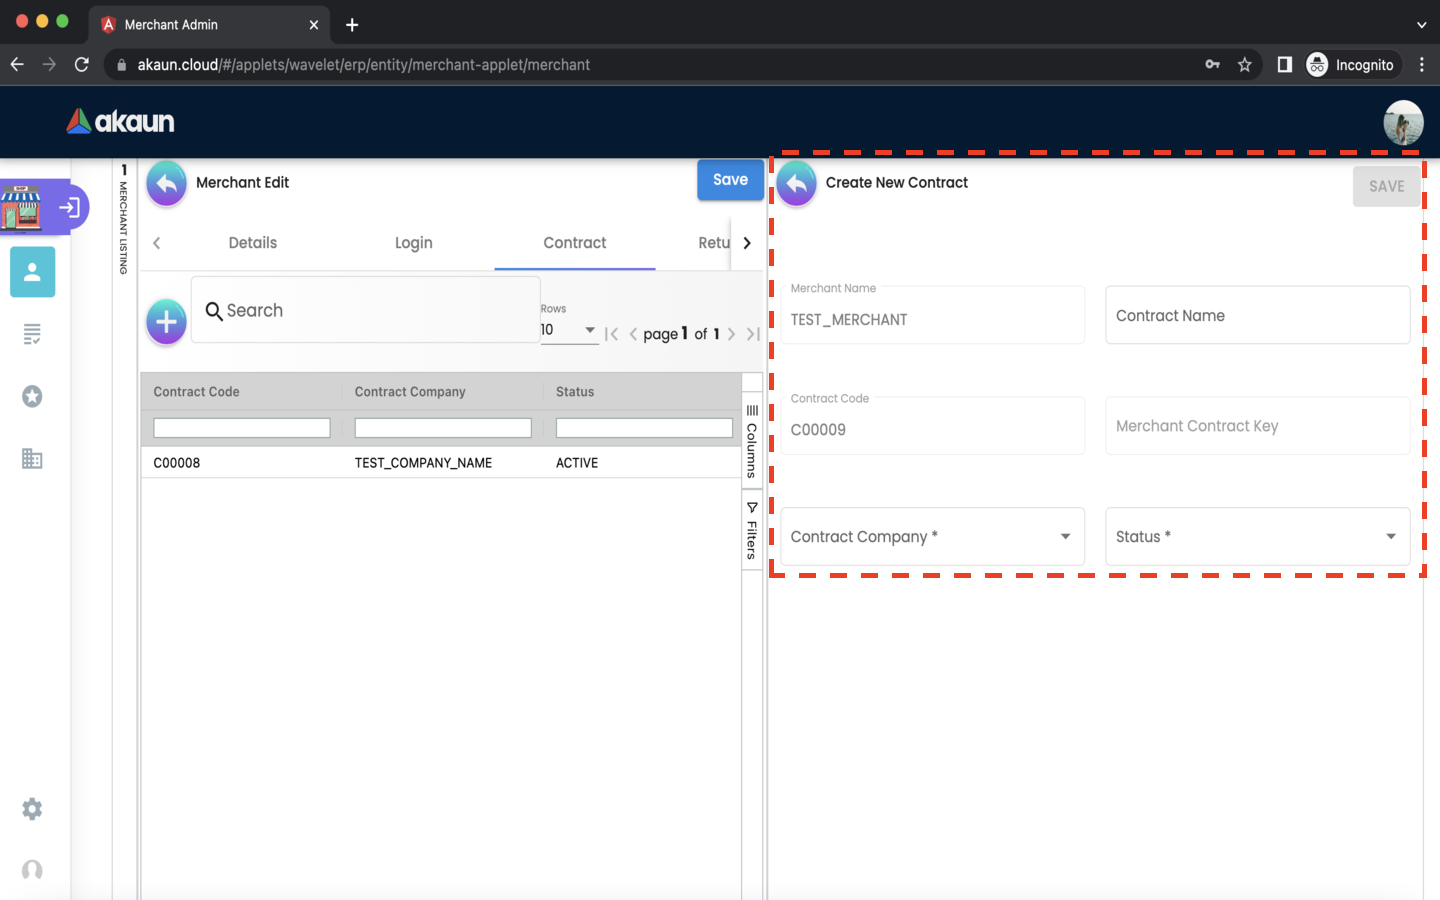
2.3.3 Contract Tab
In the contract tab, you can add contracts to the merchant.
-
Please click the ‘+’ button to add a contract to the merchant.
The following fields are compulsory:
-
Contract Name
-
Contract Company
-
Status
Please click the save button to add the contract to the merchant.
After adding the contract to the merchant, it will be listed on the Contract tab. Please click on the contract to edit it
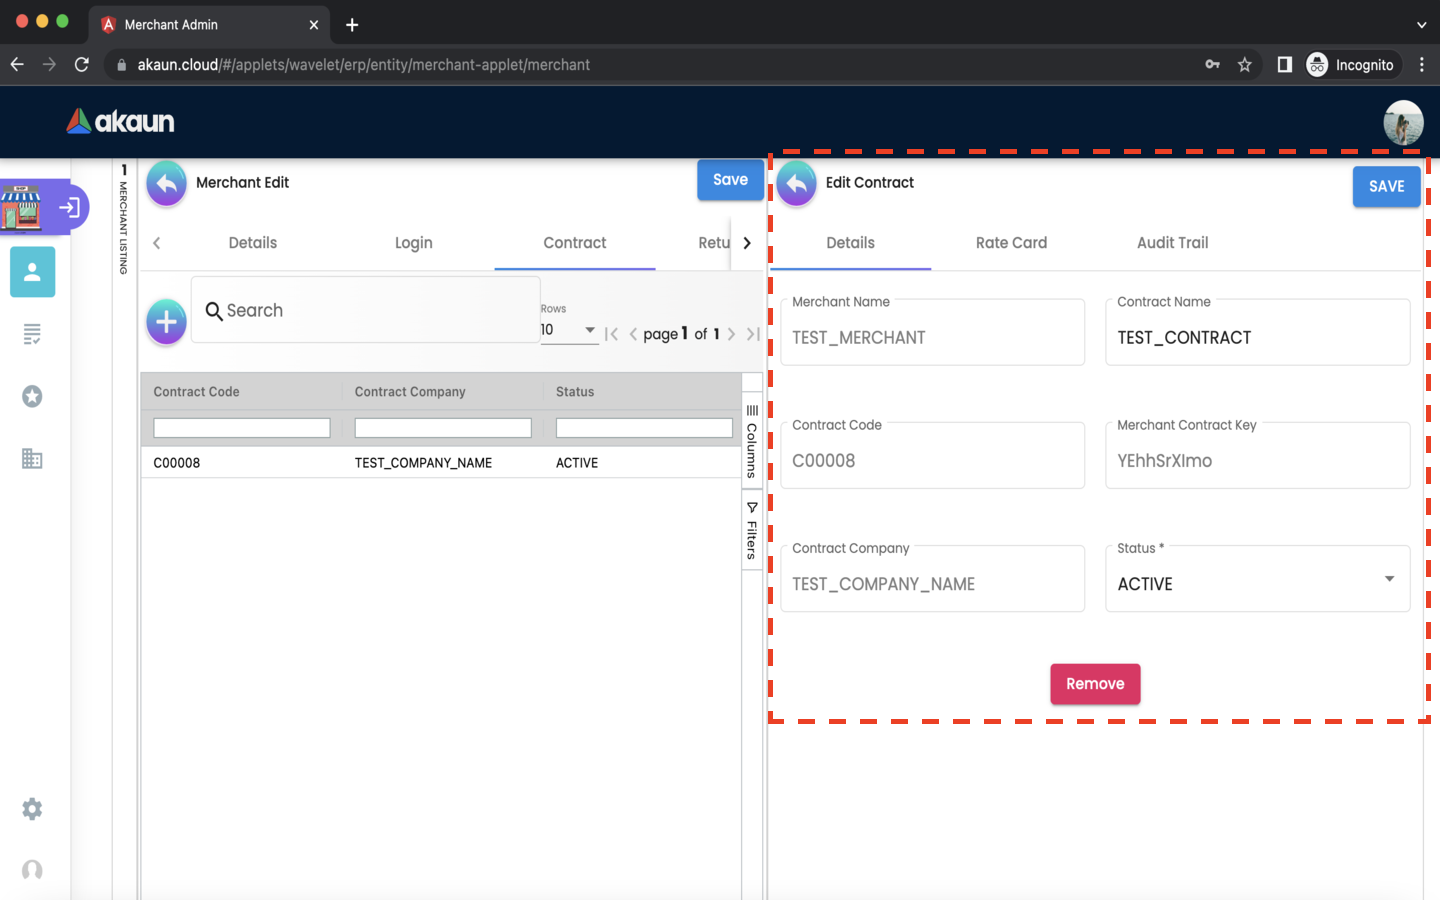
In the details tab, the following information can be edited:
-
Contract Name
-
Status
Please click ‘remove’ to remove the contract from the merchant.
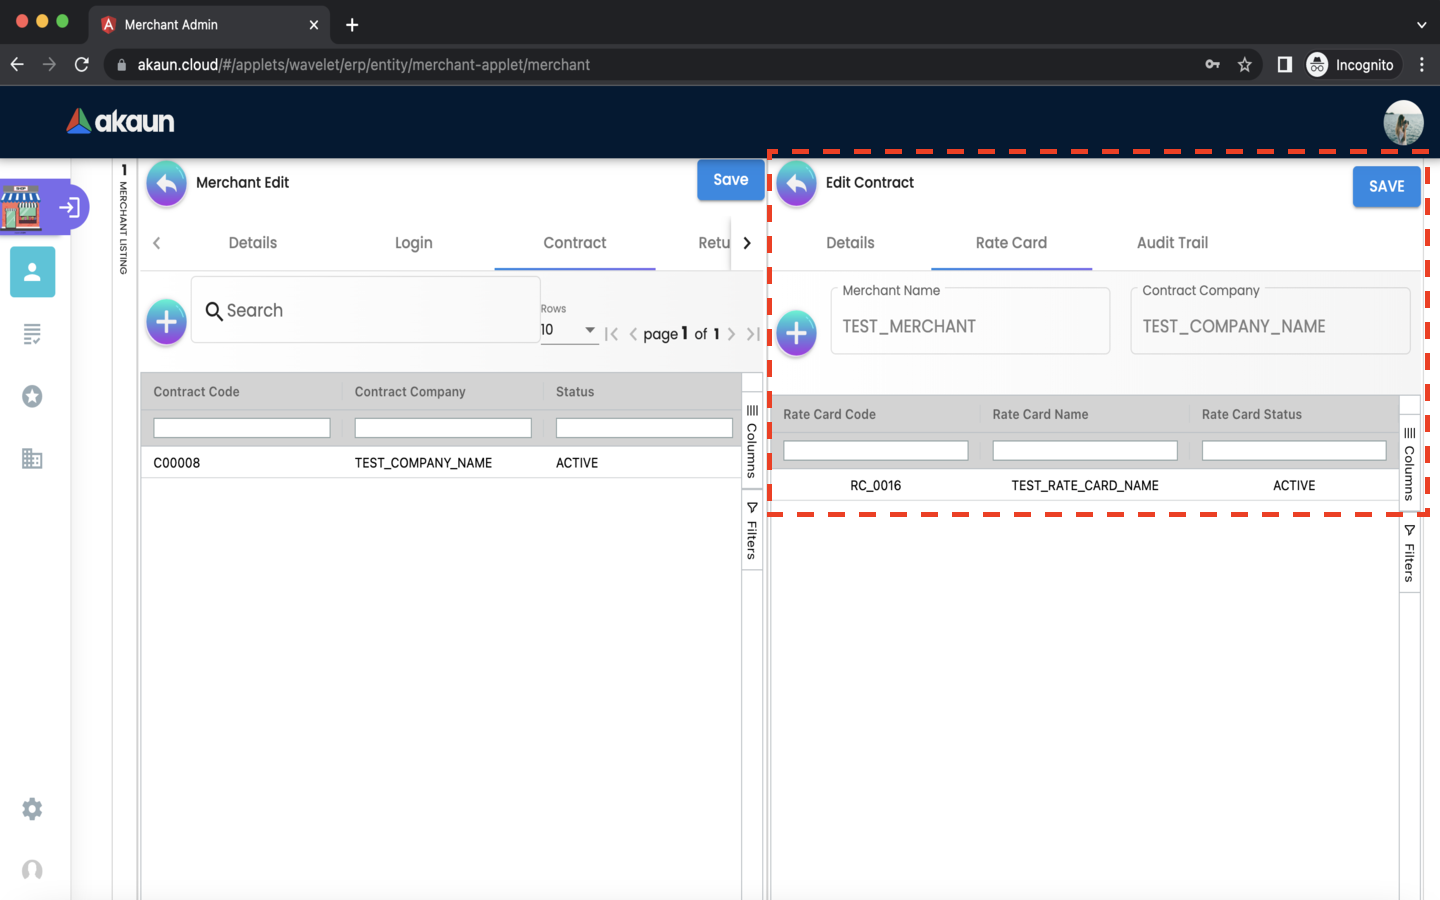
In the Rate Card tab, you can add rate cards to the contract.
-
Please click the ‘+’ button to add a rate card to the contract.
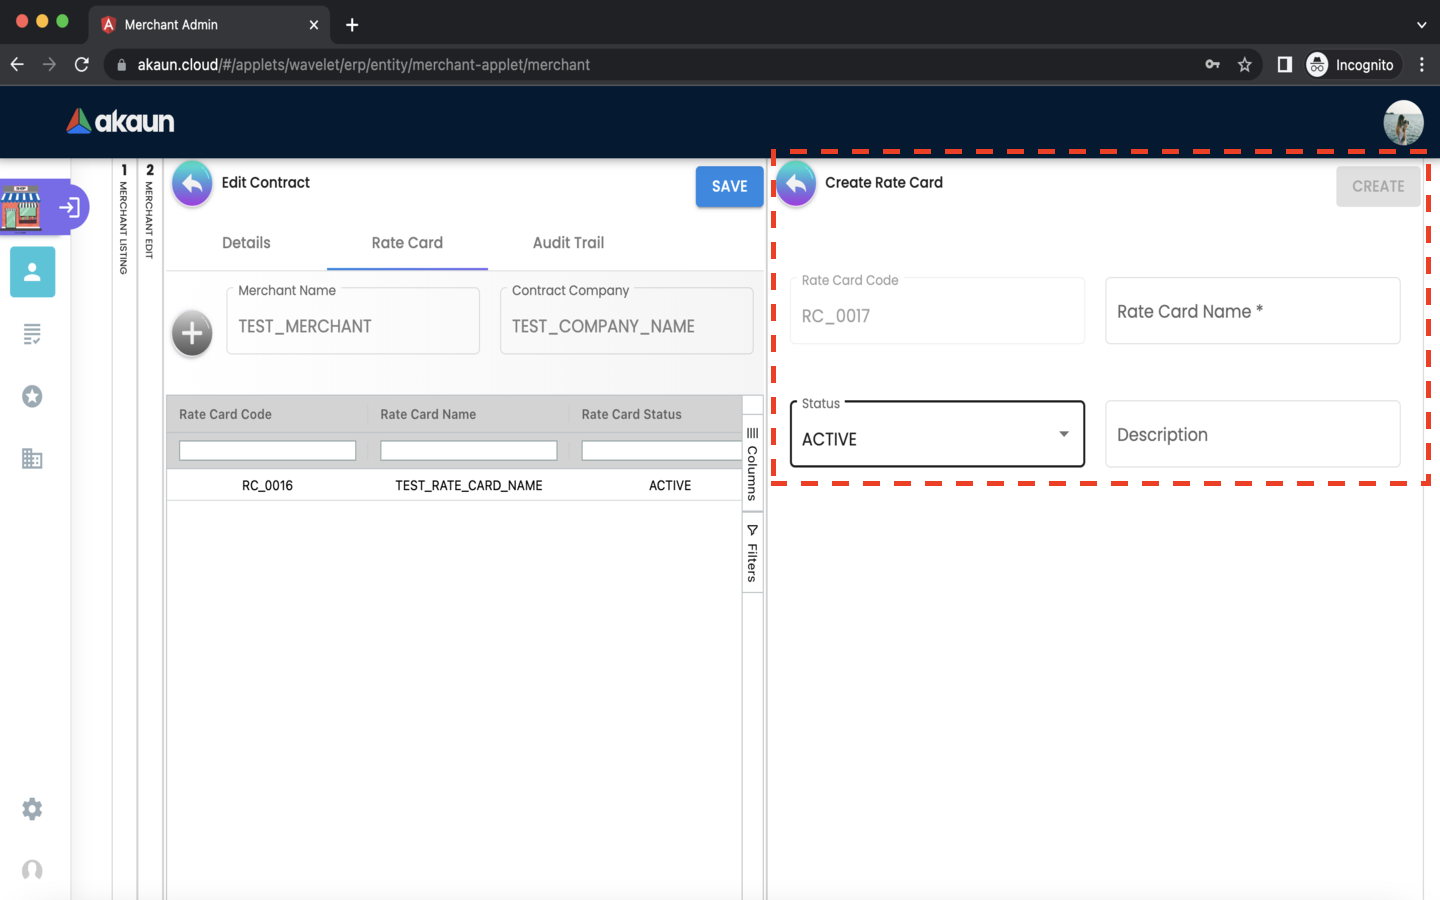
The following fields are compulsory:
-
Rate Card Name
Please click the ‘CREATE’ button to add the rate card to the contract.
After adding the rate card to the contract, it will be listed on the Contract tab. Please click on the rate card for further details.
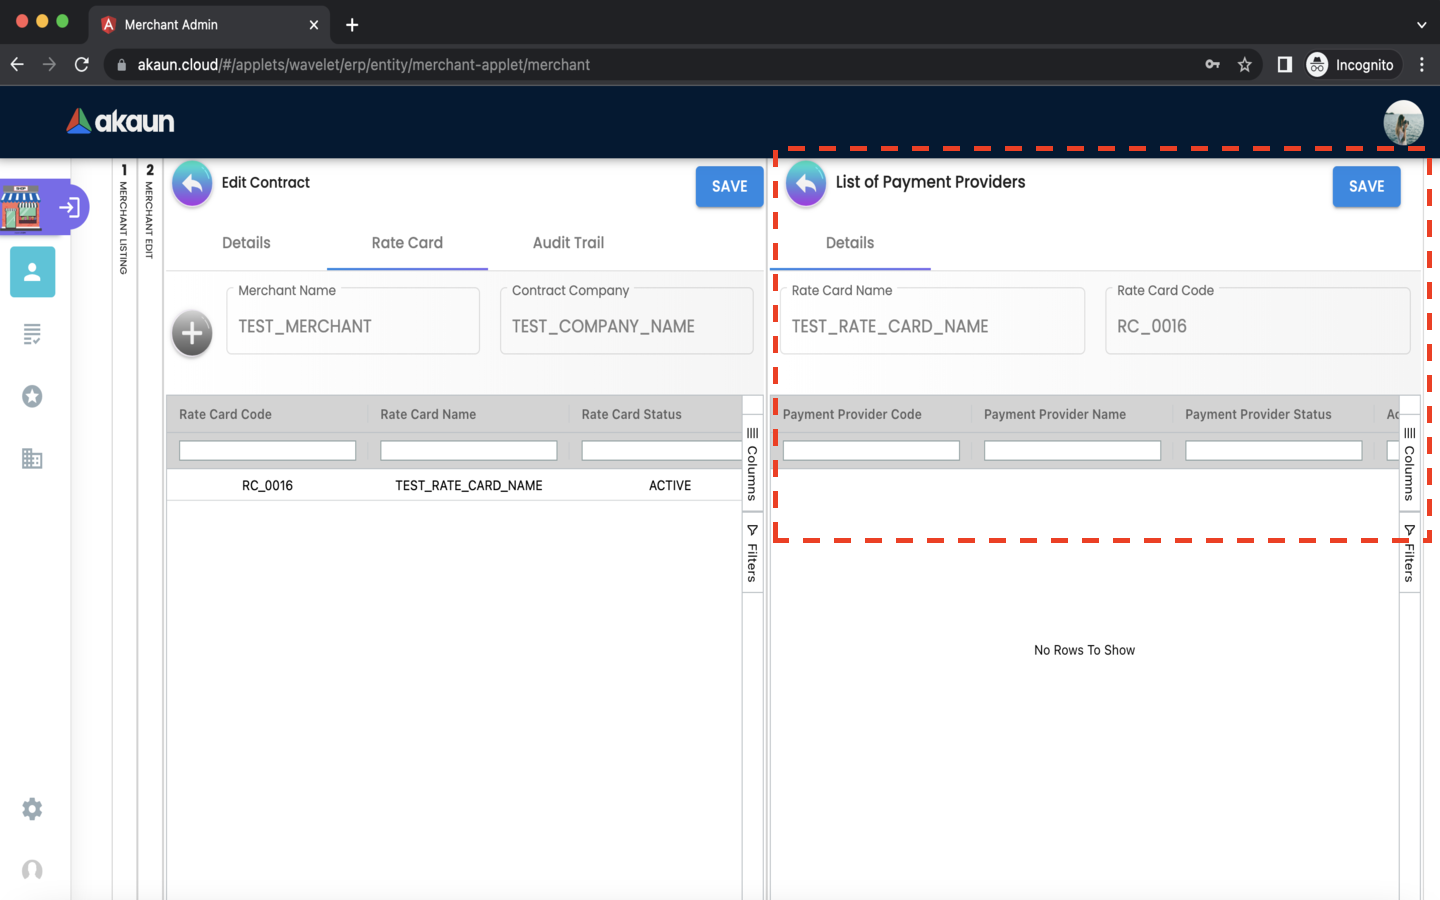
A list of payment providers for the rate card will be displayed.
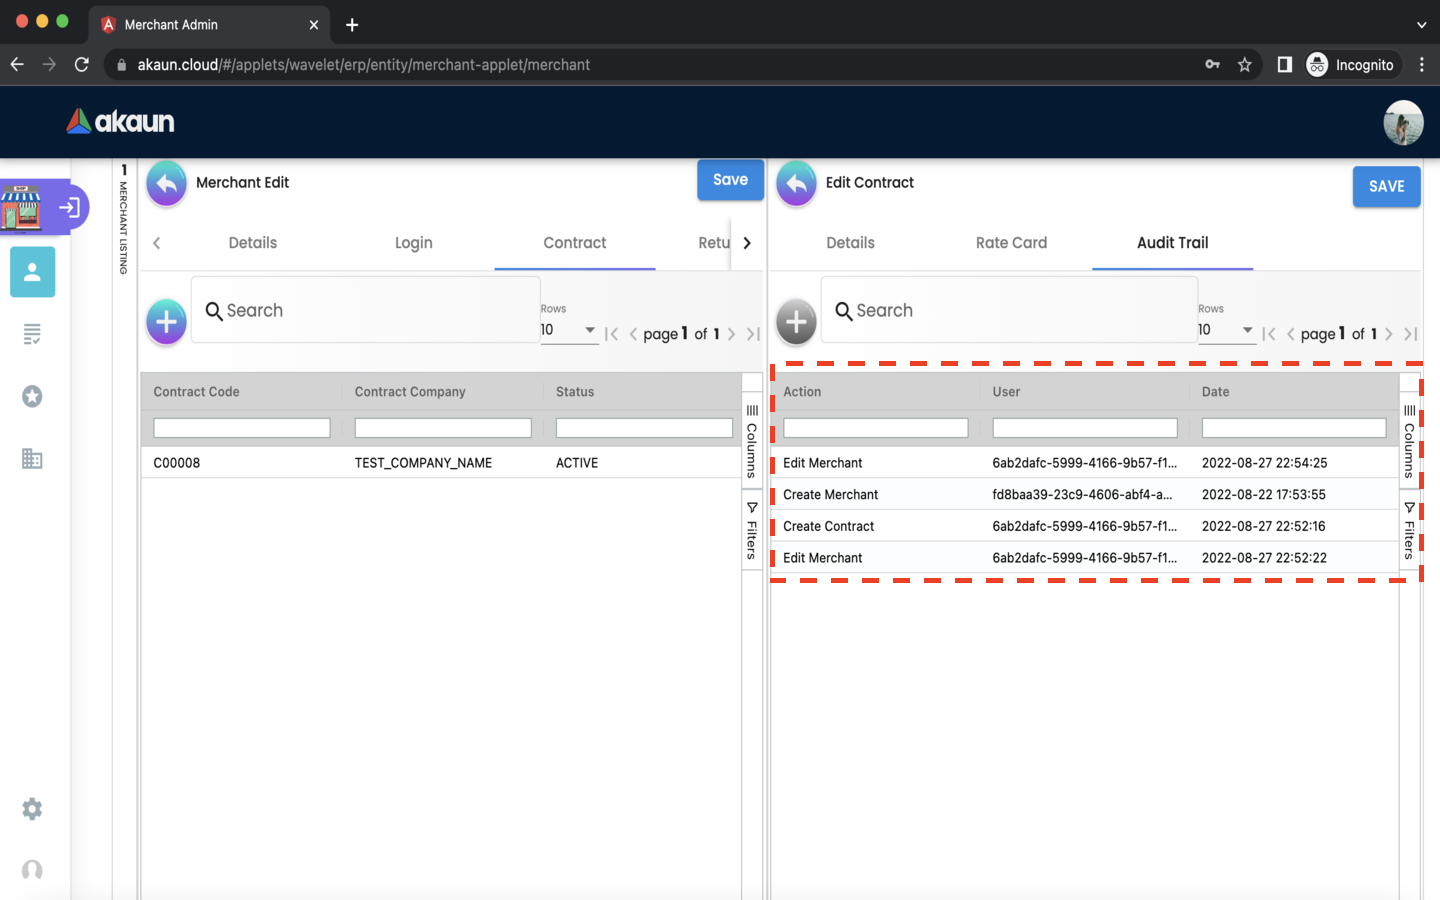
In the Audit Trail tab, you can view a list of records containing the Action, User and Date. The listings show the action made by which users relating to a particular contract create or edit at a certain date and time.
2.3.4 Return URL Tab
In the return url tab, you can add return urls to the merchant.
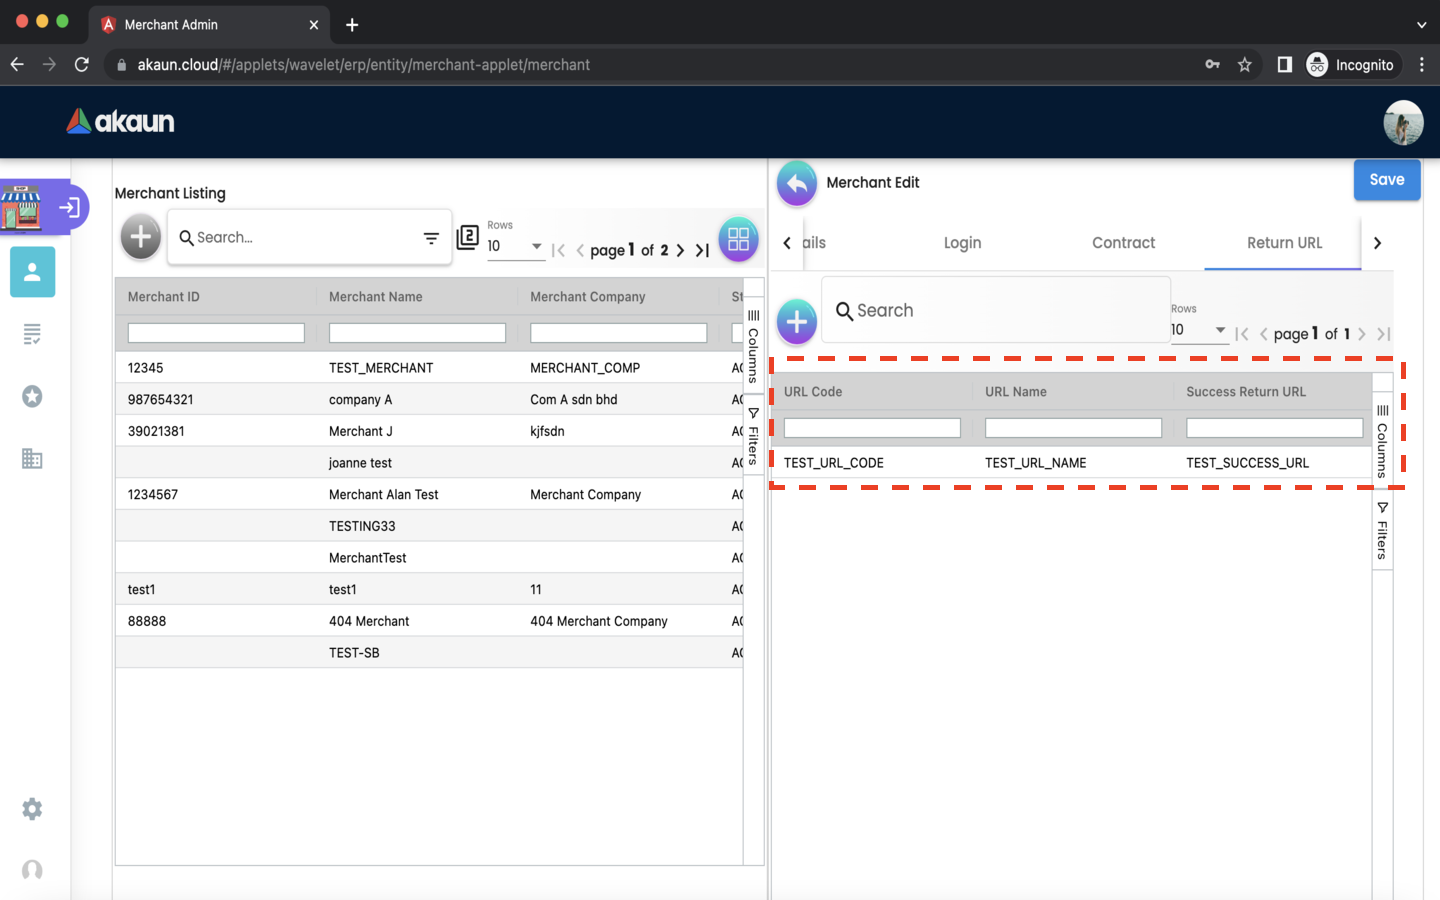
-
Please click the ‘+’ button to add a return URL to the merchant.

The following fields are compulsory: * Return URL Code * Return URL Name
If you would like to add a success return URL, enable the toggle and proceed to enter the URL
If you would like to add an error return URL, enable the toggle and proceed to enter the URL.
Please click the top-right ‘SAVE’ button to add the return URL to the merchant.
Please click the top-left ‘SAVE’ button to save any return URLs that have been added to the merchant.
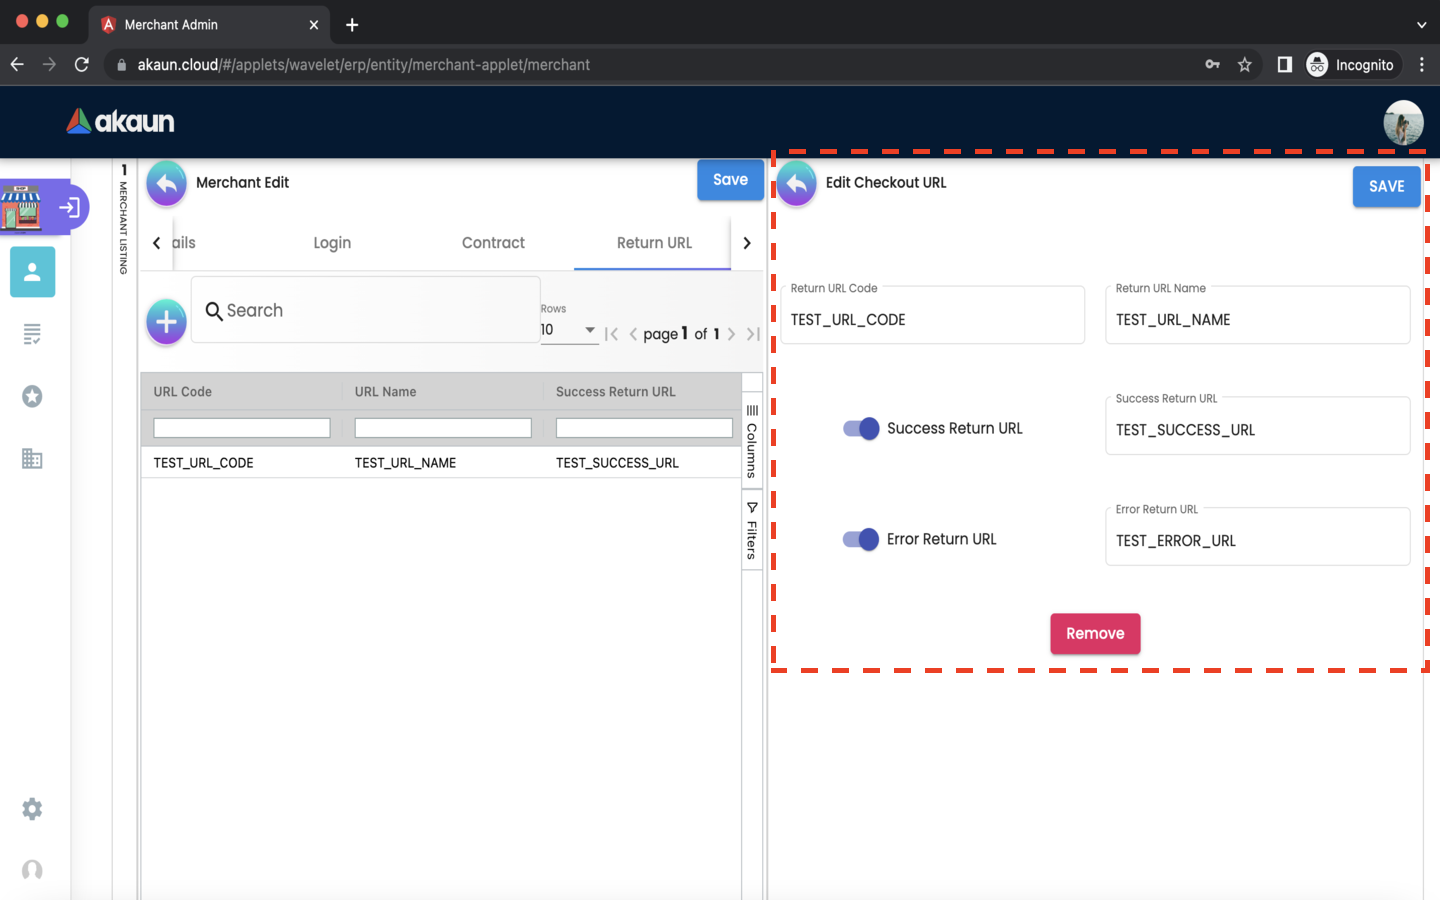
After adding the return URL to the merchant, it will be listed on the Return URL tab. Please click on any listed URLs to edit it.
-
All fields can be updated. After updating it, please click ‘SAVE’.
-
Please click ‘remove’ to remove the return URL from the merchant.
2.3.5 Tax & Billing Tab
In the tax and billing tab, you can add tax and billings to the merchant.

-
Please click the ‘+’ button to add a tax to the merchant.
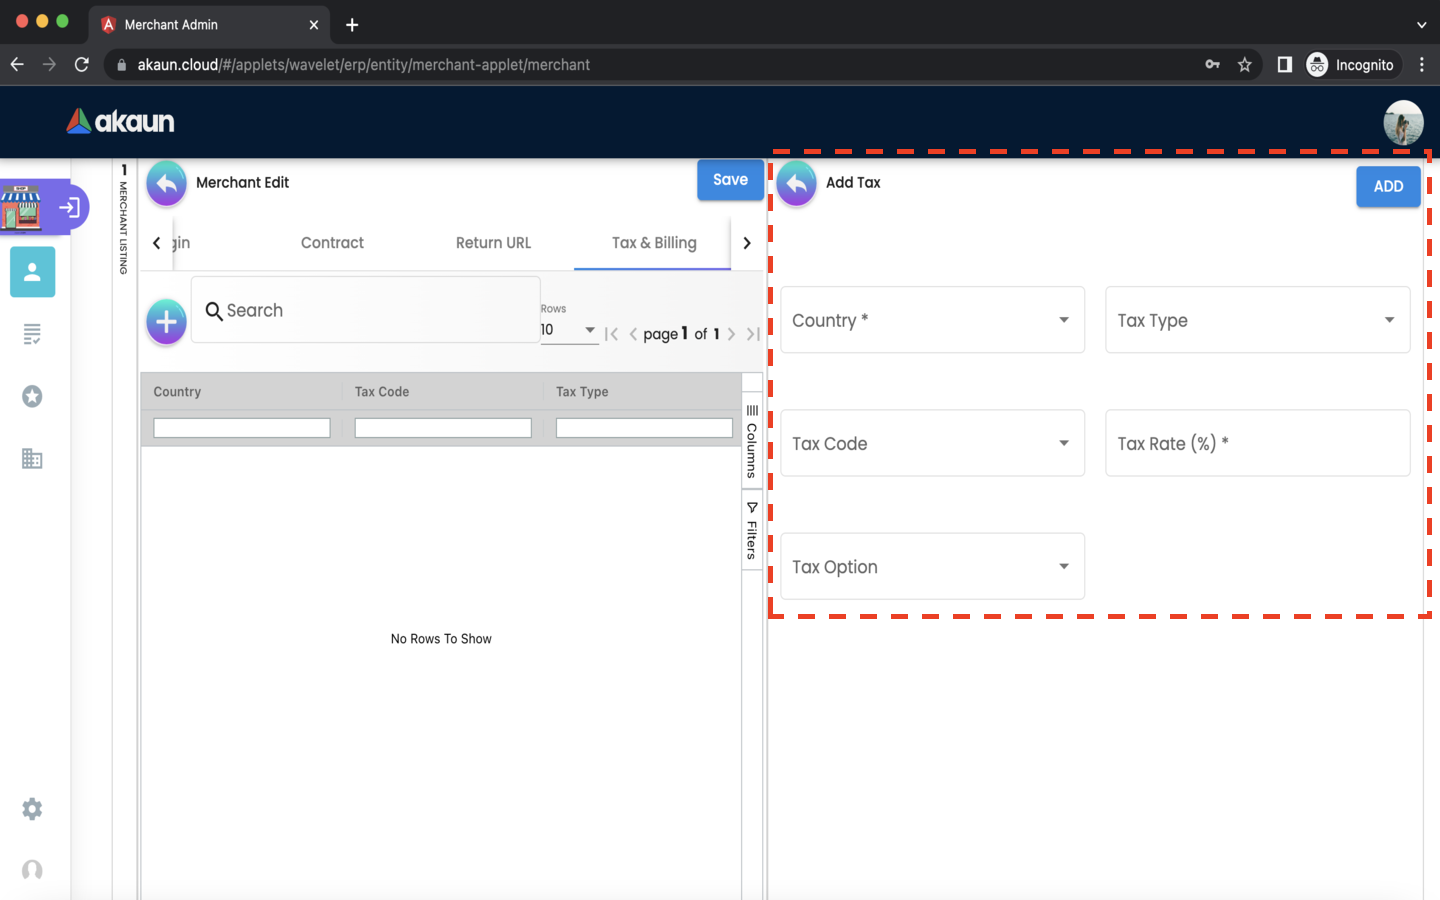
The following fields are compulsory: * Country * Tax Rate
Please click the ‘ADD’ button to add the tax to the merchant.
Please click the ‘SAVE’ button to save any tax that has been added to the merchant.
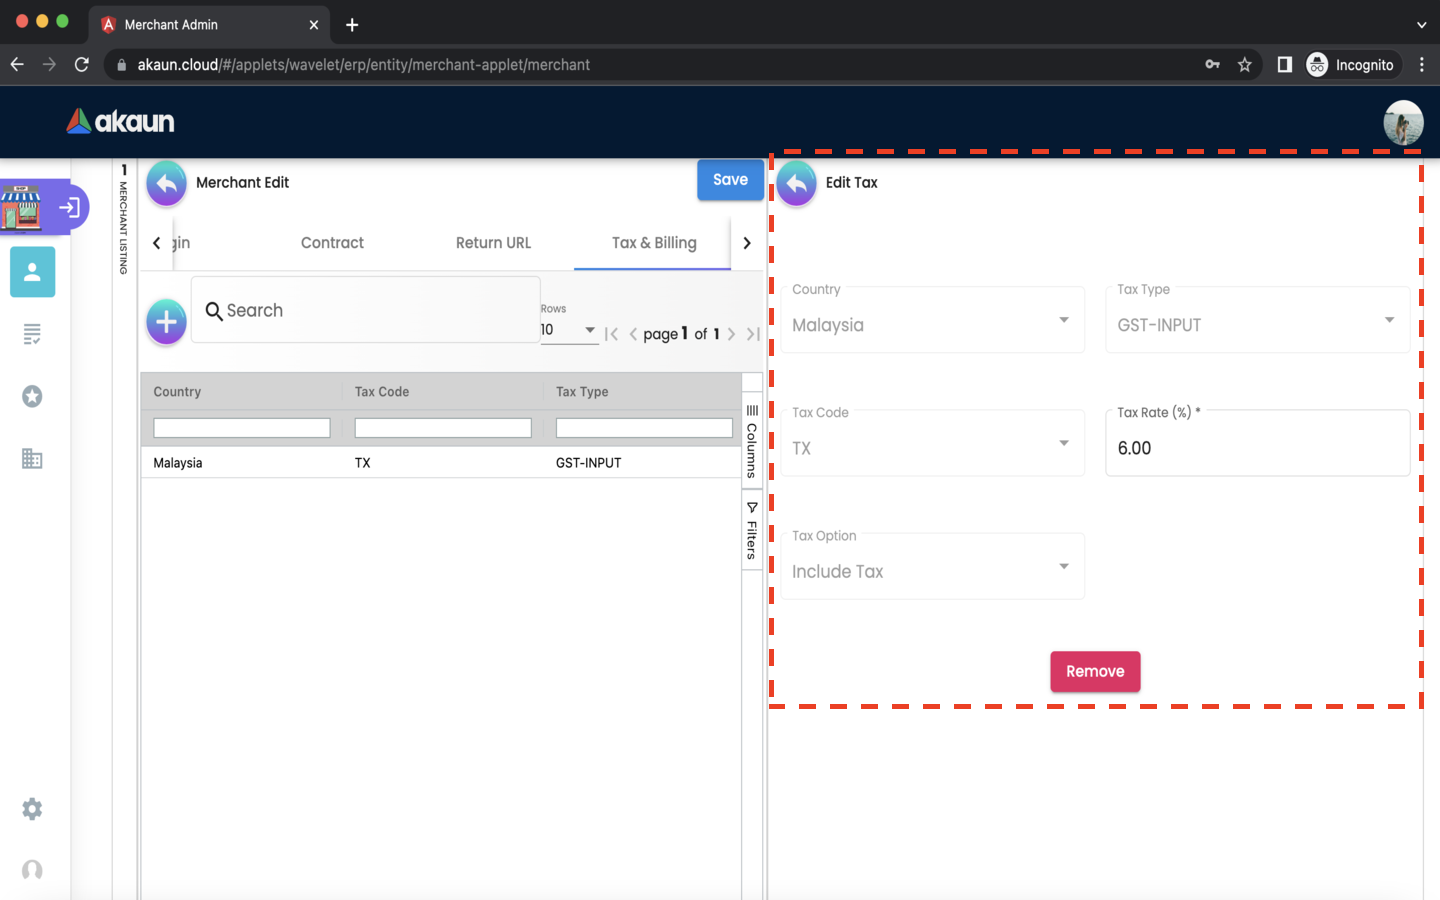
After adding the tax to the merchant, it will be listed on the Tax & Billing tab. Please click on any listed tax & billing to edit it.
-
Please click ‘remove’ to remove the tax from the merchant.
2.3.6 Payment COnfig Tab
In the payment config tab, you can add payment configs to the merchant.
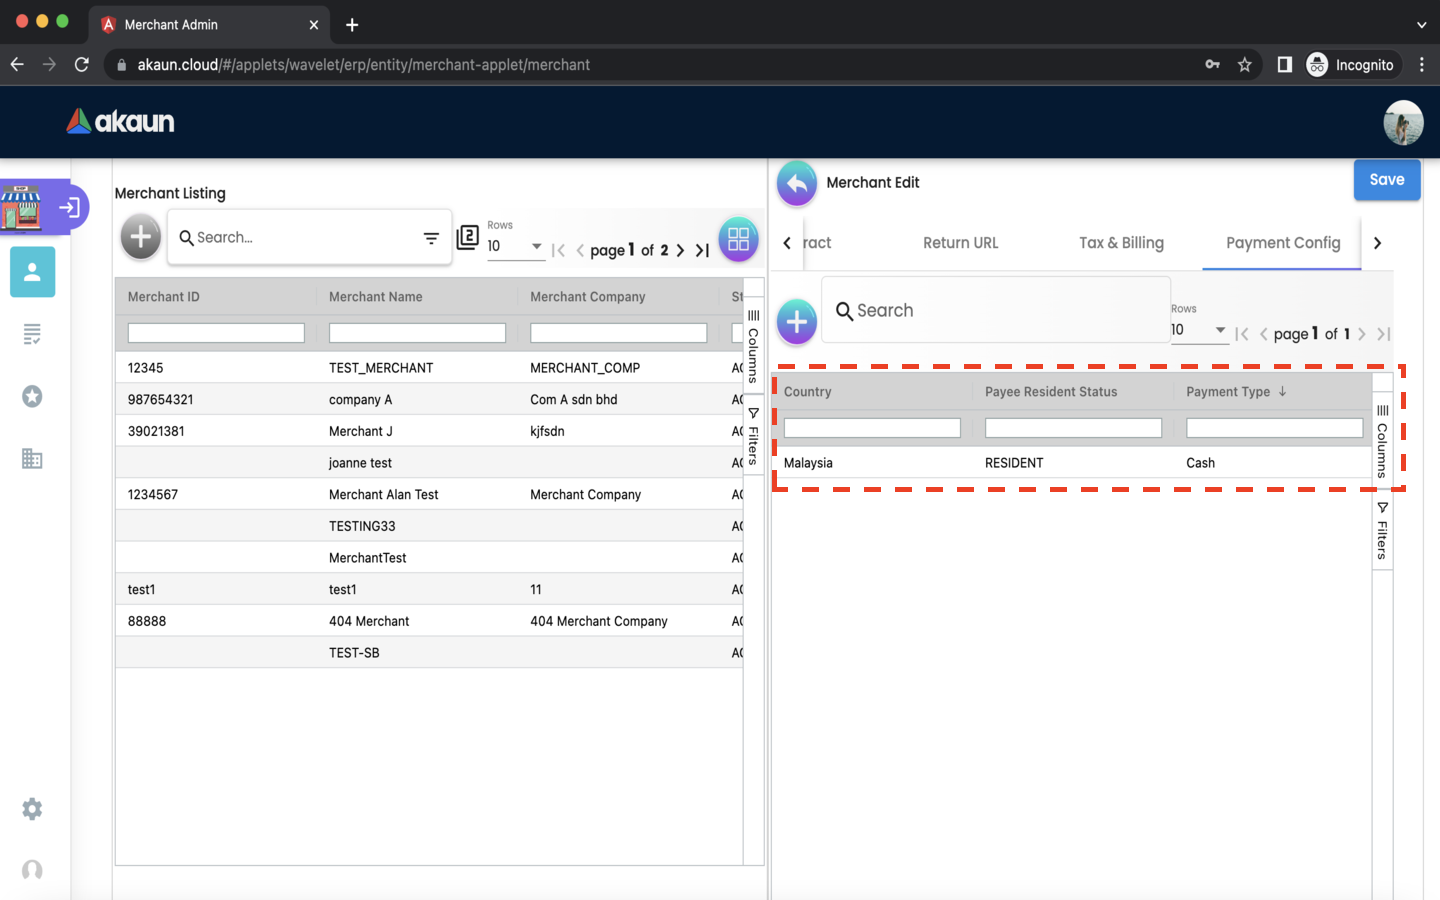
-
Please click the ‘+’ button to add a payment config to the merchant.
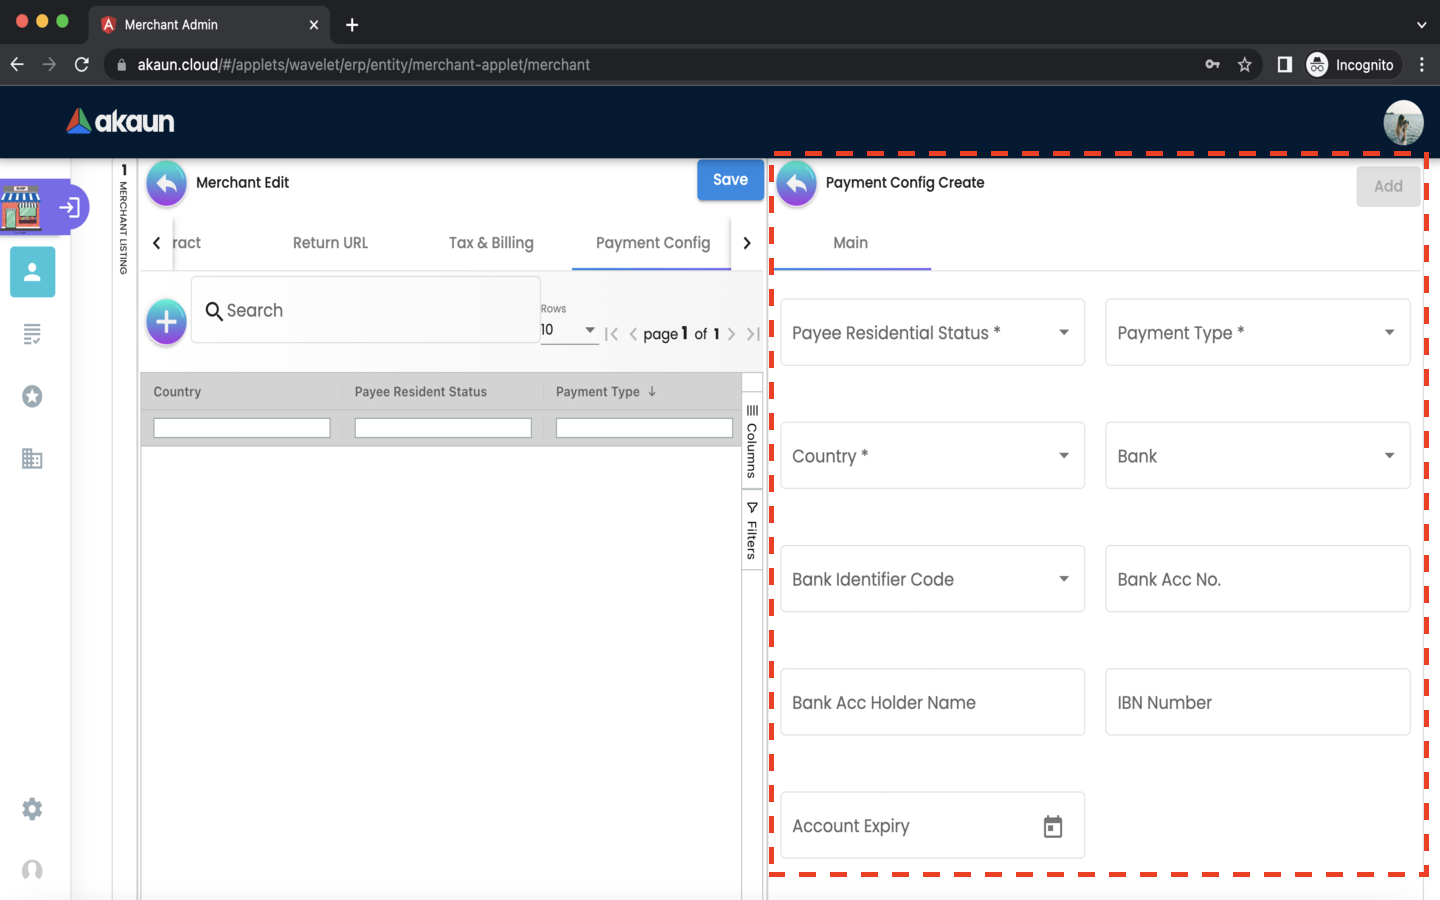
The following fields are compulsory:
-
Payee Residential Status
-
Payment Type
-
Country
Please click the ‘ADD’ button to add the payment config to the merchant.
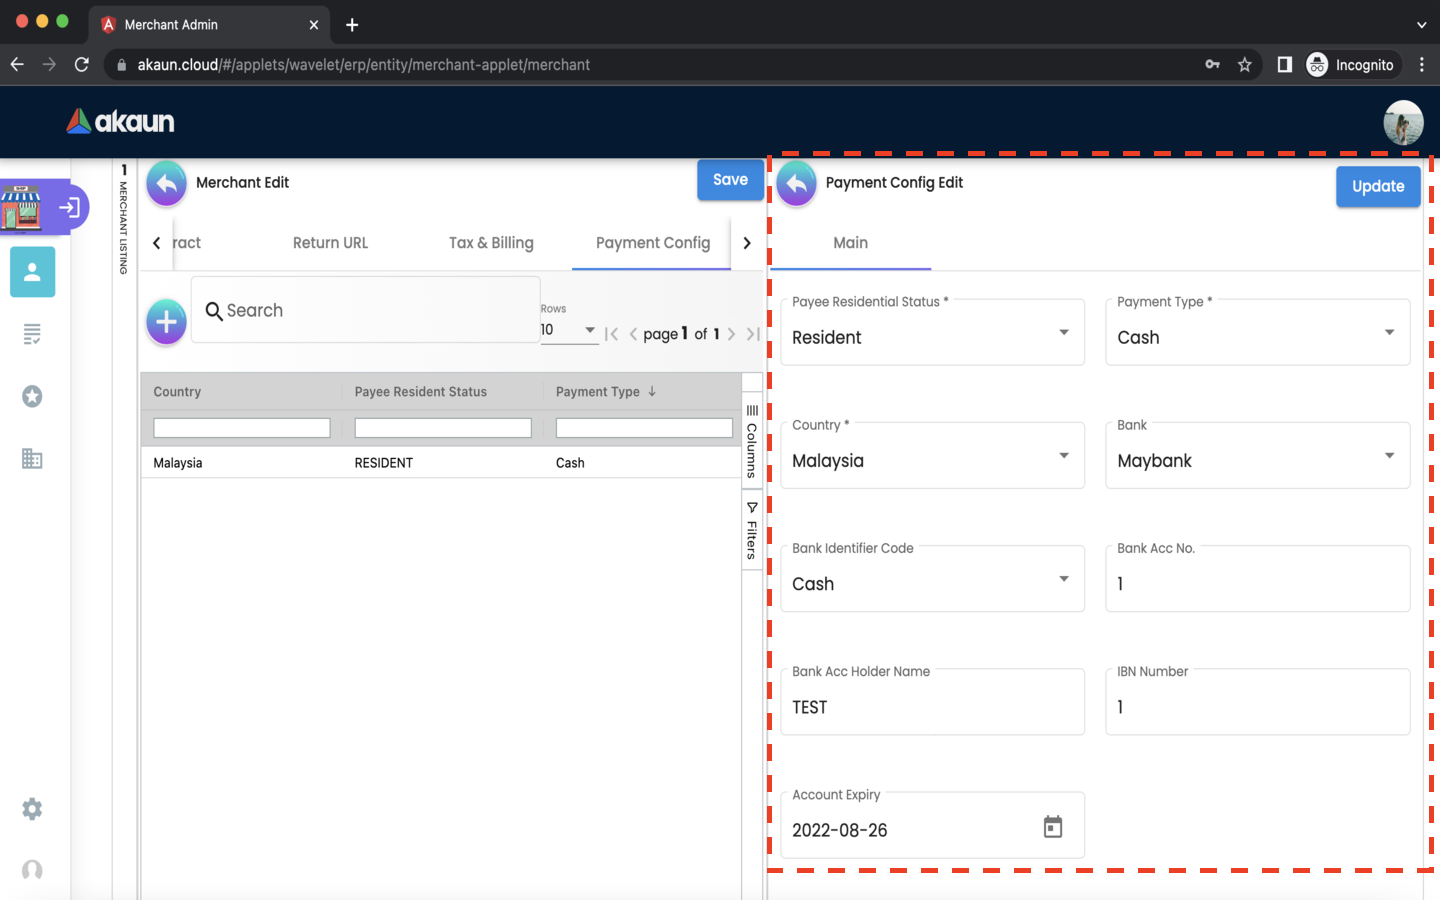
After adding the payment config to the merchant, it will be listed on the Payment Config tab. Please click on any listed payment config to edit it.
-
All fields can be updated. After updating any fields, please click ‘UPDATE’.
-
Please click ‘remove’ to remove the payment config from the merchant.
2.3.7 Address Tab
In the address tab, you can add addresses to the merchant.
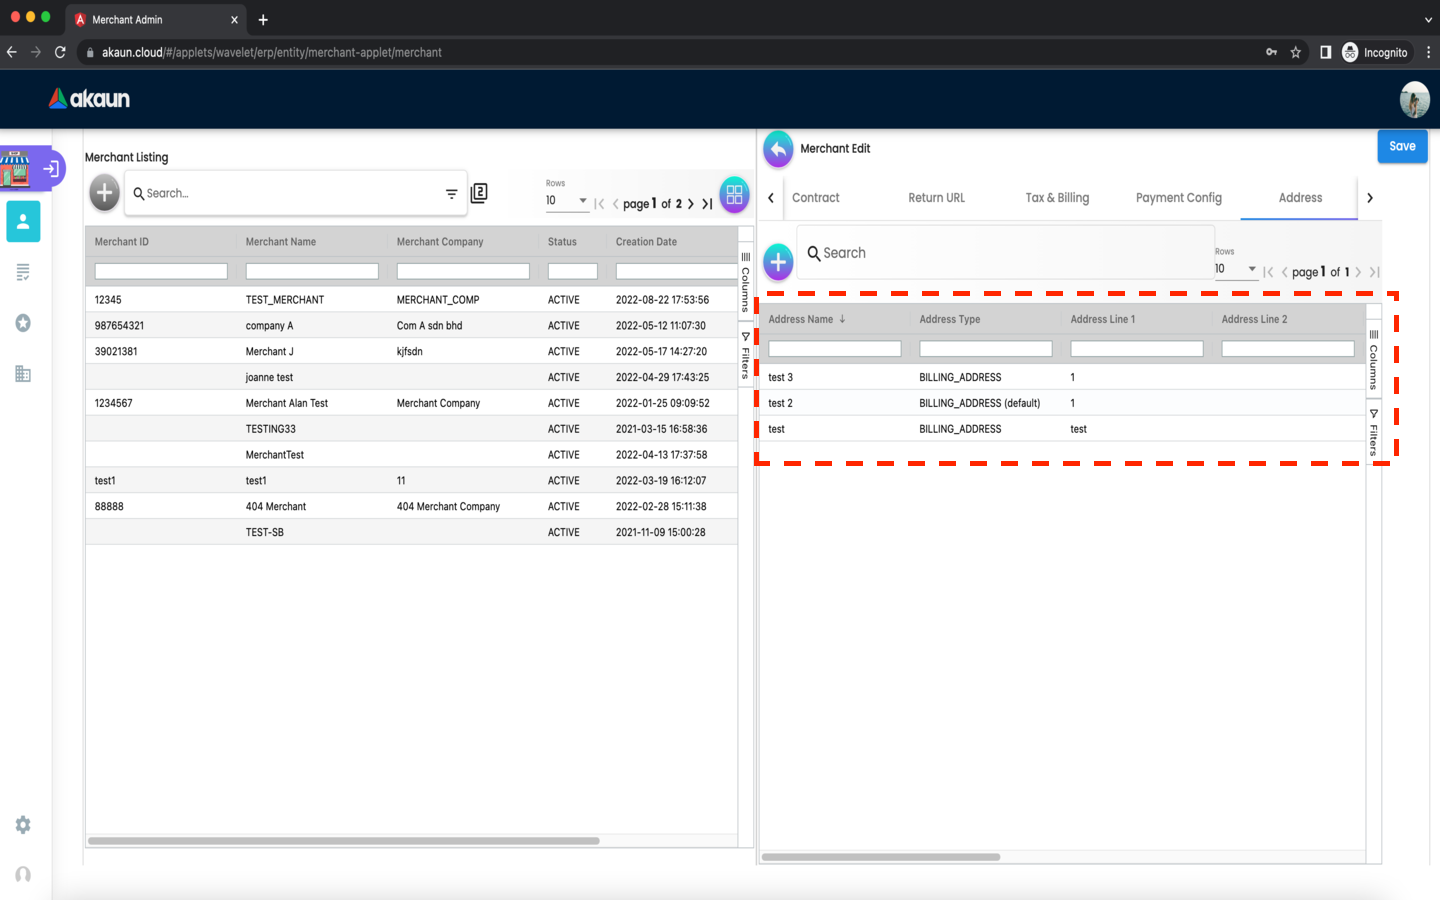
-
Please click the ‘+’ button to add an address to the merchant.
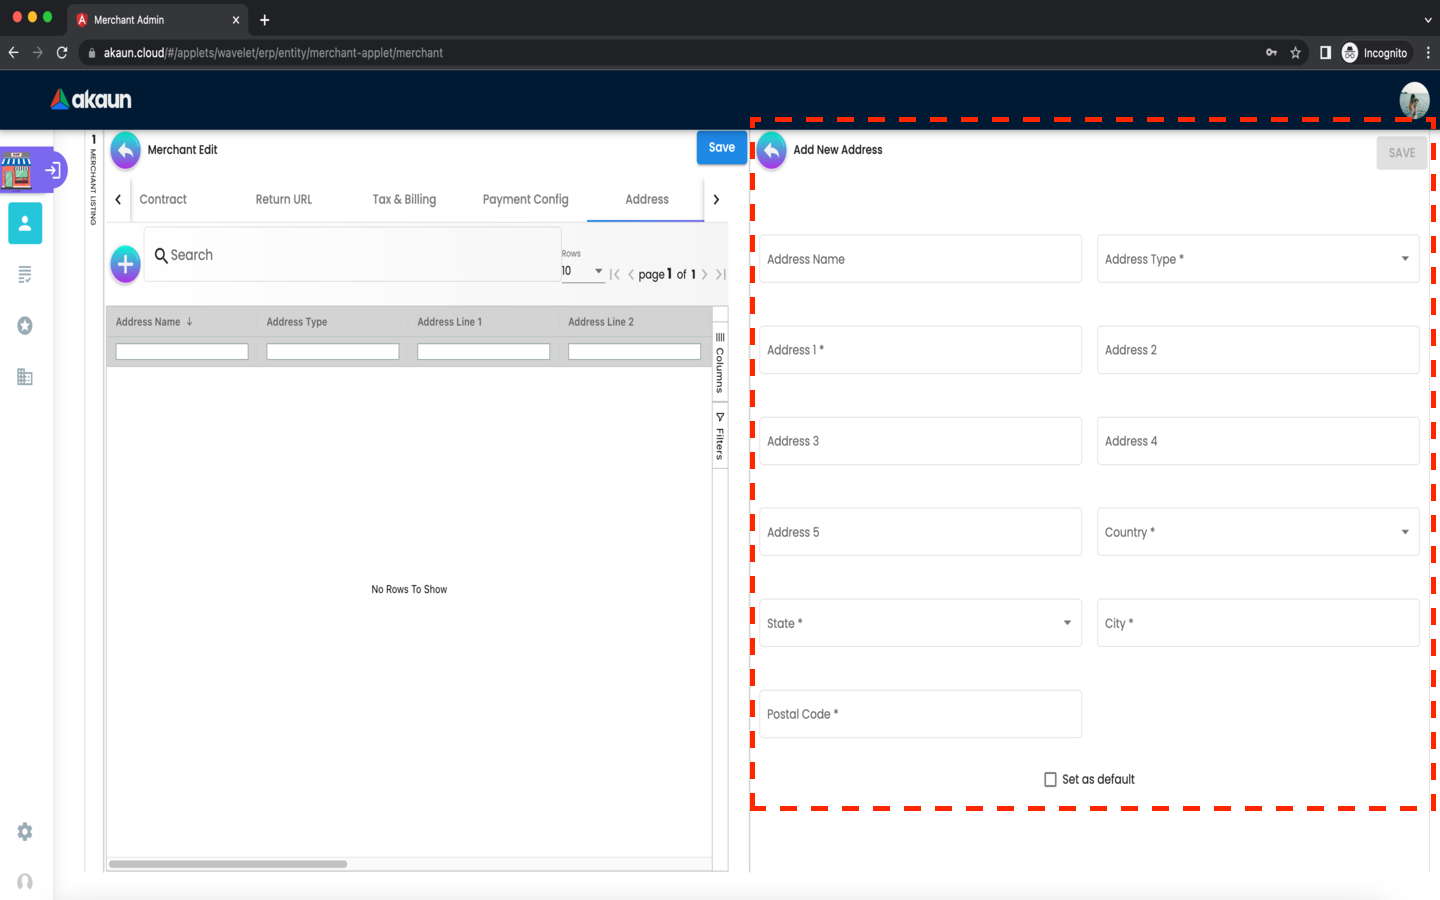
The following fields are compulsory: * Address Type * Address 1 * Country * State * City * Postal Code
Please tick the ‘SET AS DEFAULT’ checkbox to set this address as default.
Please click the top right ‘SAVE’ button to temporarily add the address to the merchant.
Please click the top left ‘SAVE’ button to finally add the address to the merchant.
Whenever a new address has been chosen to set as default, the previous default address will automatically no longer be default.
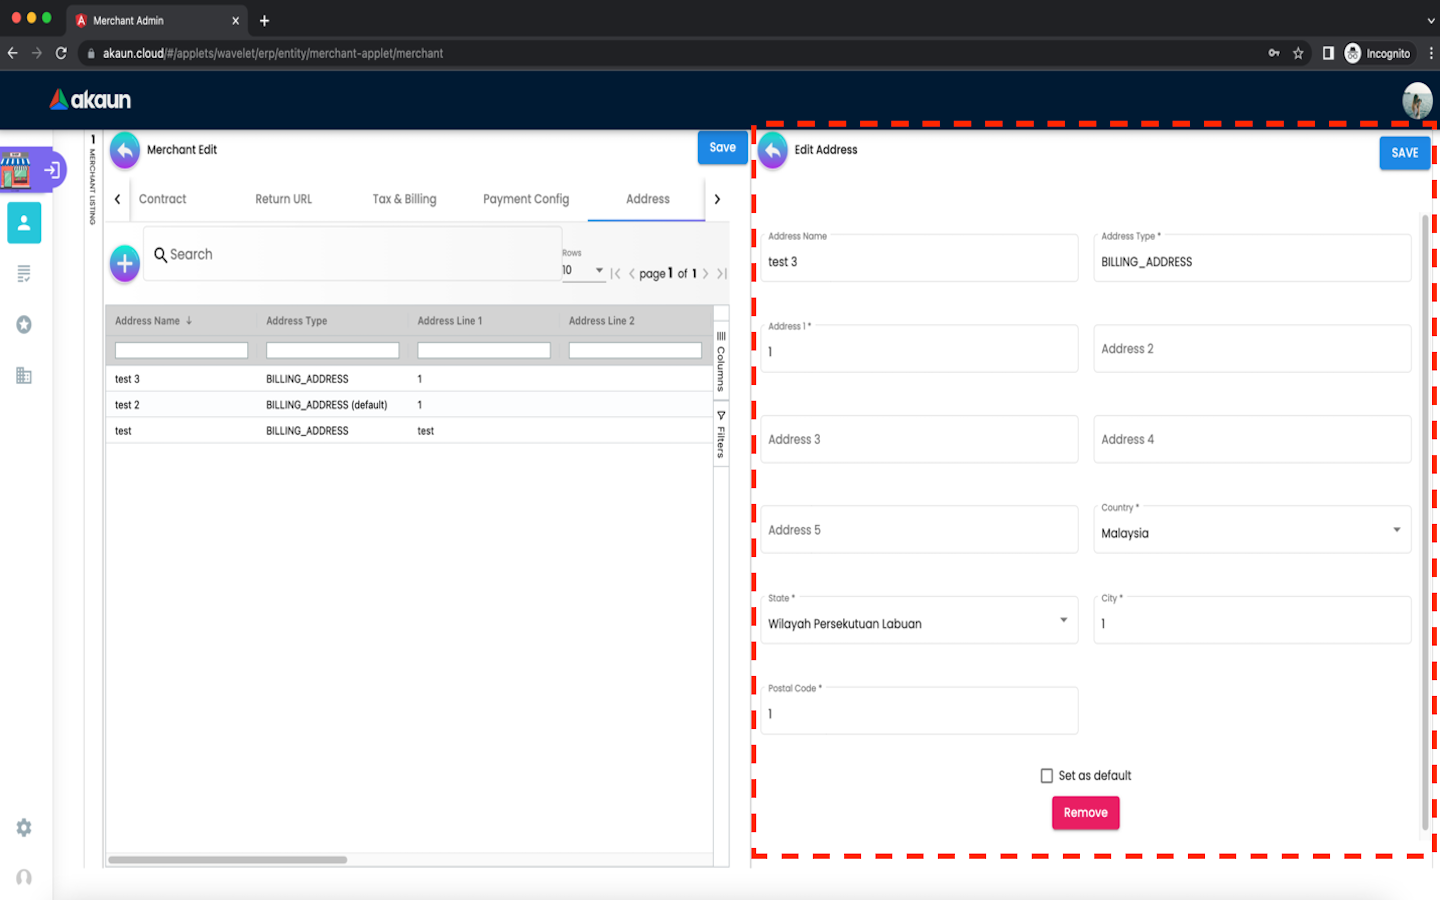
After adding the address to the merchant, it will be listed on the Address tab. Please click on any listed address to edit it.
-
All fields can be edited. After editing any fields, please click ‘SAVE’.
-
Please click ‘remove’ to remove the payment config from the merchant.
Contact Tab
In the contact tab, you can add contacts to the merchant.
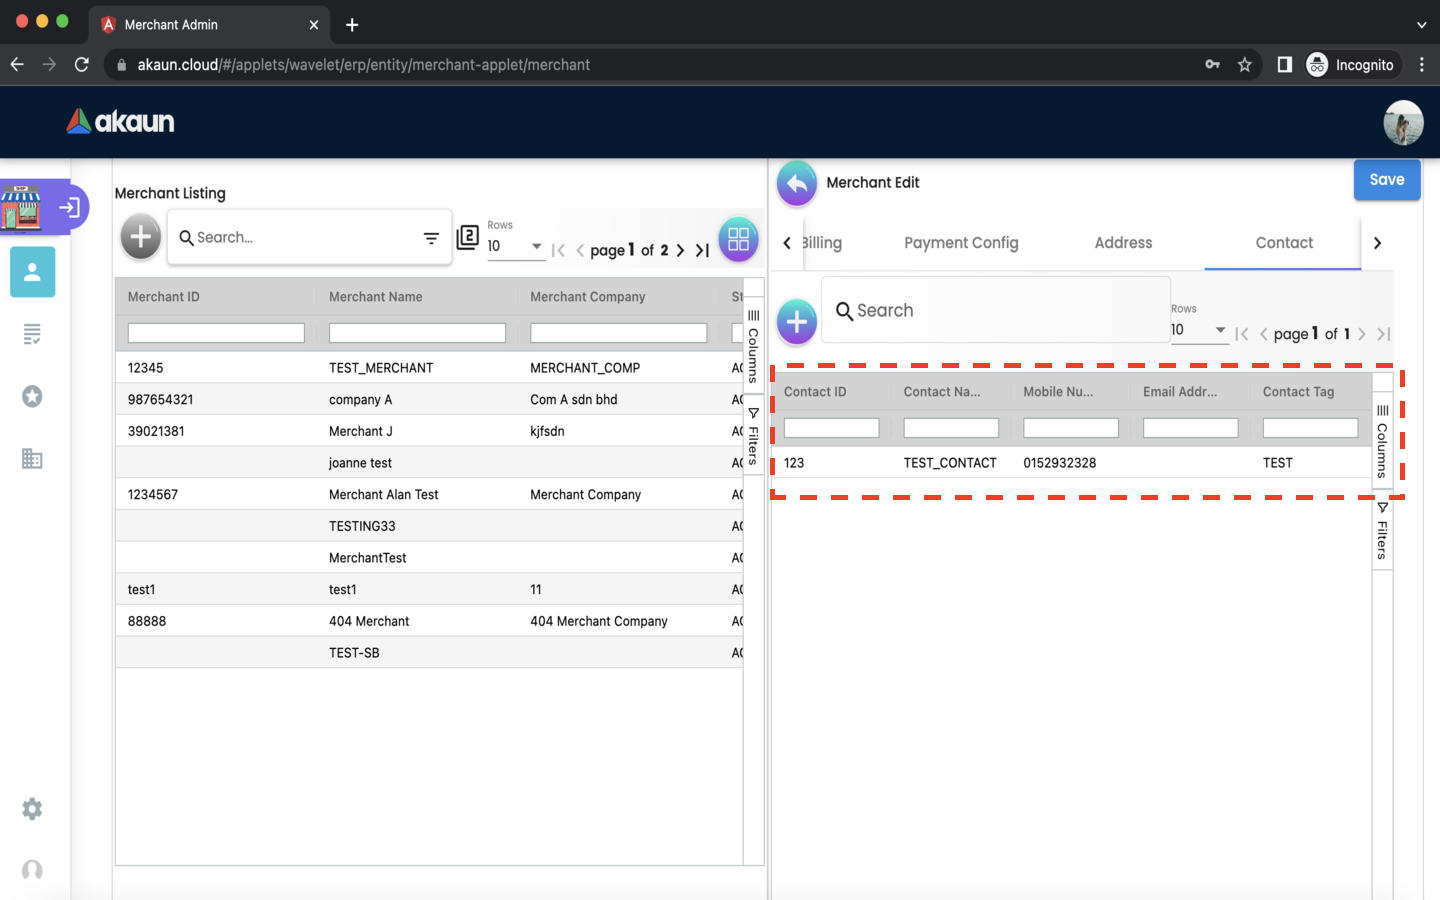
-
Please click the ‘+’ button to add a contact to the merchant.
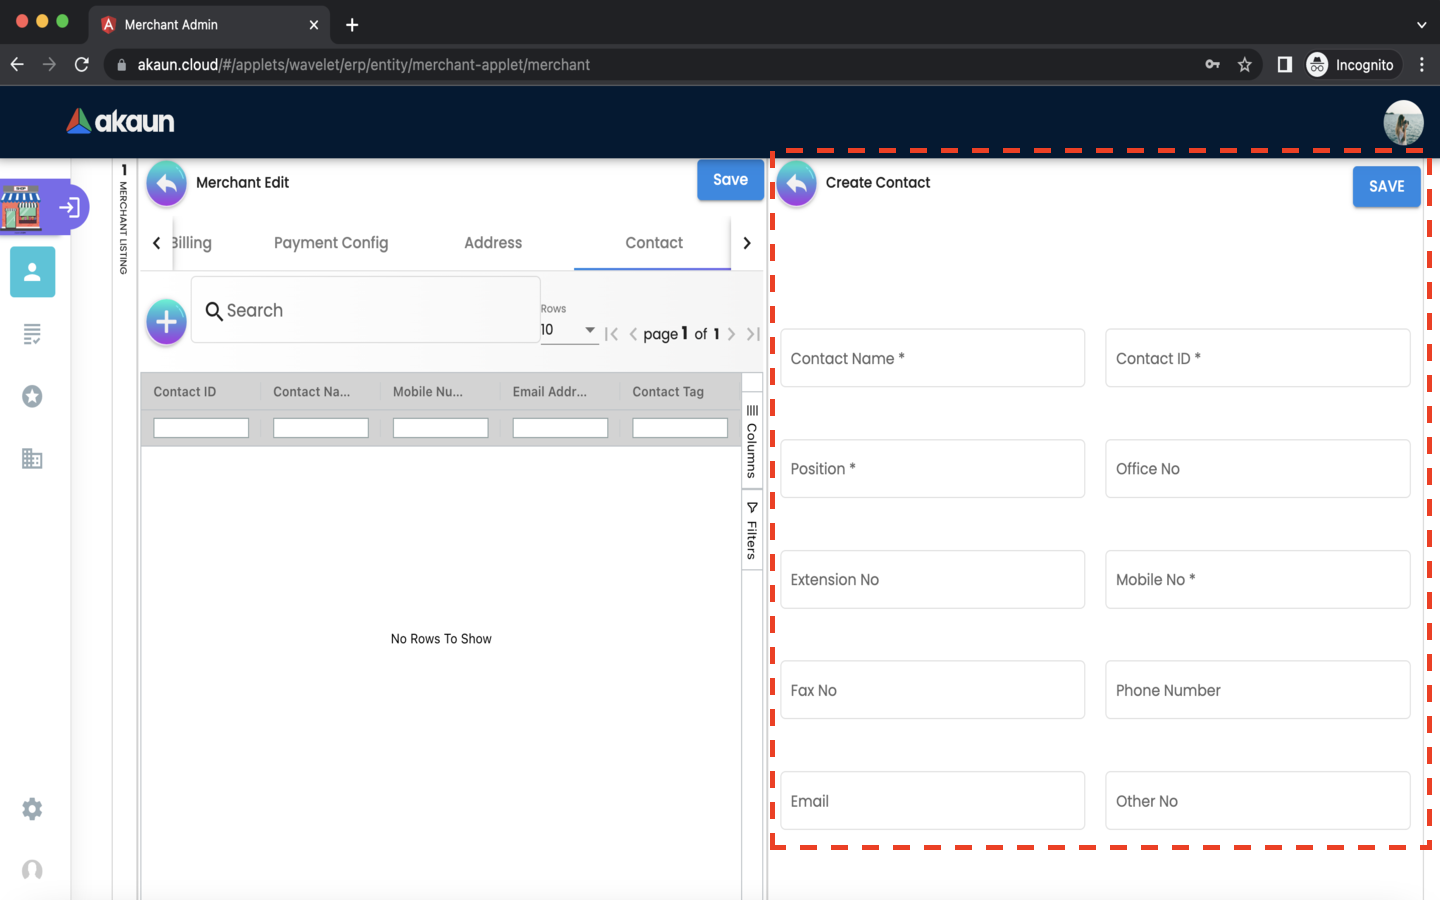
The following fields are compulsory:
-
Contact Name
-
Contact Id
-
Mobile No
Please click the top right ‘SAVE’ button to temporarily add the contact to the merchant.
Please click the top left ‘SAVE’ button to finally save any contact that has been added to the merchant.
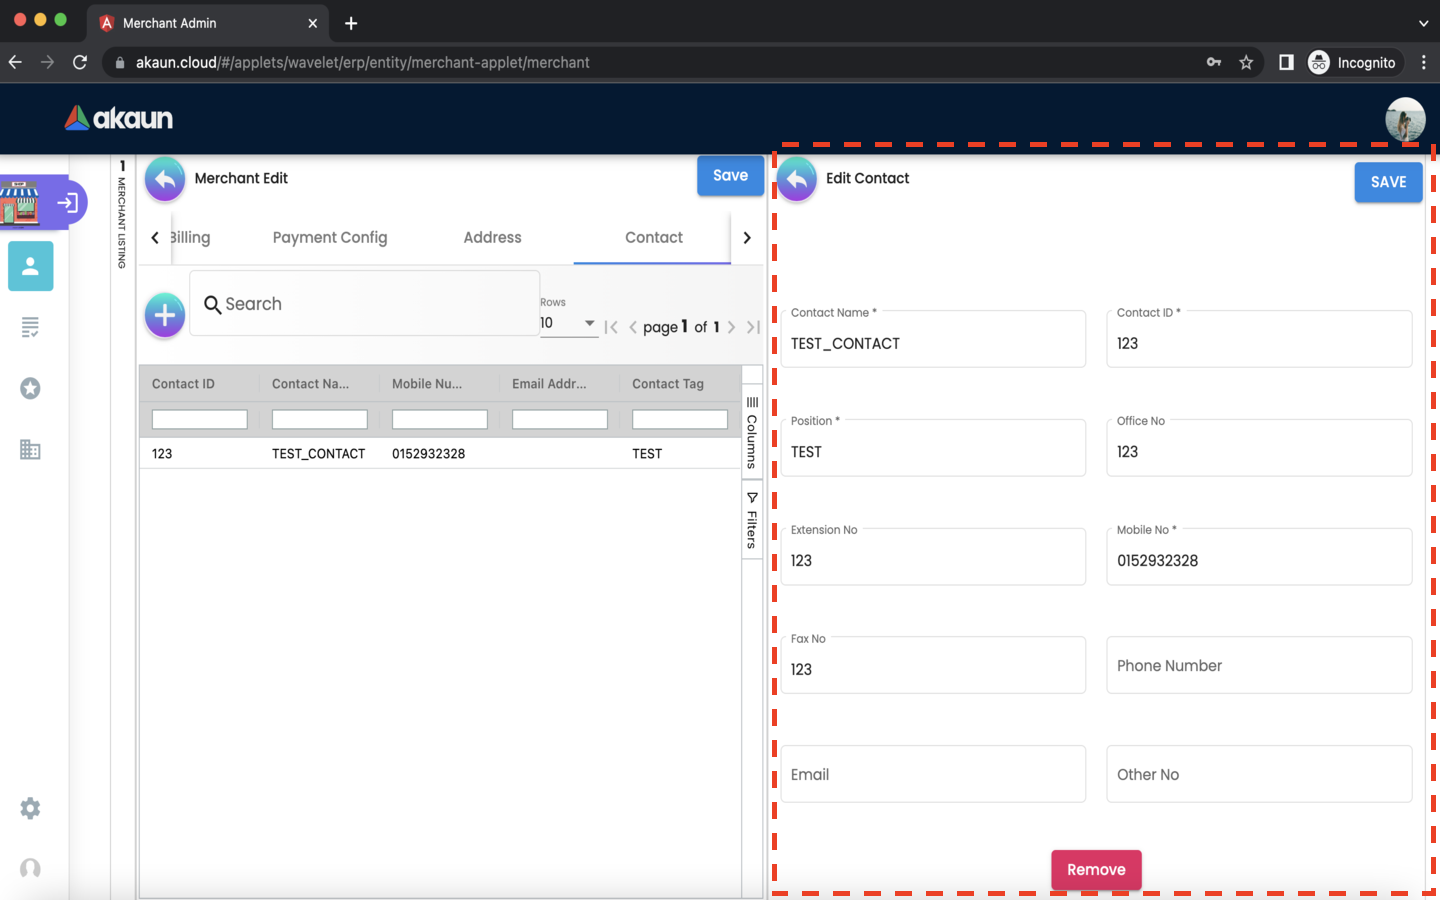
After adding the contact to the merchant, it will be listed on the Contact tab. Please click on any listed contact to edit it.
-
All fields can be updated. After updating any fields, please click ‘UPDATE’.
-
Please click ‘remove’ to remove the contact from the merchant.
2.3.8 Company Linking Tab
In the Company Linking tab, you can add companies to the merchant.

-
Please click the ‘+’ button to add a company to the merchant.
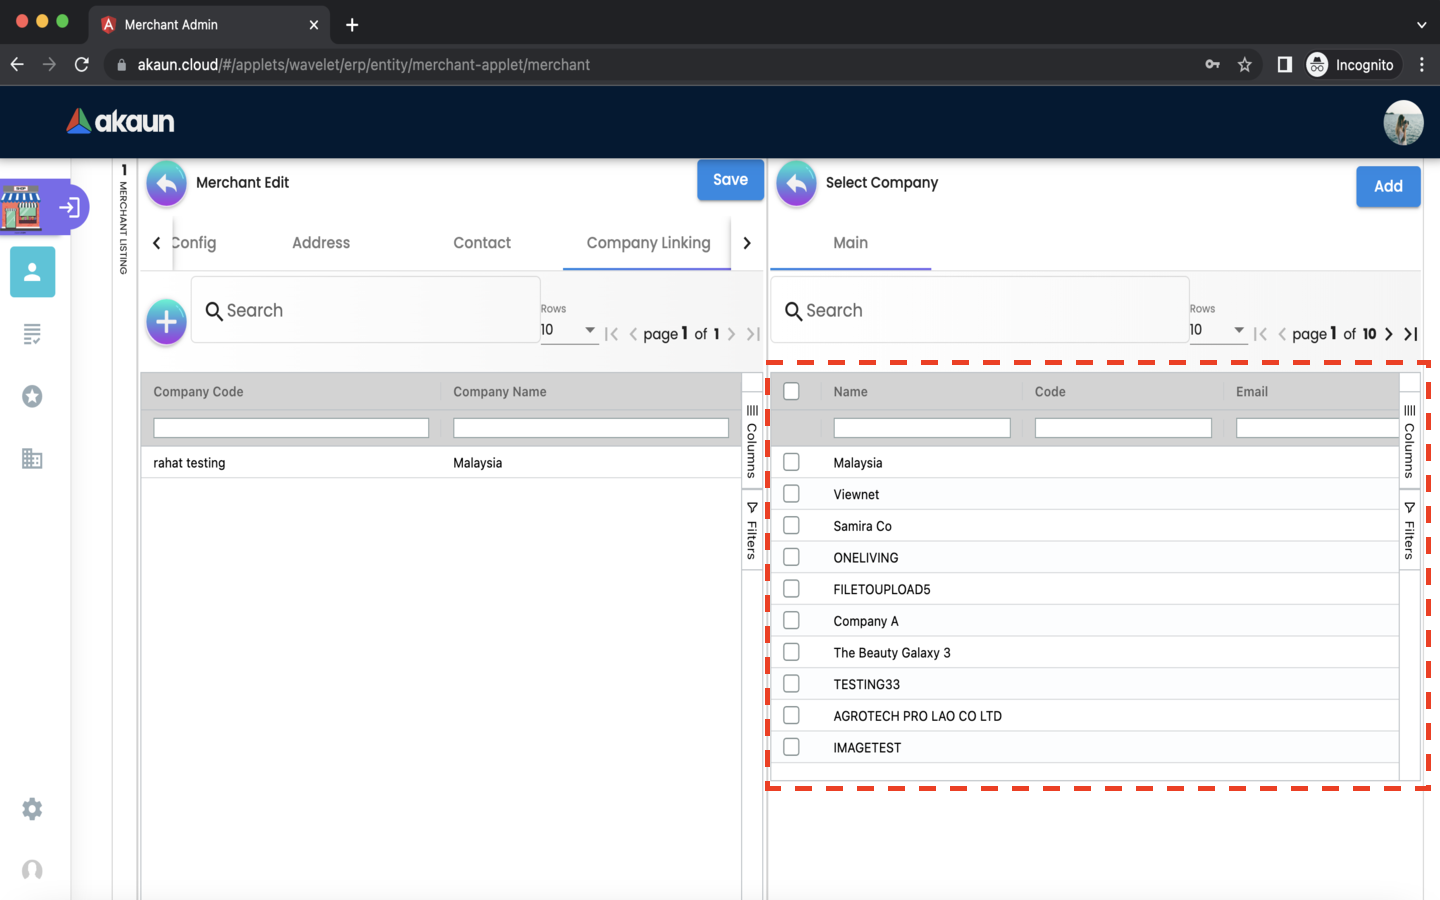
Tick the checkboxes next to any company which you would like to add. Please click the ‘ADD’ button to add the company to the merchant.
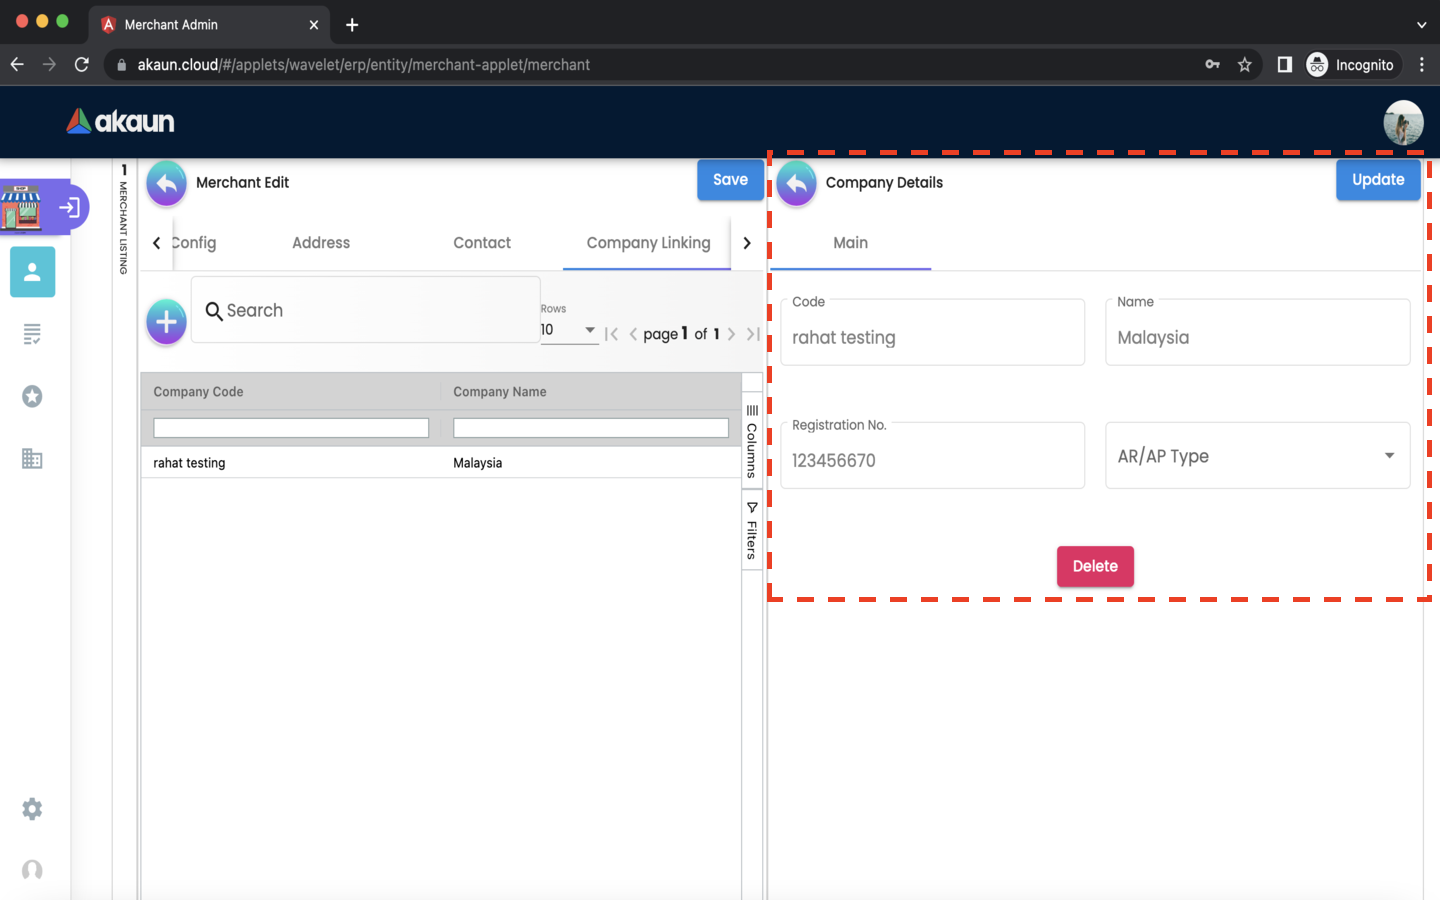
After adding the company to the merchant, it will be listed on the Company tab. Please click on any listed company to edit it.
-
The AR/AP Type is the only field that can be edited. After editing, please click ‘UPDATE’.
-
Please click DELETE to remove the company from the merchant.
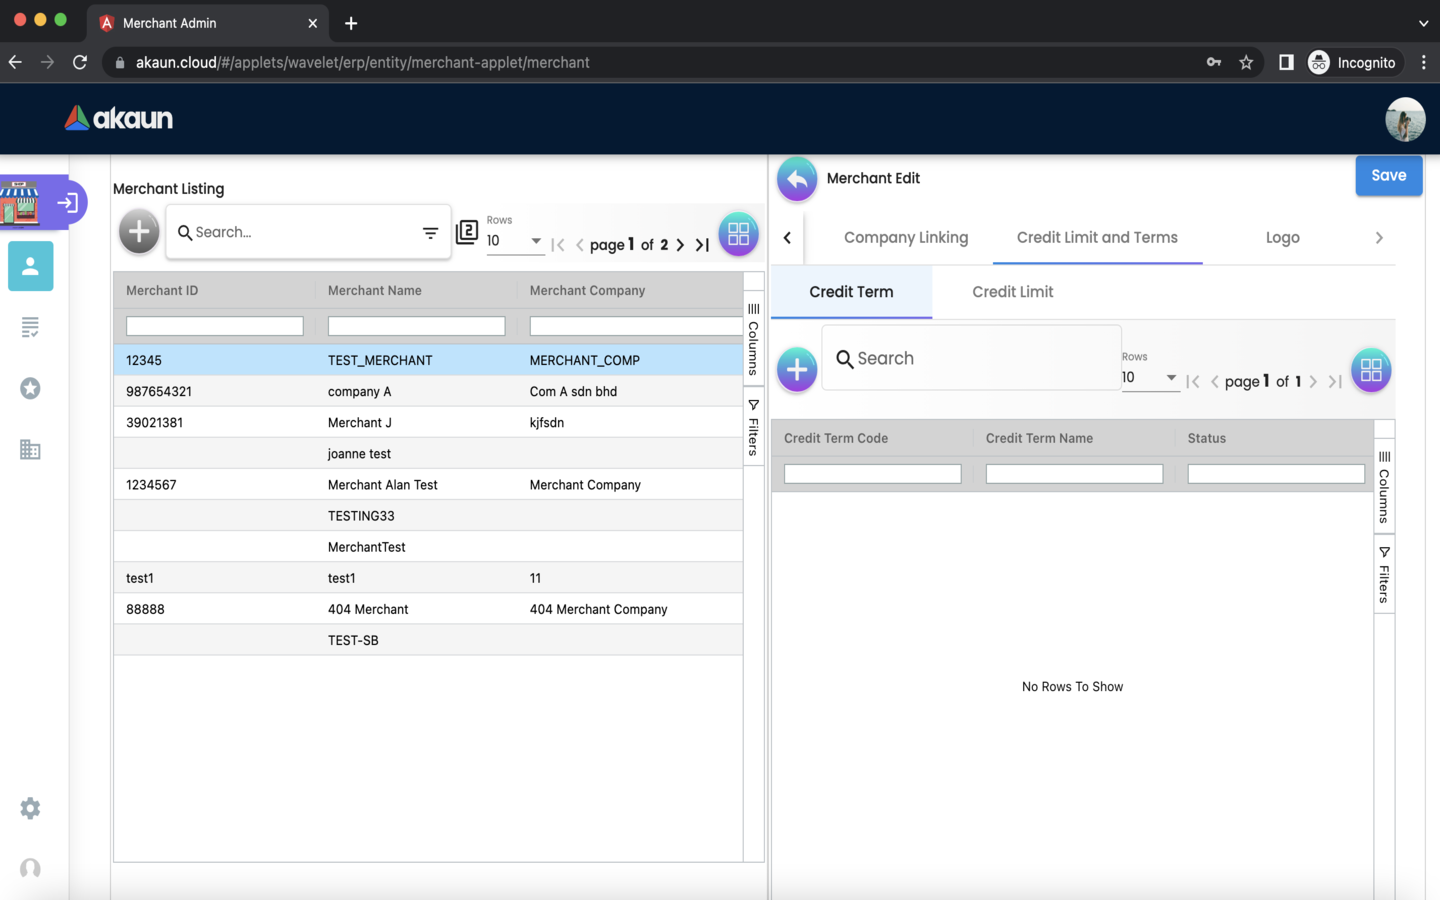
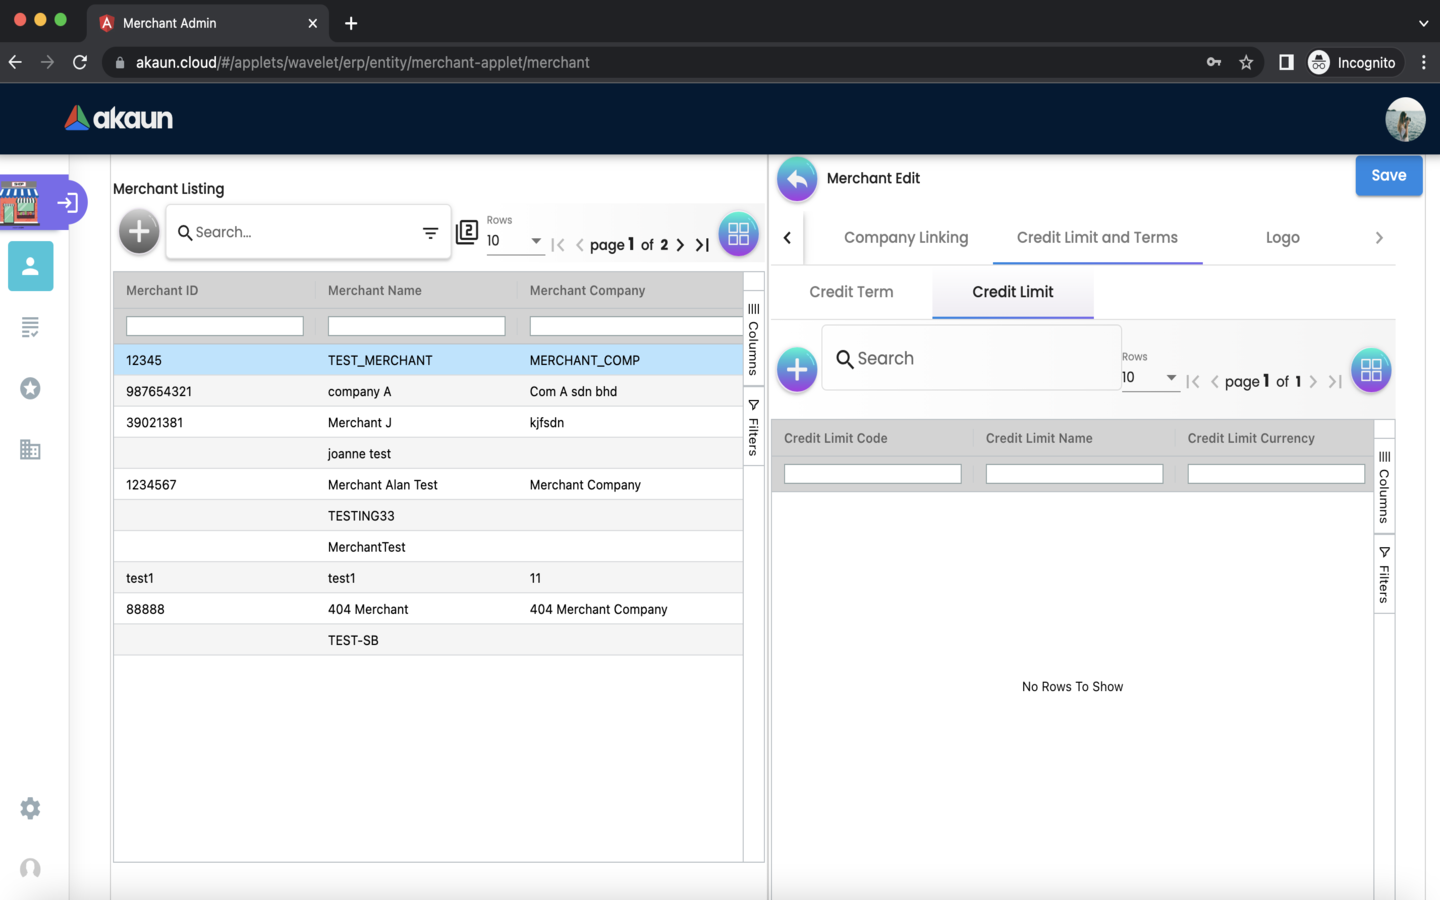
2.3.9 Credit Limit and Terms
In the credit limit and terms tab, you can add credit limit and terms to the merchant.
2.3.9.1 For Credit Terms:
Please click the ‘+’ button to add a credit term to the merchant.
Please choose one of the two options below:
-
Existing Credit Term
-
New Credit Term
If the Existing Credit Term option is selected, please select an available credit term from the dropdown box.
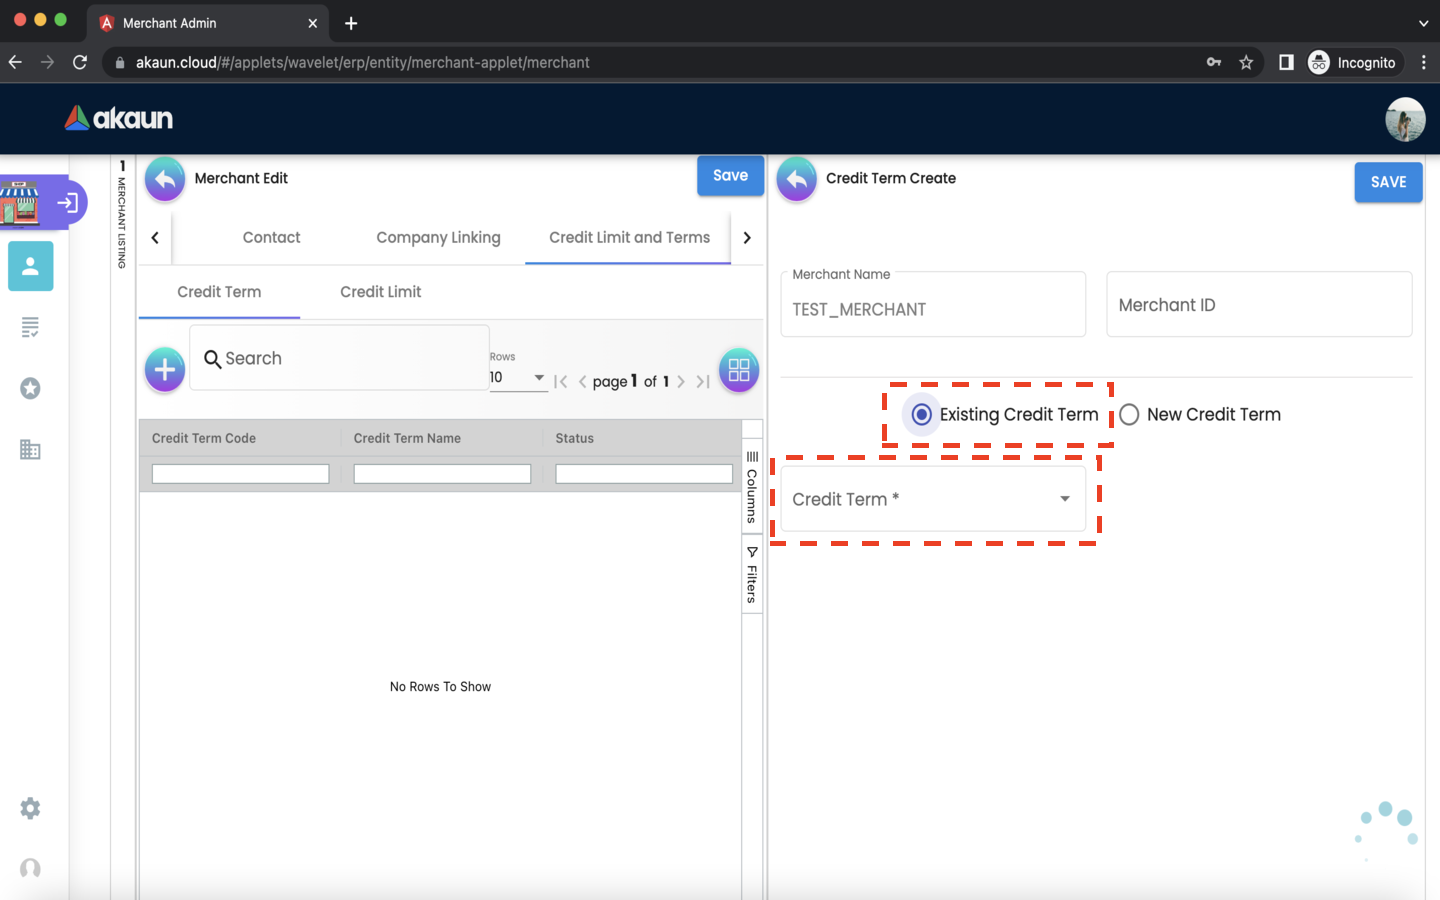
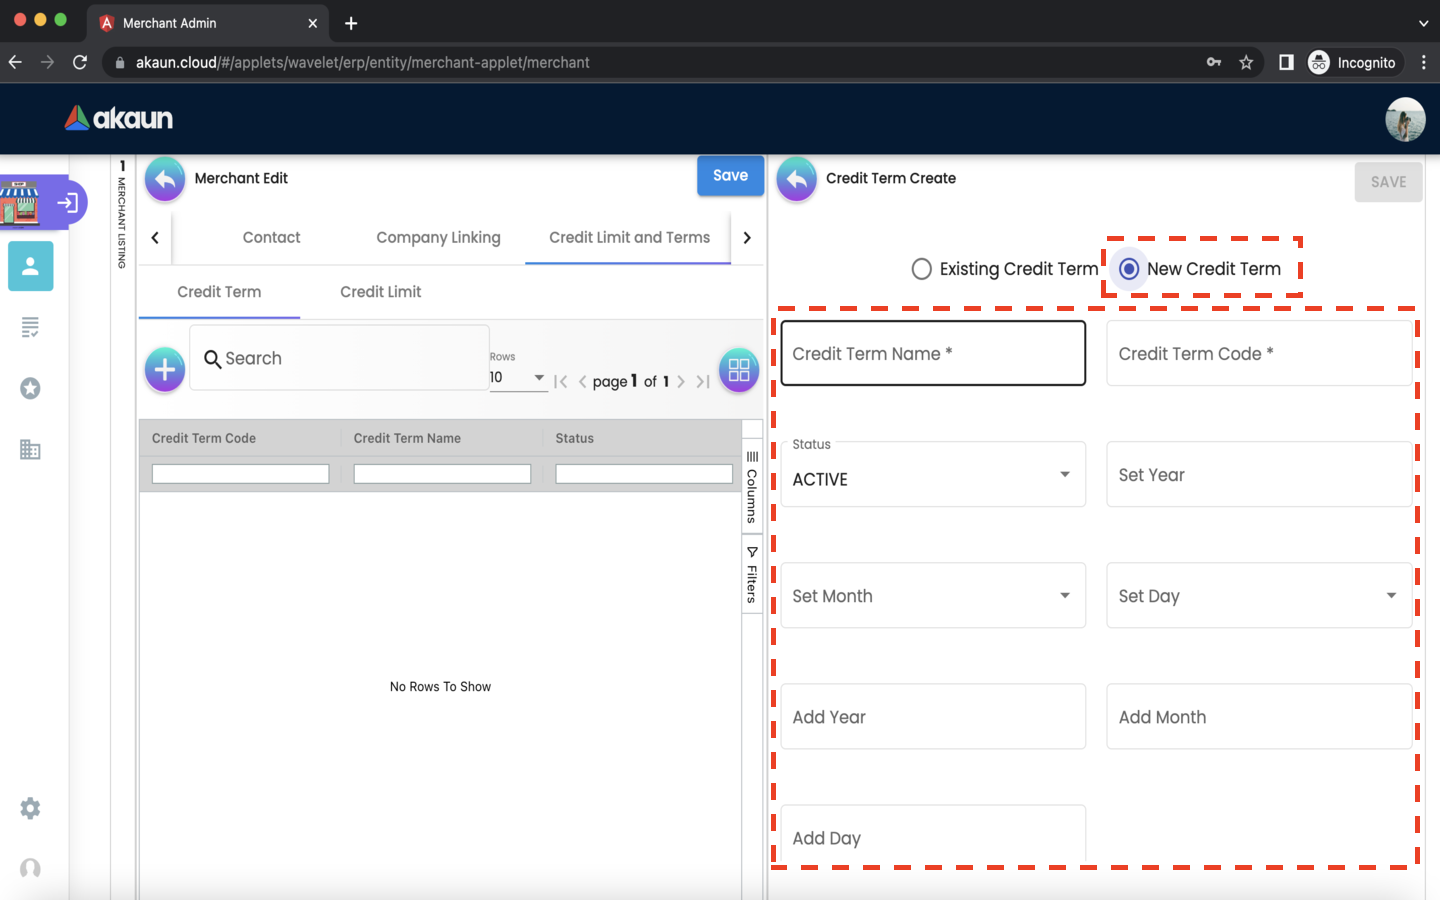
If the New Credit Term option is selected, the following fields are compulsory:
-
Credit Term Code
-
Credit Term Name
2.3.9.2 For Credit Limit:
Please click the ‘+’ button to add a credit limit to the merchant.
Please choose one of the two options below:
-
Existing Credit Limit
-
New Credit Limit
If the Existing Credit Limit option is selected, please select an available credit limit from the dropdown box.

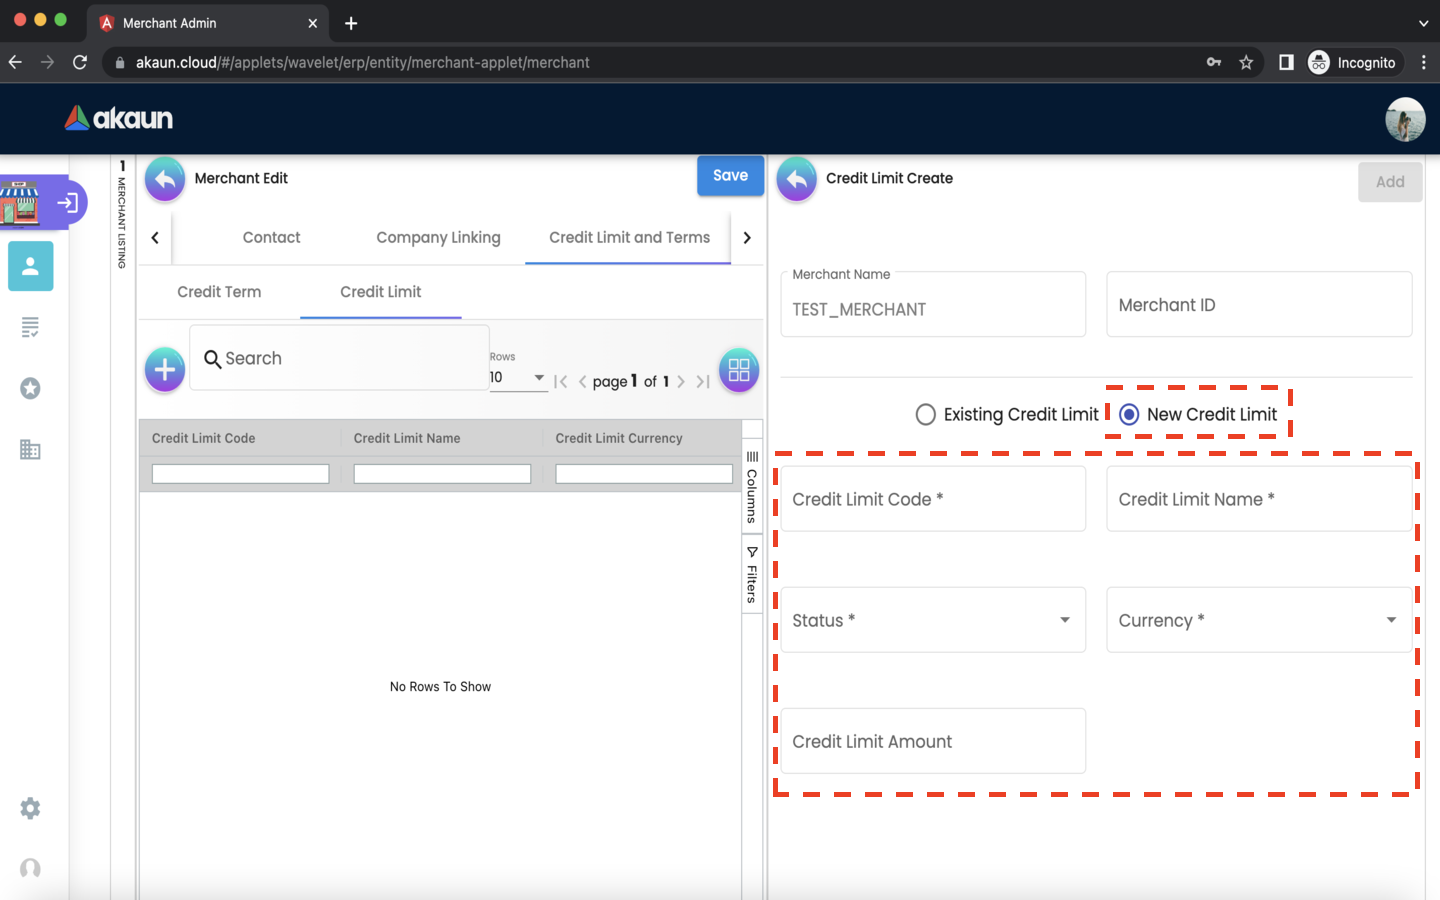
If the New Credit Limit option is selected, the following fields are compulsory:
-
Credit Limit Code
-
Credit Limit Name
-
Status
-
Currency
2.3.10 Logo Tab
In the logo tab, you can add a logo to the merchant.
-
Please click the ‘+’ button to add a logo to the merchant.
Please click ‘Add Merchant’s Logo’ to upload an image file containing the logo. The image you have uploaded will then be listed below.
If you would like to re-upload a different logo, choose any option below:
-
Please click ‘DELETE’ to remove the previous logo, then click ‘Add Merchant’s Logo’ to upload a new logo.
-
Please click ‘Add Merchant’s Logo’ to upload a new logo, the previous logo would be removed automatically.
Please click the ‘SAVE’ button to add the logo to the merchant.
A merchant can only have a single logo. Thus, the ‘+’ button would be disabled when the merchant has an associated logo.
If you would like to re-upload a different logo, please click ‘DELETE’ first, which removes the existing logo and re-enables the ‘’ button. Then, click the ‘’ button to upload a new logo as per the instructions listed above.