4.0 Edit Guest Tenants
4.1 Main Details
In order to edit the information of a created guest tenant, users have to first click on the particular tenant record in the Guest Tenant Listing page. Then, users will be directed to the Edit - Guest Tenant page as shown in the screenshot below.
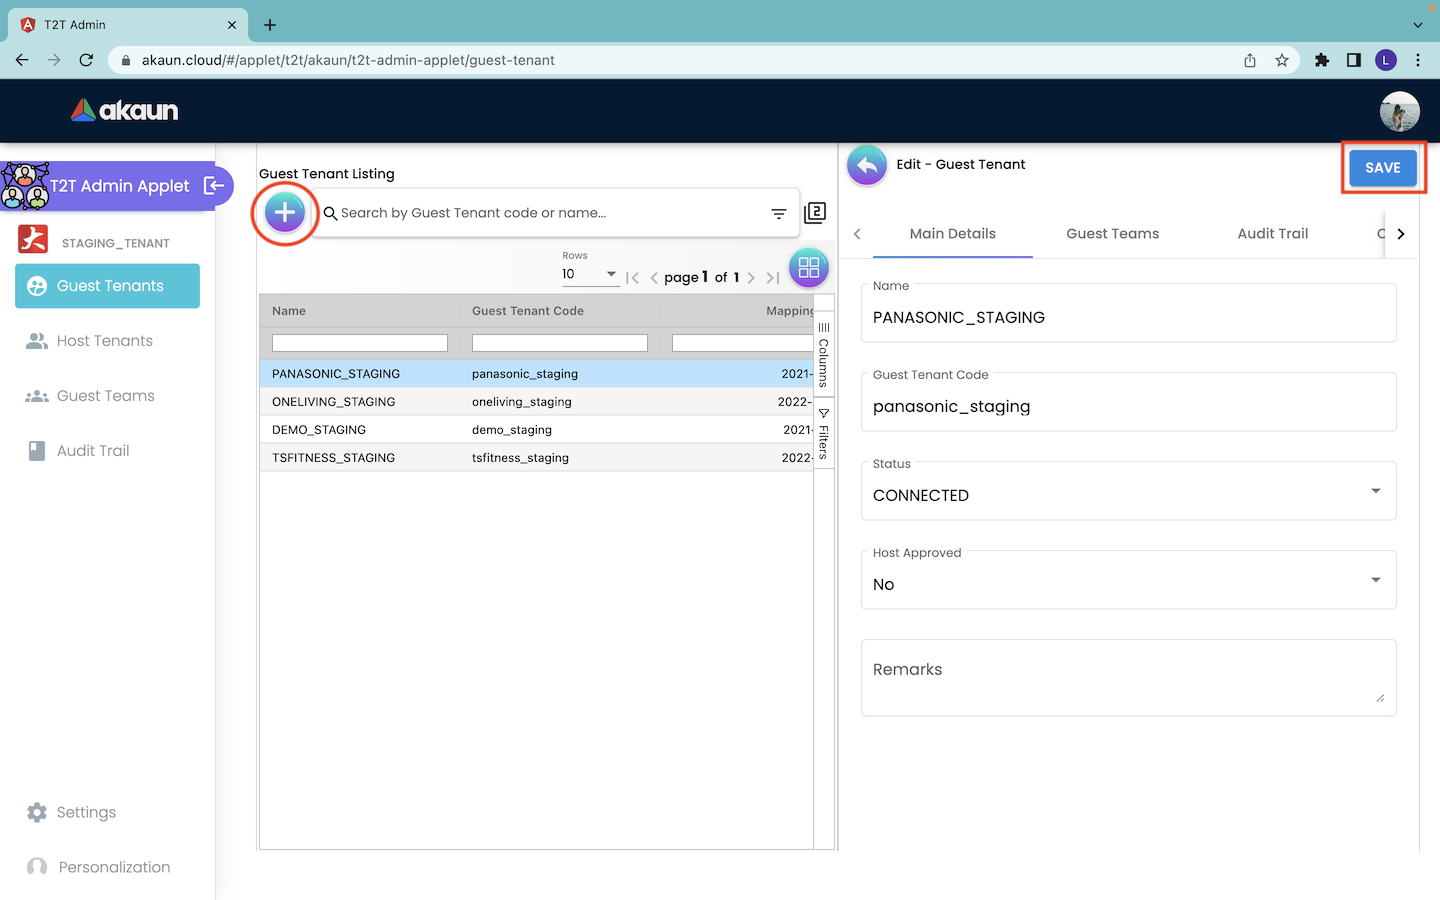
Under the Main Details tab, users can edit the name of guest tenant, status of tenants’ connection, approval of host invitation and remarks columns of the guest tenant. Users are not allowed to edit the information of the guest tenant code column because the code value is fixed and immutable.
4.2 Guest Teams
The Guest Teams page records the team information of all the guest tenants. The purpose of creating teams is to simplify the process of assigning permissions to the members of the guest tenant. By creating teams, the host tenant can assign permission roles to all the members of the team at once, instead of assigning permission to each member separately.
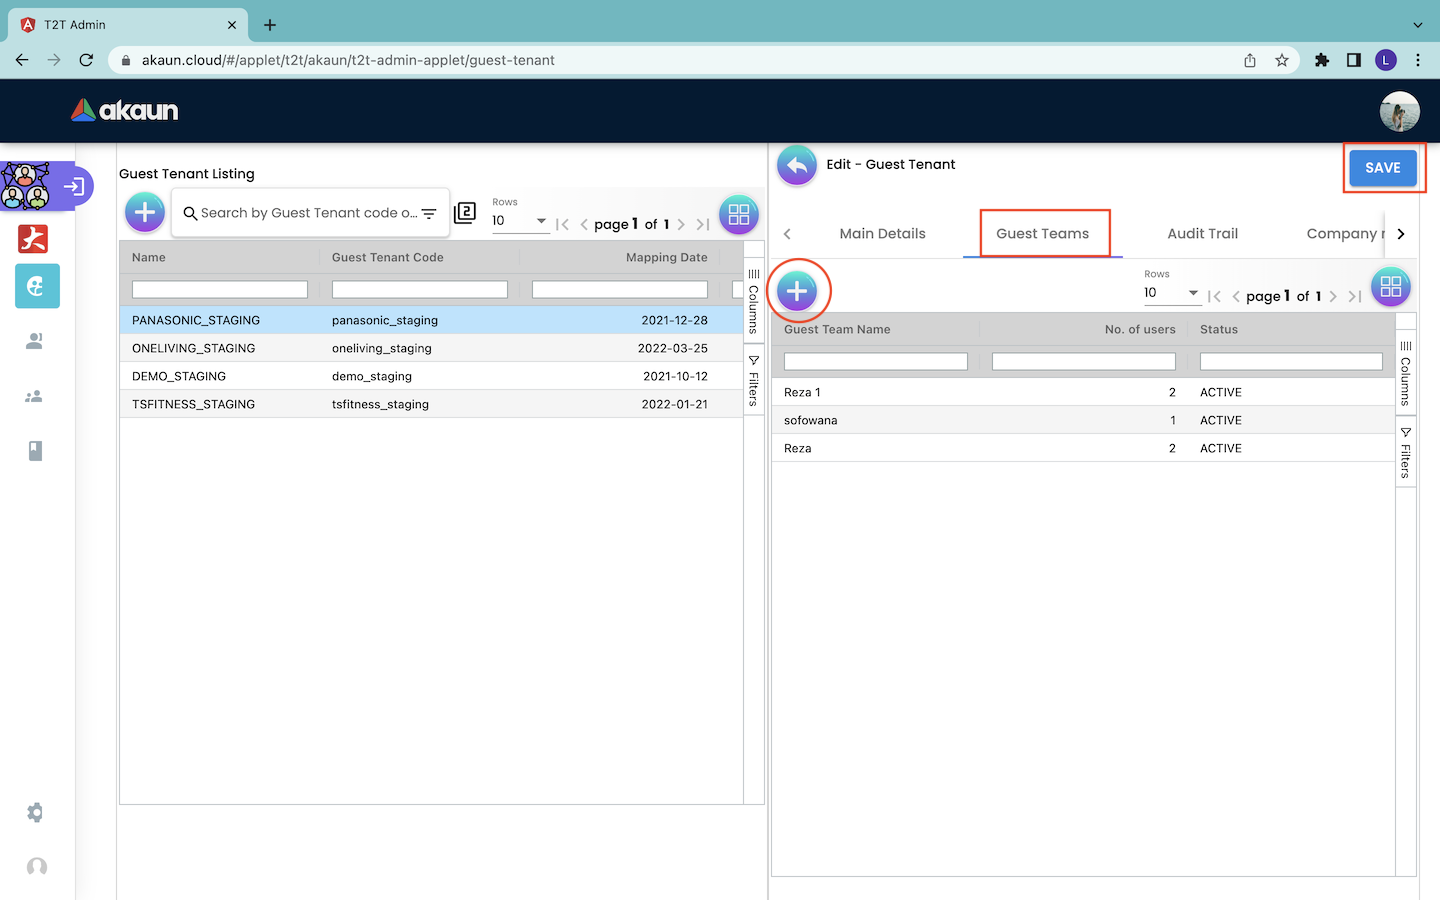
The Guest Teams page shows information: 1. Guest team name: The name of the team. 2. Number of users: The number of users in the team. 3. Status: The status of the team. It can be either ACTIVE or INACTIVE.
4.2.1 Create Guest Teams
Firstly, users can click on the “+” button in the Guest Teams page to begin the creation of a new team for the guest tenant.
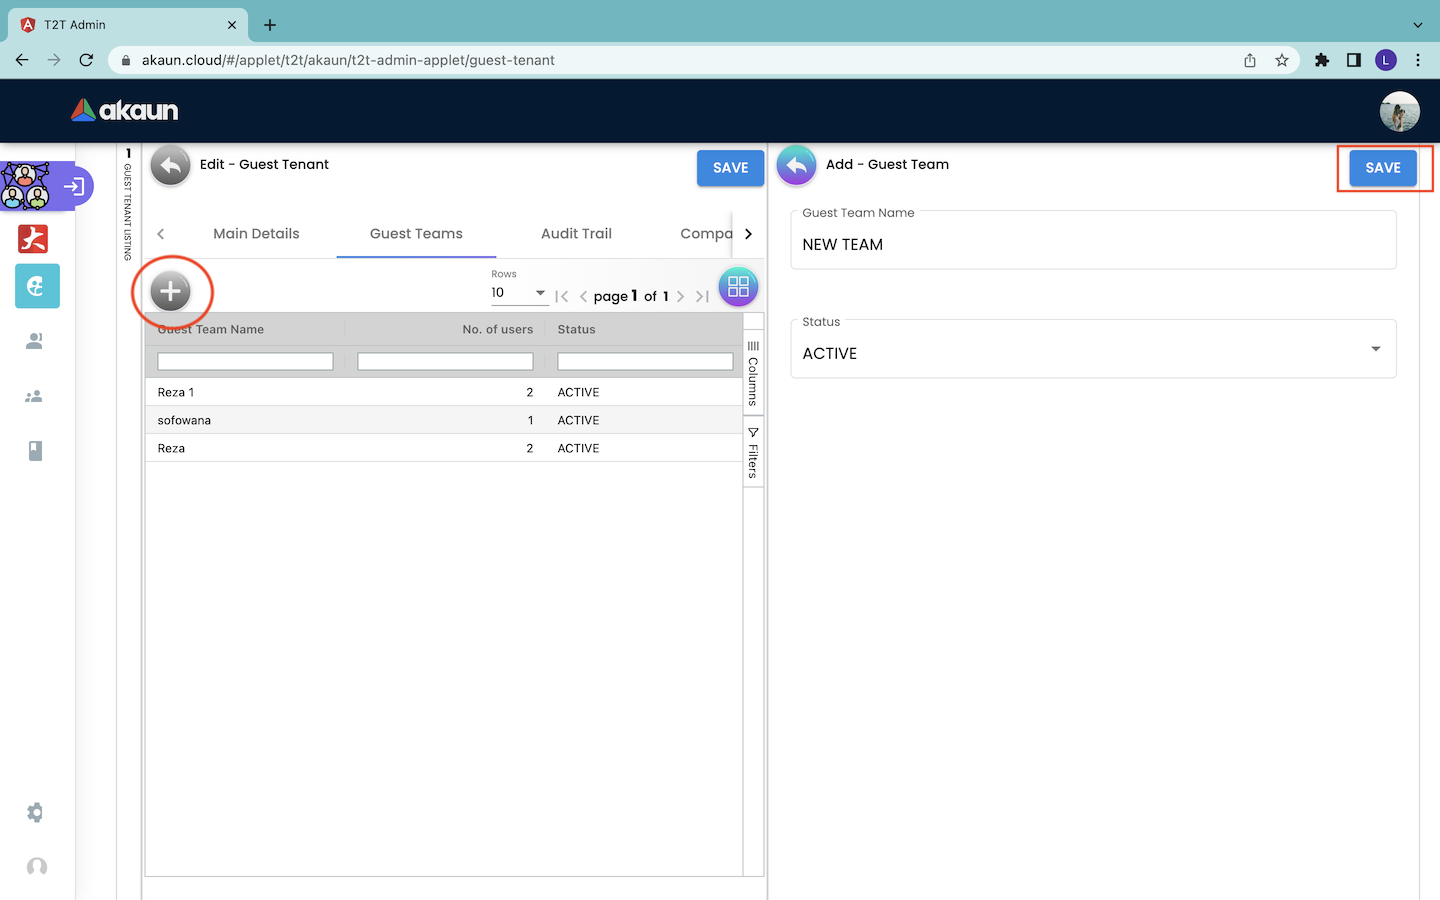
Then, users will be directed to the Add - Guest Team page. At this page, users must provide the name and status of the team. The options for the team status include “ACTIVE” and “INACTIVE”. Then, users can click on the “SAVE” button to save the created team information. By doing that, the record of created team information will be shown as a new row in the Guest Teams page.
4.2.2 Edit Guest Teams
In order to edit the information of a created guest tenant team, users have to click on the particular guest tenant record in the Guest Team tab under the Edit - Guest Tenant page. Then, the users will be directed to the Edit - Guest Team Page as shown in the screenshot below.
Main Details
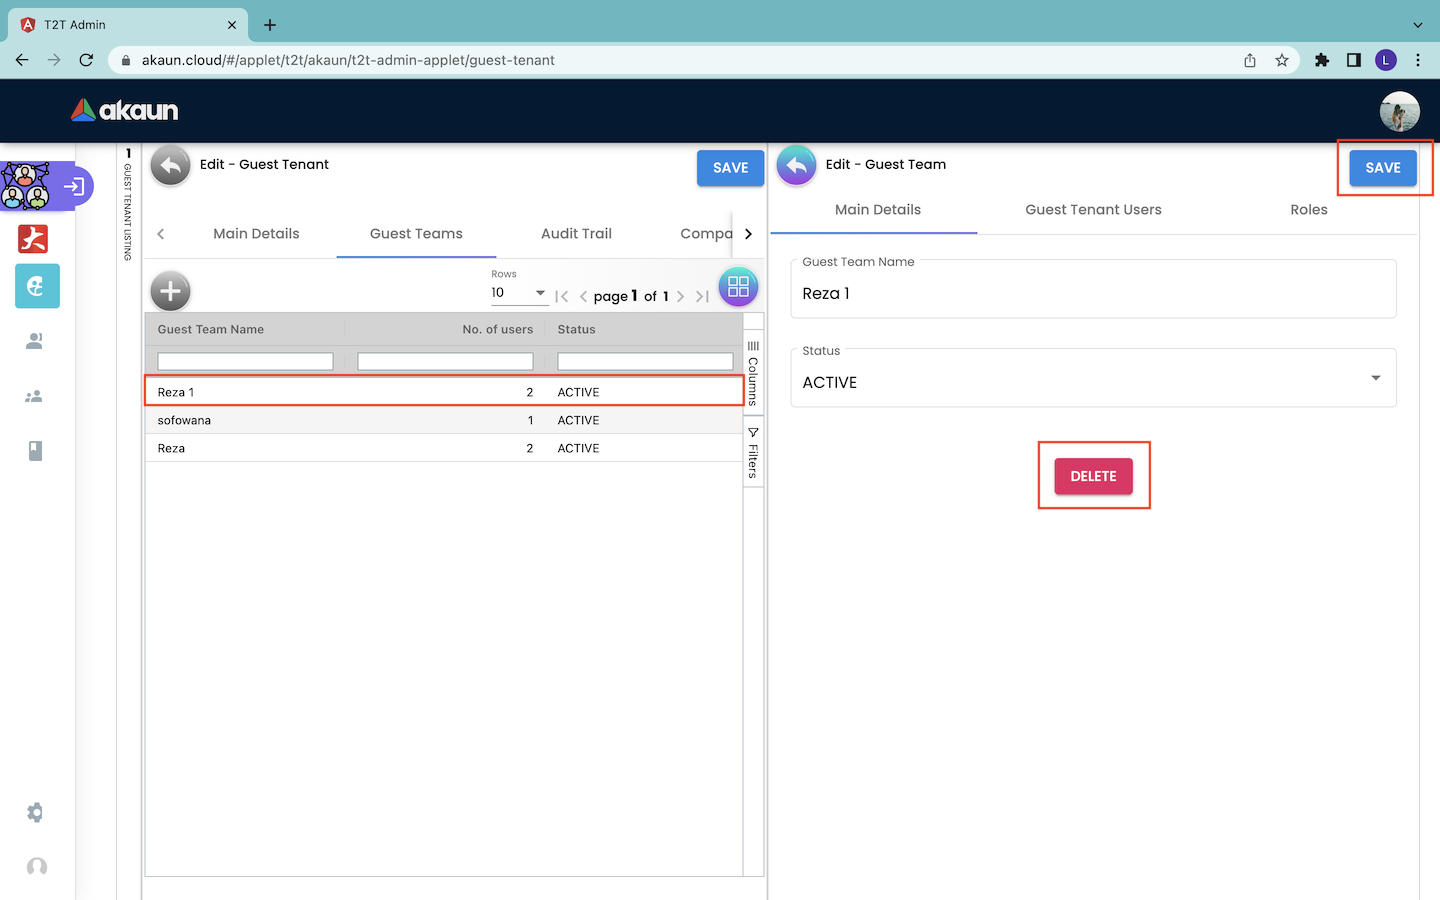
Under the Main Details tab, users can read the name and status of the guest tenant team.
In this tab, users can only edit the status of the team by setting it to either “ACTIVE” or “INACTIVE”. Users are not allowed to edit the team name of the guest tenant. Then, users have to click on the “SAVE” button to save all the changes. Next, users can choose to delete the particular guest team by clicking on the “DELETE” button on that page.
Guest Tenant Users
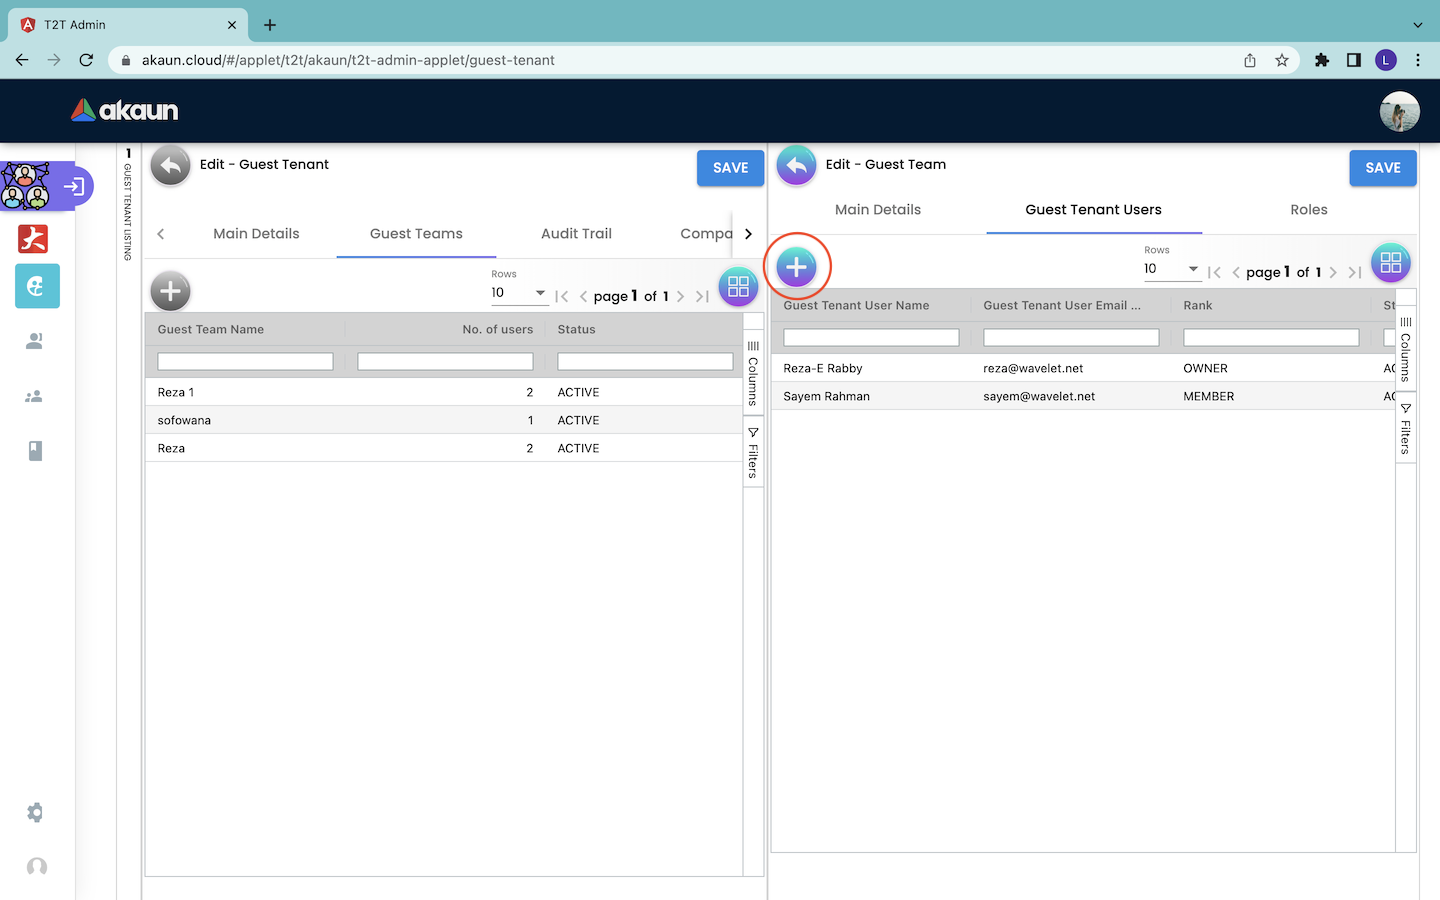
The Guest Tenant Users tab shows the information about the guest tenant users of the target guest tenant team. It shows information: 1. Guest Tenant User Name : The name of the user from the guest tenant. 2. Guest Tenant User Email: The email of the user from the guest tenant. 3. Rank: The rank of the user in using the applet. The options include OWNER, ADMIN or MEMBER. 4. Status: The status of the guest tenant user. The options include ACTIVE or INACTIVE.
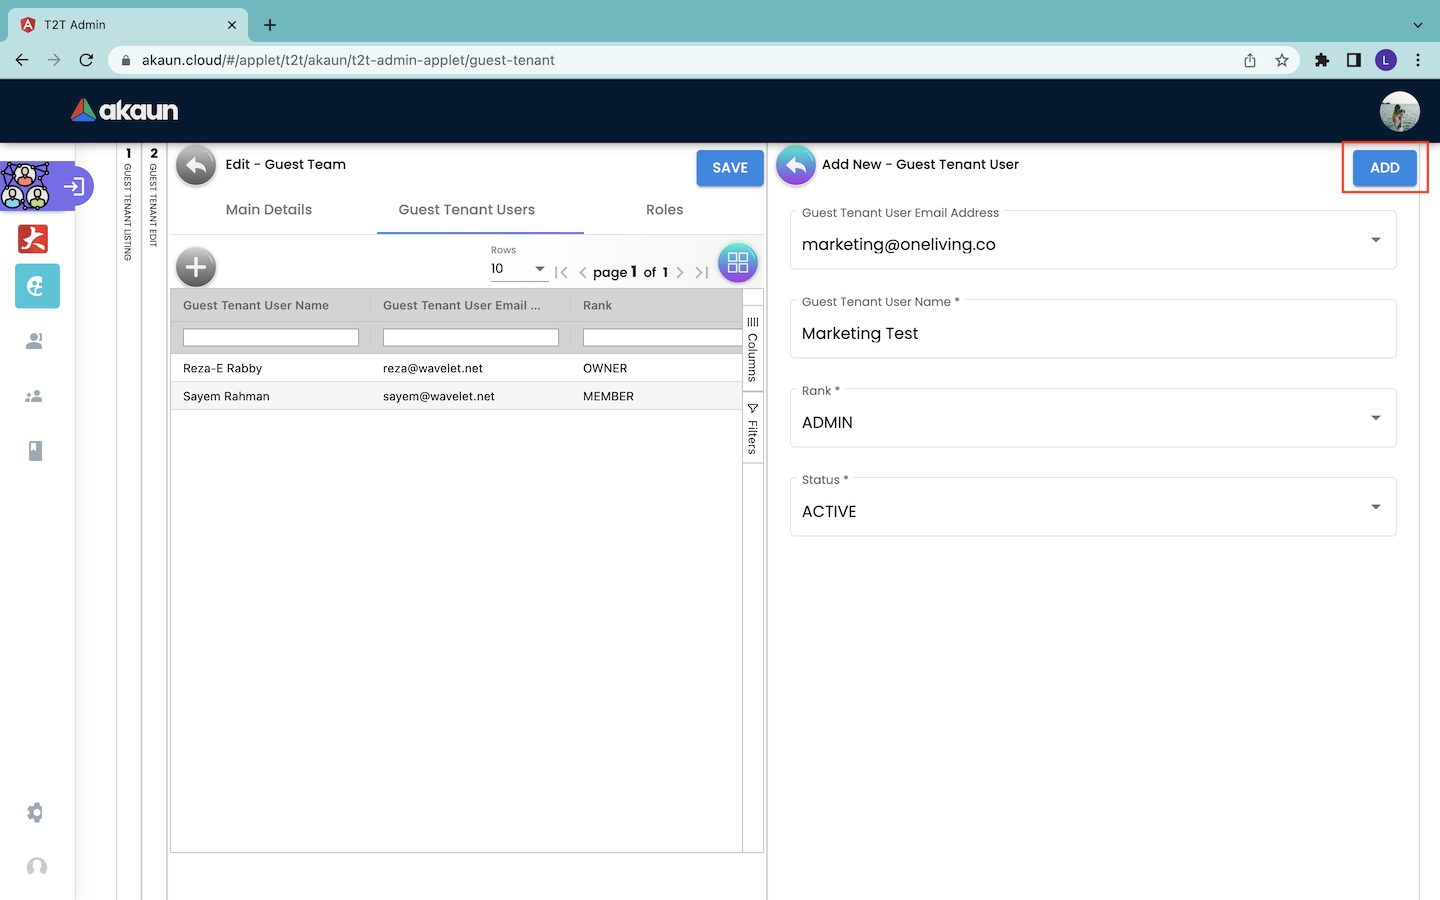
Create Tenant Users
In order to create a new tenant user for a tenant team, users have to click on the “+” button in the Edit - Guest Team page. By doing that, the Add New - Guest Tenant User page will appear from the right.
Edit / Delete Tenant Users
Users are not allowed to update the information of the tenant user in the applet.
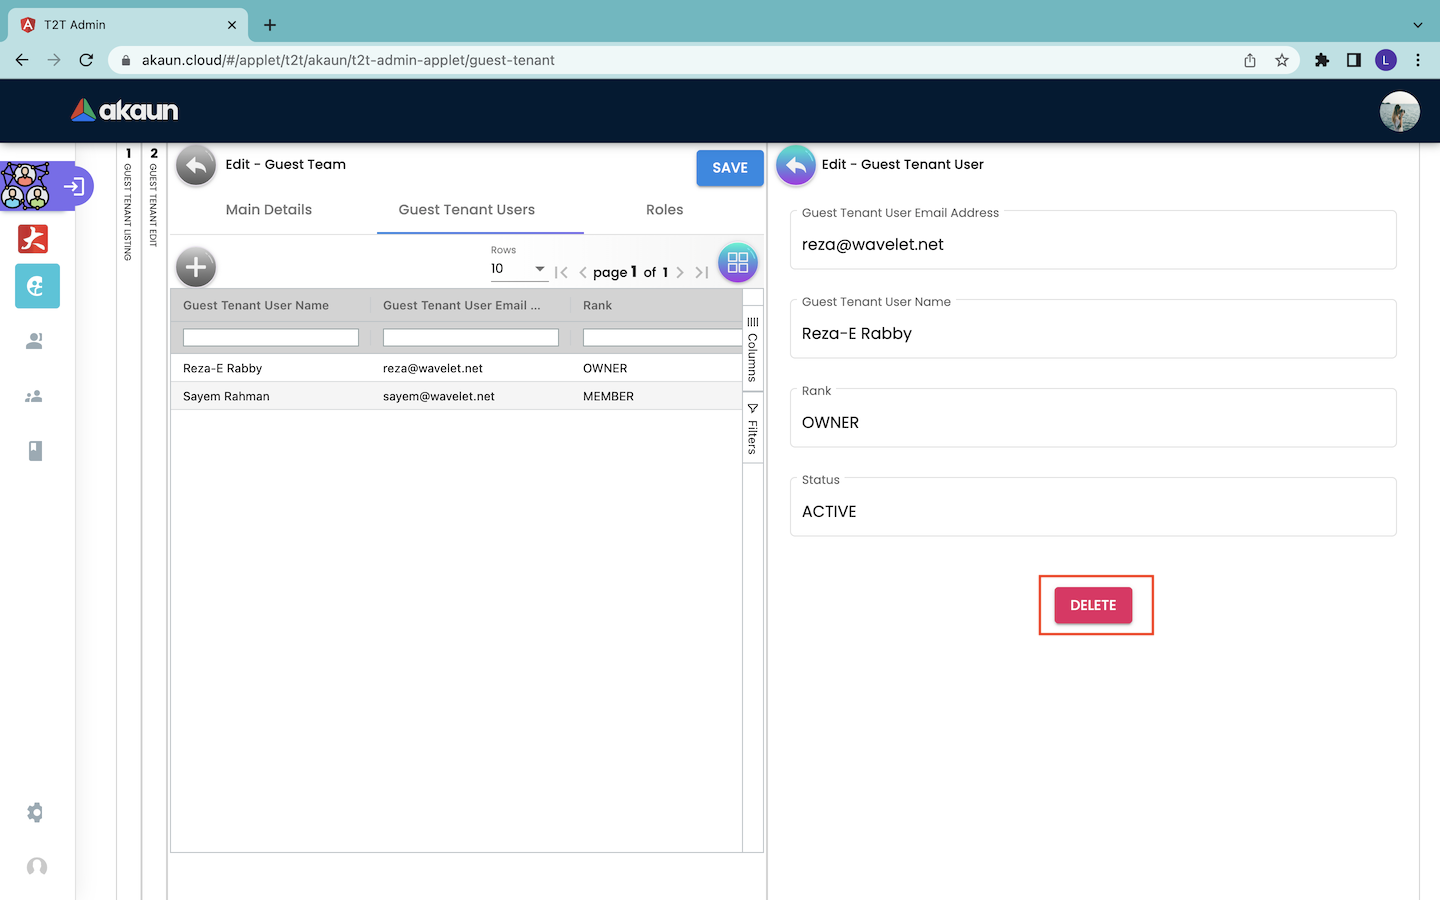
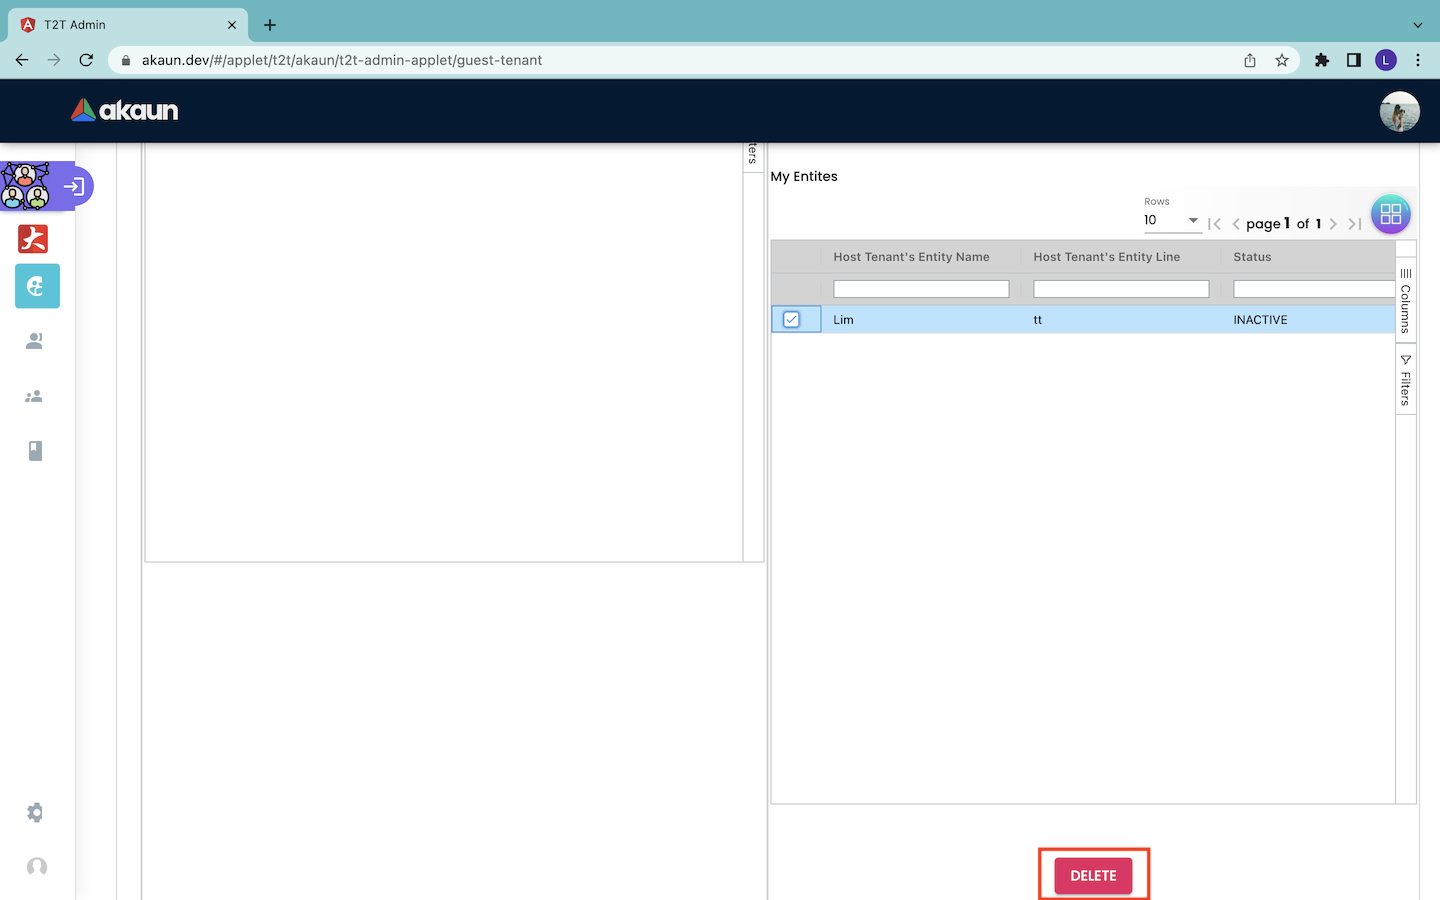
However, users are allowed to delete the tenant user in the applet. In order to delete a tenant user, users have to click on the particular tenant user record in the Guest Tenant Users tab. By doing that, users will be directed to the Edit - Guest Tenant User tab. This page shows the basic information of the target user in that guest tenant team. The information includes the user name, user email, rank of the user in using the applet and status of the user. Then, users have to click on the “DELETE” button to delete the tenant user.
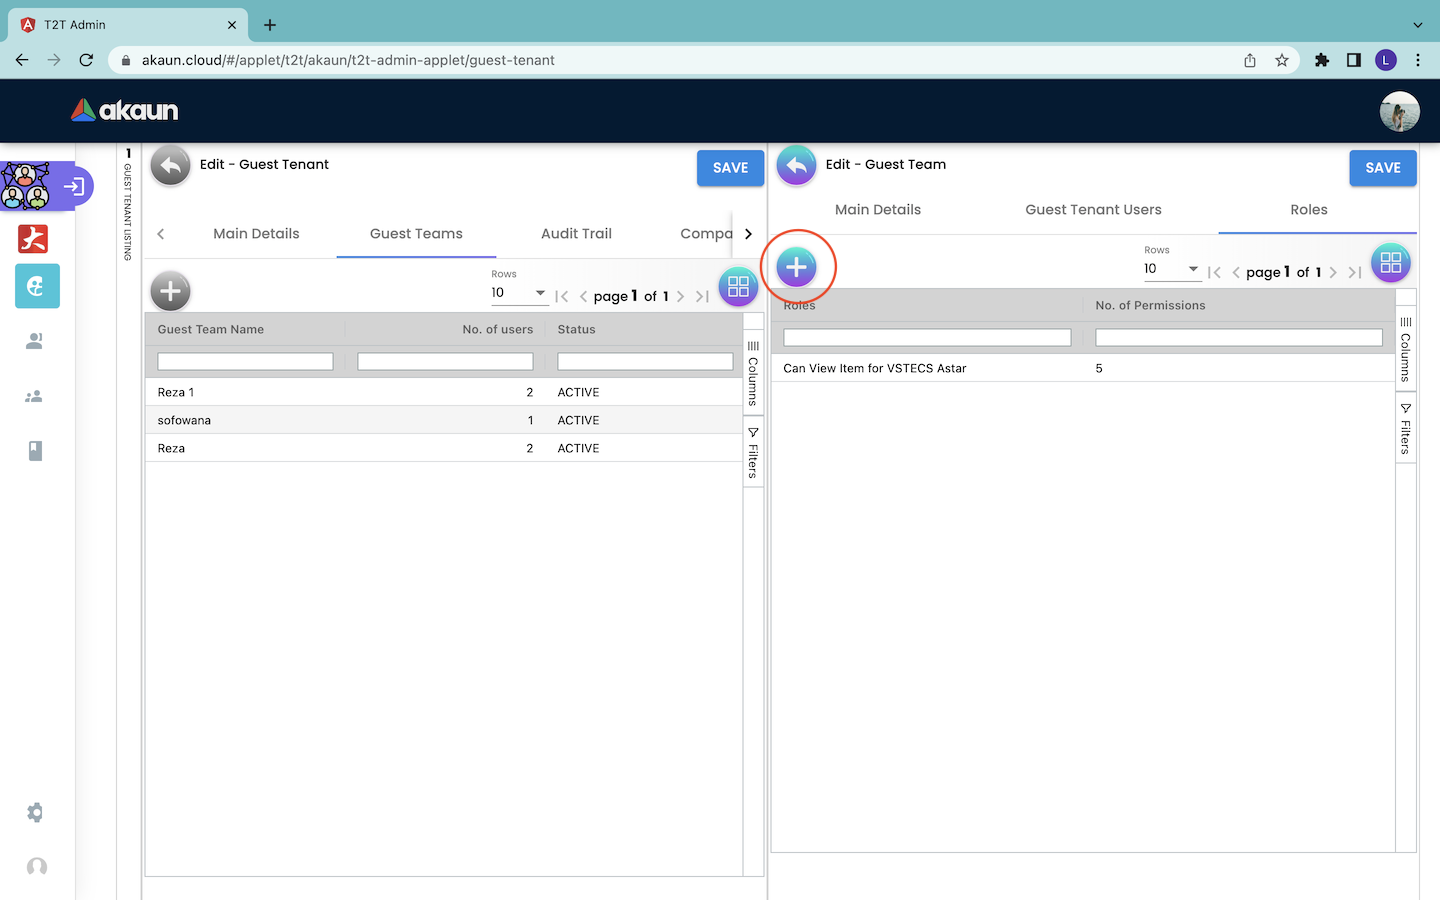
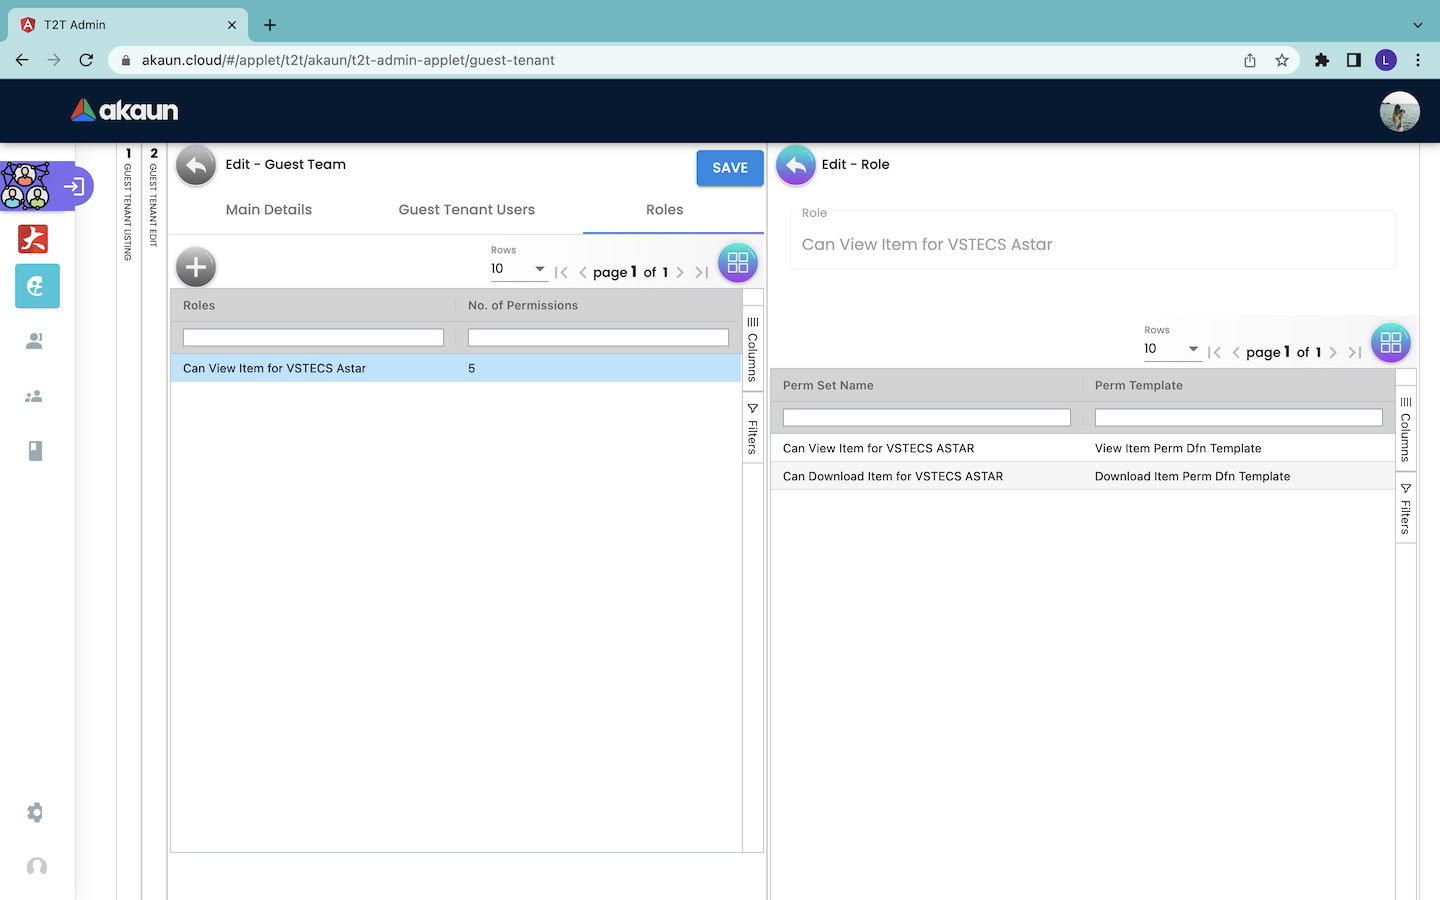
Roles
The Roles tab shows the roles that are assigned to the particular guest tenant team. A role contains a list of pre-configured permissions. The Roles tab records the roles and the number of permissions assigned to the role.
Read A Role
In order to read the exact permissions that are assigned under the roles to a team, users can click on the particular role record in the Roles tab. Then users will be directed to the Edit - Role page.This page shows the permission set and permission templates assigned for that role.
Add New Role to The Team
In order to add new roles to the team, users have to click on the “+” button as shown in the screenshot below.
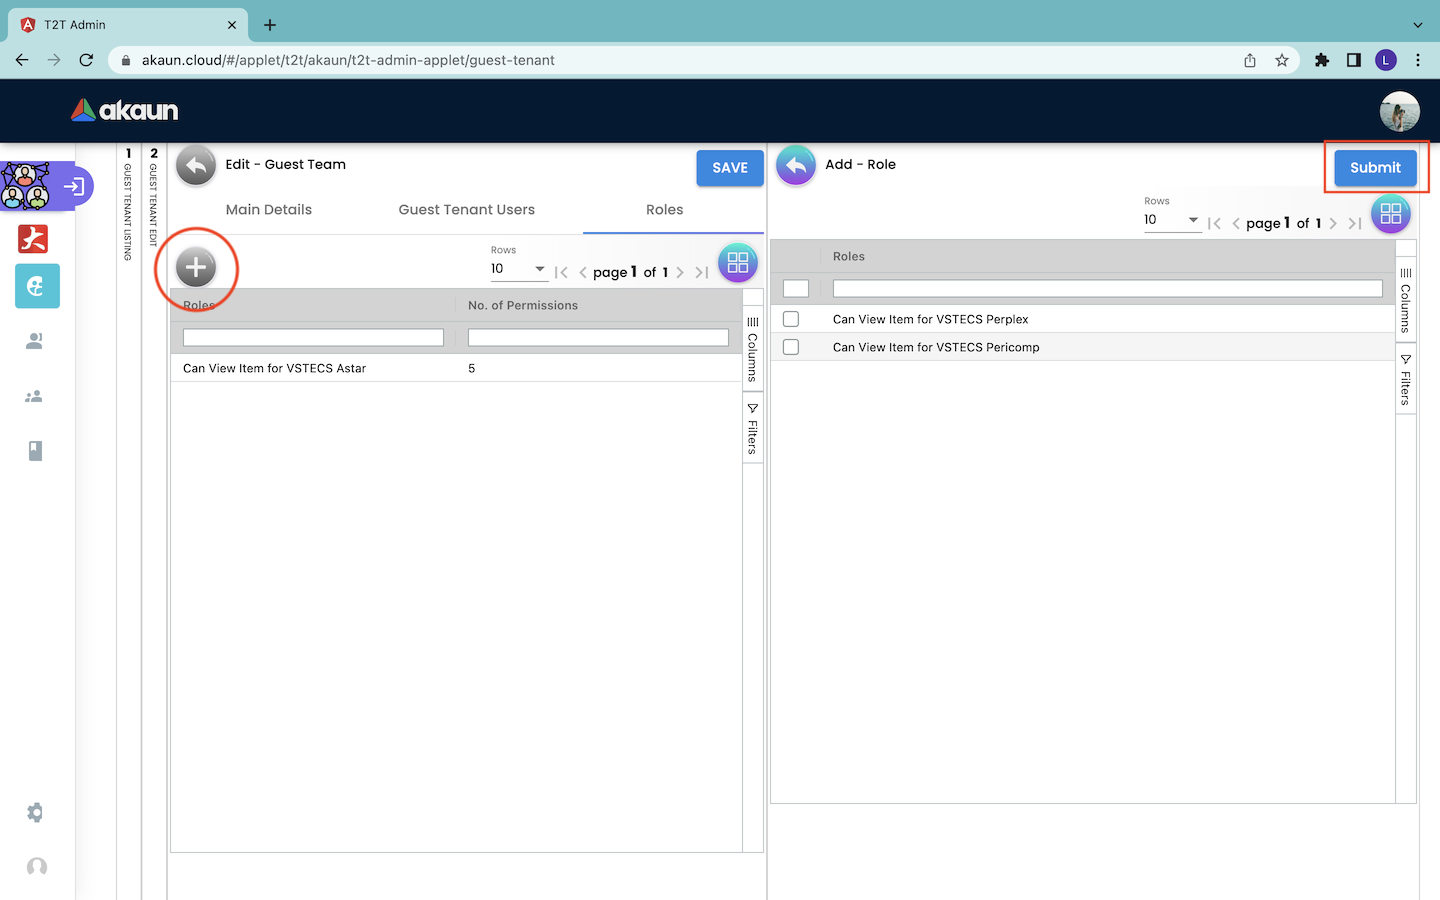
Then, they will be directed to the Add - Role page. In the Add - Role page, users can see a list of available roles that can be added to the team. From there, they can tick on one or multiple roles that they want to assign to the team. After that, users can click on the “SUBMIT” button to assign the roles to the team. In other words, it assigns the permissions that are under the selected roles to all the users in the particular team.
4.3 Audit Trail
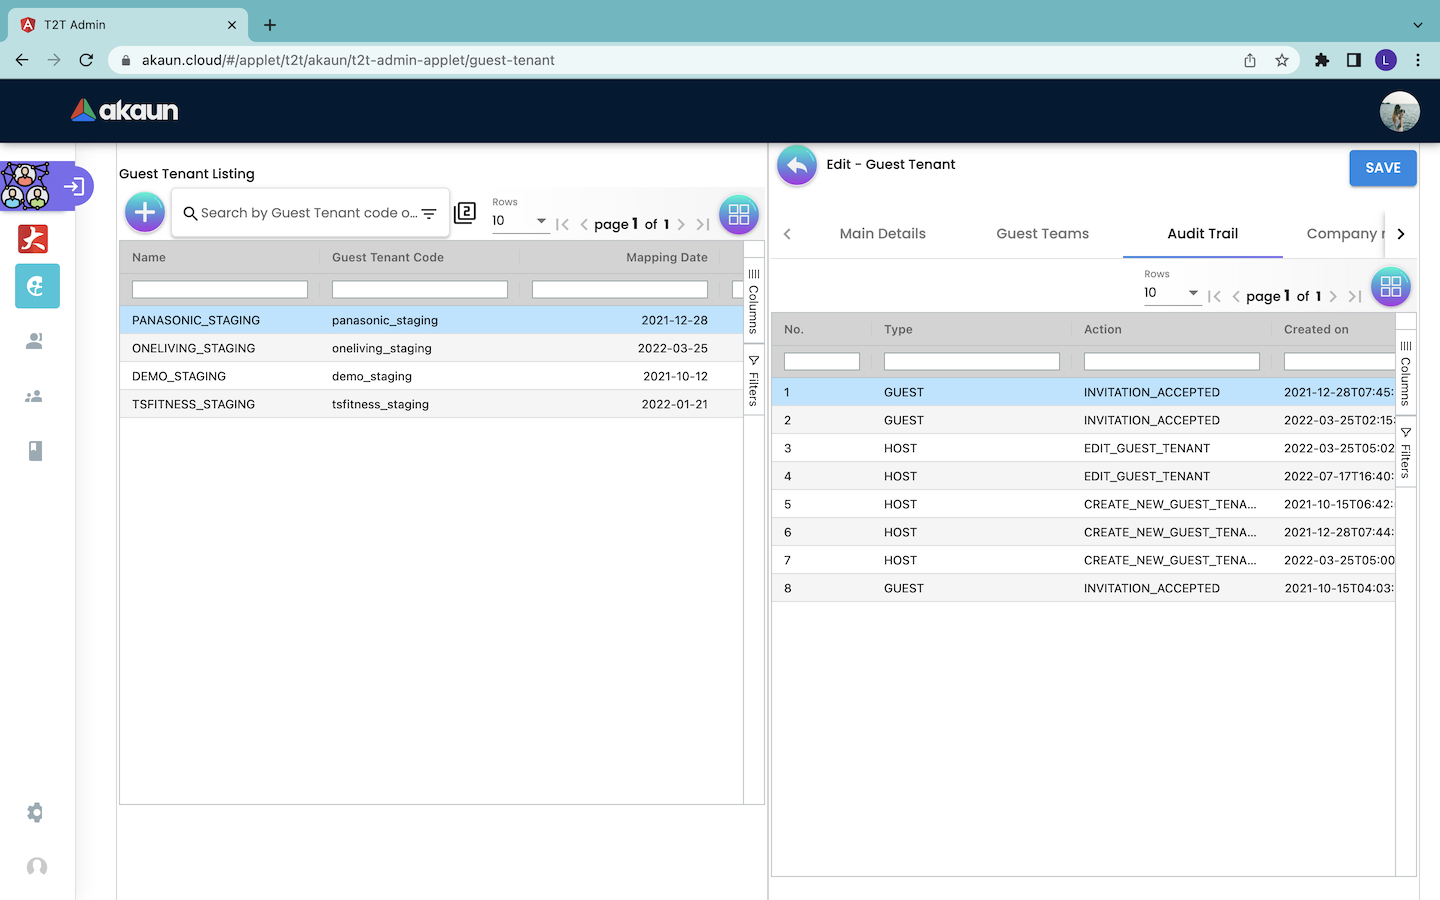
The audit trail tab records all the changes that have been made to the guest tenant. It shows:
-
Type: The type of the tenant. It can be either GUEST or HOST.
-
Action: The action that is done between the host and guest tenant.
-
Created Date: The date in which the action is created.
-
Updated By: The date in which the action is updated.
4.4.1 Company Mapping Listing
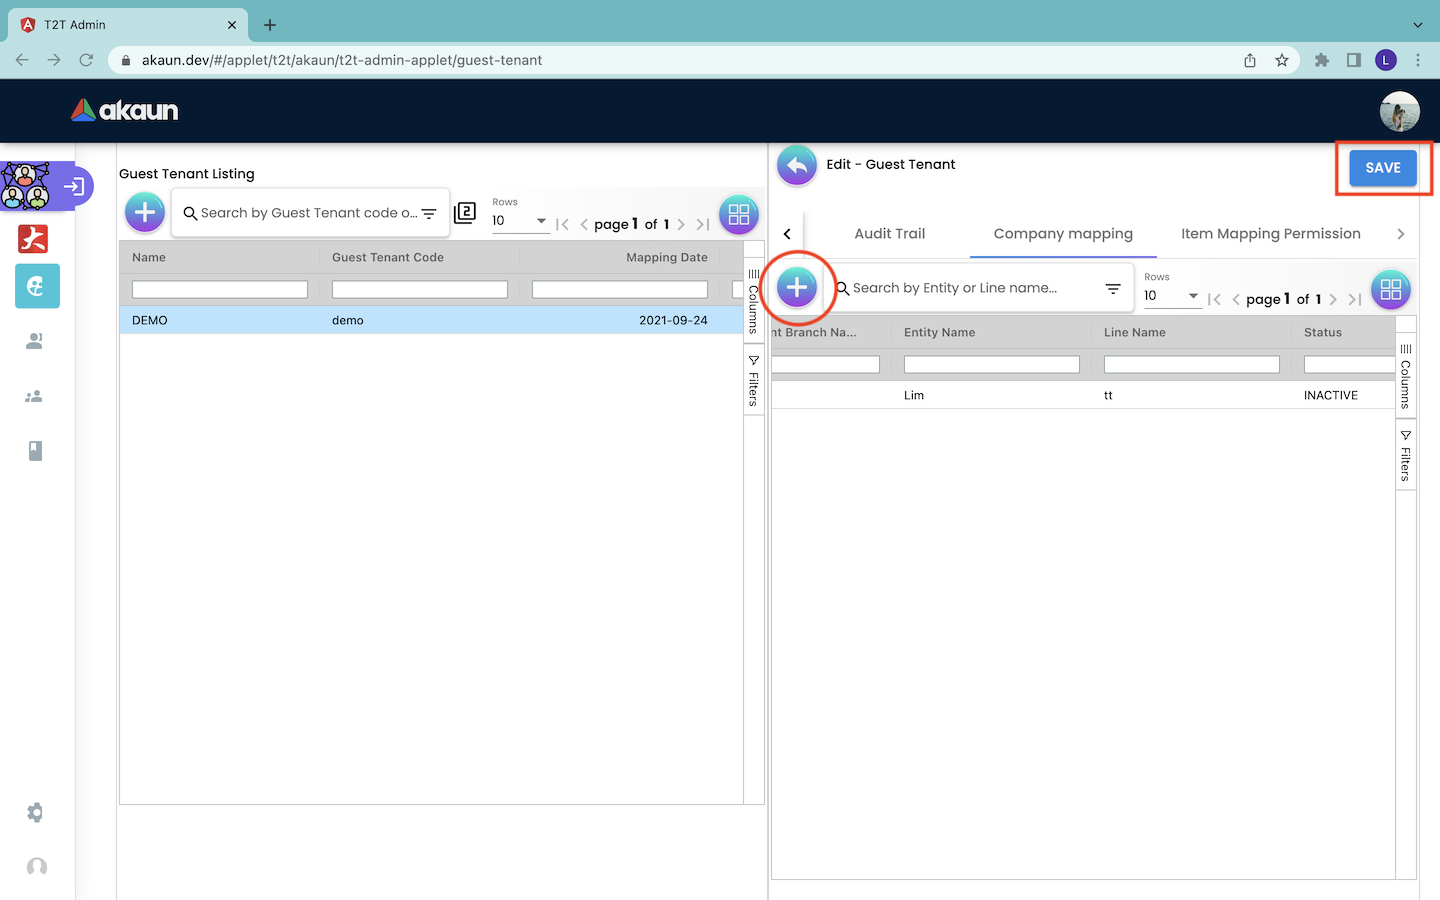
The company mapping tab shows the information of the entities of the guest tenant that are mapped with the host tenant. The information includes:
-
Guest Tenant Company Name: The name of the company of the guest tenant.
-
Guest Tenant Branch Name: The name of the branch of the guest tenant.
-
Entity Name: The name of the entity.
-
Line Name: The subdivision of the company of the guest tenant.
-
Status: The status of the entity mapping. It can be either ACTIVE or INACTIVE.
4.4.3 Edit Company Mapping
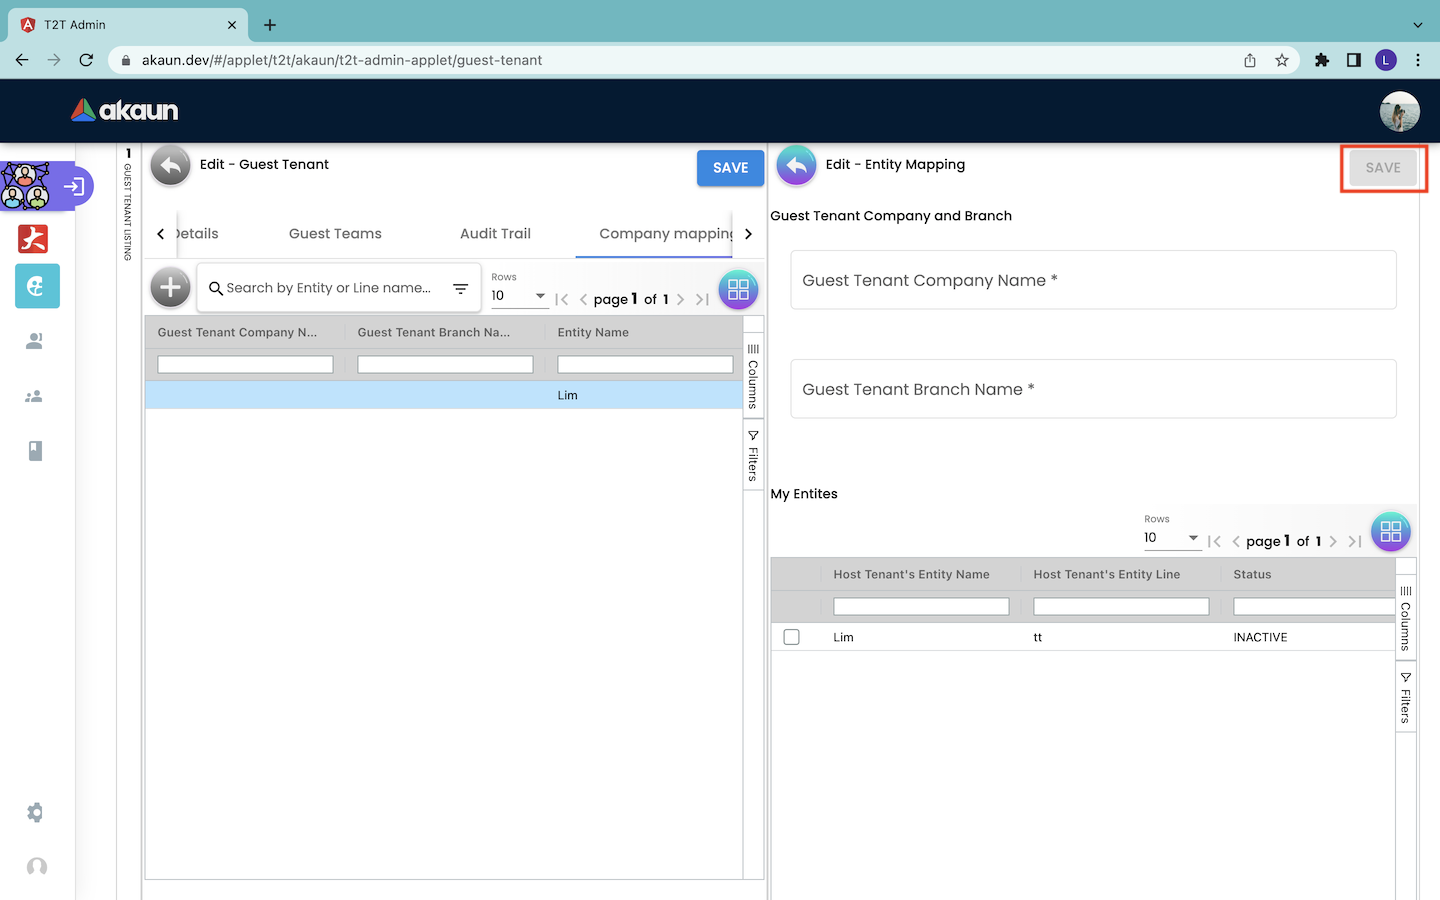
In order to edit a company mapping, users have to first click on the particular company mapping record in the Edit - Guest Tenant page. Then, the Edit - Entity Mapping page will appear from the right. Users can edit the name of the company and branch of the guest tenant. Then, users have to click on the “SAVE” button to save all the changes.
4.5 Item Mapping Permission
4.5.1 Item Mapping Permission Listing
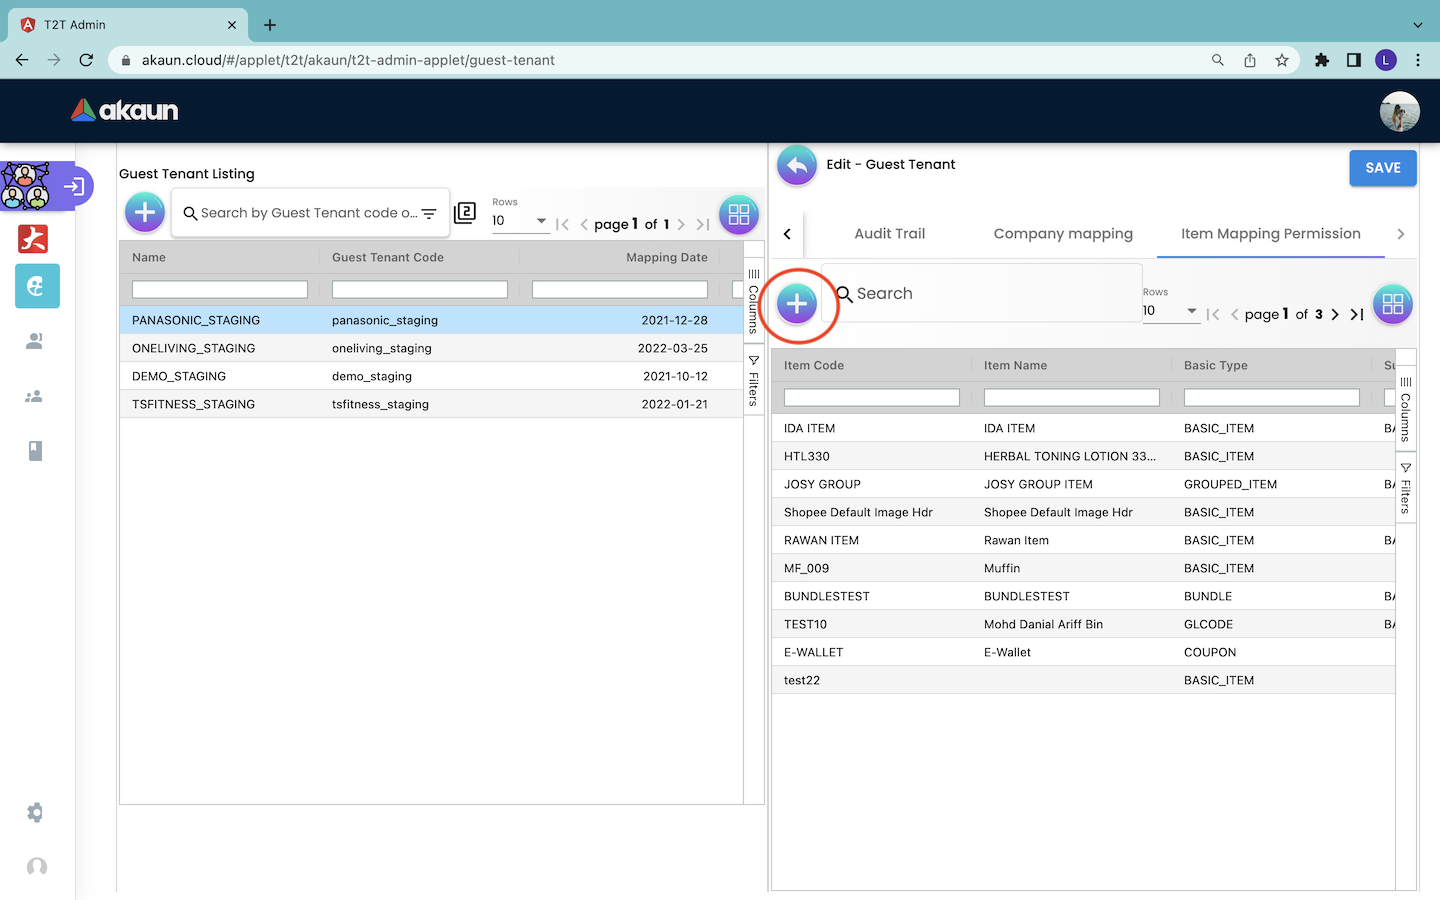
The Item Mapping Permission page shows the information of the mapping of items between the guest tenant and the host tenant. The information includes:
-
Item Code: The code of the item.
-
Item Name: The name of the item.
-
Basic Type: The basic type of the item. For example, it is a basic item, group item, bundle item, coupon and others.
-
Sub Item Type: the subtype of the item.
4.5.3 Remove Item

In order to remove an item from the Item Mapping Permission page, users have to first click on the row that represents the target item in the Item Mapping Permission page. Then, the Item Mapping Permission Edit page will appear from the right.
Users cannot edit any information about the item mapping. However, users can click on the “Remove” button to remove the item mapping from the guest tenant.