2.0 Internal Sales Return Listing
2.1 In The Search Tab
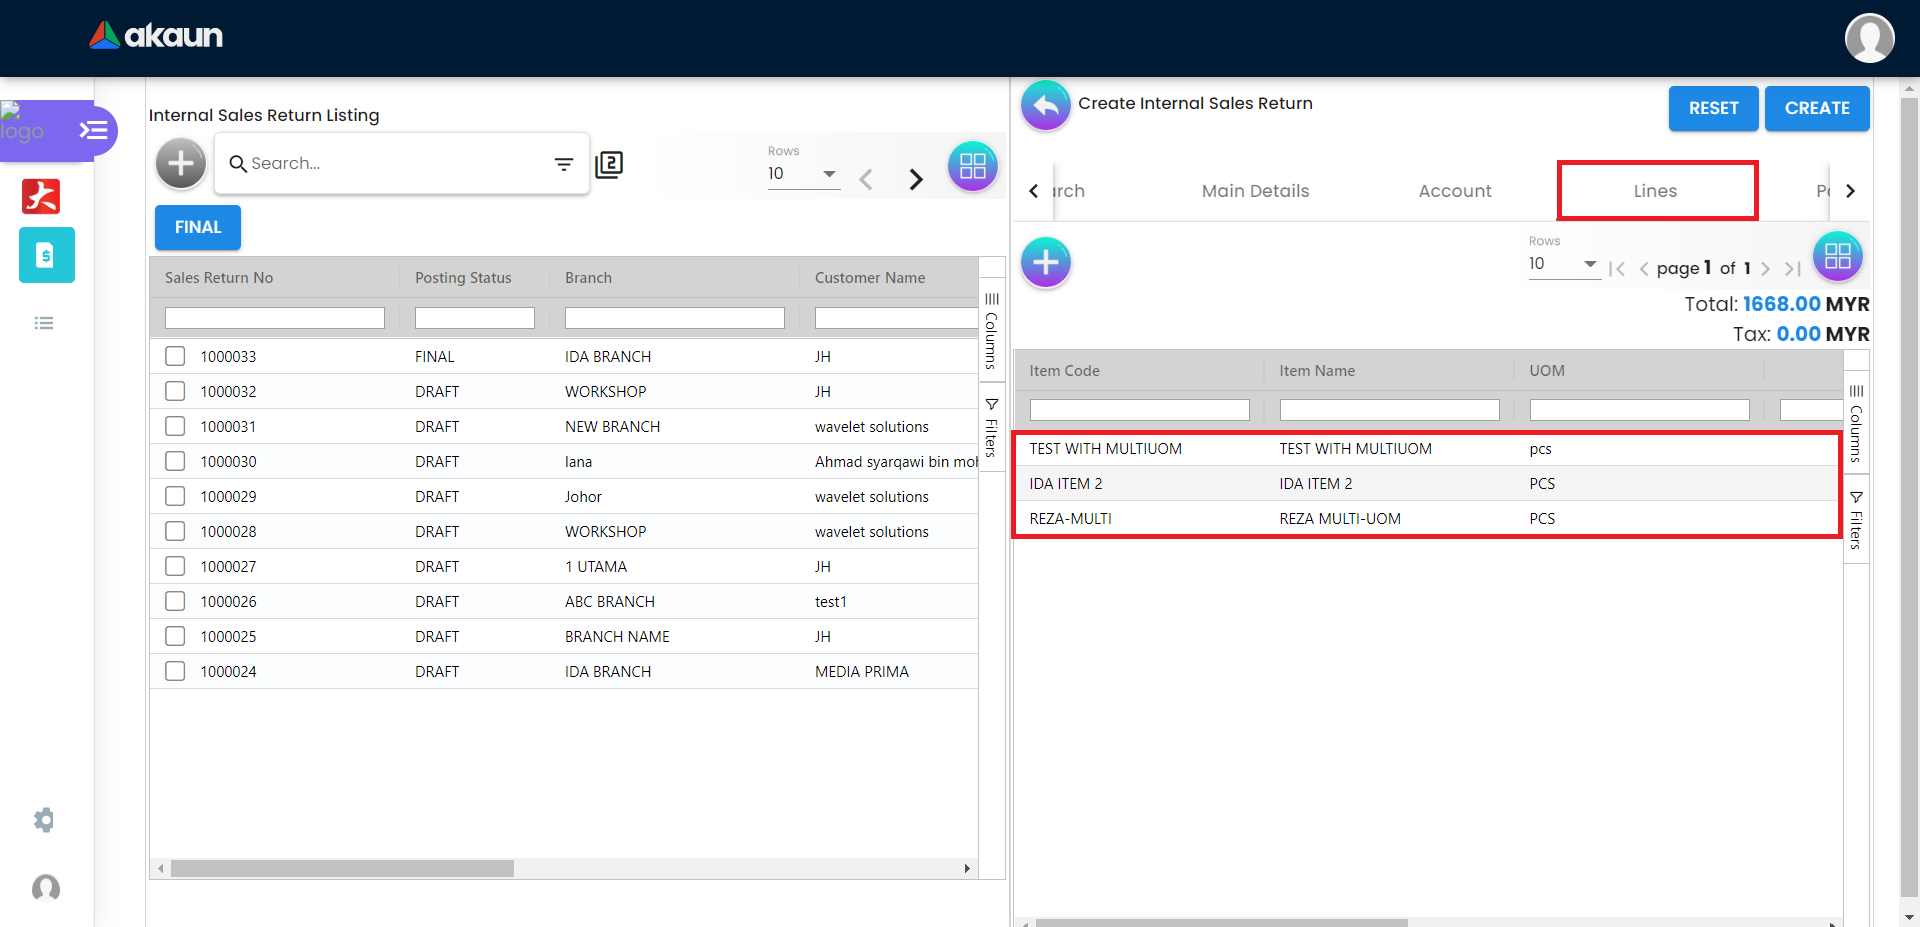
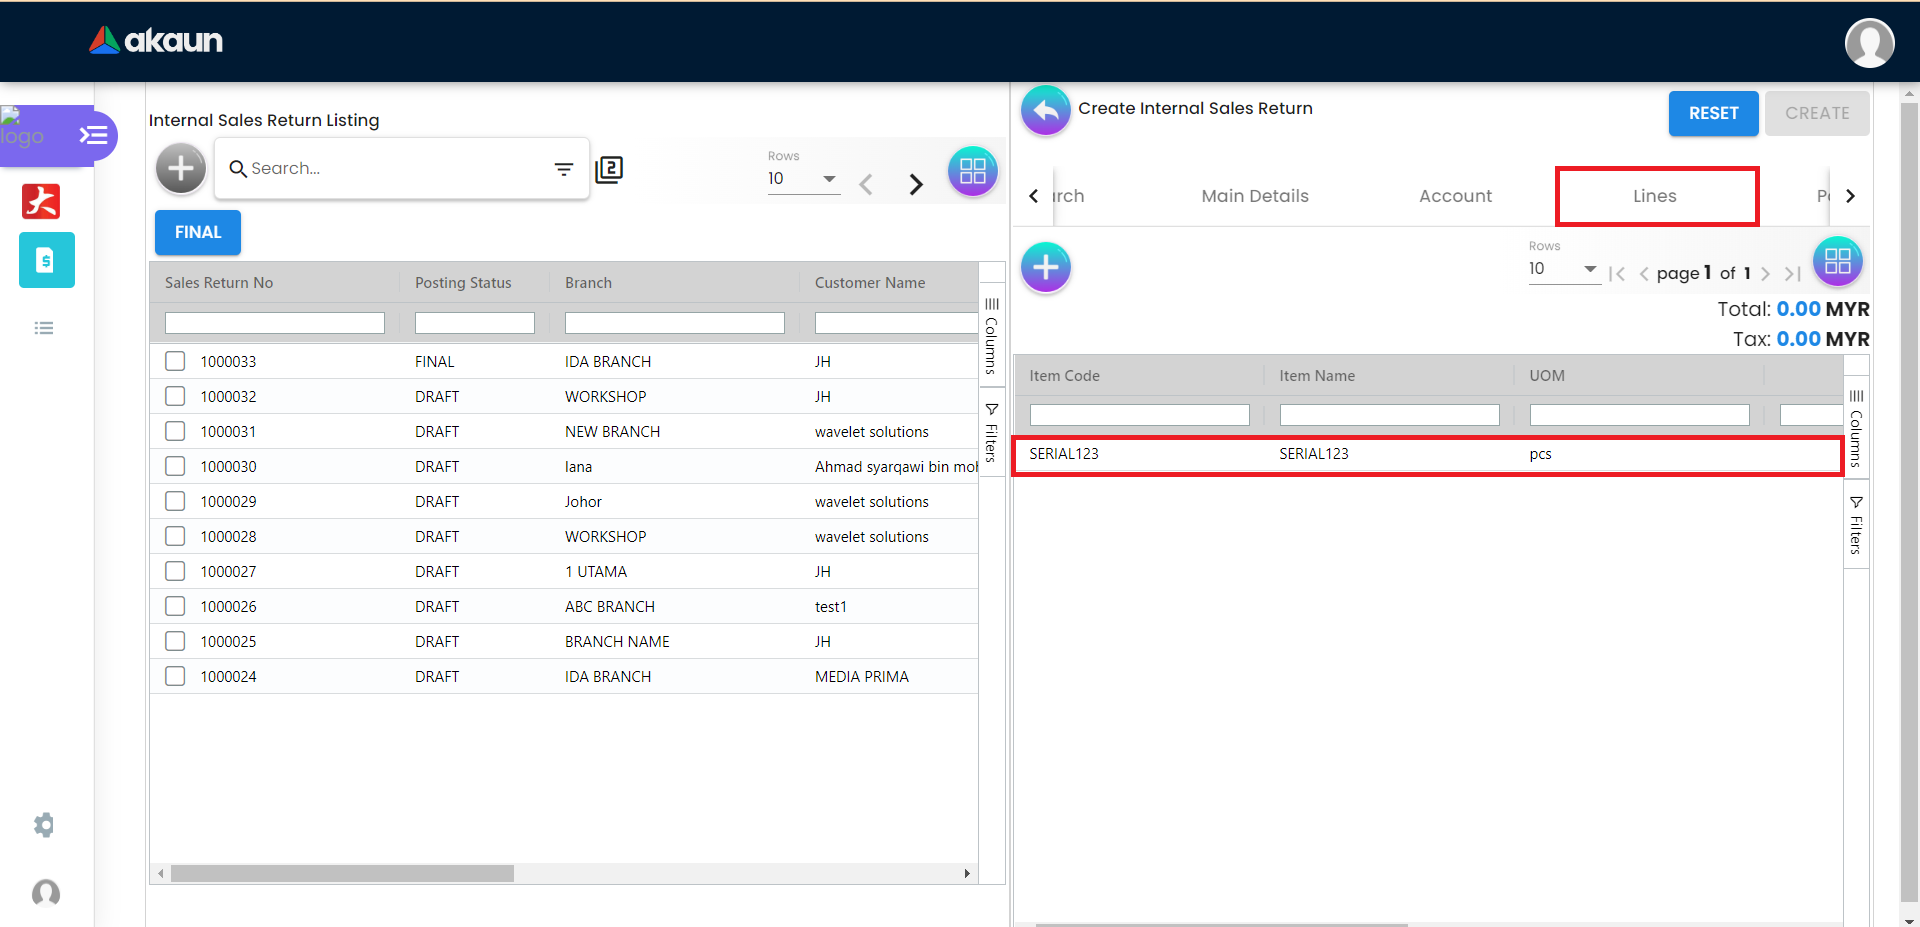
If the system successfully adds an invoice line item to the Sales Returns applet, it will display a "Line Item Added" message in the lower left corner
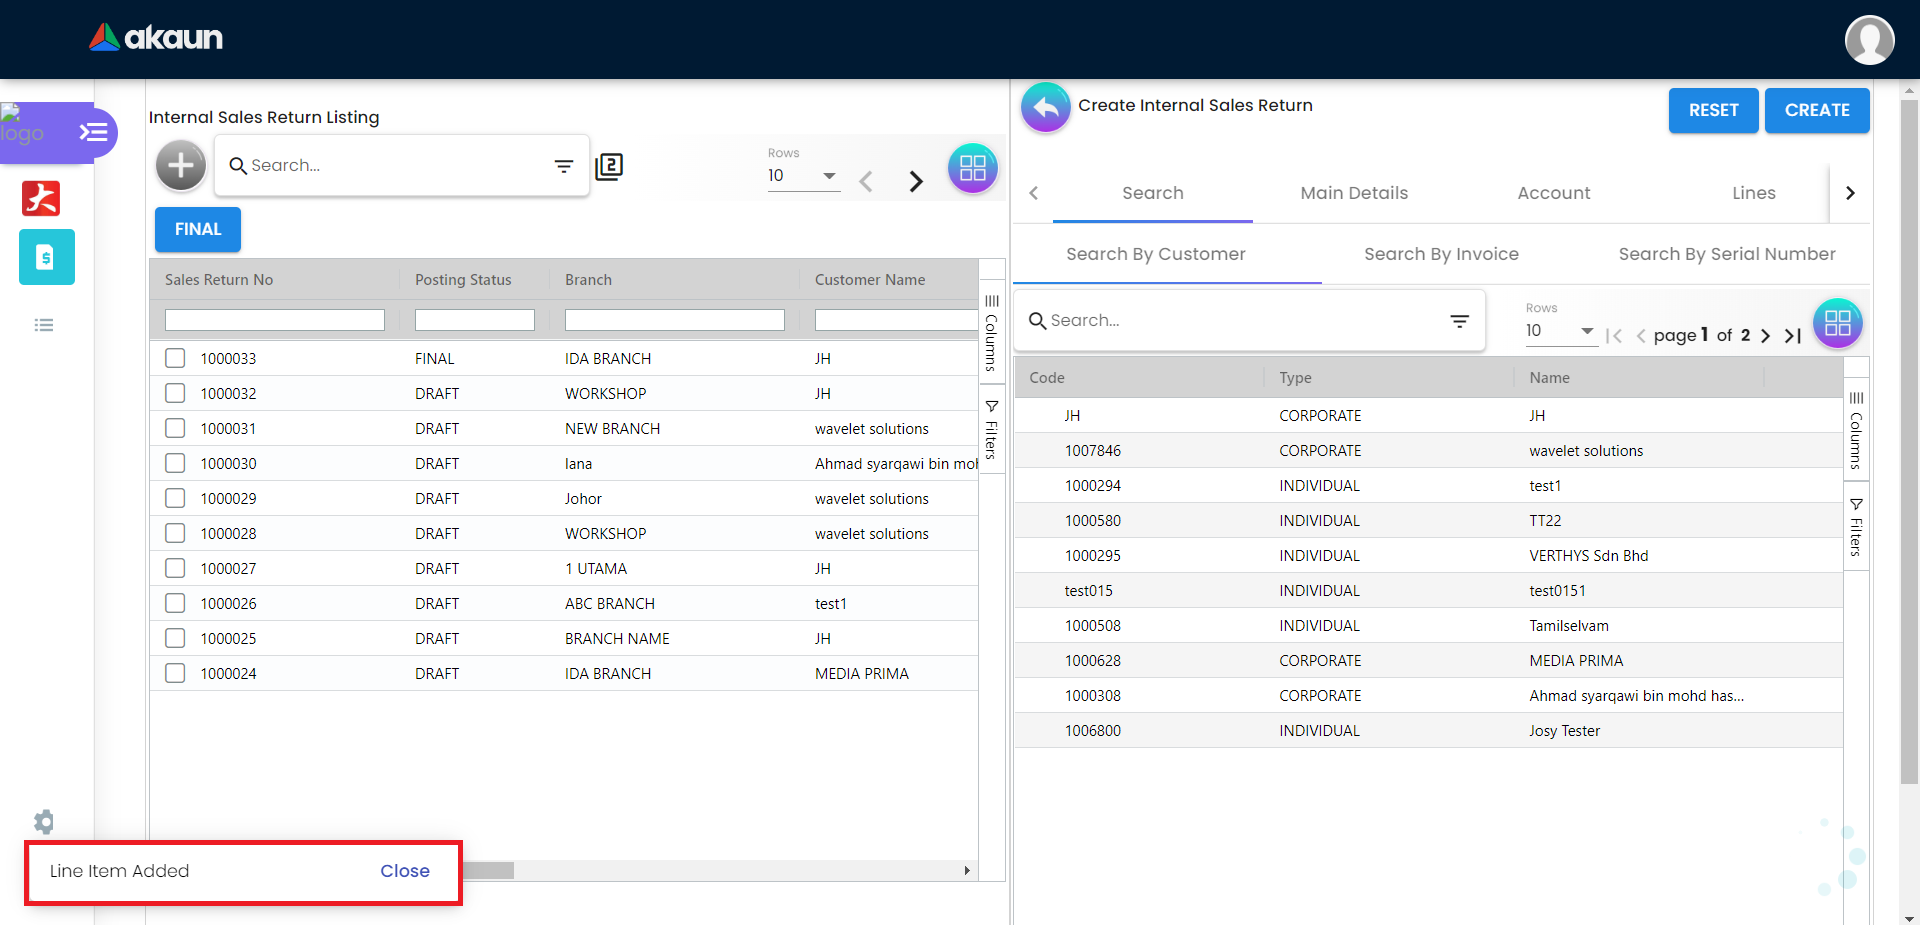
2.1.1 Search By Customer Tab
By clicking one of the customer, it will display the listing of invoice owned by the customer

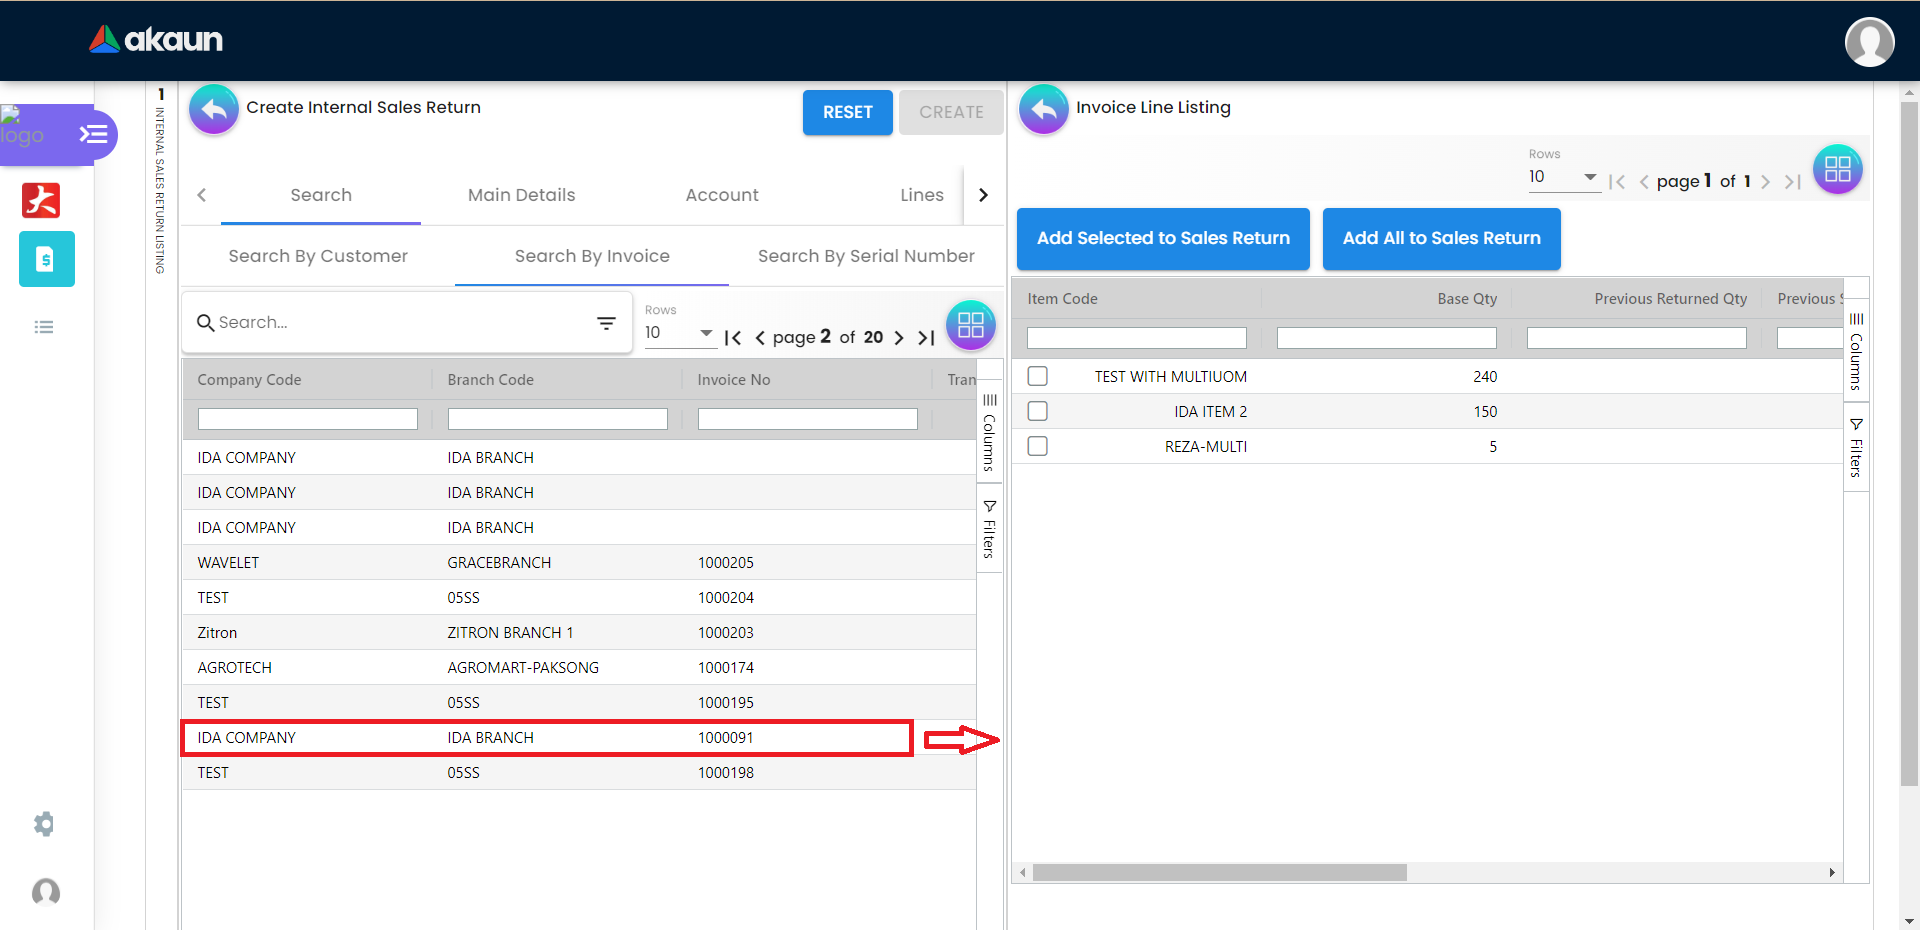
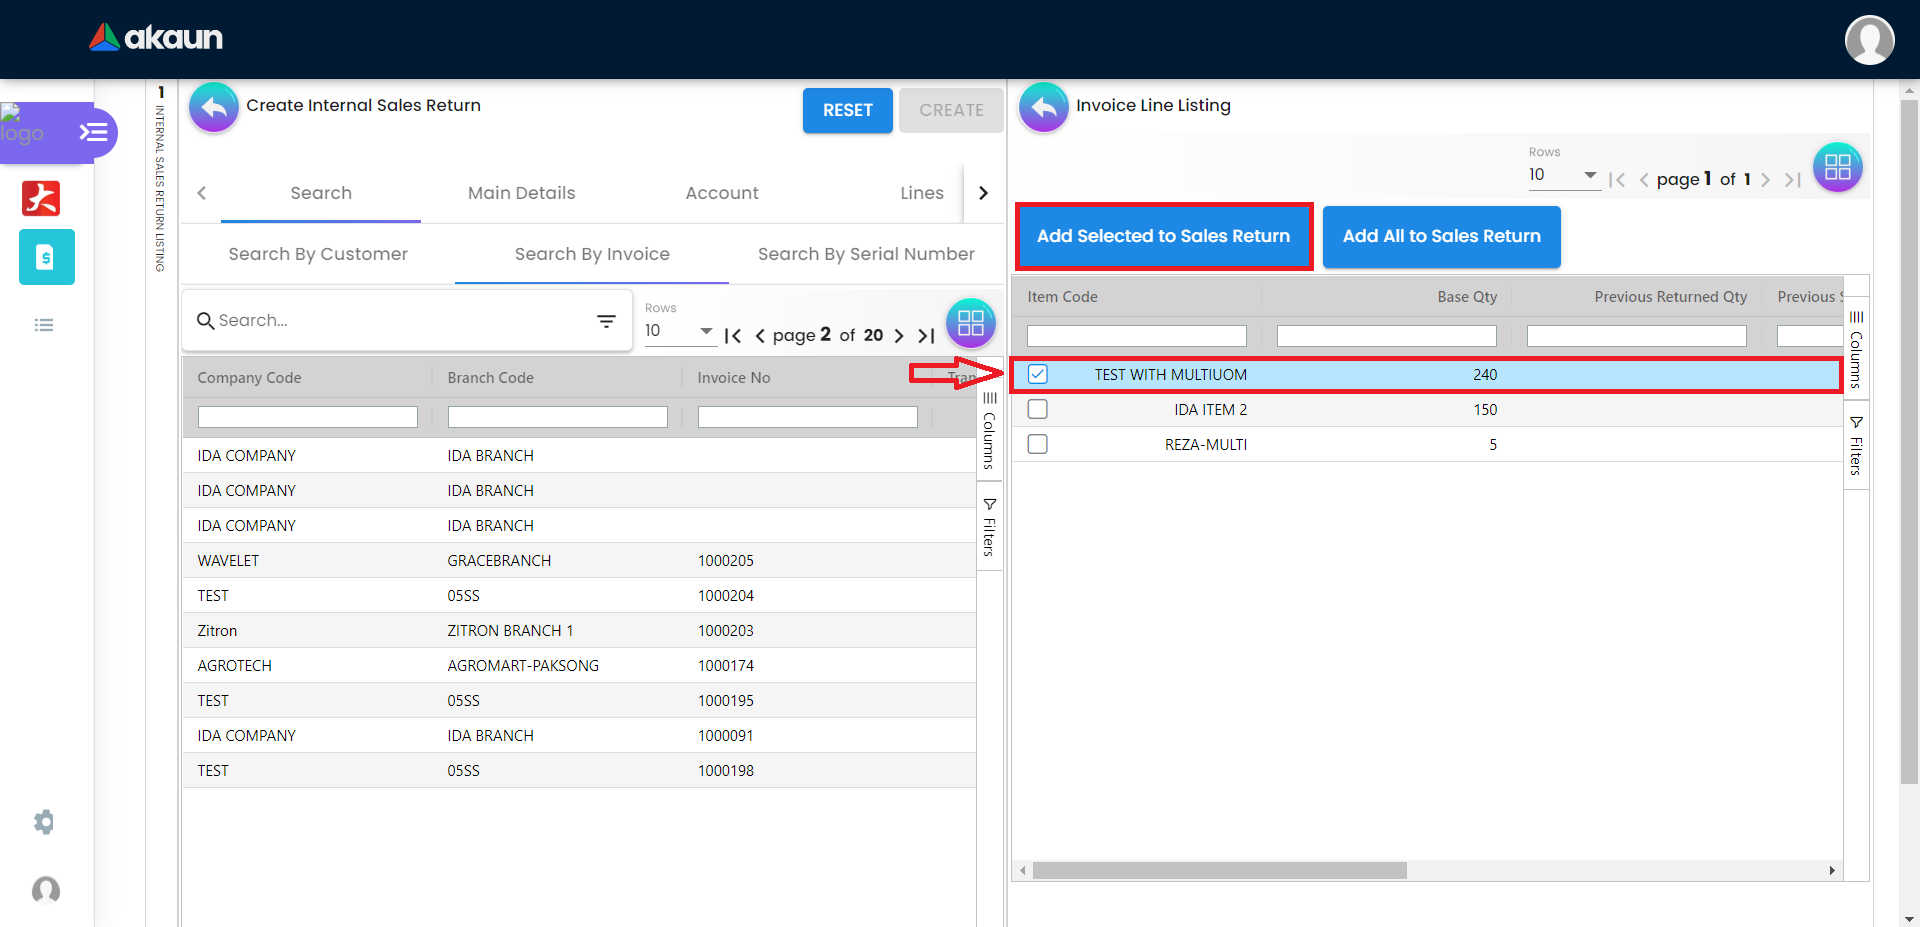
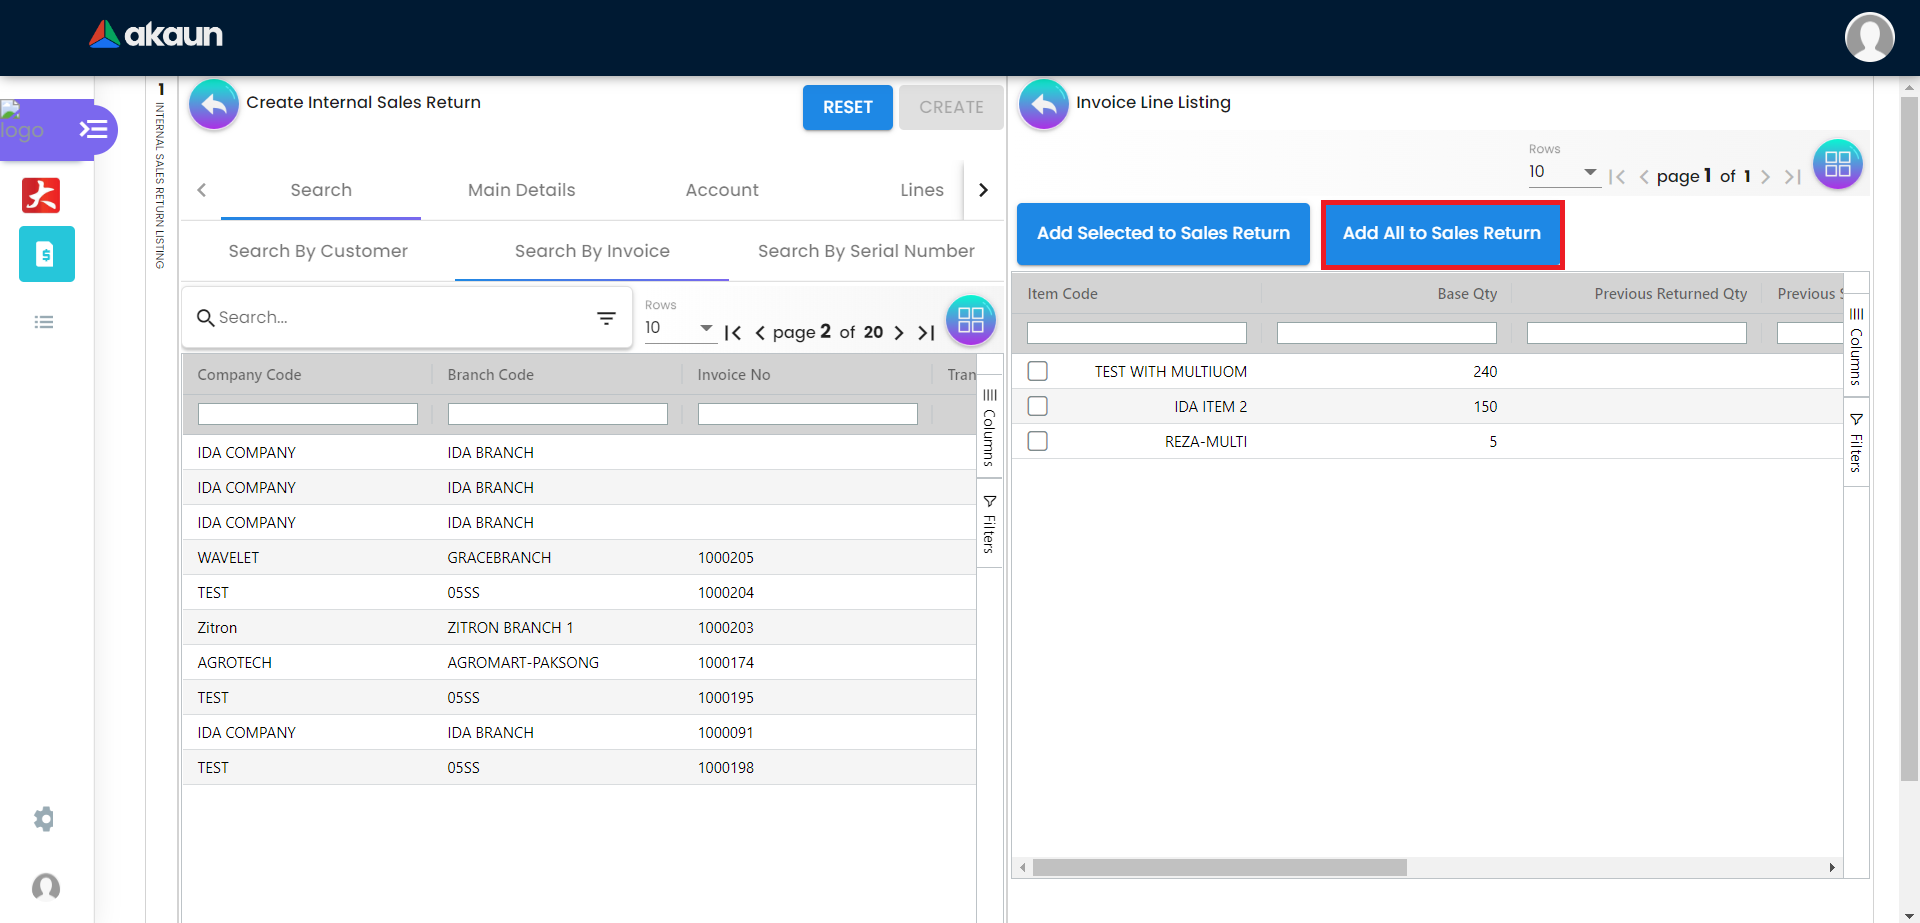
By clicking on one of the invoices, it will display a list of invoice lines owned by that invoice.
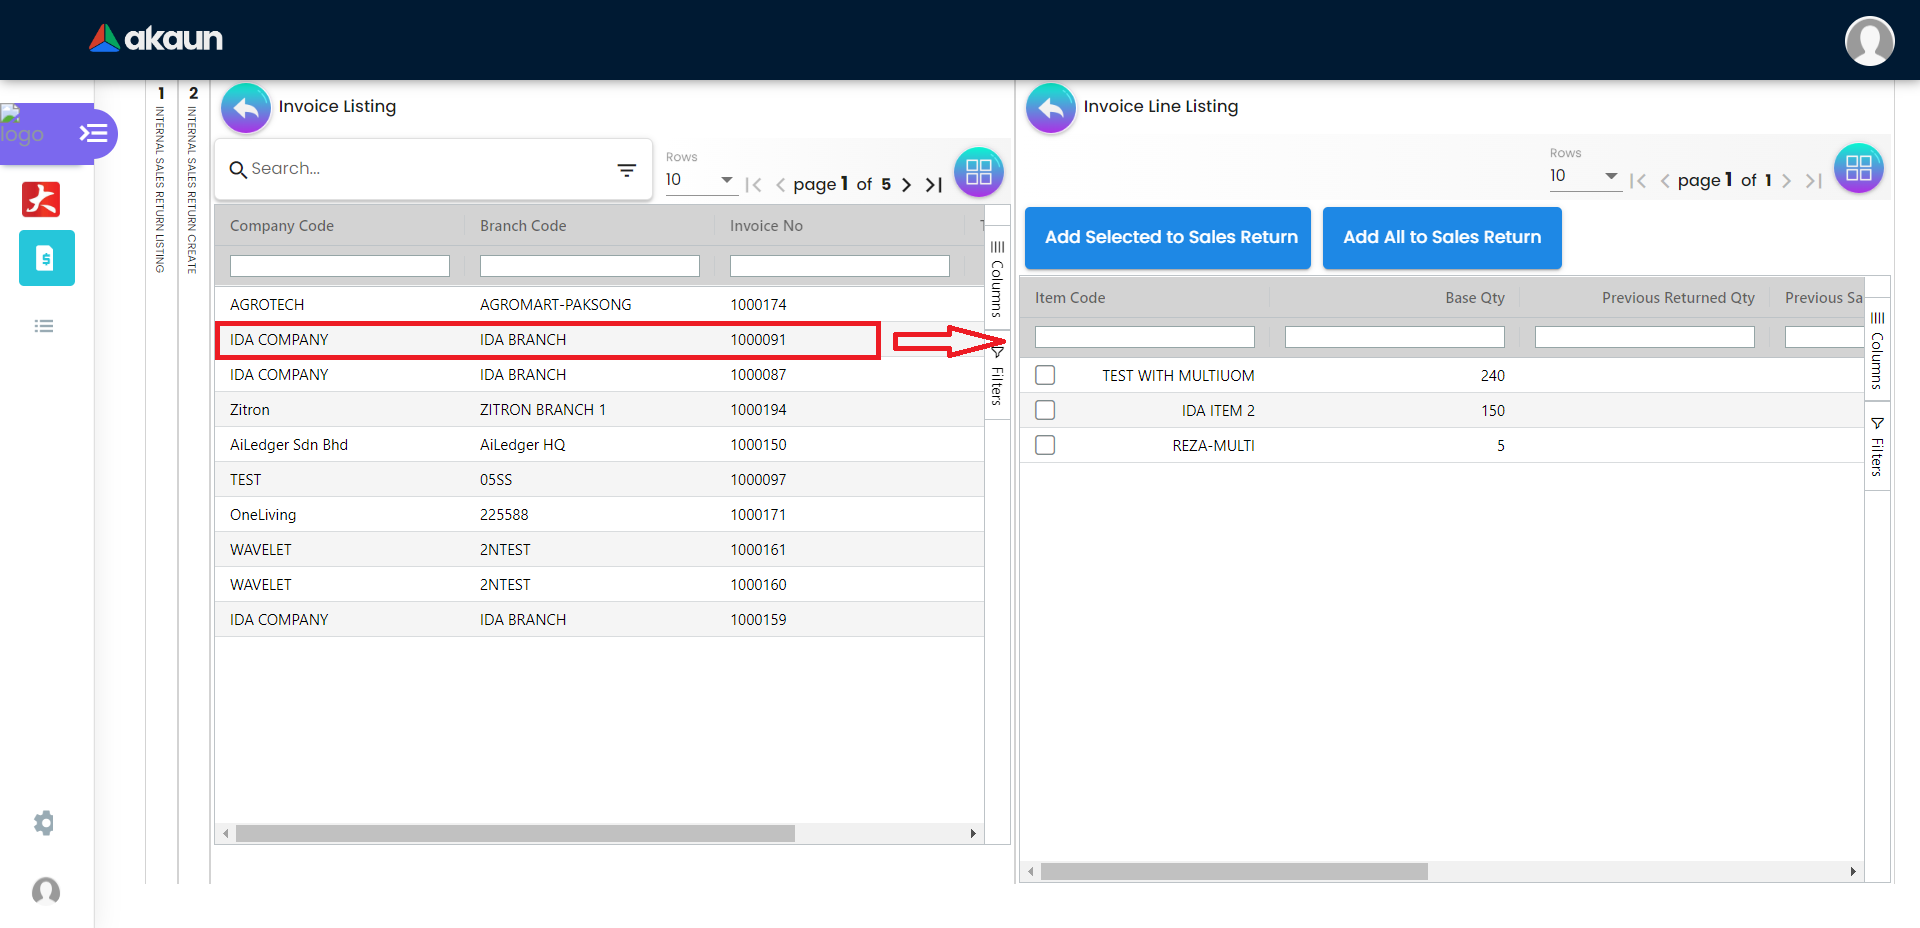
In the Invoice Line Listing, you can:
-
Click on the “tick” box to select one or more invoice line items. Then you can click “Add Selected to Sales Return” button to add the selected invoice line item to the Lines tab
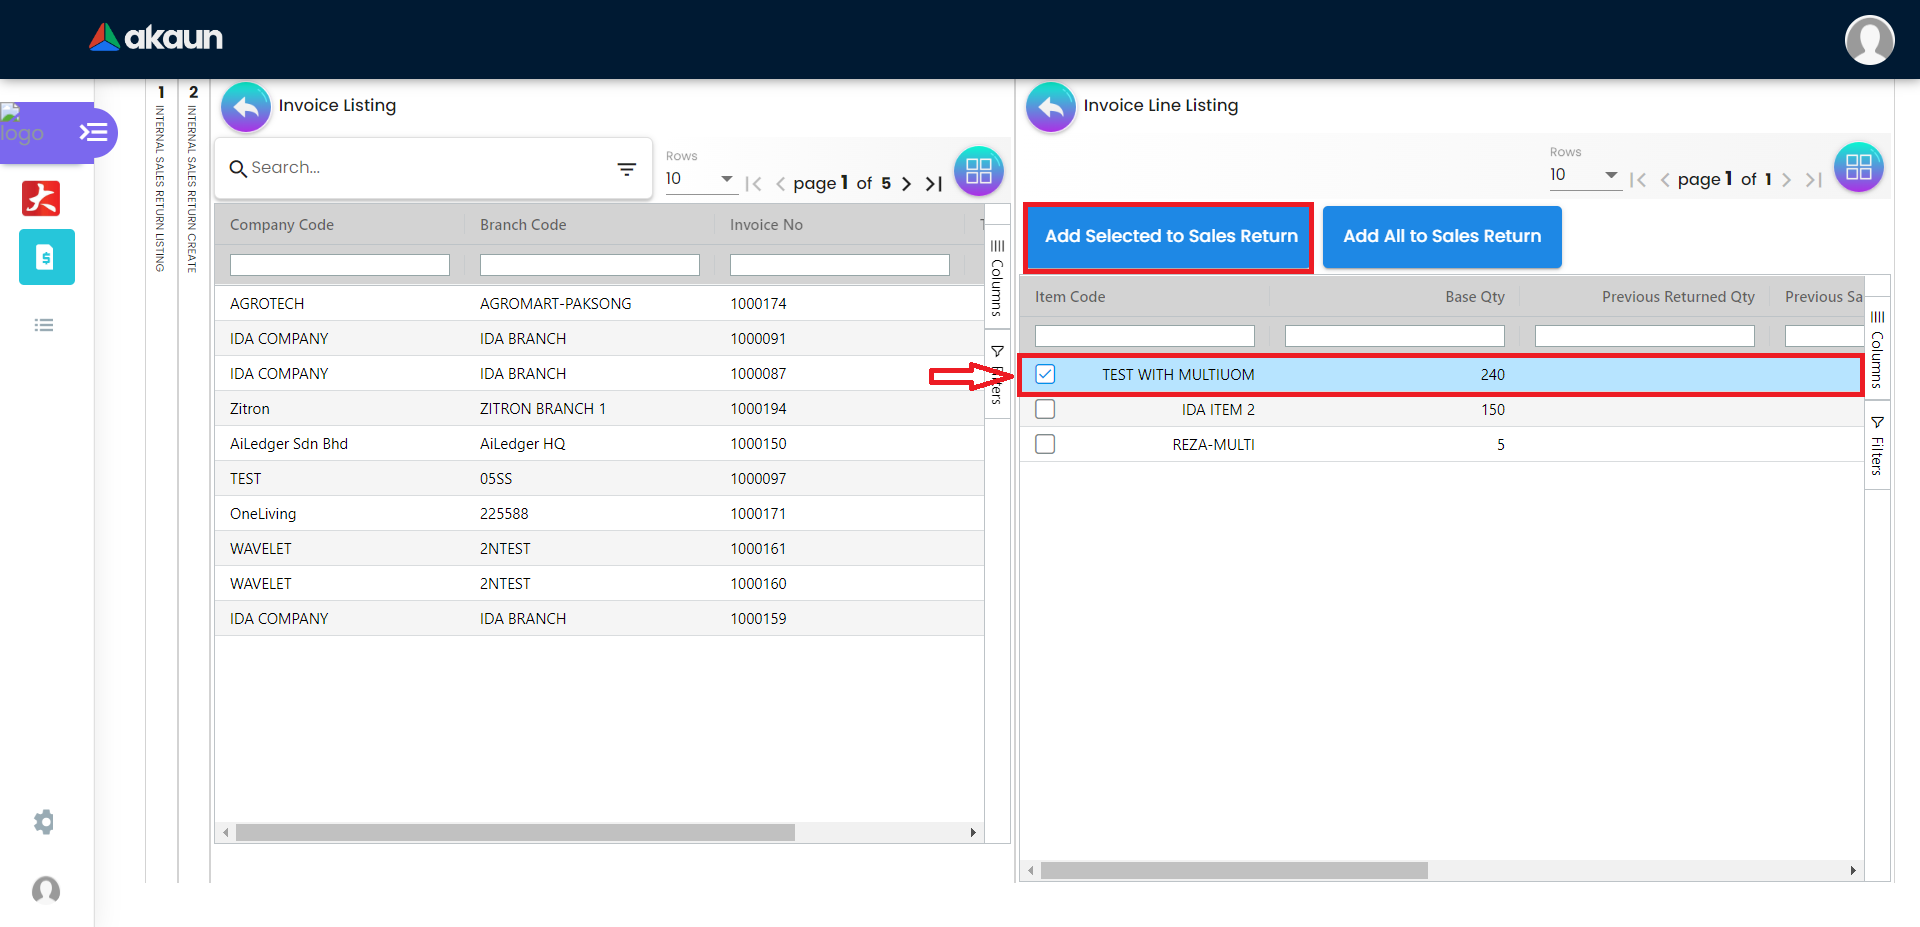

-
Click the "Add All to Sales Returns" button to add all invoice line items shown in the list to the Lines tab


2.1.2 Search By Invoice Tab
By clicking on one of the invoices, it will display a list of invoice lines owned by that invoice.
In the Invoice Line Listing, you can:
-
Click on the “tick” box to select one or more invoice line items. Then you can click “Add Selected to Sales Return” button to add the selected invoice line item to the Lines tab

-
Click the "Add All to Sales Returns" button to add all invoice line items shown in the list to the Lines tab
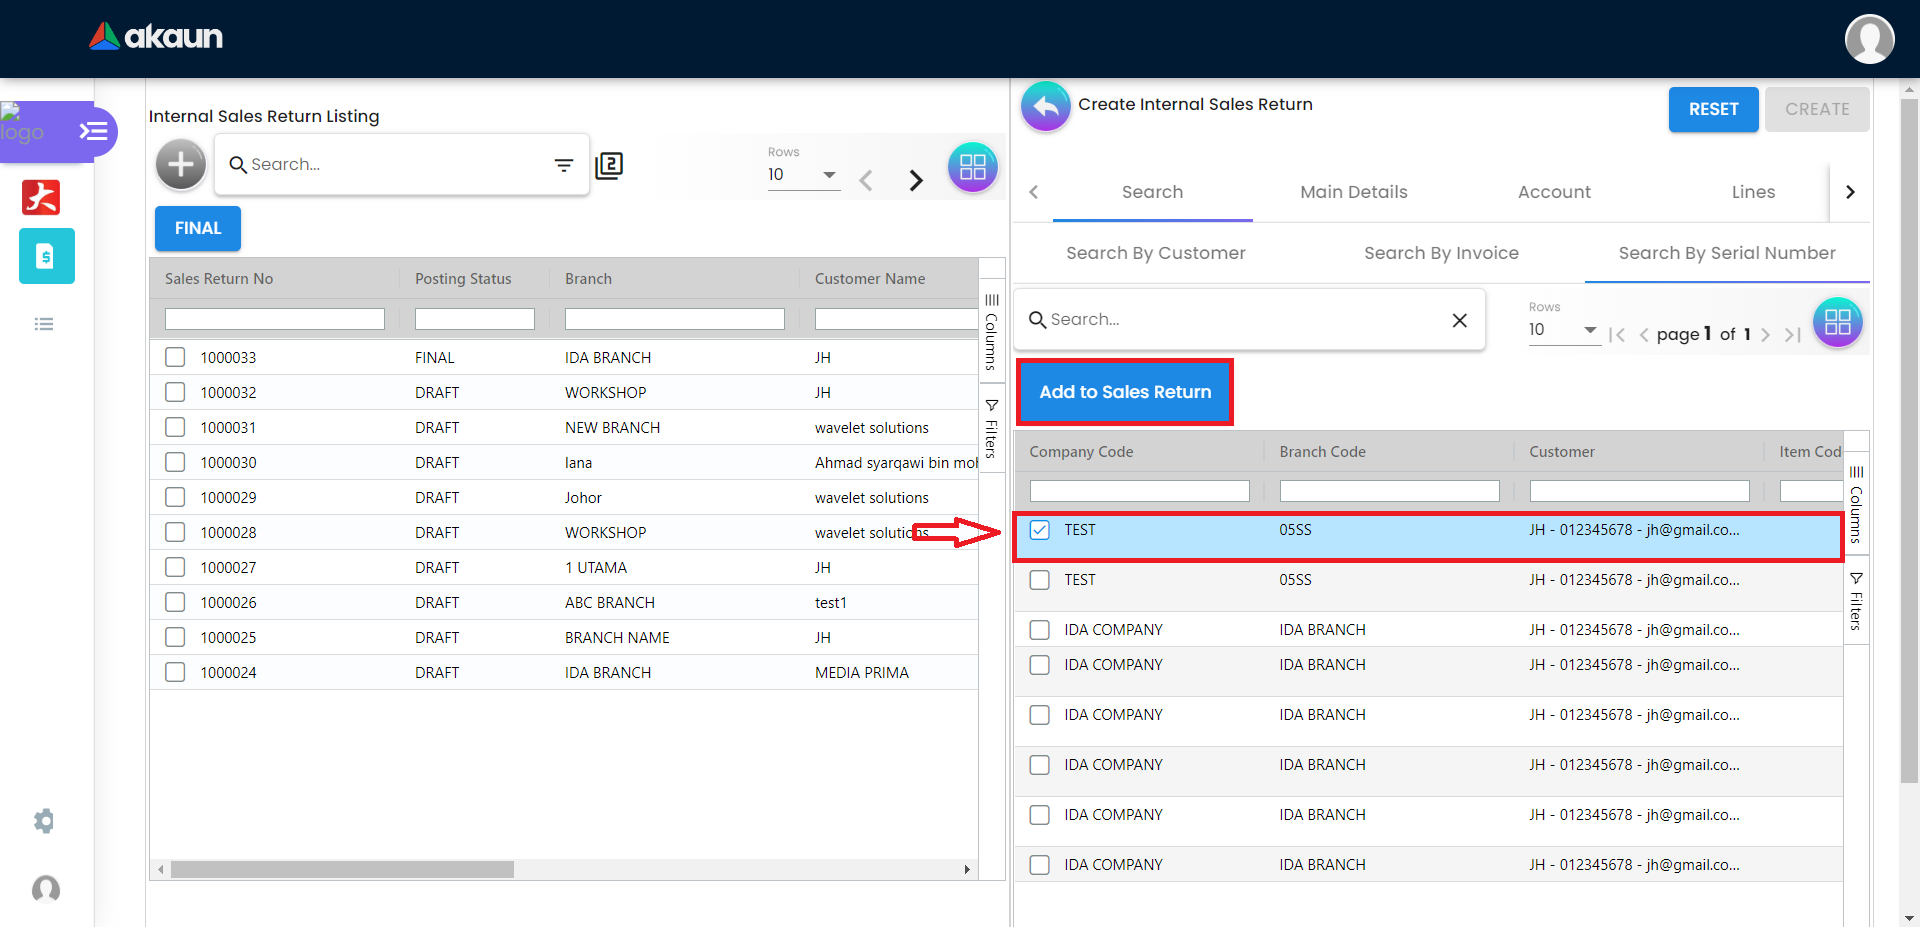
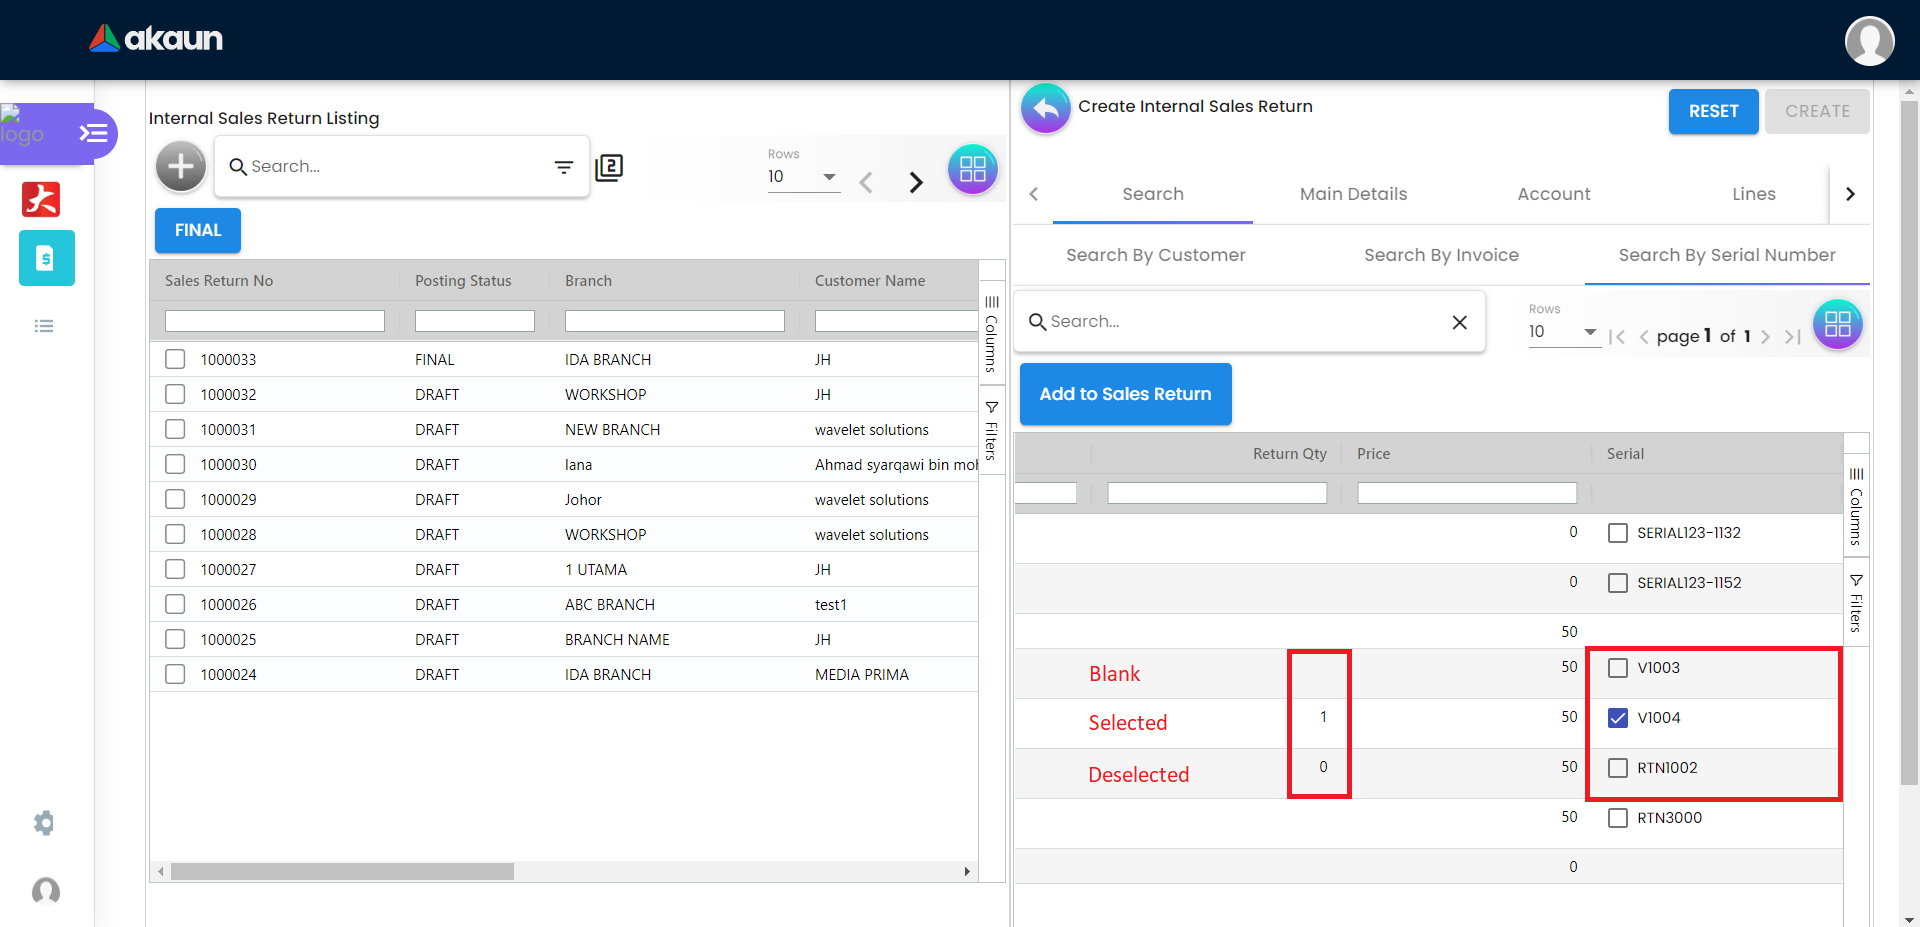
2.1.3 Search By Serial Number Tab
You can click on the “tick” box to select one or more invoice line items. Then you can click the “Add to Sales Return” button to add the selected invoice line item to the Lines tab.
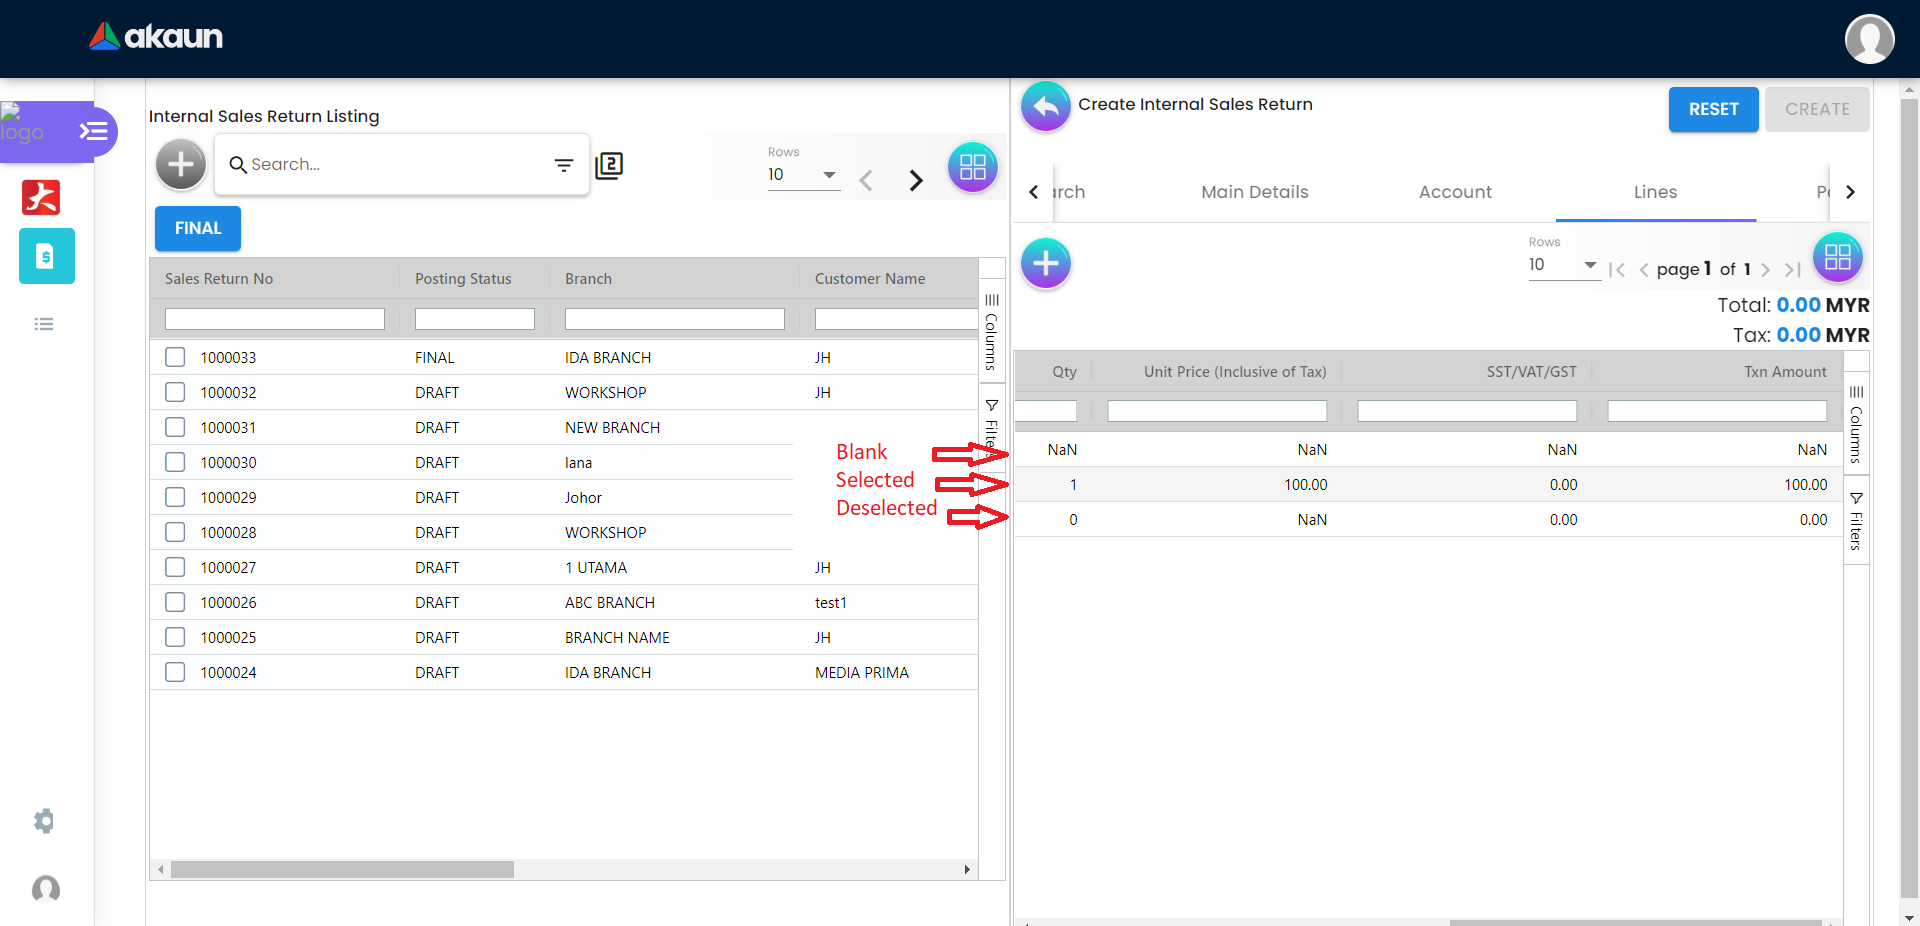
If serial number in Search By Serial Number Tab is:
-
Blank : the quantity in Lines tab will be null
-
Selected : the quantity in Lines tab will be 1
-
Deselected : the quantity in Lines tab will be 0
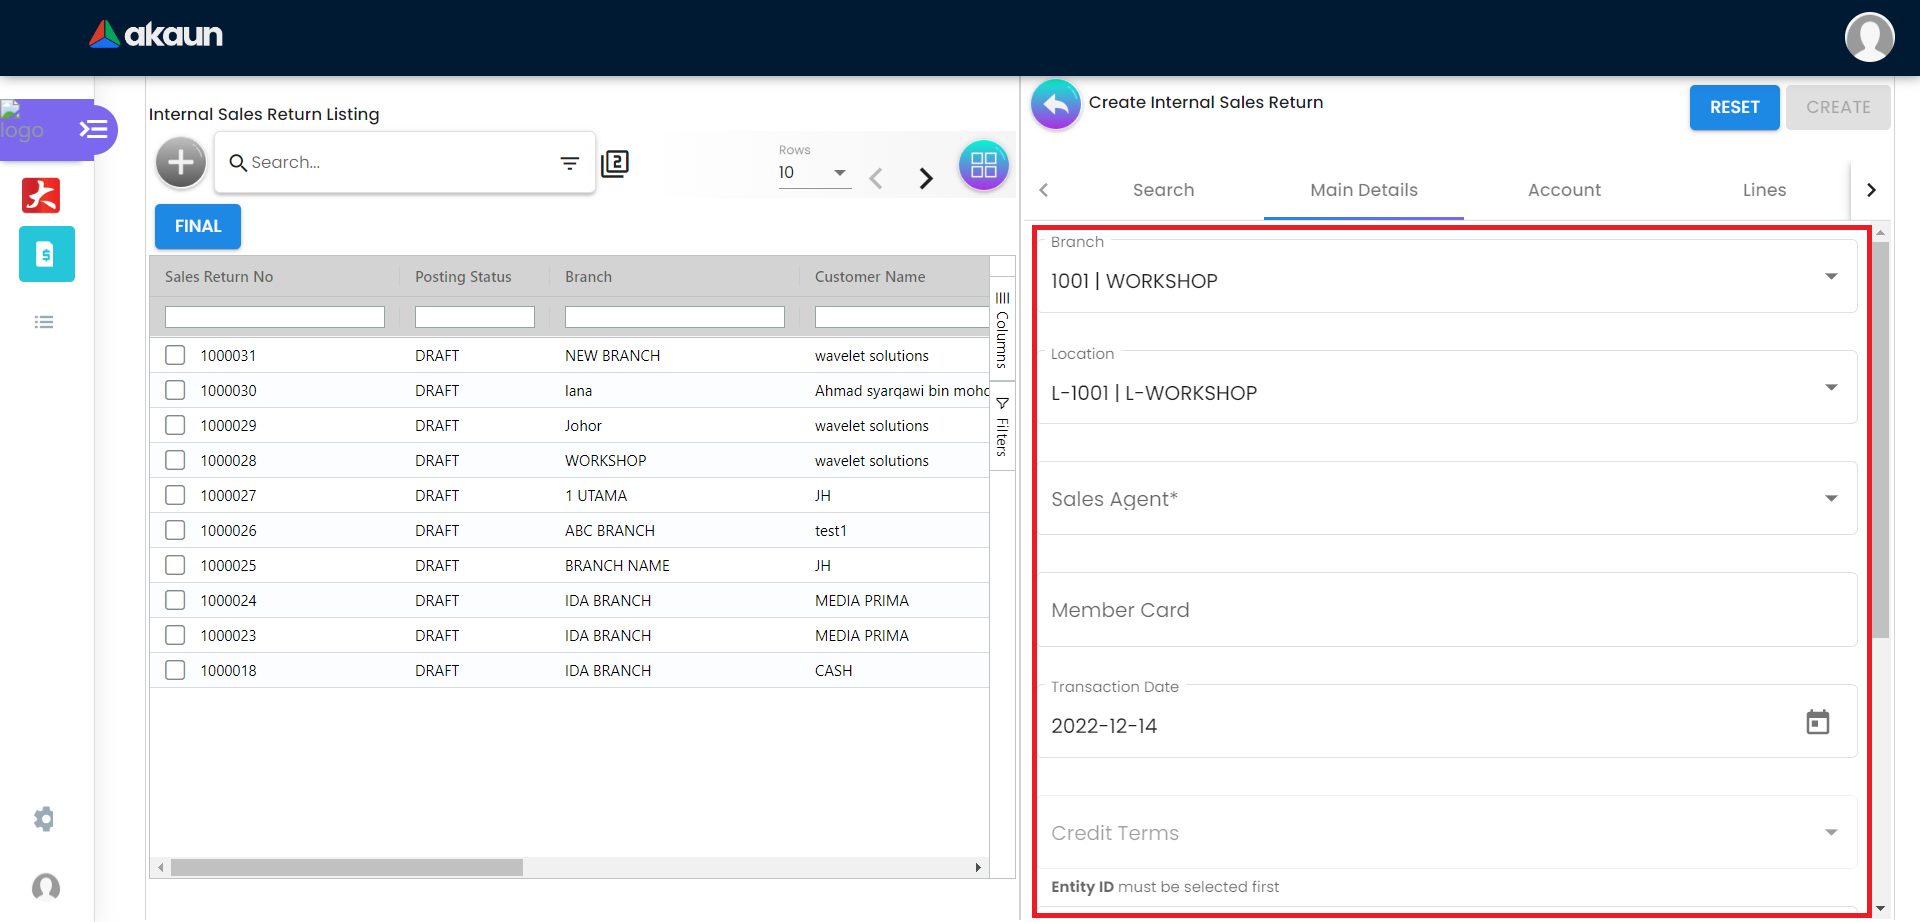
2.2 In the Main Details Tab
Please fill up the compulsory (*) information for creating the sales return.
There are 14 components which allow the user to make changes respectively:
-
Branch - Will populate default branch according to the branch selected in the setting
-
Location - Will populate default location if branch according to the branch selected in the setting
-
Sales Agent
-
Member Card
-
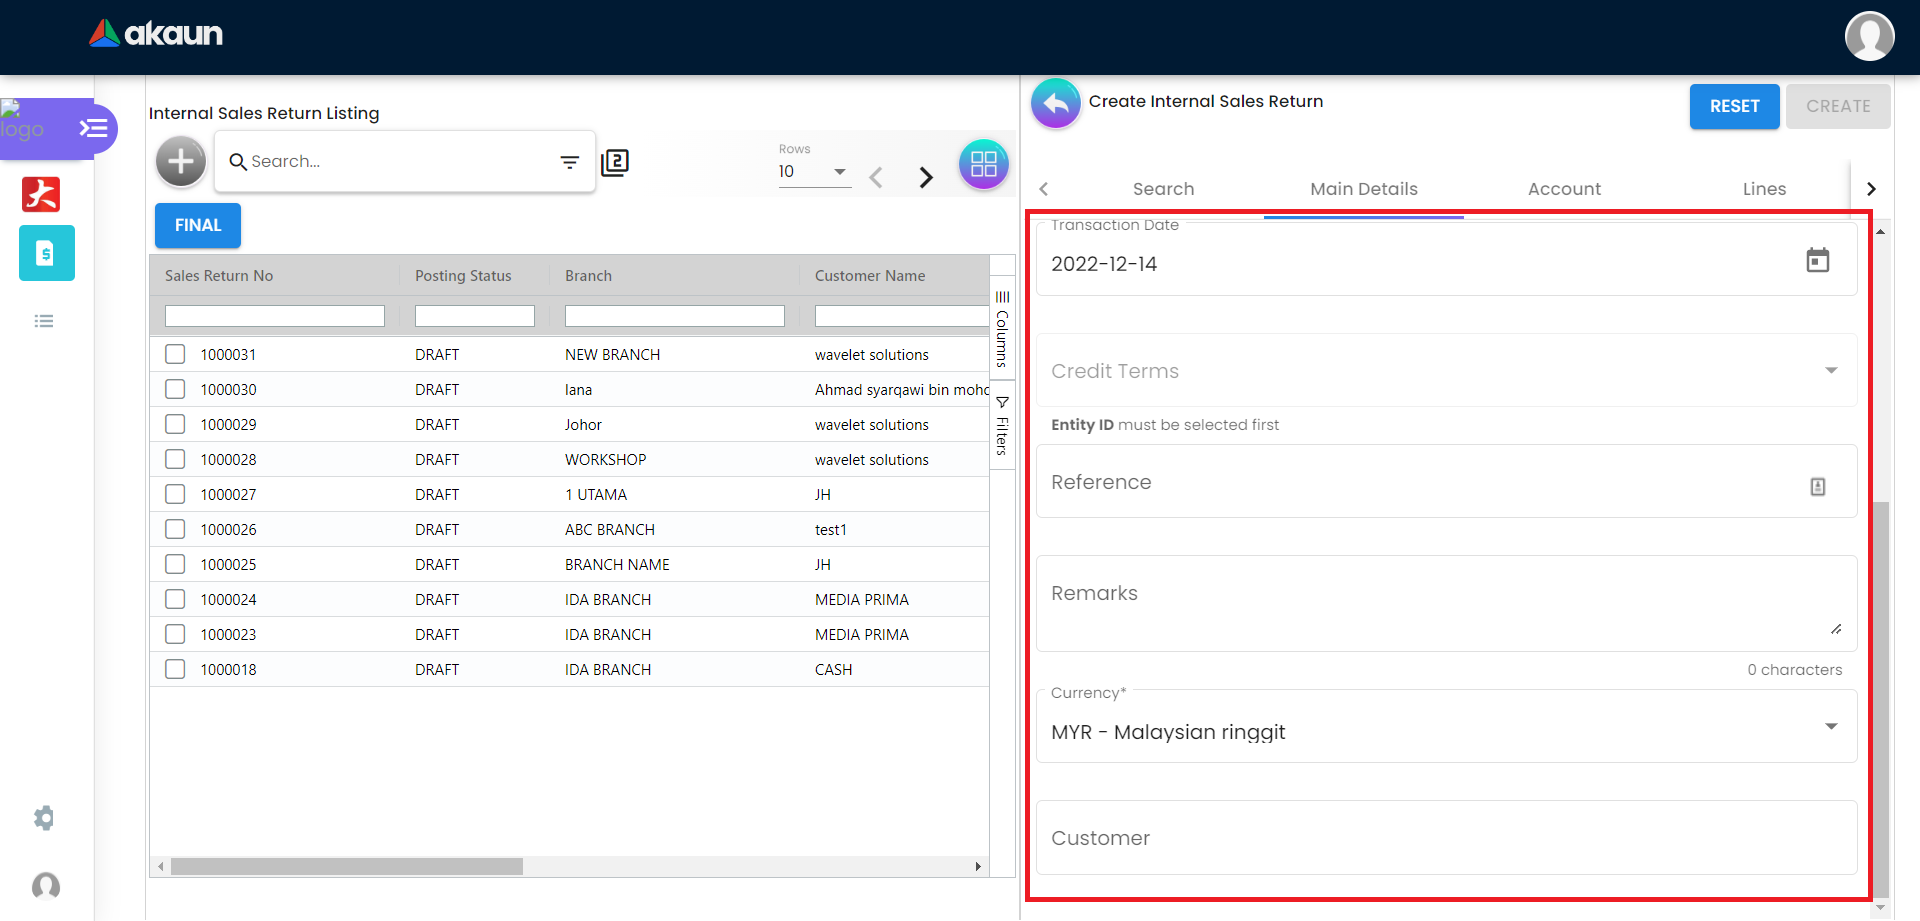
Transaction Date - Default to the current date
-
Credit Terms - Entity ID must be selected first
-
Due Date
-
Reference
-
Remarks
-
Currency
-
Customer
2.3 In the Account Tab
2.3.1 Entity Details Tab
Compulsory Information:
-
Entity ID: Customer Code, auto-filled when a customer entity is selected.
-
Entity Name: Customer Name, auto-filled when a customer entity is selected.
-
Status: Active or Inactive. Auto-filled when a customer entity is selected.
-
Entity Type: Corporate or Individual. Auto-filled when a customer entity is selected.
-
Identity Type: IC or Passport, auto-filled when customer entity is selected. ** ID Number: IC or Passport number, f. auto-filled when a customer entity is selected.
-
Currency: To determine based on the pricing condition what you are maintaining. Auto-filled when a customer entity is selected.
-
GL Code: A number used to record business transactions in the general ledger. Auto-filled when a customer entity is selected.
-
Description: Additional notes. Auto-filled when a customer entity is selected.
-
Email: A central email through which customers want to communicate. Auto-filled when a customer entity is selected.
-
Phone Number: A central phone number through which customers want to communicate. Auto-filled when a customer entity is selected.
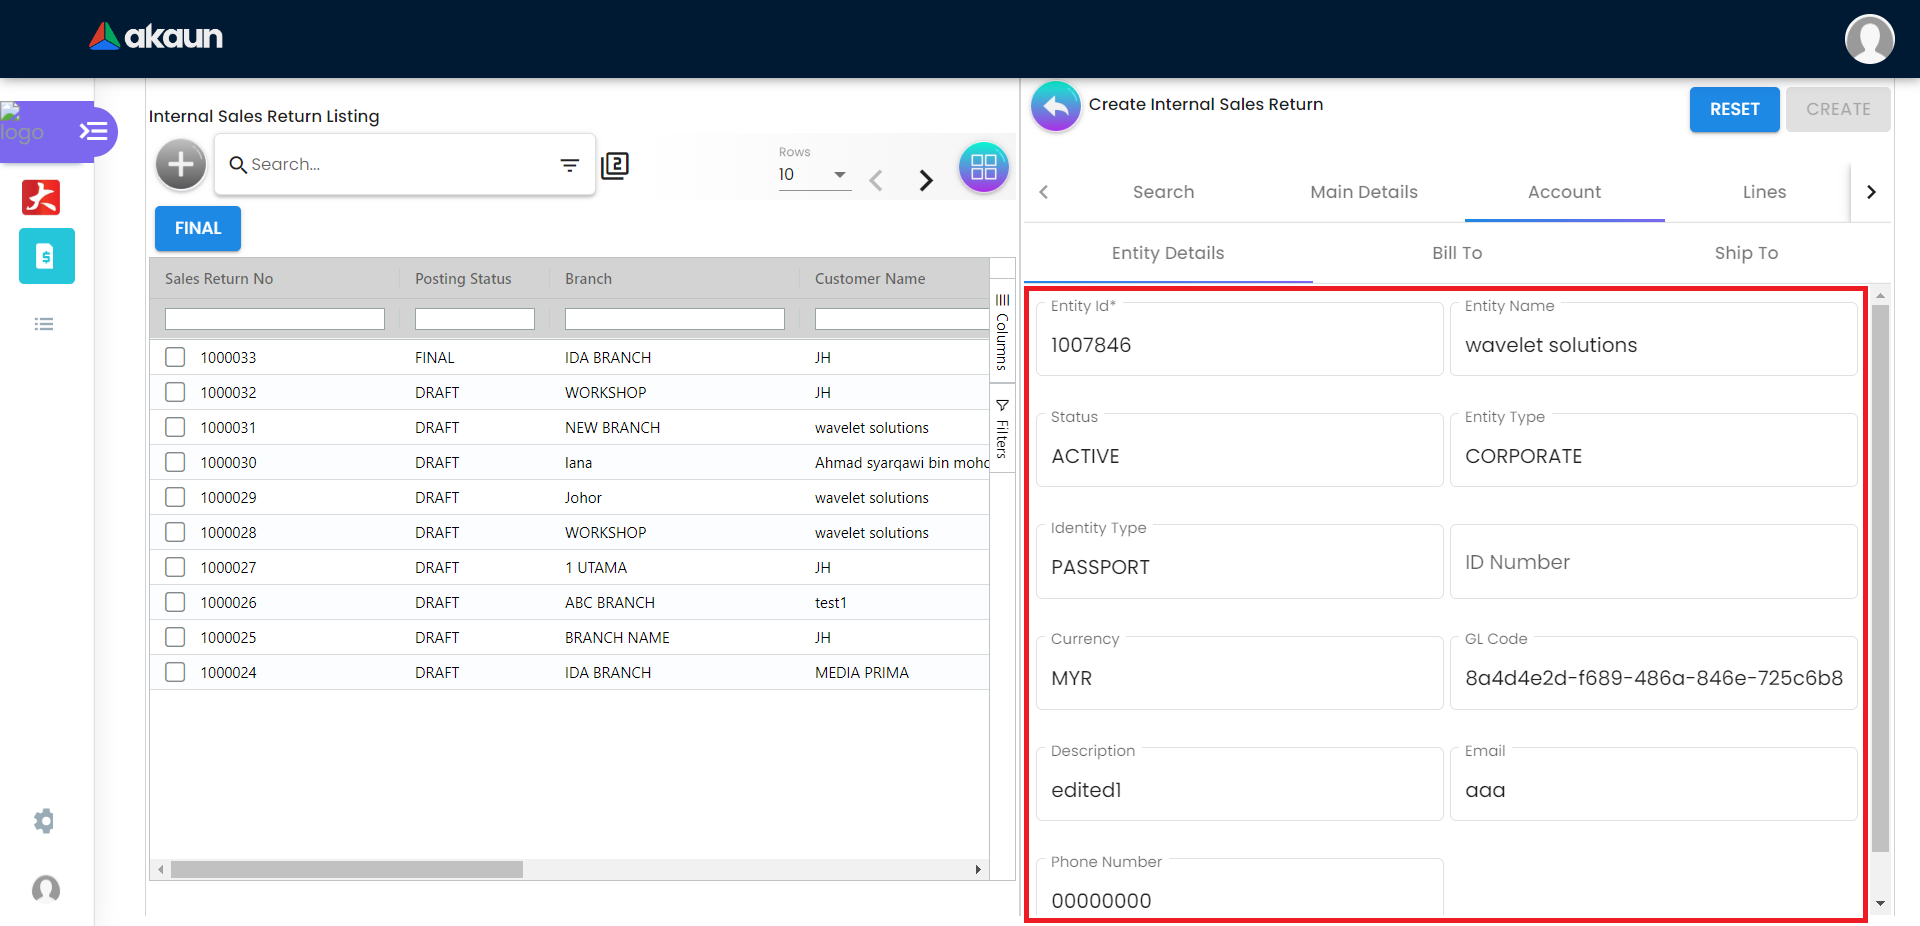
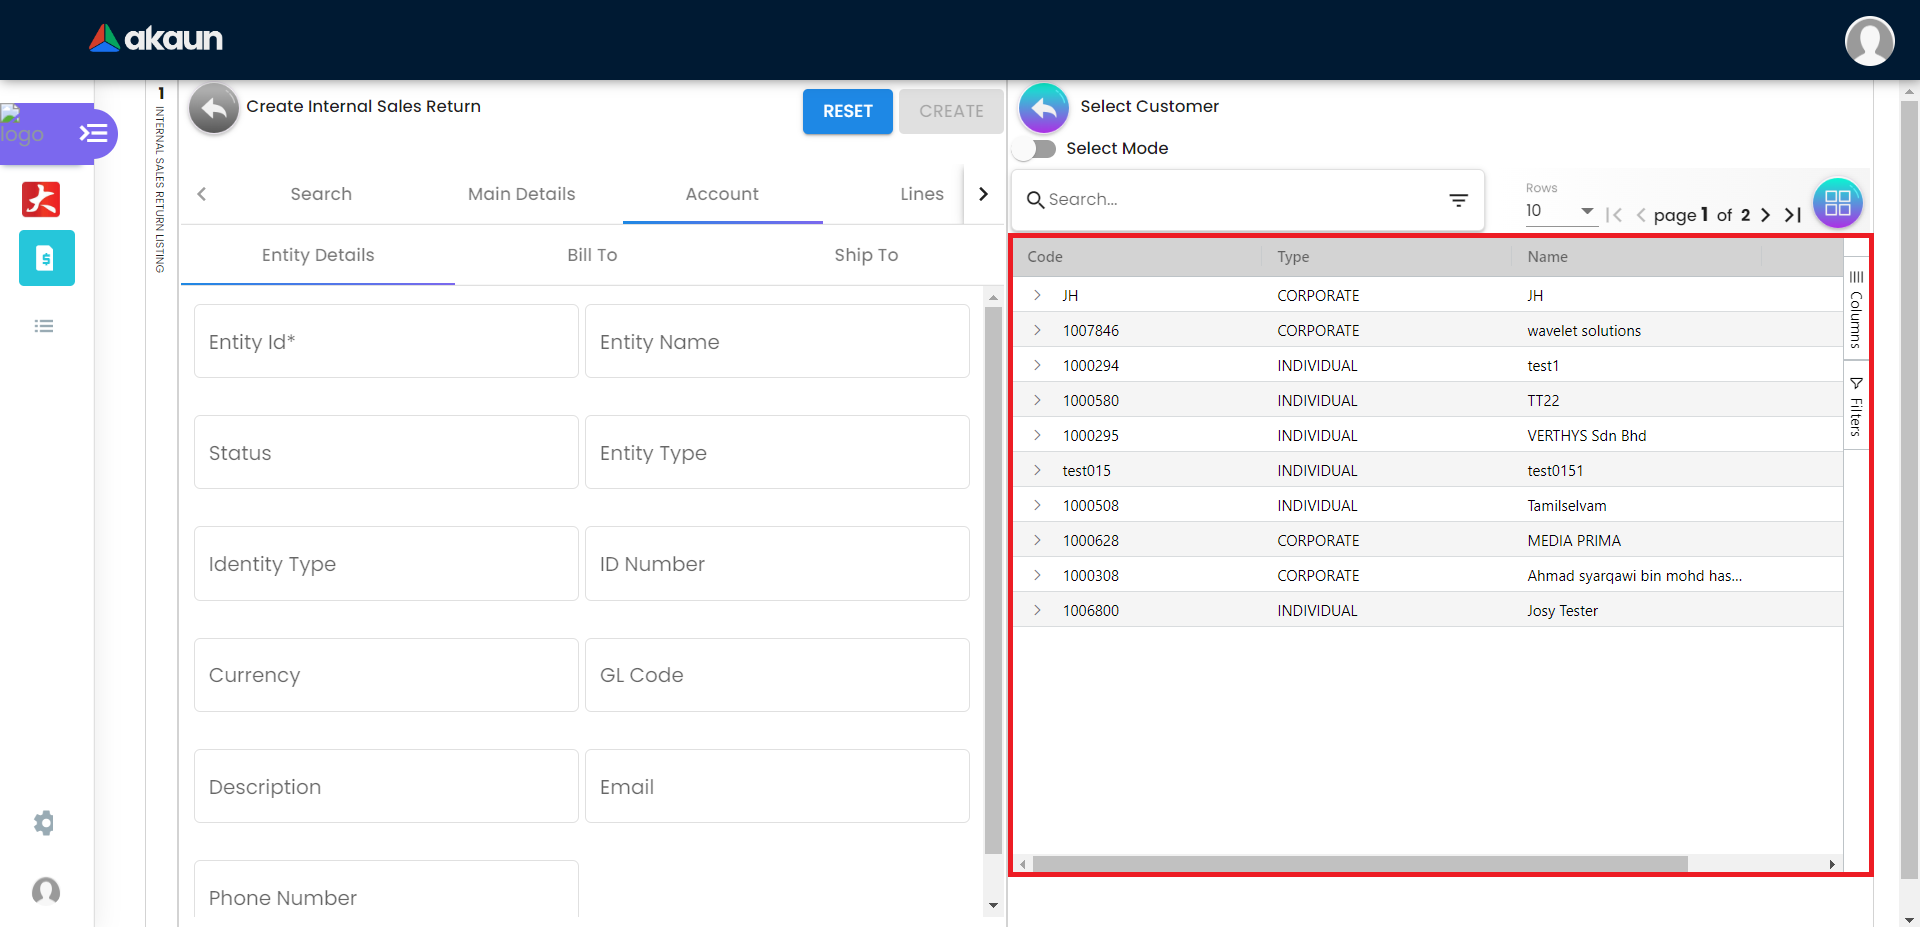
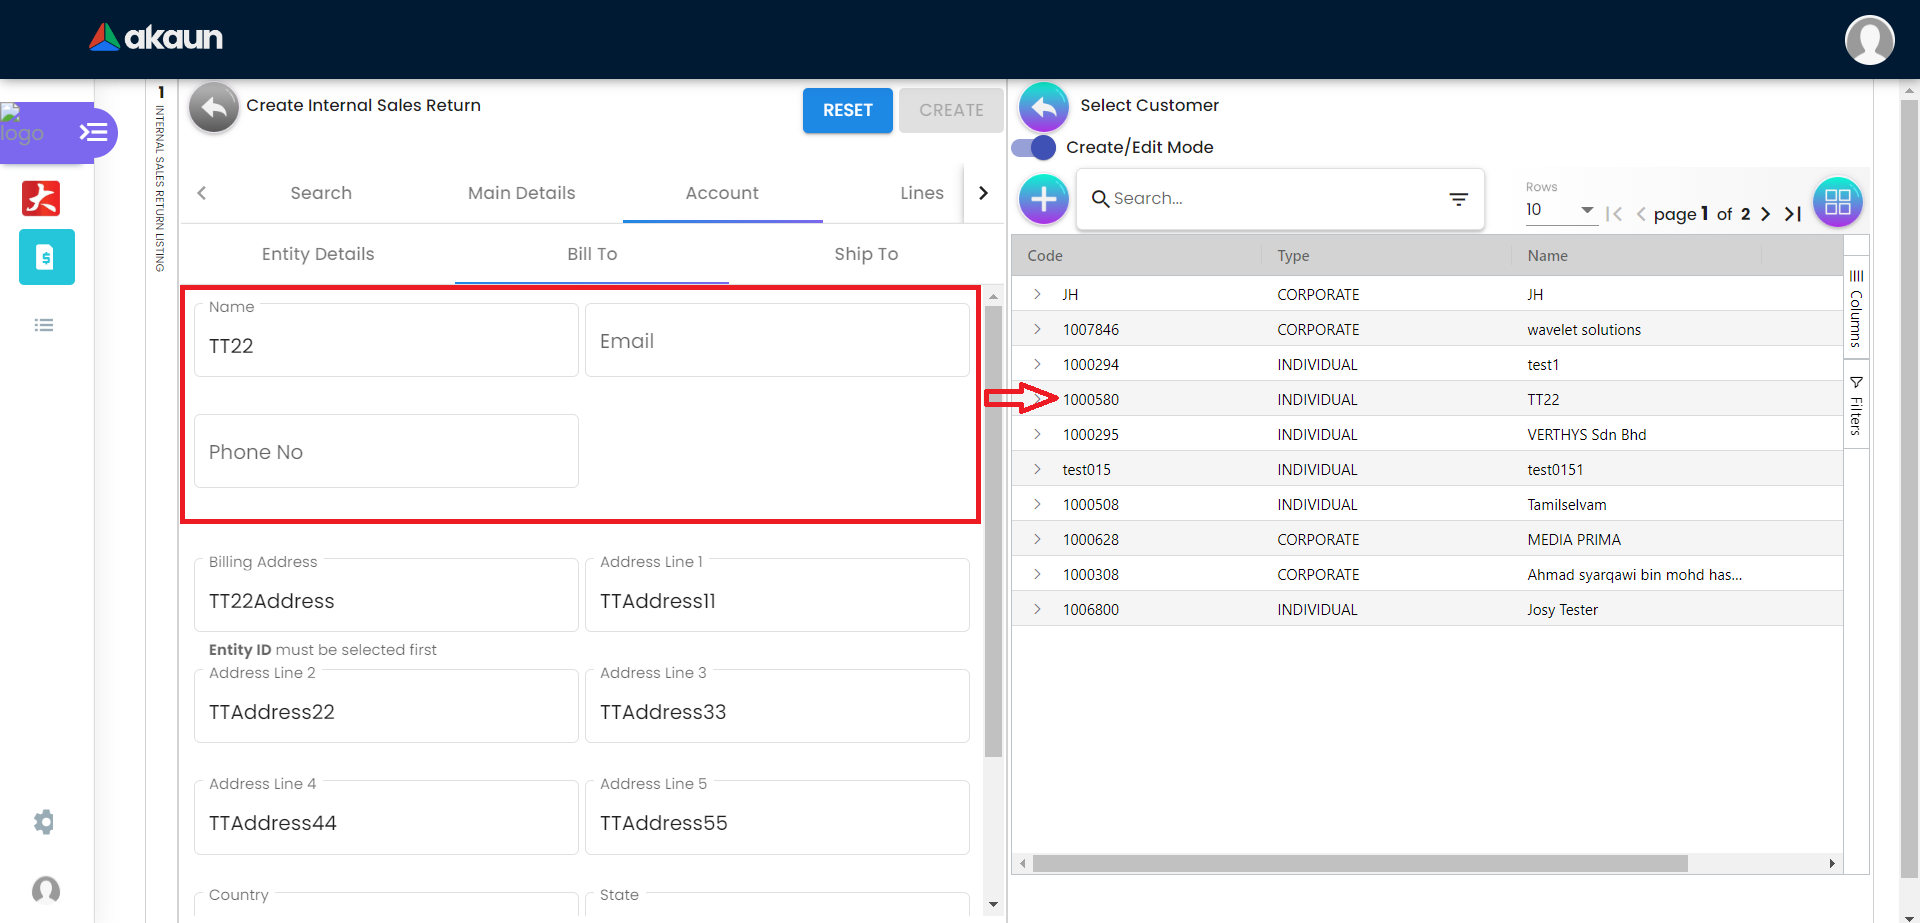
After the Entity Id has been clicked, a list of customers will be displayed on the right side. You can select the customers from the list.
2.3.2 Bill To Tab
Name, Email and Phone No will be Autofill after have select the Entity ID.
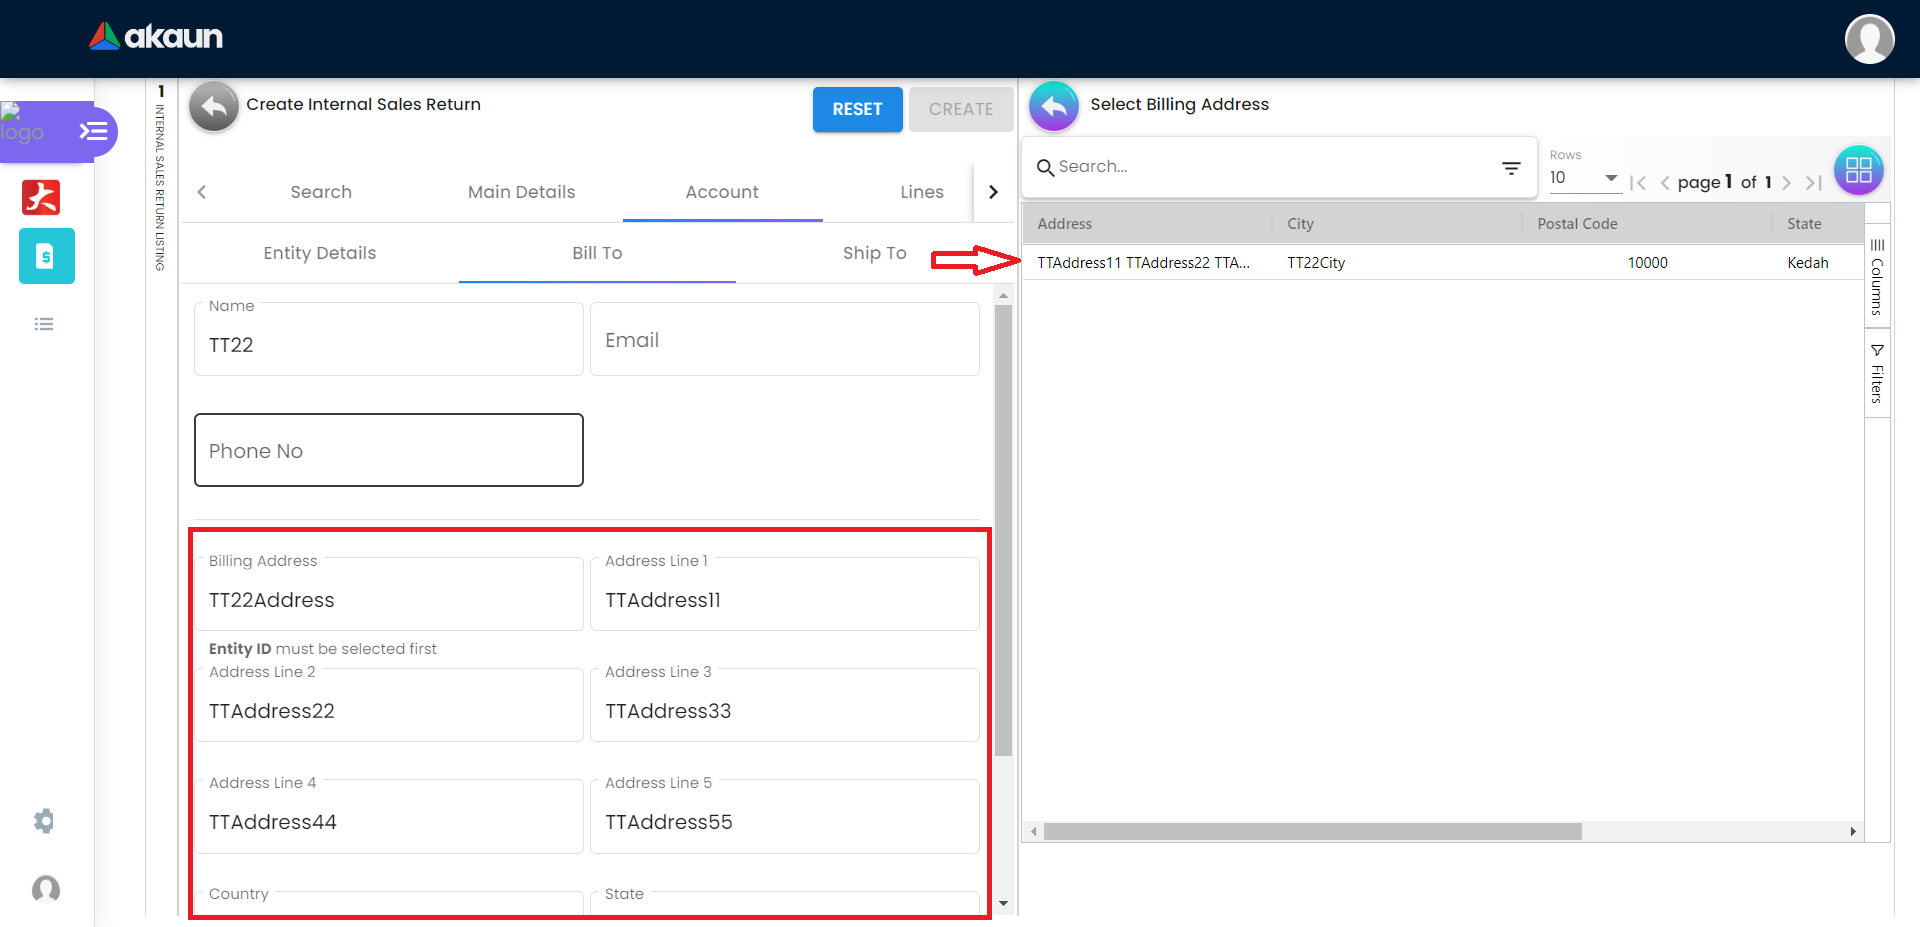
If only 1 Billing Address exists in that Entity ID, the Billing Address will auto-populate after selecting the Entity ID.
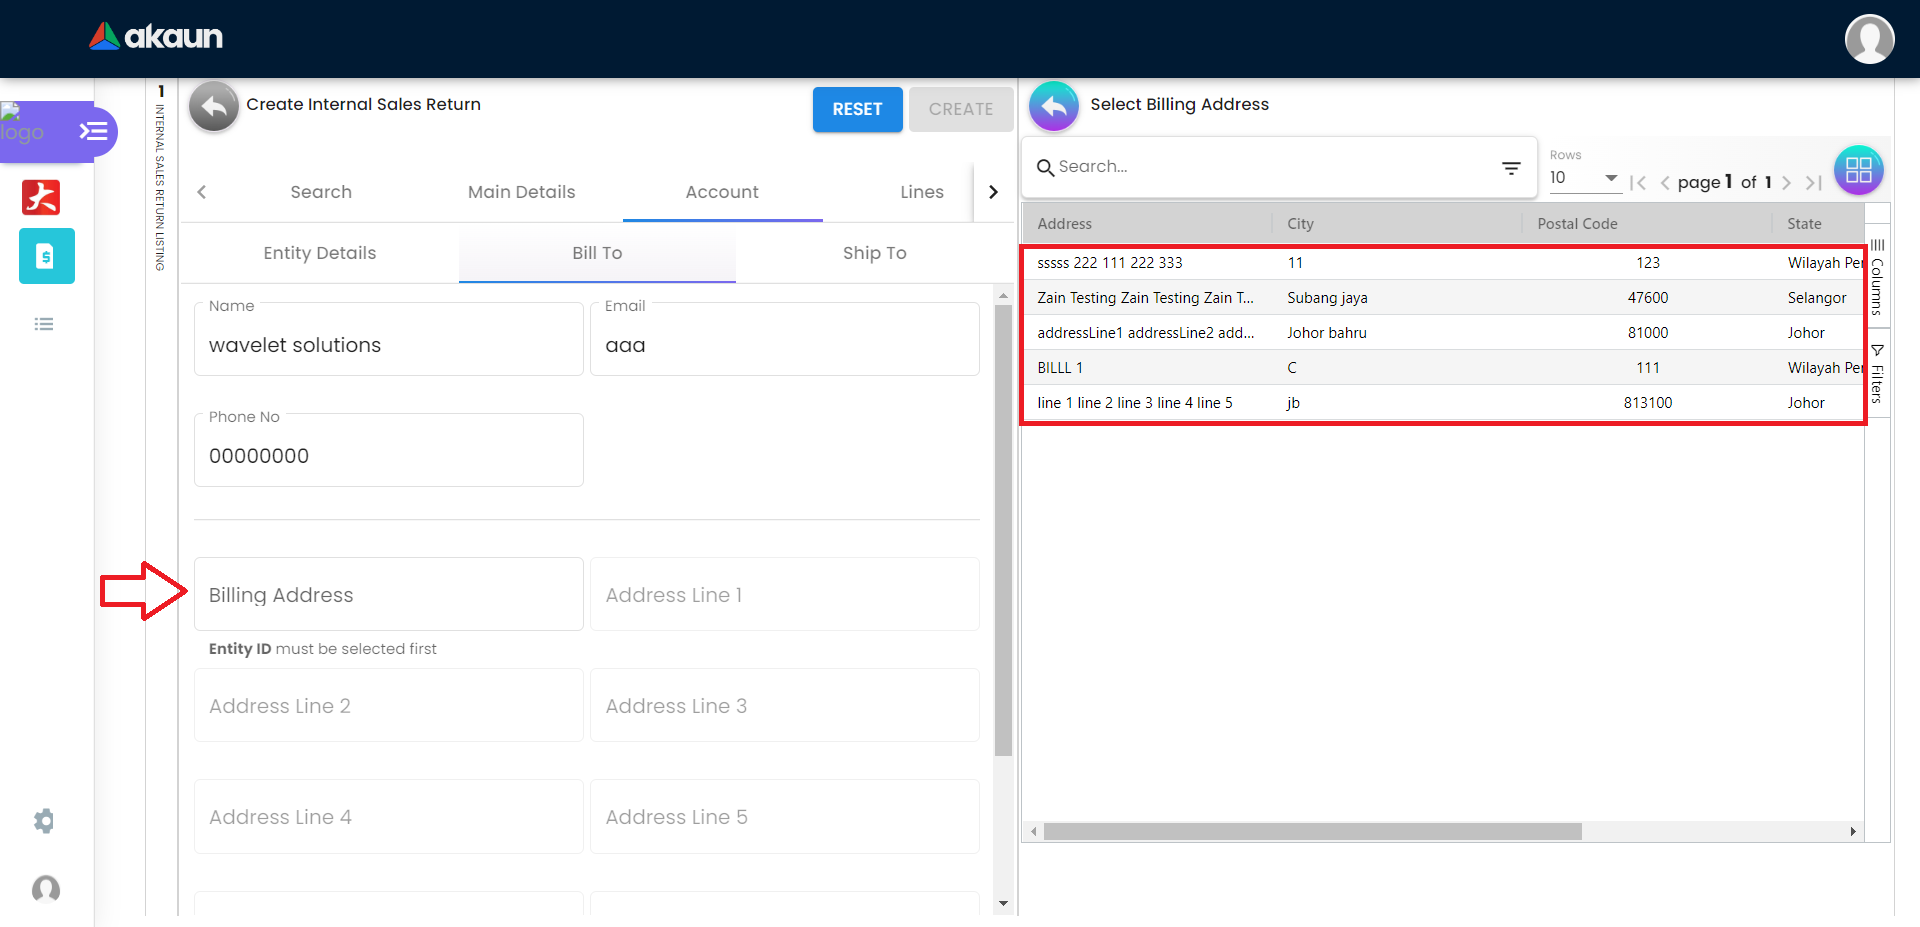
List of Billing Addresses will be displayed on the right side for selection after clicking on the Billing Address.
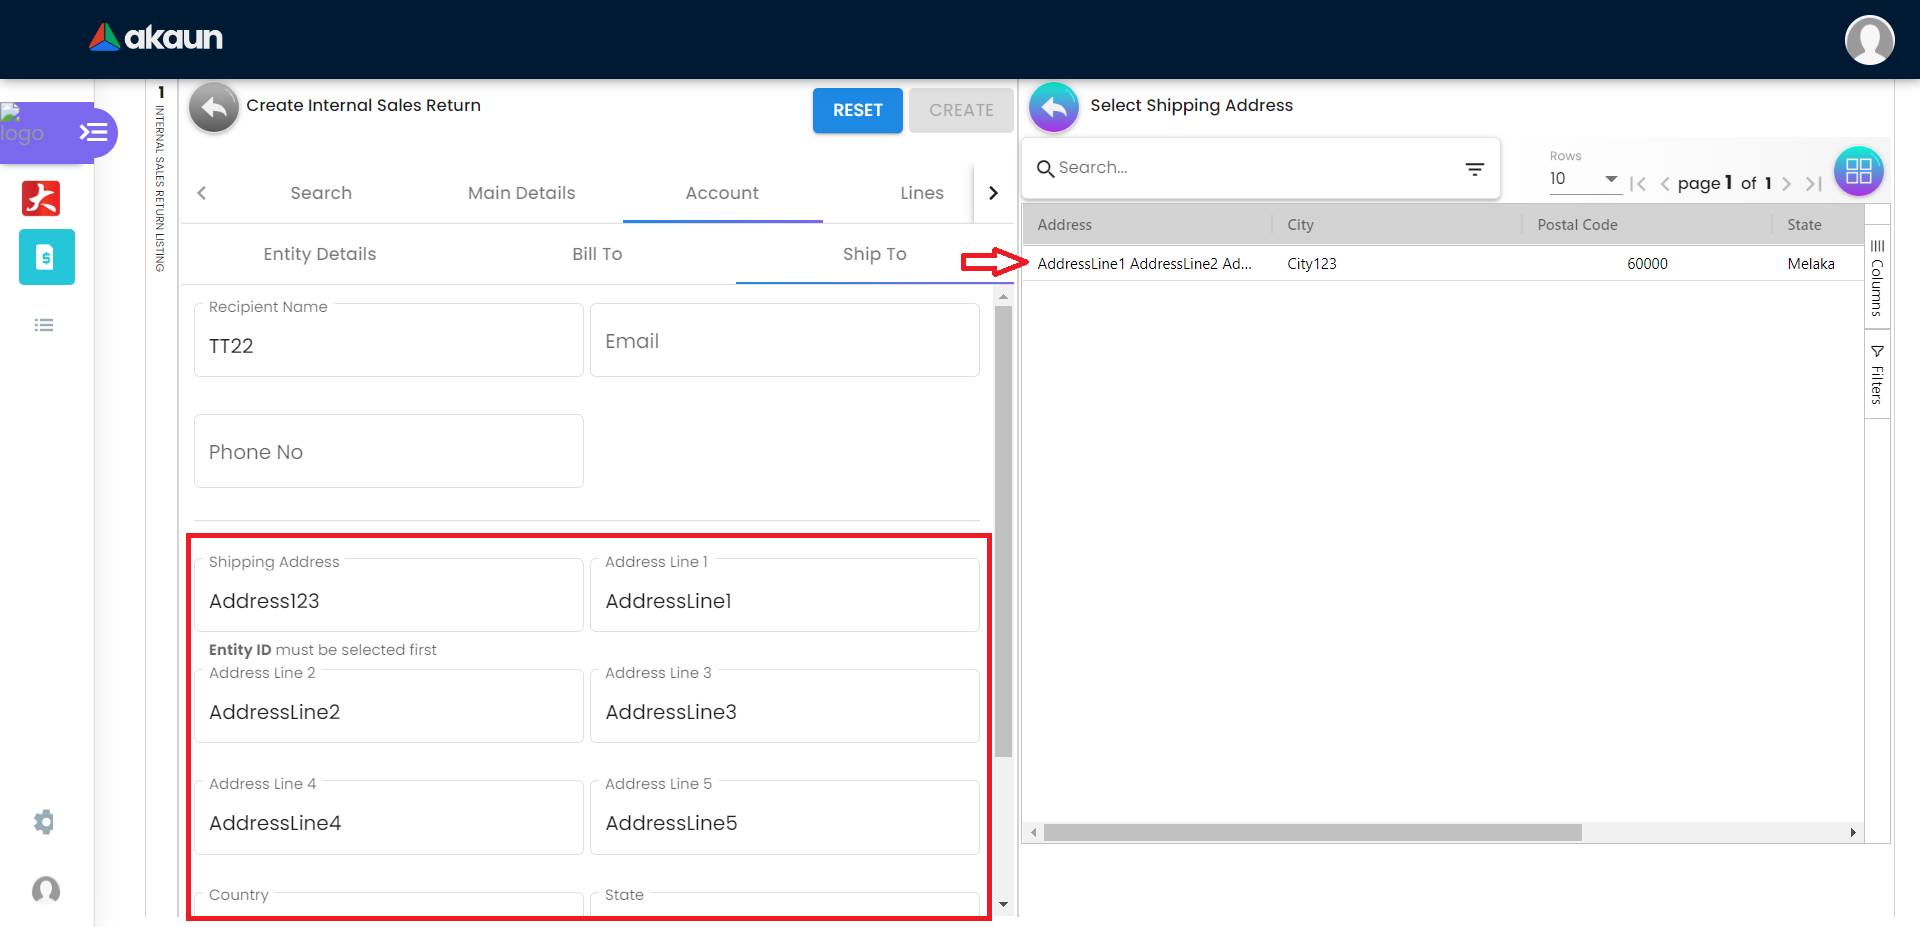
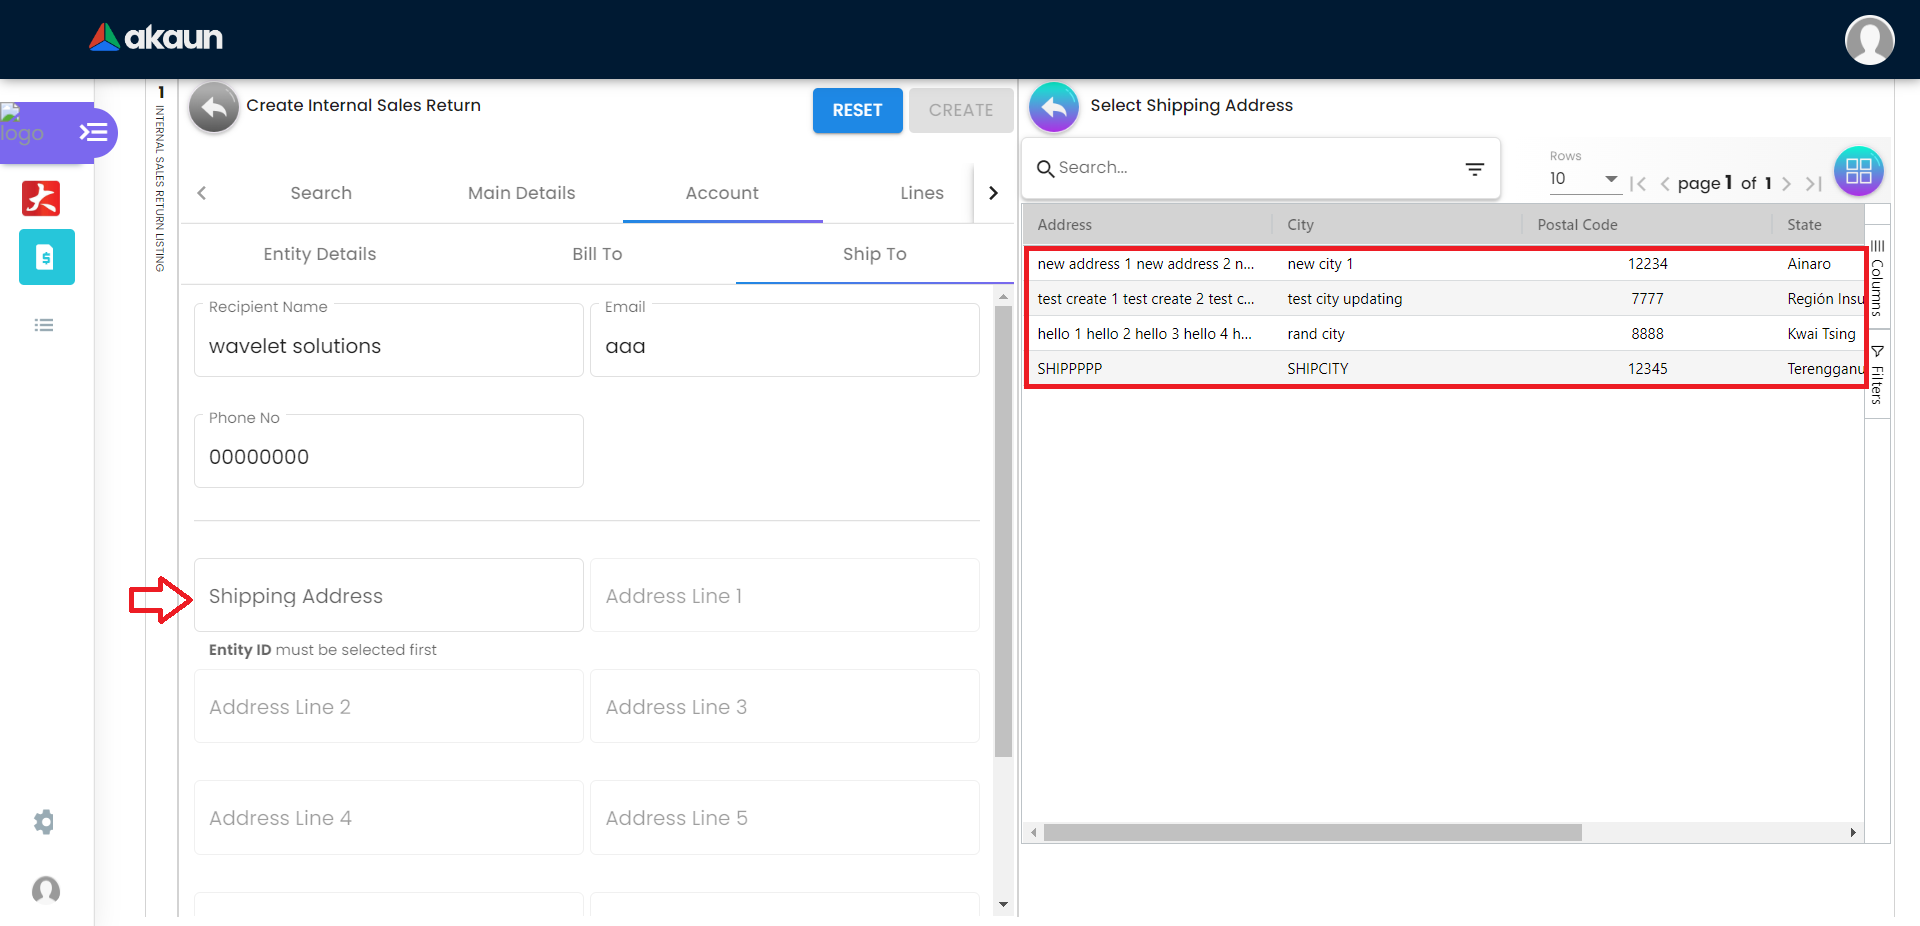
2.3.3 Ship To Tab
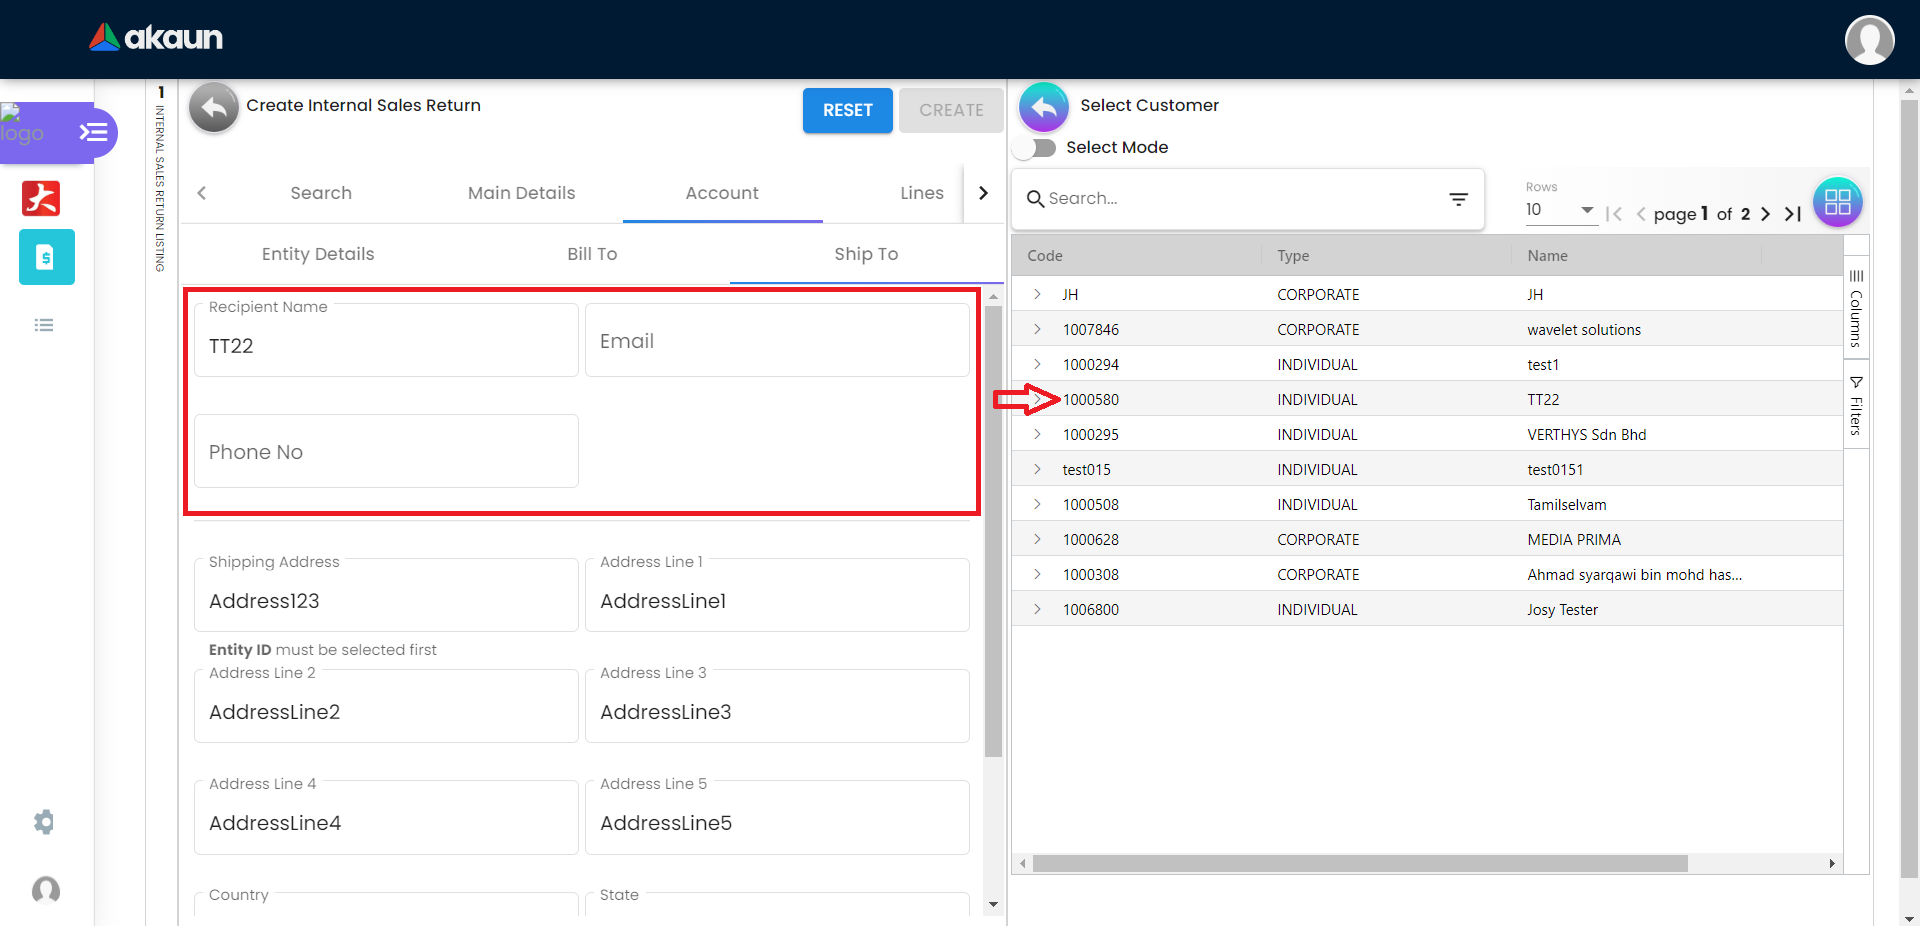
Name, Email and Phone No will be Autofill after have select the Entity ID.
If only 1 Shipping Address exists in that Entity ID, the Shipping Address will auto-populate after selecting the Entity ID.
List of Shipping Addresses will be displayed on the right side for selection after clicking on the Shipping Address.
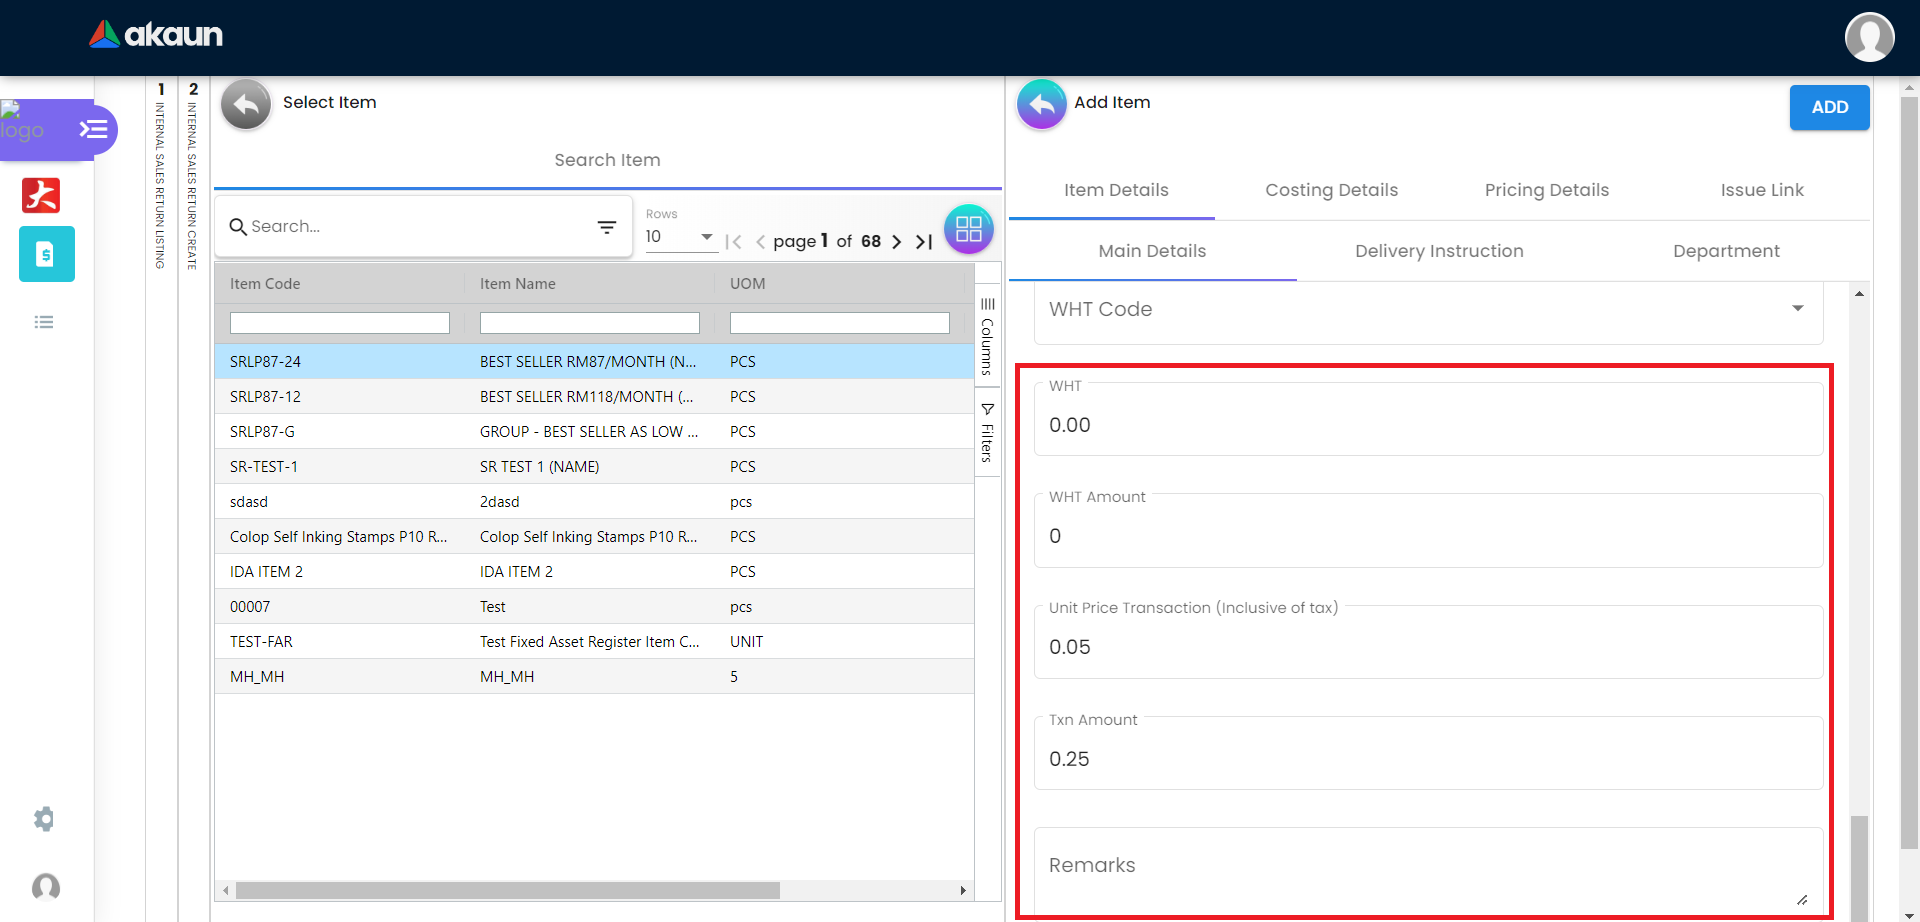
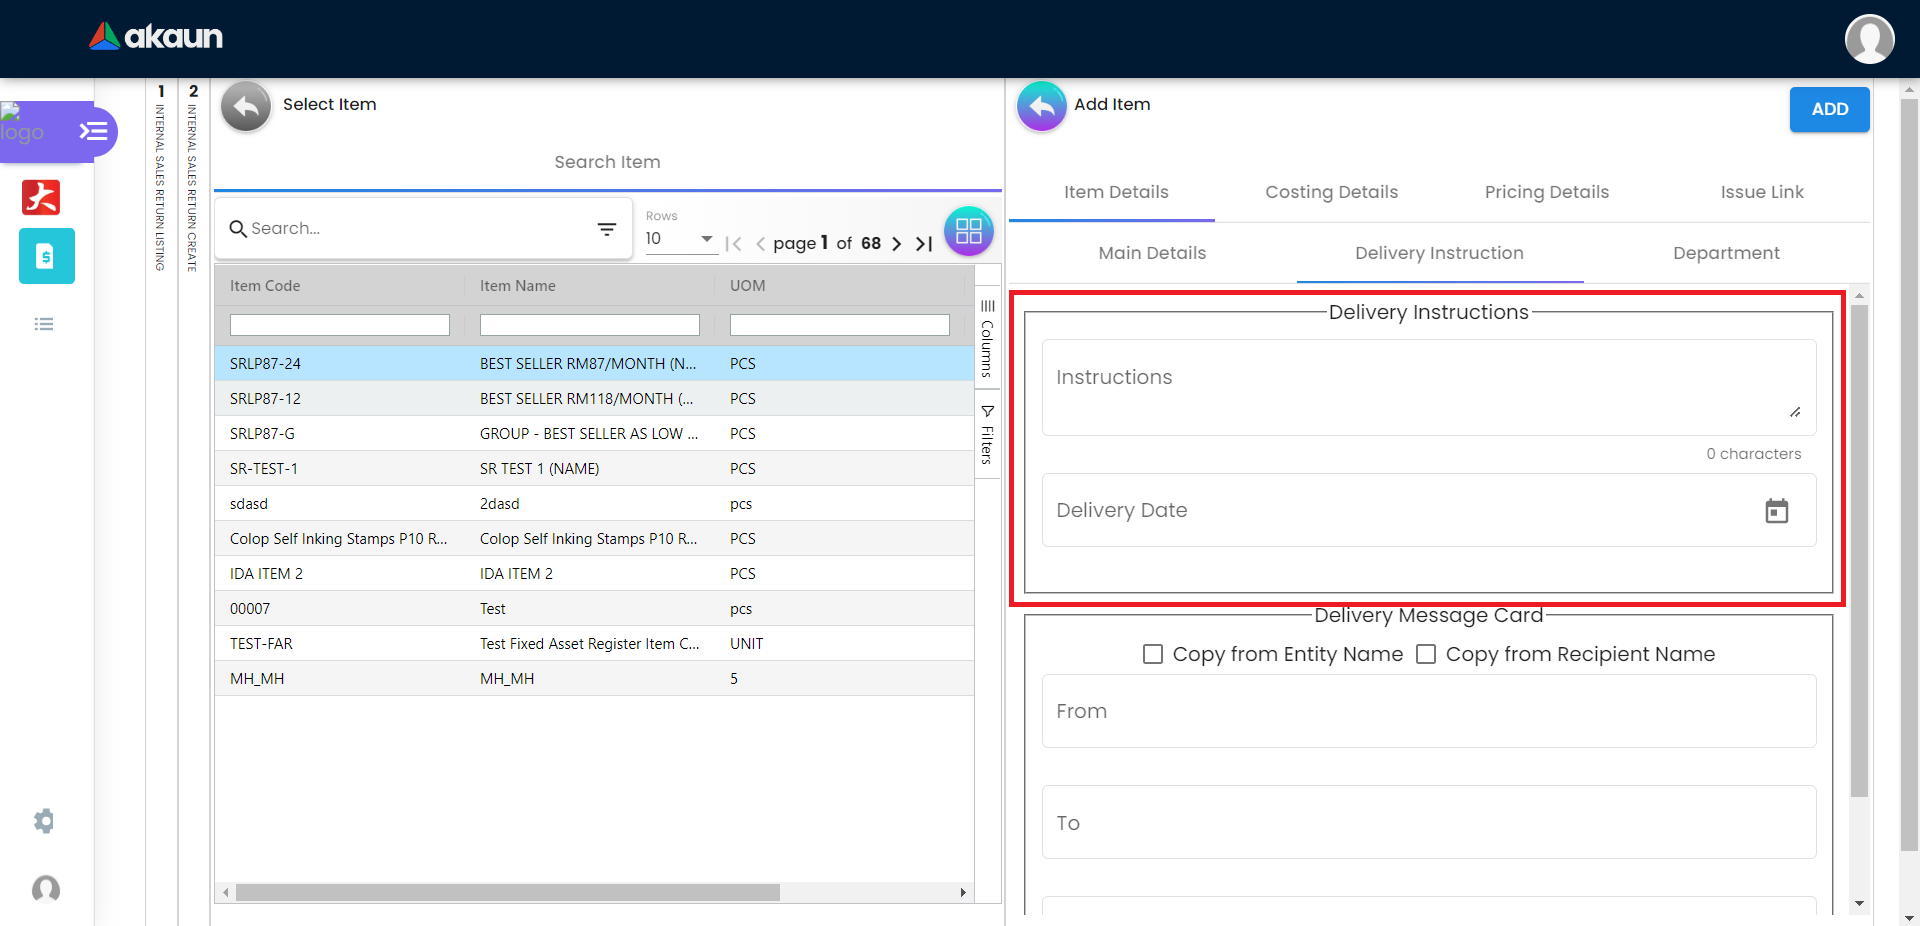
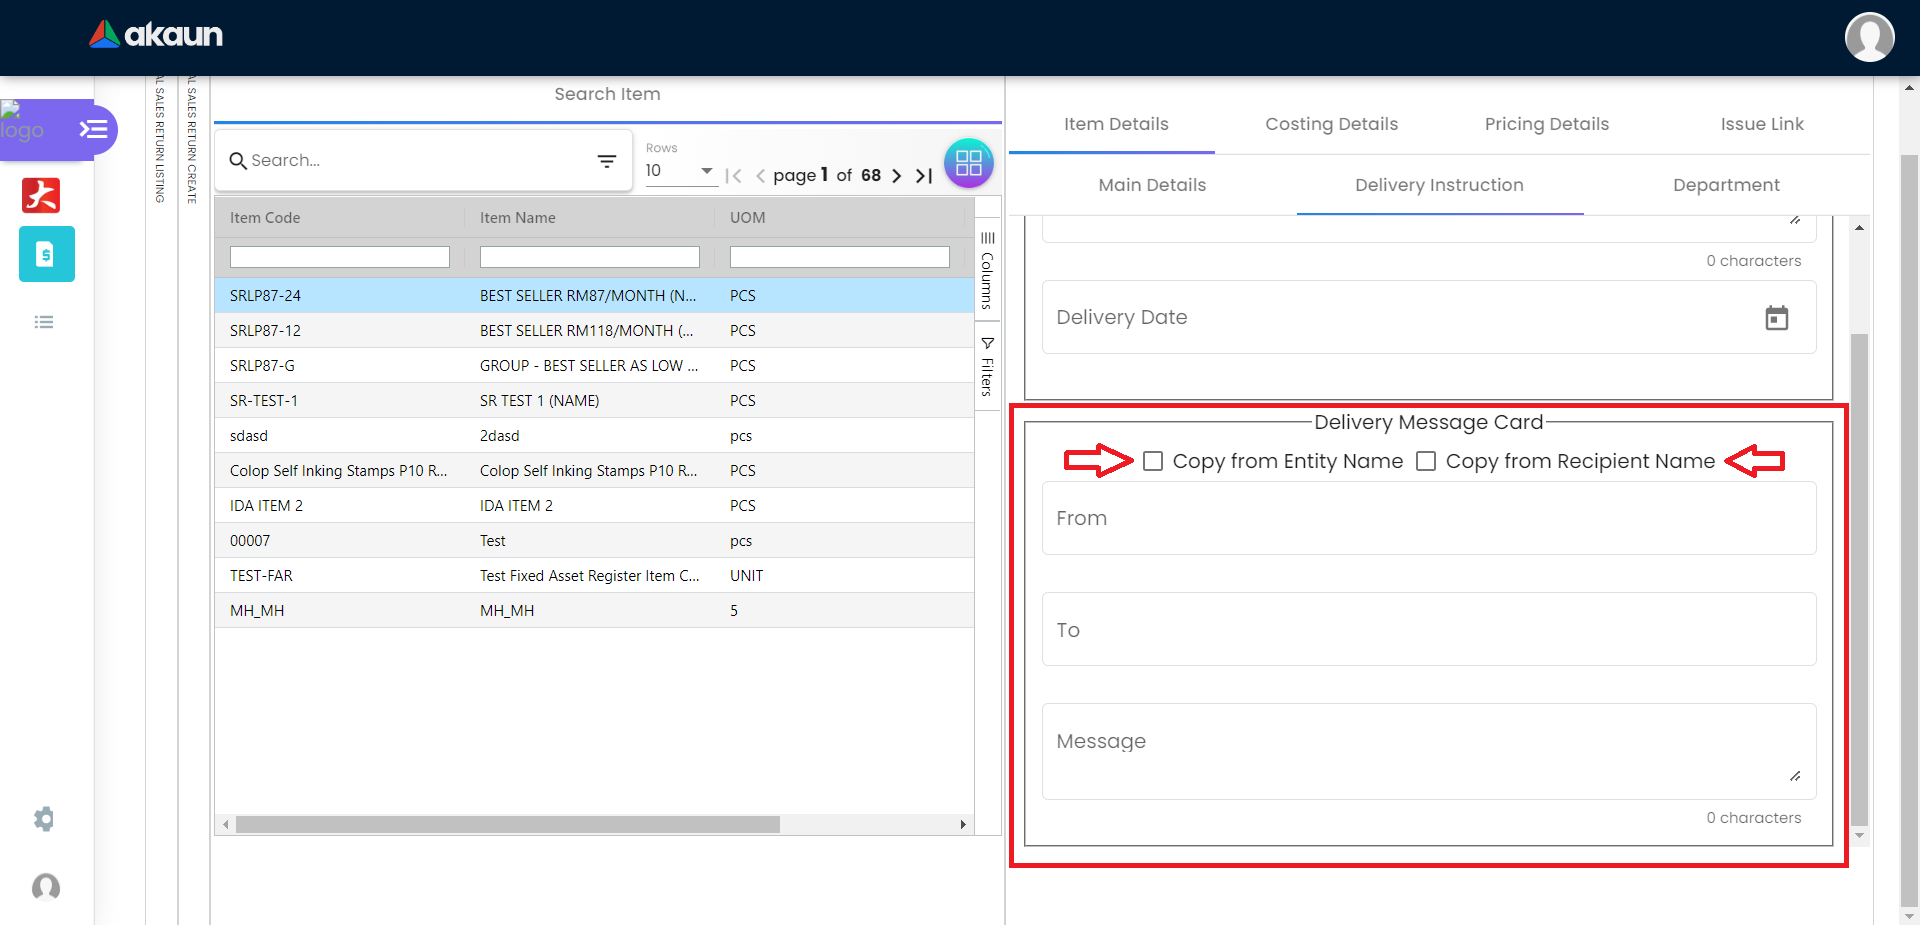
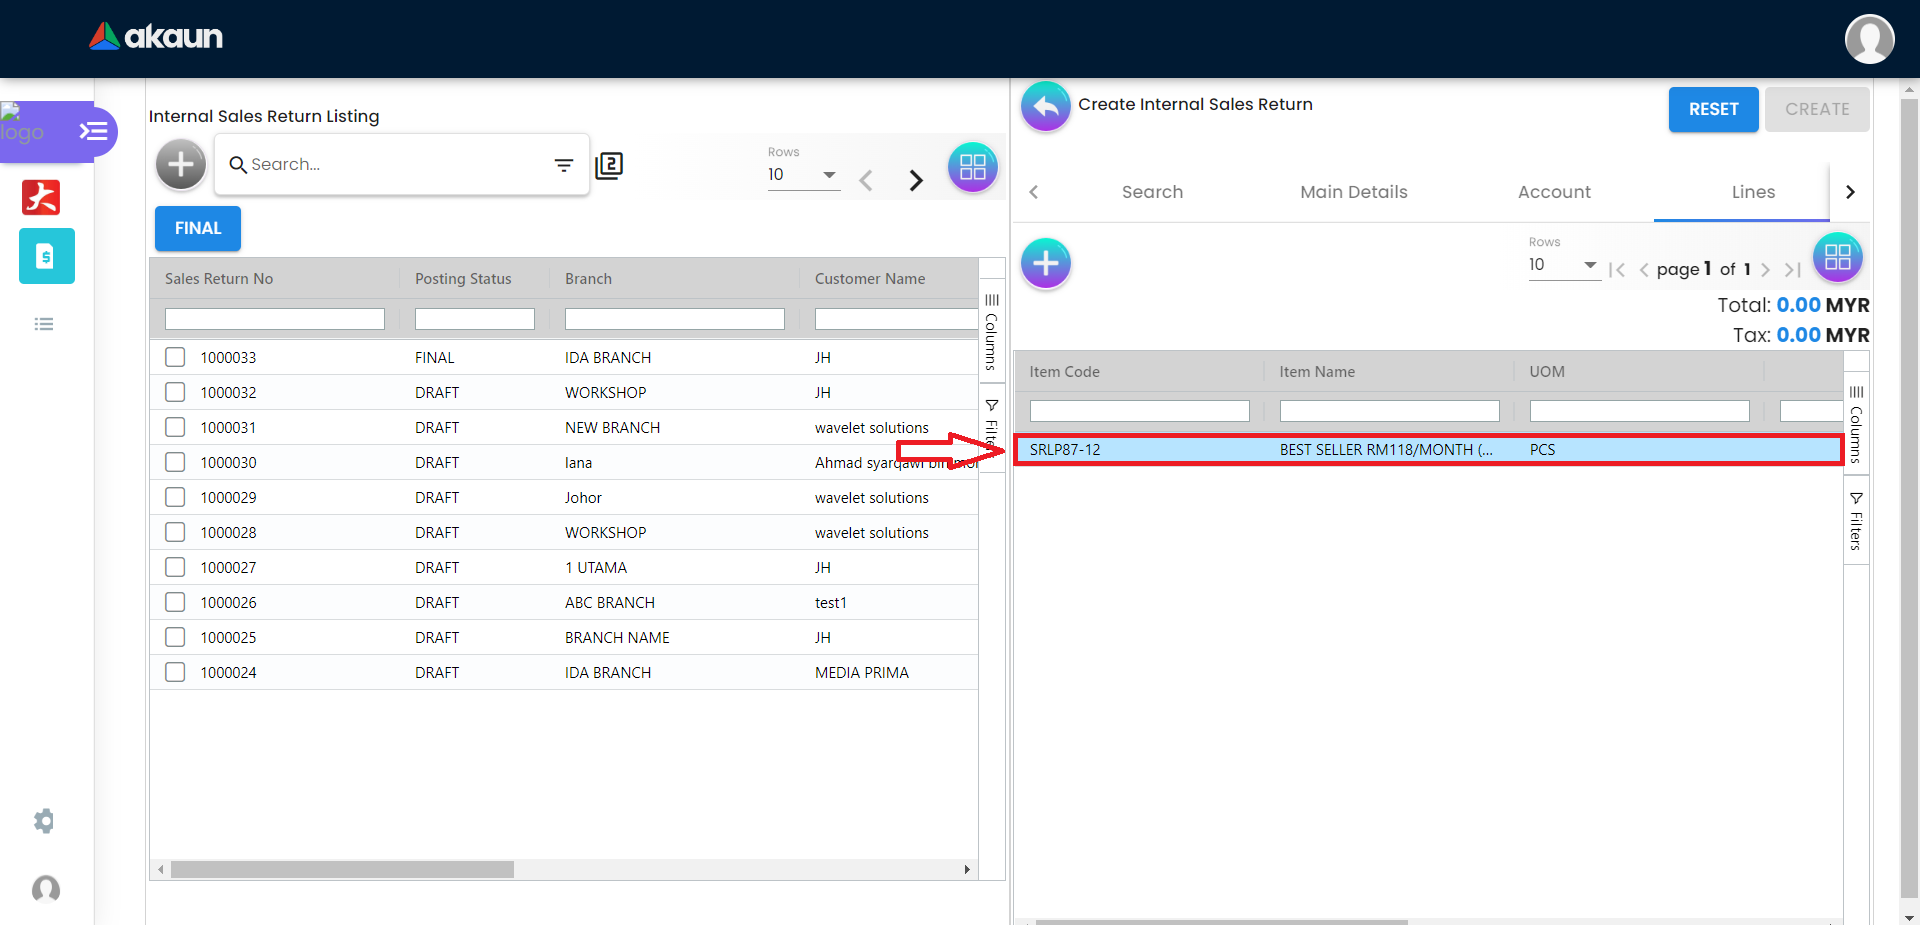
2.4 In the Line Items Tab
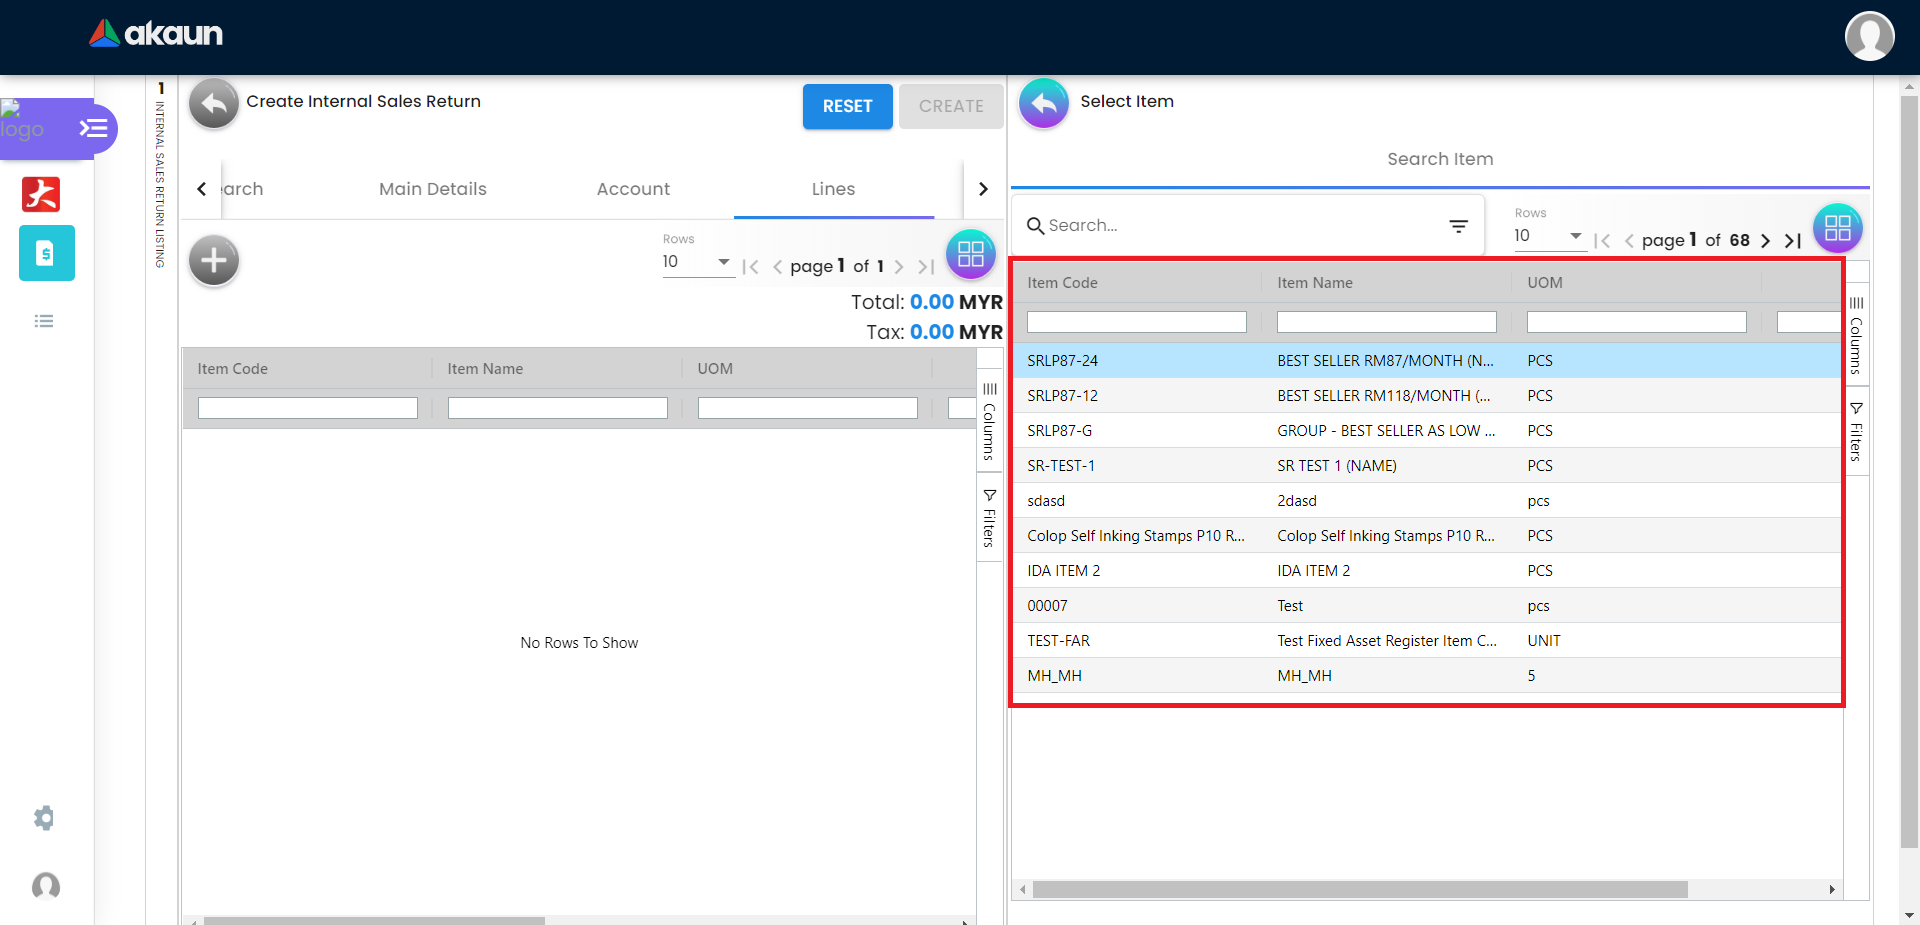
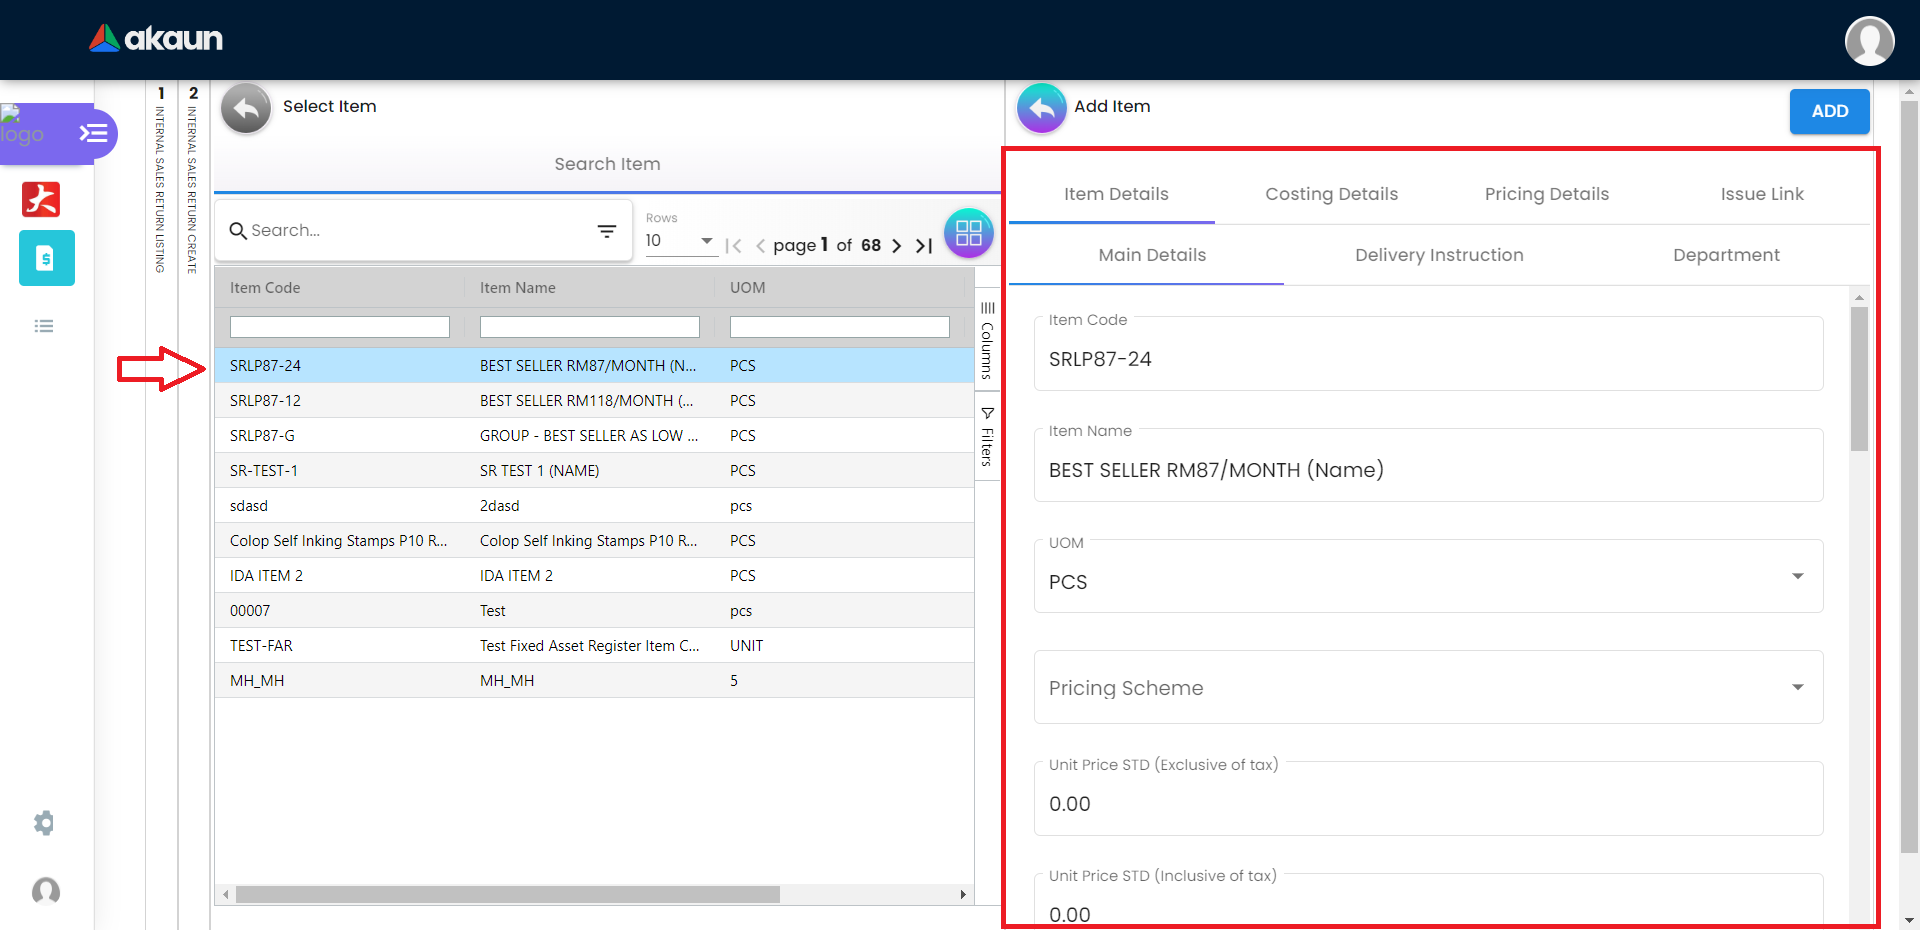
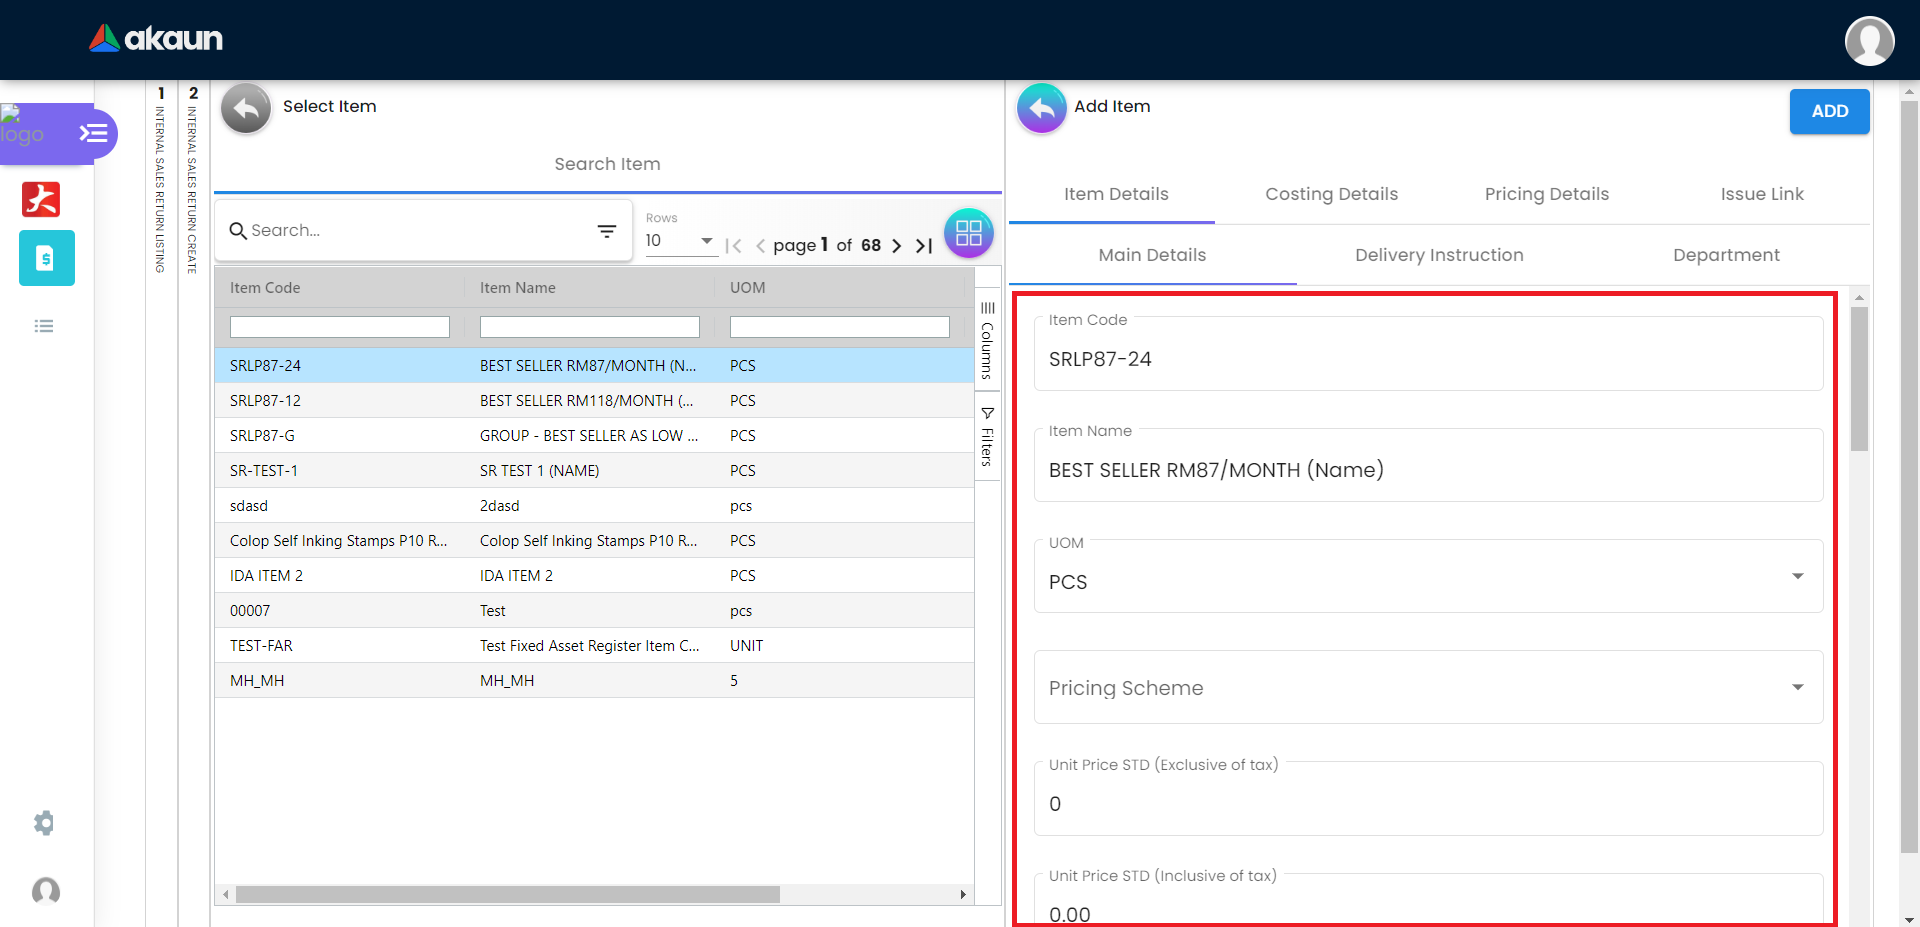
Please click the ‘+’ button to add new line items.
A list of items will be displayed on the right side.
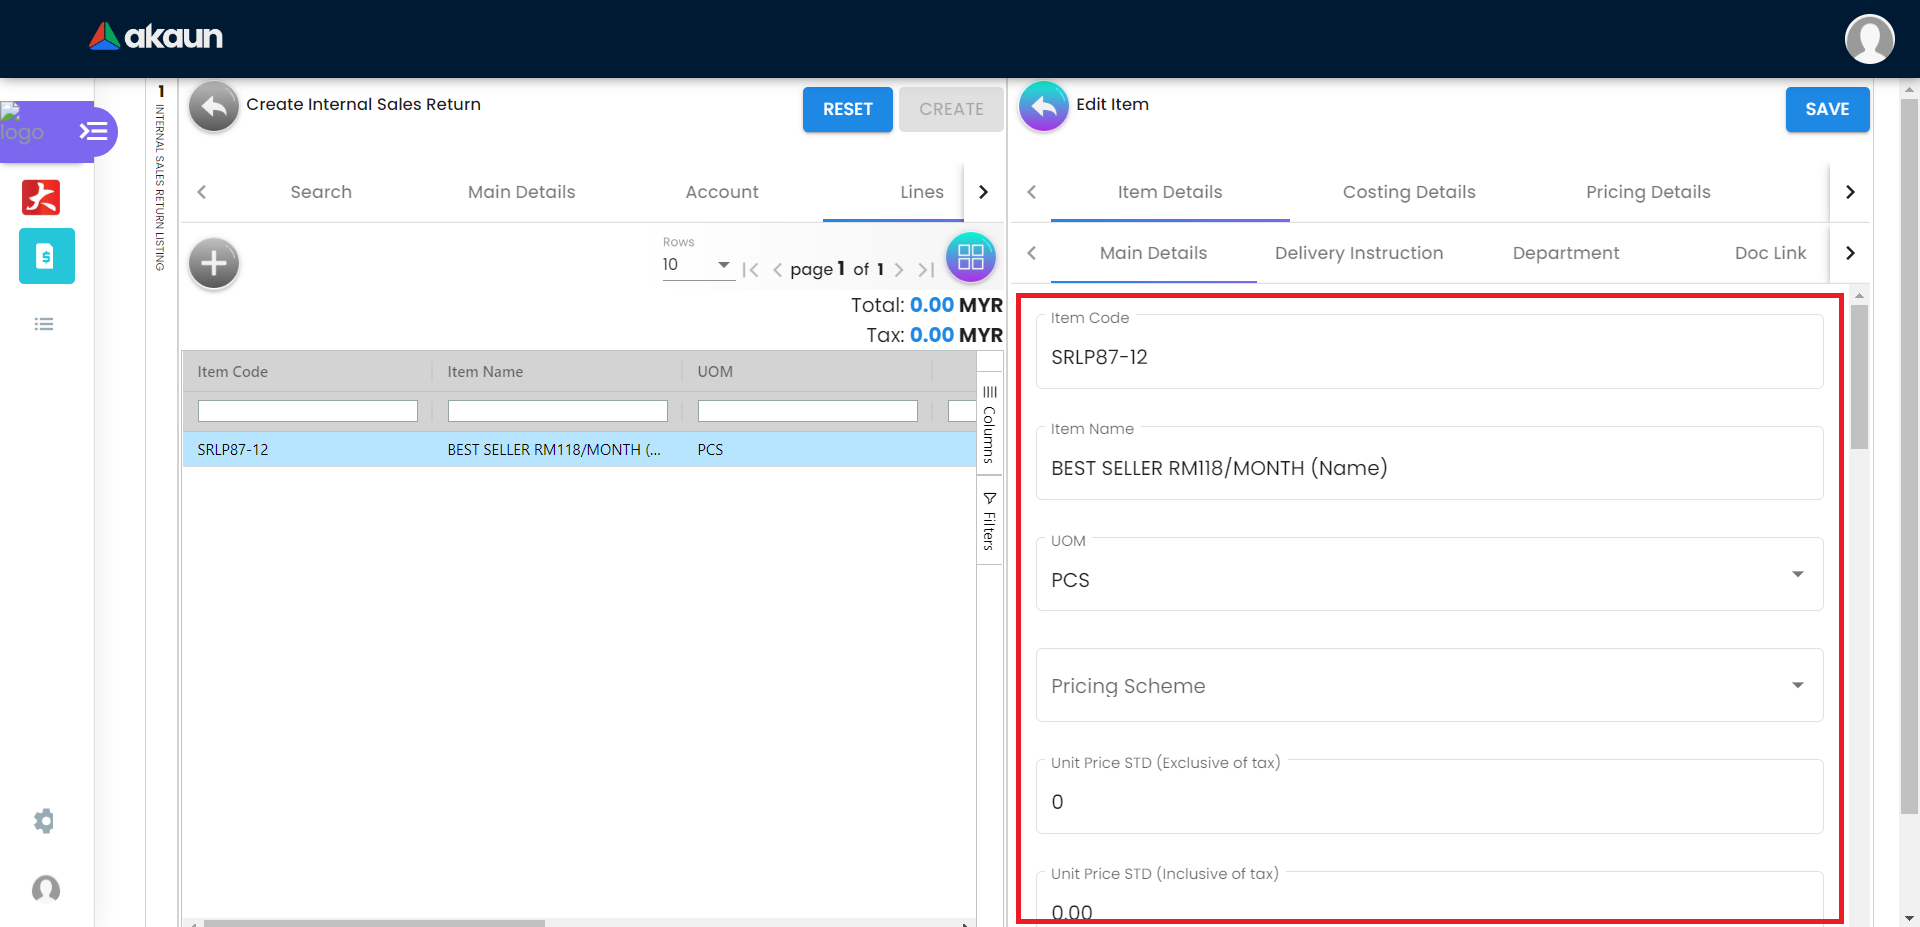
A new column of Add Item will be displayed on the right side when one of the items is clicked and the changes can be saved by clicking on the Add button.

2.4.1 Item Details Tab

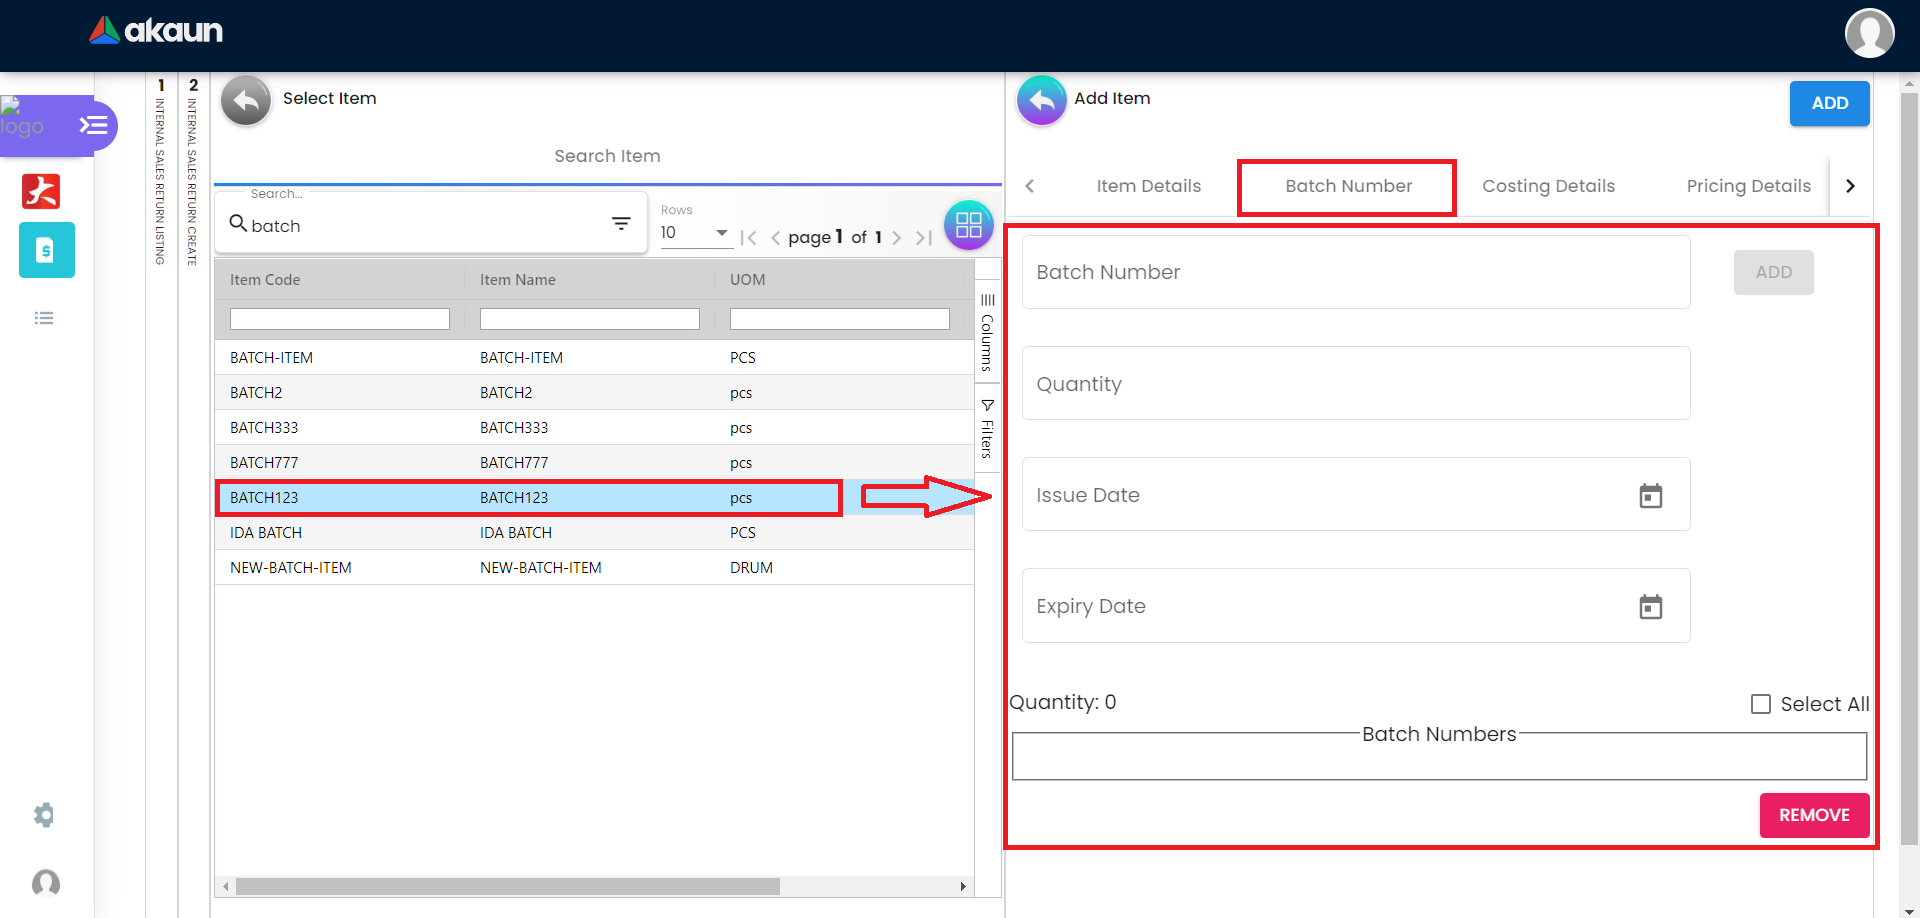
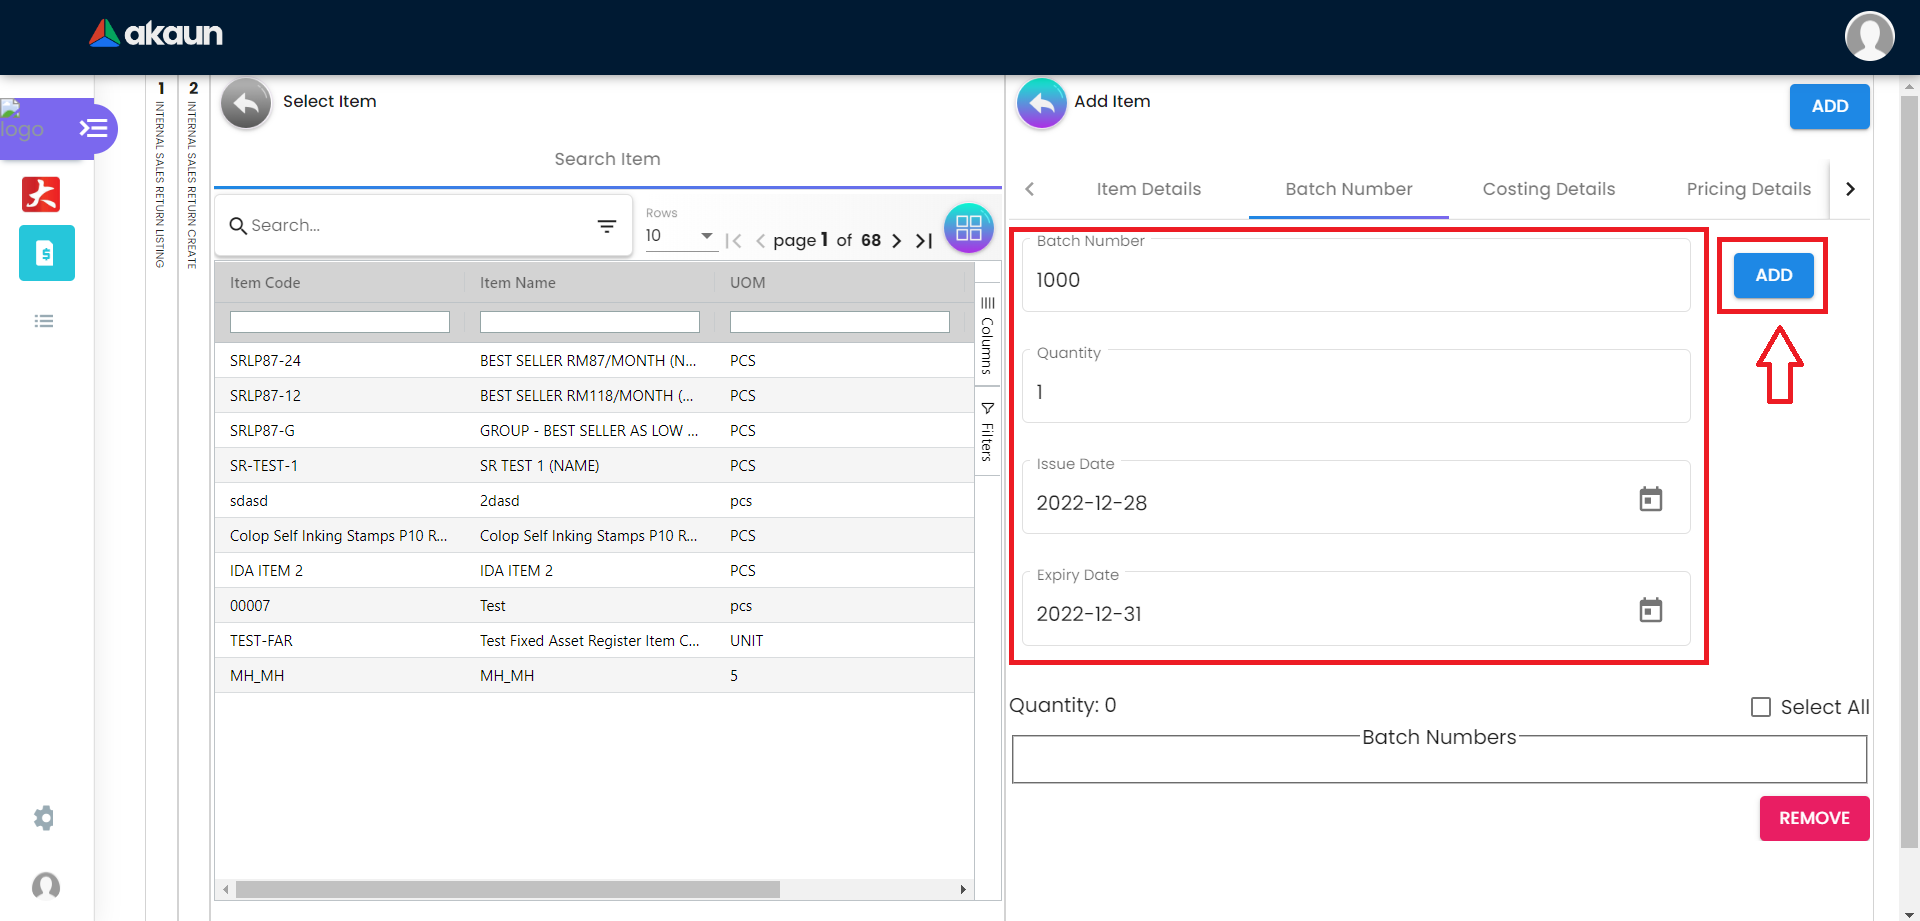
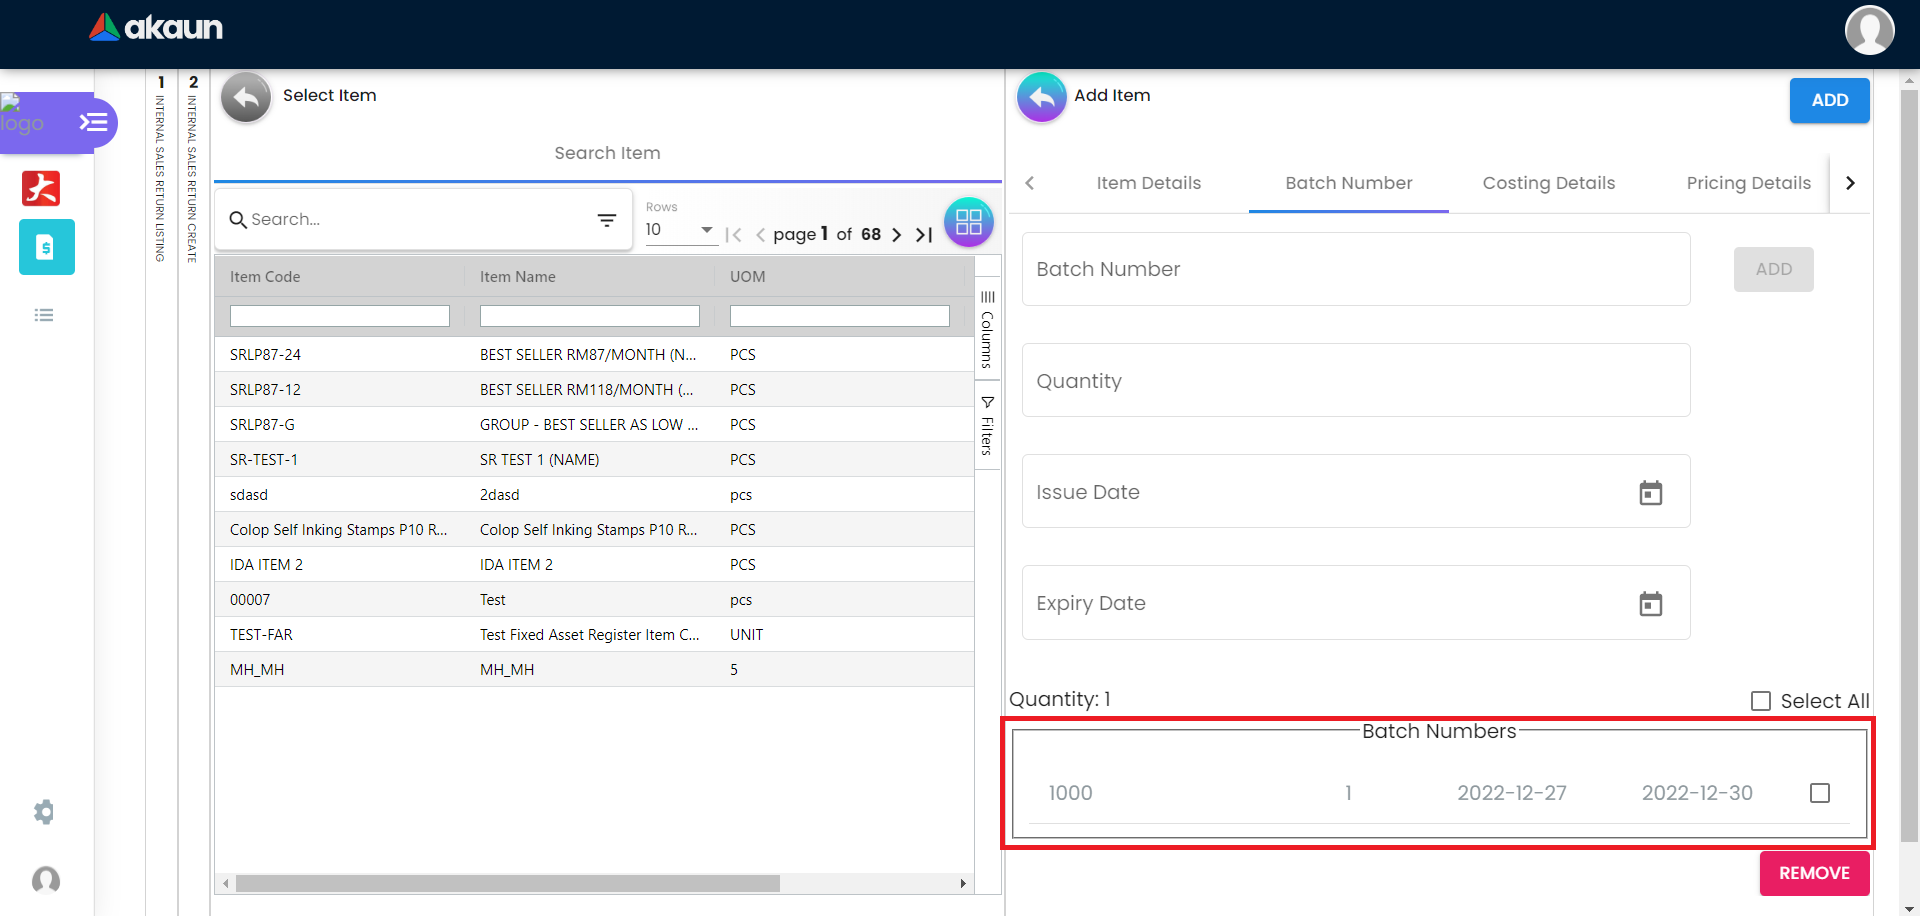
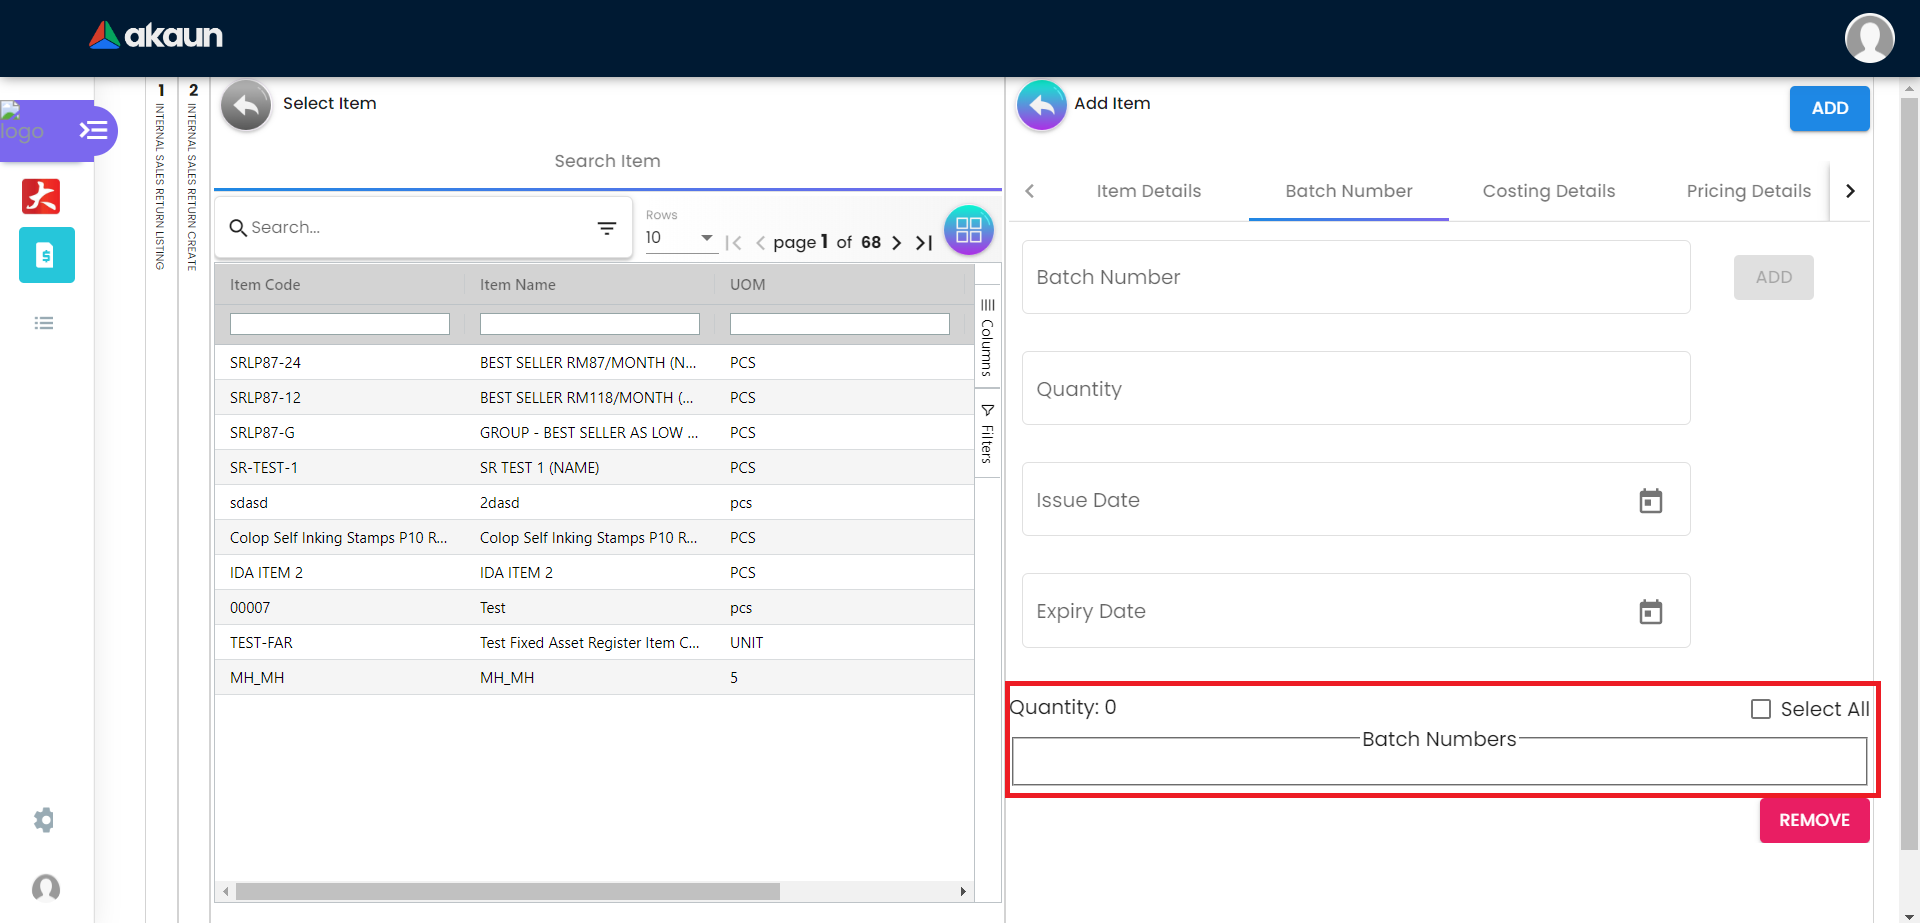
2.4.2 Batch Number Tab
The Batch Number Tab will displayed when the batch item is selected.
After the Batch Number, Quantity, Issue Date and Expiry Date are filled, click the “ADD” button will increase the quantity.
Click the checkbox to select the Batch Number that needs to be removed.

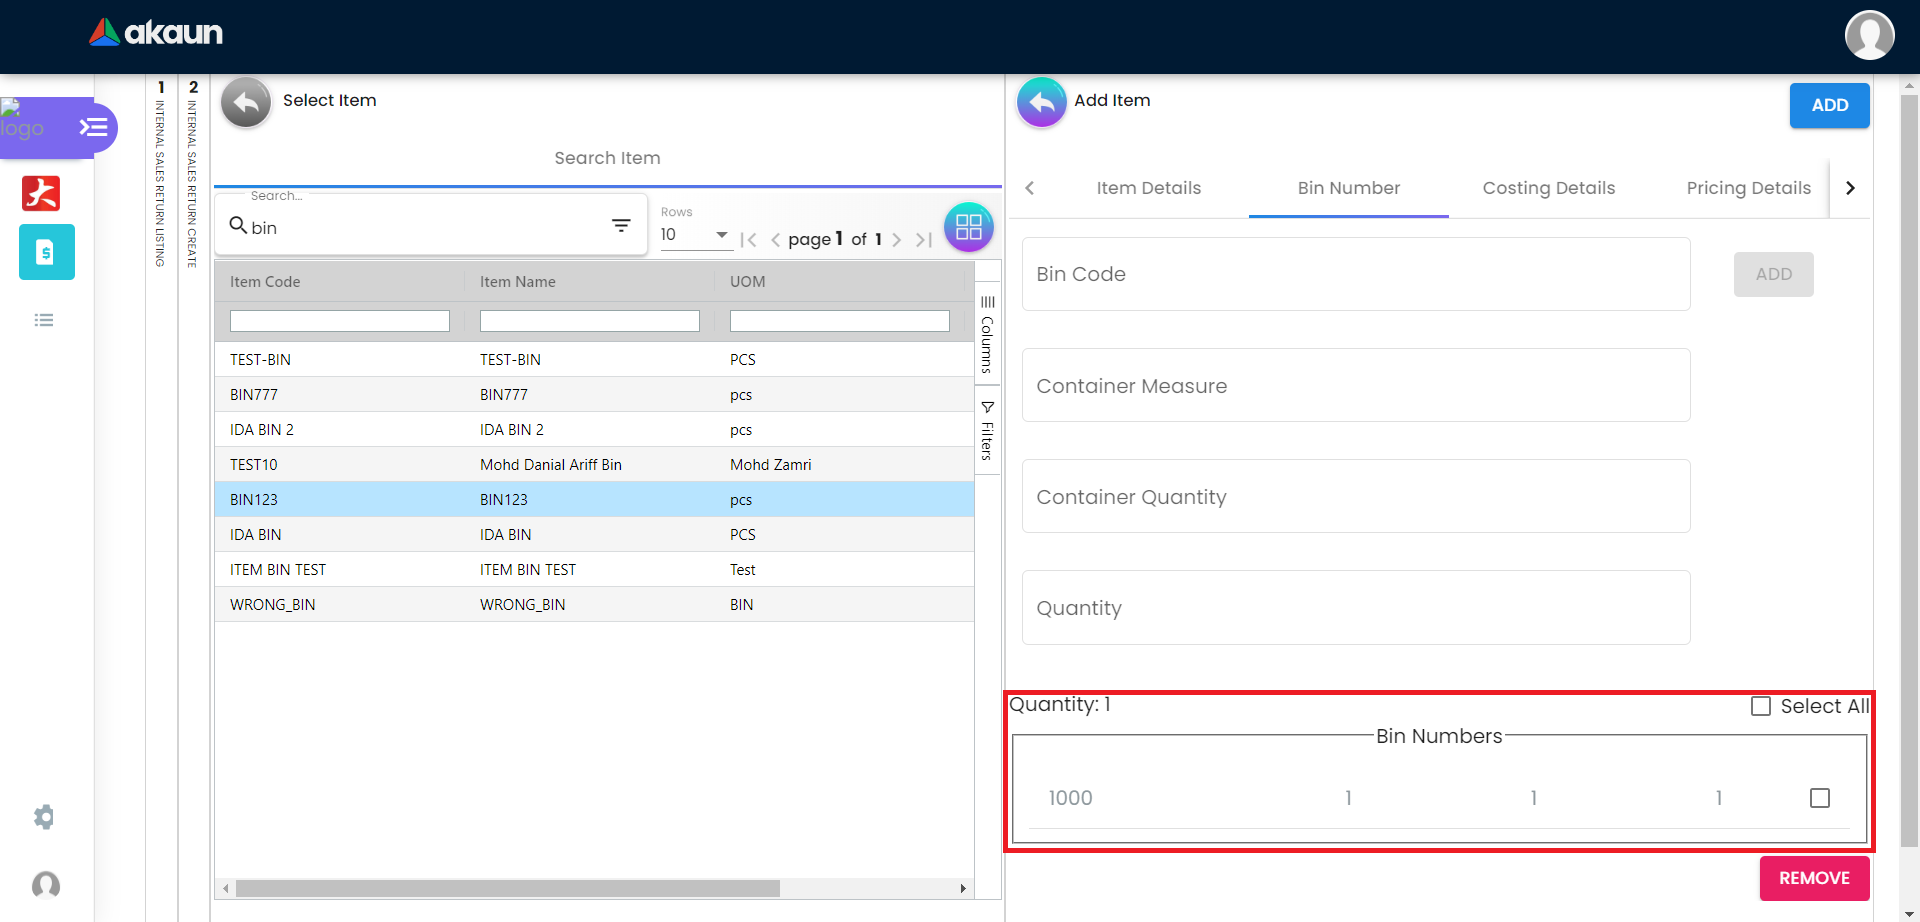
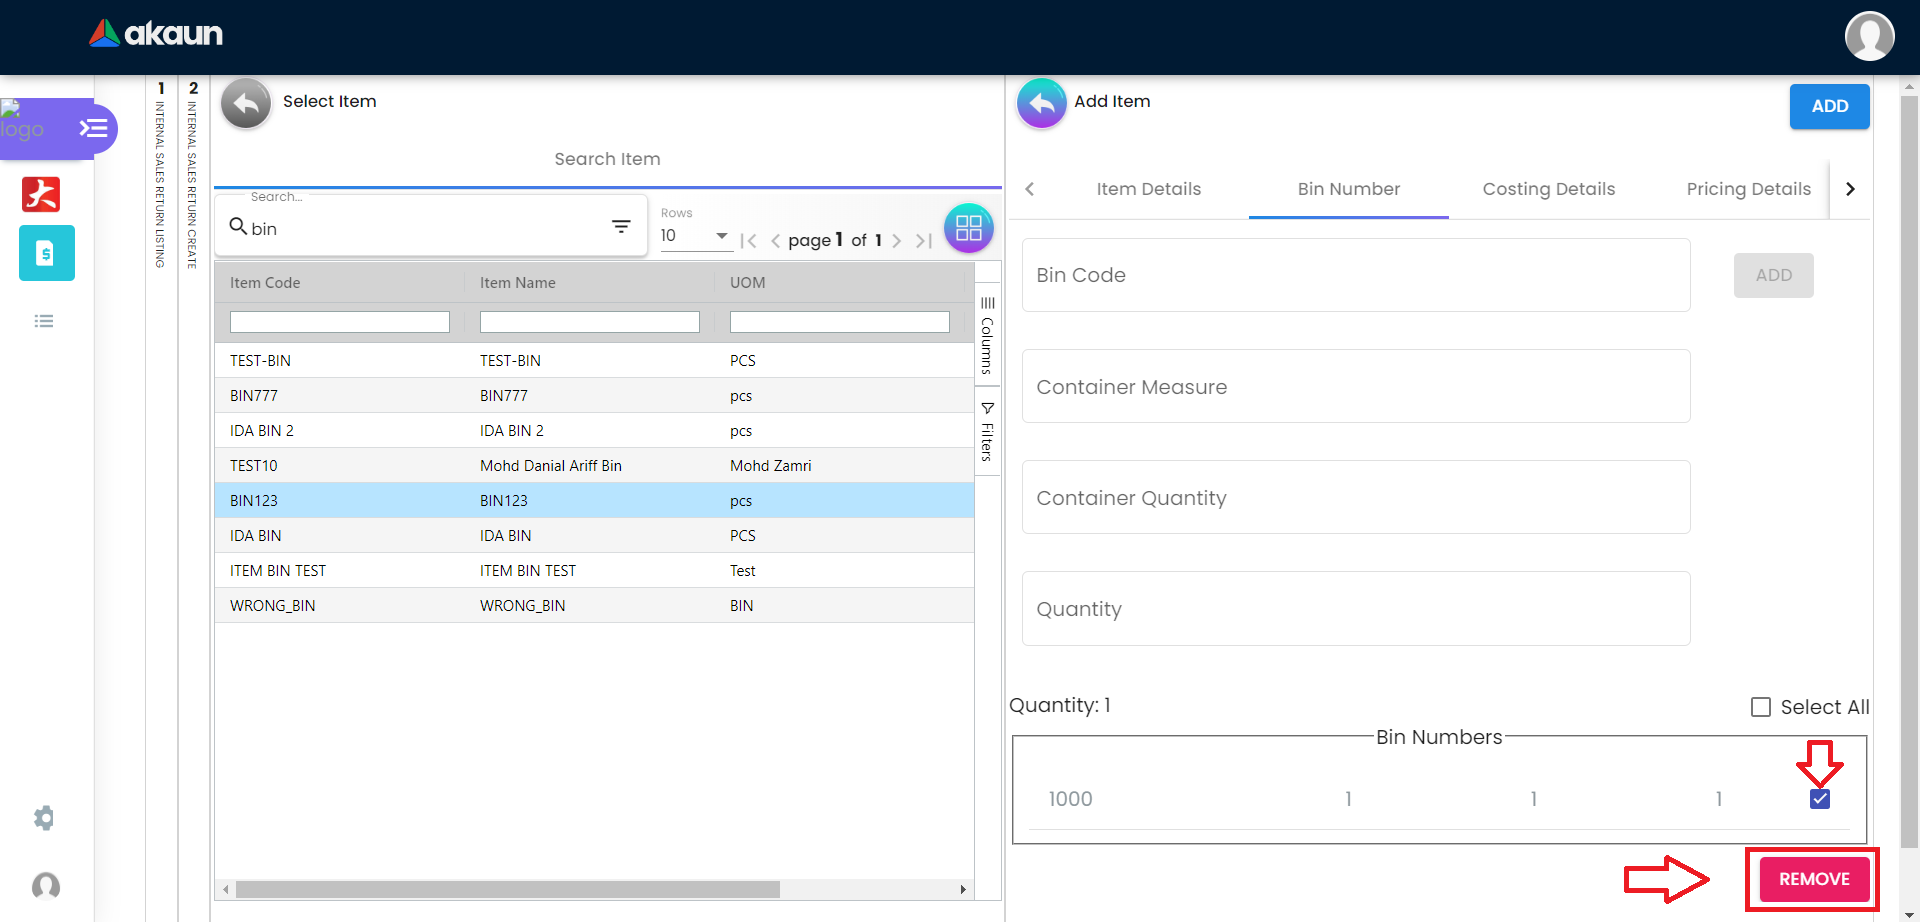
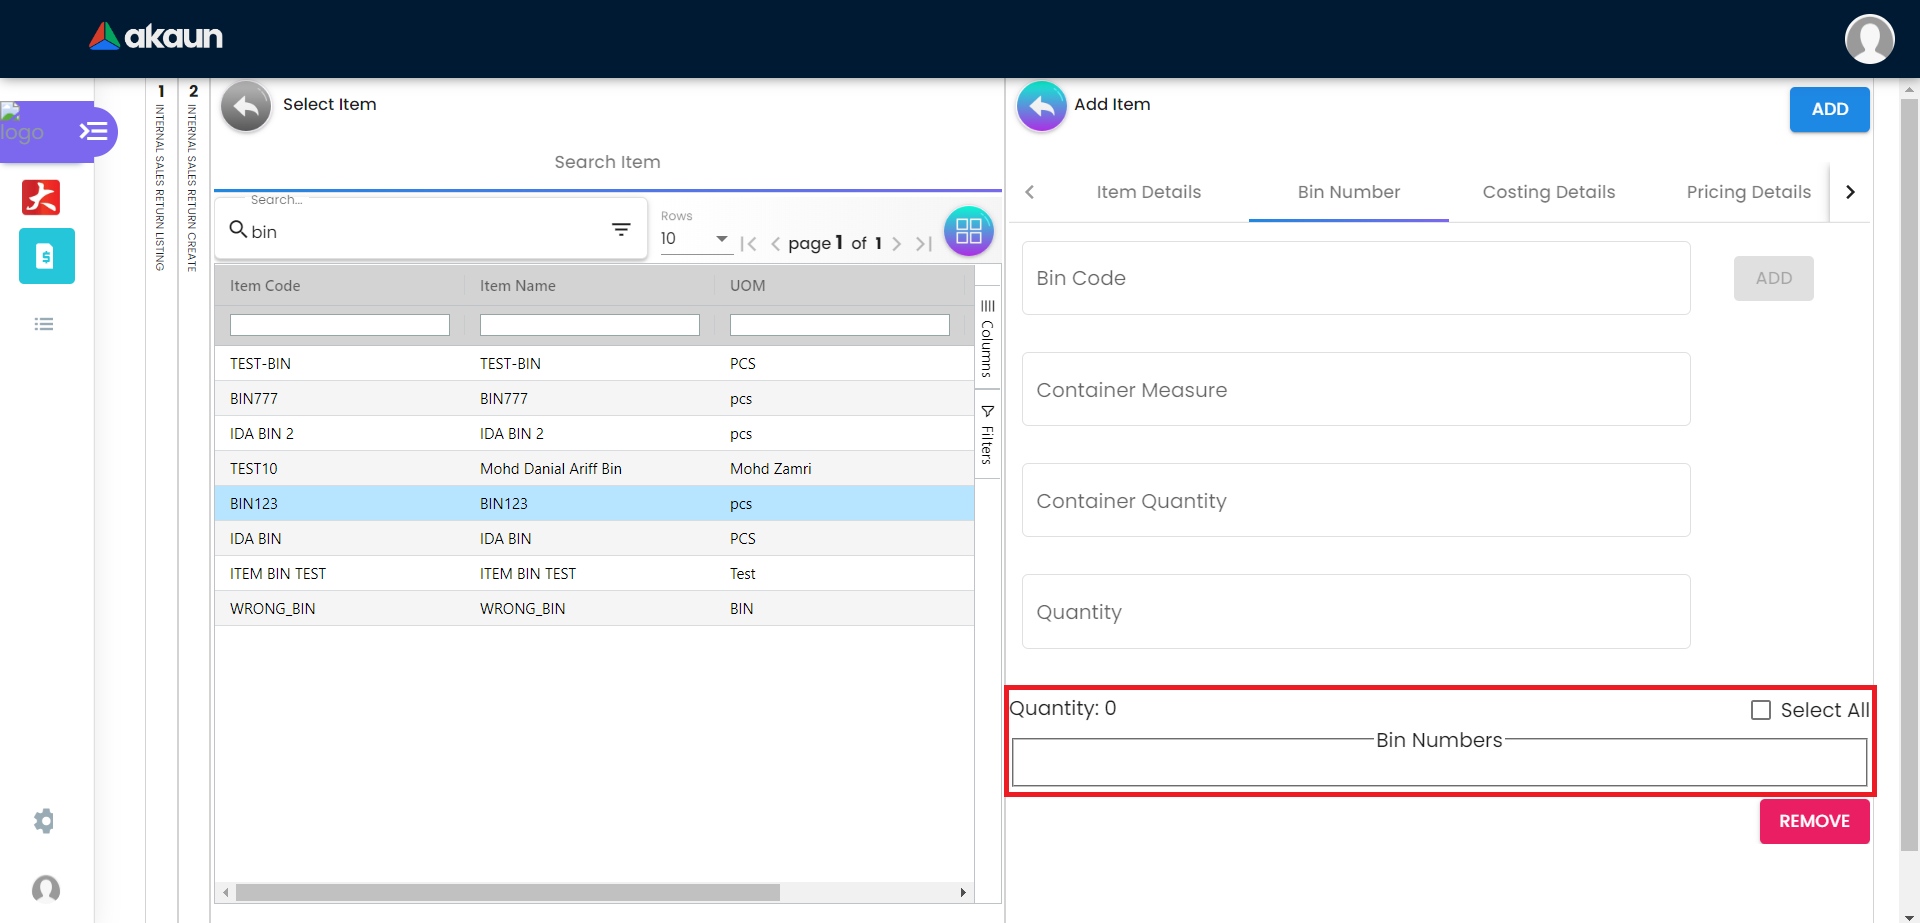
2.4.3 Bin Number Tab
The Bin Number Tab will displayed when the bin item is selected.
After the Bin Number, Container Measure, Container Quantity and Quantity are filled, click the “ADD” button will increase the quantity.
Click the checkbox to select the Bin Number that needs to be removed.


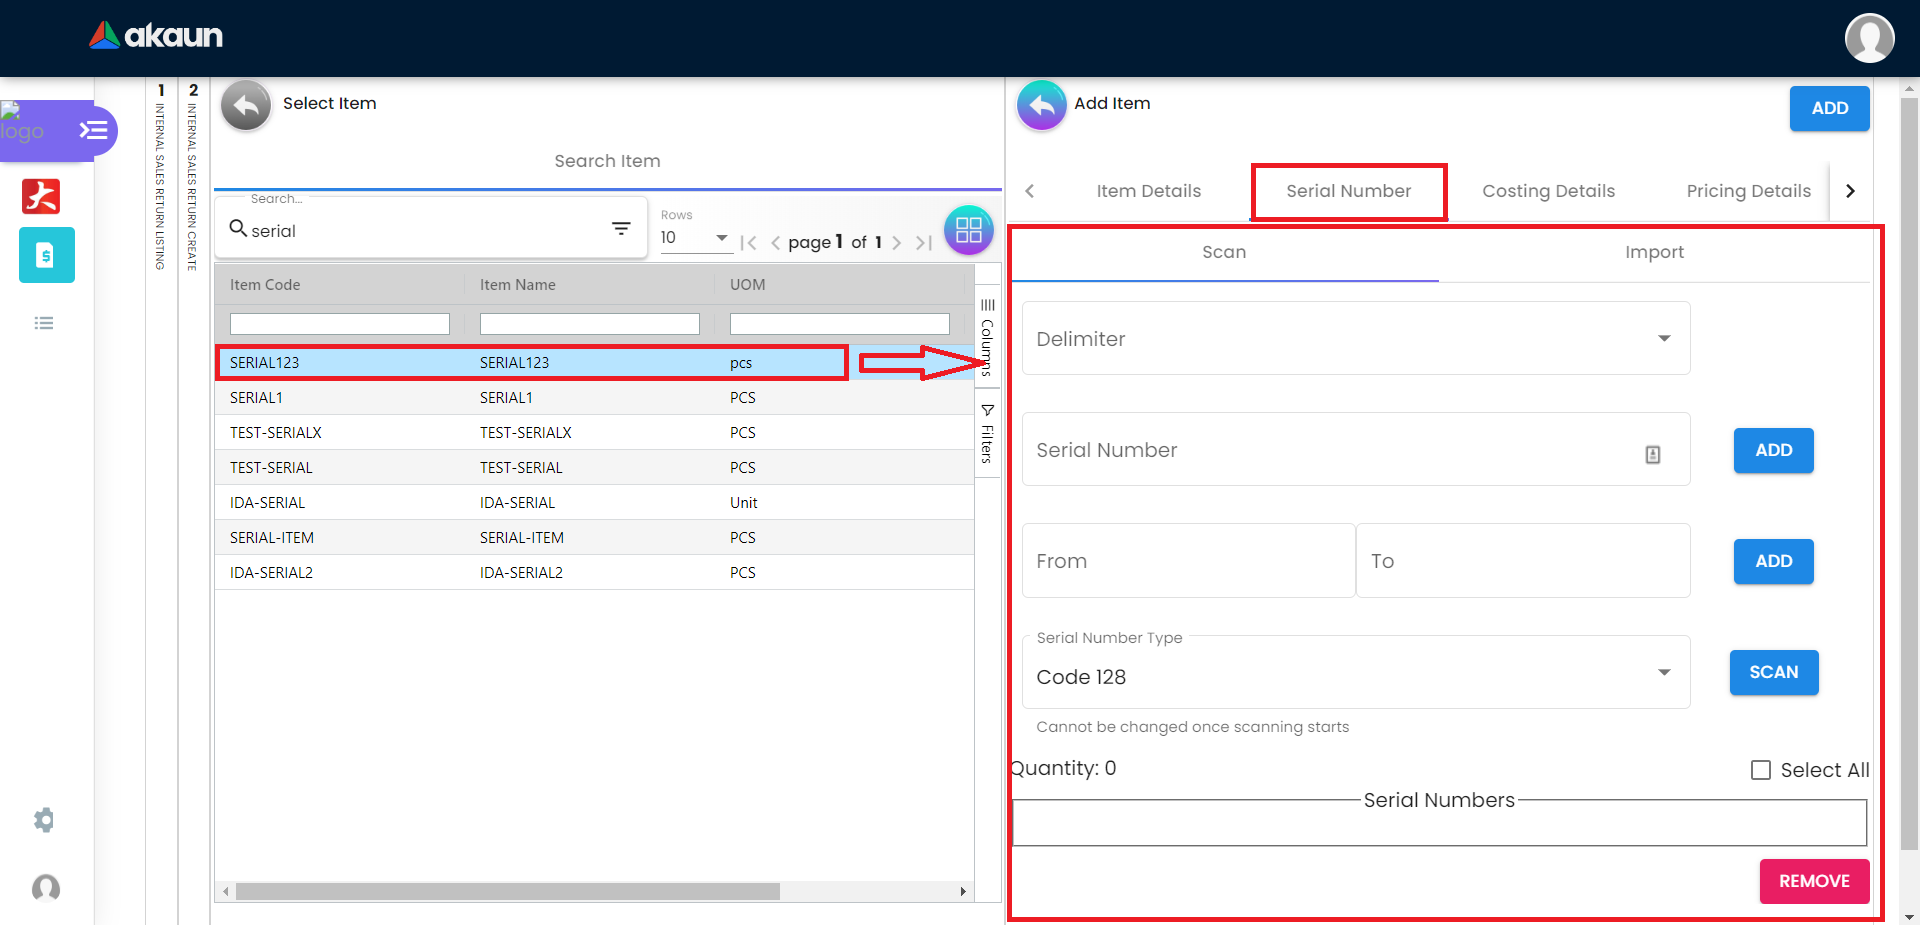
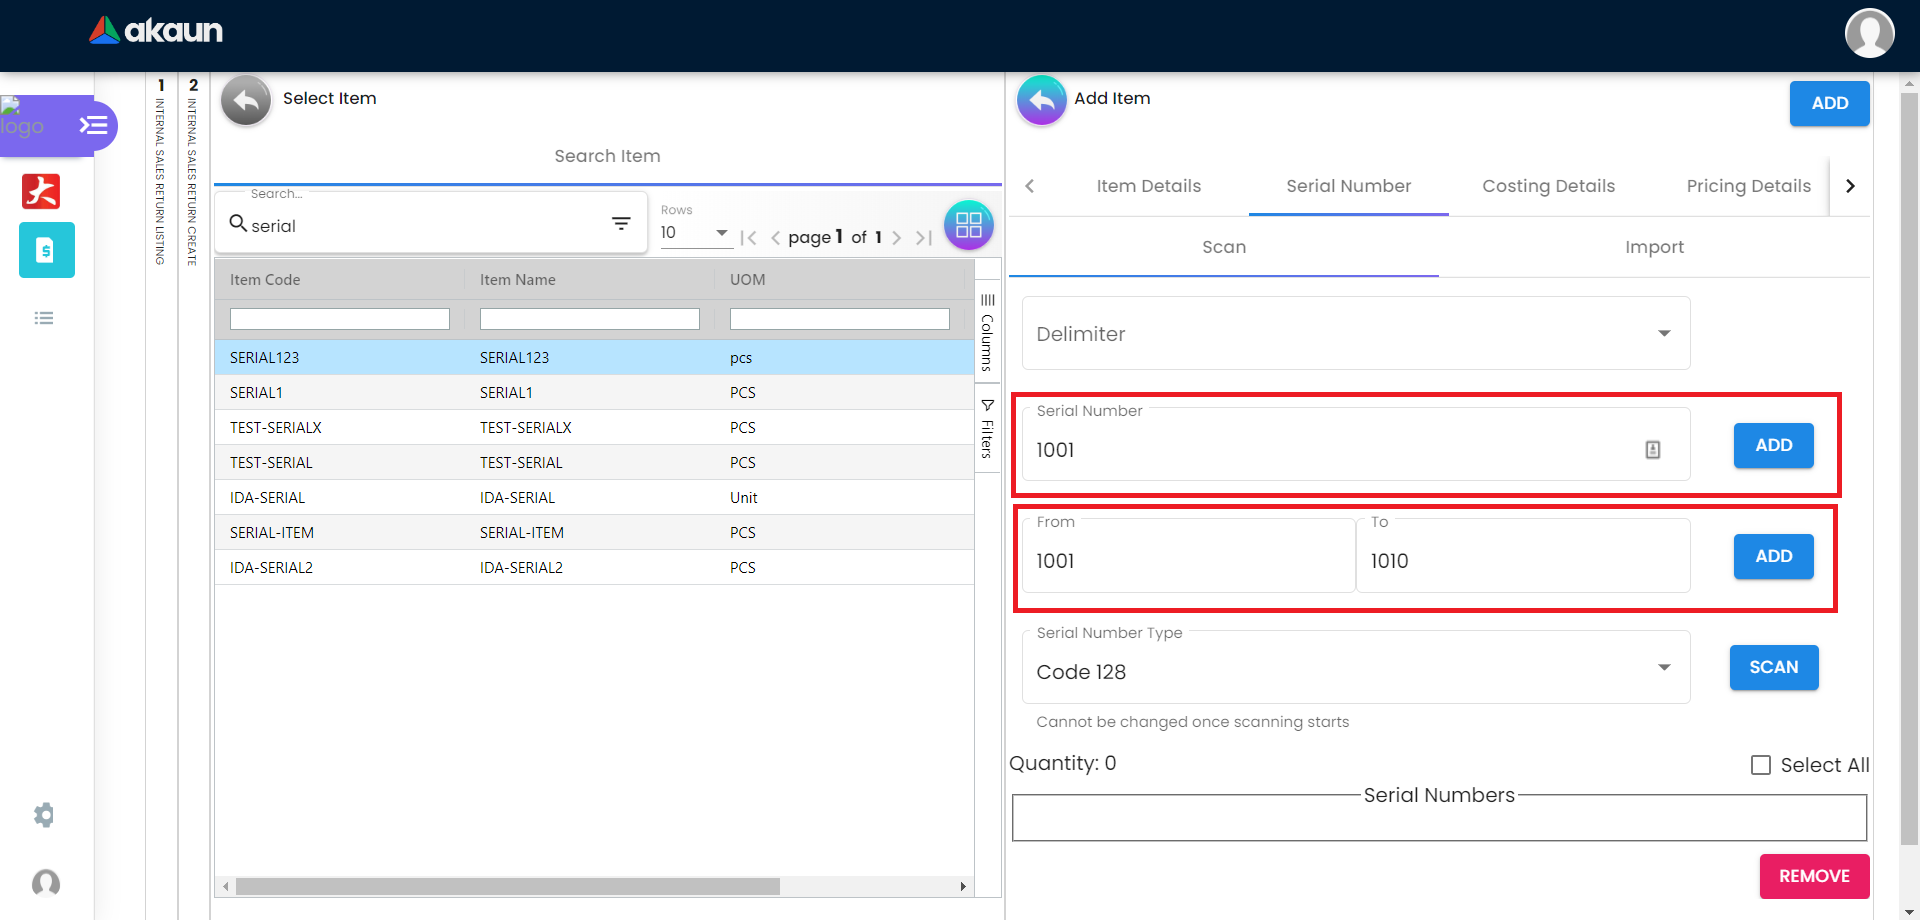
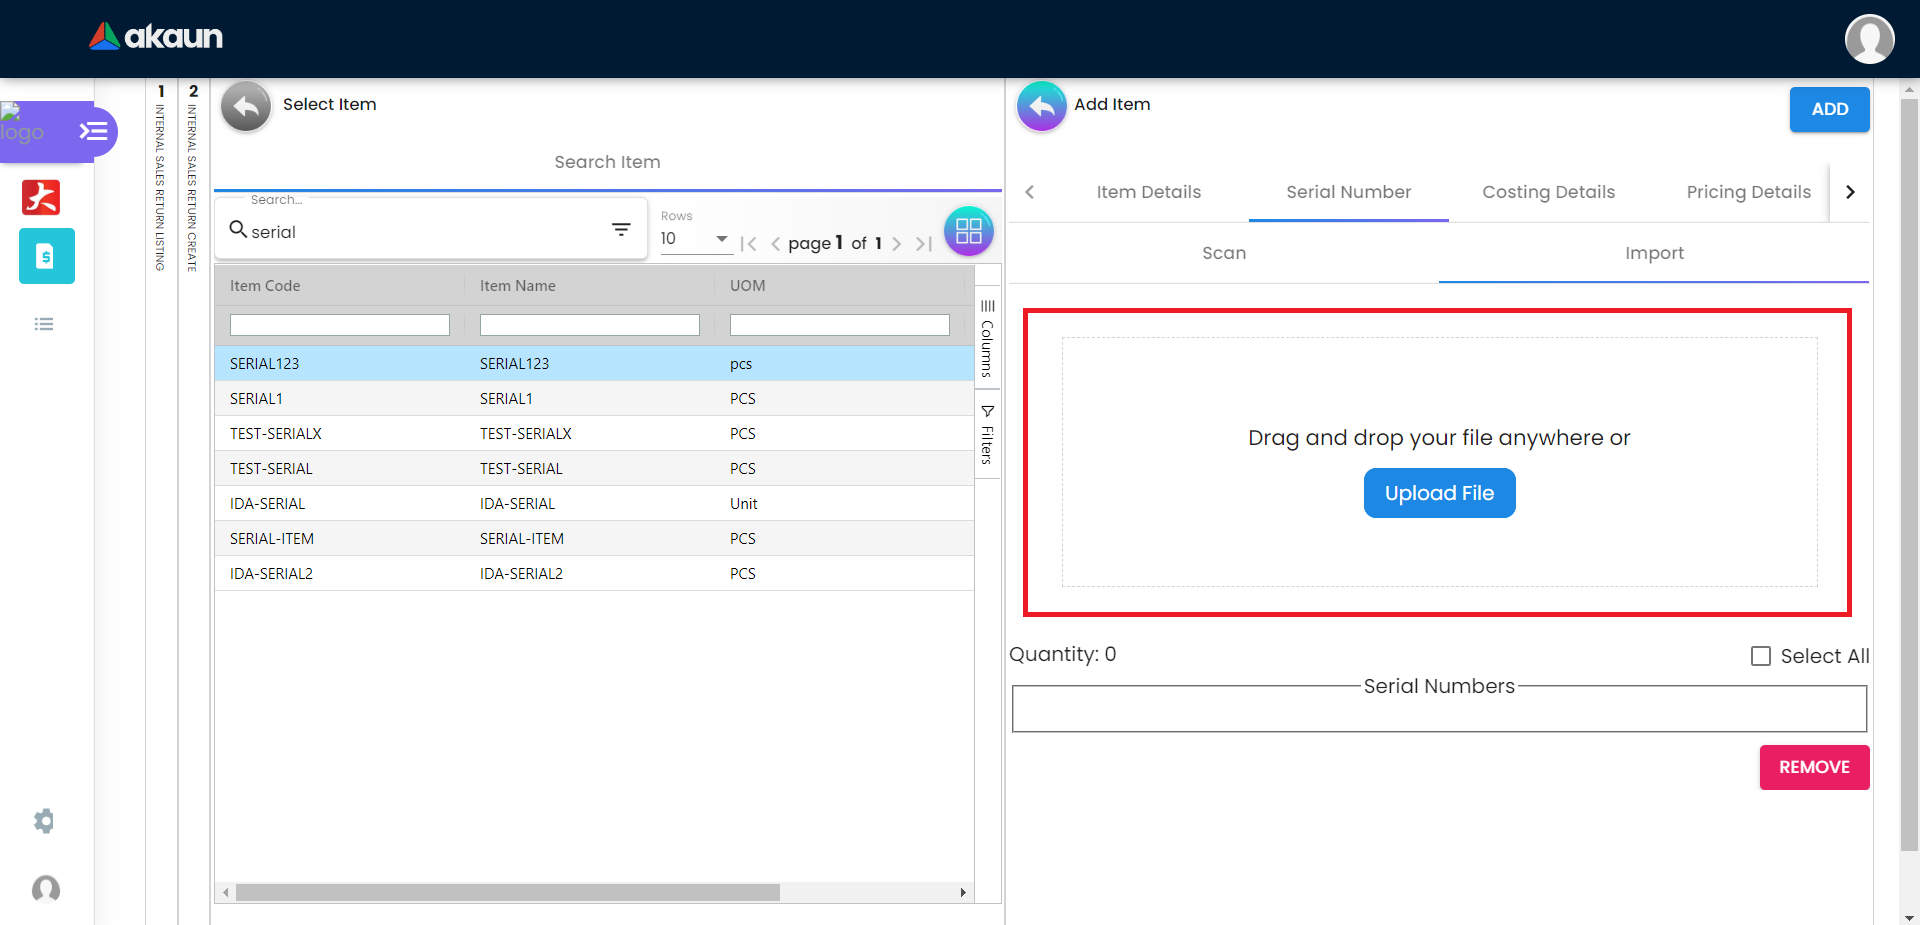
2.4.4 Serial Number Tab
The Serial Number Tab will displayed when the serial item is selected.
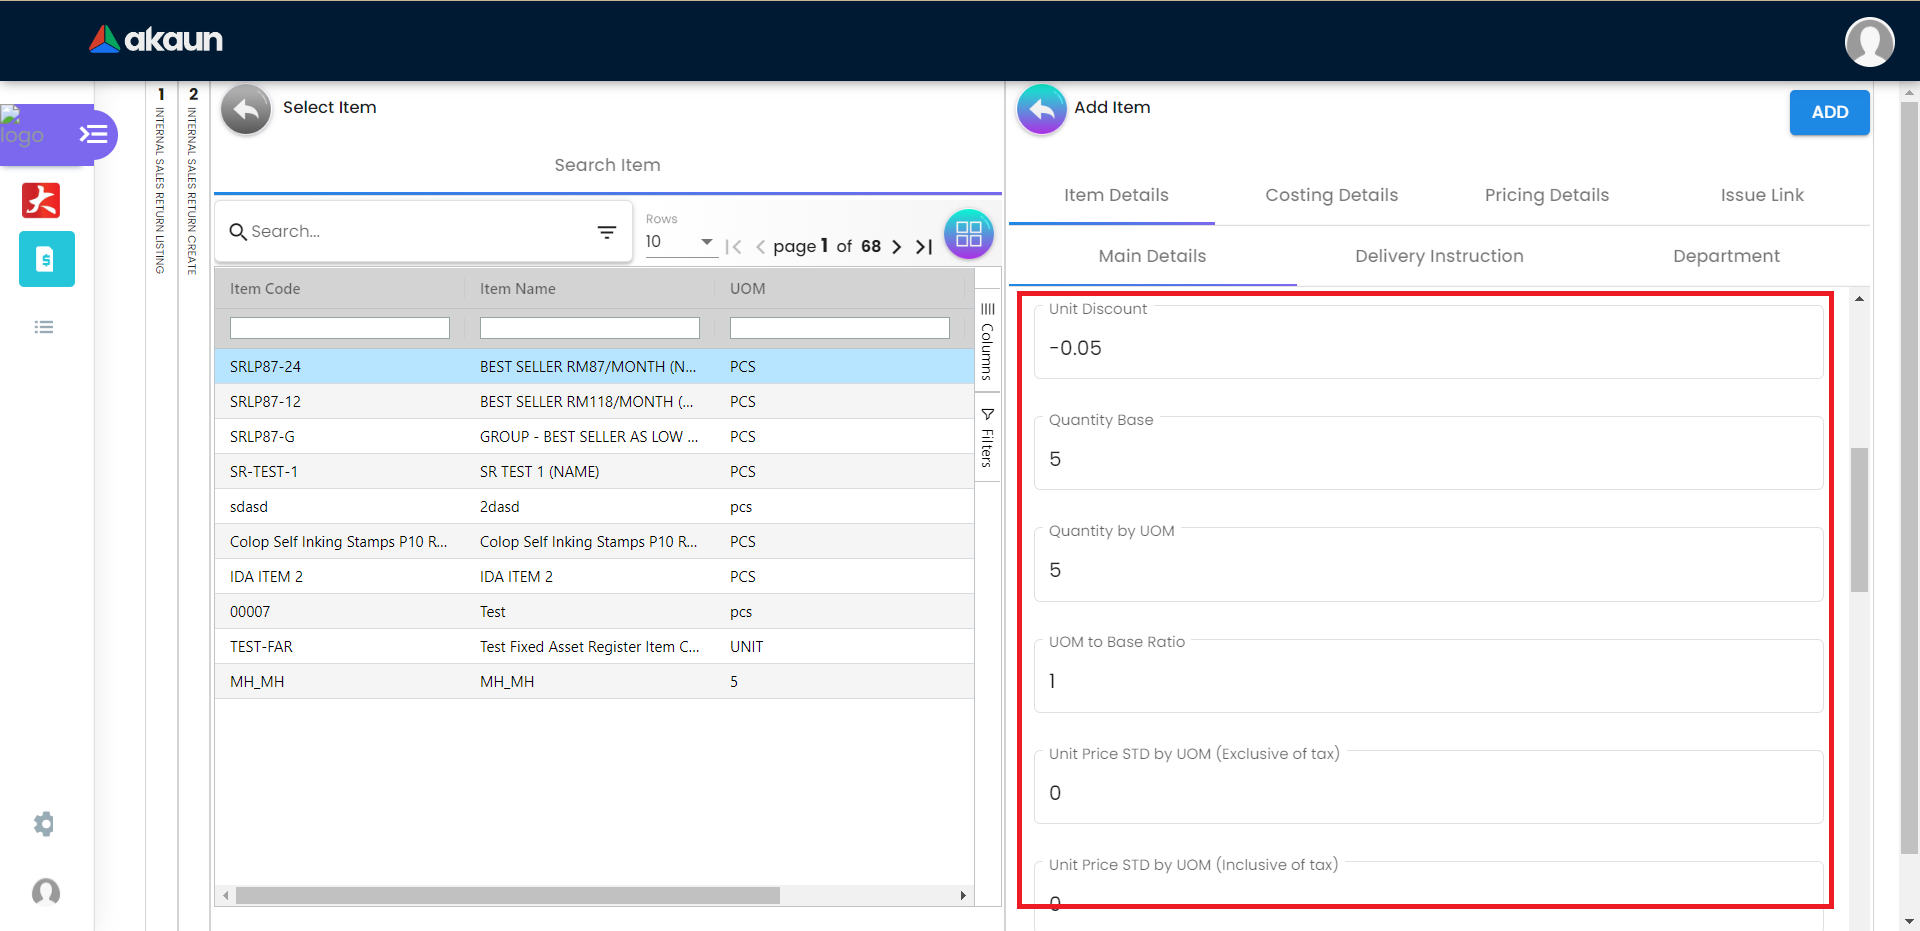
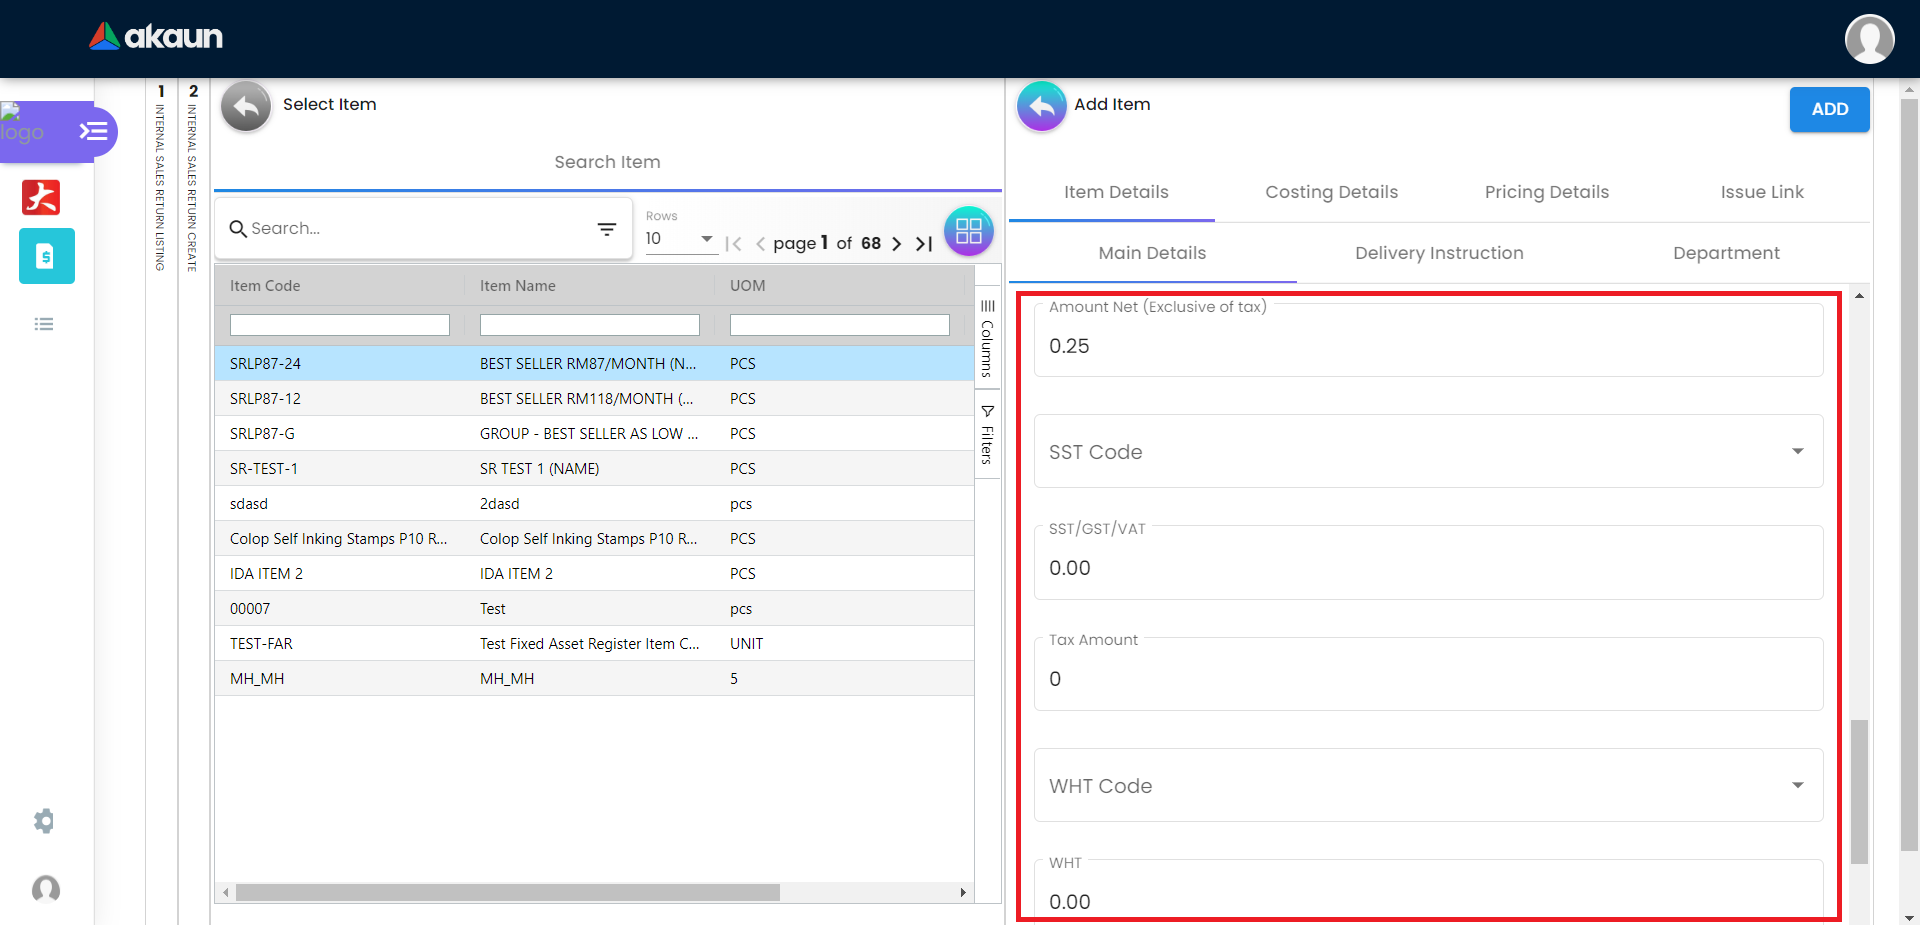
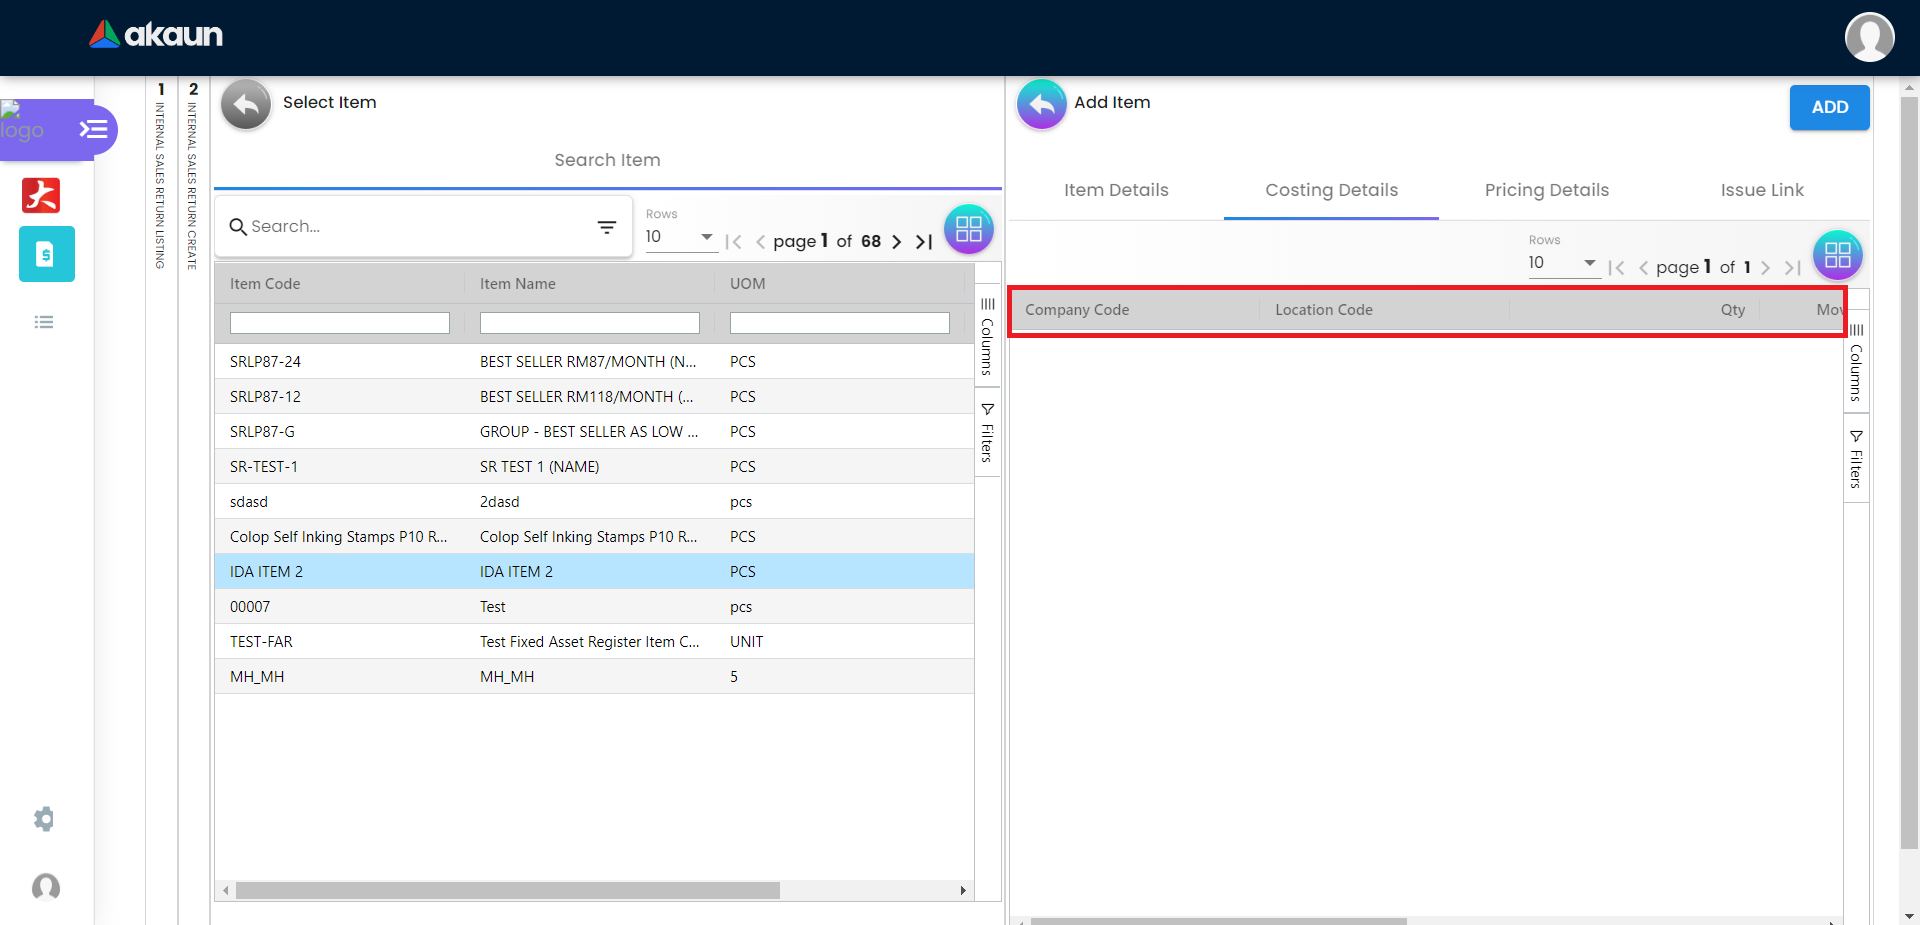
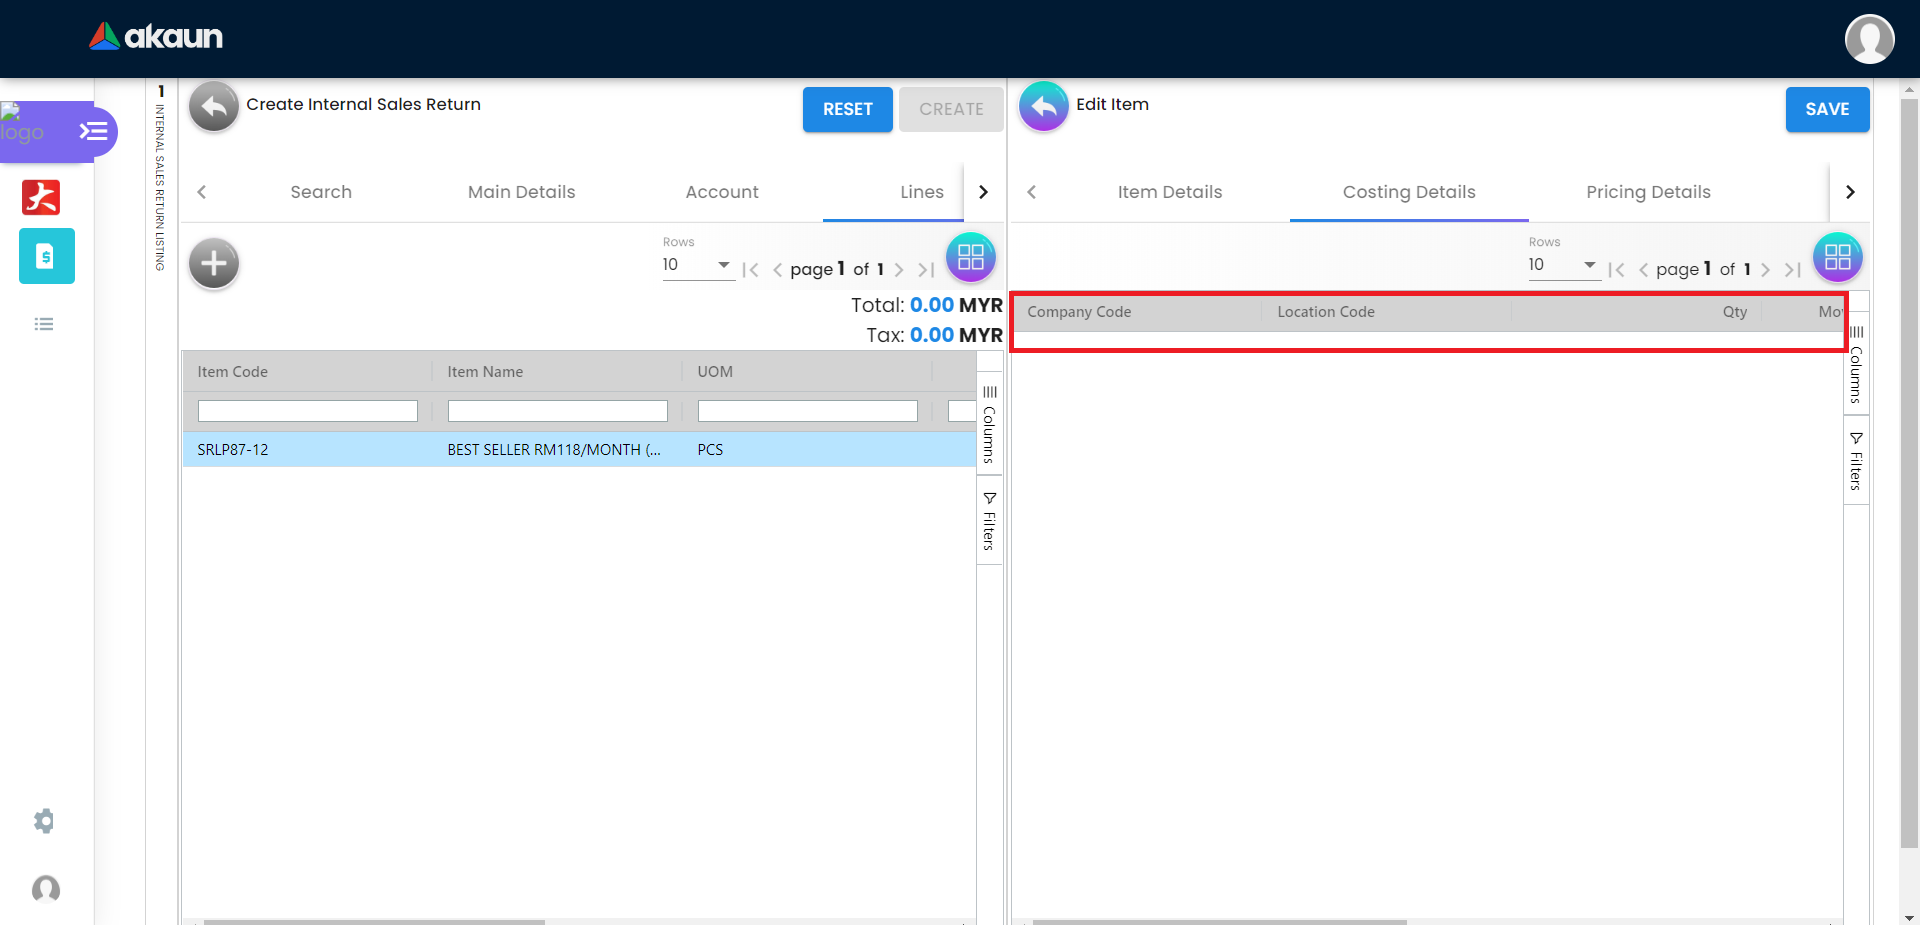
2.4.5 Costing Details Tab
Showing all the costing details about the selected item:
-
Company Code
-
Location Code
-
Quantity
-
Moving Average Unit Cost
-
FIFO Unit Cost
-
Manual Unit Cost
-
Last Purchase Unit Cost
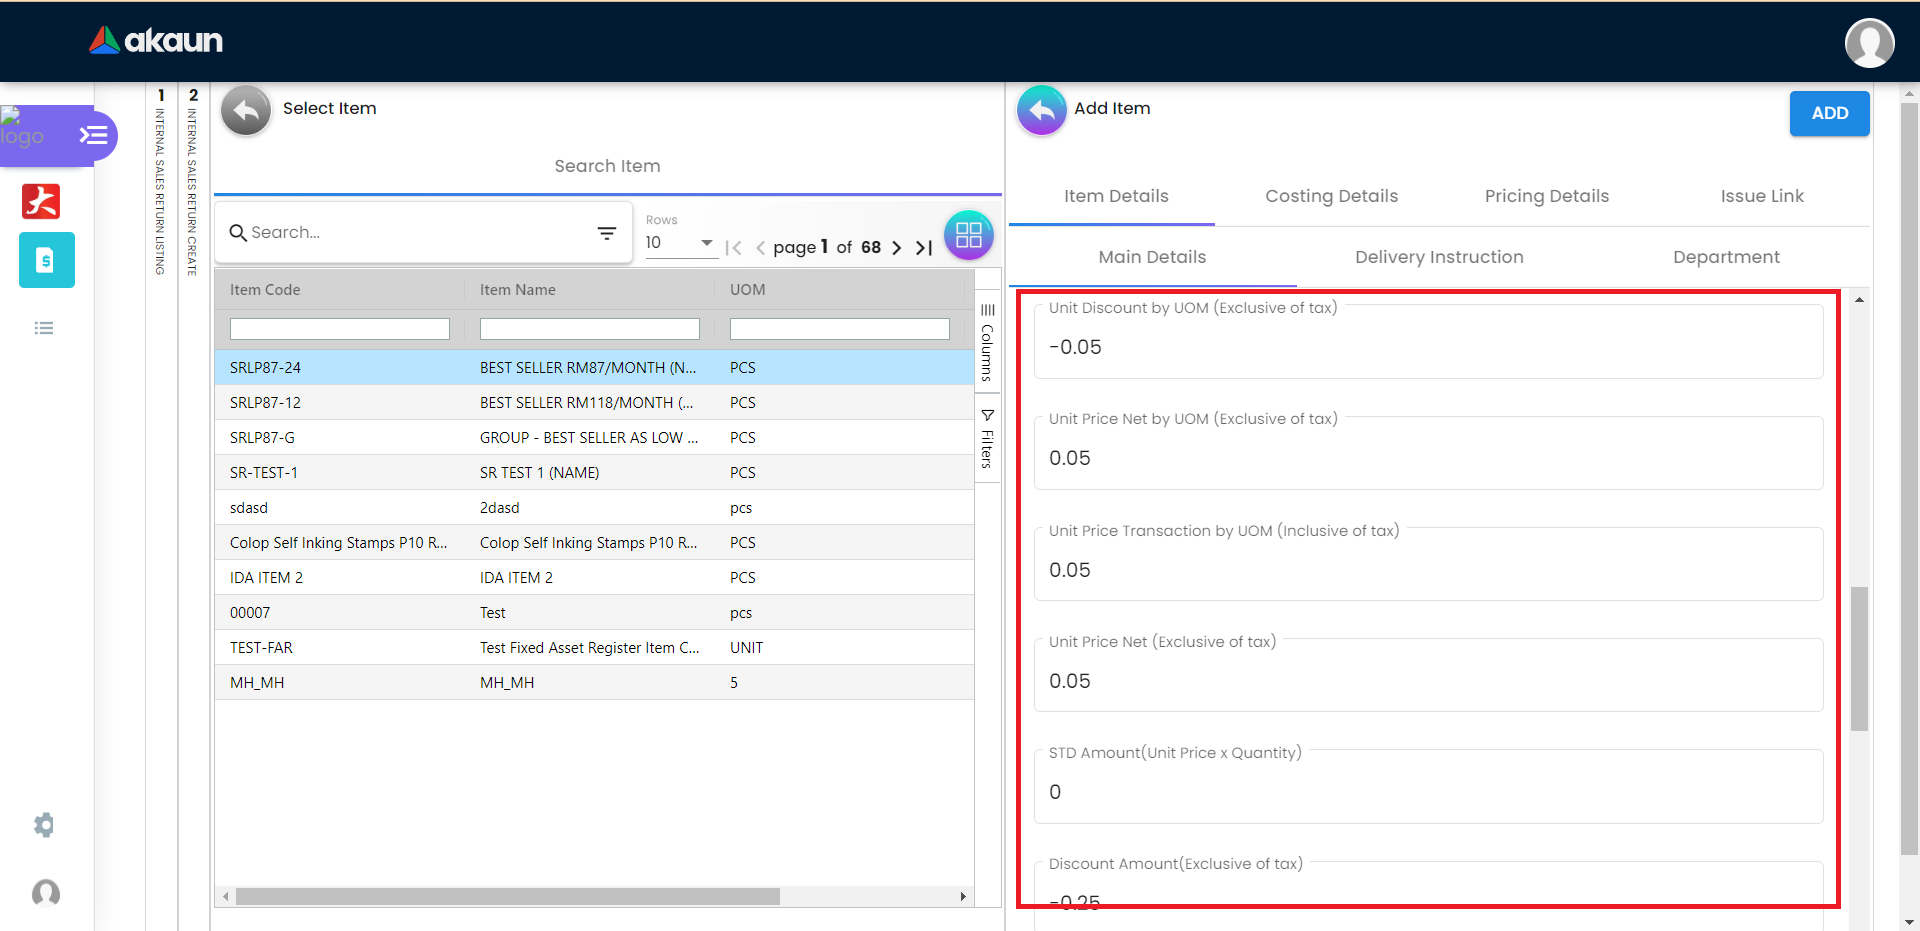
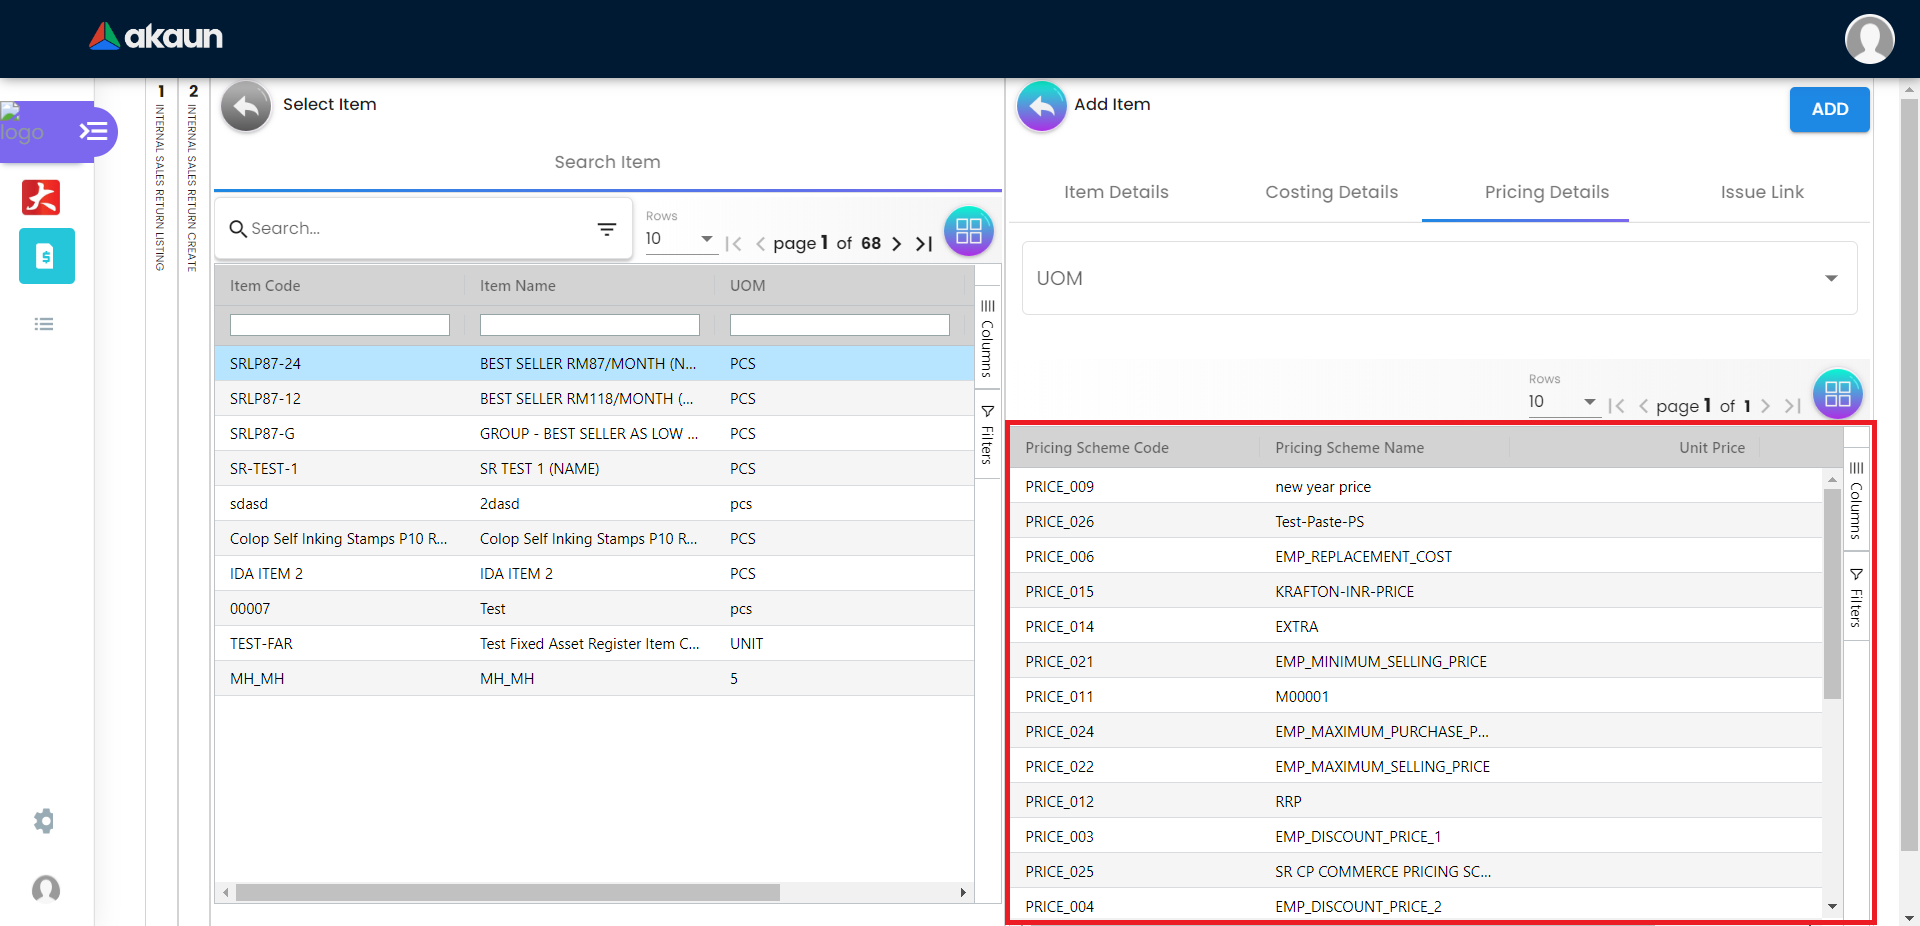
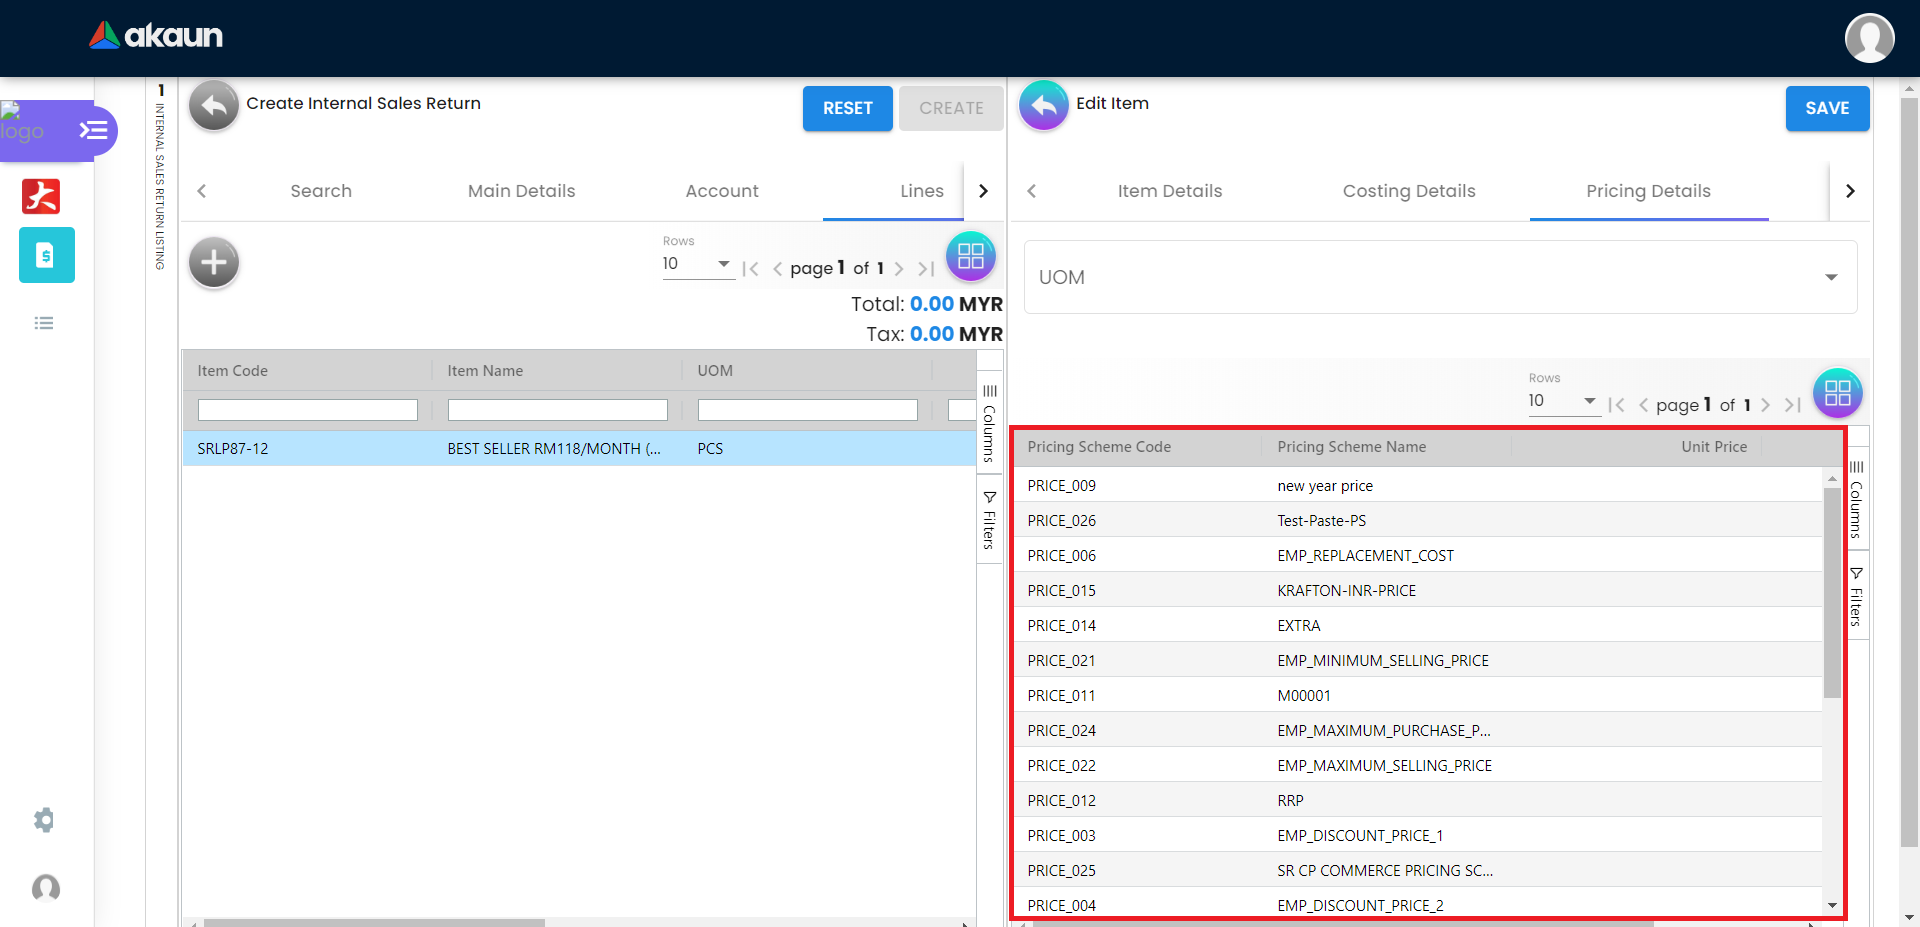
2.4.6 Pricing Details Tab
Showing all the pricing details:
-
Pricing Scheme Code
-
Name
-
Unit Price
-
Modified Date
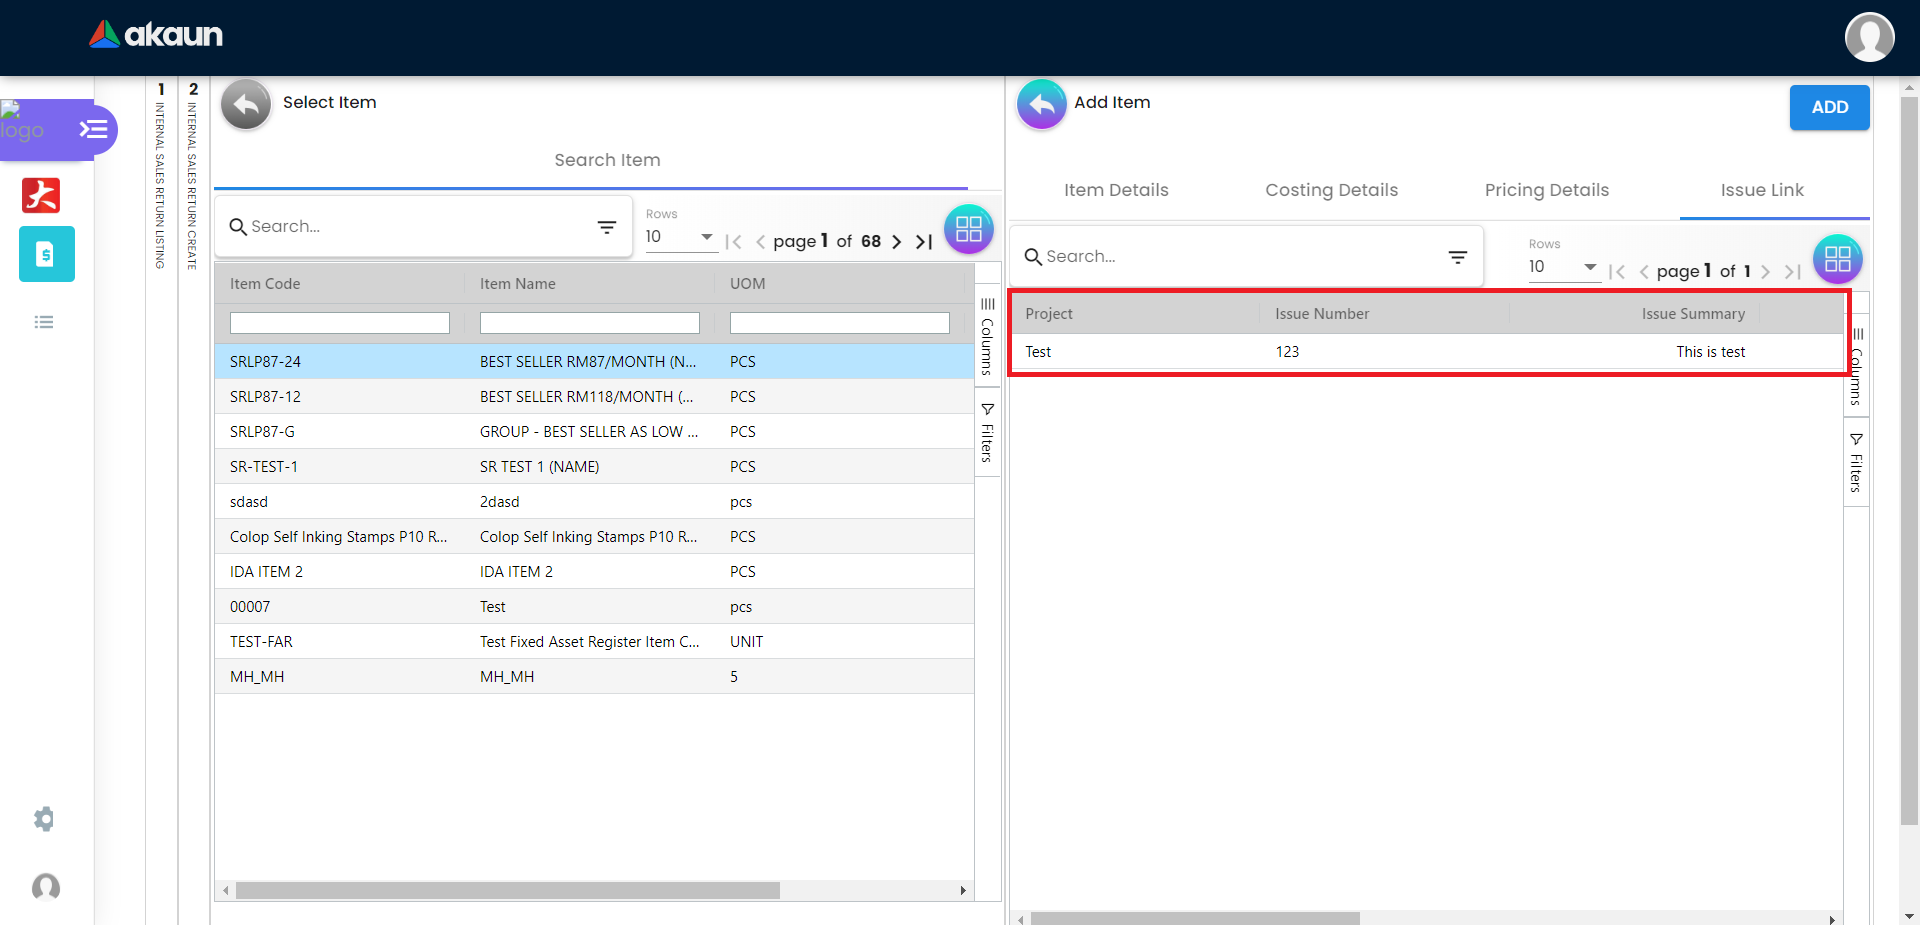
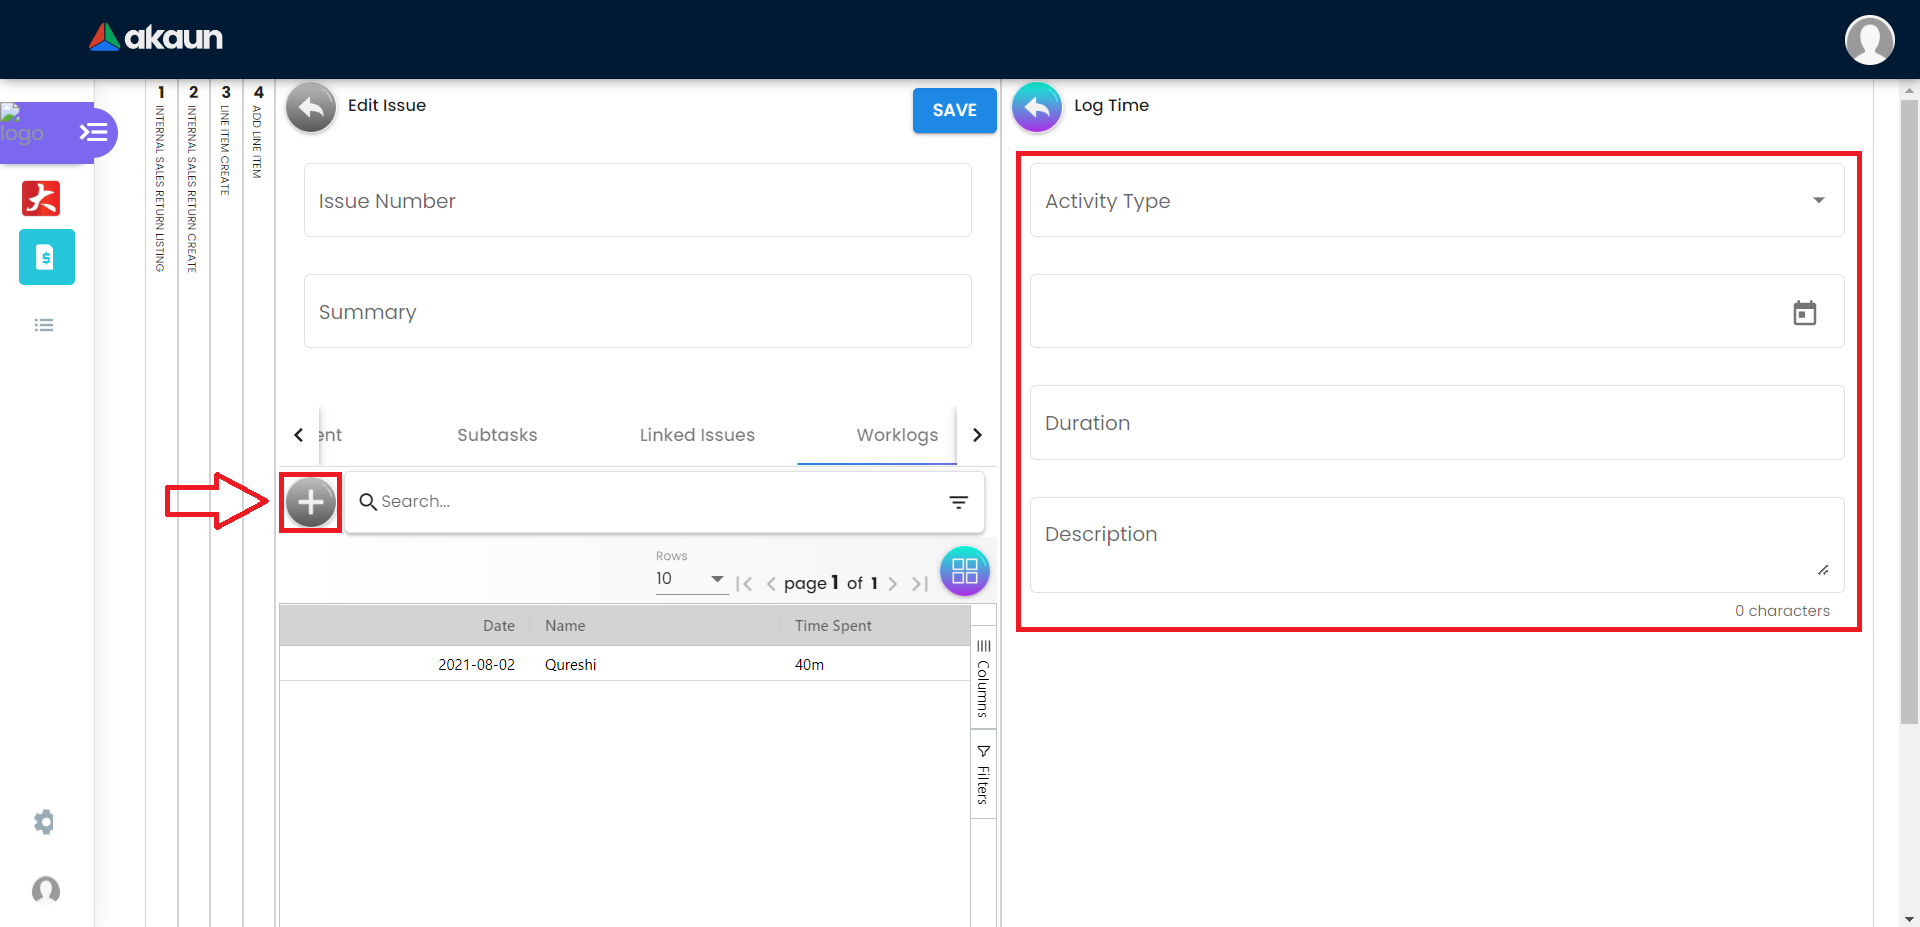
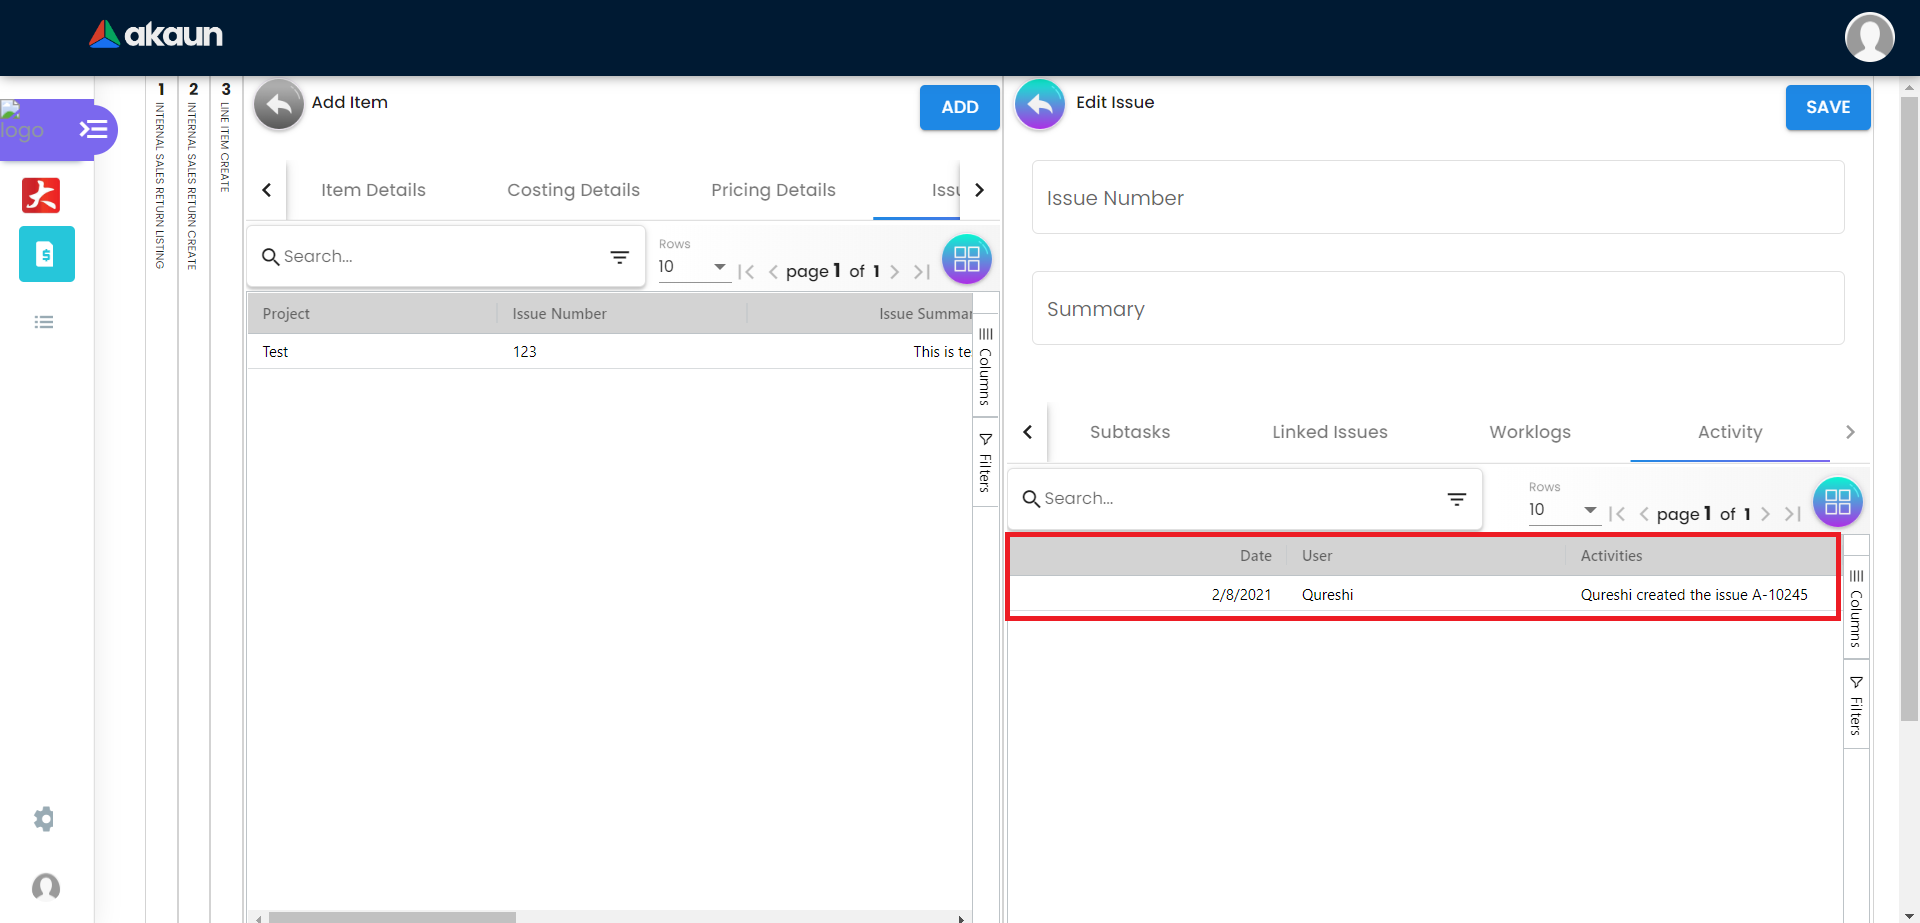
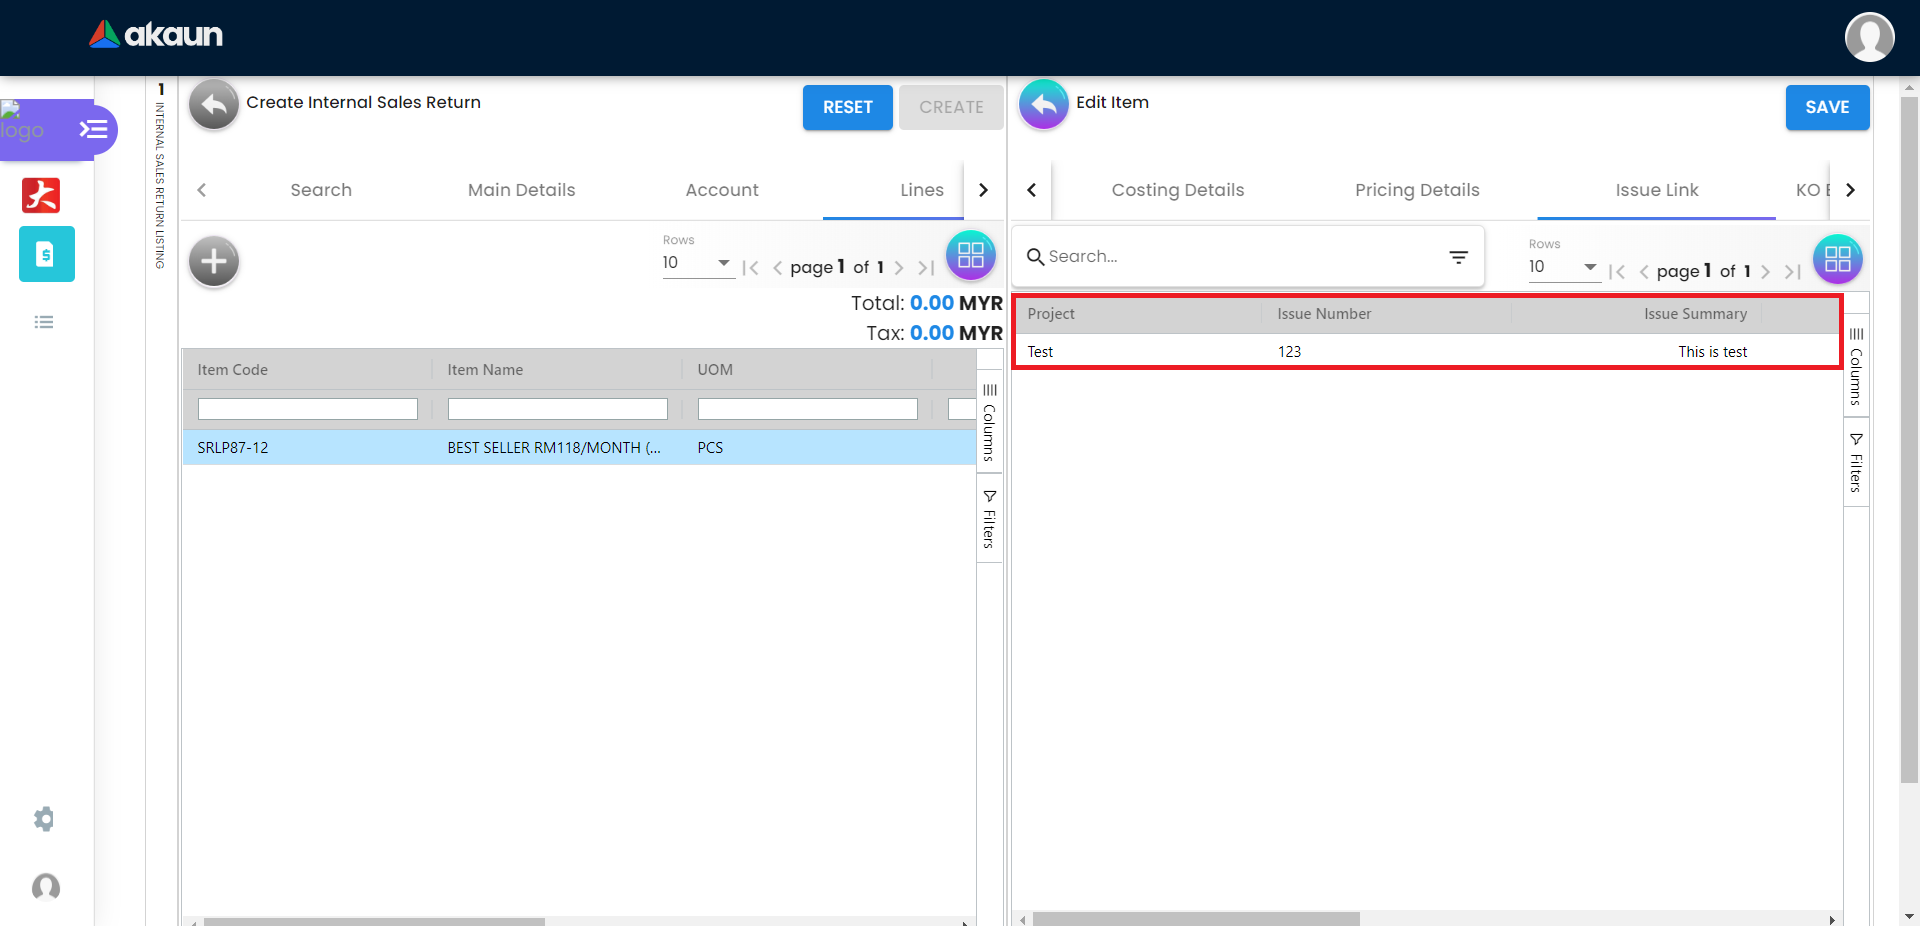
2.4.7 Issue Link Tab
-
Showing list of issue link
-
Contain project name, issue number and issue summary
-
A new Edit Issue column will be displayed on the right side when one of the issue link is clicked
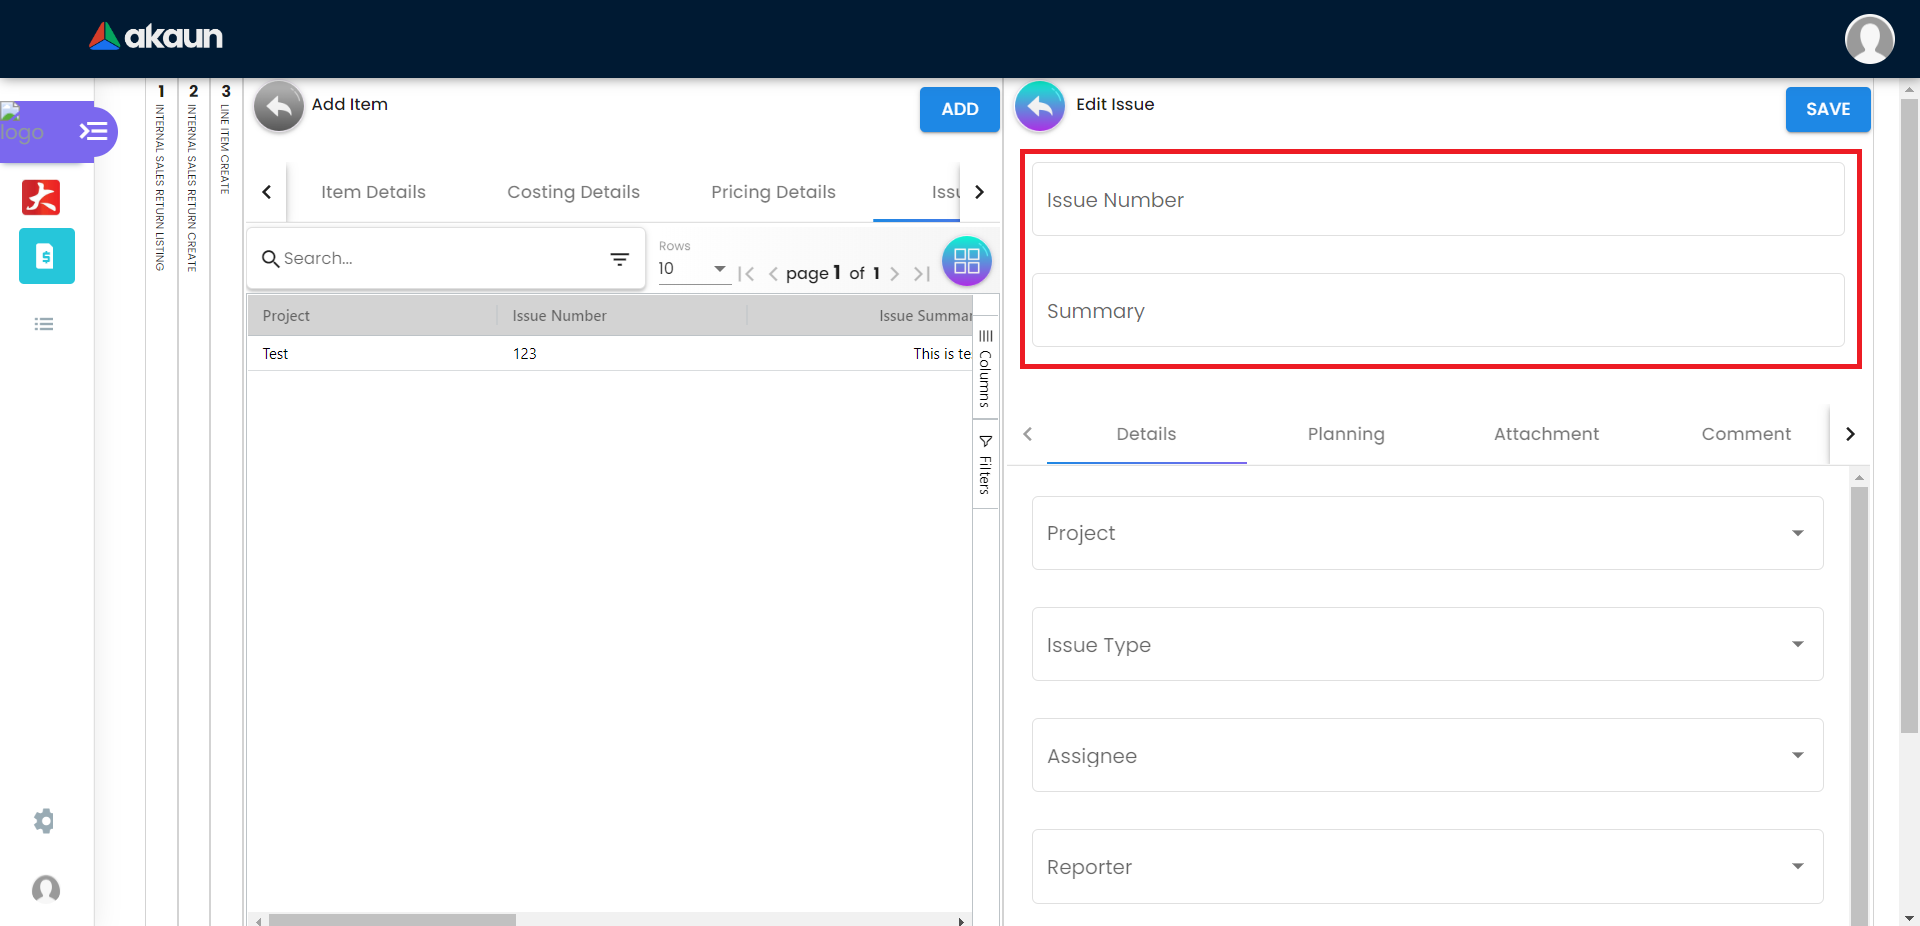
2.4.7.1 Edit Issue
In the Edit Issue, users can fill in fields of Issue Number and Summary
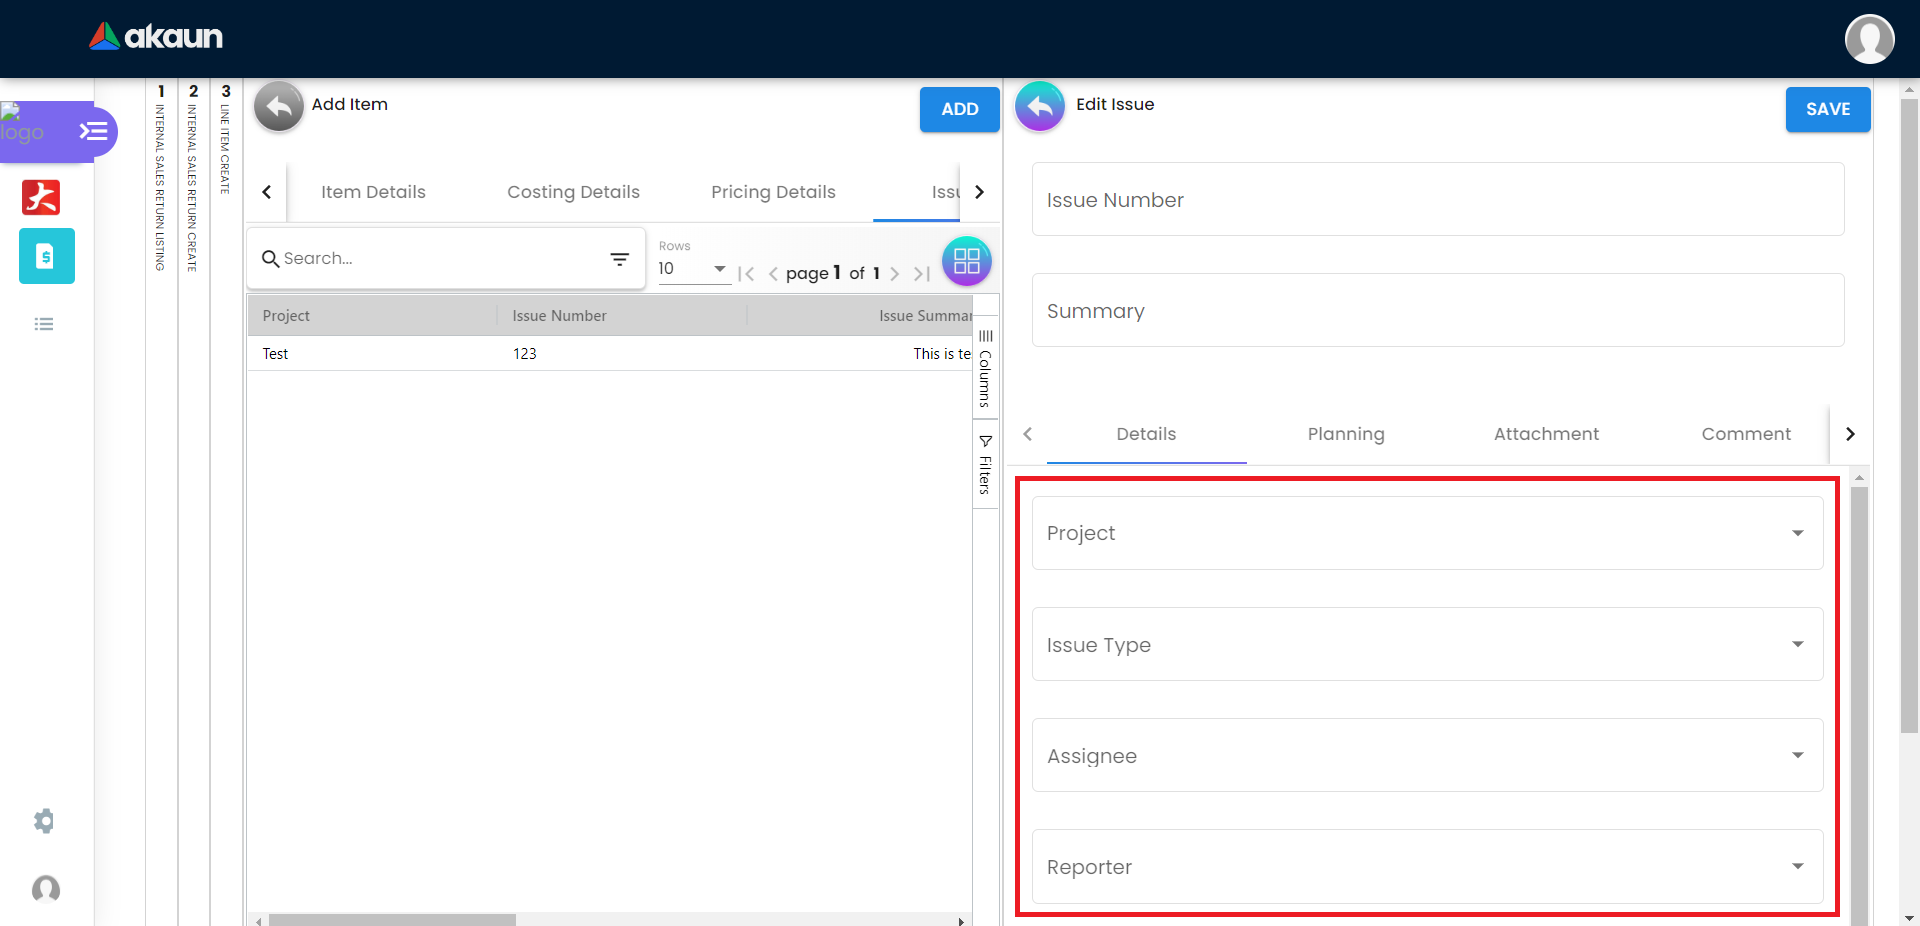
2.4.7.1.1 Details tab
Drop down field like Project. Issue Type, Assignee, Reporter, Summary, Description, Parent and Created Date are selectable

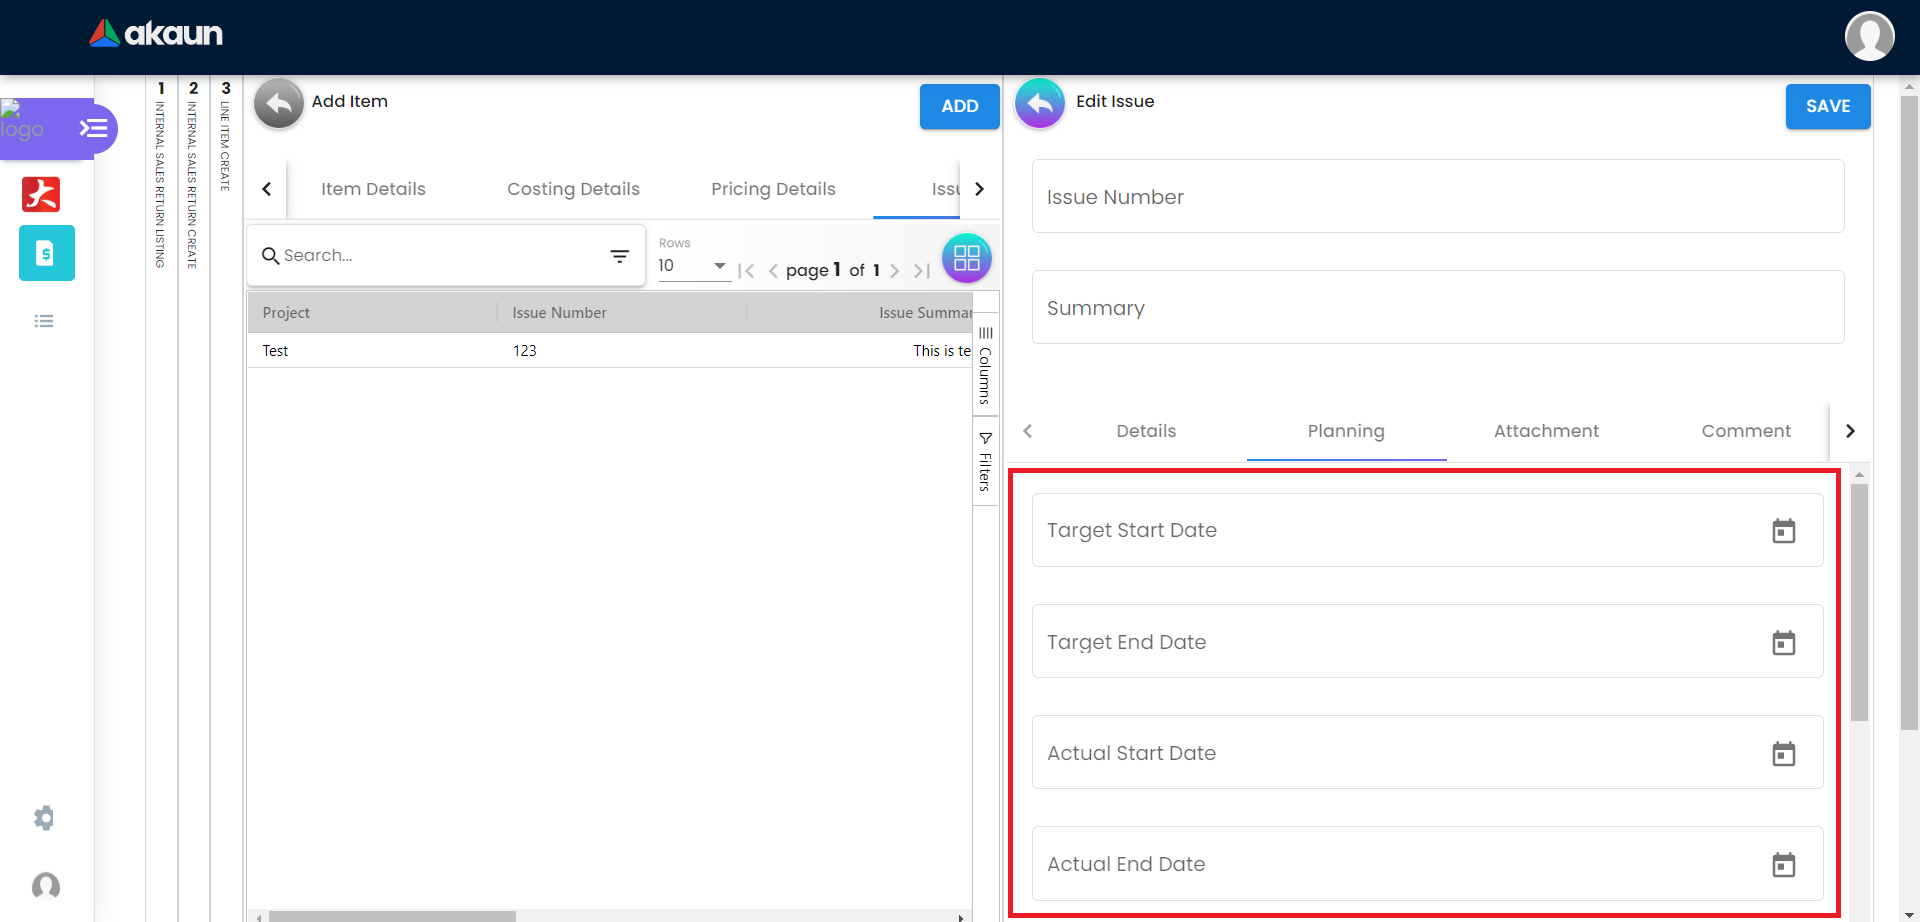
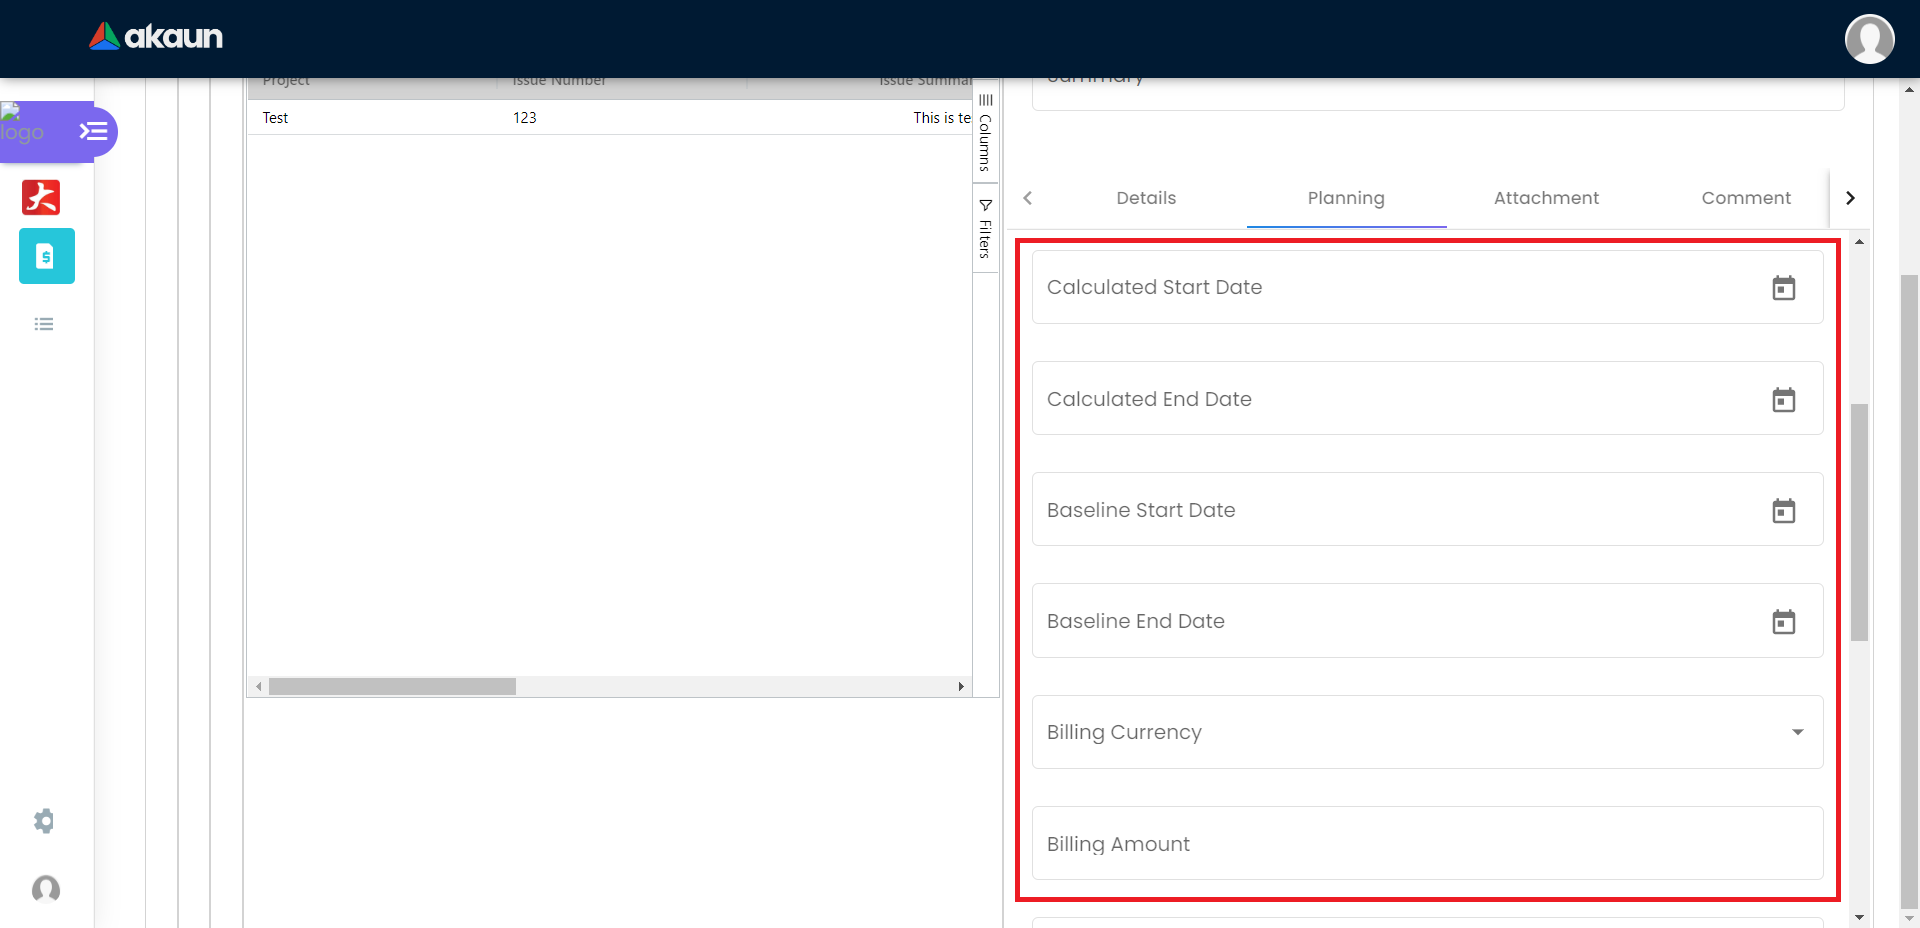
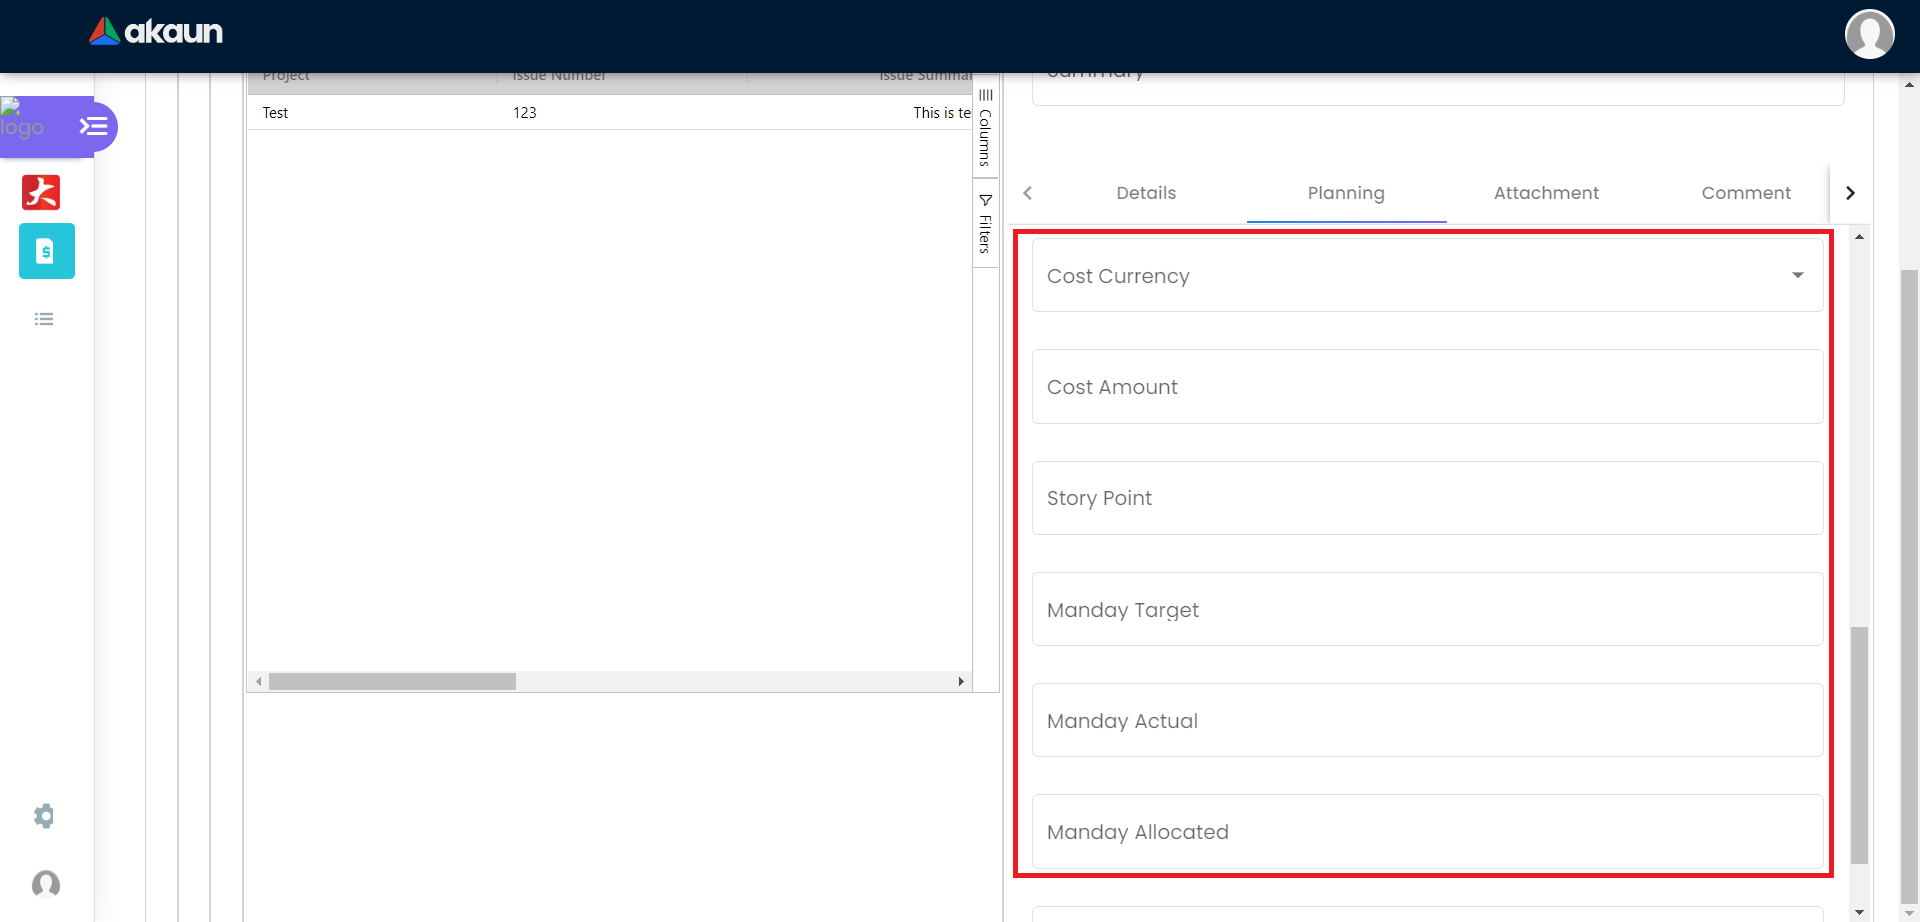
2.4.7.1.2 Planning tab
The fields such as Target Start Date, Target End Date, Actual Start Date, Actual End Date, Calculated Start Date, Calculated End Date, Baseline Start Date, Baseline End Date, Billing Currency, Billing Amount, Cost Currency, Cost Amount, Story Point, Manday Target, Manday Allocated and Manday Billing can be filled.


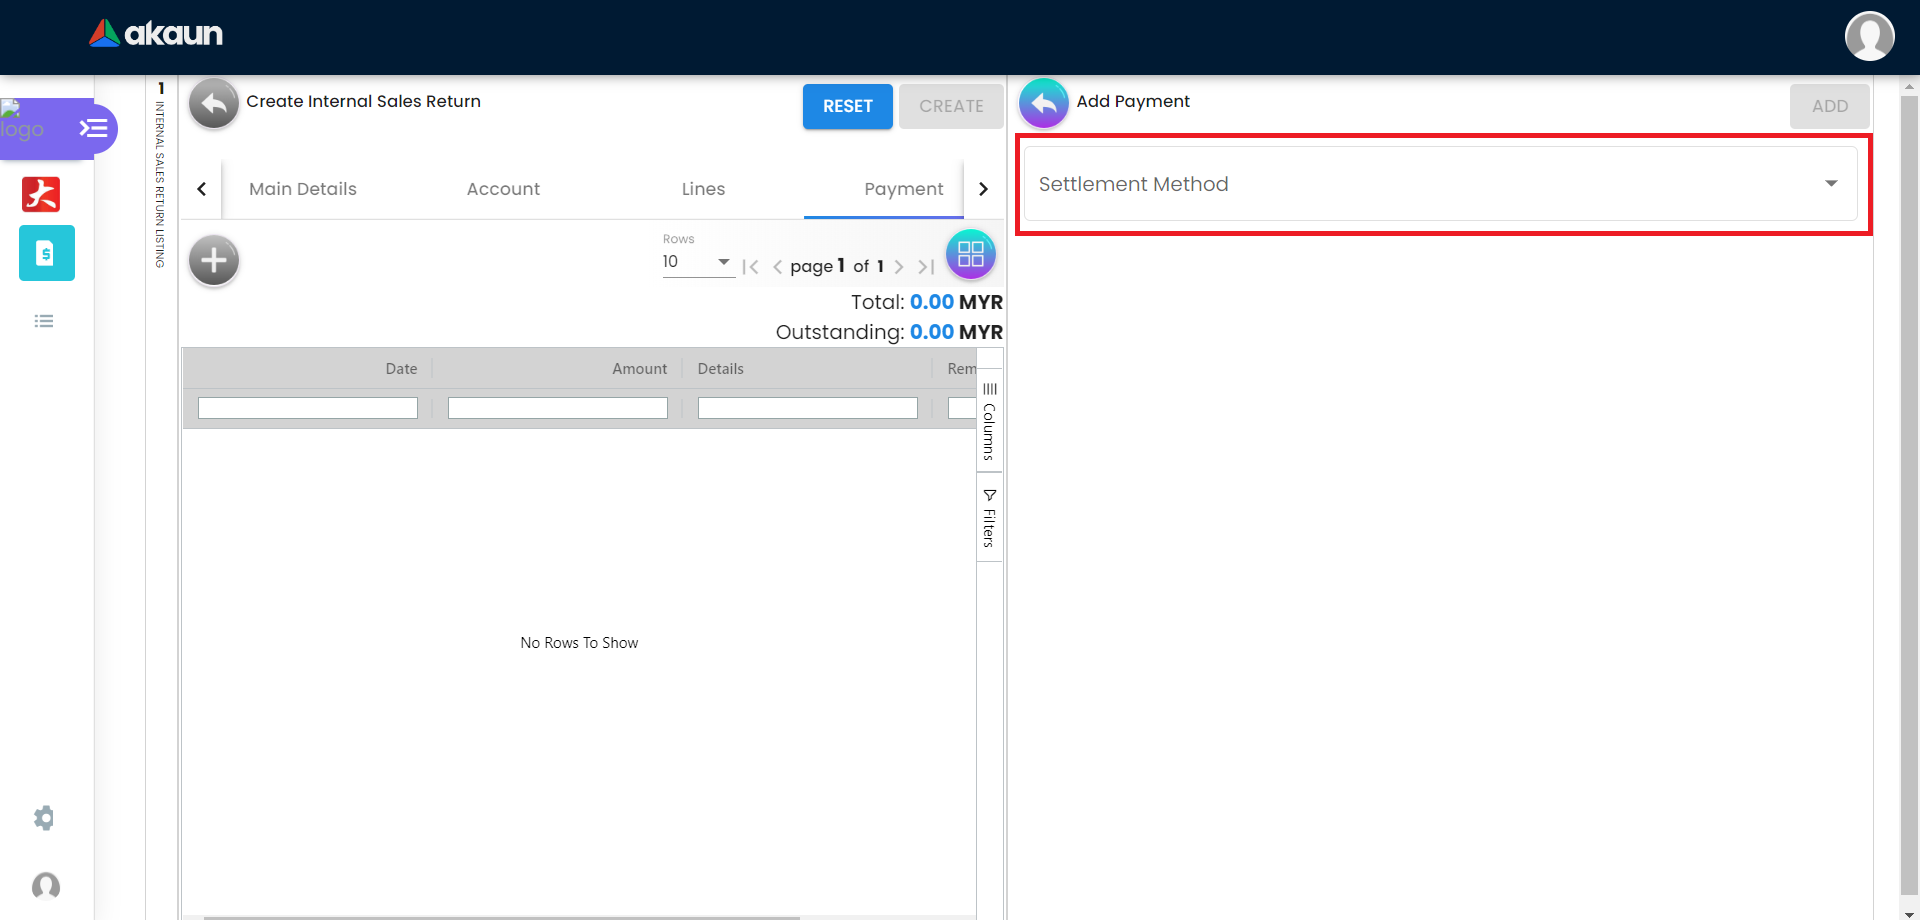
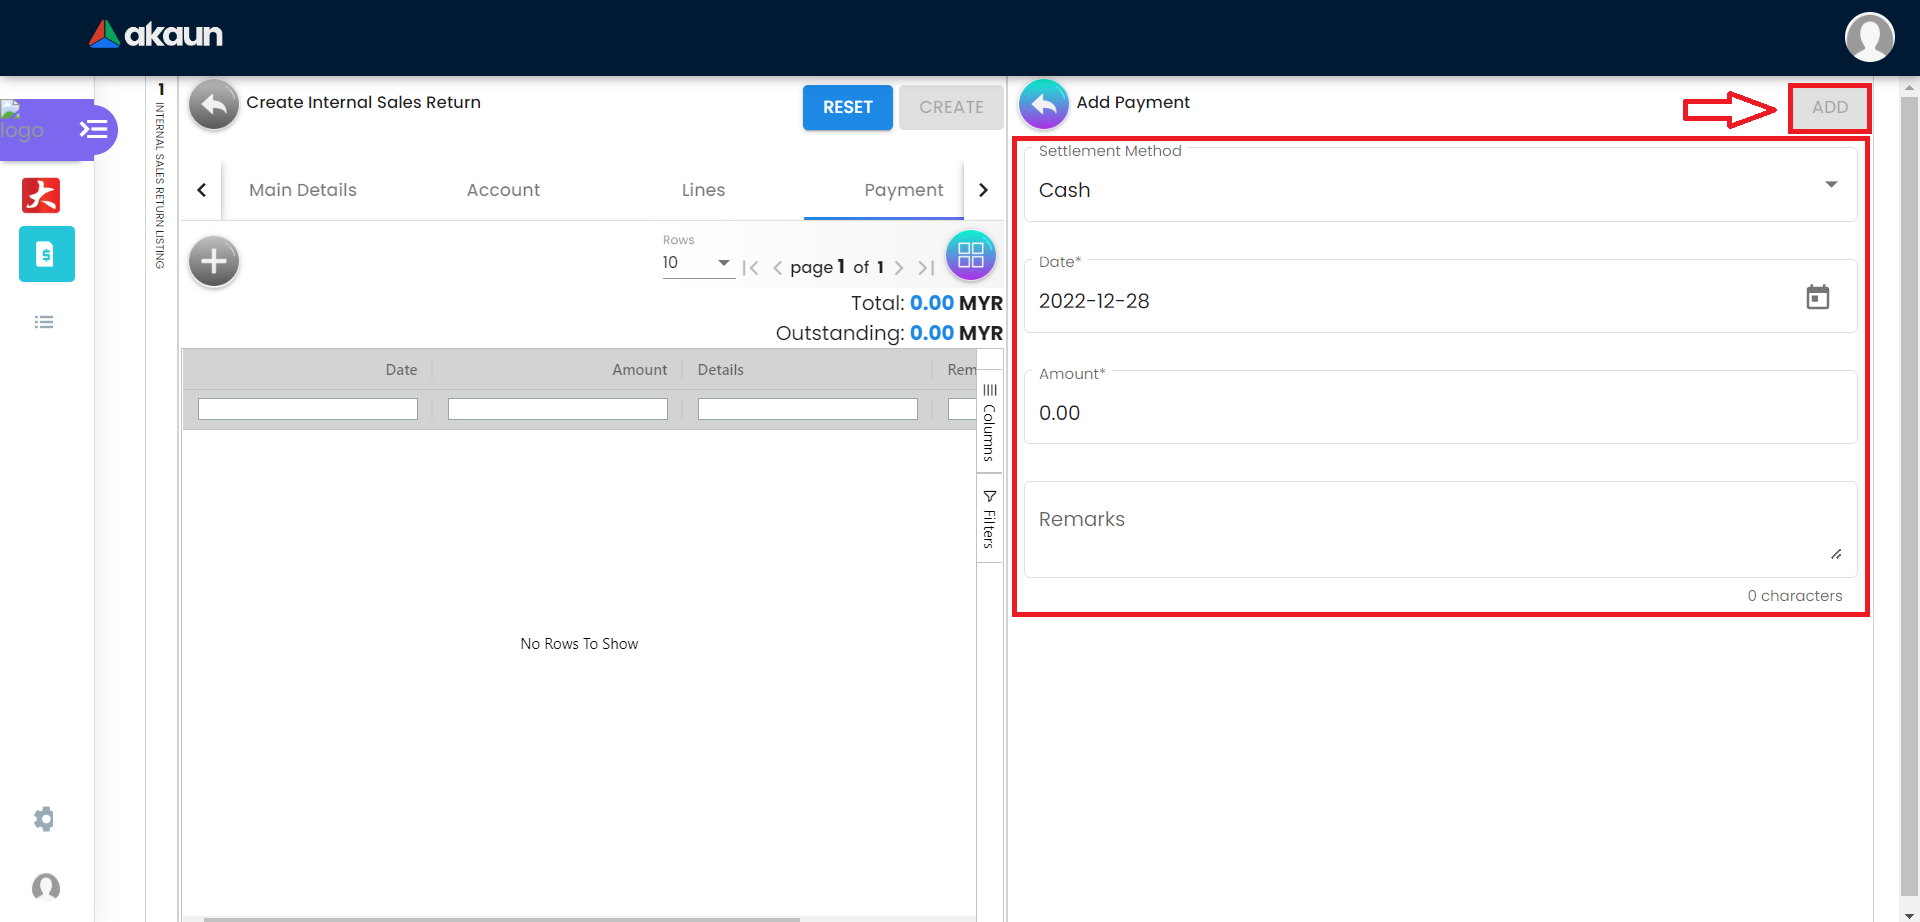
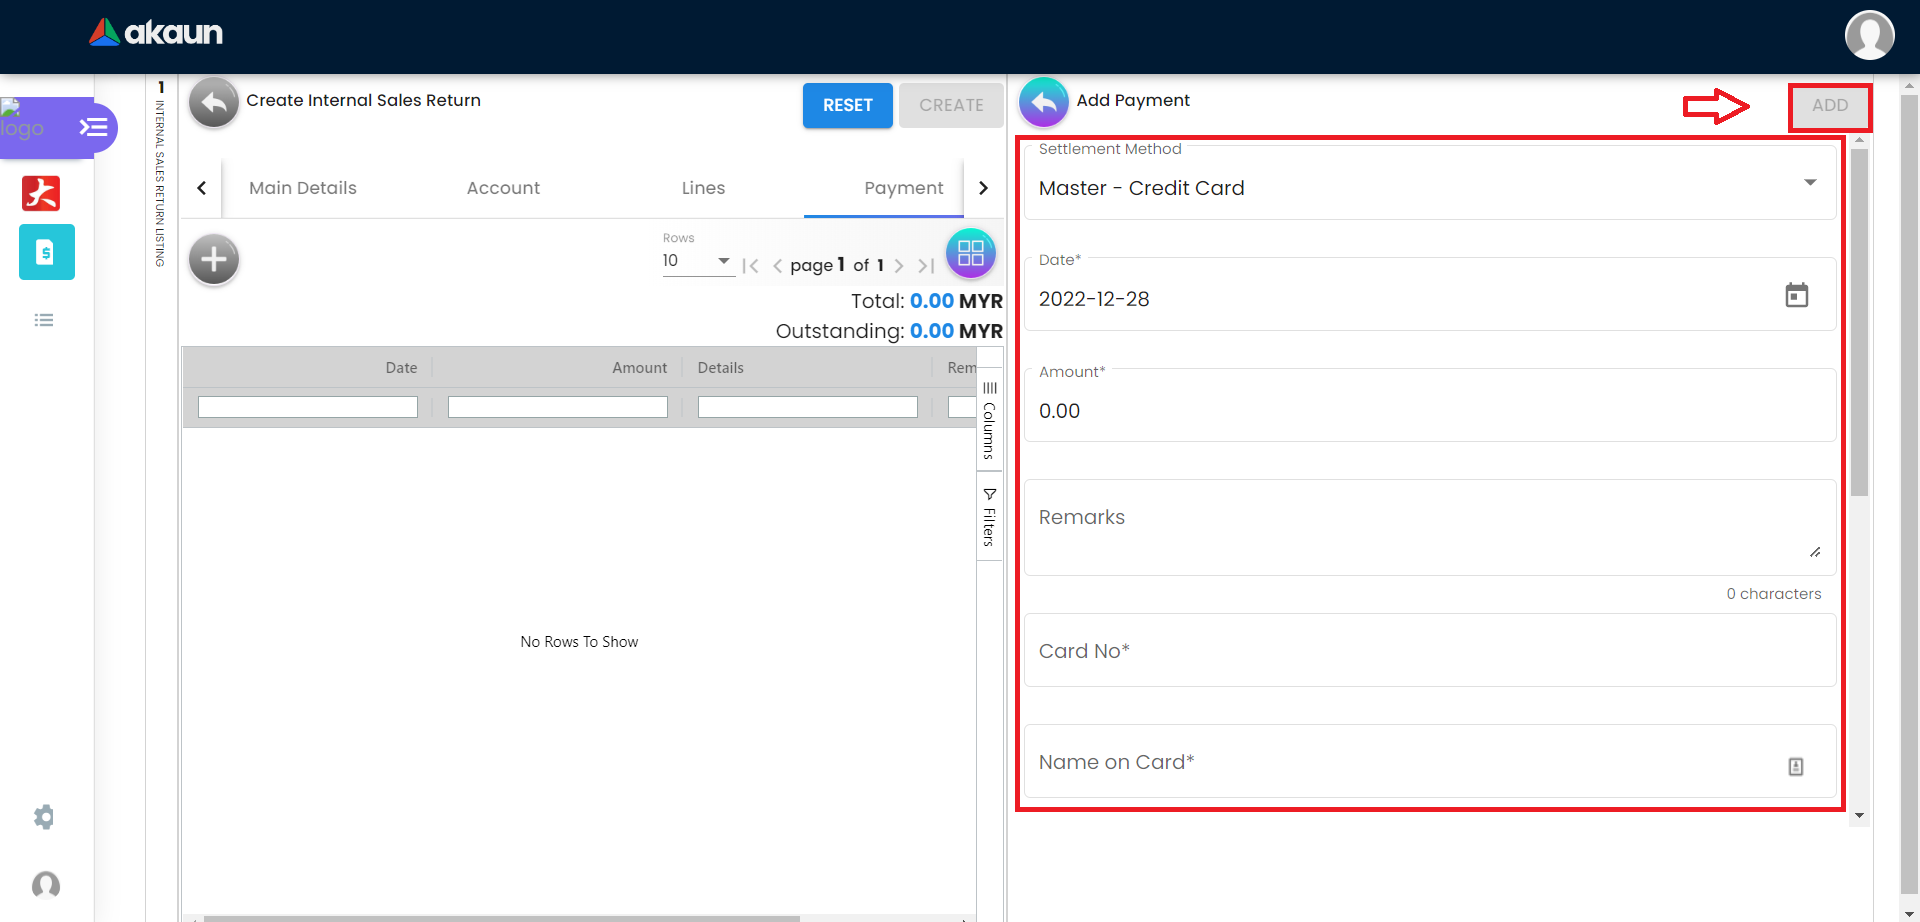
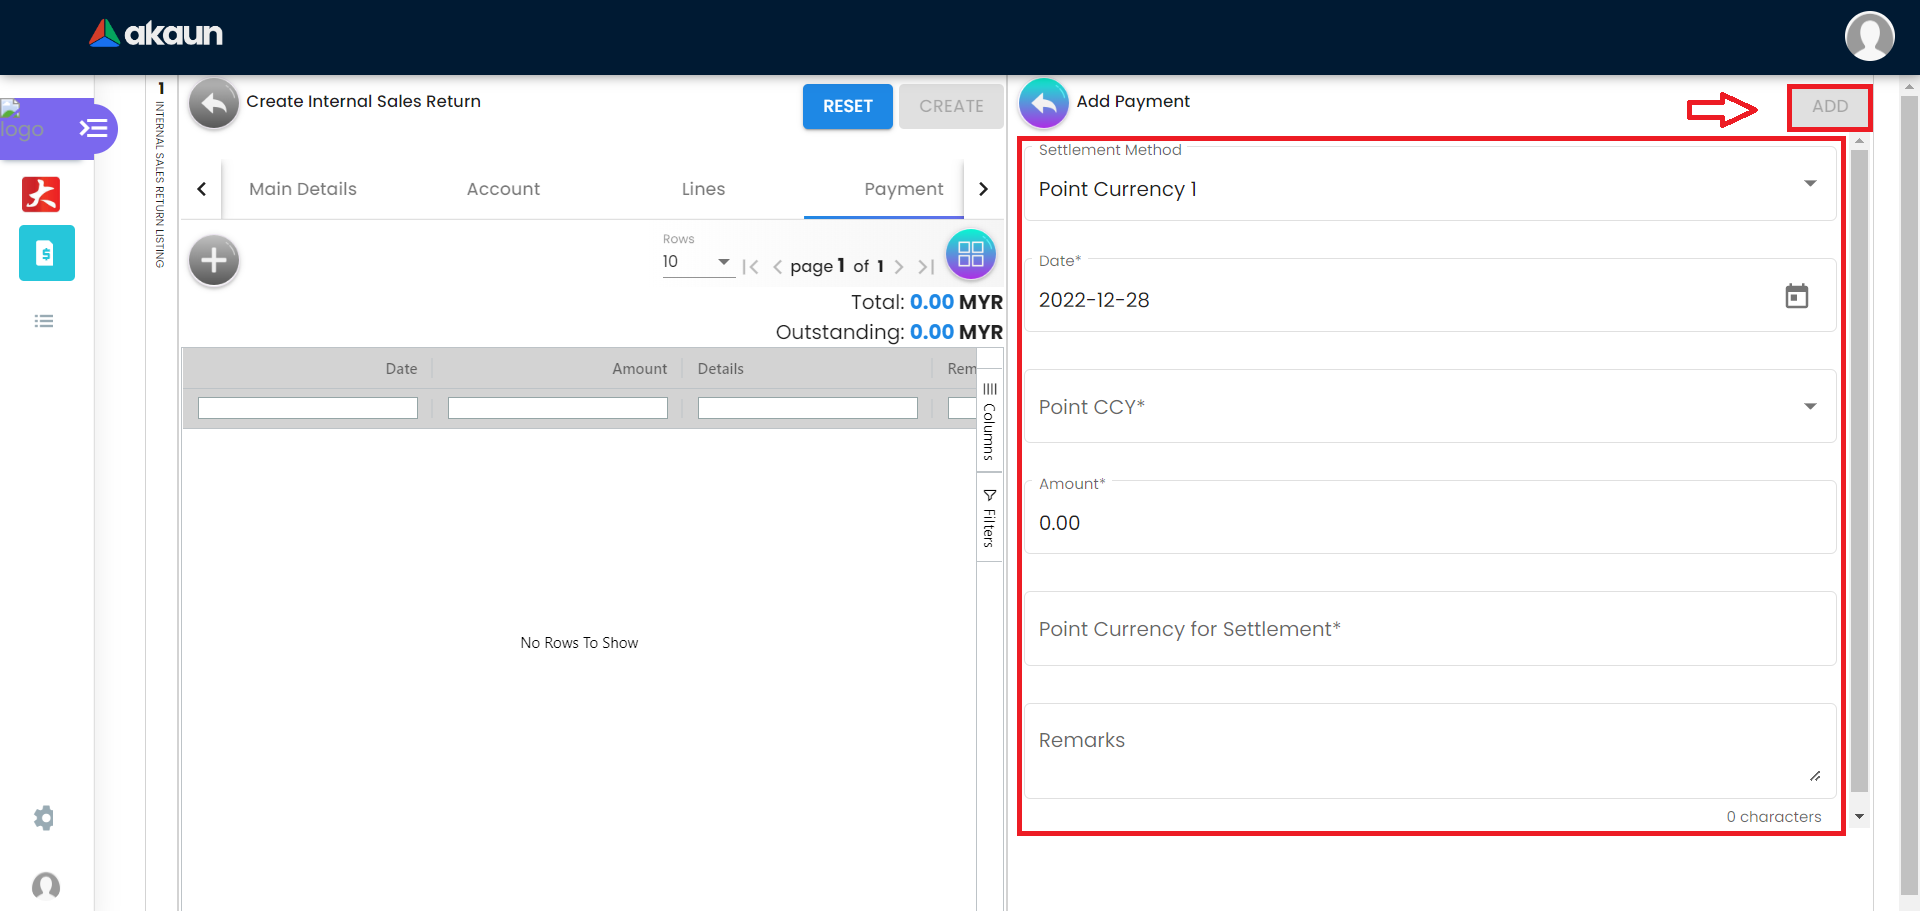
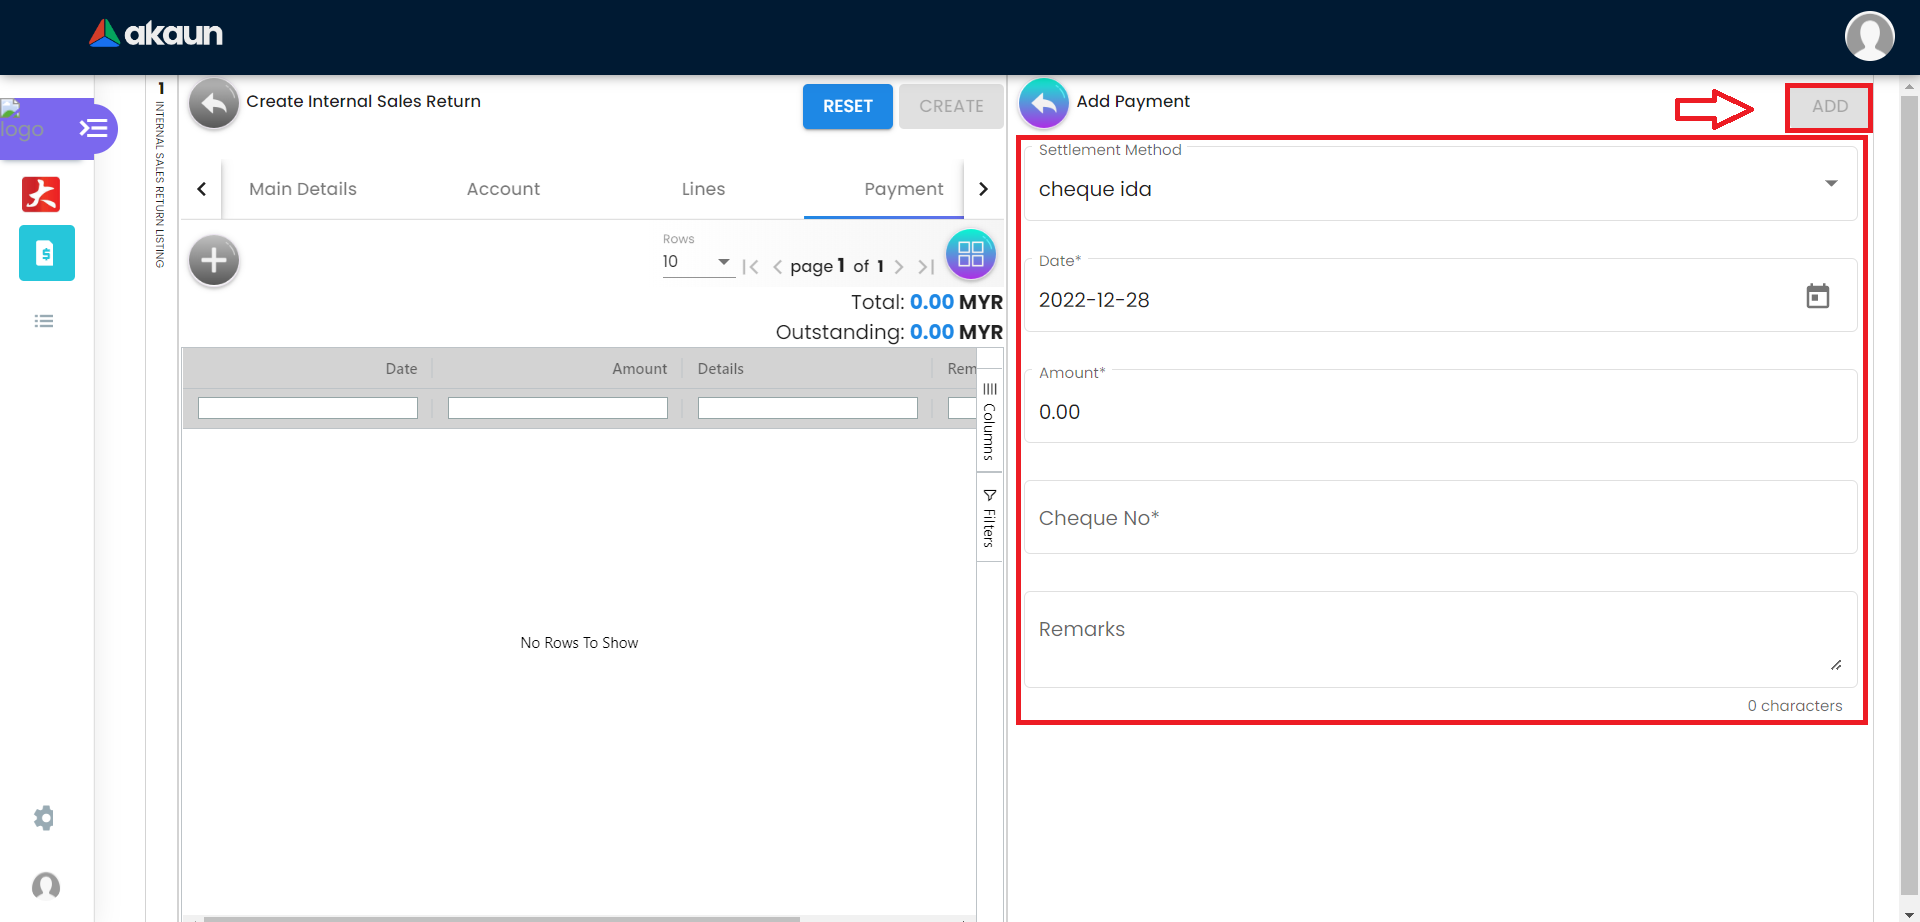
2.6 Payment Tab
Please click the ‘+’ button to add a new payment.
-
Can add different payment method such as Cash, Credit Card, Membership Point Currency, Voucher and Cheque
-
Can add a new settlement method in the Cashbook Applet

2.6.1 Cash
Please fill in the compulsory fields such as Date, Amount.
Click on the ‘Add’ to add the settlement.
2.6.2 Voucher
Please fill in the compulsory fields such as Voucher # and Amount.
Click on the ‘Add’ to add the settlement.

2.6.3 Credit Card
Please fill in the compulsory fields such as Date, Amount, Credit Card No and Name on Card.
Click on the ‘Add’ to add the settlement.
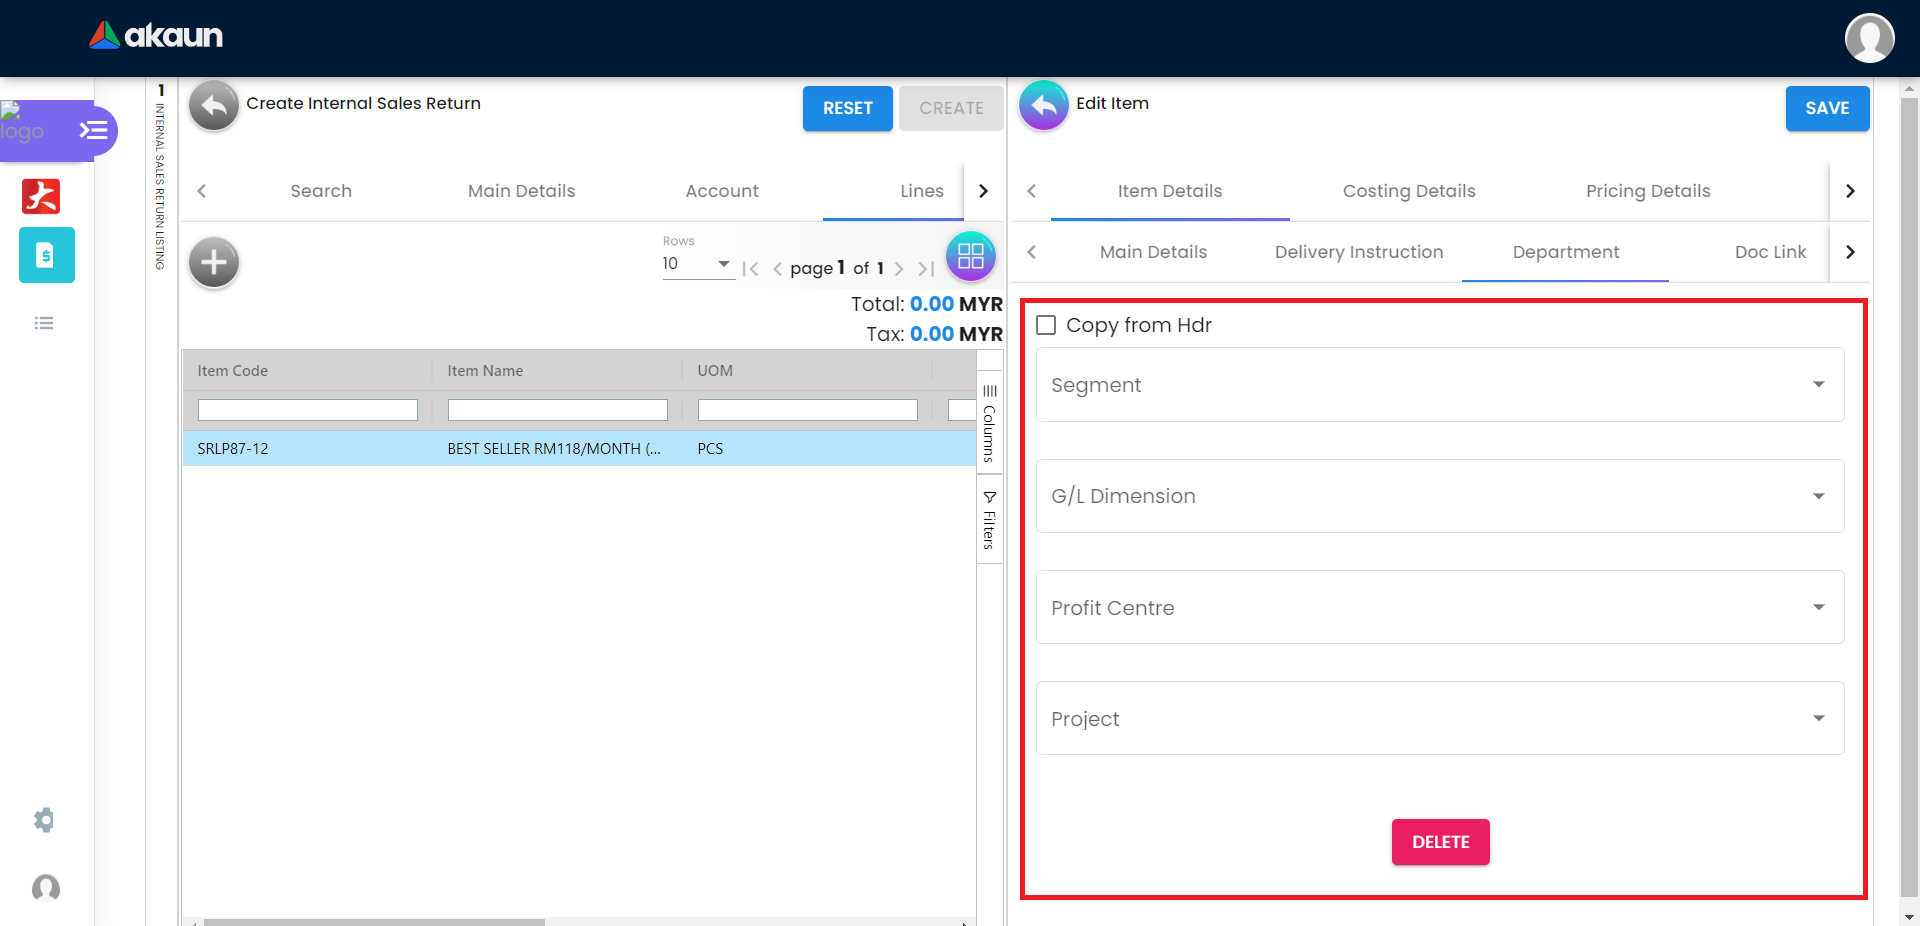
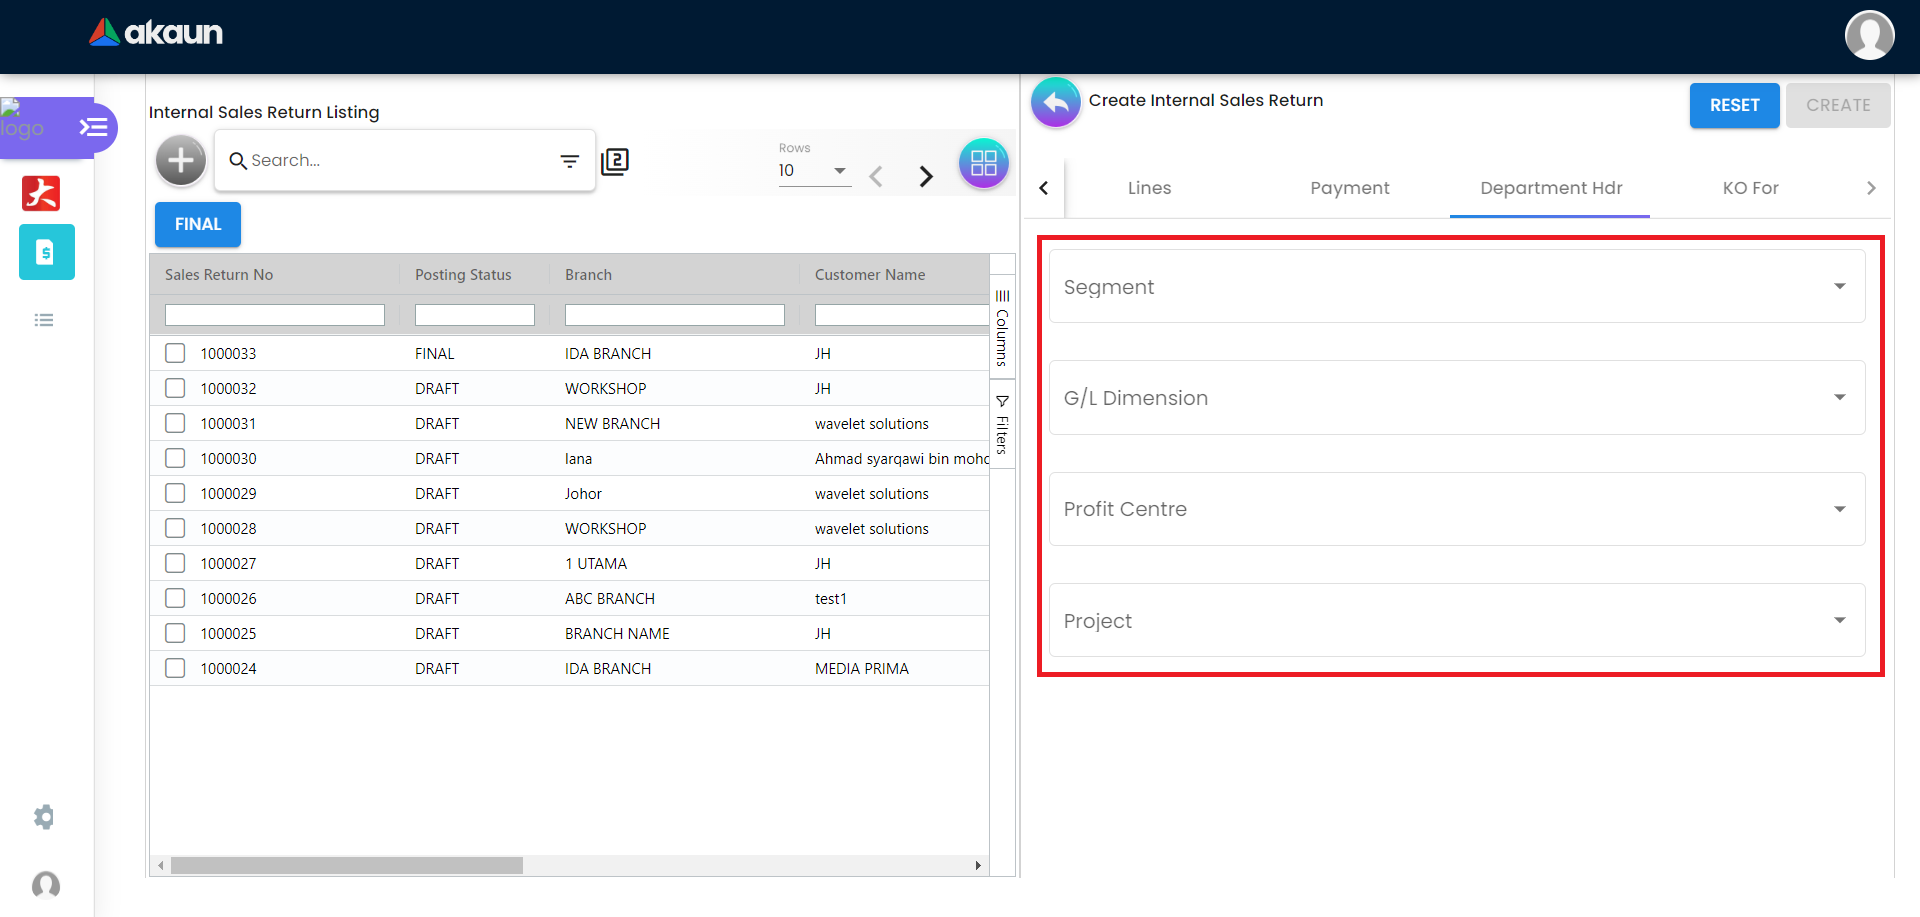
2.7 Department Hdr Tab
Can select Segment, G/L Dimension, Profit Centre and Project when creating Sales Return
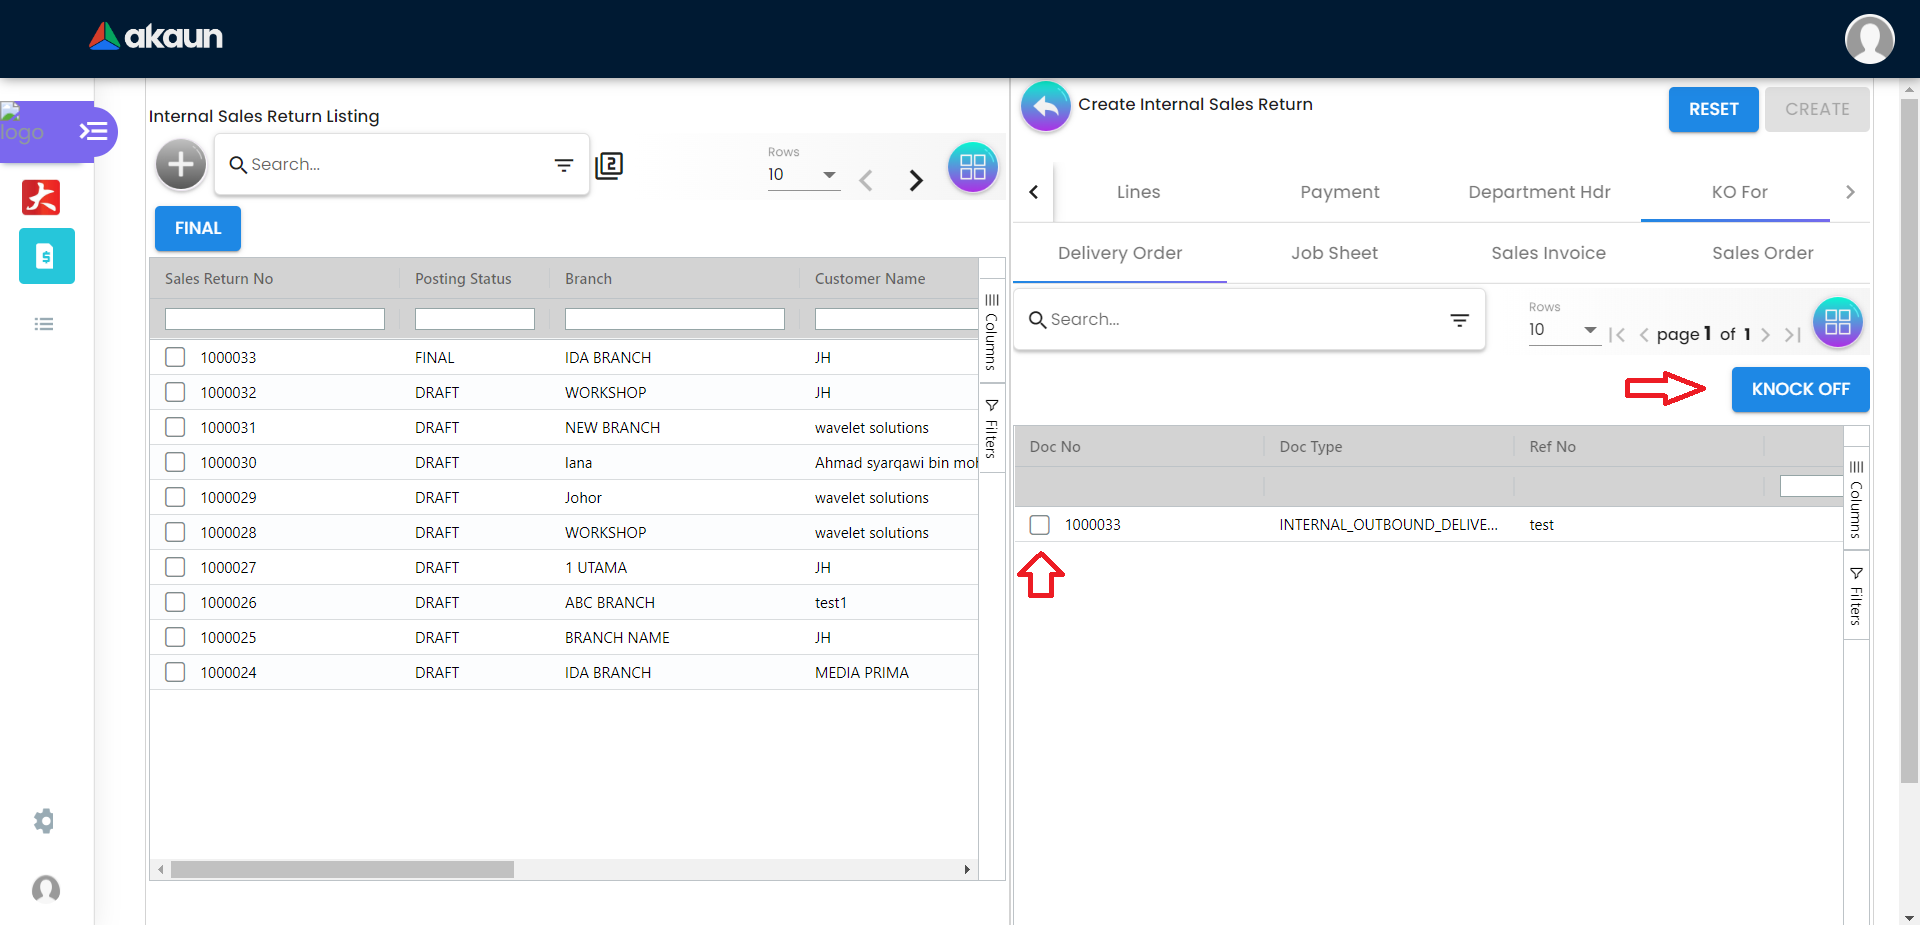
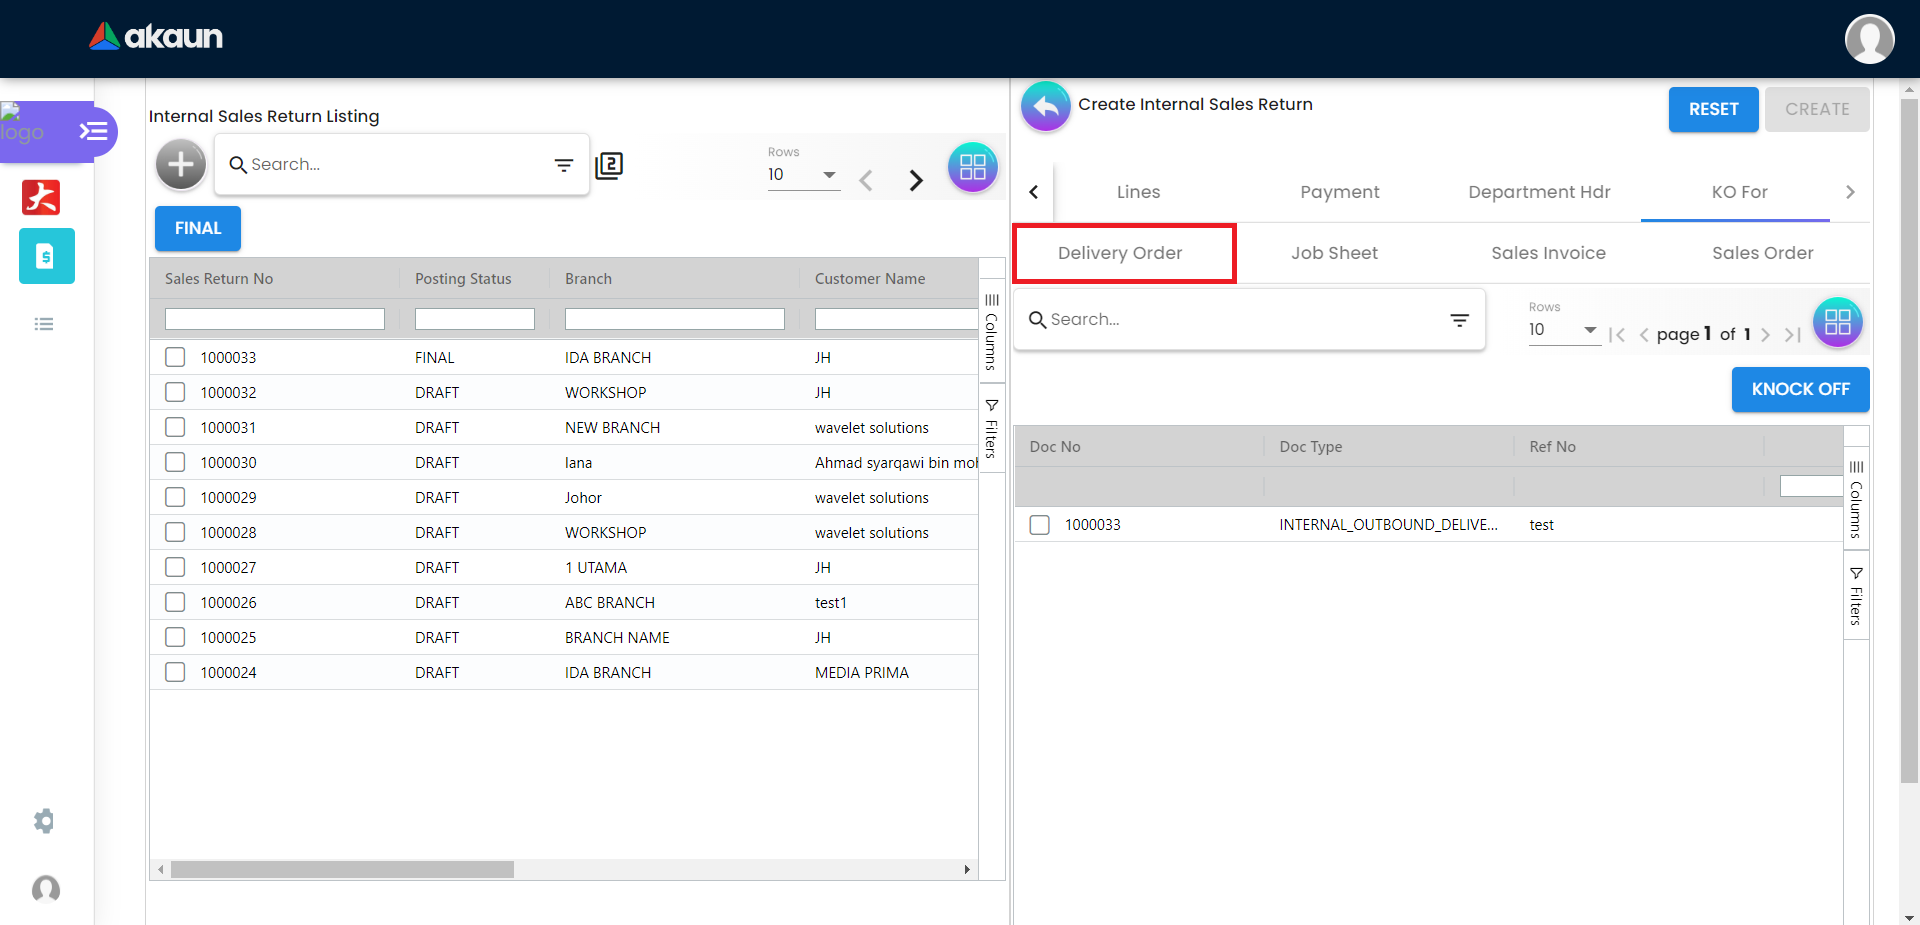
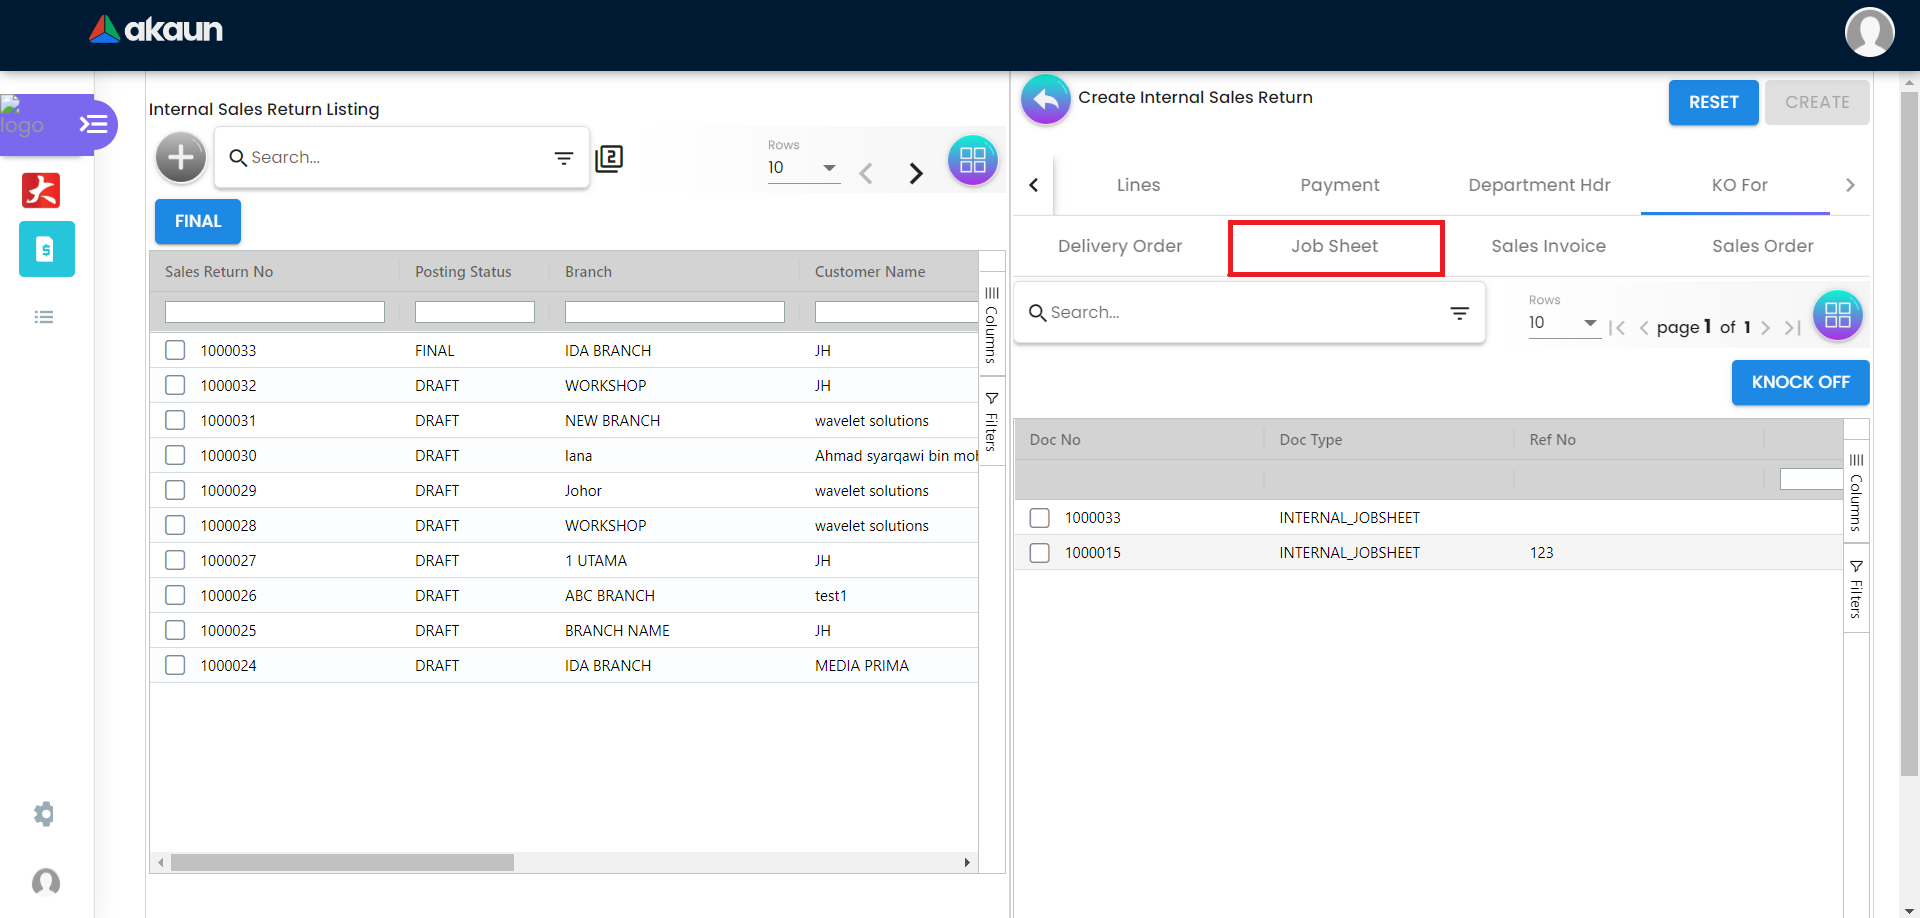
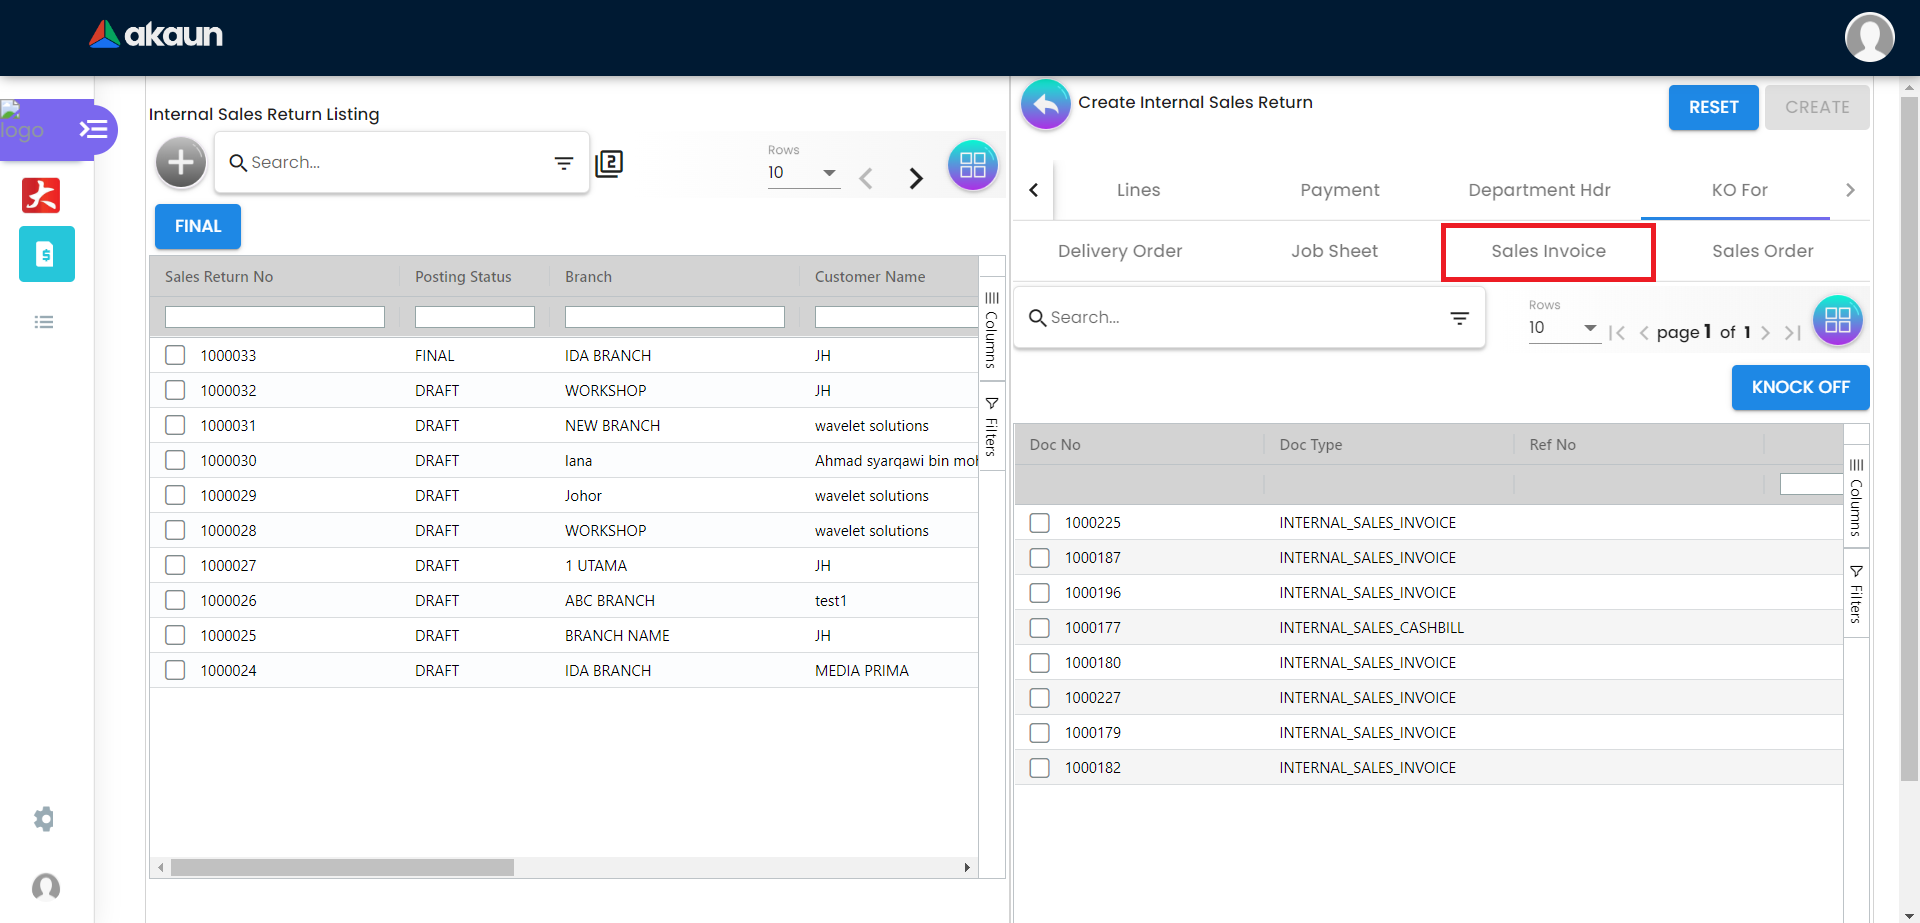
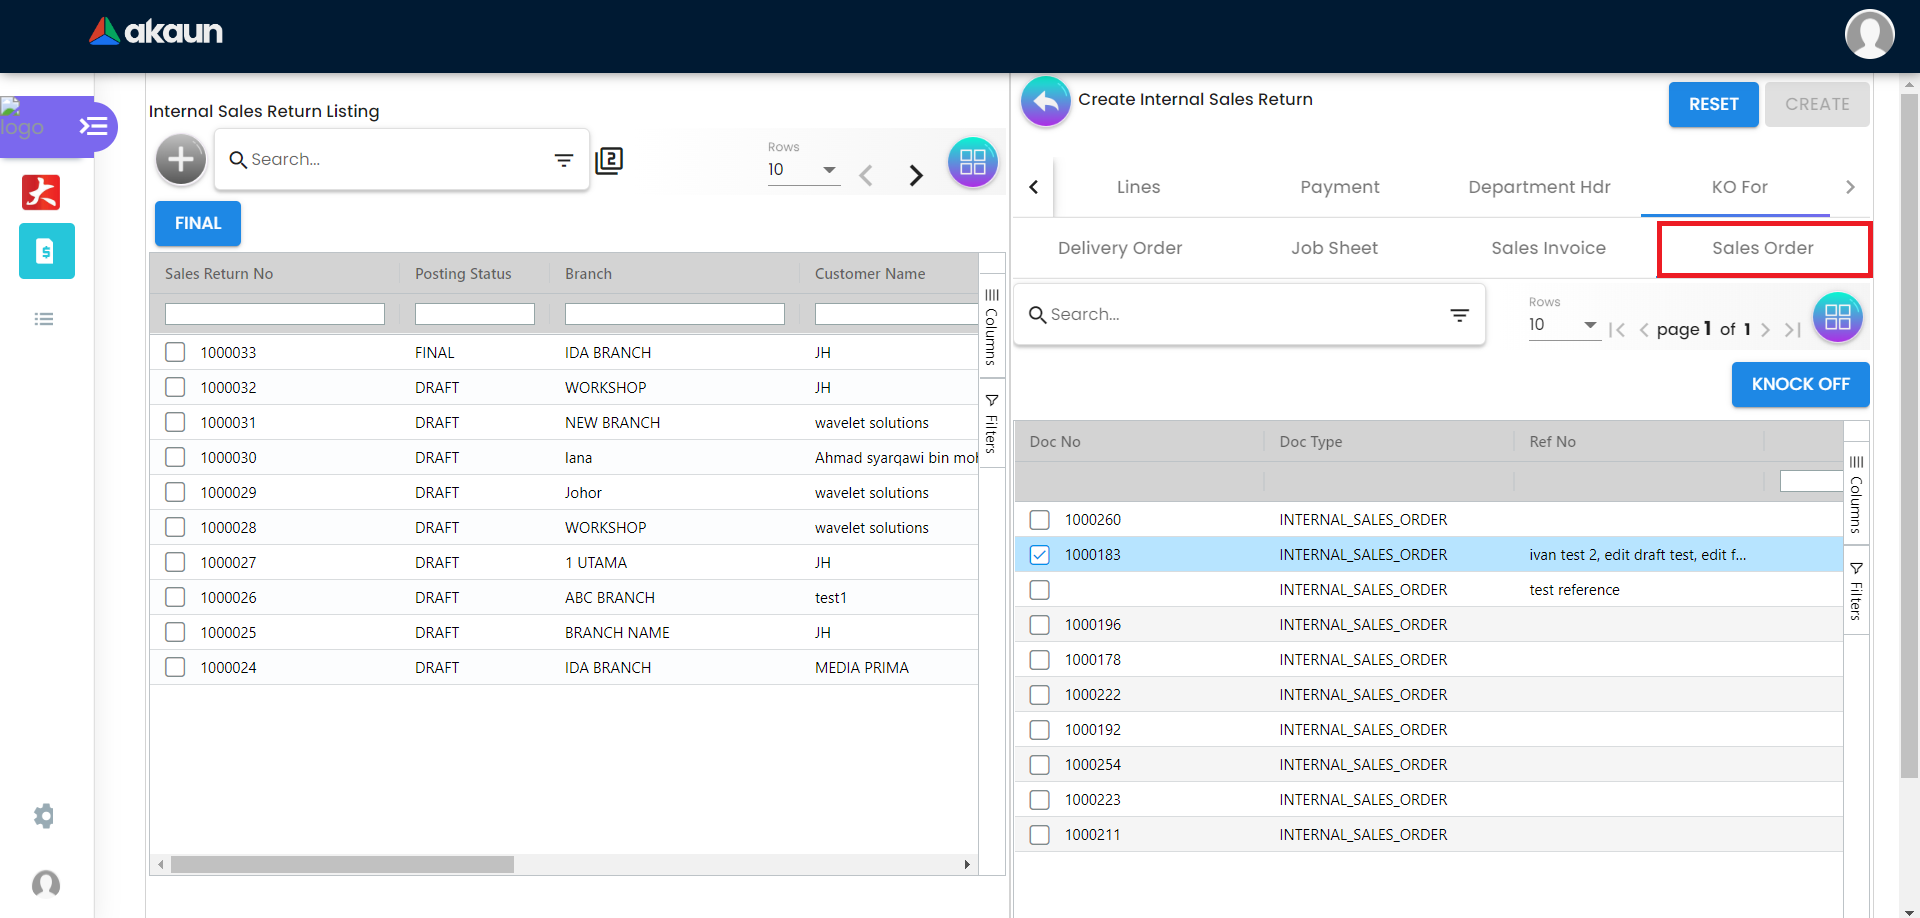
2.8 KO For Tab
Showing the item that the user can knock off.
Can choose to knock off for Delivery Order, Job Sheet, Sales Invoice and Sales Order.
Click on the tick box to select item that want to knock off.
Then Click on the ‘KNOCK OFF’.
A knock off is a copy of an original that sells for a considerably lower price.