2.0 Create Feature
2.1 Create Delivery Order
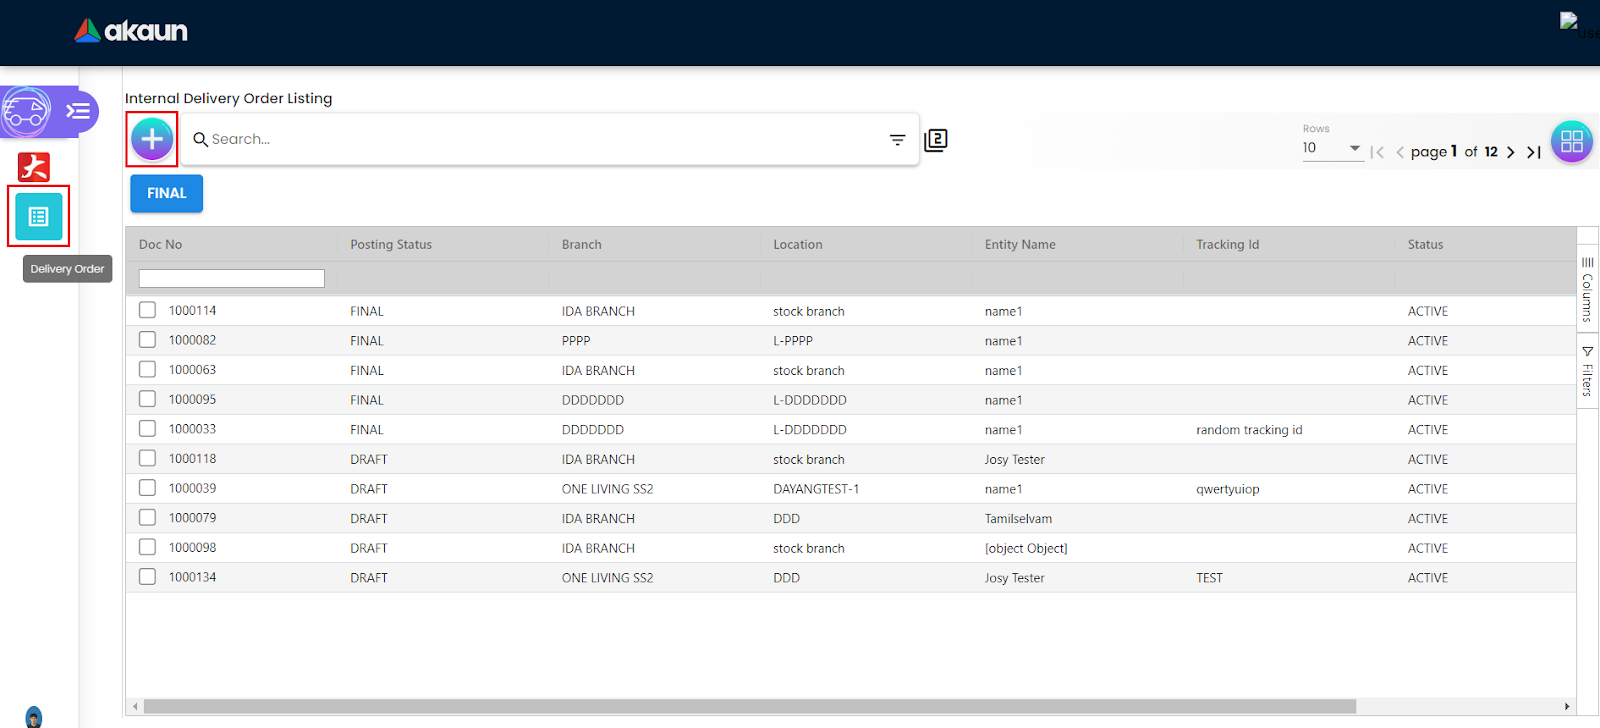
Users by default will land on the Delivery Order page, which can also be accessed by navigating to the sidebar on the left by clicking on the “Delivery Order” icon. The “+” icon represents the create button, which enables the user to create new delivery orders upon clicking it.
2.1.1 Main Details
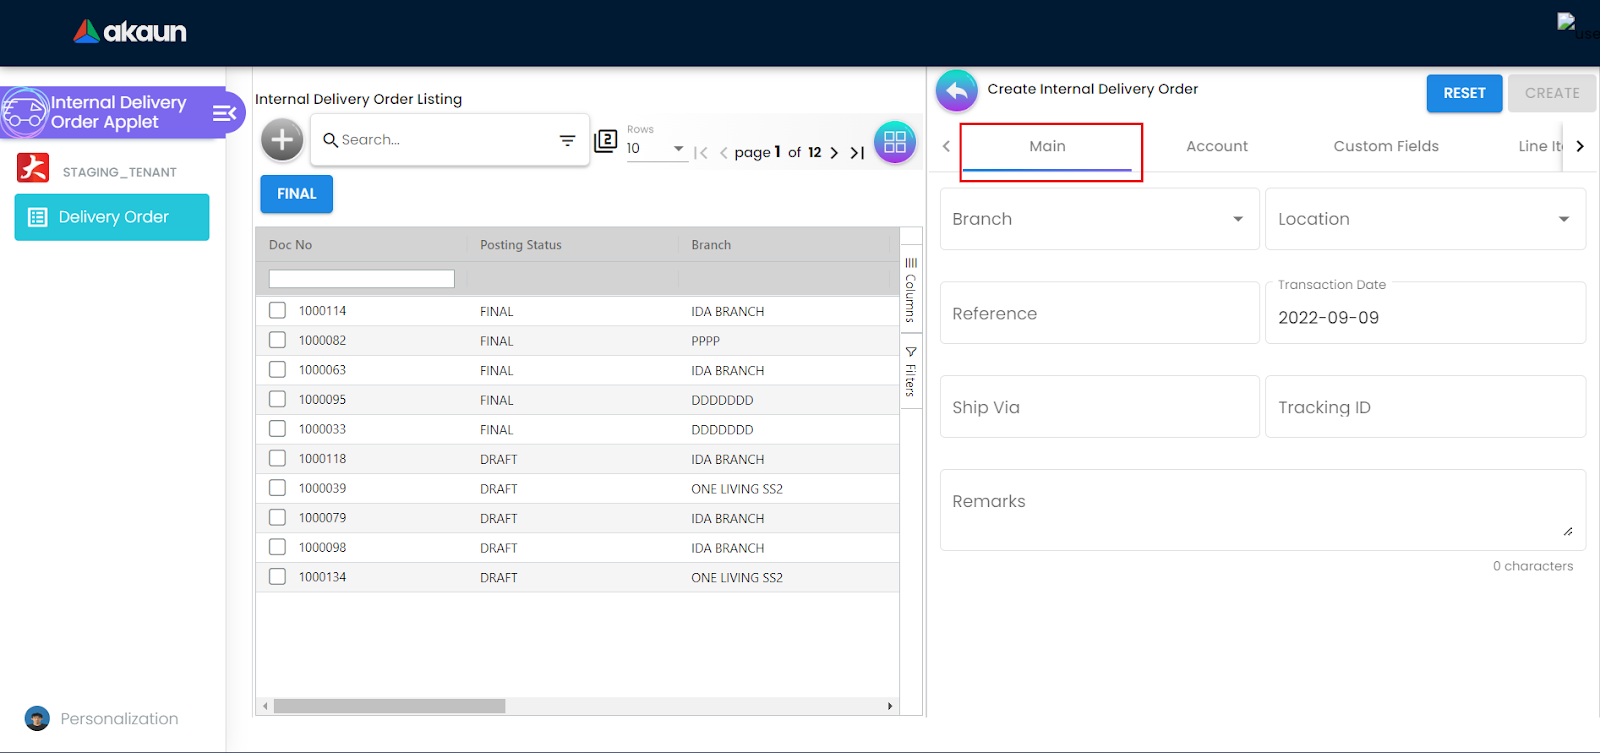
On the Main details of the tab of the Create Internal Delivery Order, users are required to select the Branch and its corresponding Location field in the drop down list to create a new delivery order. The Transaction Date field will be default set to the current date, and is not allowed for any changes. Users could also edit the following fields:
-
Reference
-
Ship Via
-
Tracking ID
-
Remarks
2.1.2 Account Details
2.1.2.1 Entity Details
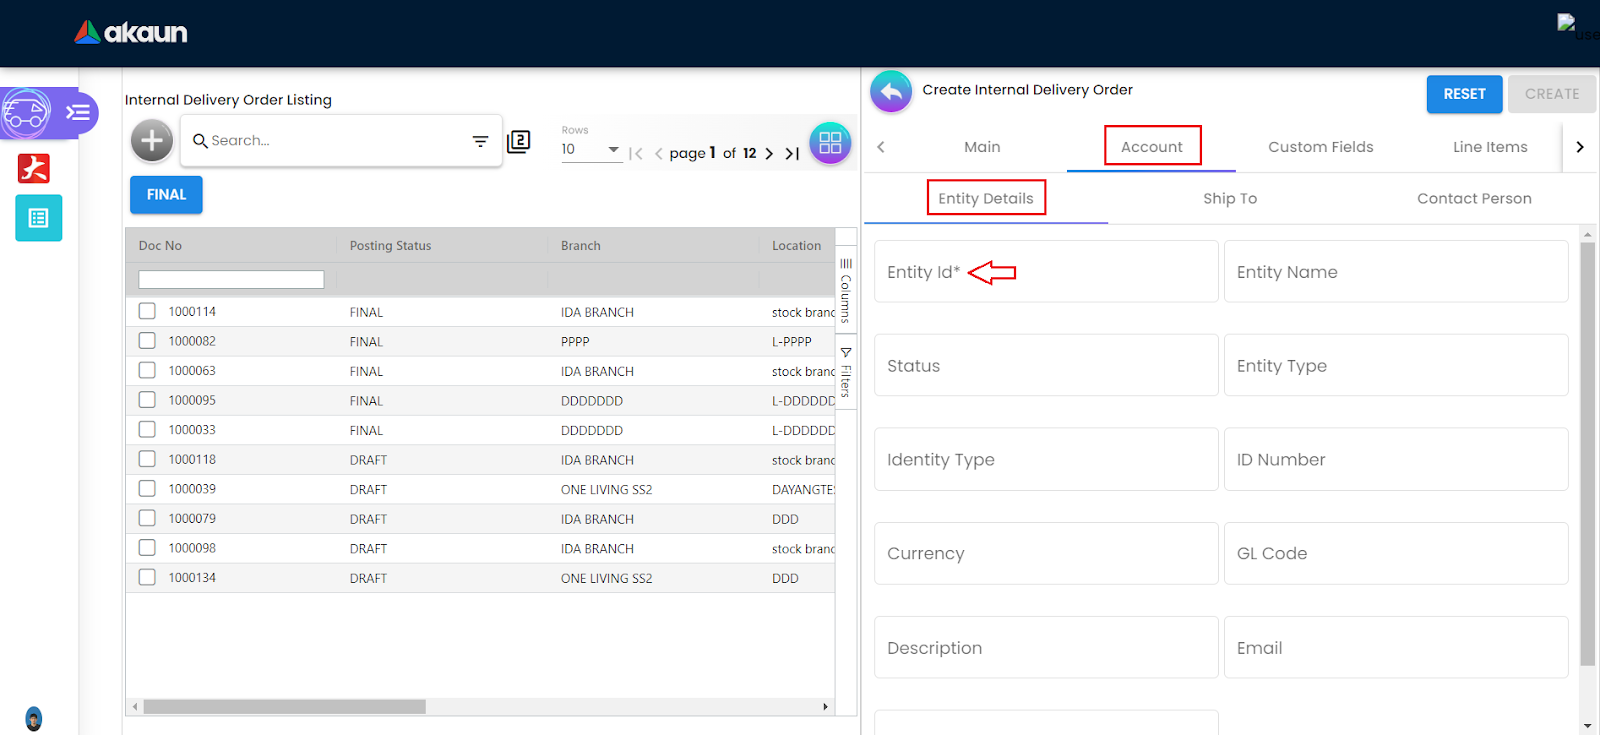
Users are able to navigate to the Entity Details by clicking on the Account tab. Fields marked with a “*” sign indicates that the particular field is required to be filled, and will not be allowed for any modifications once the order has been finalized:
-
Entity ID
To ADD or CREATE an entity, the user needs to click on the Entity ID* field based on the arrow indicated.
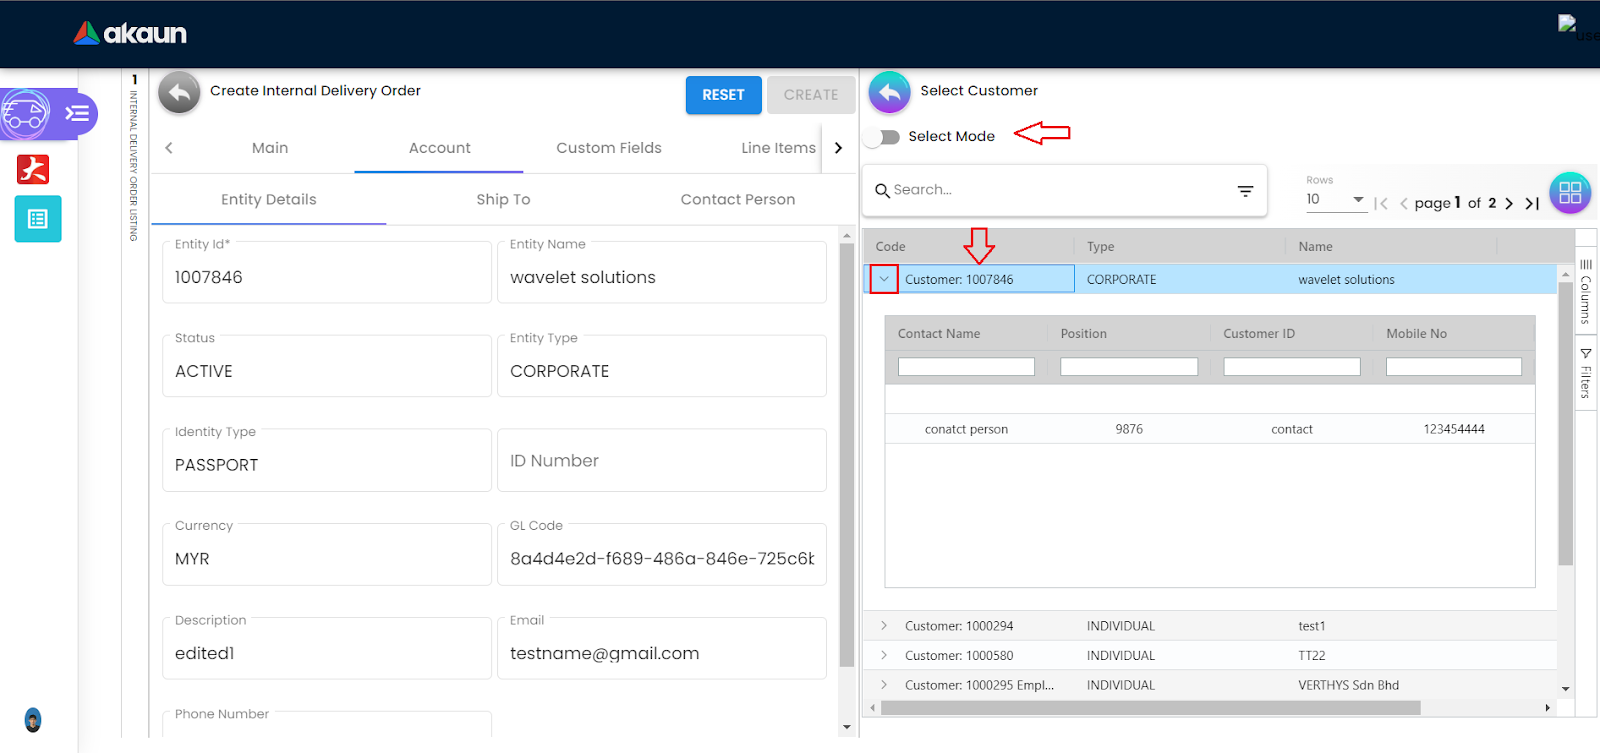
To select an entity, users are required to click on the Customer List on the RHS. The selected customer will have its details updated in the Entity Details on the LHS. Users can also click the dropdown list (red box) to view the general details of the entities before selecting.
To CREATE or EDIT customer details, users will need to toggle the Select Mode option
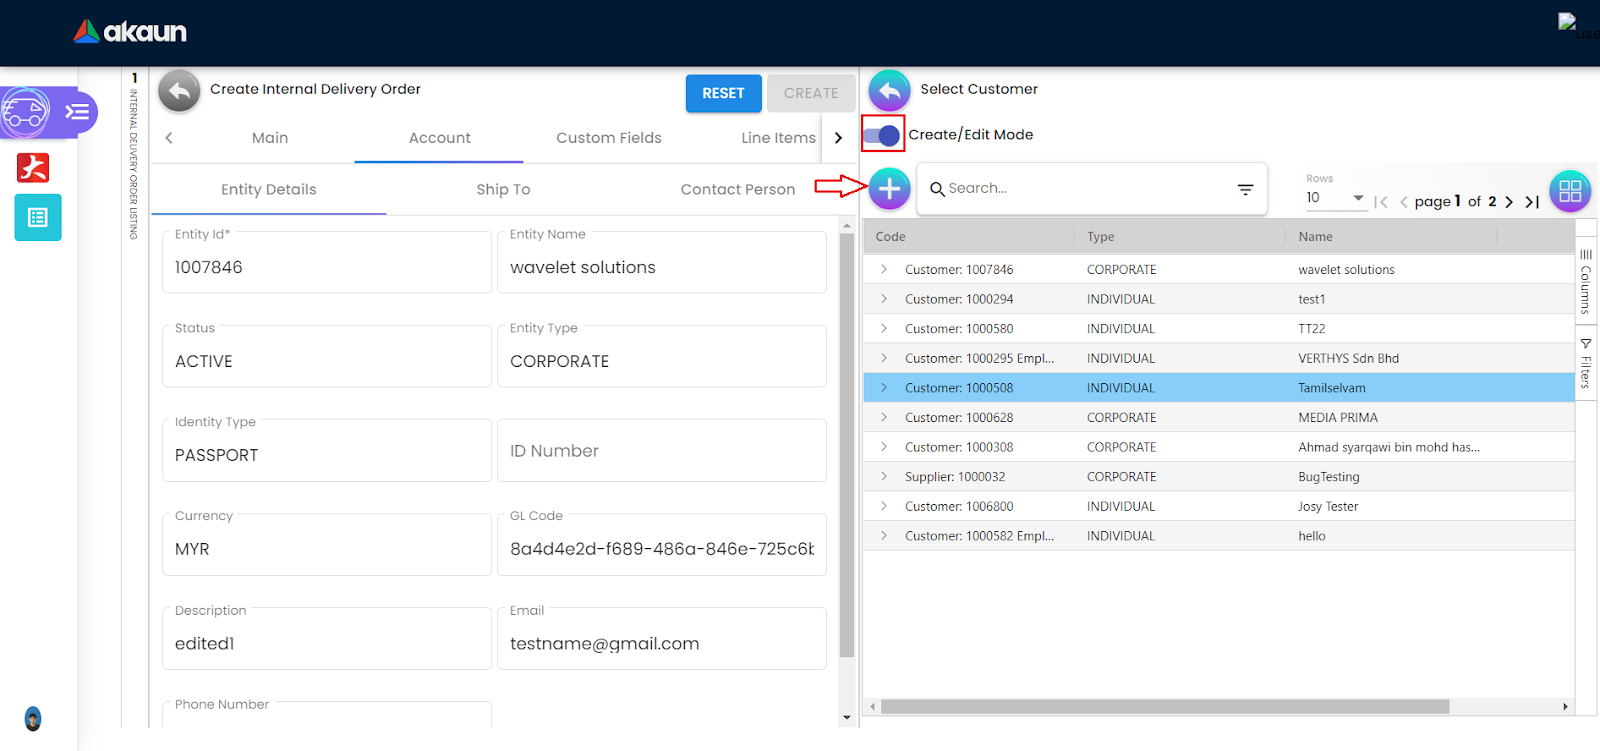
Once the Create/Edit Mode has been toggled, users are now able to edit the customer details by clicking on any of the customers. Users are also able to create new customers by clicking on the “+” icon, and filling up the required fields marked with “*”.
2.1.2.2 Ship To & Contact Person Details

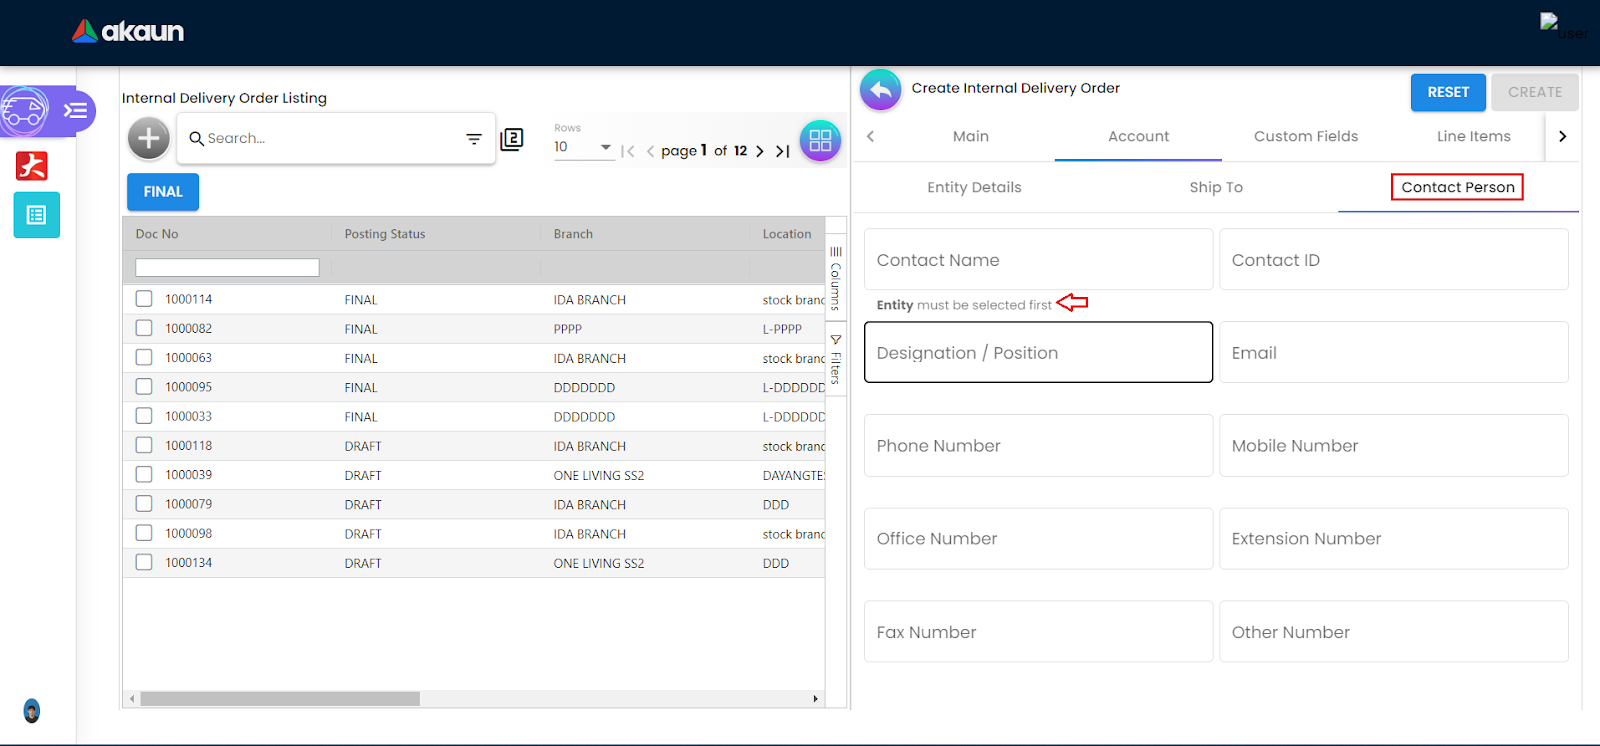
Users must select an entity before proceeding towards filling in certain fields in Ship To and Contact Person tabs as indicated by the arrows in red.
2.1.3 Custom Fields

Users are given the option to CUSTOMIZE the delivery order fields in the Custom Fields tab by adding or removing. This enables the delivery order to handle different scenarios if required. Users need to fill in relevant information in the following fields:
-
Transport Driver
-
Transport Company
-
Lorry No.
-
Total Weight (kg)
-
Total Quantity
2.1.4 Line Items
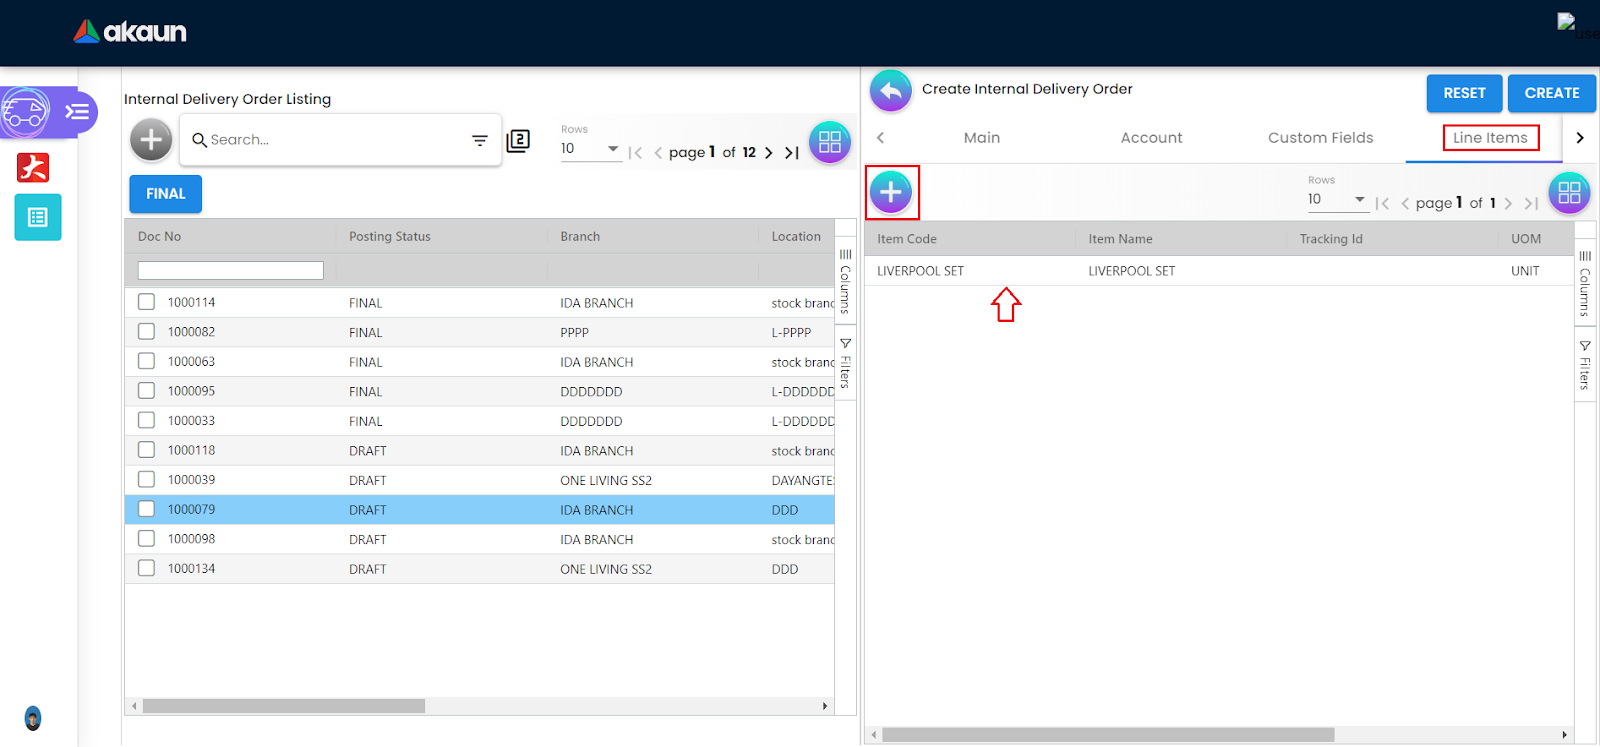
At the Line Items tab, users are able to ADD line items by clicking on the “+”, or EDIT the created line items by clicking on the specific row.

2.1.5 Department Hdr
Lastly, by clicking on the Department Hdr tab, users can fill in the details and move on to the final step of the Delivery Order Creation process.
-
Segment
-
Dimension
-
Profit Center
-
Project
The CREATE button will finish the Delivery Order Creation, while the RESET button will reset all fields in each tab (eg: Main, Account, Custom Fields).