2.0 Set Up in Organisation Applet and Cashbook Applet
2.1 ORGANISATION APPLET
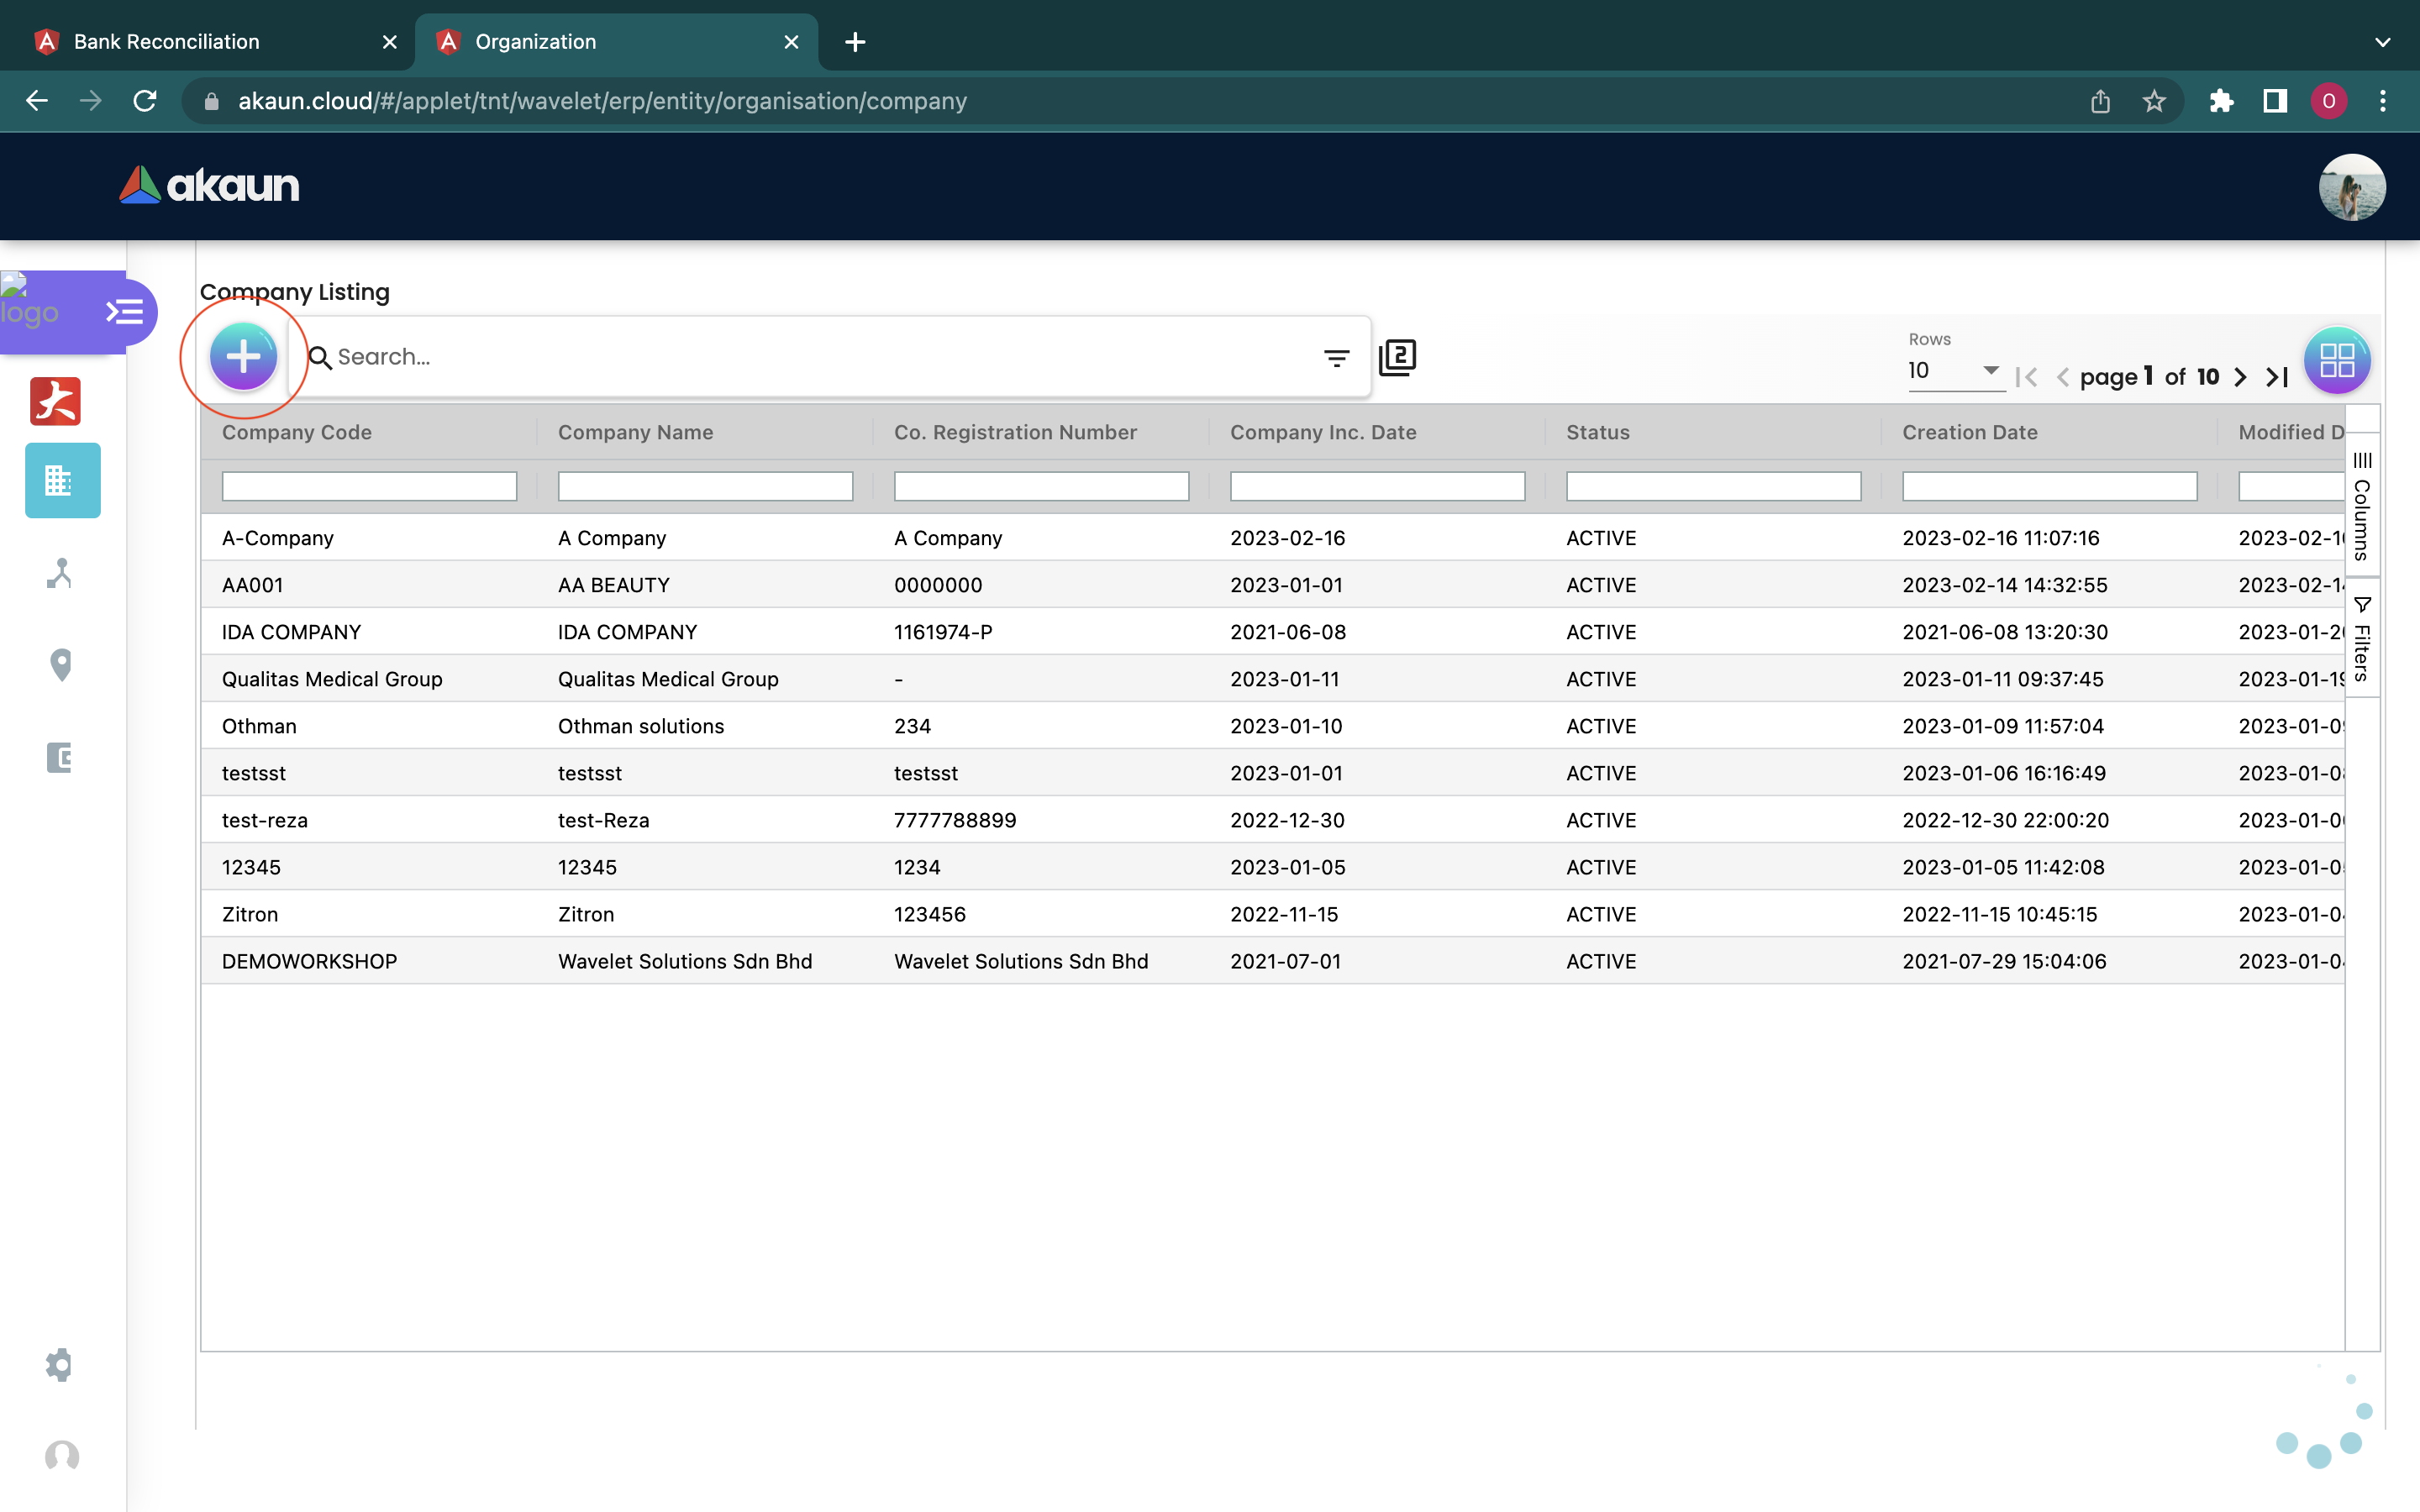
When logging in into the Organisation Applet, this is the first page that will be shown to the user, which is the Company Listing page. Then, users could proceed to press the ‘+’ button placed at the top left corner to start creating a company.
2.1.1 DETAILS
Users then could fill in the necessary information on each column. Please be noted that if there is a * sign on the column, users must fill in relevant information in that column as it could not be modified later.
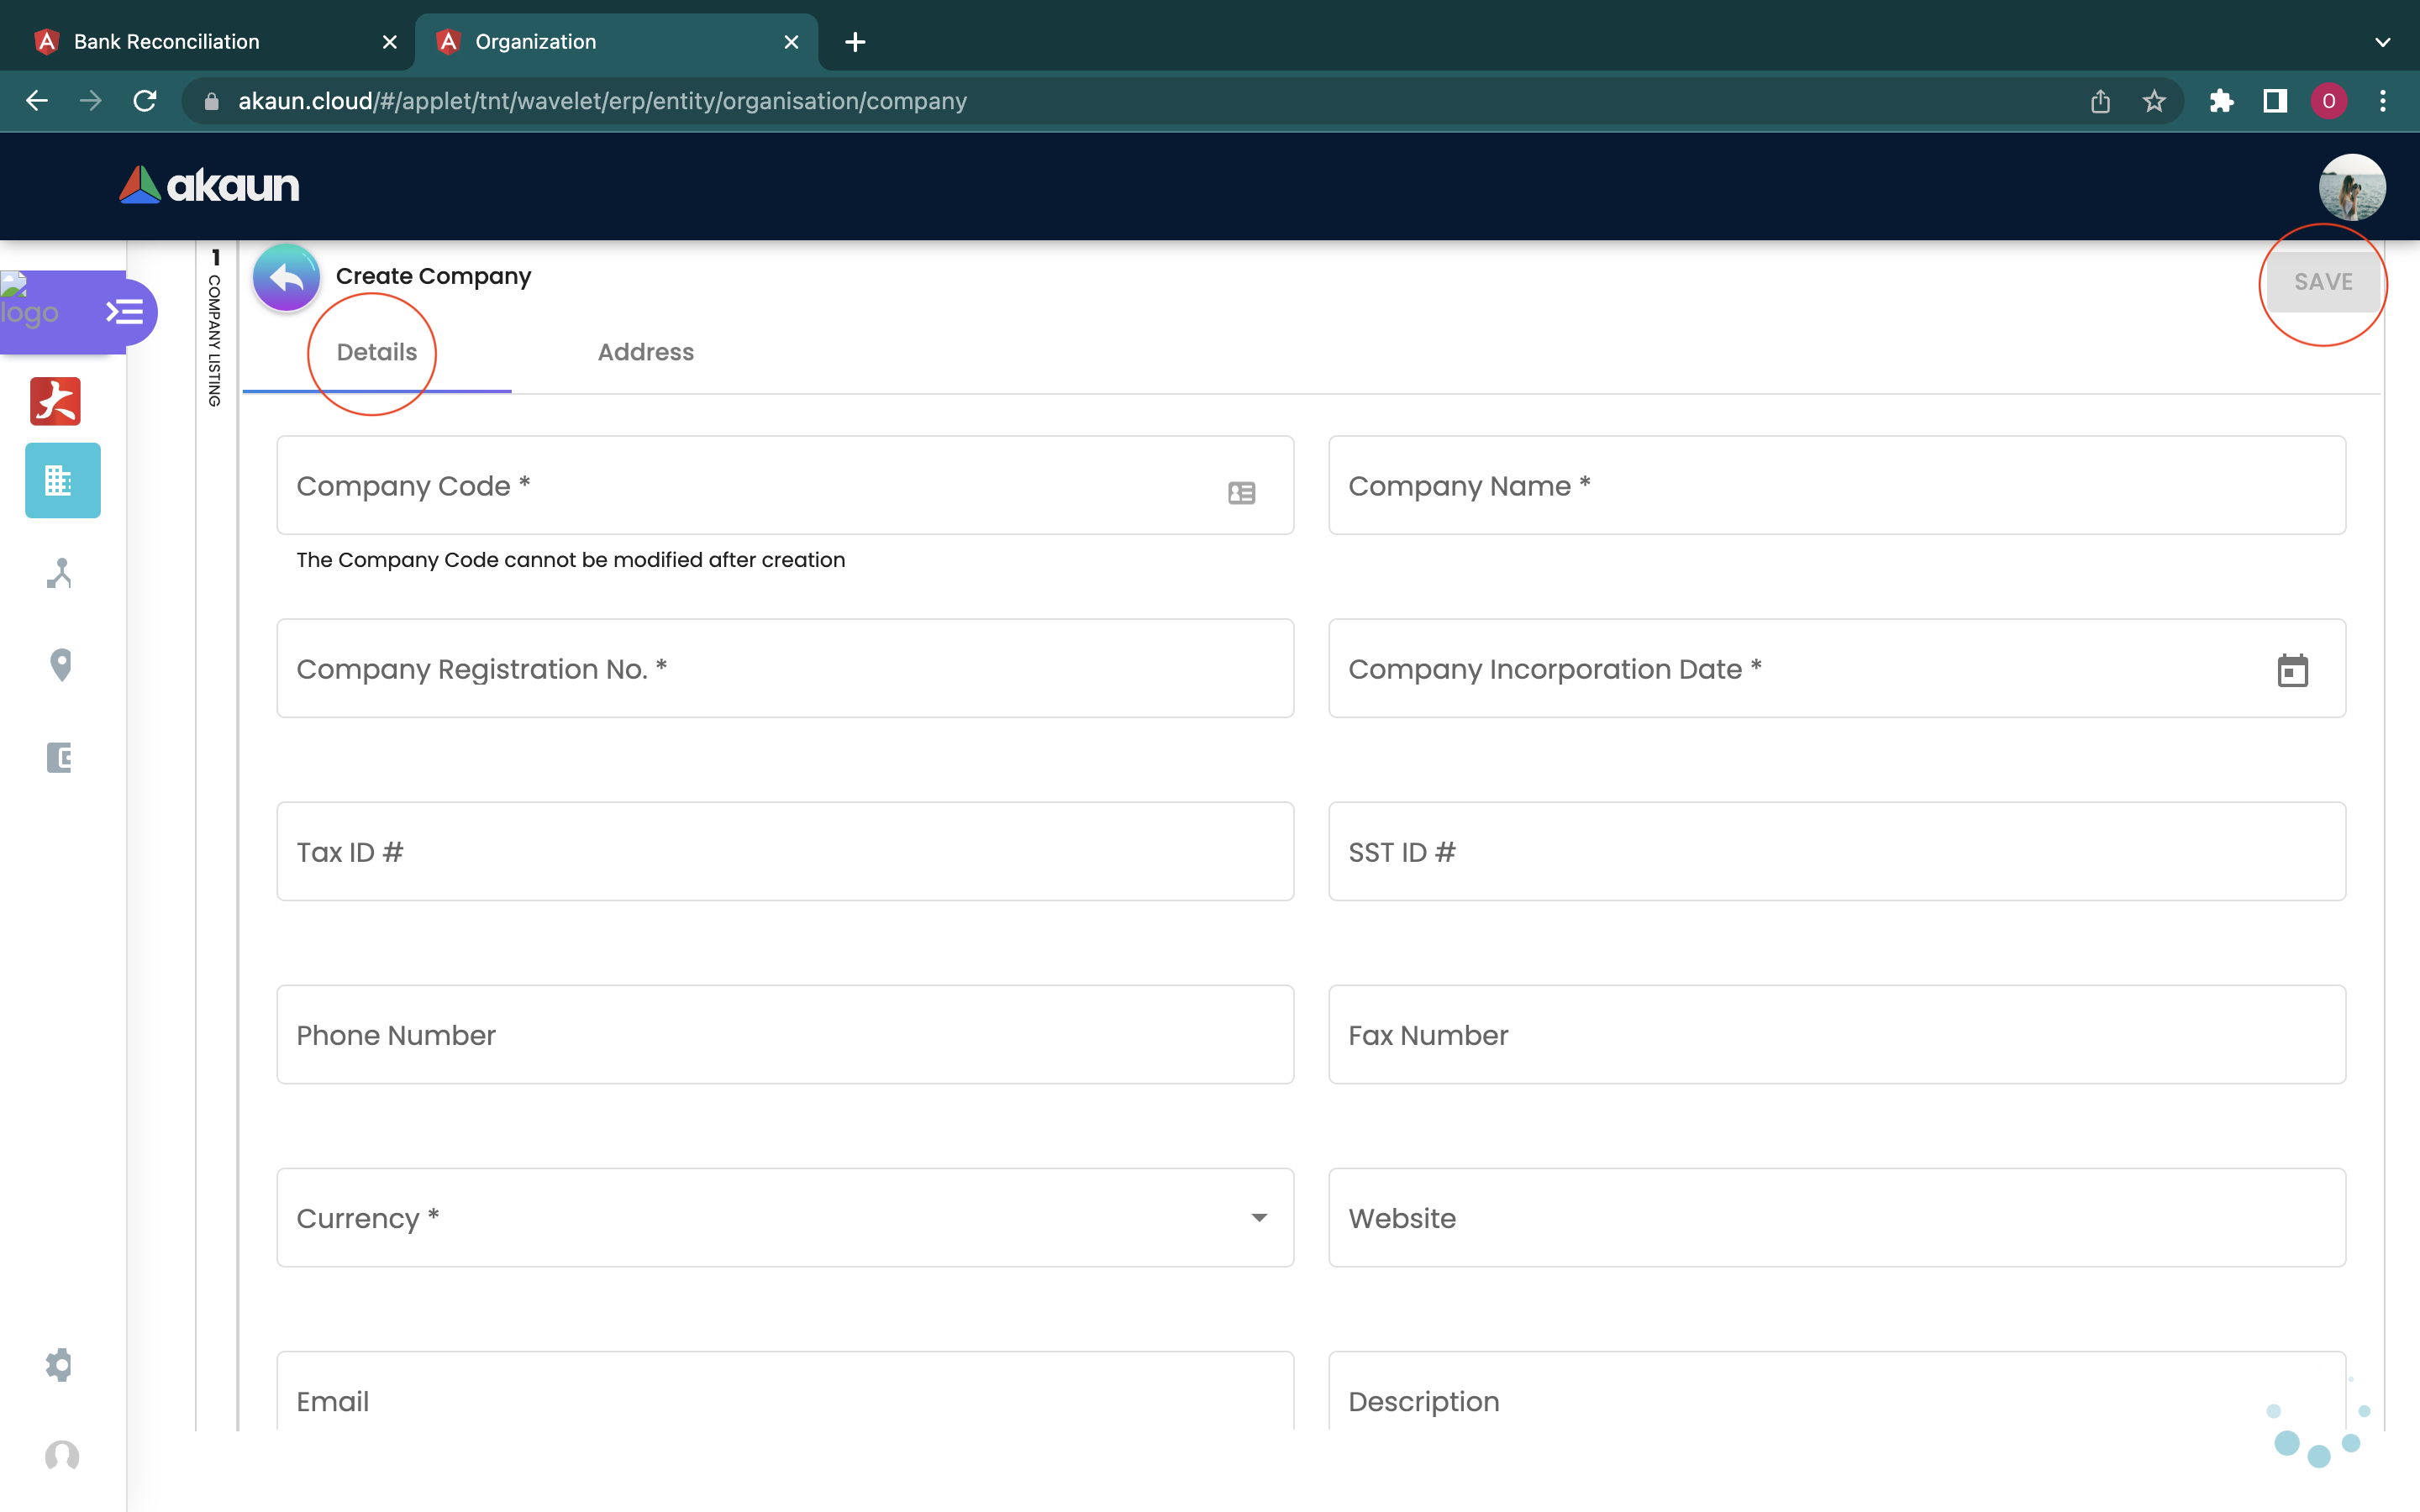
The fields that are needed to be filled in are:
-
Company Code
-
Company Name
-
Company Registration No.
-
Company Incorporation Date
-
Tax ID #
-
SST ID #
-
Phone Number
-
Fax Number
-
Currency: Different currencies can be chosen from the drop down list
-
Website
-
Email
-
Description
-
Abbreviation
-
Chart of Account
Users can also choose whether they want to upload their company logo now, or upload it later.
2.1.2 ADDRESS
Users are required to fill in their address when creating the company.

The fields that are needed to be filled in are:
-
Address Line 1
-
Address Line 2
-
Address Line 3
-
Address Line 4
-
Address Line 5
-
Postal Code
-
City
-
Country: Different countries can be chosen from the drop down list
-
State: Different states can be chosen from the drop down list
After checking all the information filed, the user can click on the “save” button to save the details.
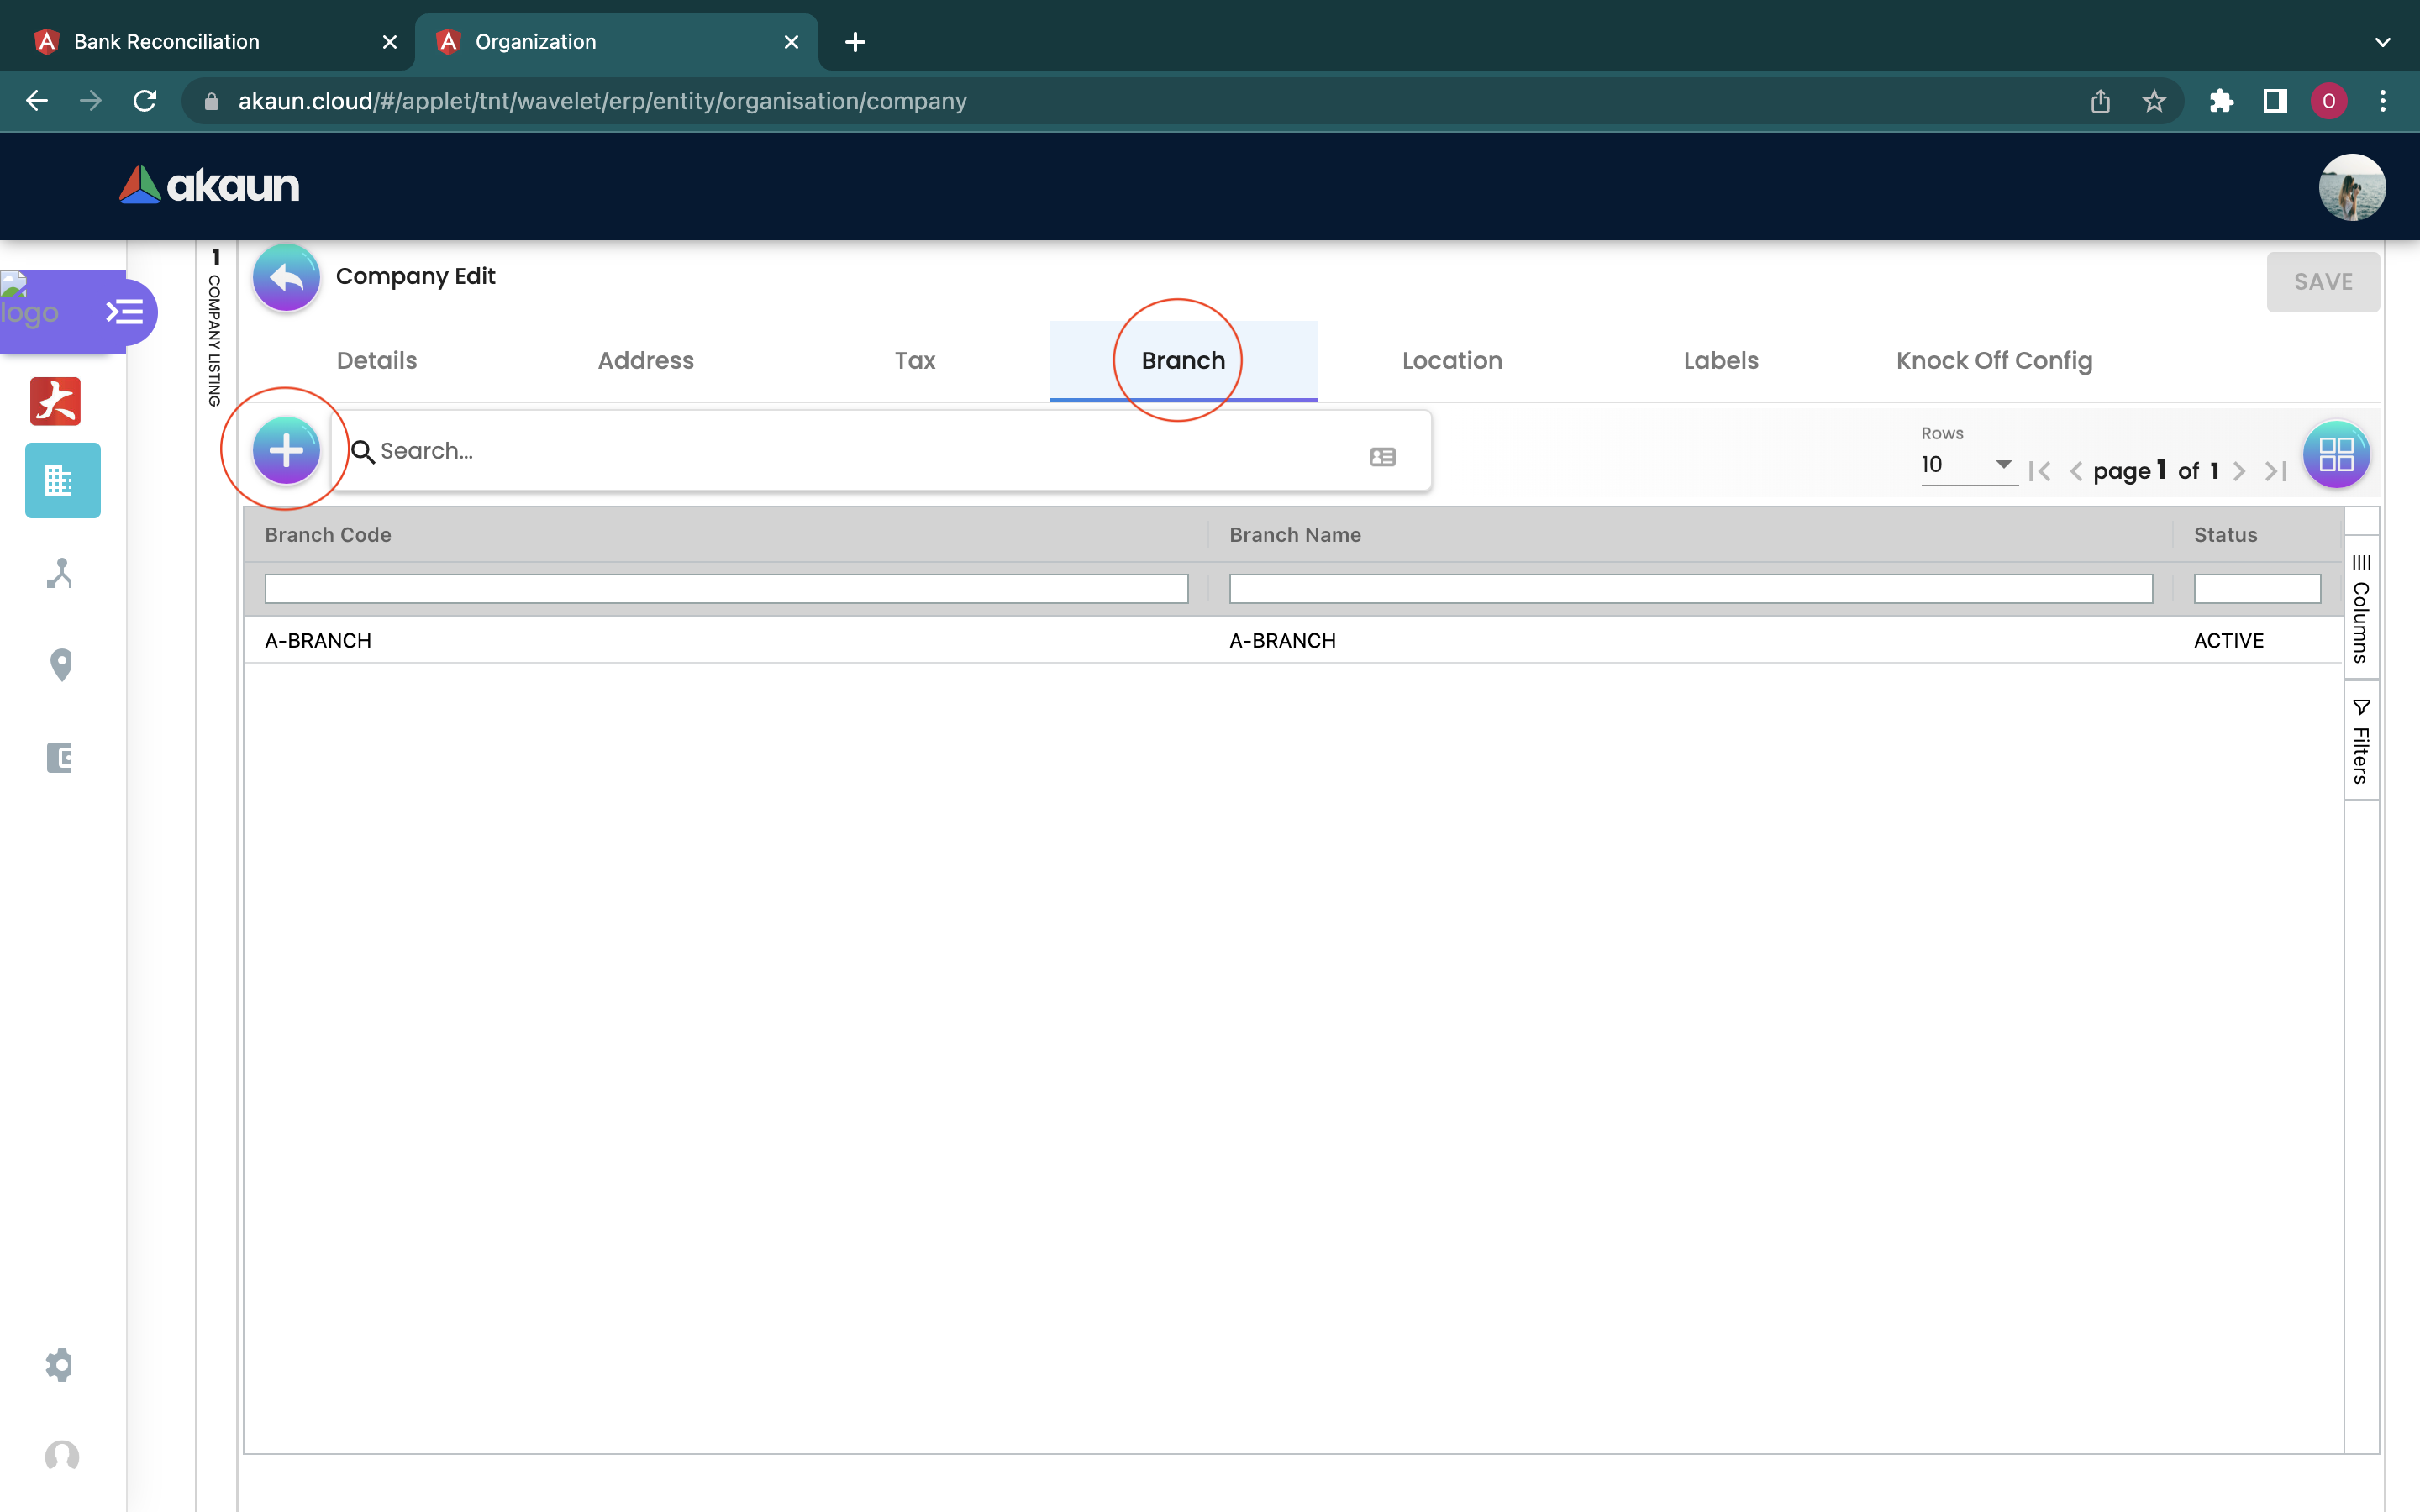
2.1.3 BRANCH
2.1.3.1 CREATE BRANCH FROM COMPANY LISTING TAB
Users can either choose to create their branch here in the Company Listing edit tab, or to move to the second icon at the left side bar, to create the branch.
If users choose to create a branch in the Company Listing Page for the selected company, users can click on the “+” sign to start creating the branch.
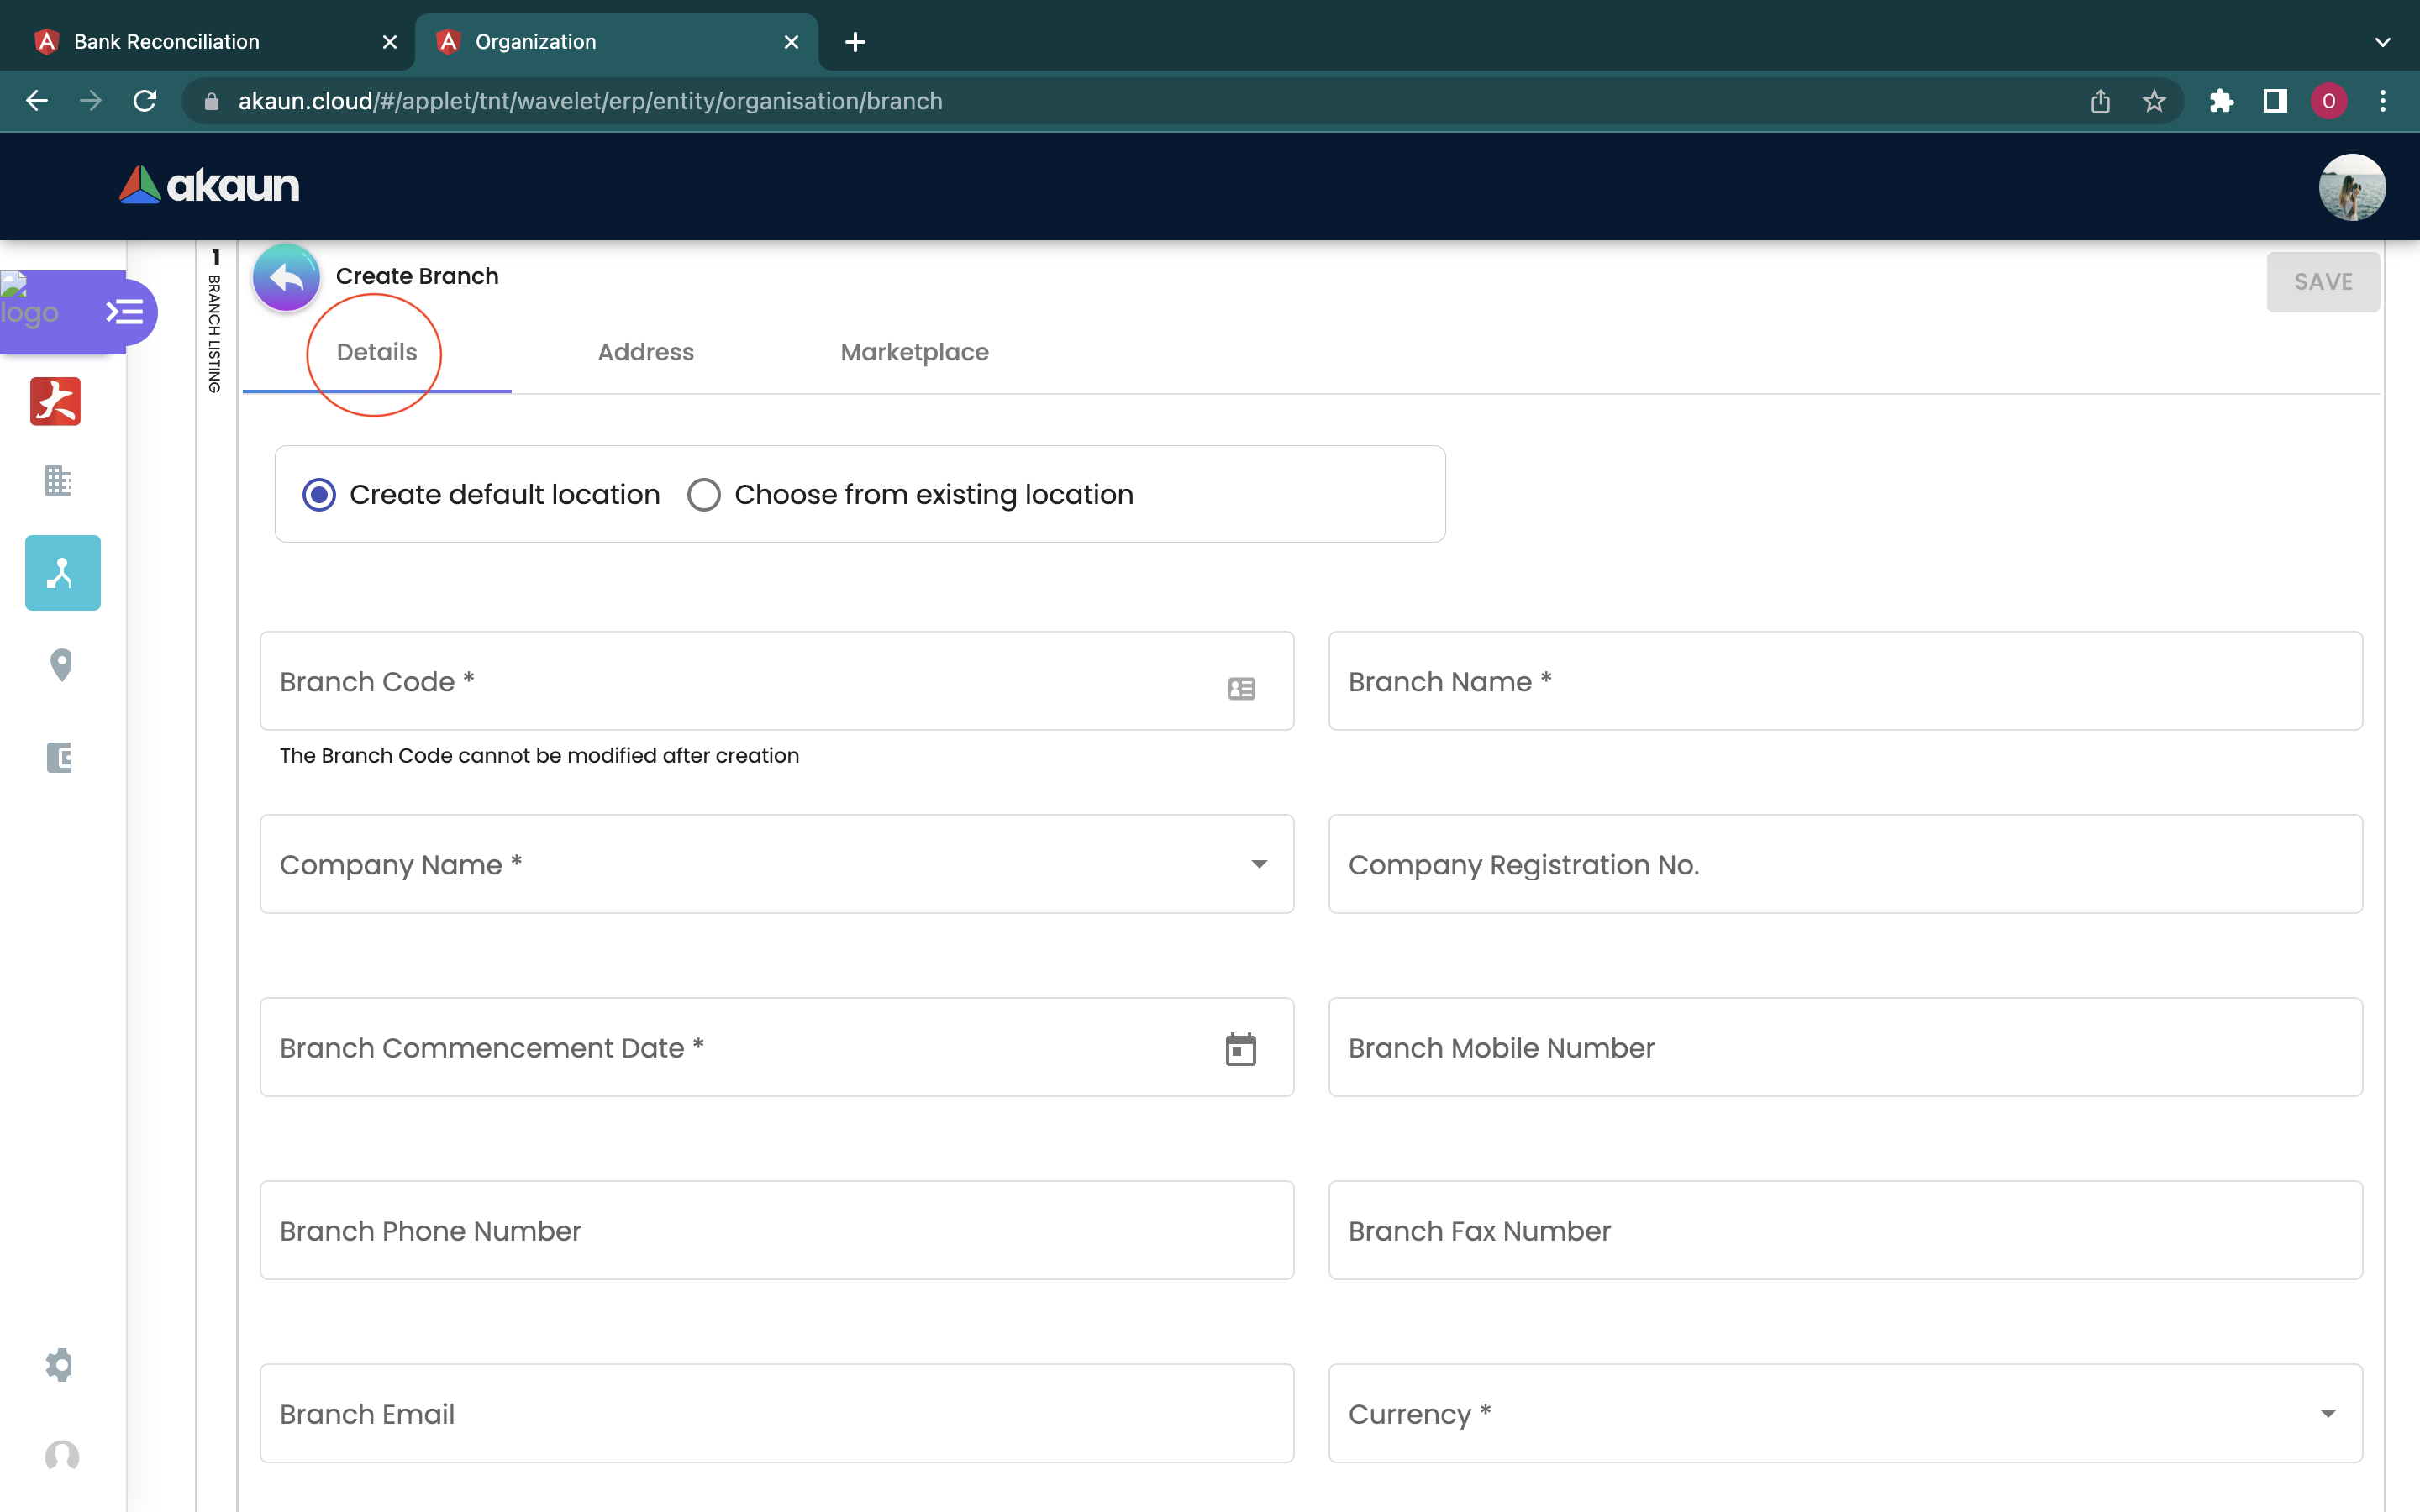
The fields that are needed to be filled in the Details tab are:
-
Branch Code
-
Branch Name
-
Company Name: The company name will be displayed as the selected company name by user
-
Company Registration No.: The company registration no. will be displayed as number filled in by user for the selected company
-
Branch Commencement Date
-
Branch Mobile Number
-
Branch Phone Number
-
Branch Fax Number
-
Branch Email
-
Currency: Different currencies can be chosen from the drop down list
-
Description
-
Abbreviation
-
Tax Registration Number
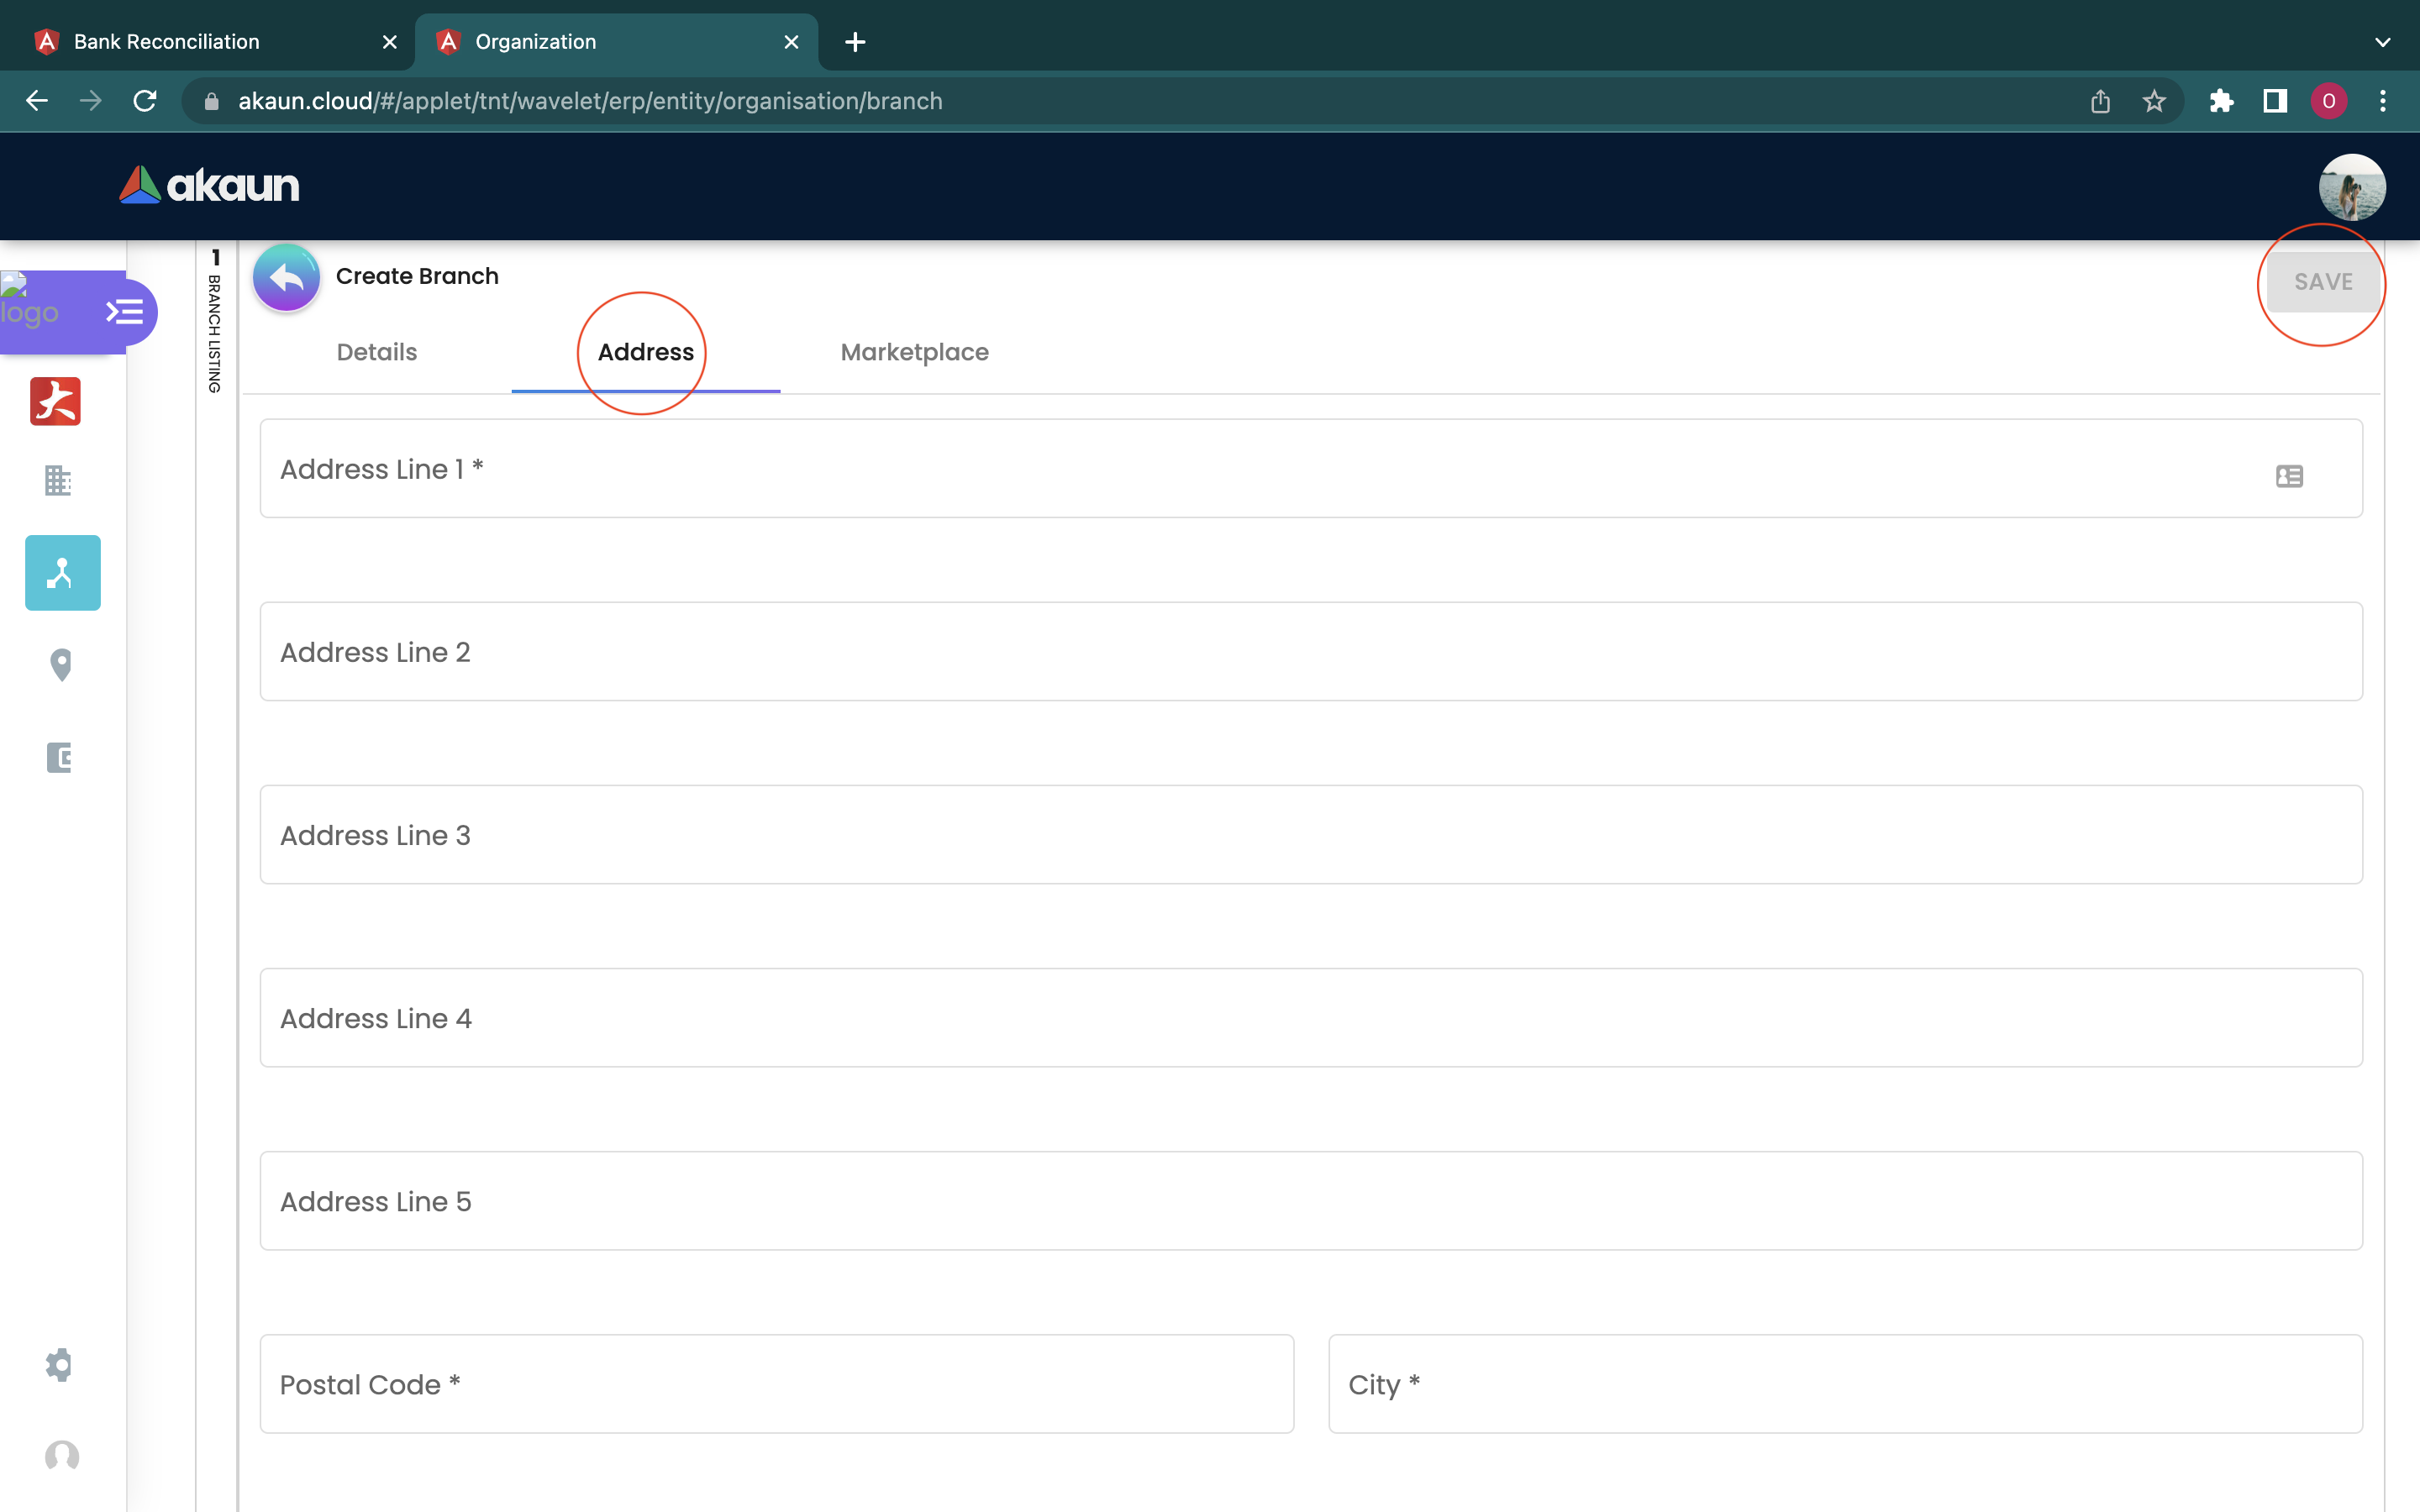
The fields that are needed to be filled in the Address tab are:
-
Address Line 1
-
Address Line 2
-
Address Line 3
-
Address Line 4
-
Address Line 5
-
Postal Code
-
City
-
Country
-
Different countries can be chosen from the drop down list
-
State
-
Different states can be chosen from the drop down list
After checking all the information filed, the user can click on the “save” button to save the details of the branch.
2.1.3.2 CREATE BRANCH FROM BRANCH TAB
The second icon on the left menu bar is the ‘Branch’ tab which allows users to create a new branch for a certain company. Users could press the ‘+’ button to create a brand new branch.
When going into the Details tab, users can choose to create their branch with “Create Default Location” or “Choose From Existing Location”.
When creating the branch, users have to first select the company that they wish to create a branch for from the drop down list. Users can choose the company they have created in the Company Listing page. After selecting the company, the Company Name and Company Registration No. will automatically be shown in the column.

If users have chosen “Create Default Location”, the fields that are needed to be filled in the Details tab are:
-
Branch Code
-
Branch Name
-
Company Name: The company name will be displayed as the selected company name by user
-
Company Registration No.: The company registration no. will be displayed as number filled in by user for the selected company
-
Branch Commencement Date
-
Branch Mobile Number
-
Branch Phone Number
-
Branch Fax Number
-
Branch Email
-
Currency: Different currencies can be chosen from the drop down list
-
Description
-
Abbreviation
-
Tax Registration Number
If users have chosen “Choose from Existing Location”, the fields that are needed to be filled in the Details tab are:
-
Branch Code
-
Branch Name
-
Company Name: The company name will be displayed as the selected company name by user
-
Company Registration No.: The company registration no. will be displayed as number filled in by user for the selected company
-
Location Code
-
Default Location
-
Branch Commencement Date
-
Branch Mobile Number
-
Branch Phone Number
-
Branch Fax Number
-
Branch Email
-
Currency: Different currencies can be chosen from the drop down list
-
Description
-
Abbreviation
-
Tax Registration Number
2.2 CASHBOOK APPLET
2.2.1 DETAILS
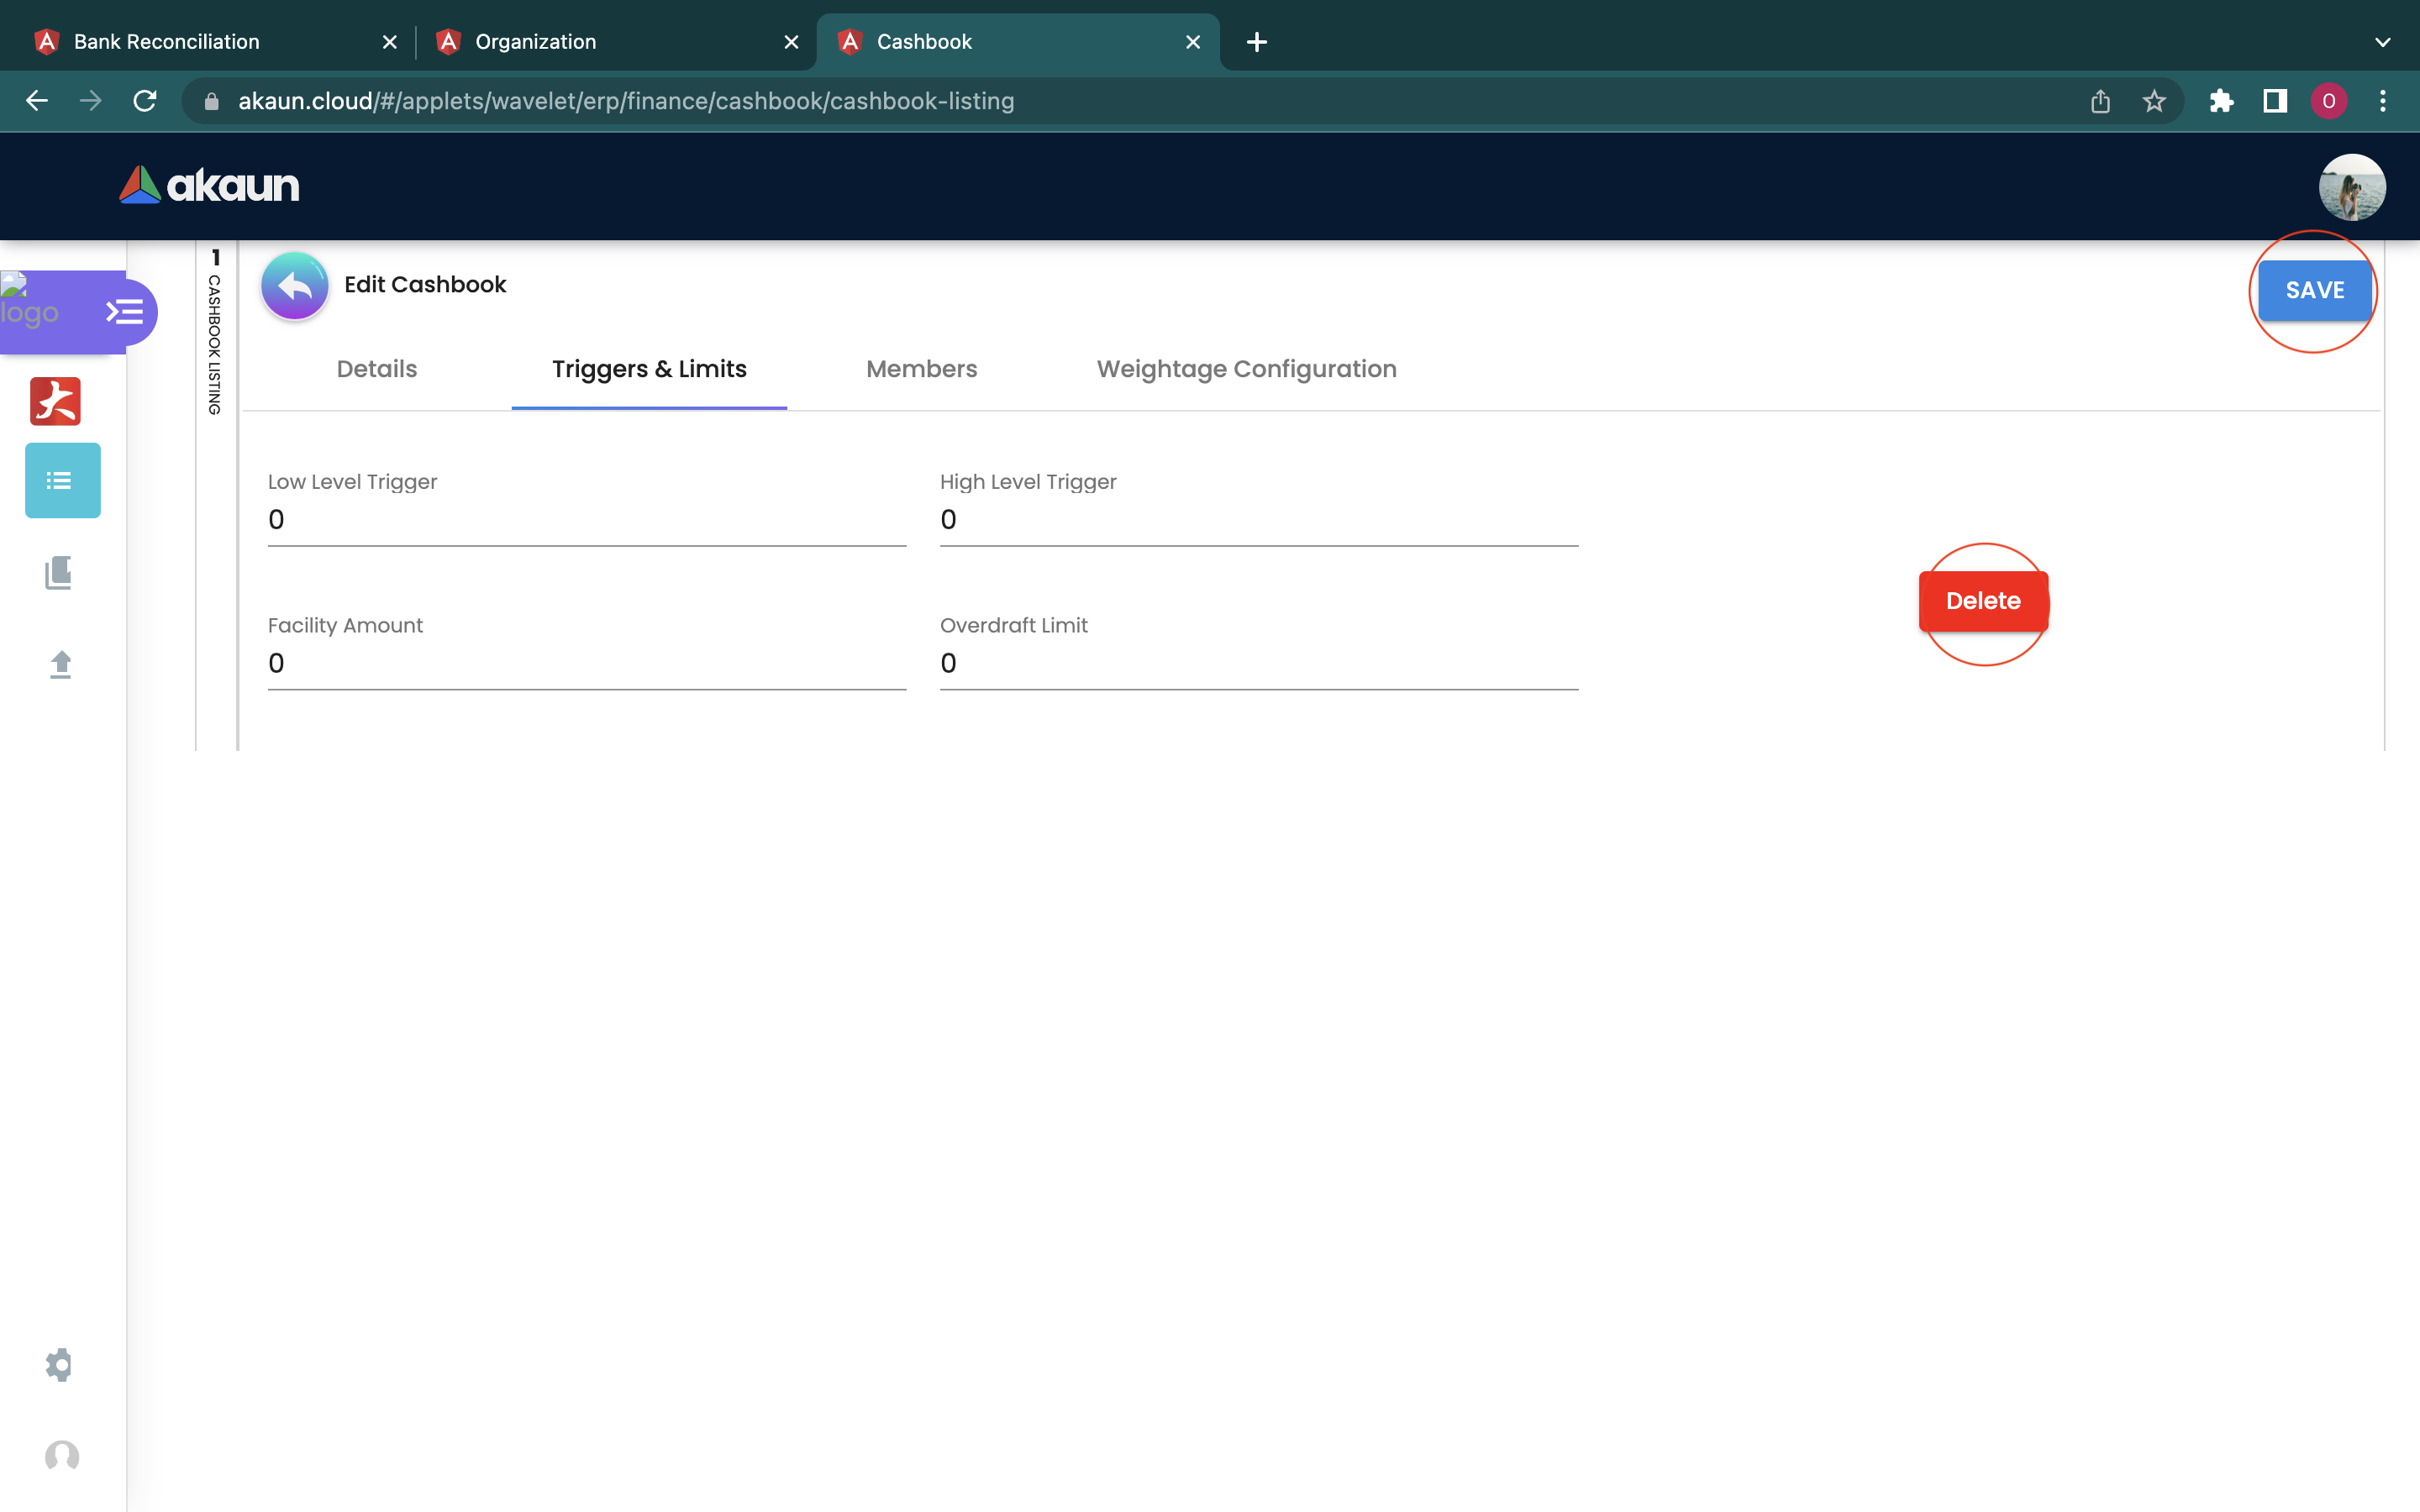
When logging in into the Cashbook Applet, this is the first page that will be shown to the user, which is the Cashbook Listing page. Then, users could proceed to press the ‘+’ button placed at the top left corner to start creating a cashbook.
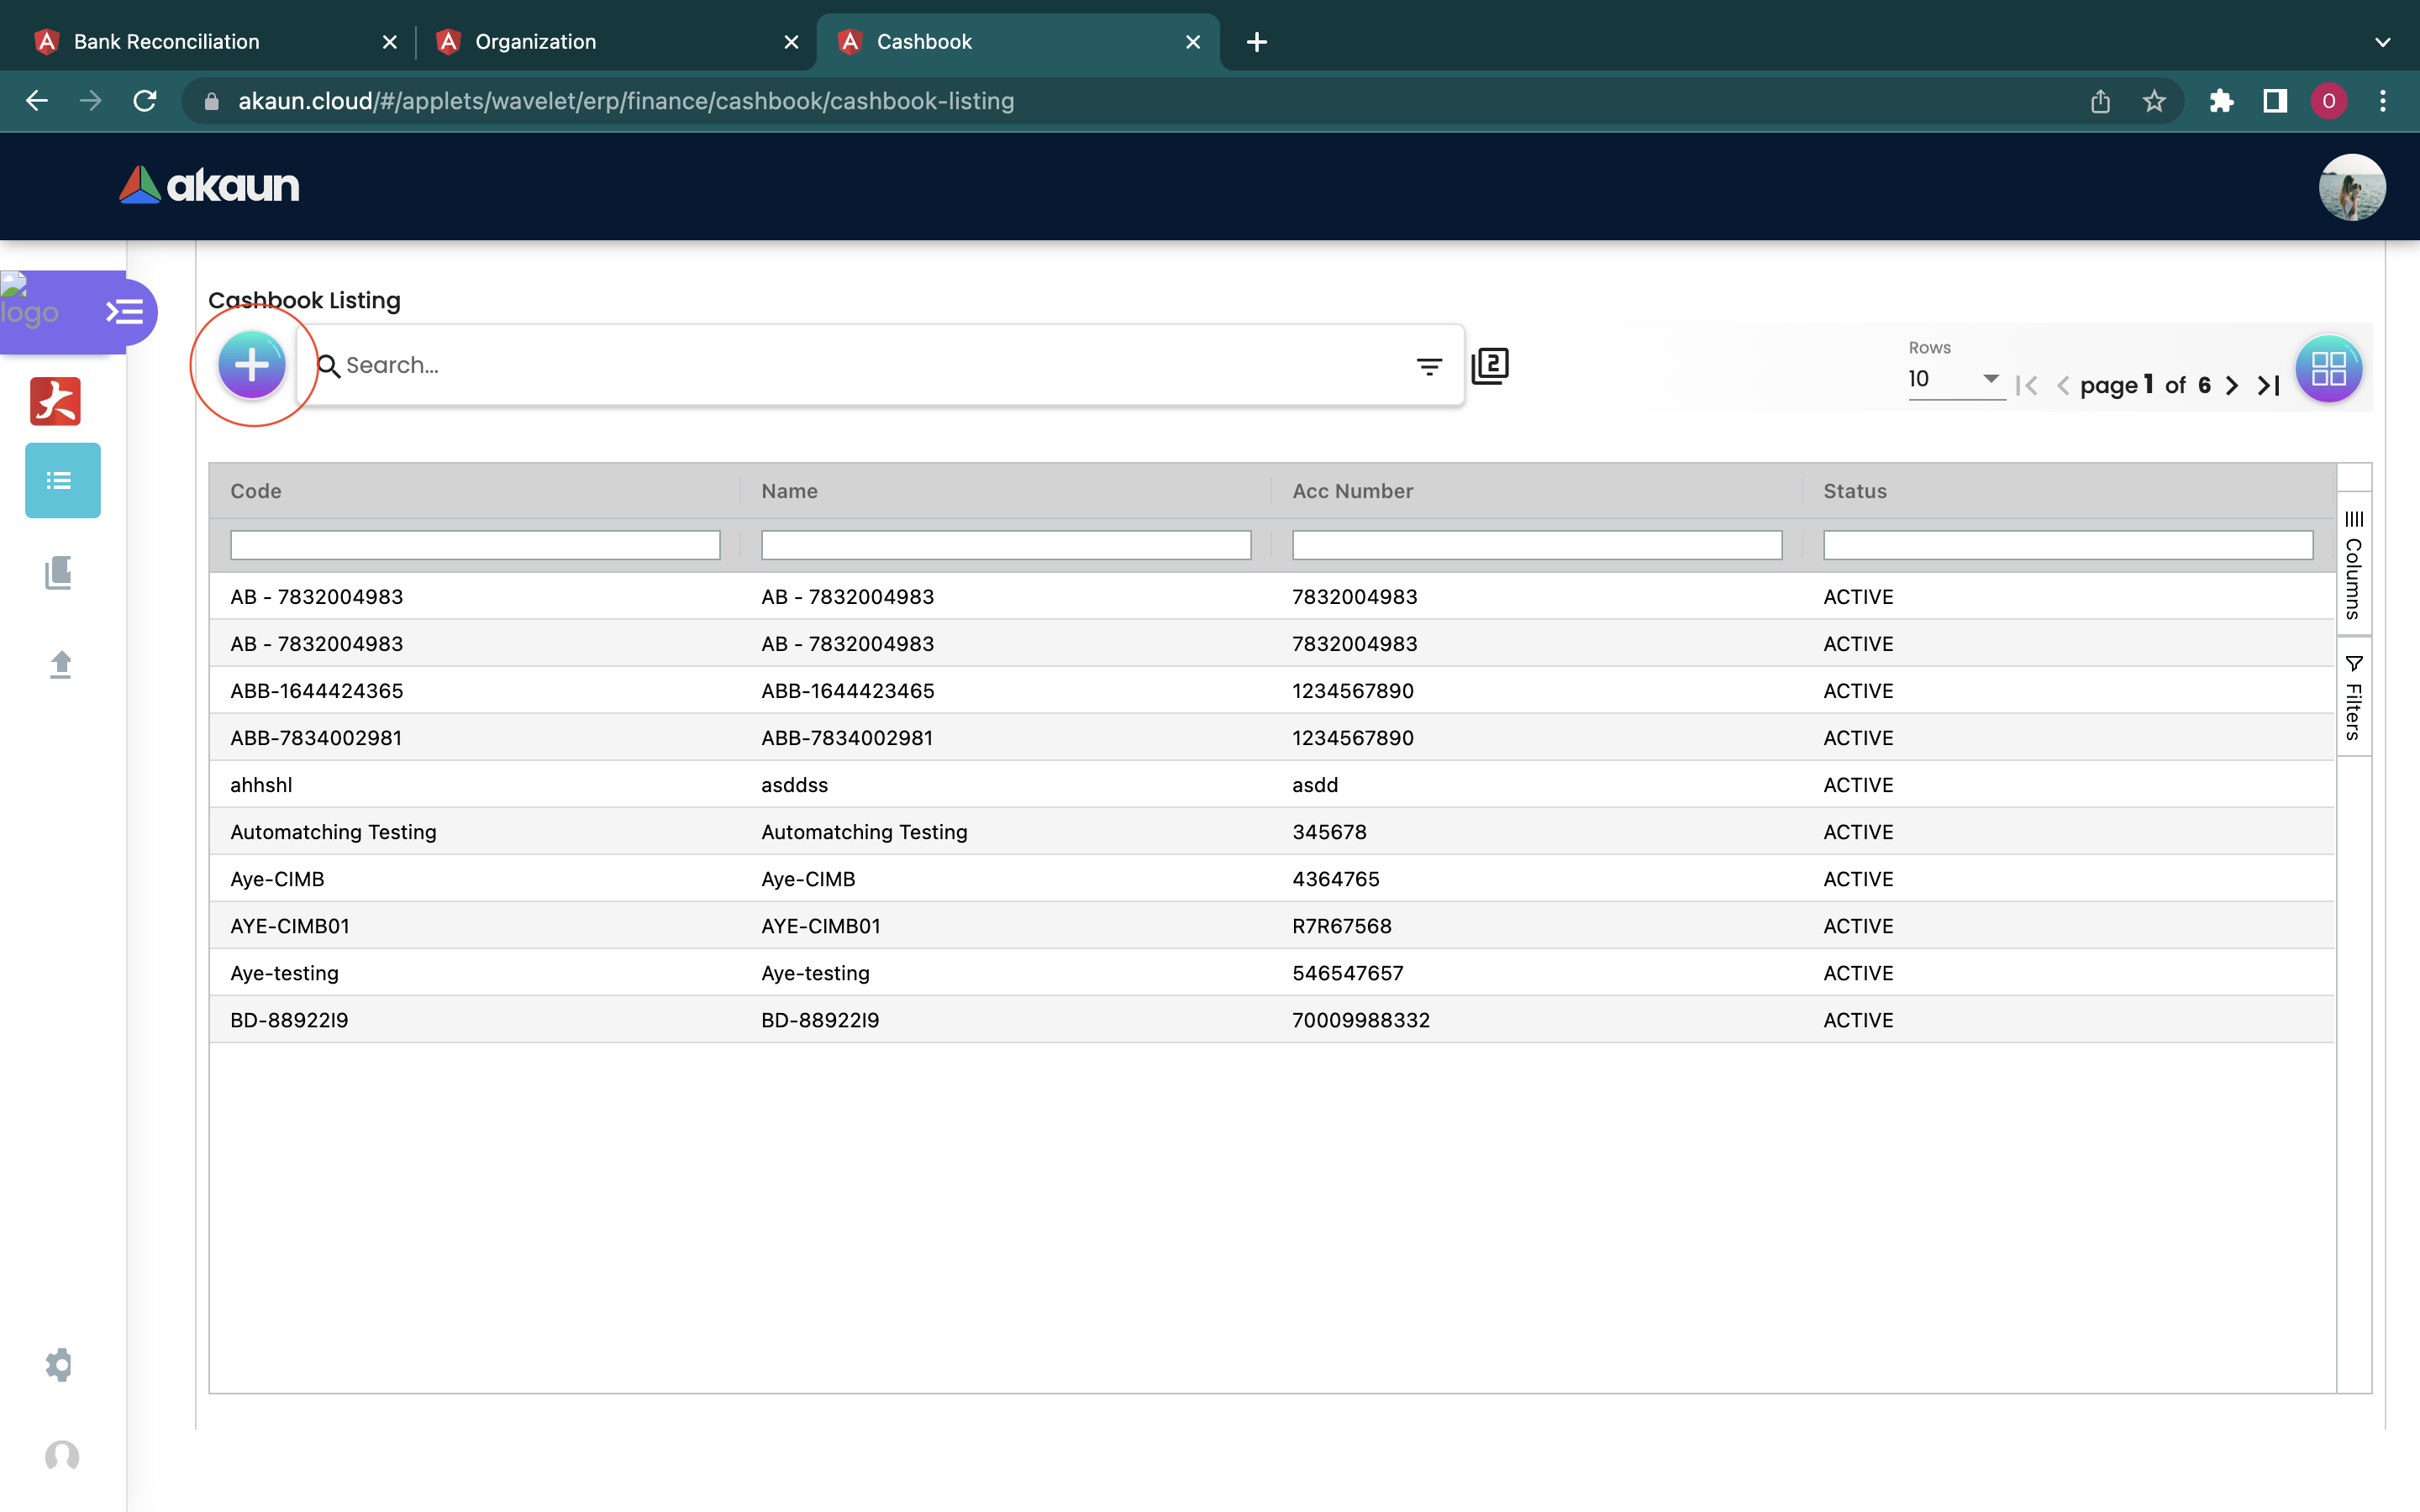
Users then could fill in the necessary information on each column. Please be noted that if there is a * sign on the column, users must fill in relevant information in that column as it could not be modified later.
The fields that are needed to be filled in are:
-
Cashbook Code
-
Cashbook Name
-
Account Number
-
Company Code/ Name (Key in at least 3 characters to start searching from the drop down list)
-
Currency Code/ Name
-
GL Code
After checking all the information filed, the user can click on the “save” button to save all the details.