Menu 03 - Features
In this section all the applet features will be introduced accordingly.
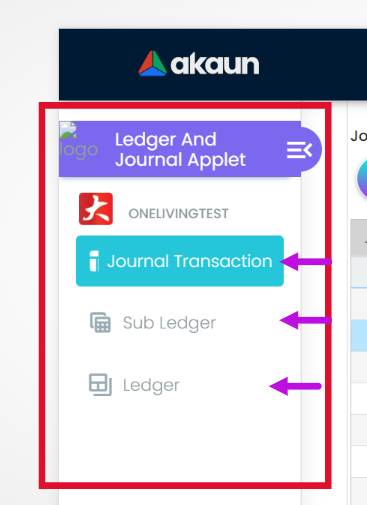
3.1 General Access
Users are able to open up the sidebar by clicking on the icon highlighted in the image below, this will allow the user to switch to different sections of the applet easily. There are three sections: Journal Transaction, Sub Ledger and Ledger.
3.2 Journal Transaction
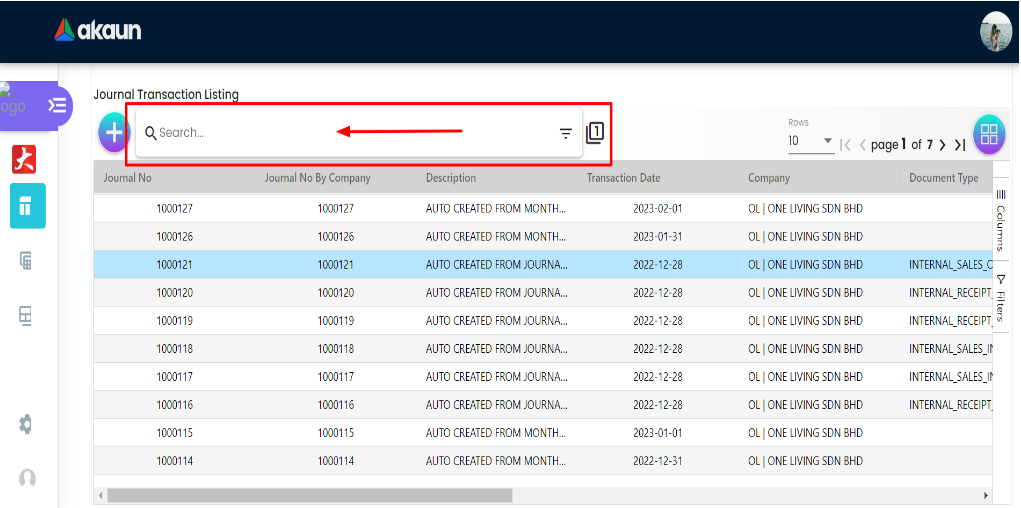
In this section there are two modules for each journal transaction. On the page of Journal and Transaction Listing there are 4 main items and 2 modules. The main items are the create icon, search bar, data table and table row (record) which will be described in details below. The record is a transaction when you click on it, it will open the View Journal Transaction page as shown in the image below. On on the View Journal Transaction there are the two modules which are:
1. Main
2. Line Items
To view “View Journal Transaction” you need to click on any record from the table and the page will display the view journal transaction page which contains main and Line Items modules.
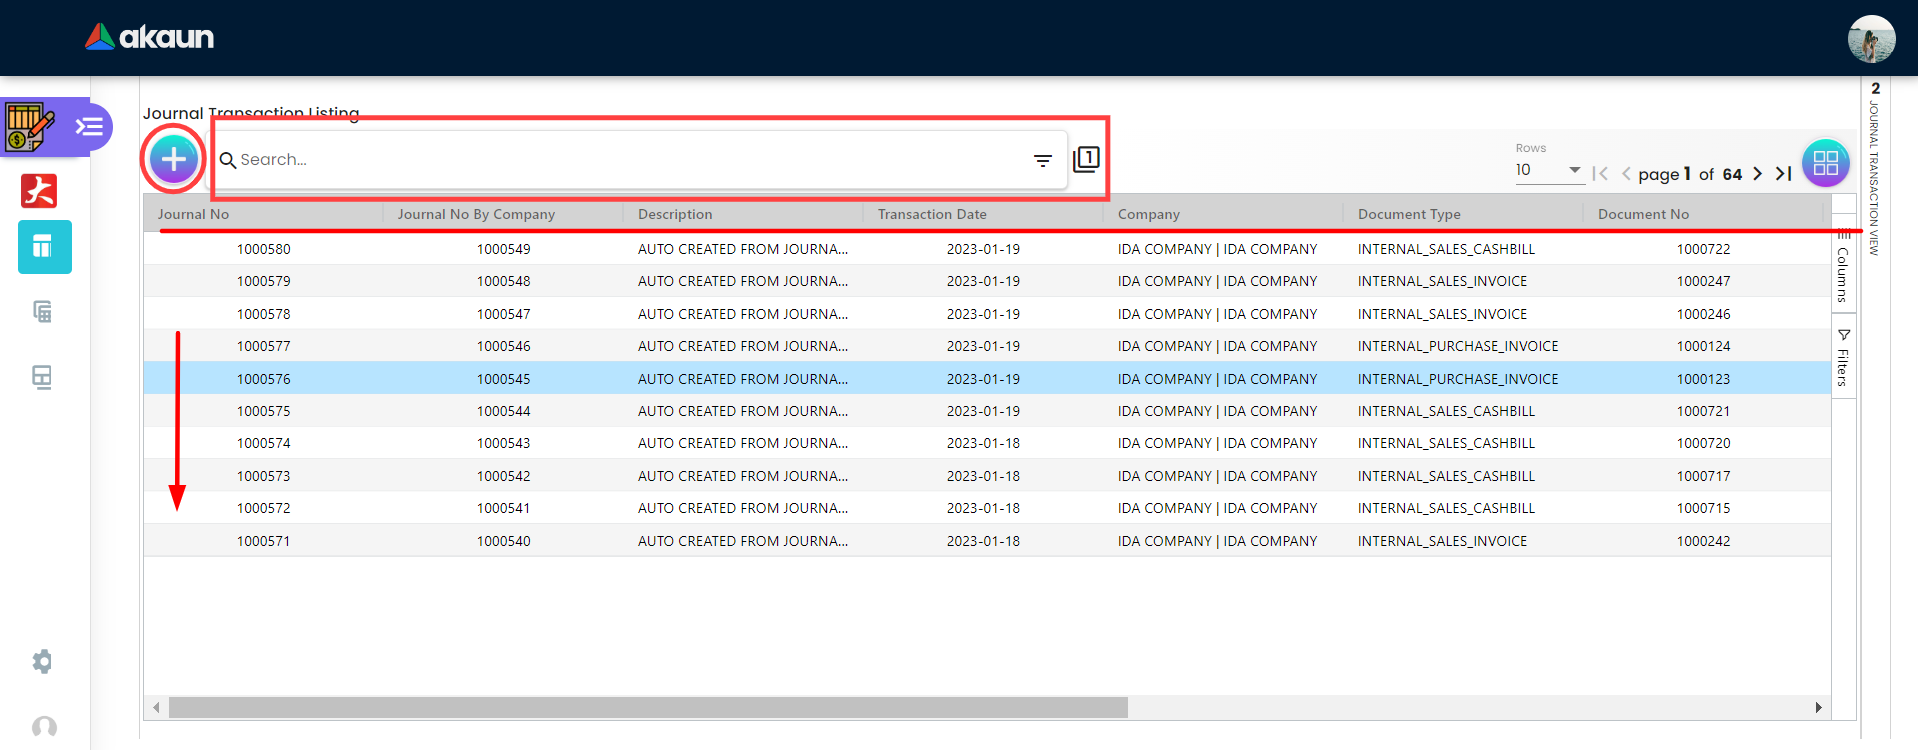
On Journal Transaction Listing page all the transactions will be displayed in a table with the following columns:
-
Journal No
-
Journal No By Company
-
Description
-
Transaction Date
-
Company
-
Document Type
-
Document No
-
Status
-
Posting Status
-
Amount
-
Created Date
-
Updated Date
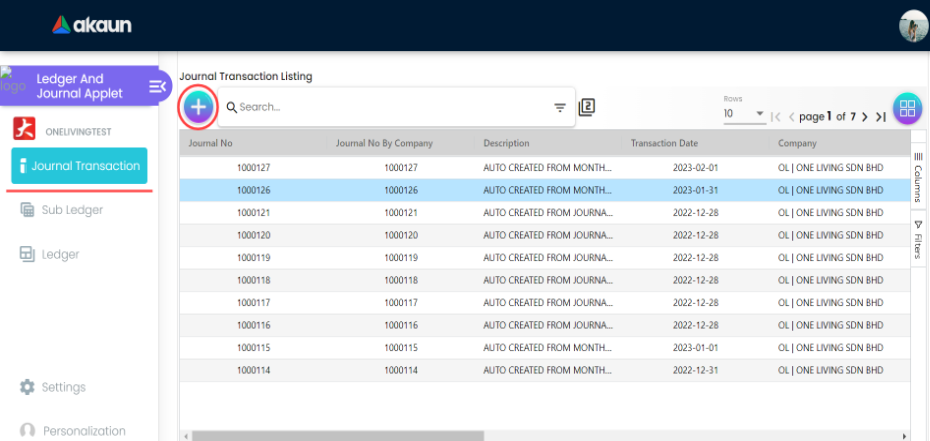
3.2.1 Create Journal Transaction
Let’s begin with the create new Journal transaction, from the journal transaction listing page click on the plus icon on the top left side. Then user is required to fill up the required data which will be shown on the Journal Transaction Main page page.
3.2.1.1 Create Journal Transaction Main Tab

After clicking on the create icon on the Journal Transaction Listing page the create journal transaction page will be shown. On the Main tab of the Create Journal Transaction, users need to fill in and select all the necessary data to add a new Journal Transaction. Please be noted that if there is a “*” star sign on the text field, it is mandatory to fill in or select. There are 9 data needed to be filled in which are:
-
Company
-
Branch
-
Ledger
-
Surrency
-
Reference Number
-
Date
-
Server Doc Type
-
Server Doc No
-
Description
There are two buttons on the most top right side, Reset button to clear all data that has been filled in and Create button to create a new Journal Transaction after filling in valid data.
3.2.1.2 Create Journal Transaction Lines Tab
After the user clicks on create Journal transaction icon and select lines tab the above page will be shown. On the line page there is a create icon displayed as “ + “ on the most top left side to create a new journal transaction line, also there are two buttons on the most top right side Reset button to clear all data filled in and Create button to create the journal transaction line.
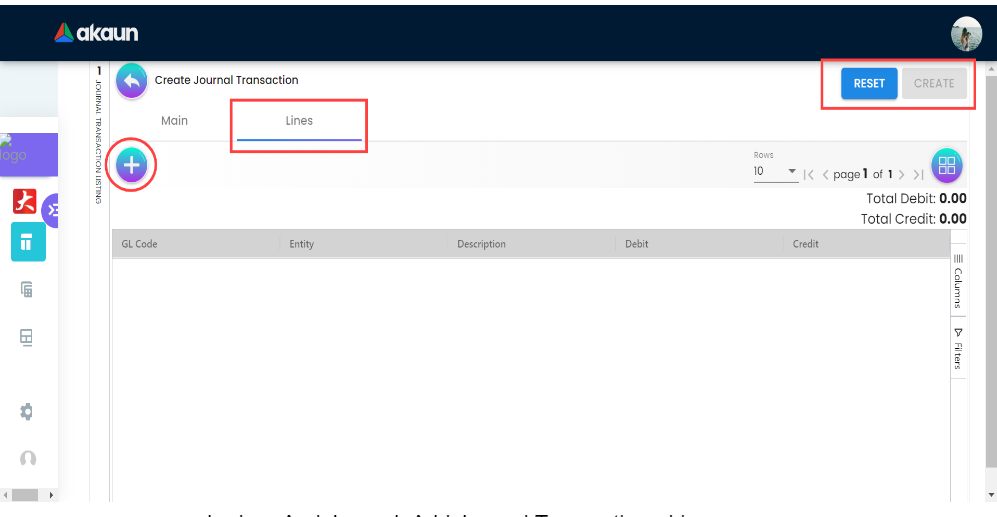
On lines tab the list of lines created will be shown on a table containing the following columns:
-
GL Code
-
Entity
-
Description
-
Debit
-
Credit
3.2.1.2.1 Add Line Item Main
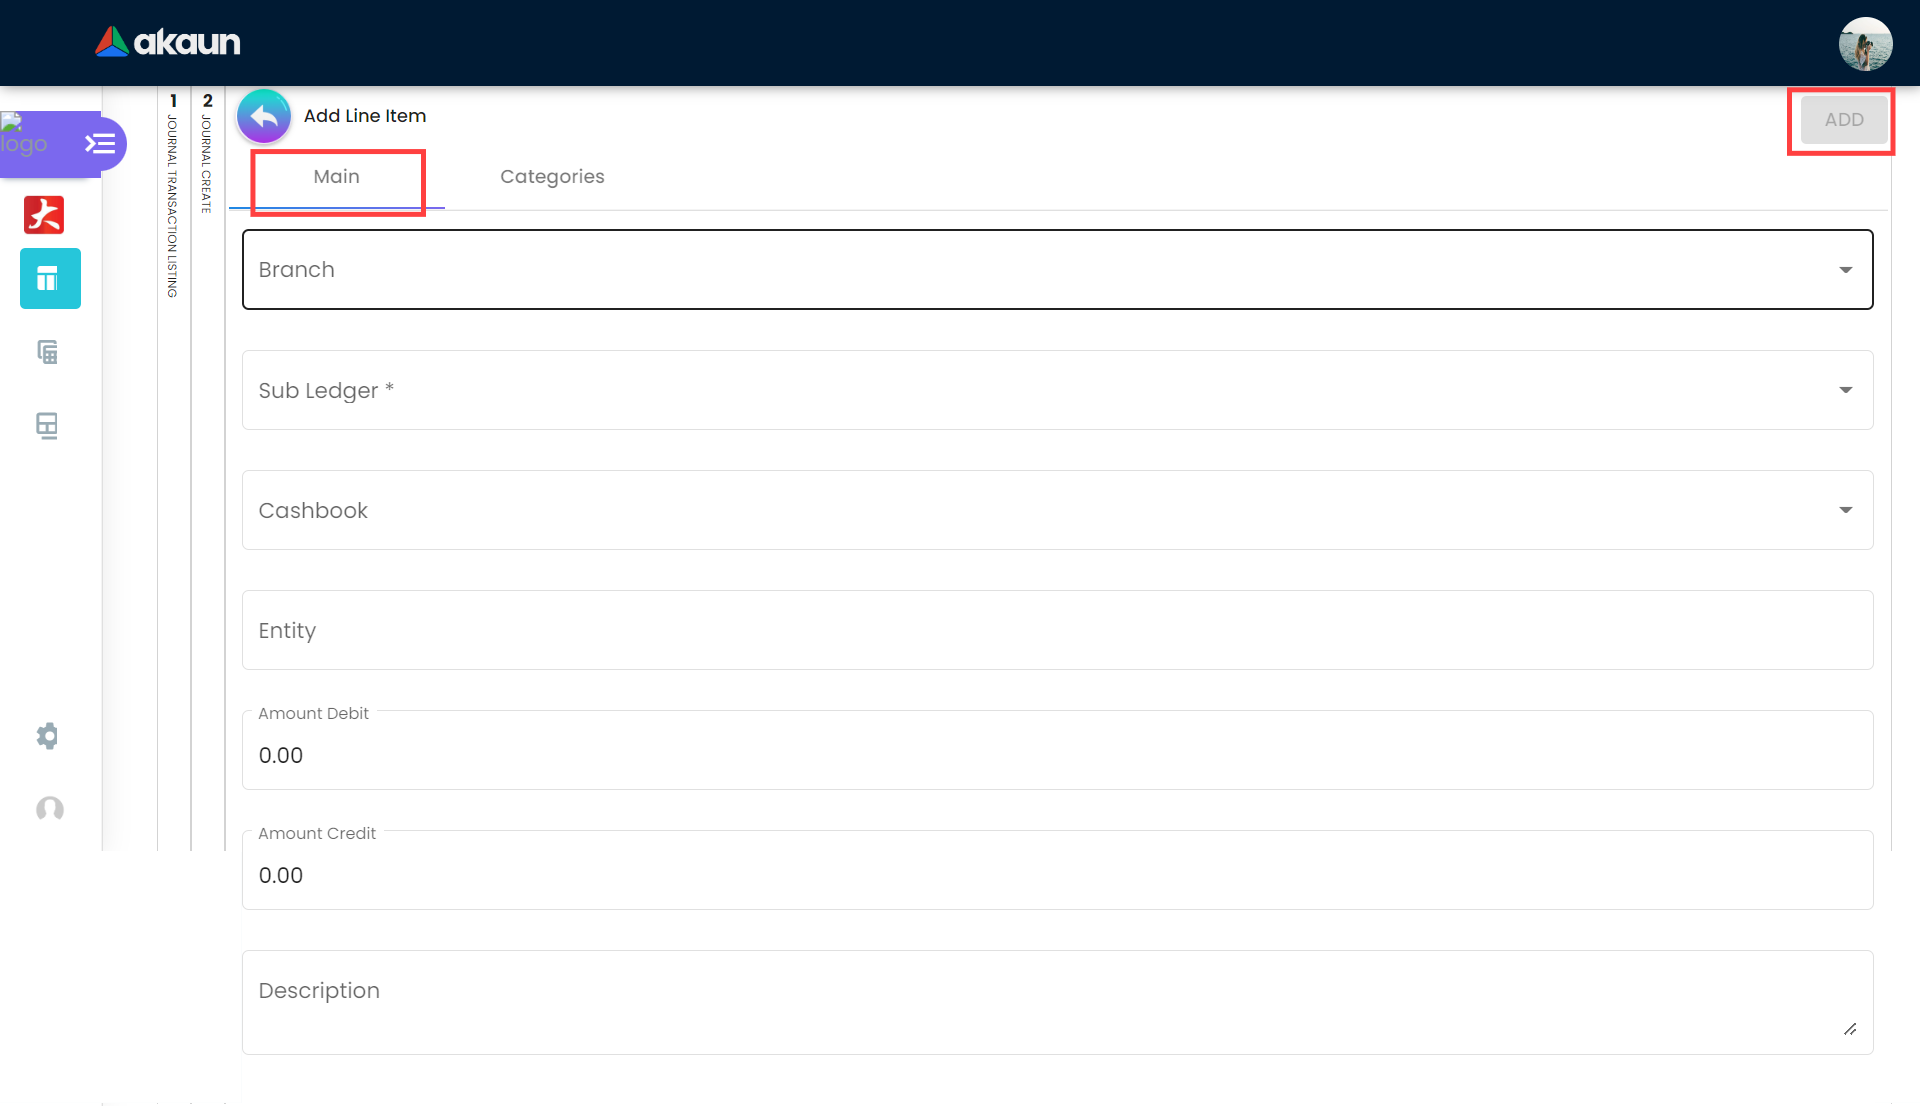
On the line item page users will be able to create a new line item for journal transaction. There are seven (7) items that need to be filled in or selected to create a new line item. Please be noted that if there is a “*” star sign on the text field, it is mandatory to fill in or select
-
Branch
-
Sub Ledger
-
Cashbook
-
Entity
-
Amount Debit
-
Amount Credit
-
Description
3.2.1.2.2 Add line Item Categories
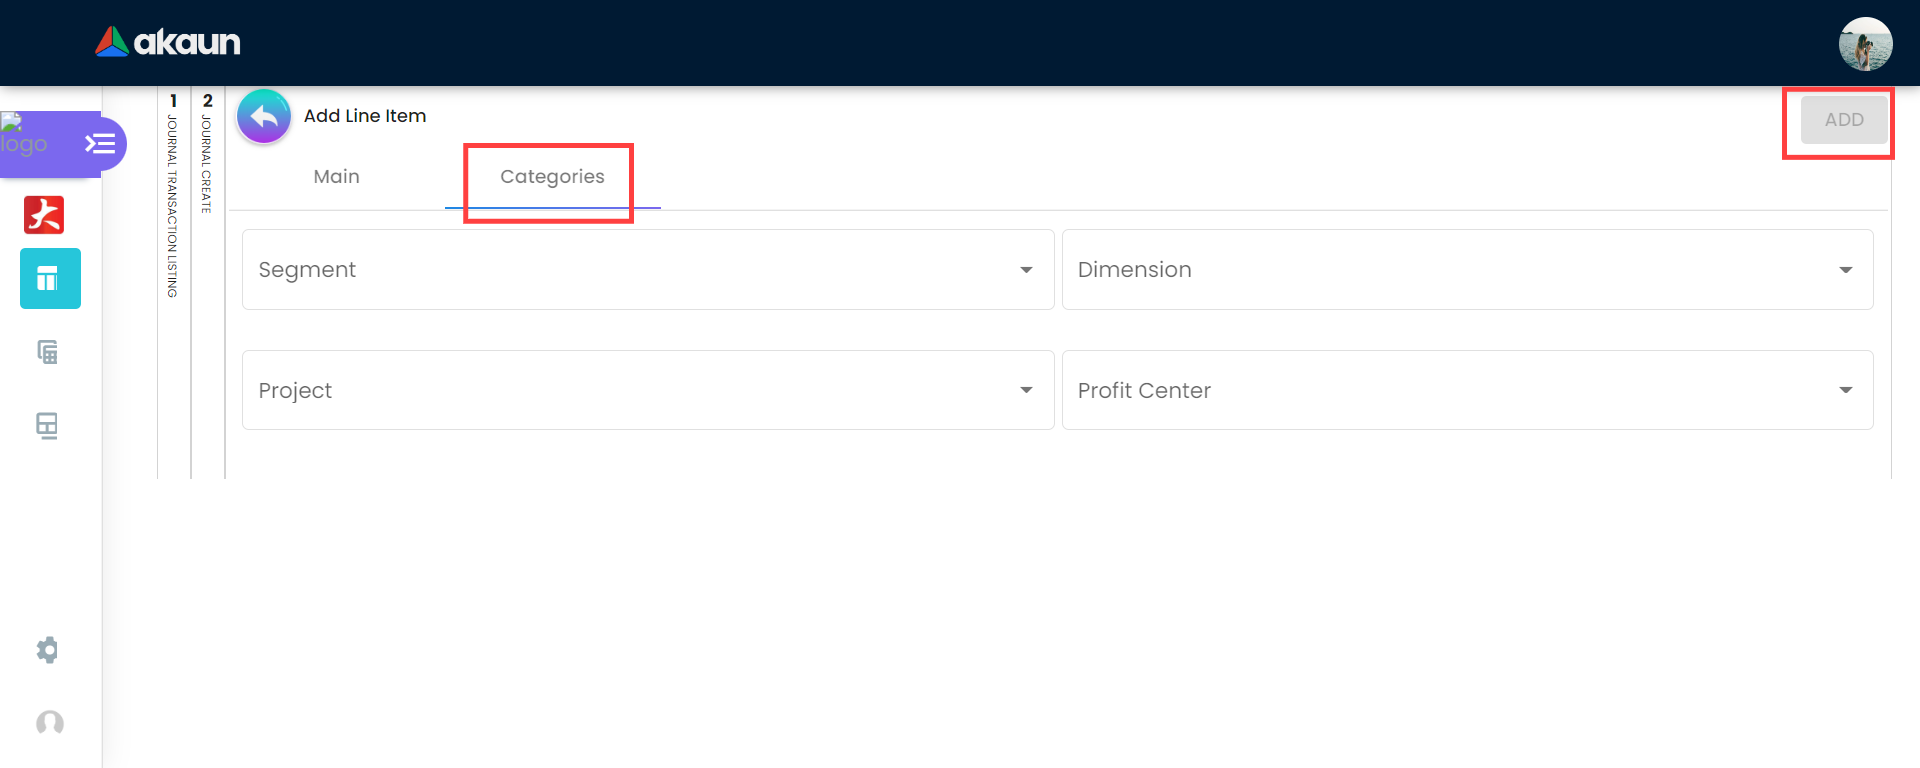
Line Item needs a category, so user can navigate to category tab and fill in the required data for the category and then click the Add button on the most top left side. In the category page user needs to select or fill in the following data to be able to add the category:
-
Segment
-
Dimension
-
Project
-
Profit Center
3.3 Sub Ledger Listing
This is the second section of the applet which mainly lists sub ledger details, edit sub ledger details and list the Journal lines. The image below shows the main page of sub ledger listing which contains the following:
-
Search bar:
On the top the search bar exists to search for any sub ledger on the sub ledger list.
-
Sub ledger row data:
Each sub ledger row data is clickable. If user click on any sub ledger row, the user will be directed to the clicked sub ledger details page which is shown in images with details in (4.2.1 Main Tab) and (4.2.2 Journal Lines Tab).
Sub ledger listing will display all the sub ledger created and with the following data:
-
Company
-
Name
-
GL Code
-
Description
-
Status
-
Created Date
-
Updated Date
3.3.1 Main Tab
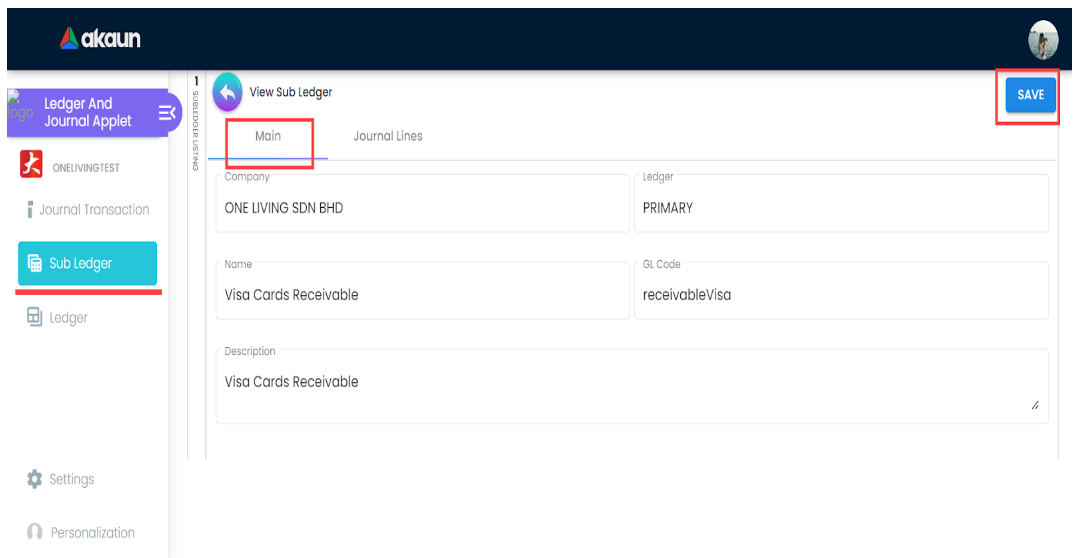
On view sub ledger main tab user will be able to edit the sub ledger detail that he/she selected on the sub ledger listing page. The details will be populated automatically and user will be able to edit only the Description while Campany, Ledger, Name, GL Code are not editable. Lastly, user needs to click the save button to save the sub ledger.
3.3.2 Journal Lines Tab
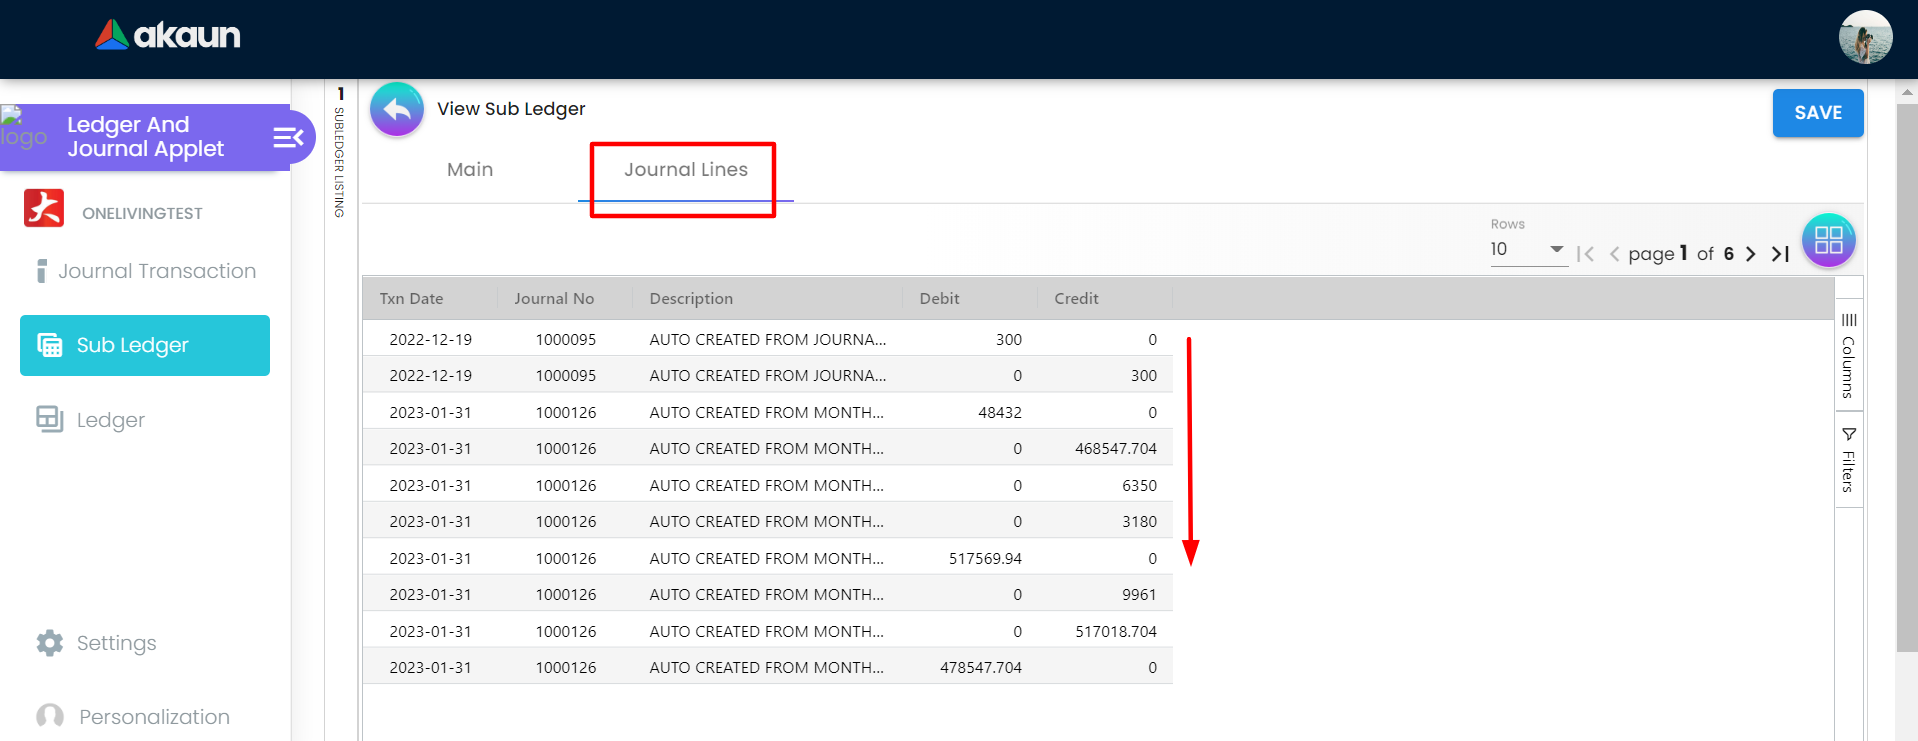
On view sub ledger main tab user will be able to list all the journal lines details for the selected Sub ledger on the sub ledger listing page. On journal lines page the selected sub ledger details or each journal line will be shown with the data of:
-
Txn Date
-
Journal No
-
Description
-
Debit
-
Credit
3.4 Ledger
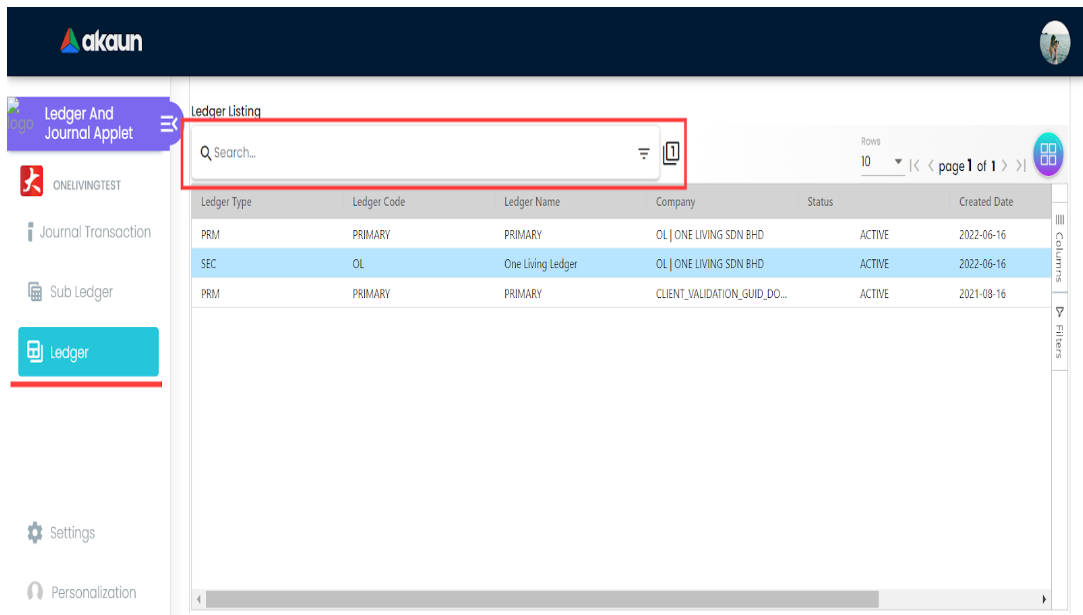
This is the third section of the applet which mainly lists ledger details and allows user to edit ledger details. The image below shows the main page of ledger listing which contains the following:
-
Search bar:
On the top the search bar exists to search for any ledger on the sub ledger list.
-
Ledger row data:
Each sub ledger row data is clickable. If a user clicks on any sub ledger row, the user will be directed to the clicked sub ledger details page.
Sub ledger listing will display all the sub ledger created and with the following data:
-
Ledger Type
-
Ledger Code
-
Ledger Name
-
Company
-
Status
-
Created Date
-
Updated Date
3.4.1 View Ledger Details Tab
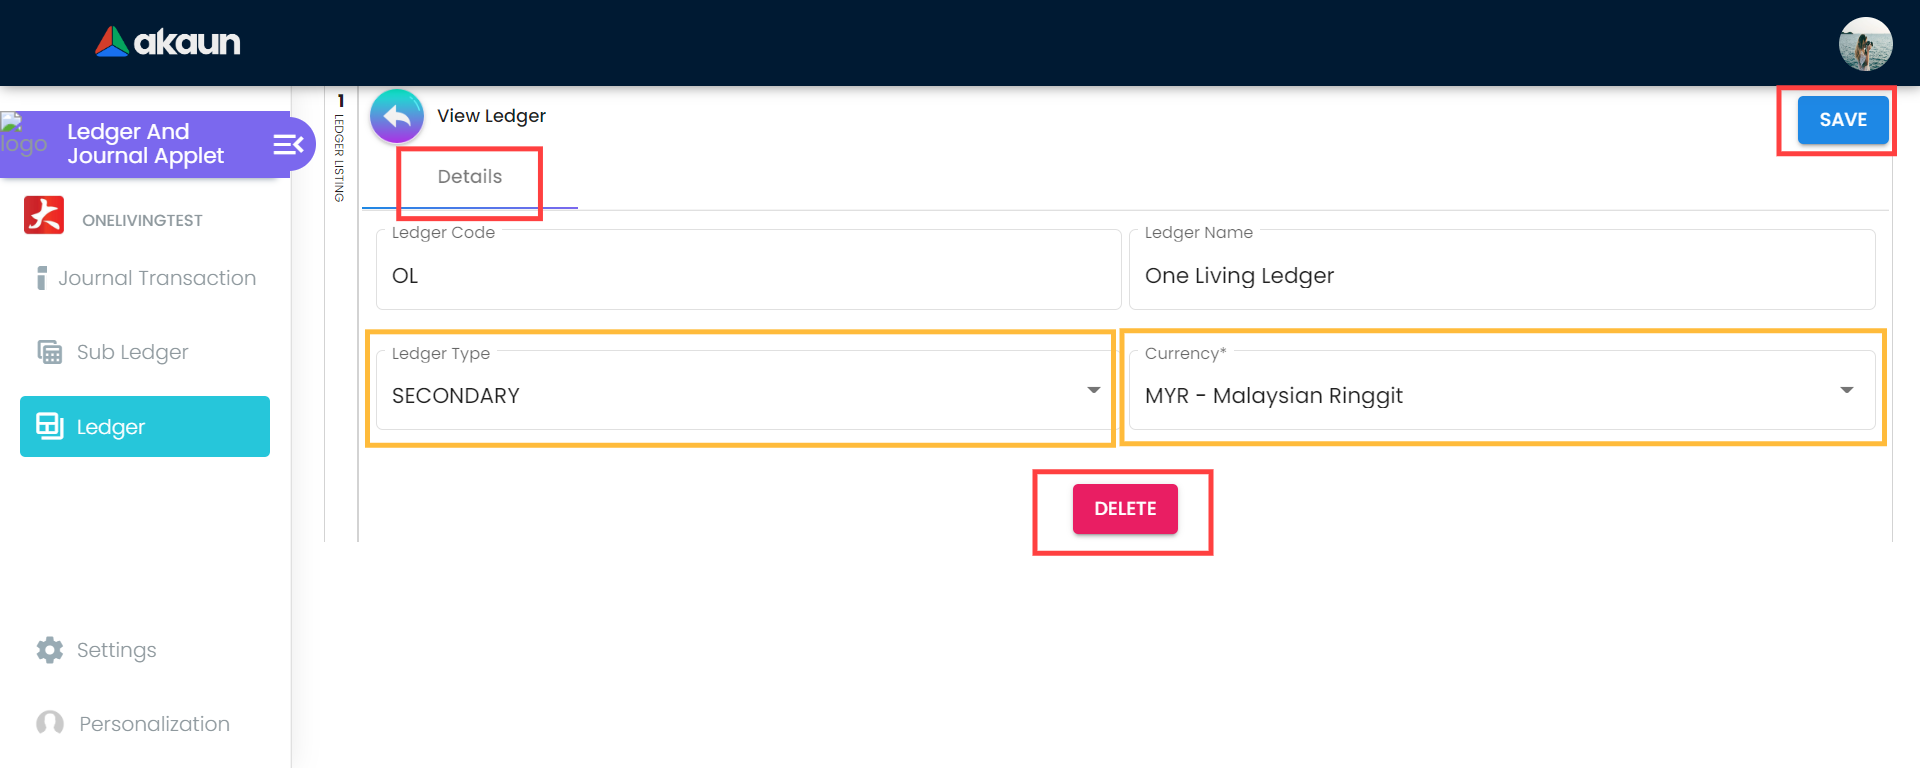
When User clicks on any ledger row on the ledger listing page the user will be navigated to the ledger detail page. In detail tab ledger data will be populated automatically and user will be able to edit or to delete ledger. In the details tab these data will be shown:
-
Ledger Code
-
Ledger Name
-
Ledger Type
-
Currency
However the only data that user will be able to edit is Ledger Type and Currency only. Then the user will select his/her action either save or delete.