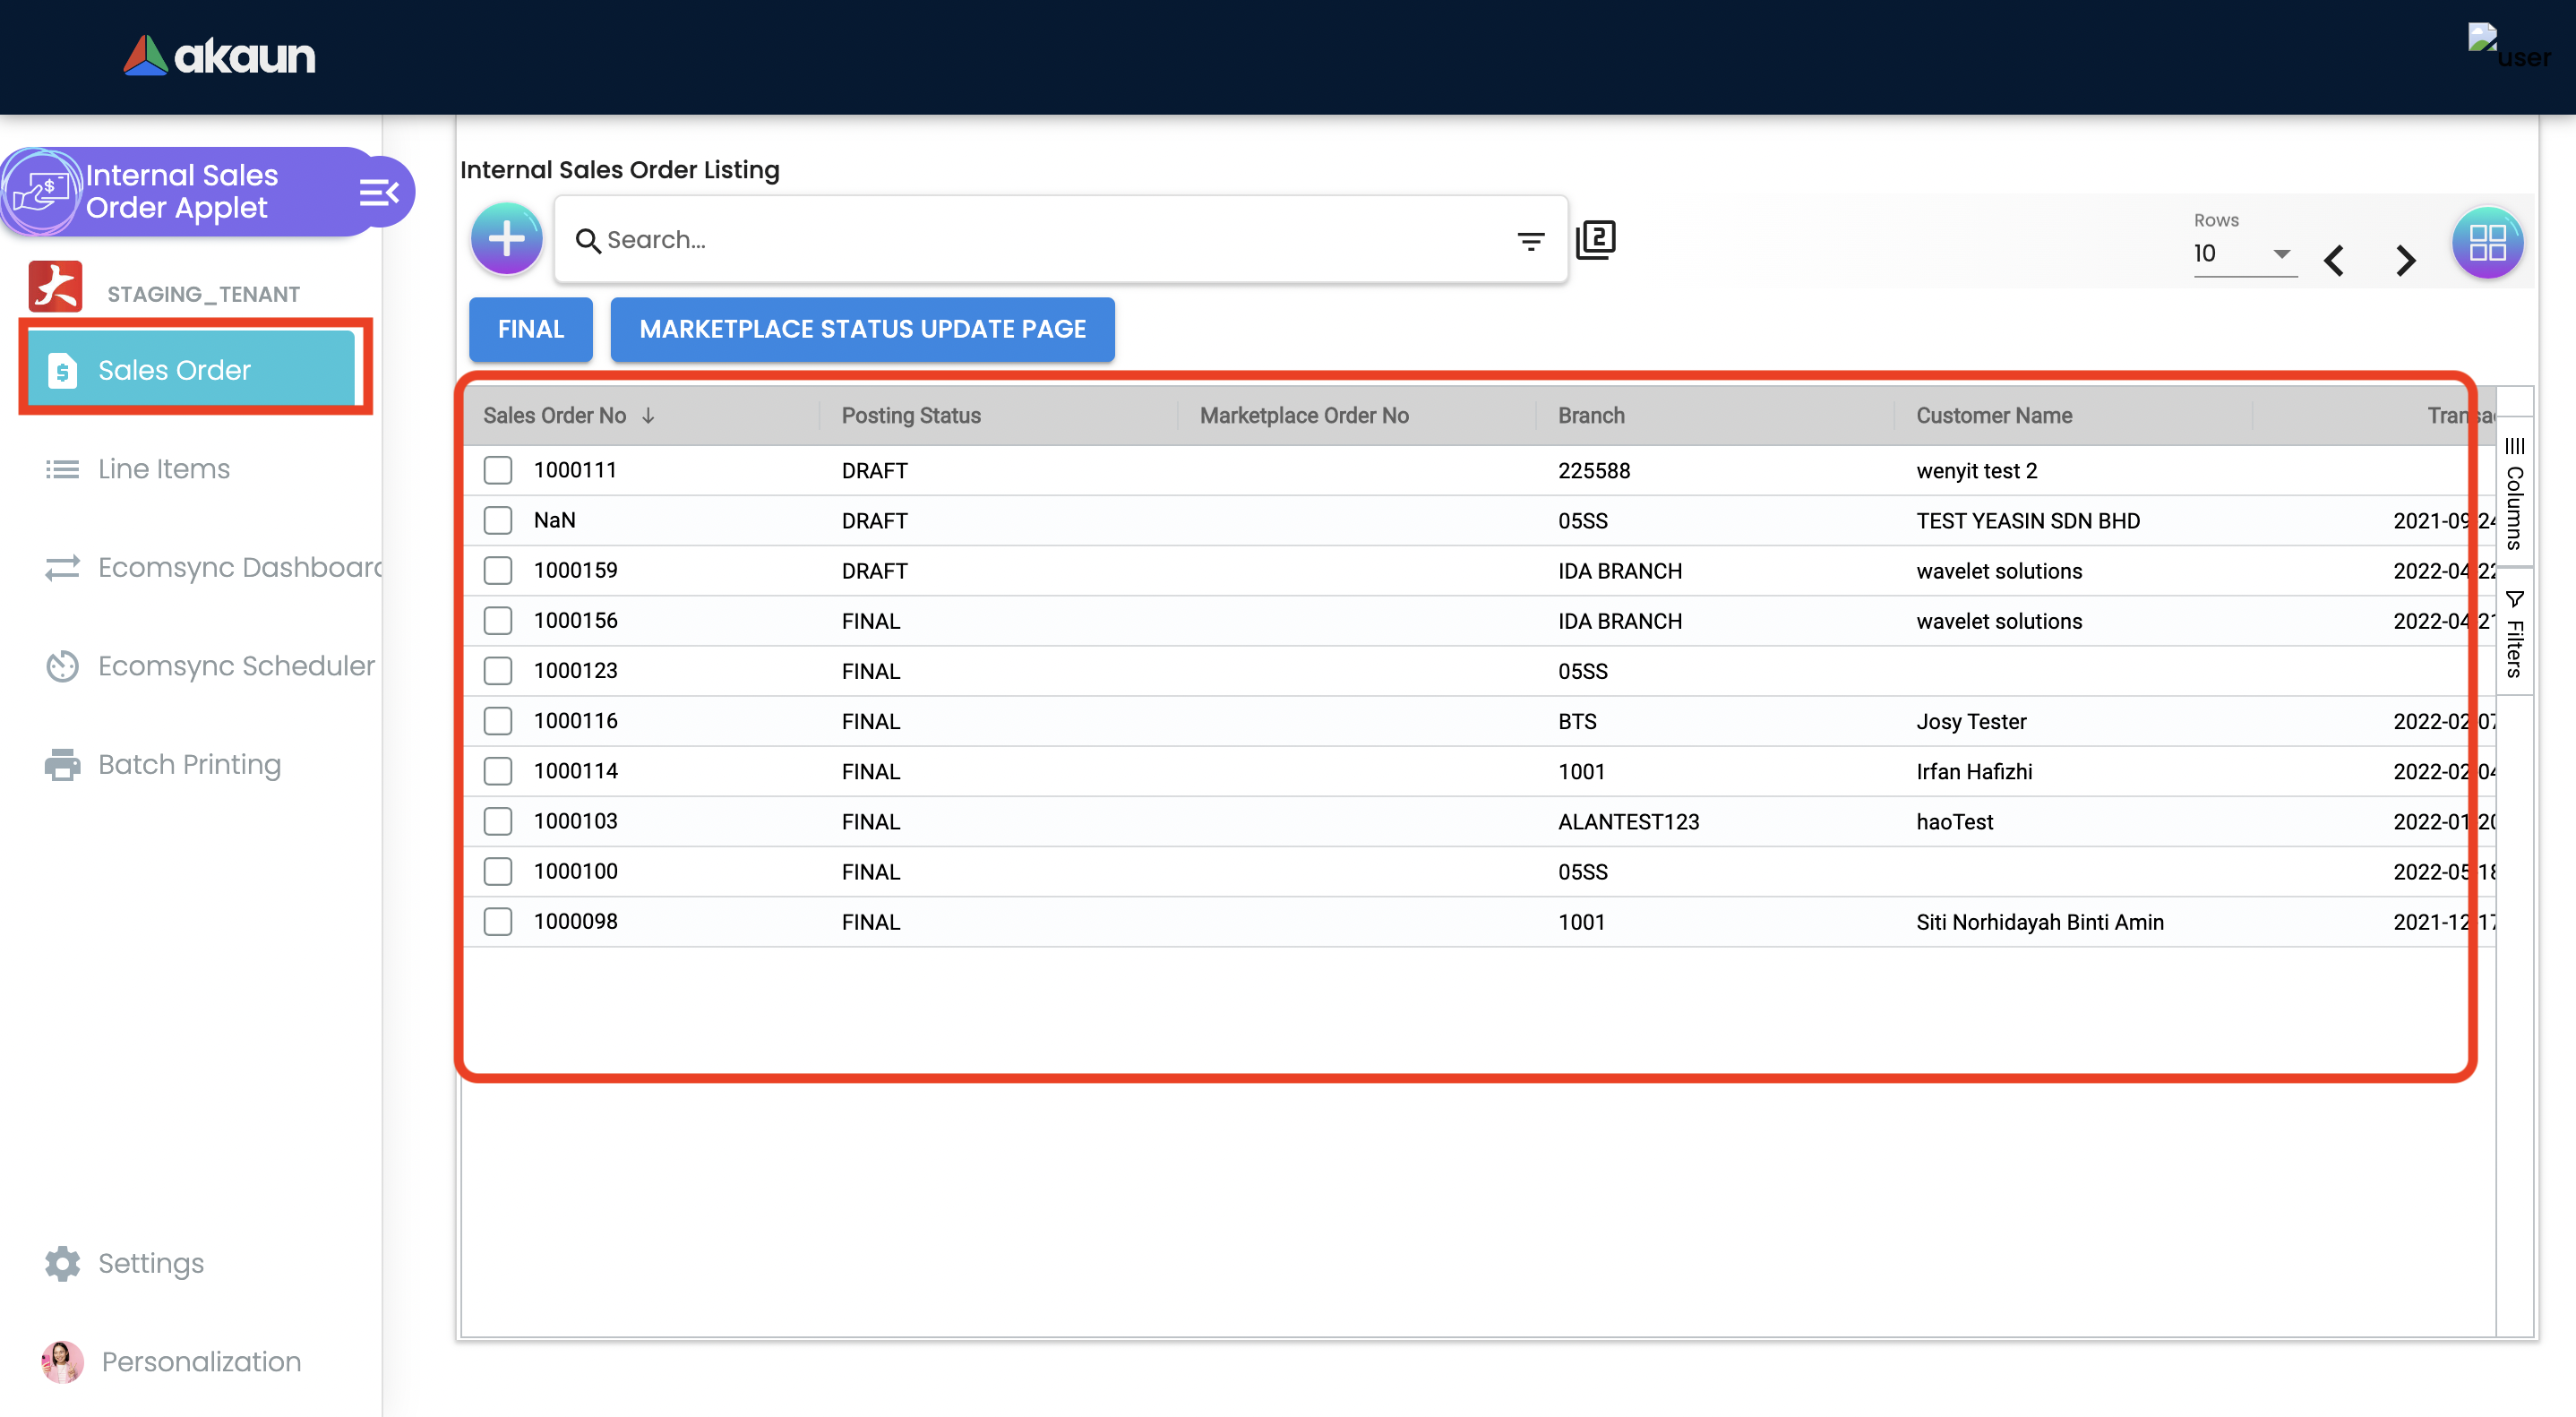
2.0 Sales Orders Listing
Upon creation, all the sales orders are listed here. Users may click on the desired sales order to view the main, customer account, line items, delivery, attachments, and other details to view and edit.
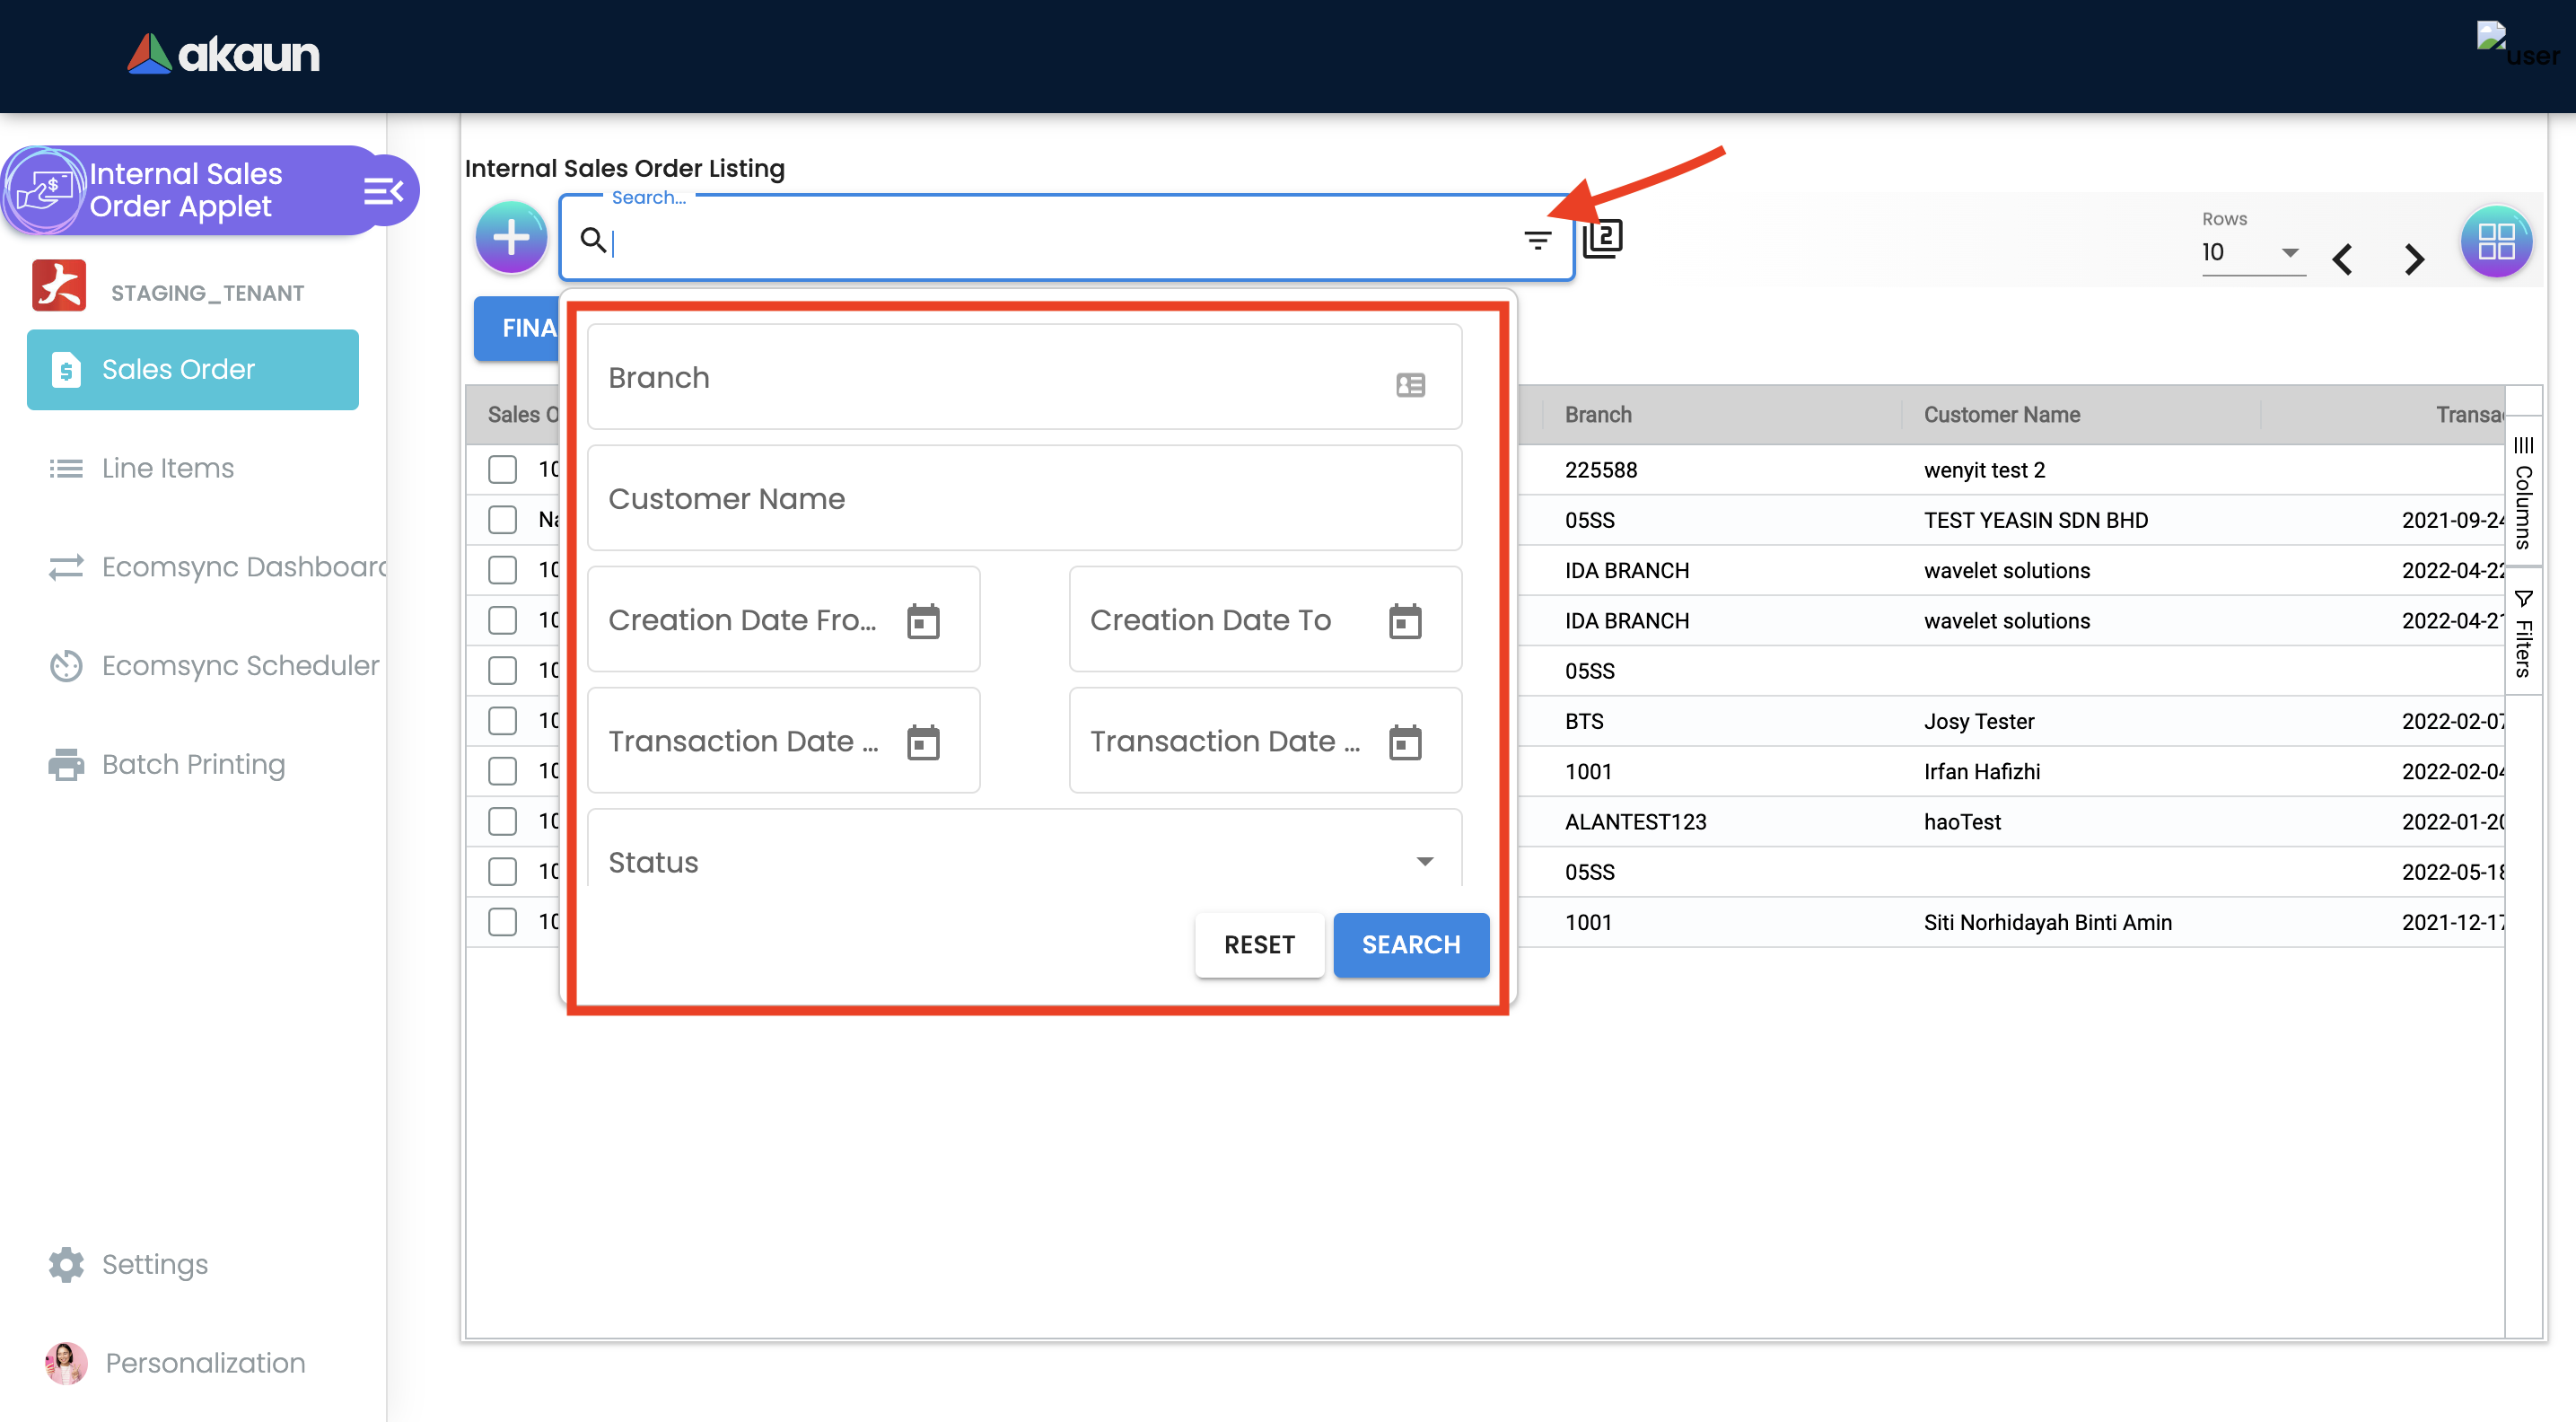
2.1 Advanced Search
The advanced search box below helps refine the search and allows the user to specify requirements by branch, customer, date, status, and marketplaces when searching from the list of sales orders.
-
Branch: A branch office is an outlet for a company.
-
Customer Name: Account or entity name the sales order is linked to.
-
Created Date: Sales order creation date.
-
Status: Current status of the sales order (Active / Inactive).
-
Marketplace Status: Current marketplace status of the sales order (Pending / Delivered / Cancelled / To Ship / Shipped / Failed and others).
2.2 Final Posting
Upon creation, the posting status of the sales order document is ‘DRAFT'.
Users can post the document(s) to ‘FINAL’ status once the sales order is confirmed. As shown in the screen below, the user selected the provided checkboxes from the listing and clicked on the FINAL button to bulk post the desired sales order to 'FINAL’ Status.

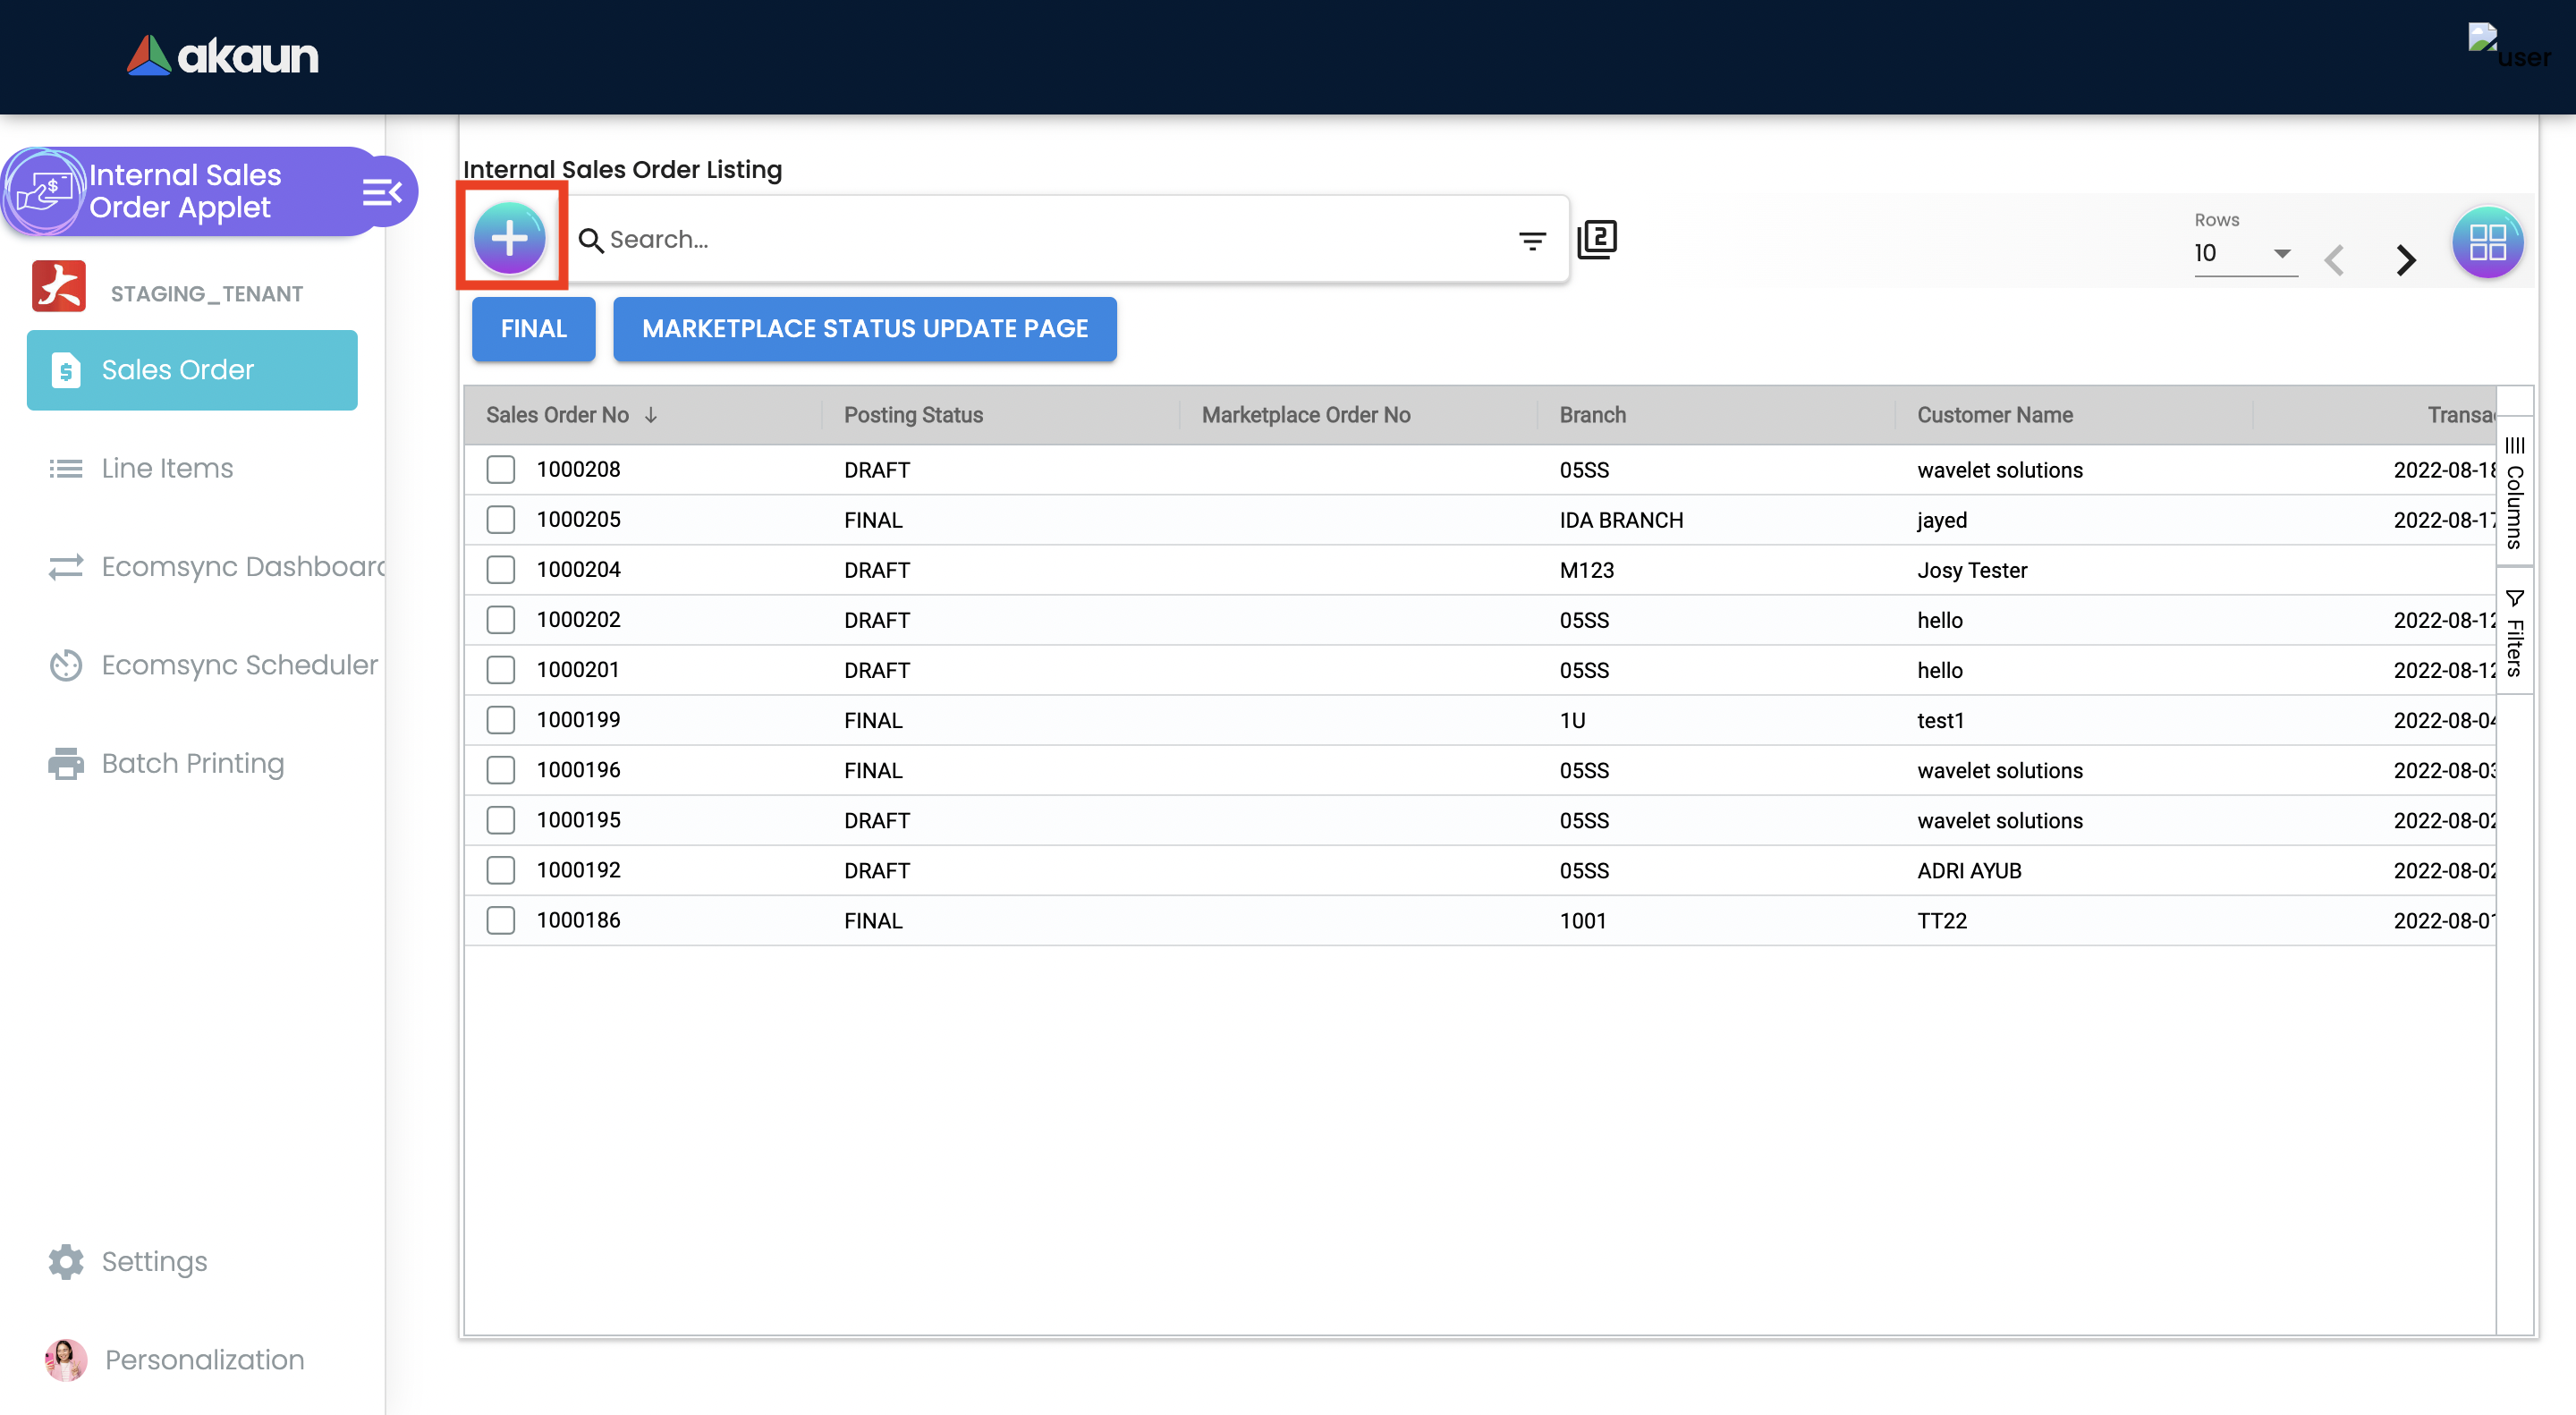
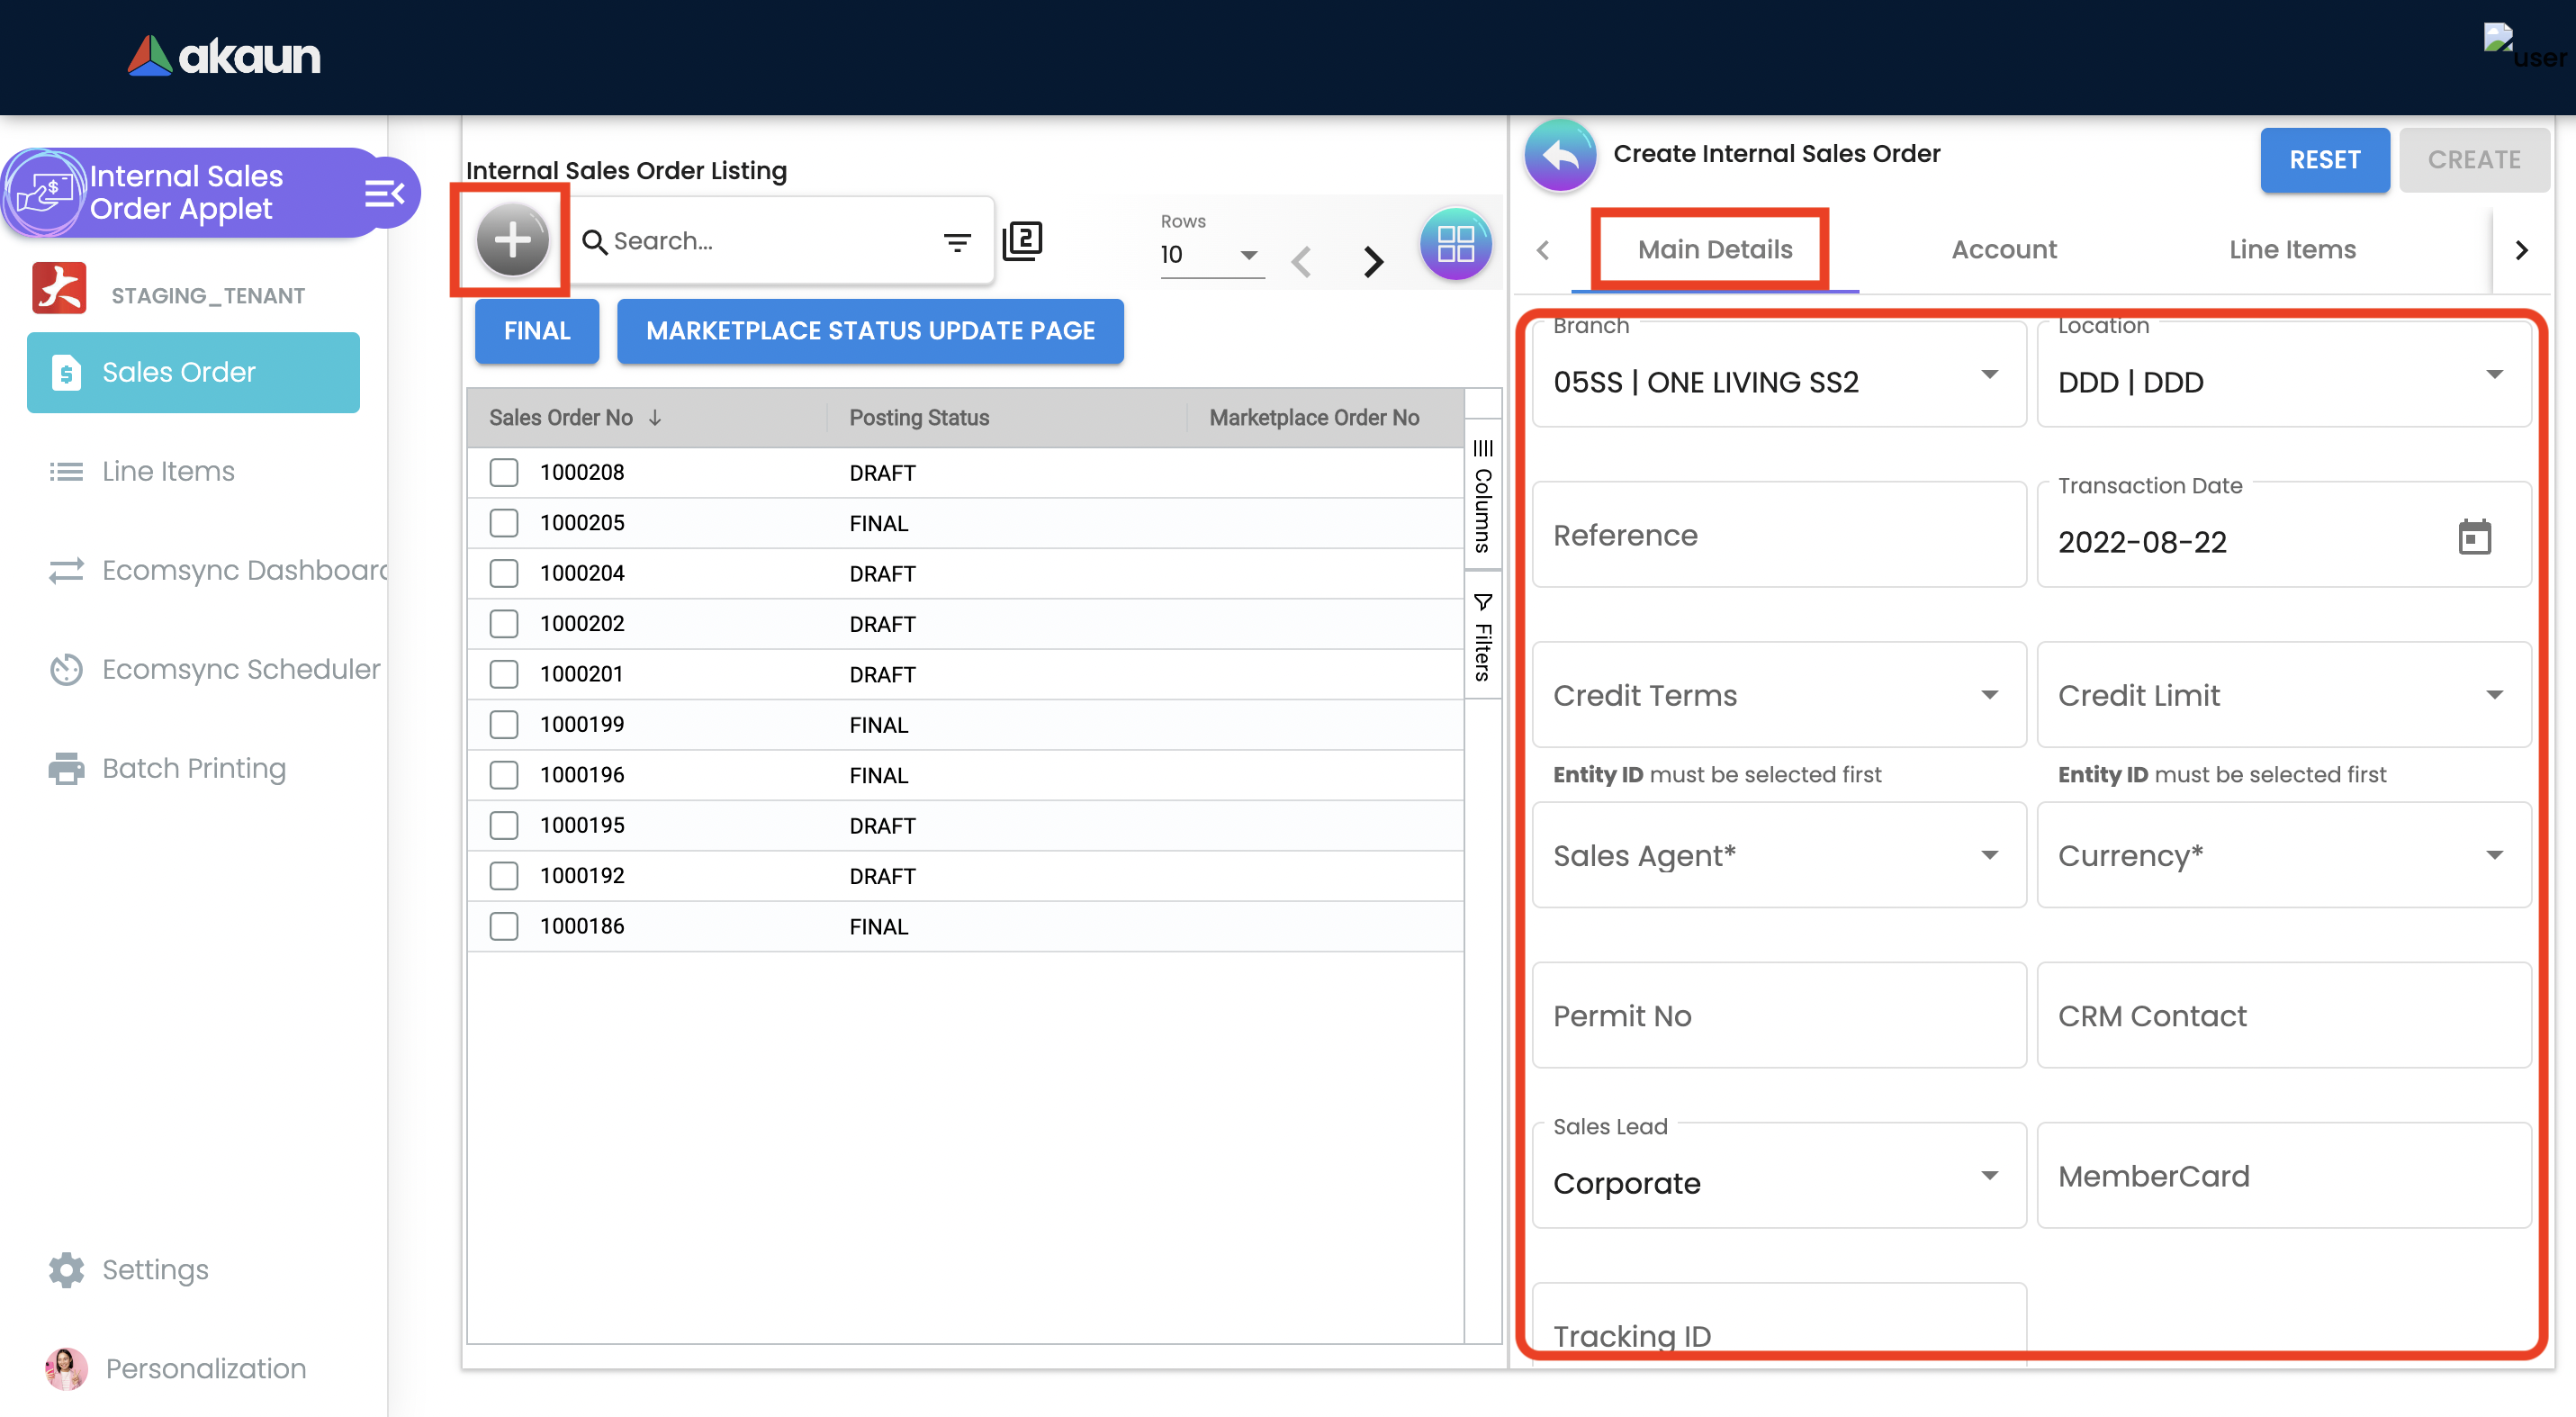
2.3 Create New Sales Order
Go to the Sales Order menu, and click on the '+' button to Create a New Sales Order.
2.3.1 Sales Order - Main Details Tab
Users may key in the main details of the new document OR copy/Knock Off from other documents.
It is, however, advisable to use 'Knock Off from other documents' because it can be traced and the outstanding reports will be meaningful.
-
In order to proceed and start on Sales Order Applet, kindly make sure that you have created company, branch, Location details in Organization Applet.
-
Branch: A branch office is an outlet for a company.
-
Location: A place to store physical inventory for sale or distribution.
-
Reference: For sales orders, it’s very common to reference a customer’s incoming purchase order number.
-
Transaction Date: The date when the transaction or dealing occurs.
-
Credit Terms: An agreement between the buyer and seller about the timings and payment to be made for the goods bought on credit.
-
Credit Limit: Maximum amount of credit offered to the customer.
-
Sales Agent: The authorized and appointed professional who sold or distributed the products or services to the customer, choose the employee from the dropdown list.
-
Currency: To be determined based on the pricing condition that you are maintaining.
-
Permit No: Sellers permit number.
-
CRM Contact: Specify the contact for whom the sales order is being created.
-
Sales Lead: The retail sales worker who is responsible for coordinating, ensuring, and ensuring the sales orders are reached to the customer. From the drop down list, user choose wether the "Corporate" or "Non-Corporate".
-
Membercard: A card issued by your company to the customer to indicate membership of a membership scheme.
-
Tracking ID: An ID or code is assigned to the sales order to typically print on the shipping label.
-
Client Key: To display the client key, for EMP users.
-
Client Value: To display the client value, for EMP users.
-
Remarks: Add extra information to accounts, customers cards, or sales orders to communicate agreements, such as a special price or delivery method, to other users.
-
2.3.2 Sales Order - Account Tab
As the user is creating a contract between organization and a Customer for the supply of specified goods and/or services, a link is configured here between the sales order and the customer.
In order to proceed and start on Sales Order Applet, kindly make sure that you have created Customer details in the Customer Maintenance Applet.
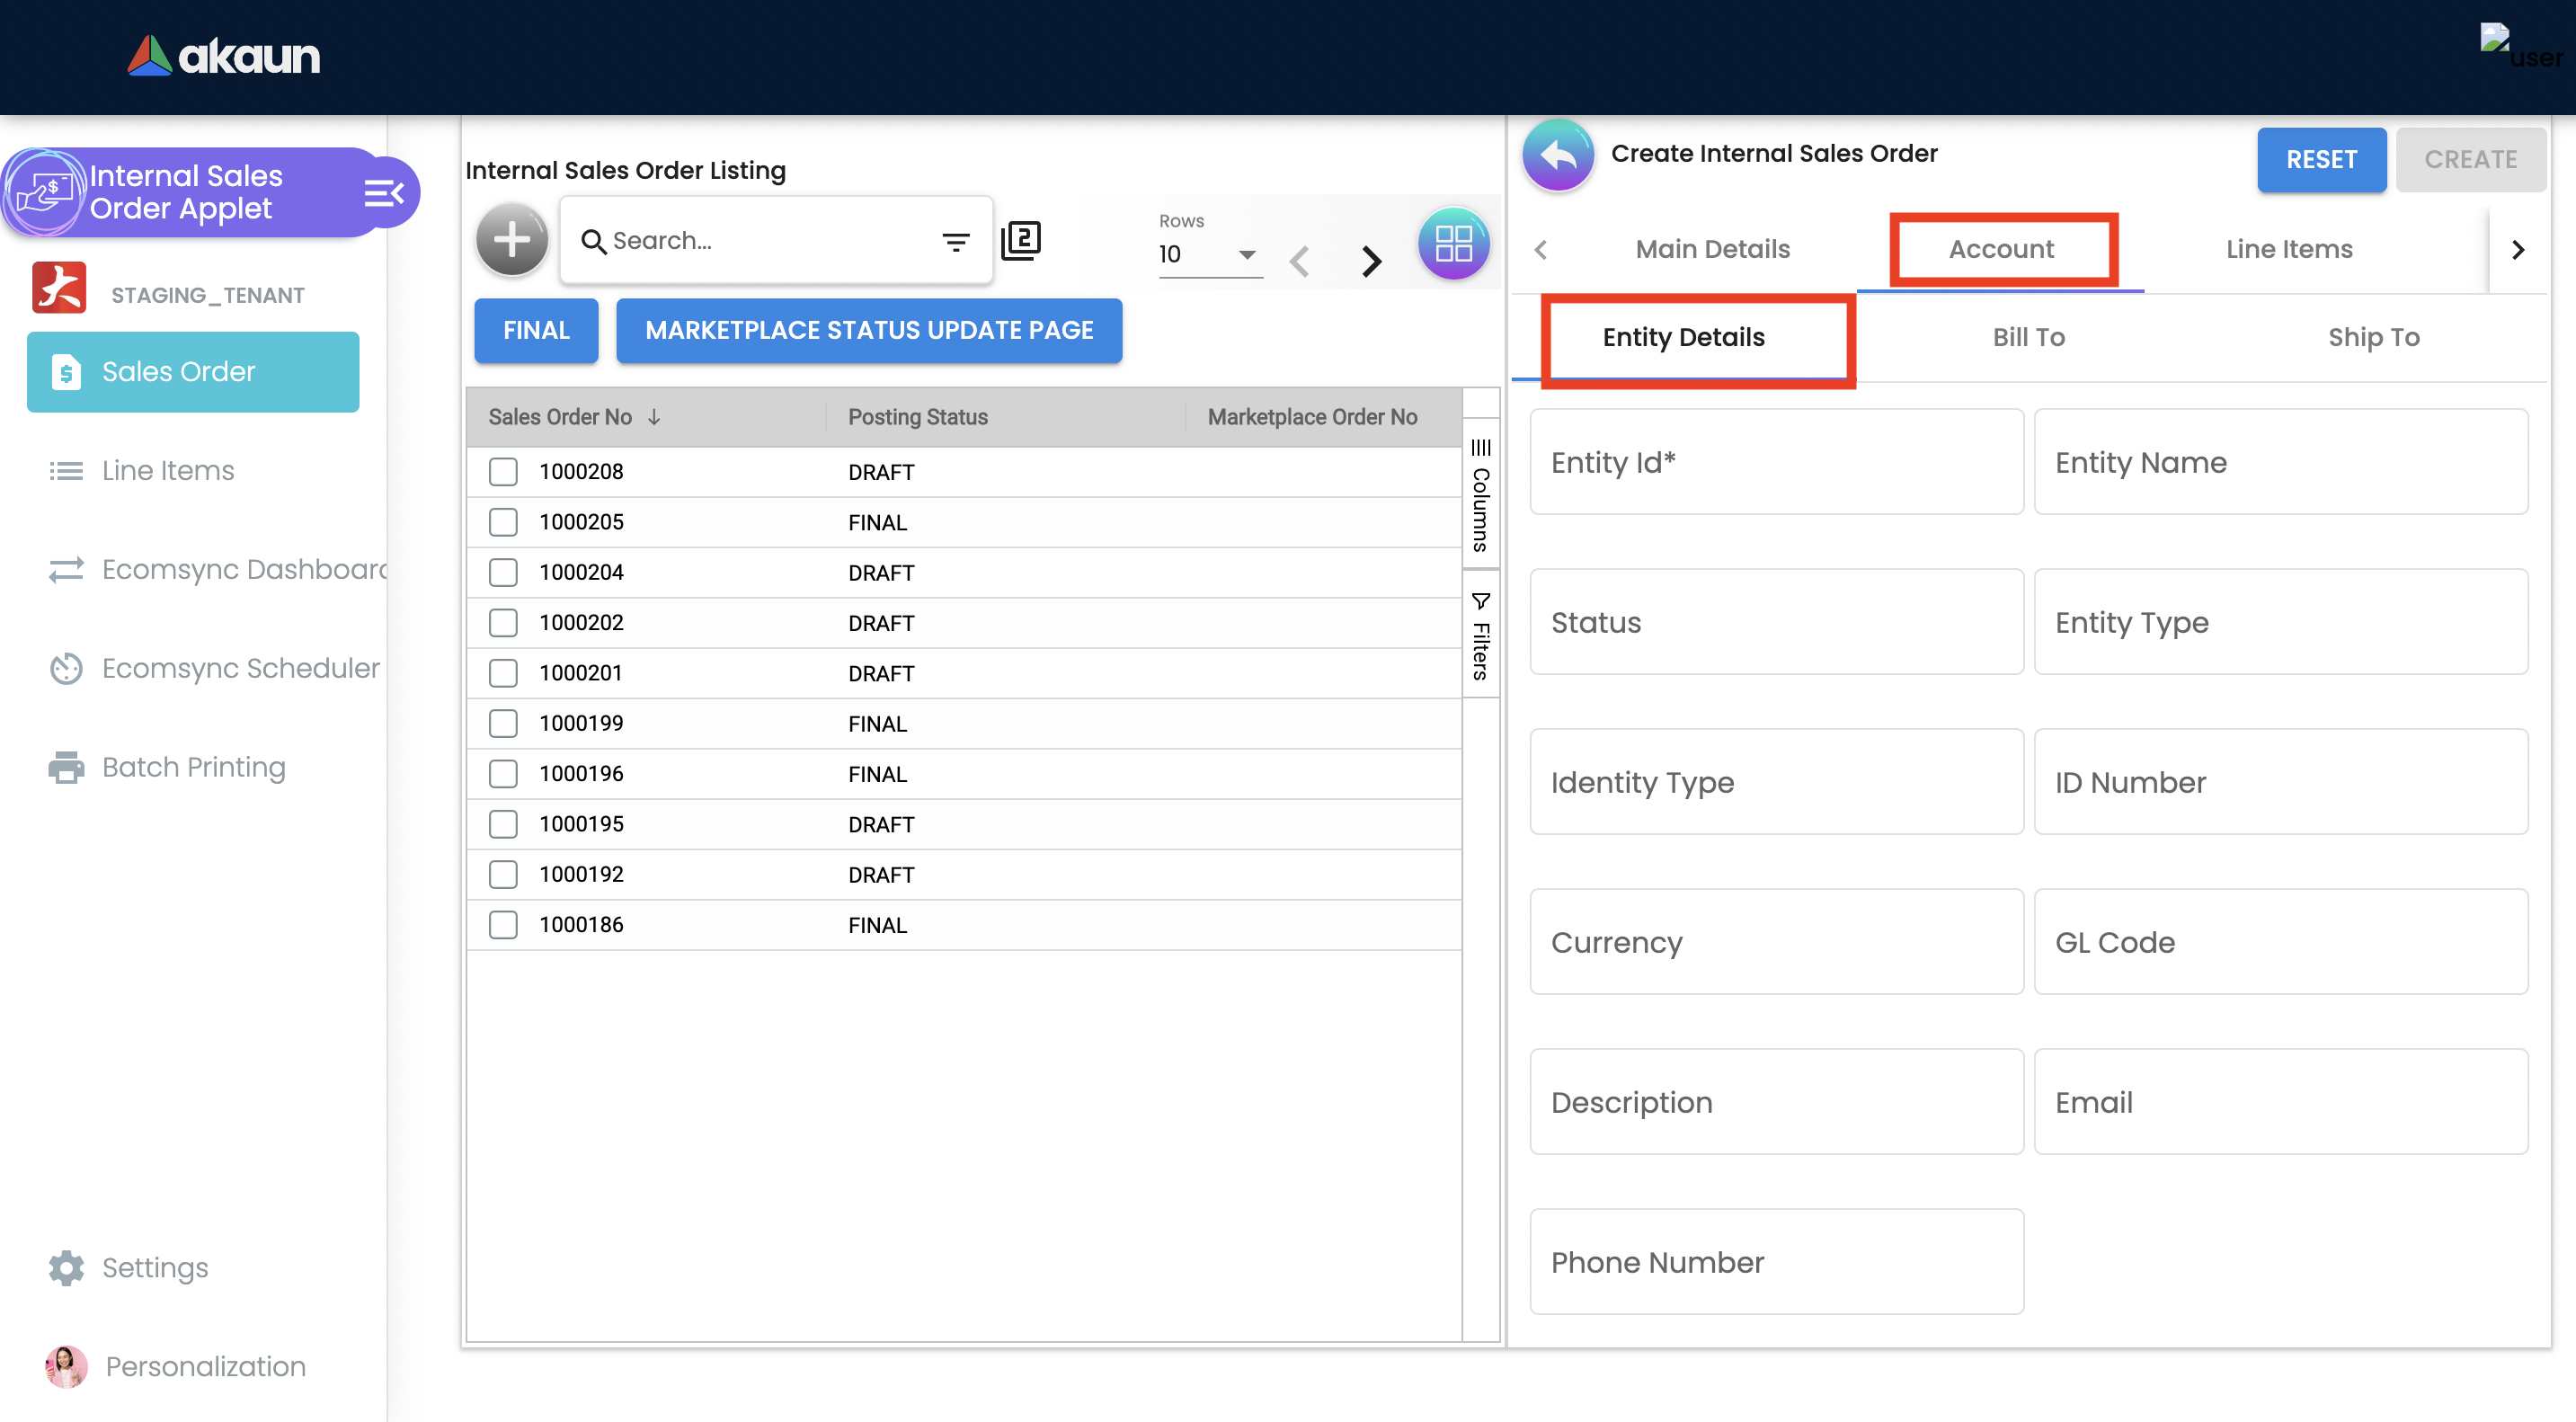
Entity ID: Customer Code, auto-filled when customer entity is selected.
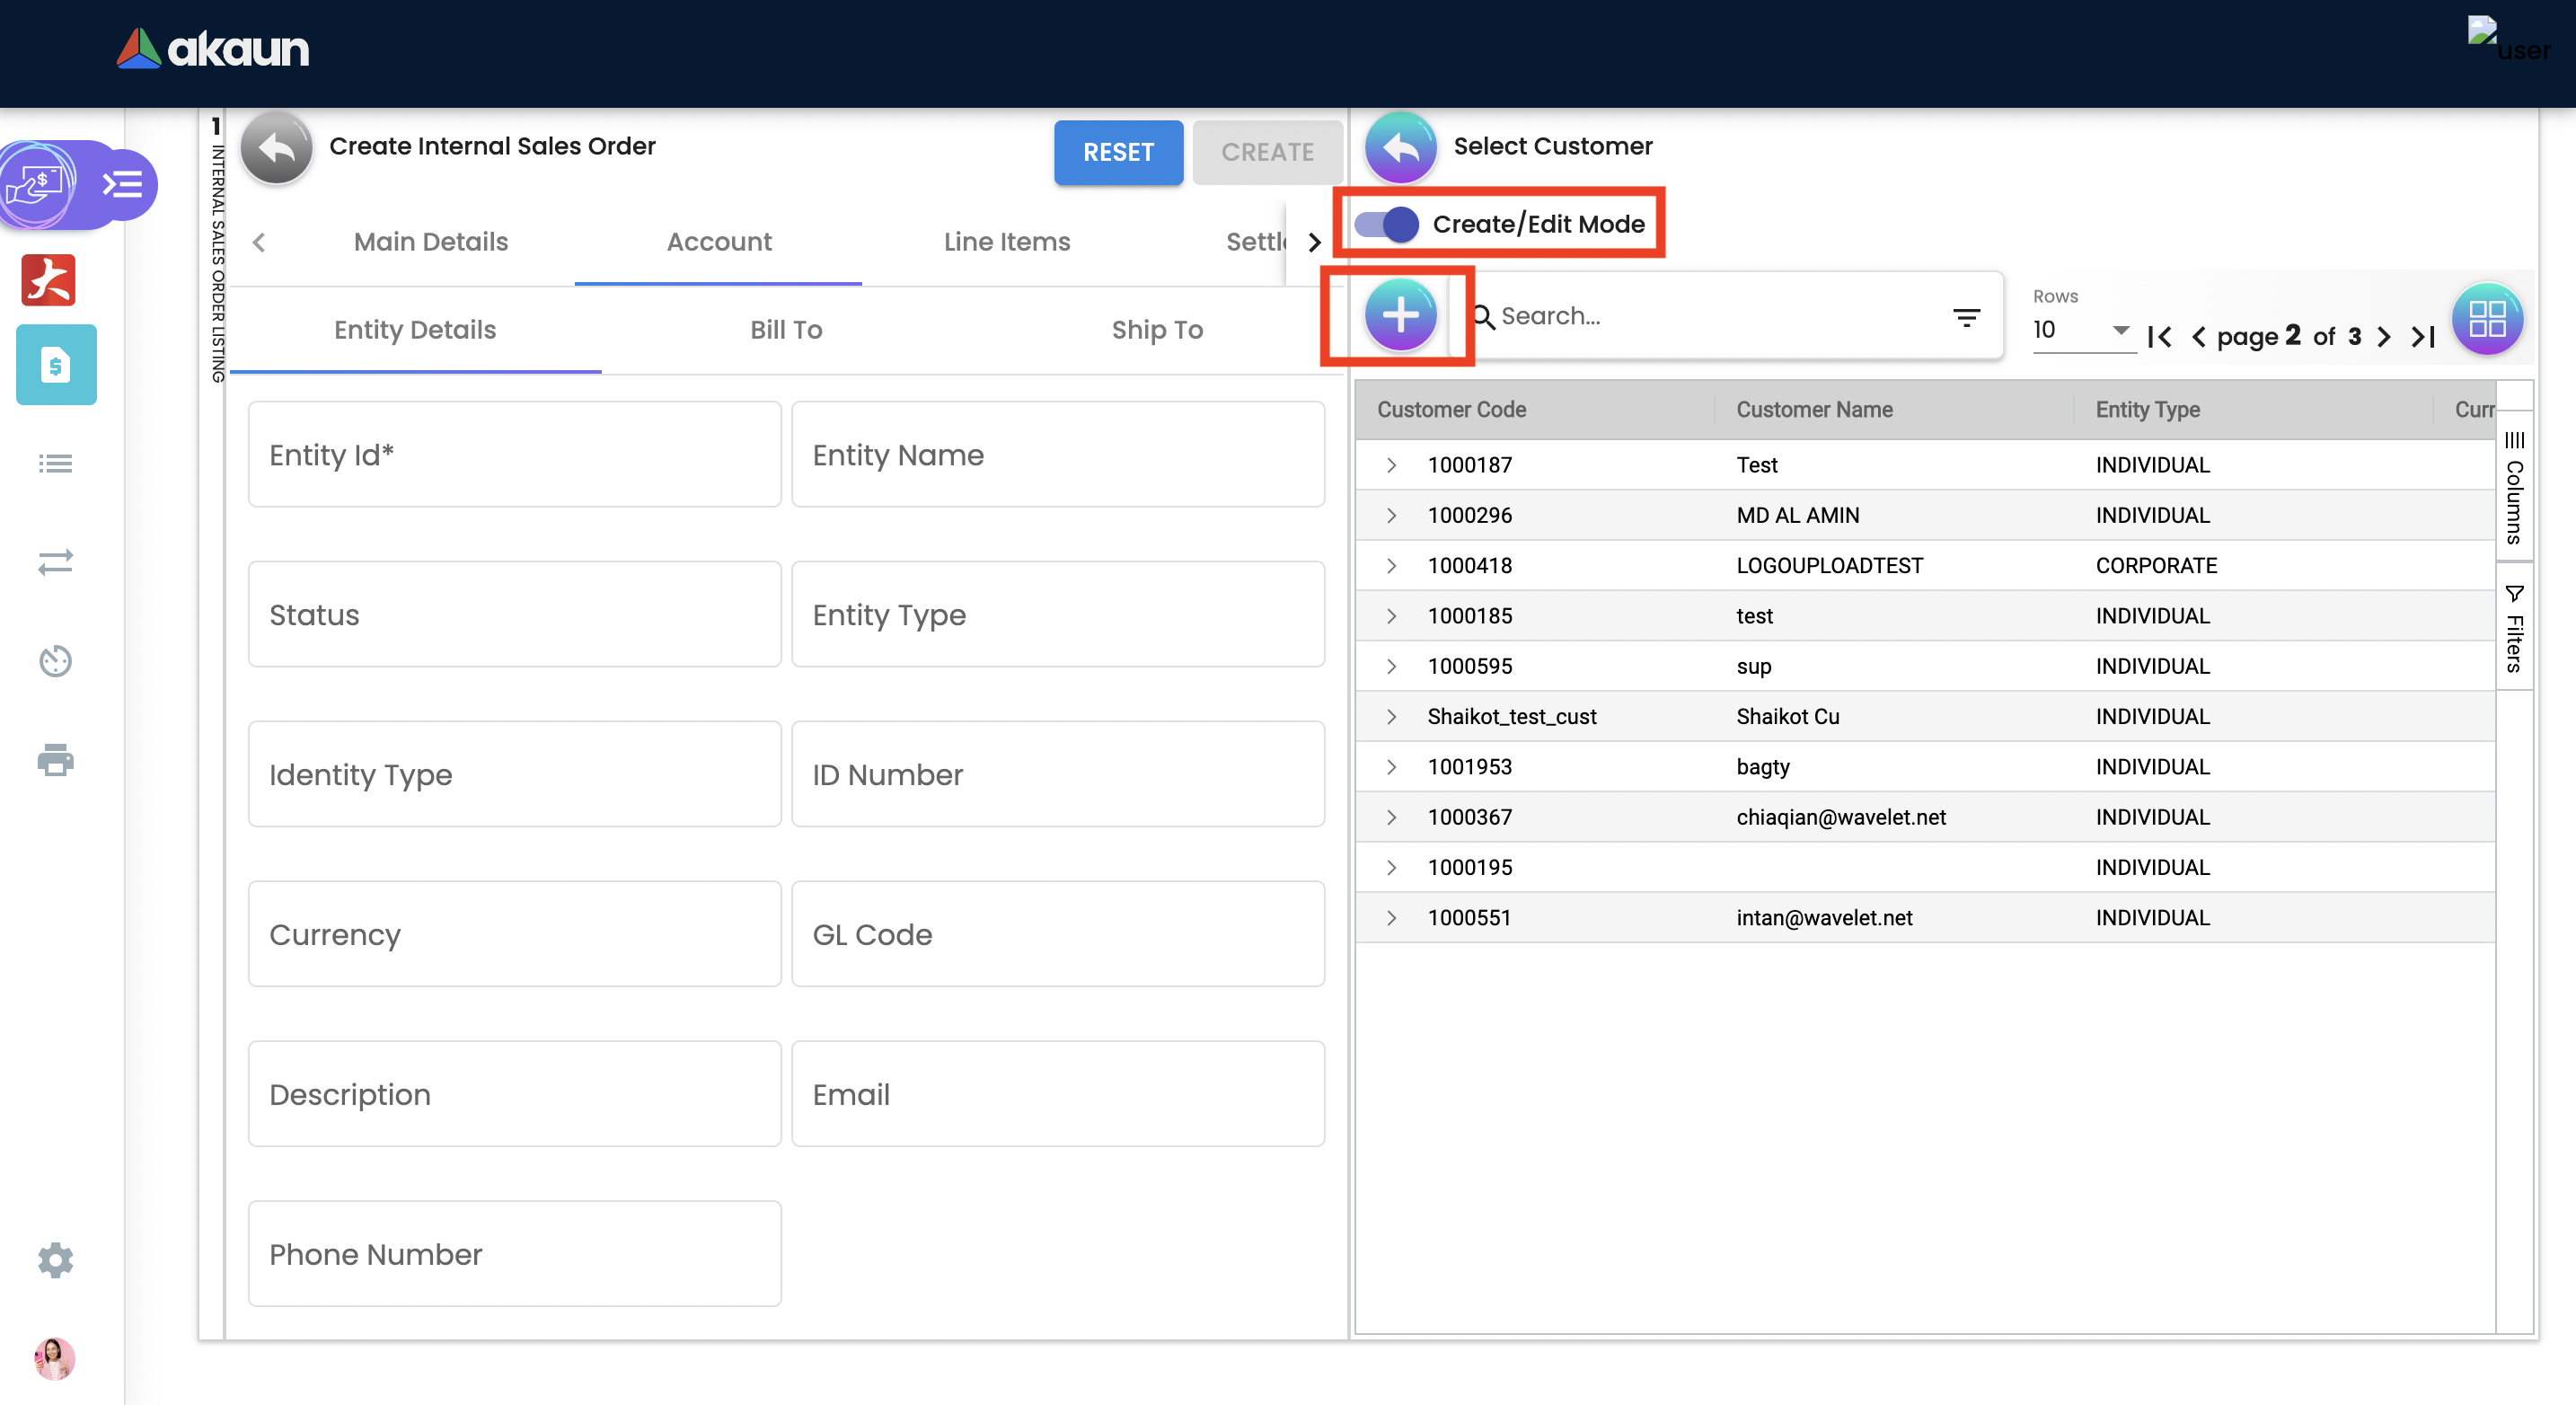
2.3.2.1 Entity Details
All relevant information from the Customer master record will be copied from here to the sales order.
Click on the Entity ID.
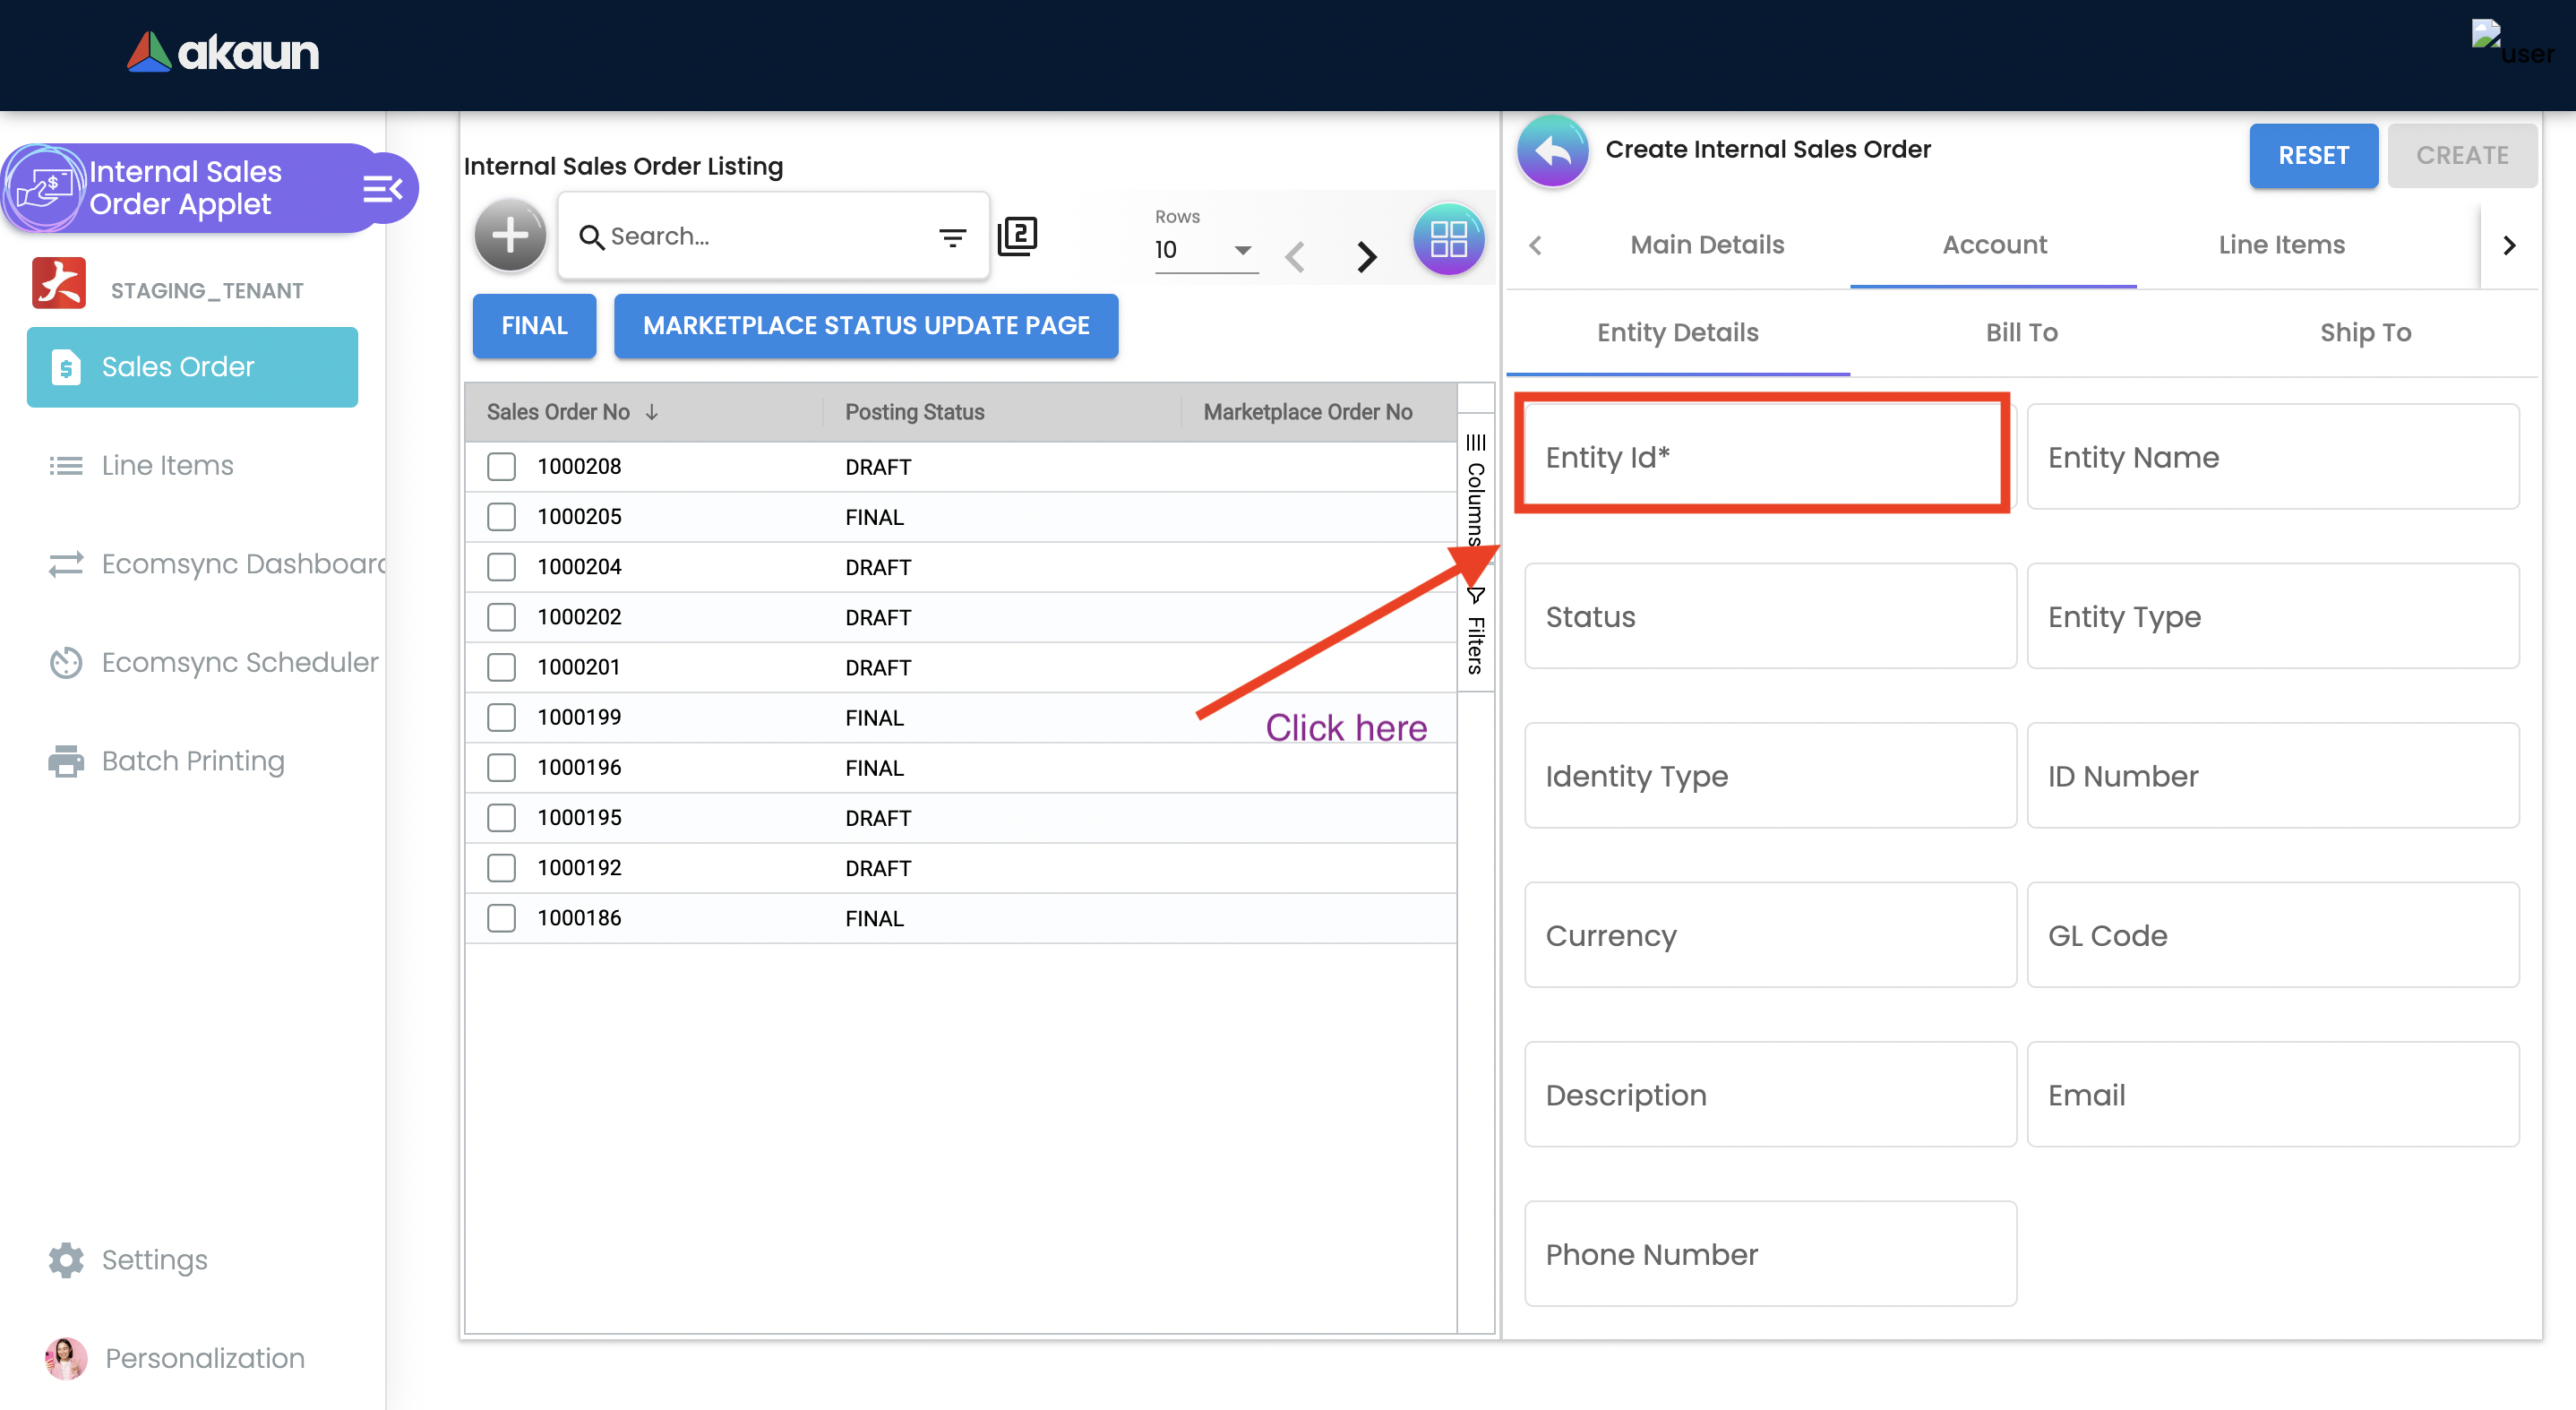
Seach Customers from the list.
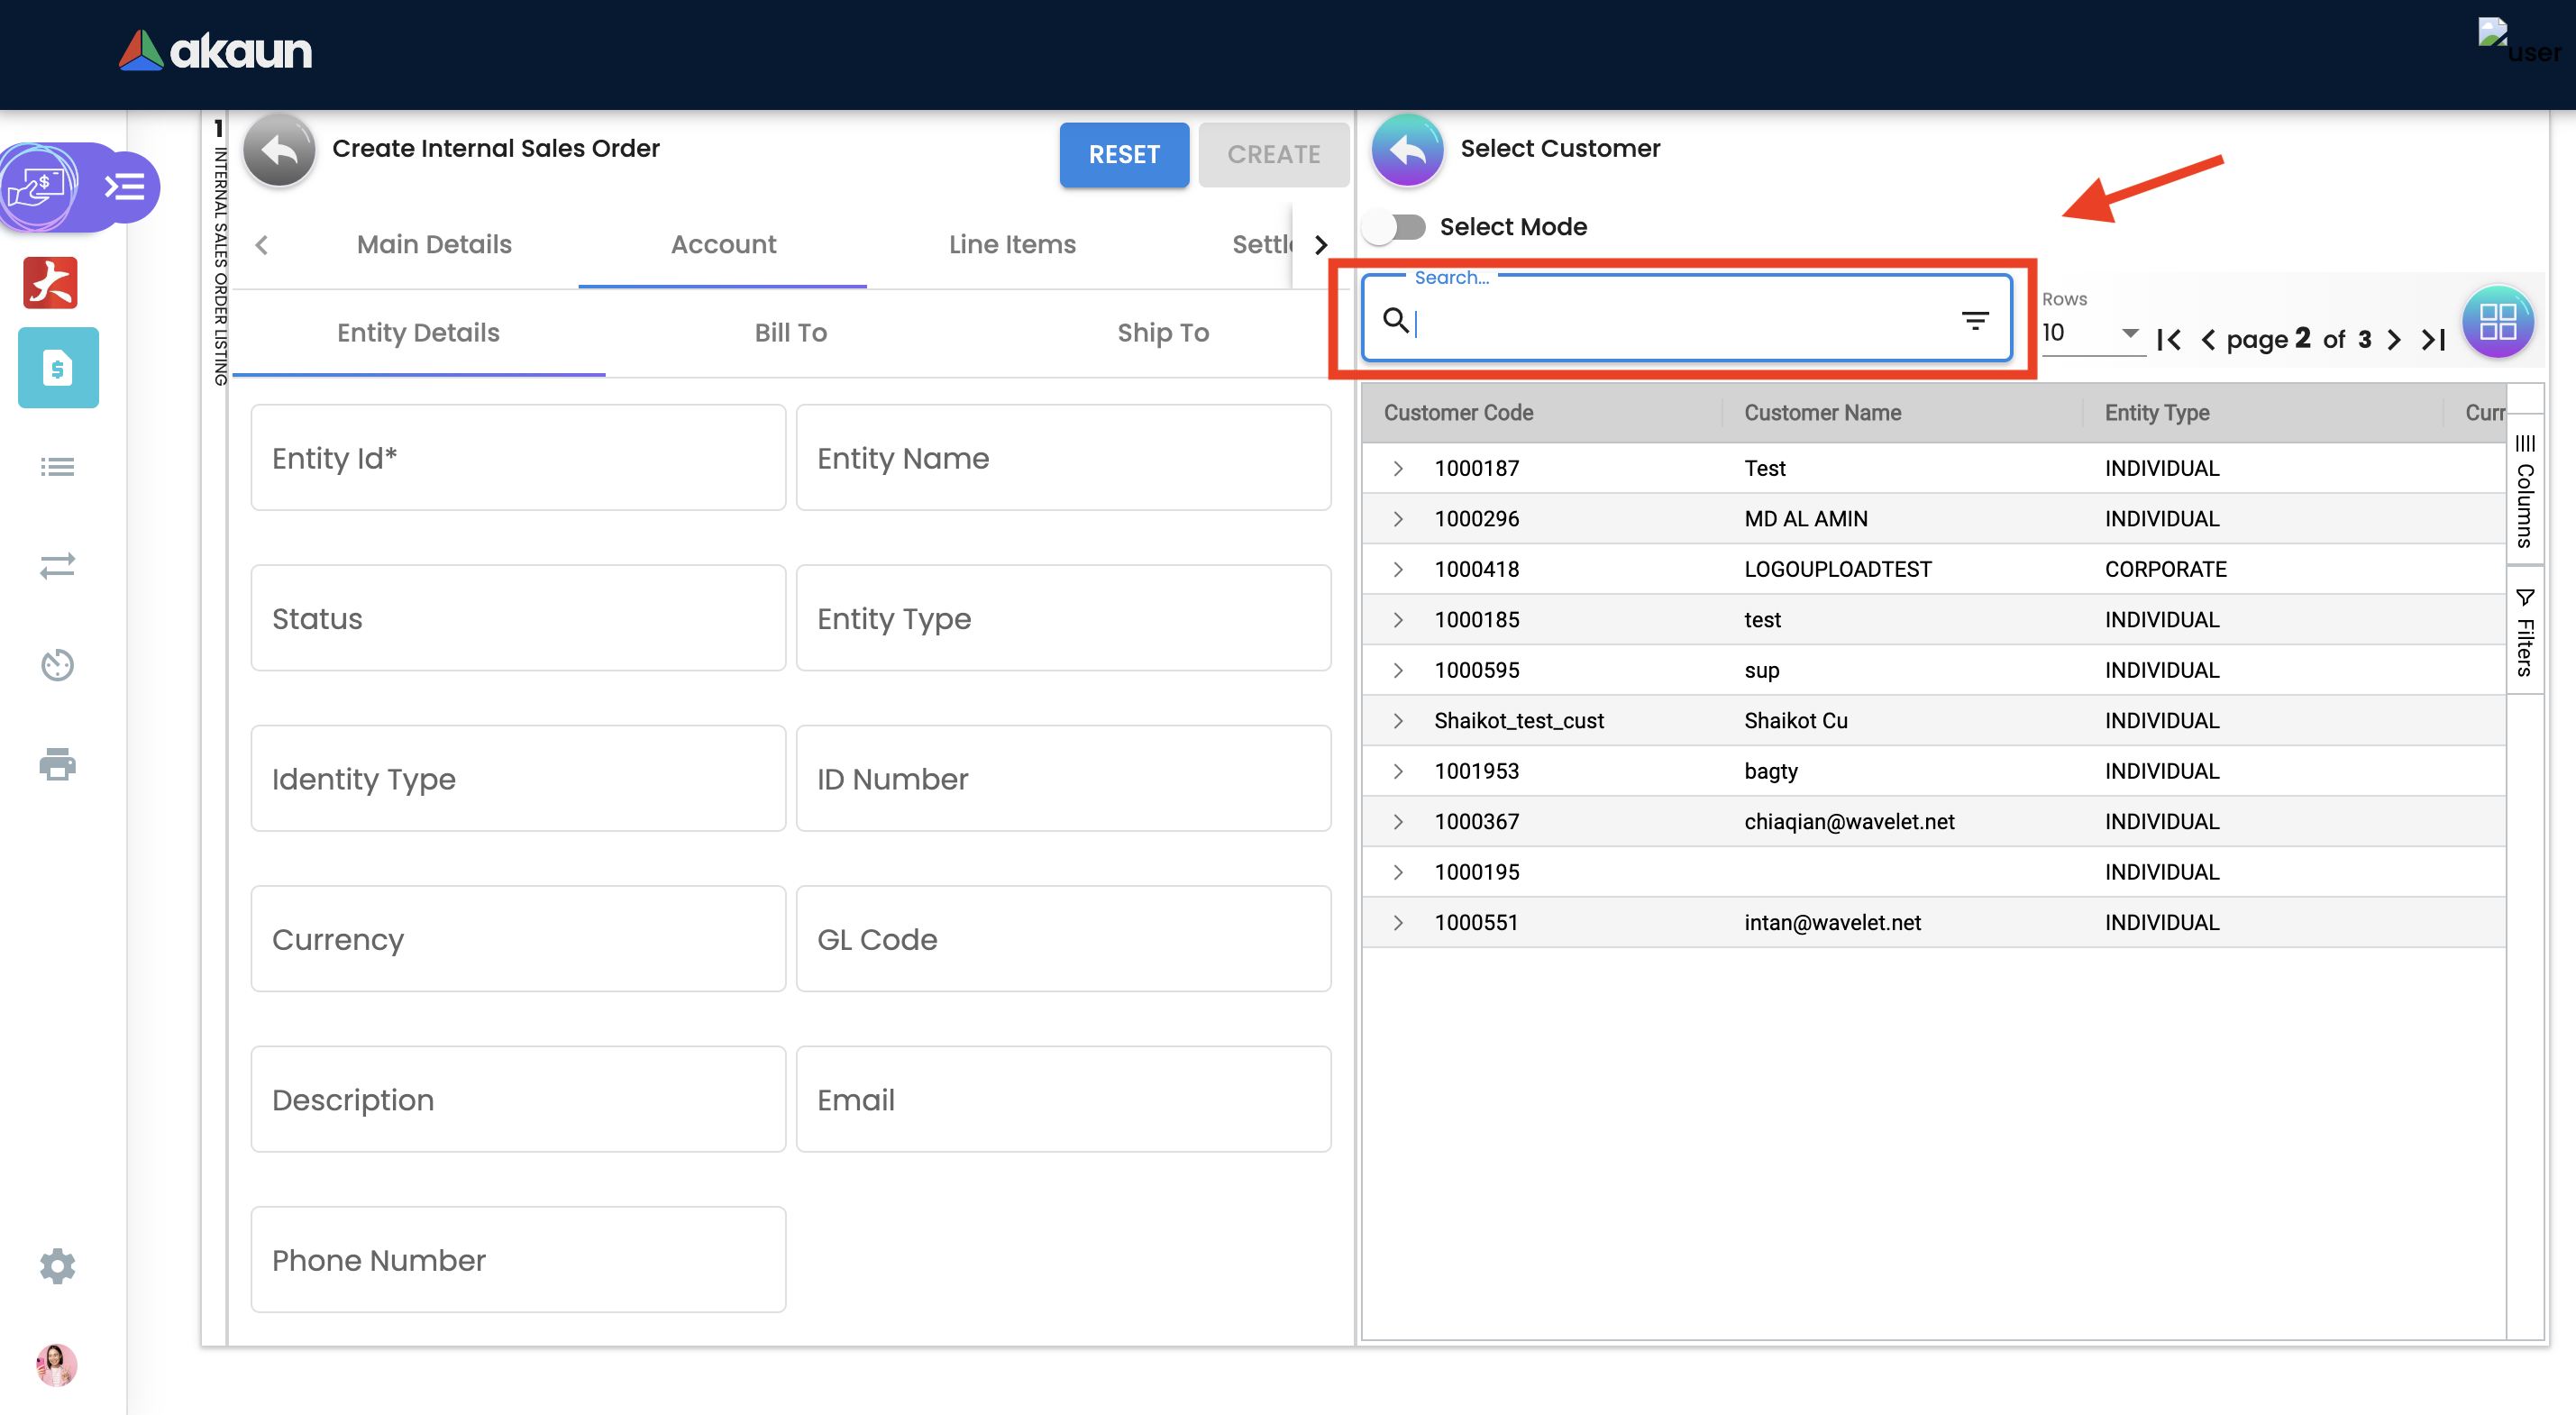
Upon selecting the customer, master record details will be auto-filled. As shown in the screen below.
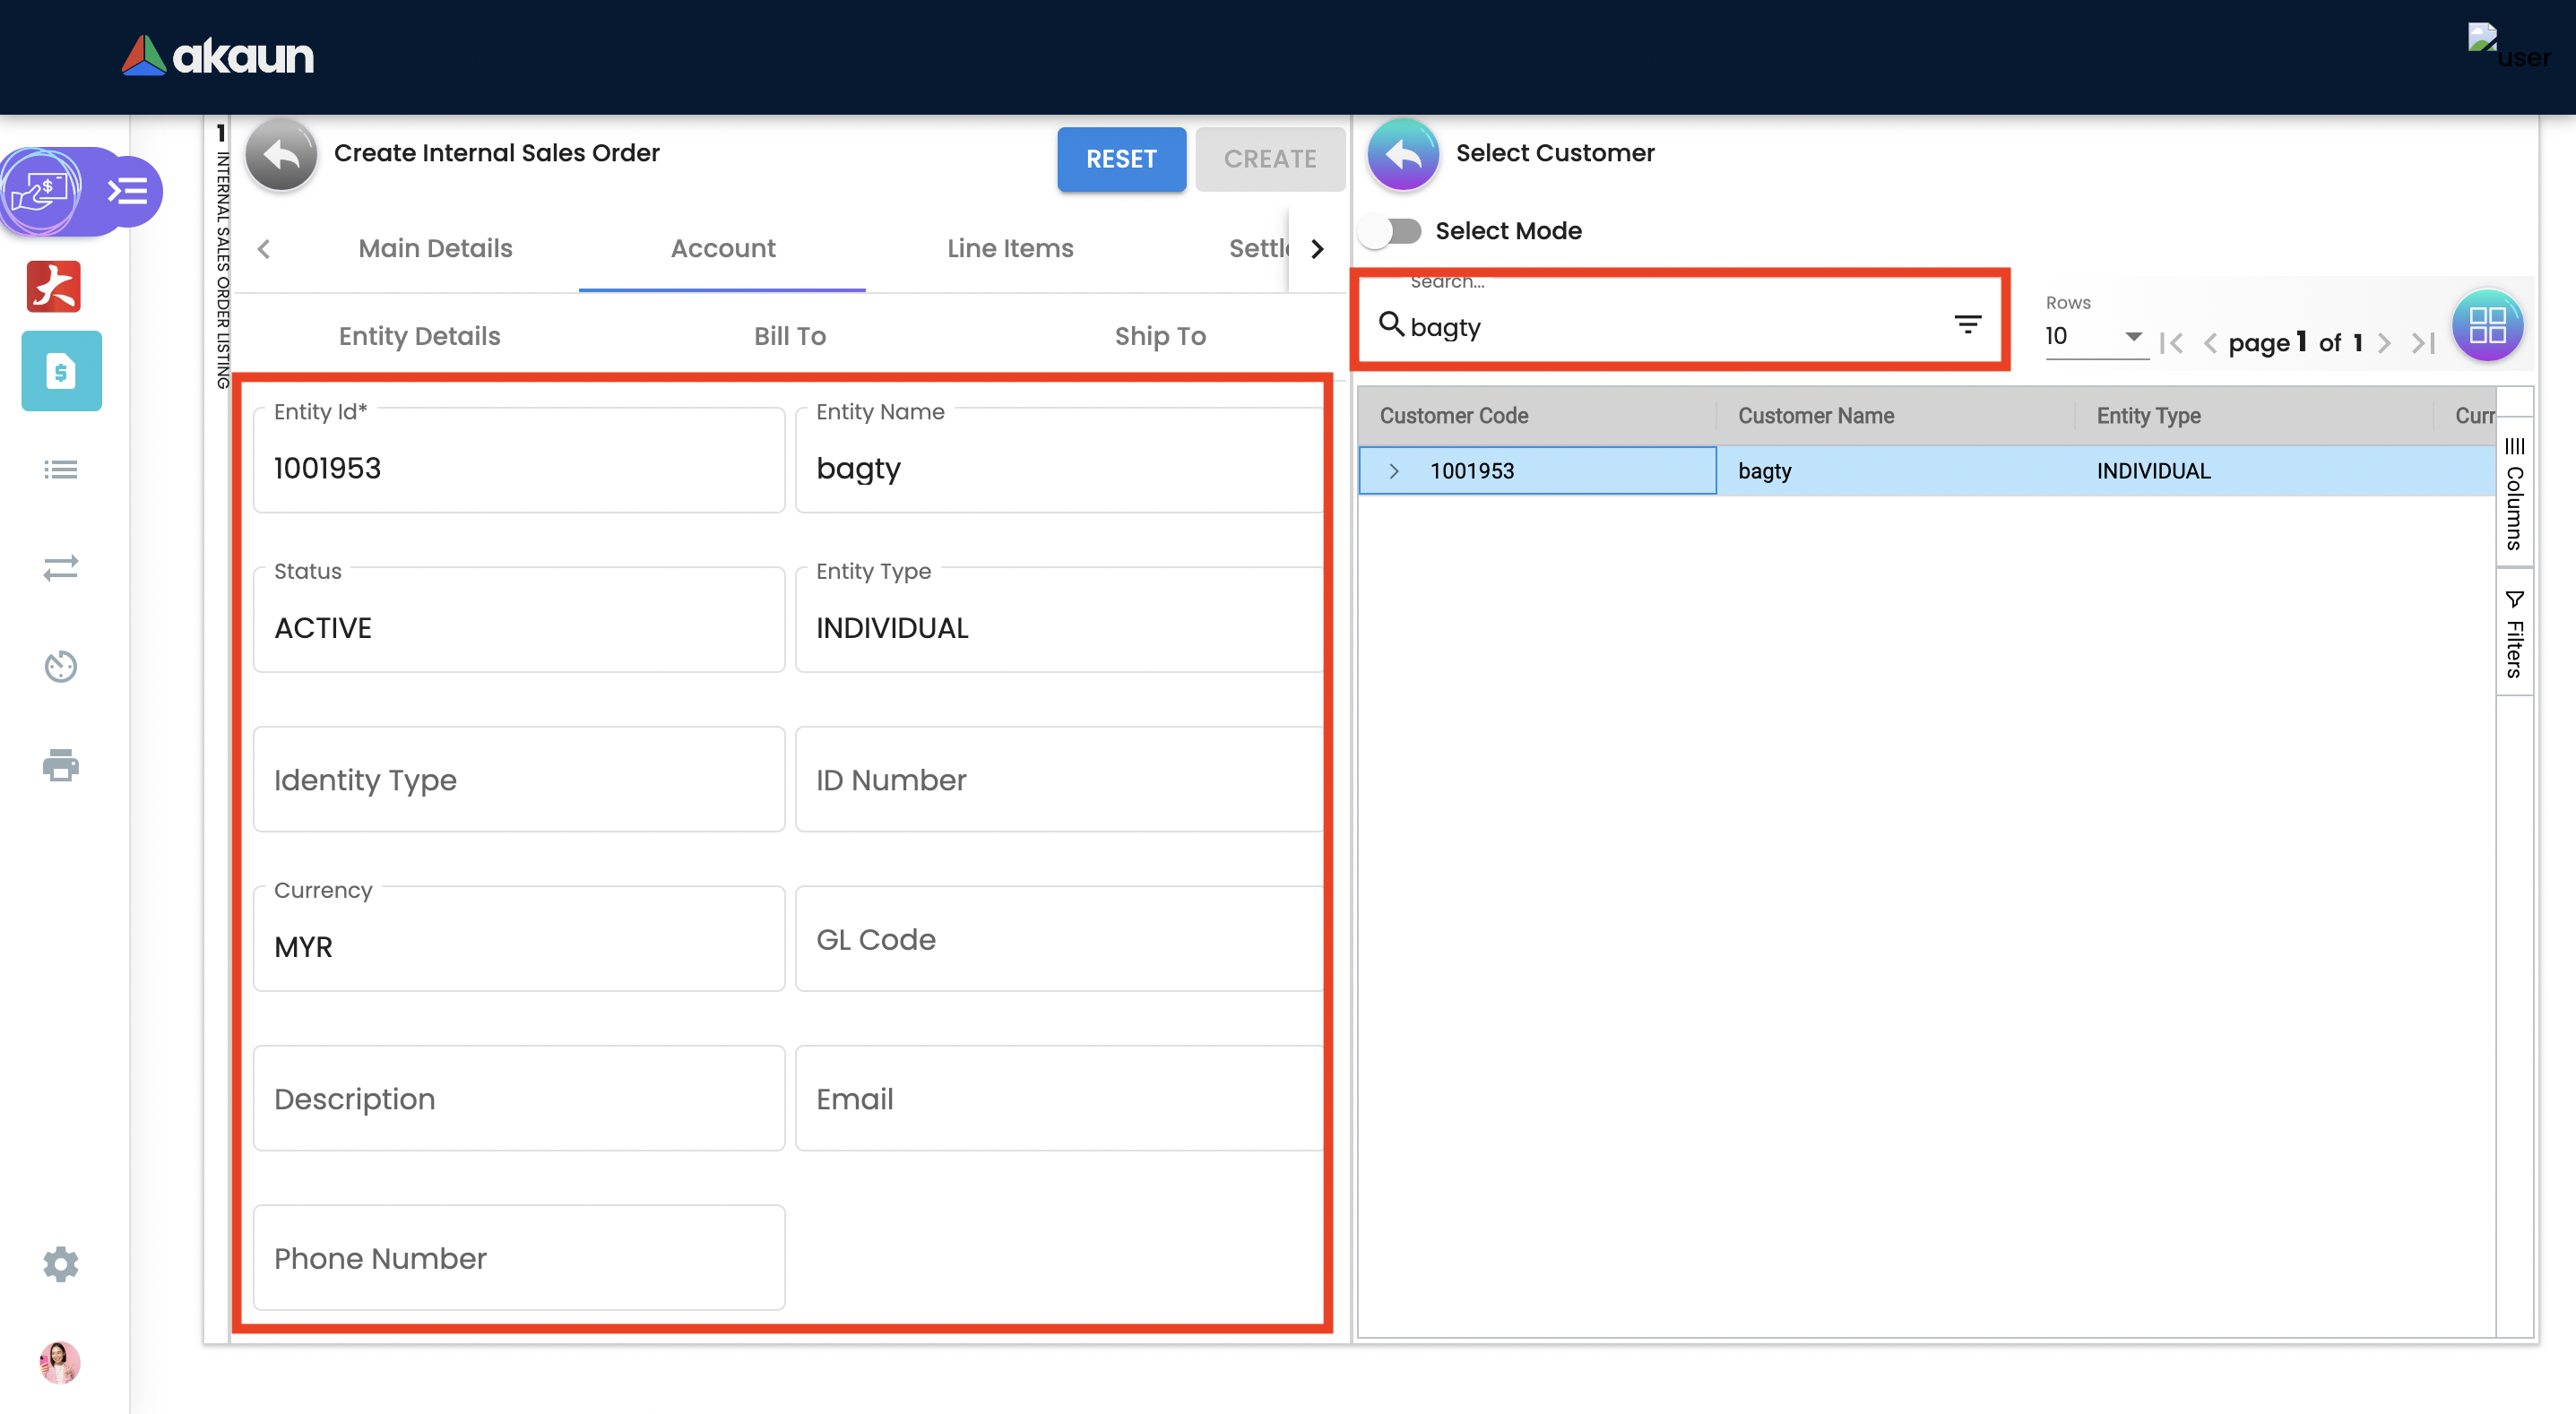
User can create and edit the Customer.
-
Entity Name: Customer Name, auto-filled when customer entity is selected.
-
Status: Active or Inactive. Auto-filled when customer entity is selected.
-
Entity Type: Corporate or Individual. Auto-filled when customer entity is selected.
-
Identity Type: IC or Passport, auto-filled when customer entity is selected.
-
ID Number: IC or Passport number, auto-filled when customer entity is selected.
-
Currency: To determined based on the pricing condition what you are maintaining. Auto-filled when customer entity is selected.
-
GL Code: A number used to record business transactions in the general ledger. Auto-filled when customer entity is selected.
-
Description: Additional notes. Auto-filled when customer entity is selected.
-
Email: A central email through which customers want to communicate. Auto-filled when customer entity is selected.
-
Phone Number: A central phone number through which customers want to communicate. Auto-filled when customer entity is selected.
2.3.2.2 Bill To
A bill to is the customer who pays for the sales order. It can be different than the sold-to customer.
In order to proceed, kindly make sure the addresses are defined in the customer maintenance applet.
Based on the entity selected, the bill to details gets auto-filled and are editable.
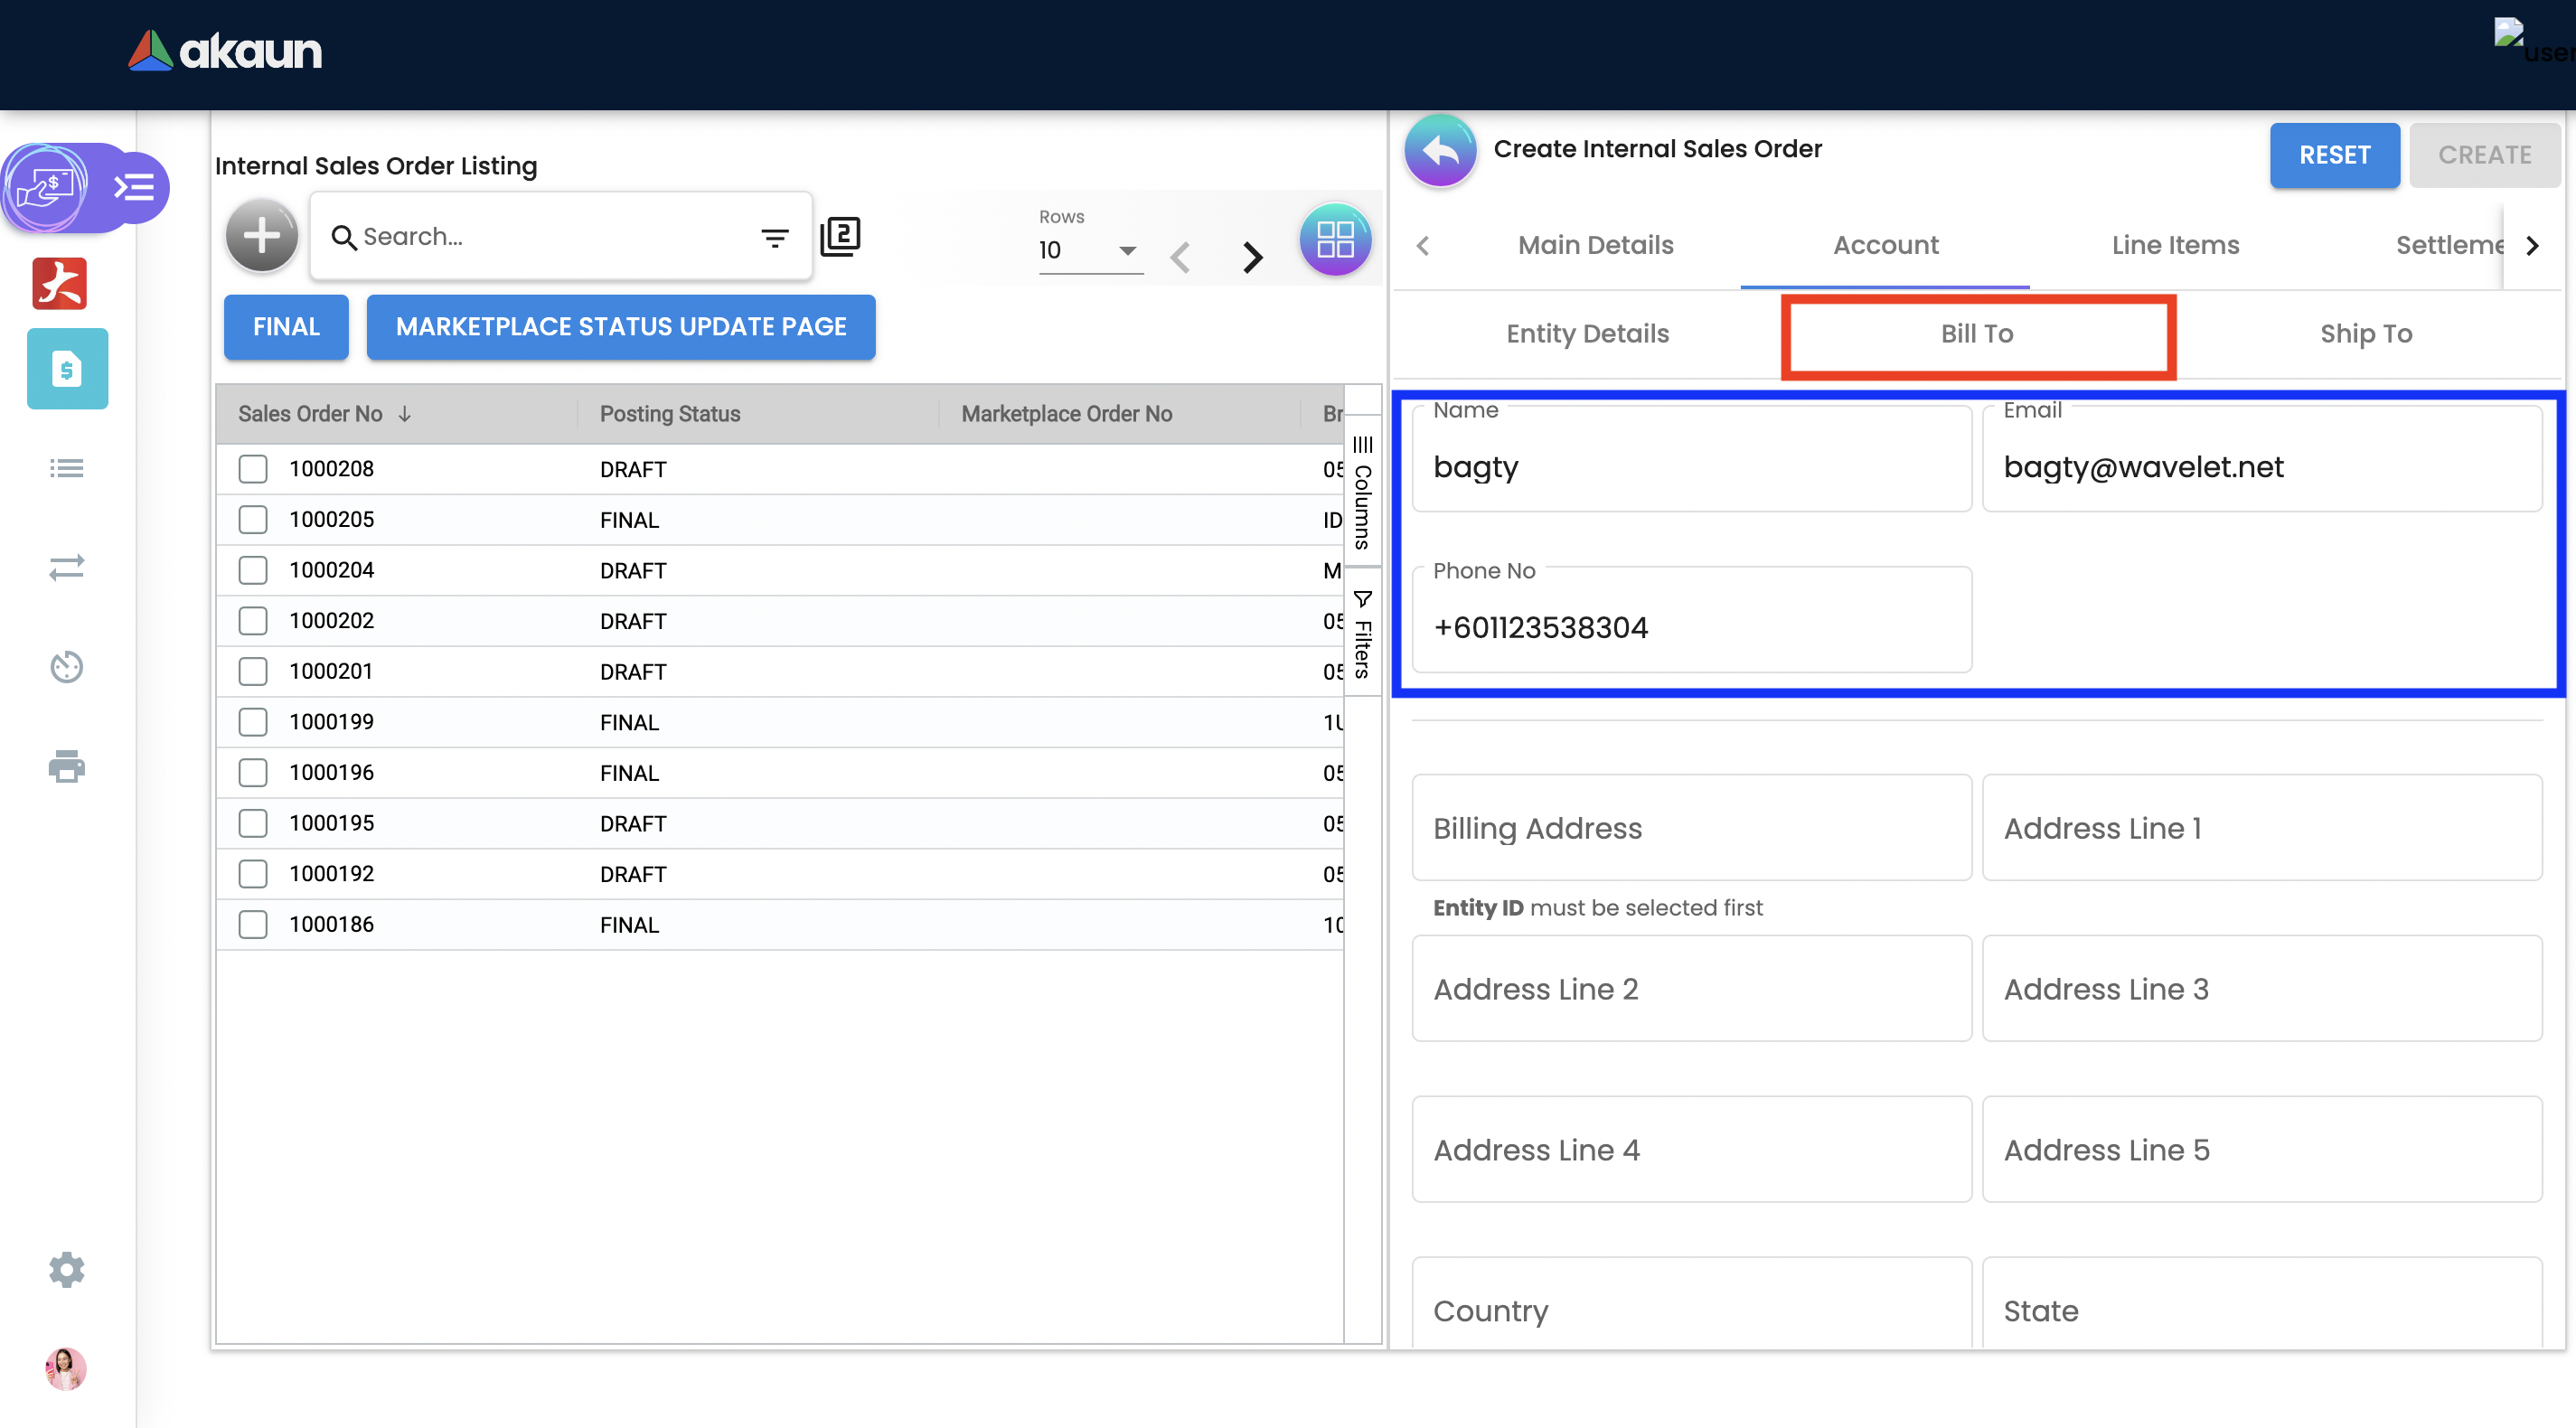
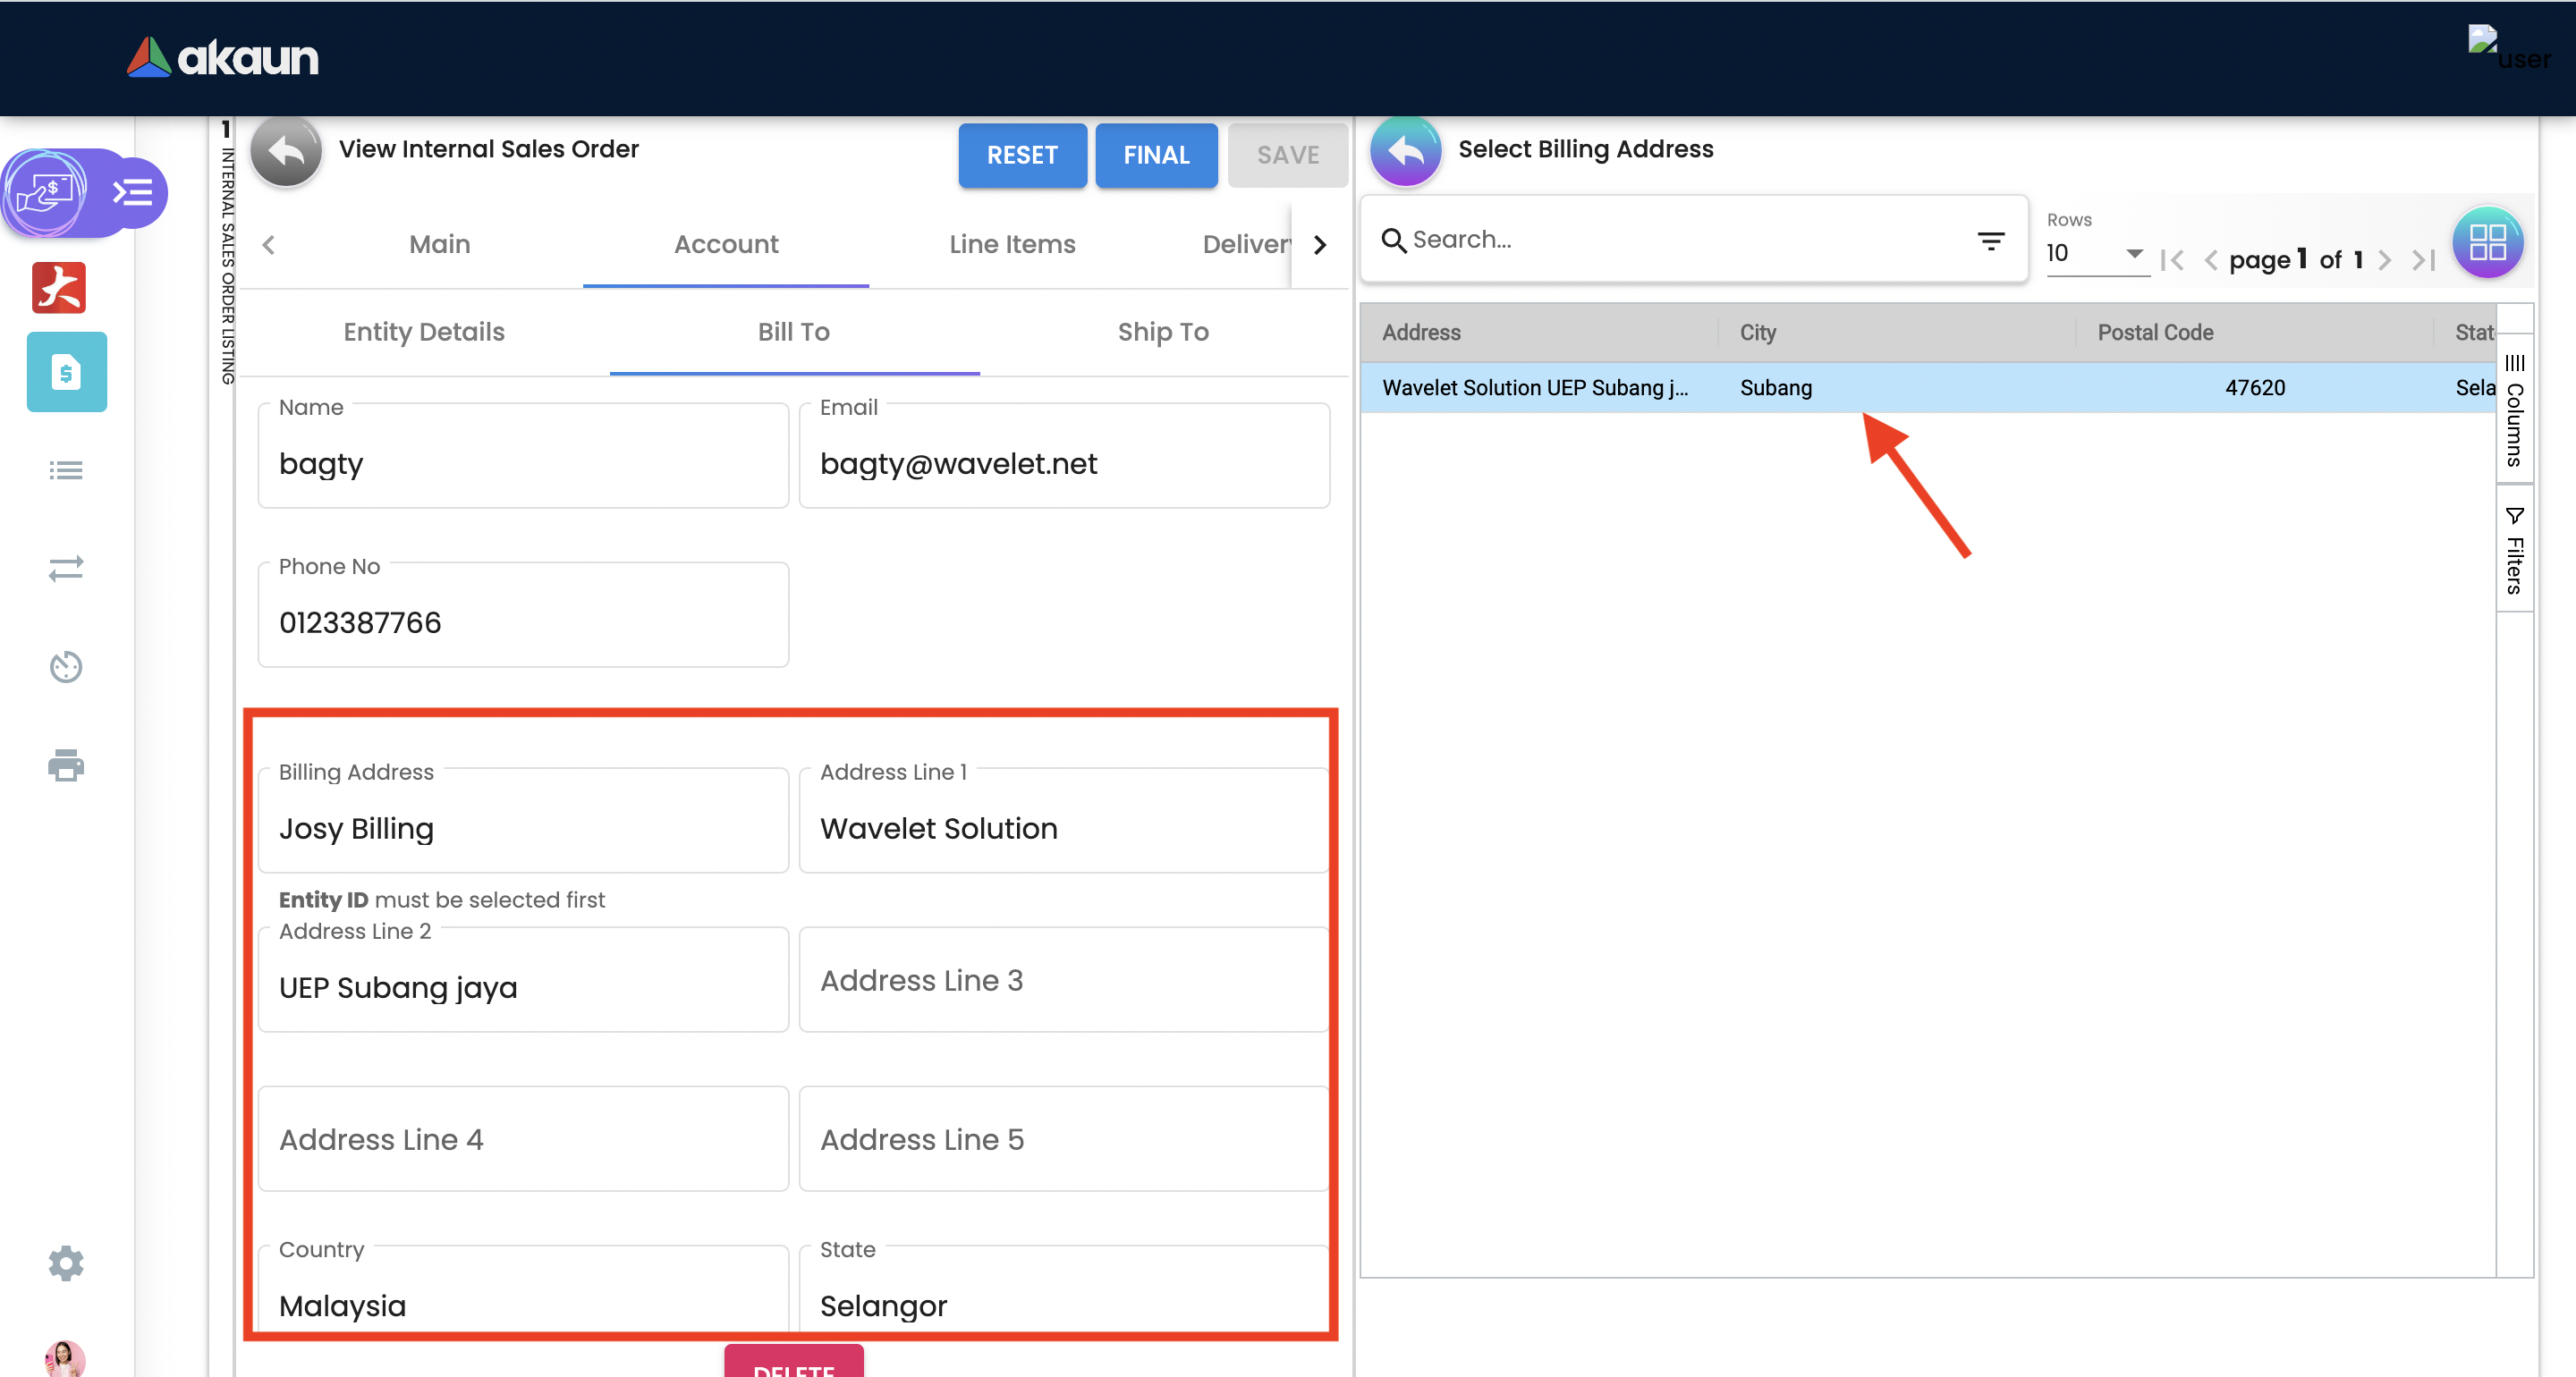
Click on the billing address.

Upon selecting the address, the billing address details get auto-filled and are editable.
2.3.2.3 Ship To
A ship to is the customer who receives the specified goods and/or services in the sales order. It can be different than the sold-to customer.
In order to proceed, kindly make sure the addresses are defined in the customer maintenance applet.
Based on the entity selected, the bill to details gets auto-filled and are editable.
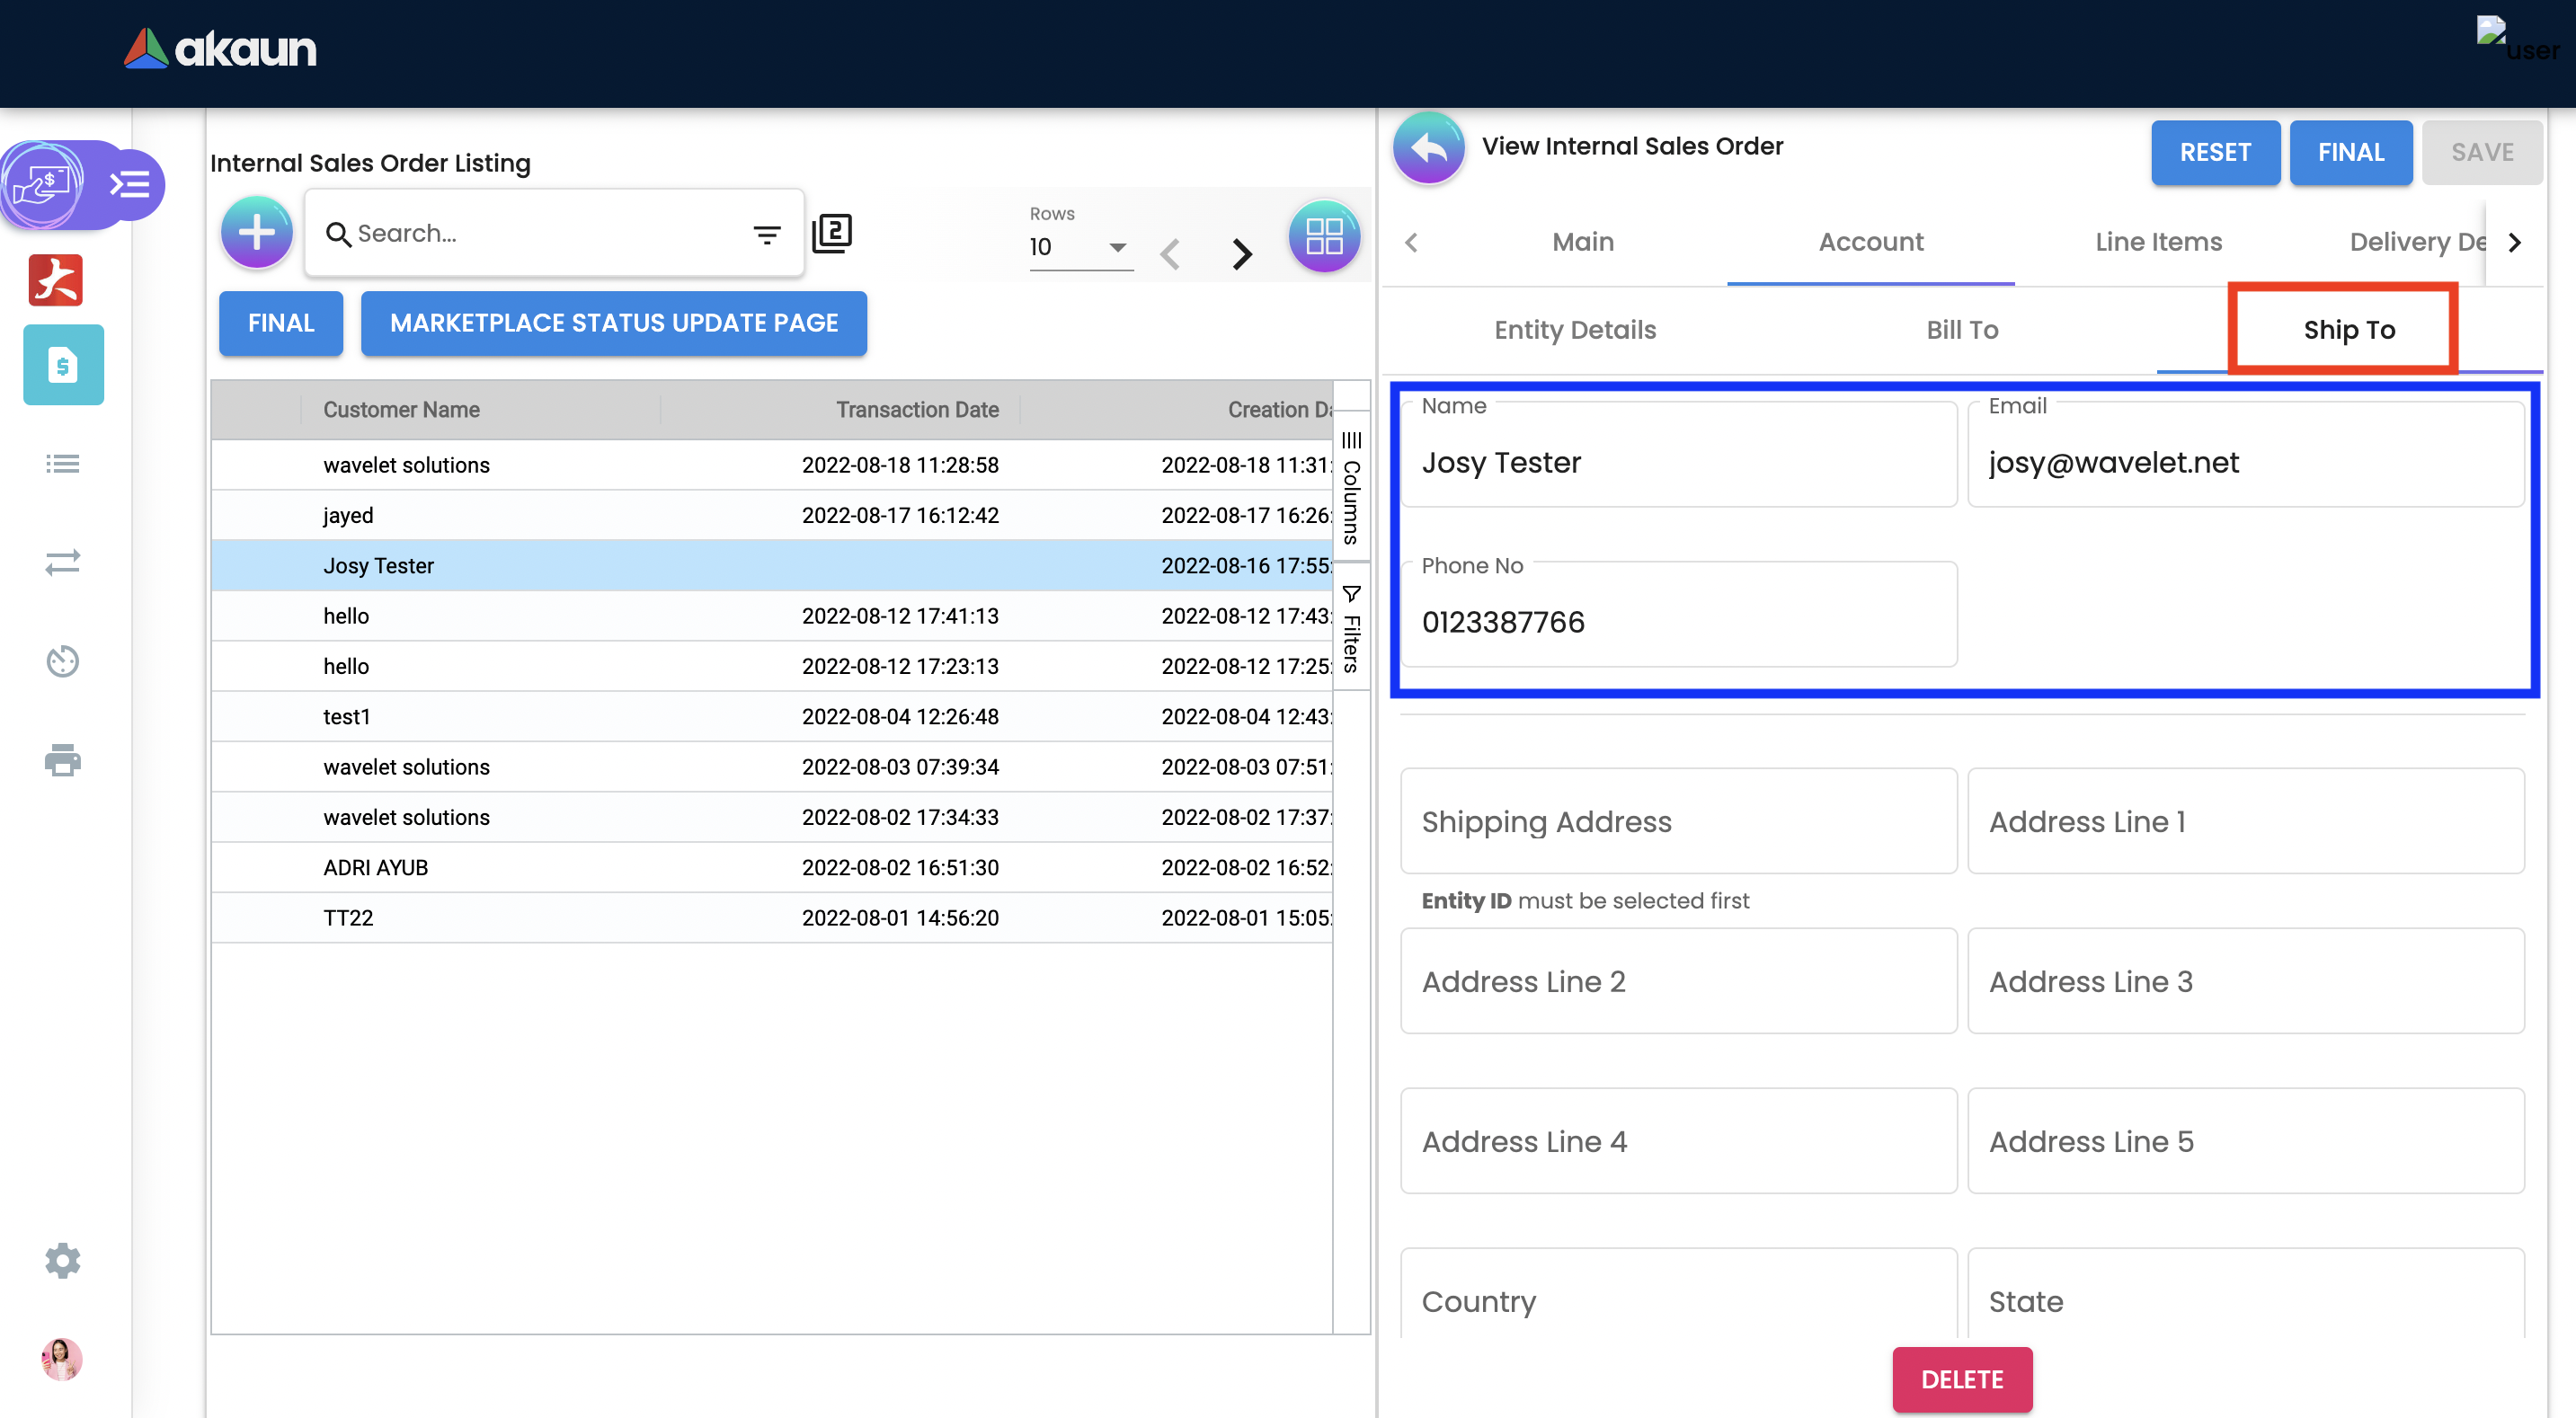
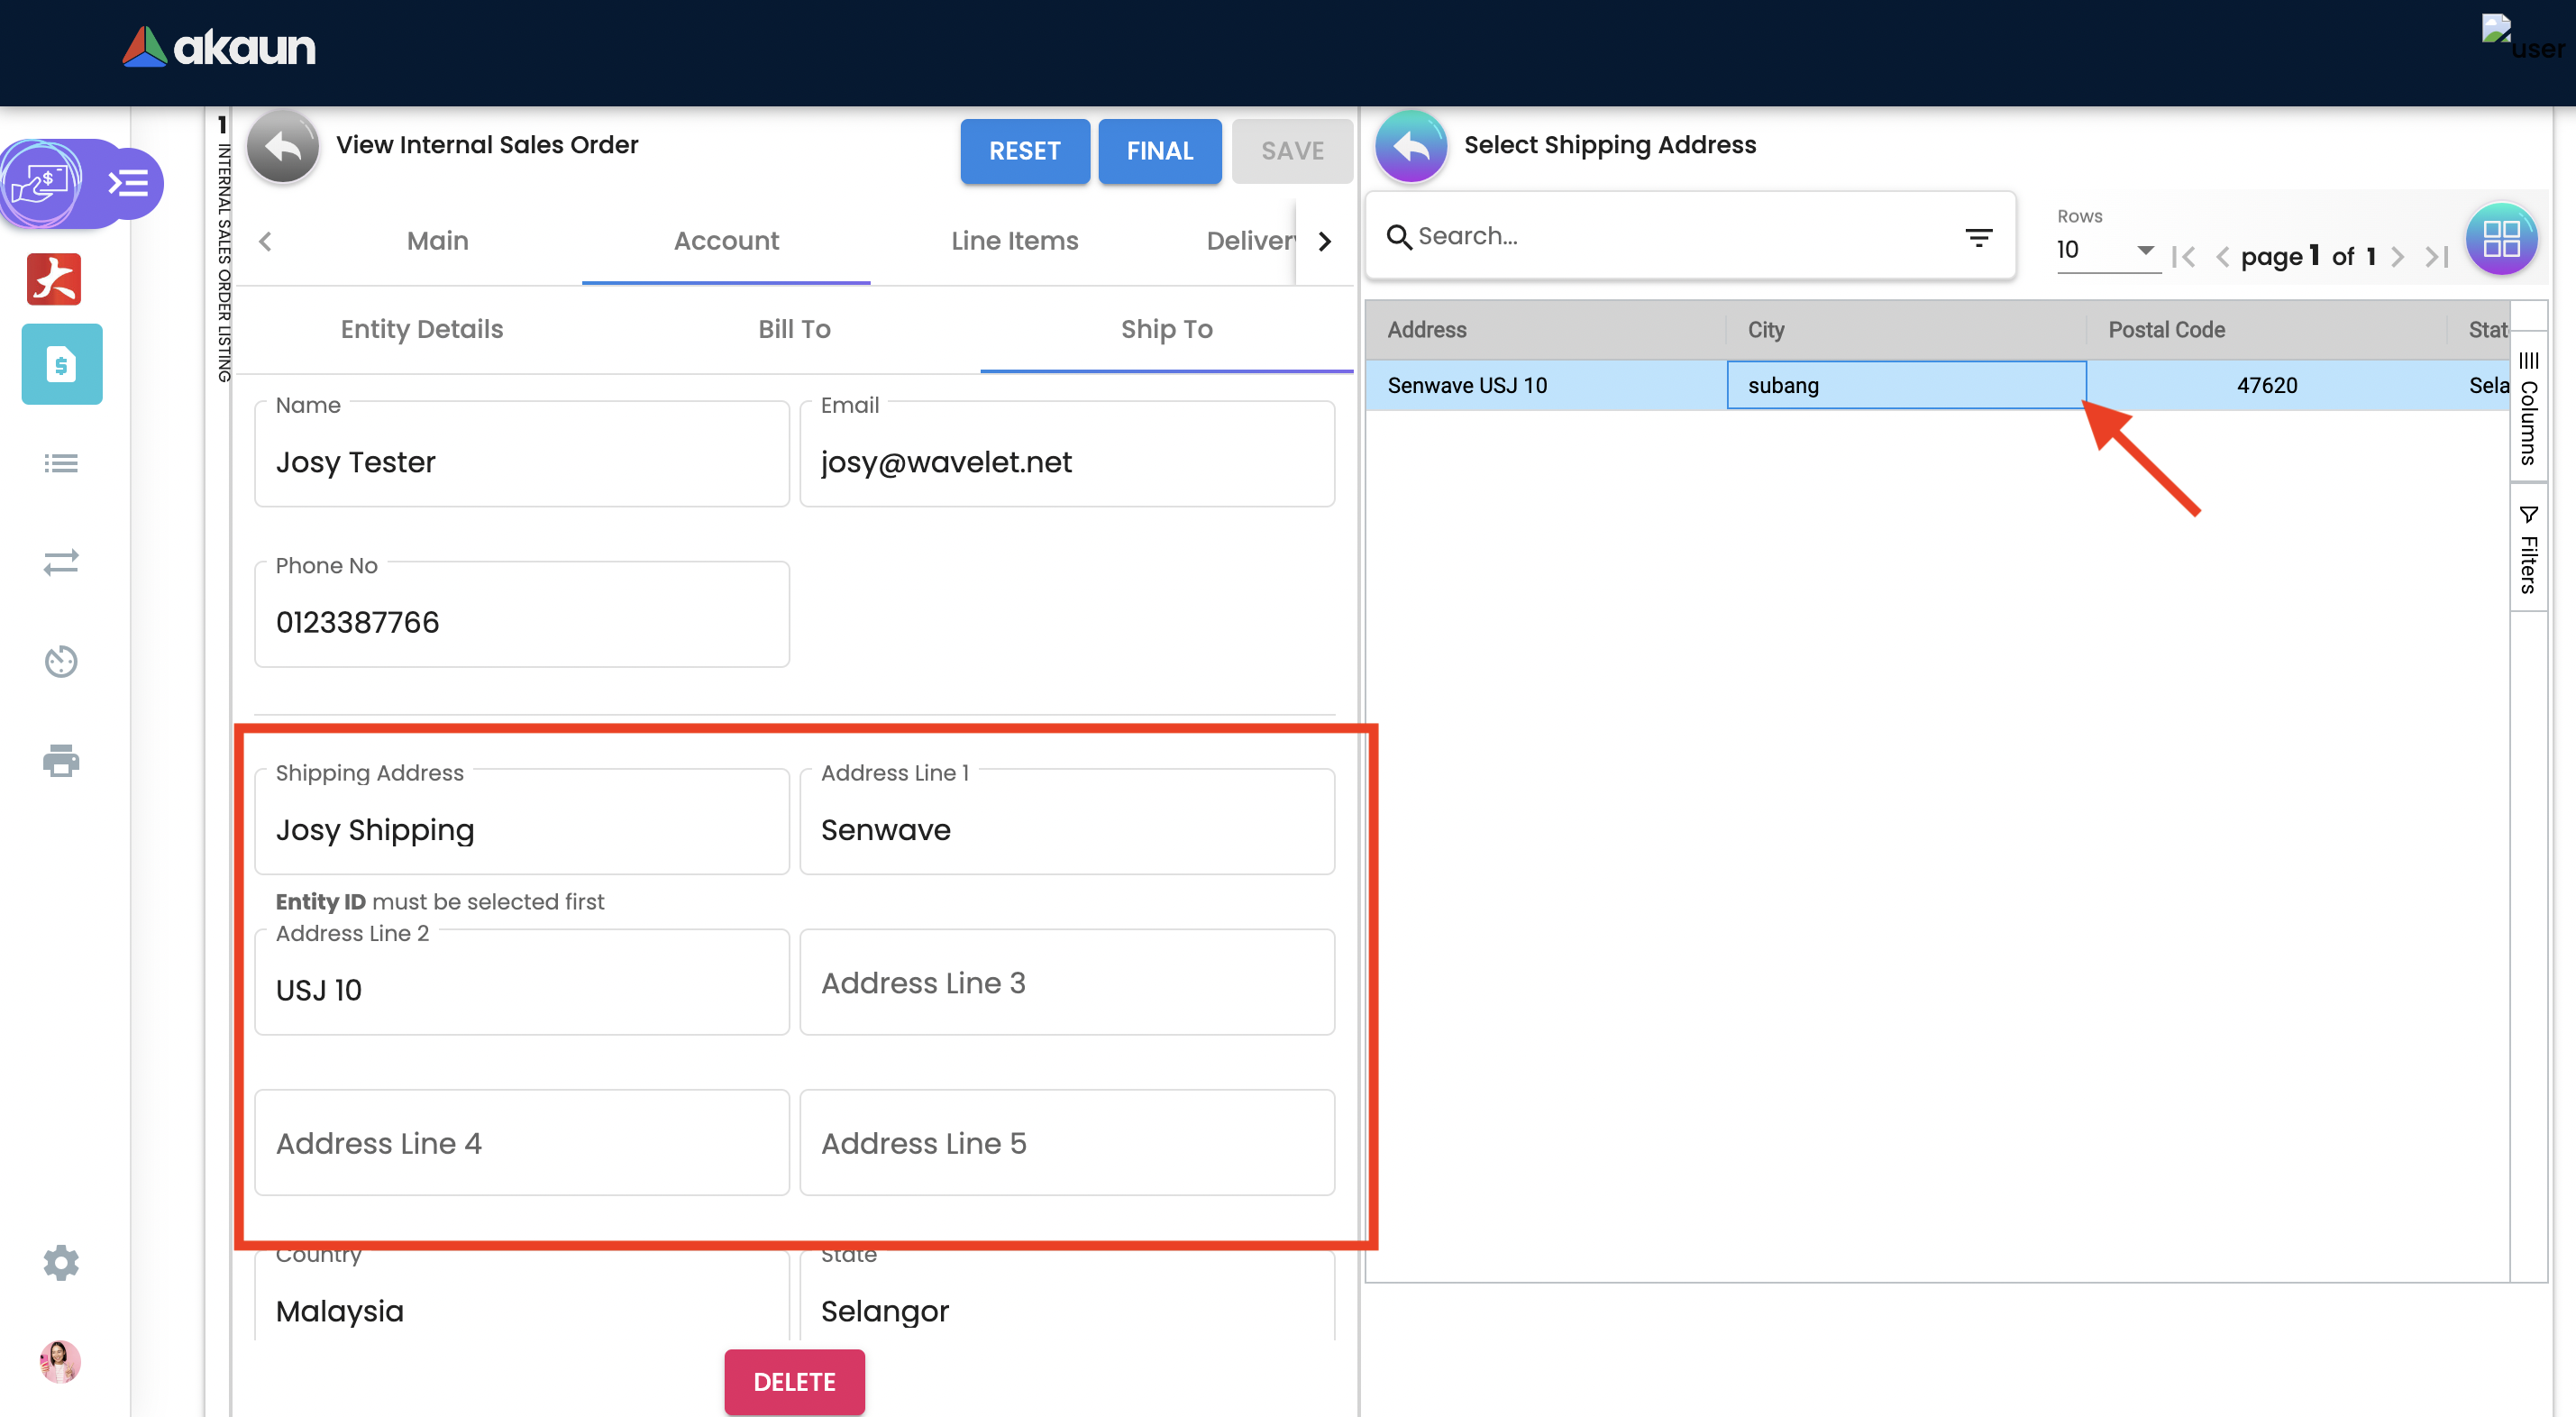
Click on the shipping address.
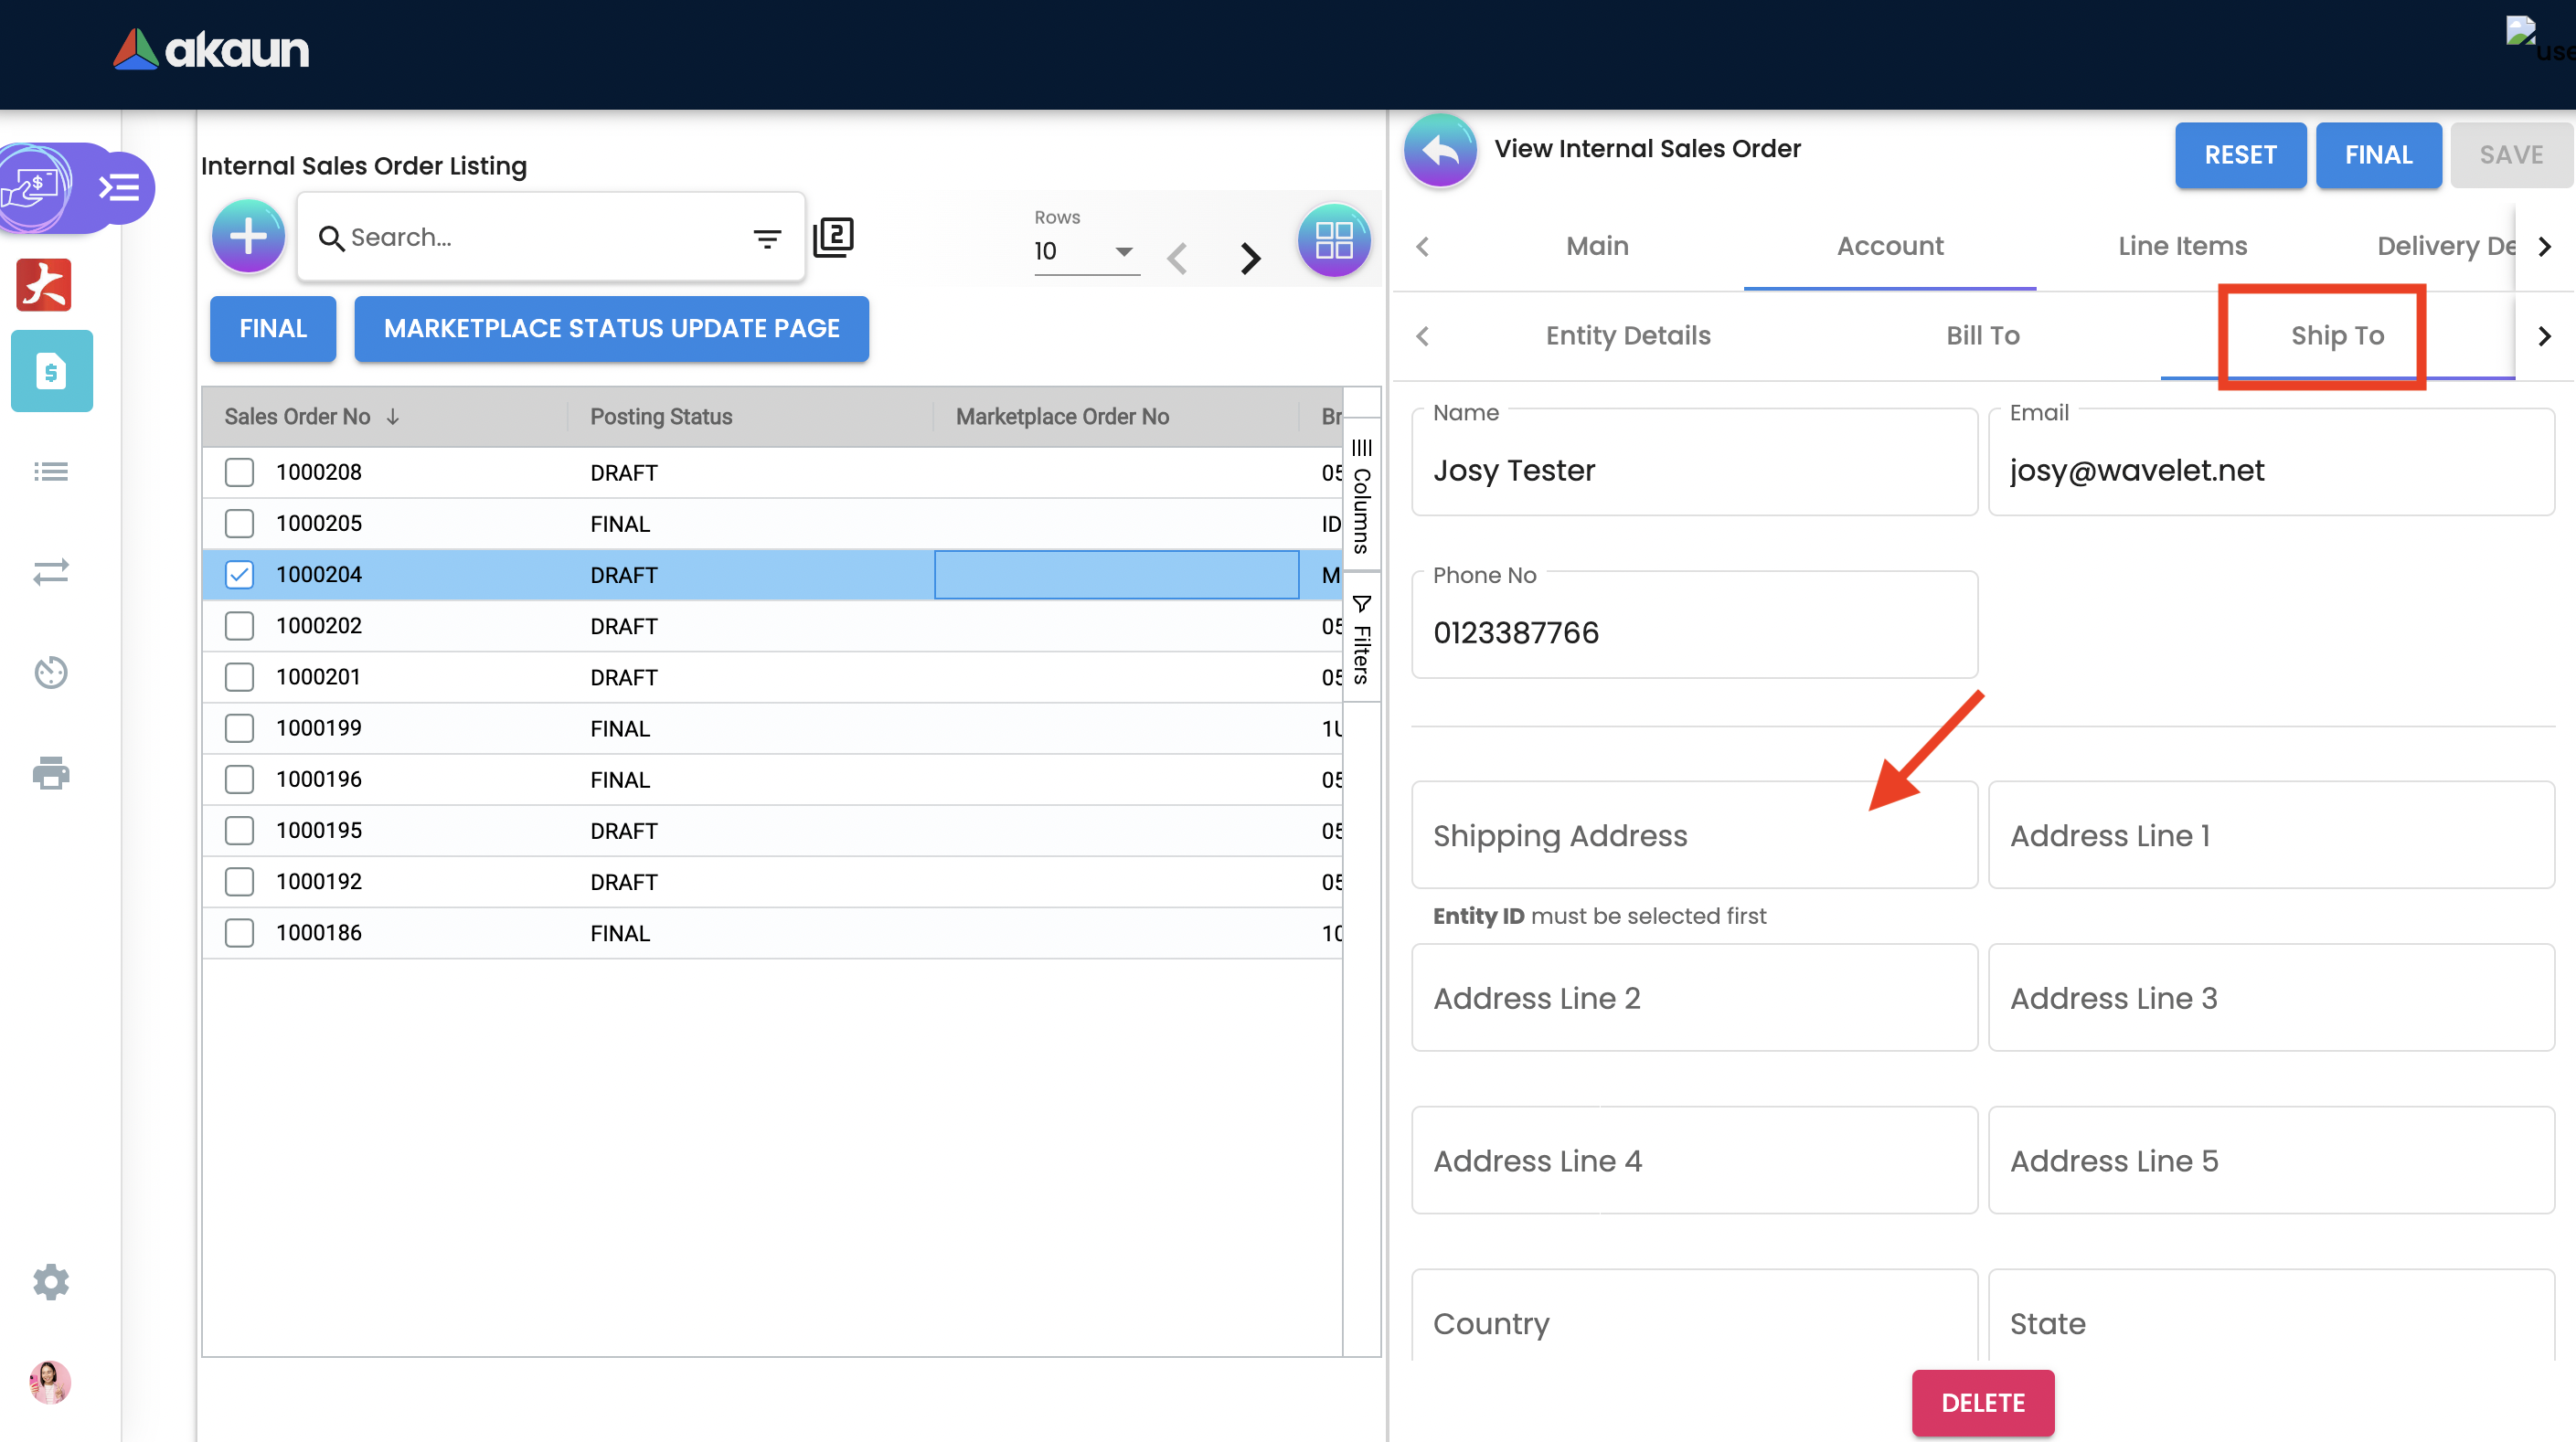
Upon selecting the address, the shipping address details get auto-filled and are editable.
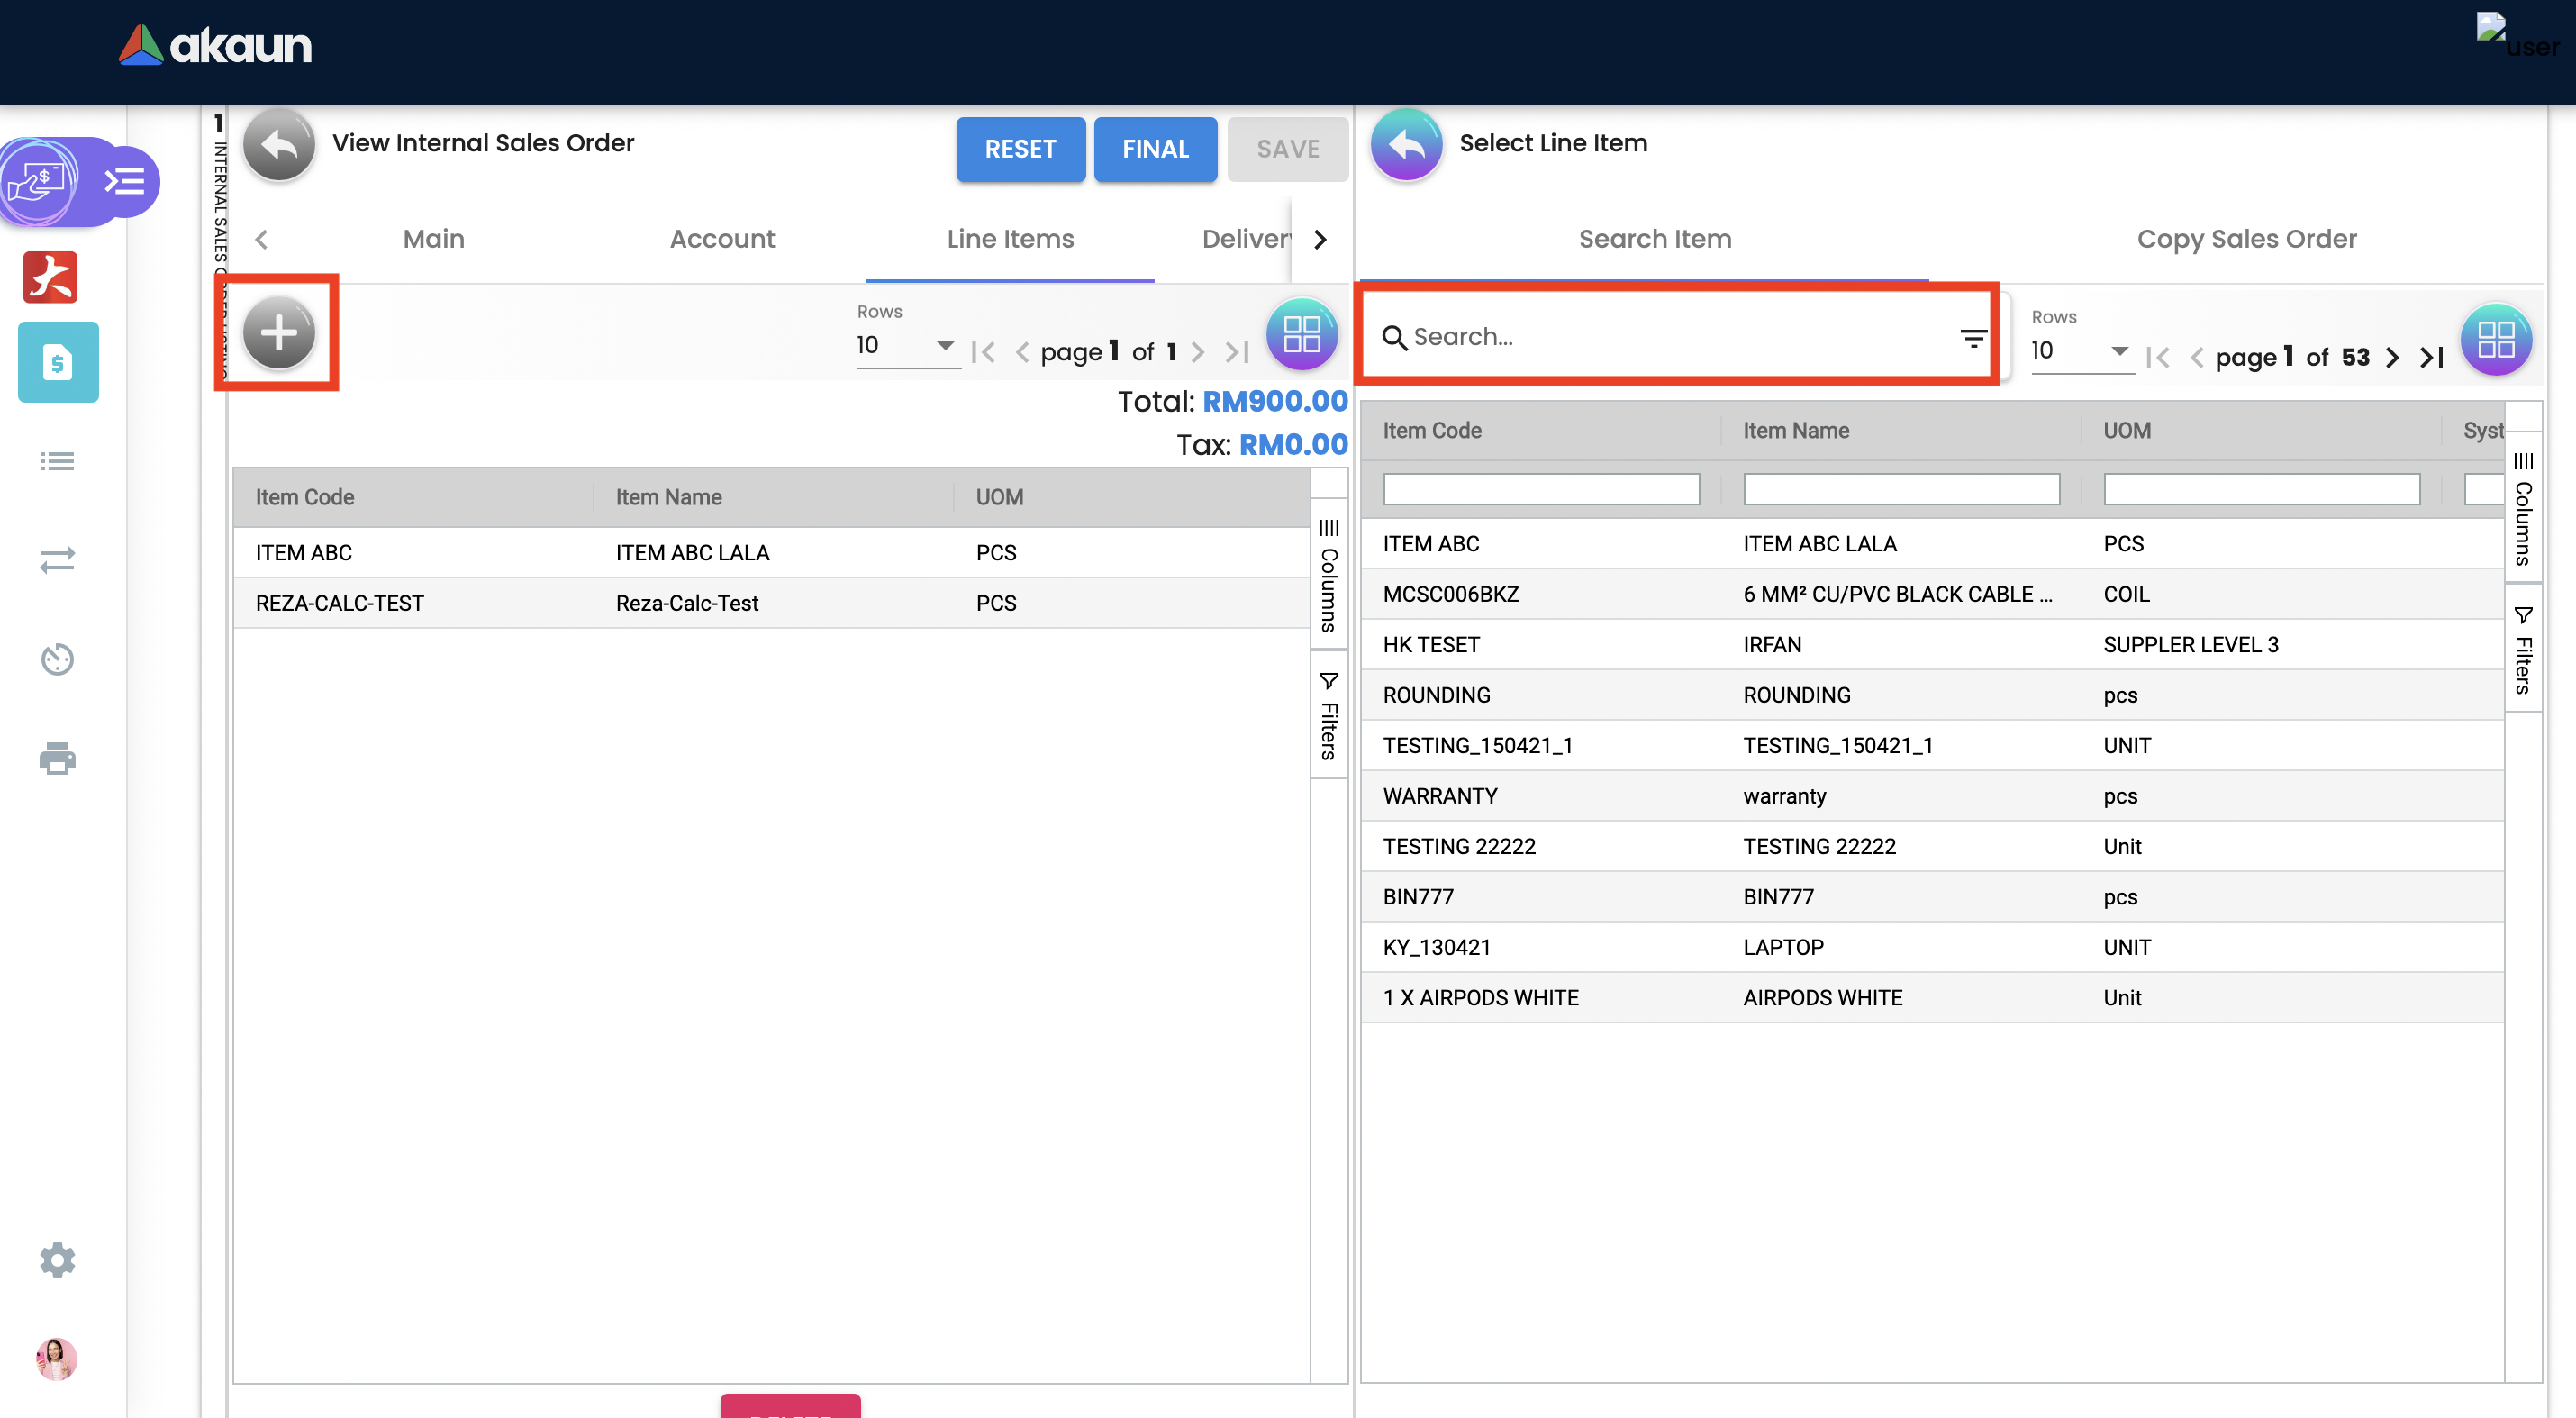
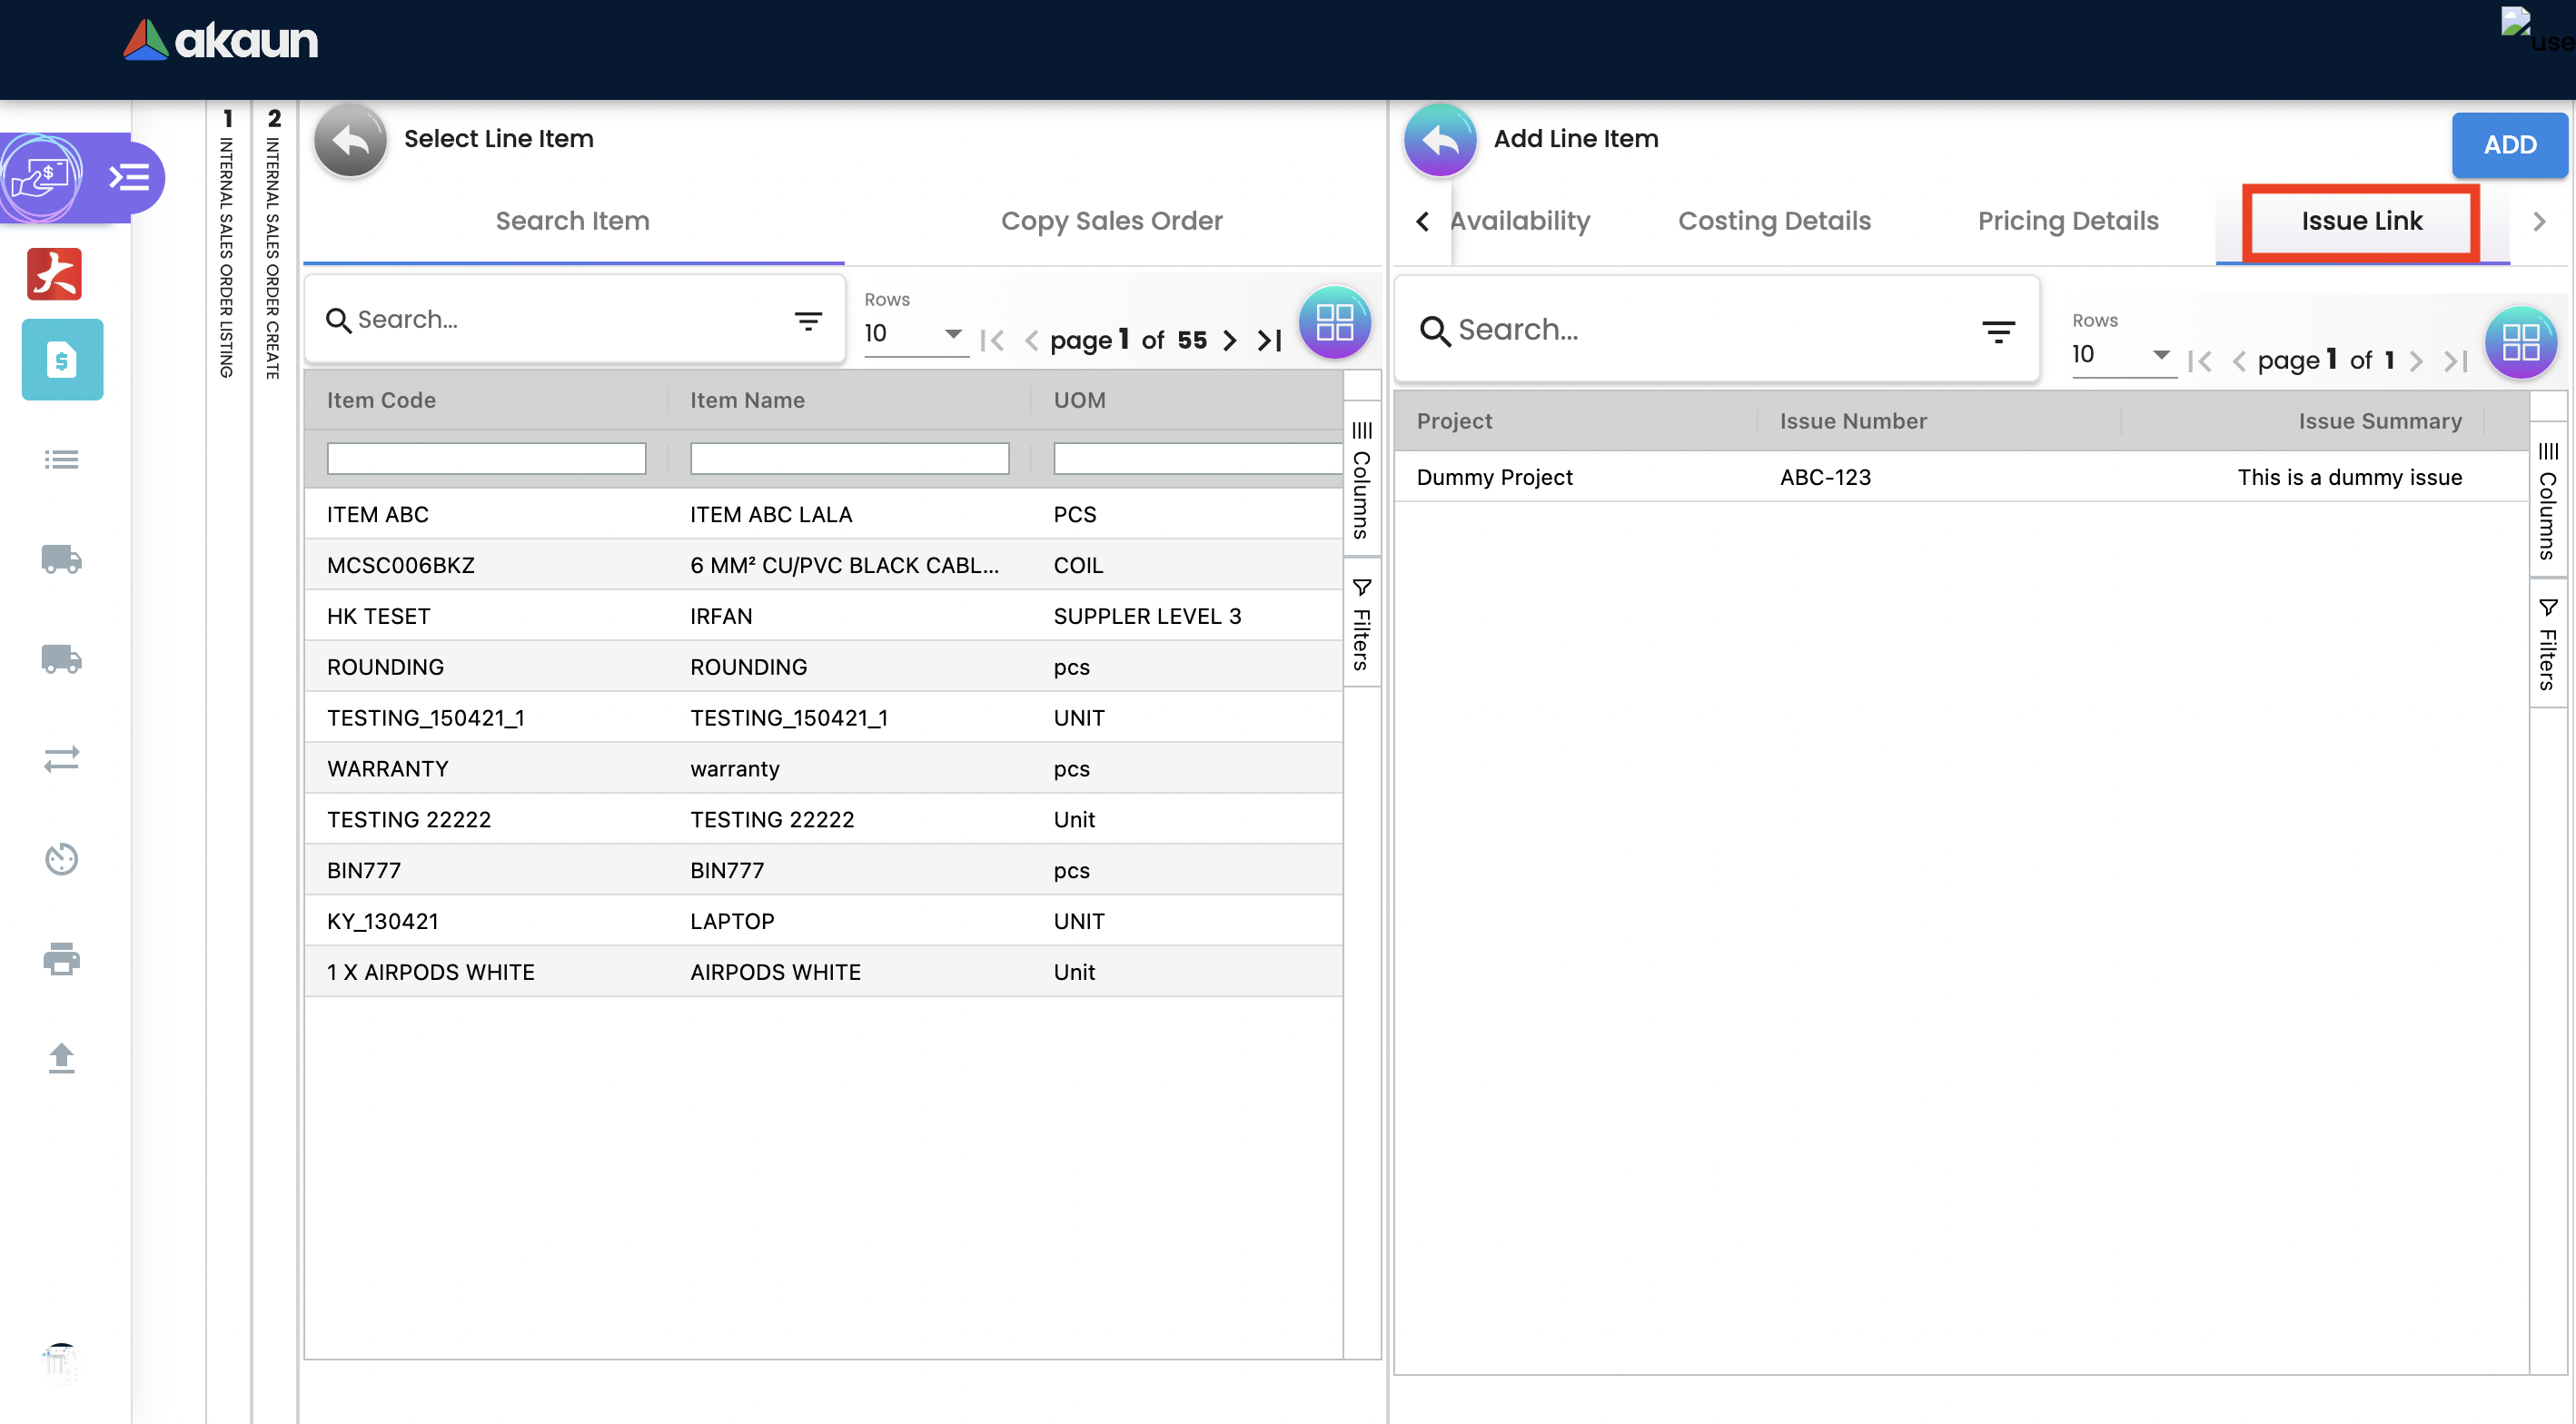
2.3.3 Sales Order - Line Items tab
An individual transaction stated on a sales order is referred to as a line item. One case of product X and two cases of product Y, for example, would count as two line items on the same sales order.
In order to proceed, kindly make sure the items are defined in the doc item maintenance applet.
Click on the '+' button to Add a New Line Item.
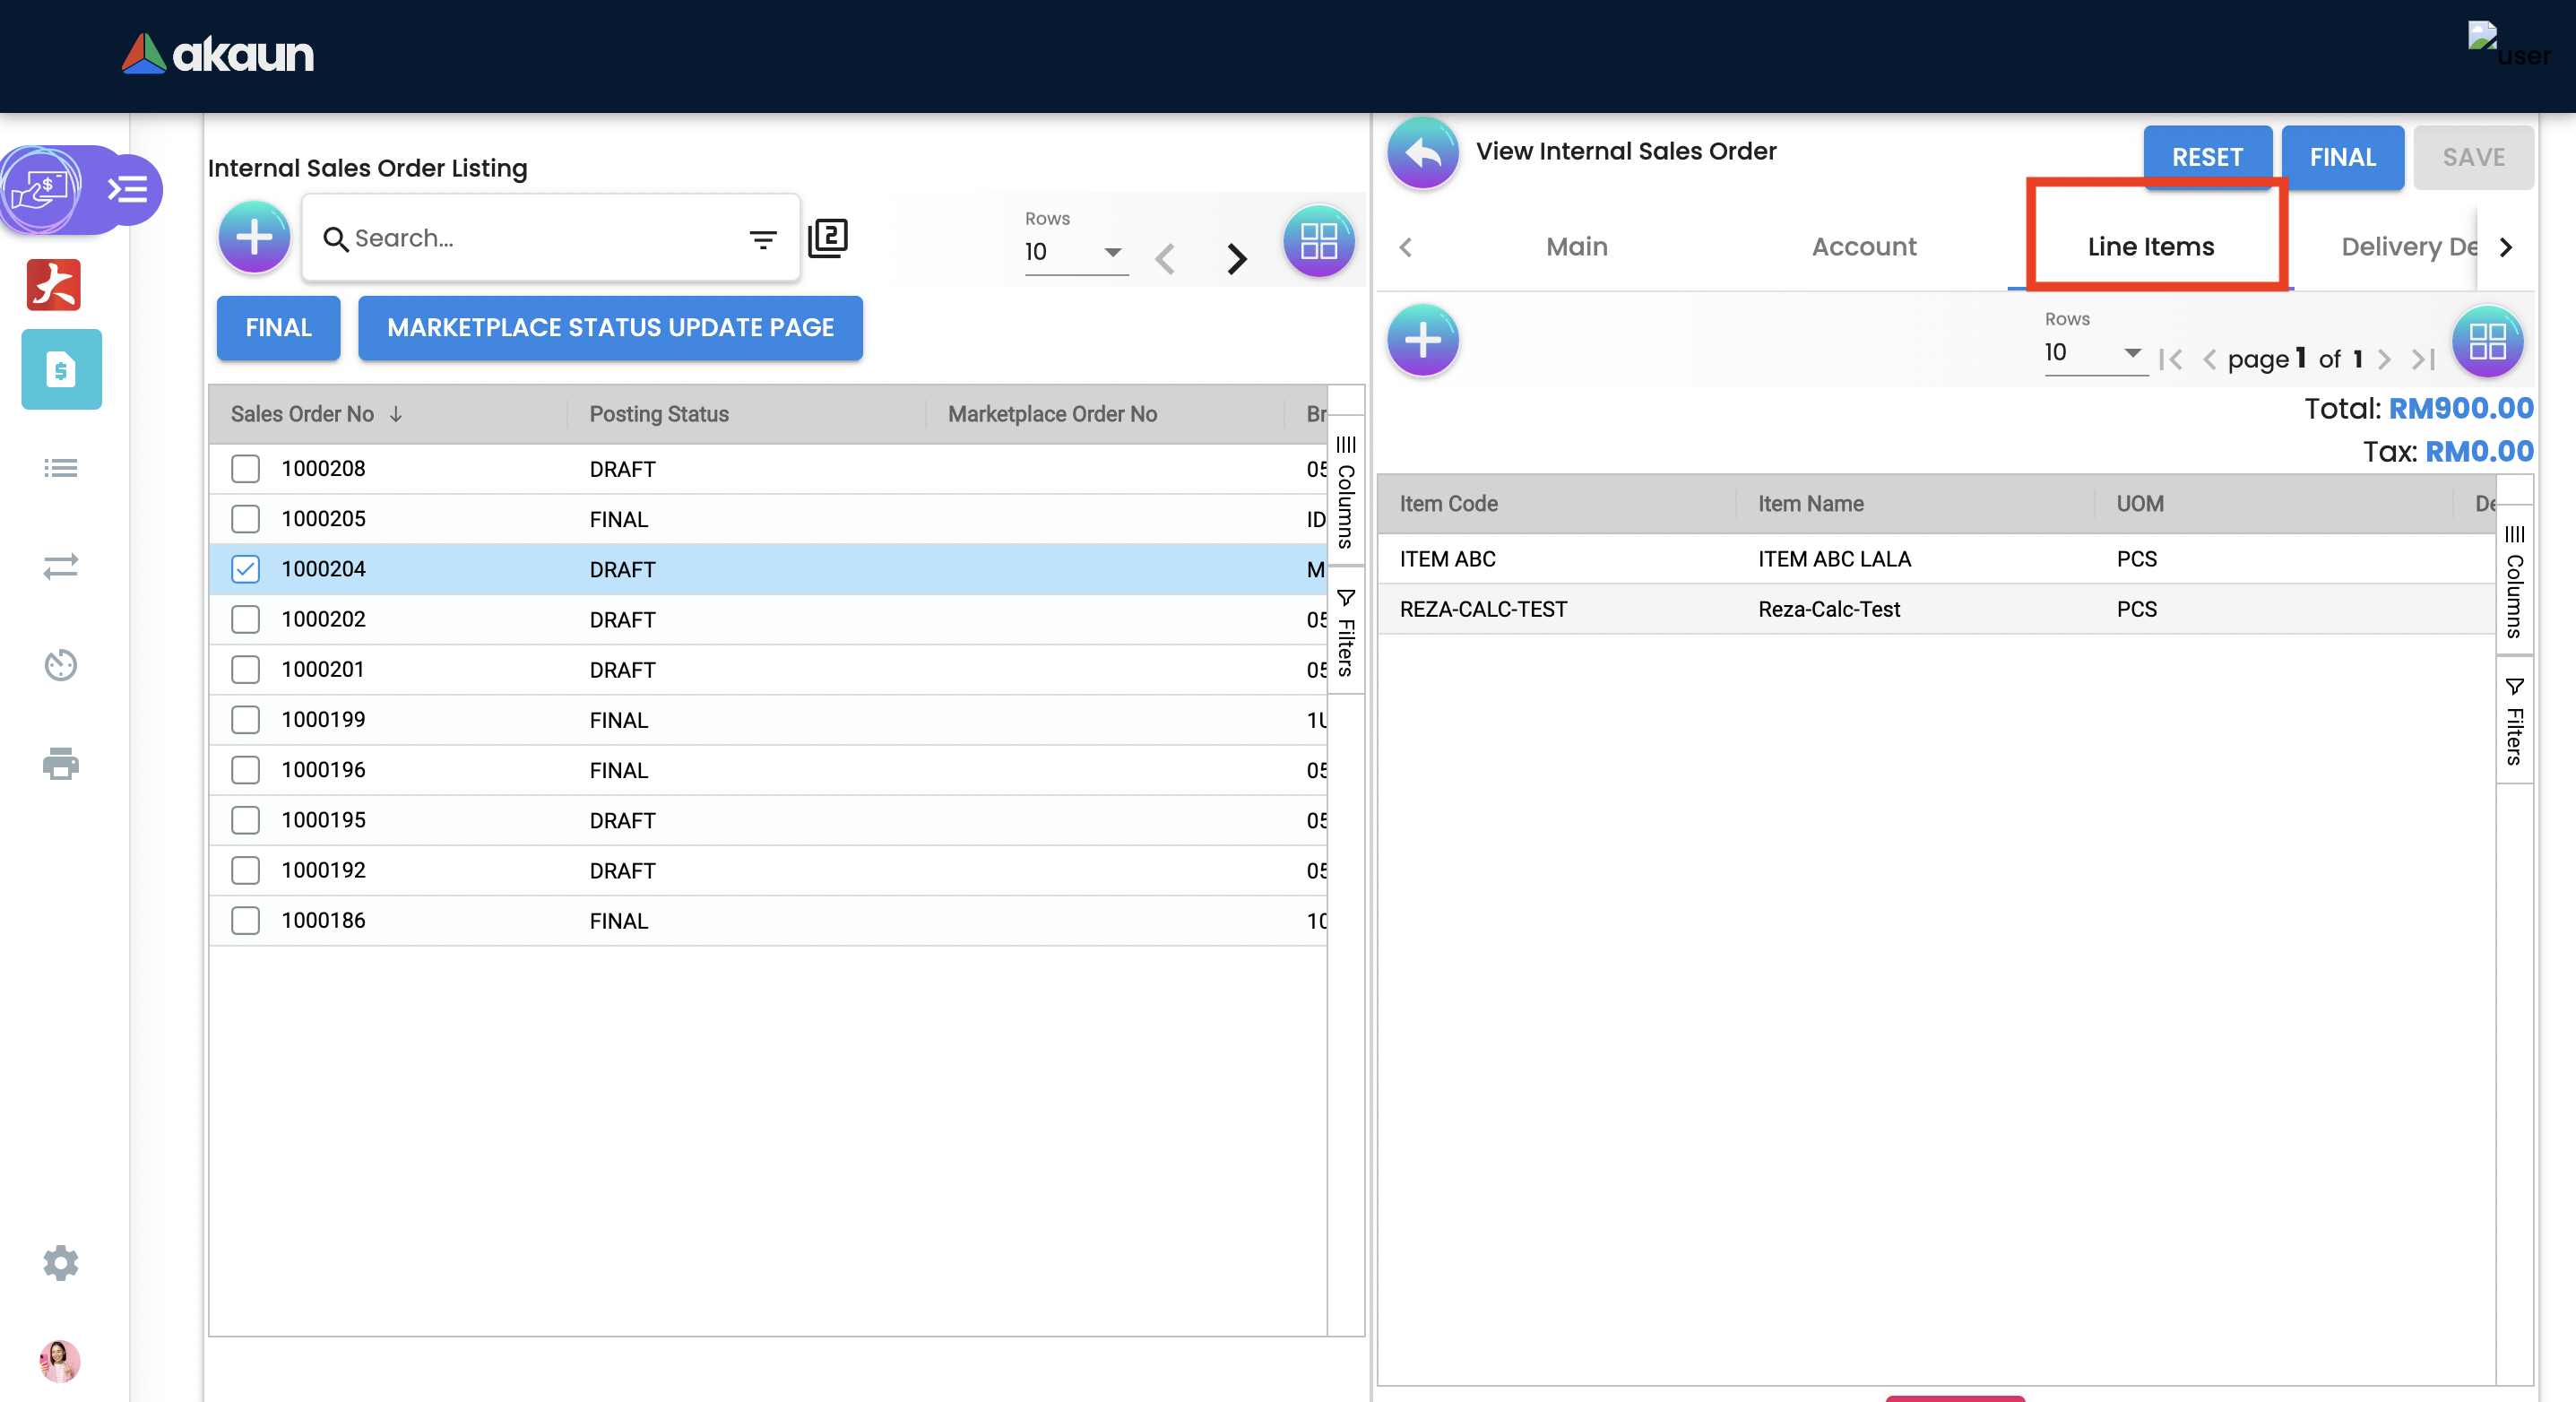
Search Item from the list.
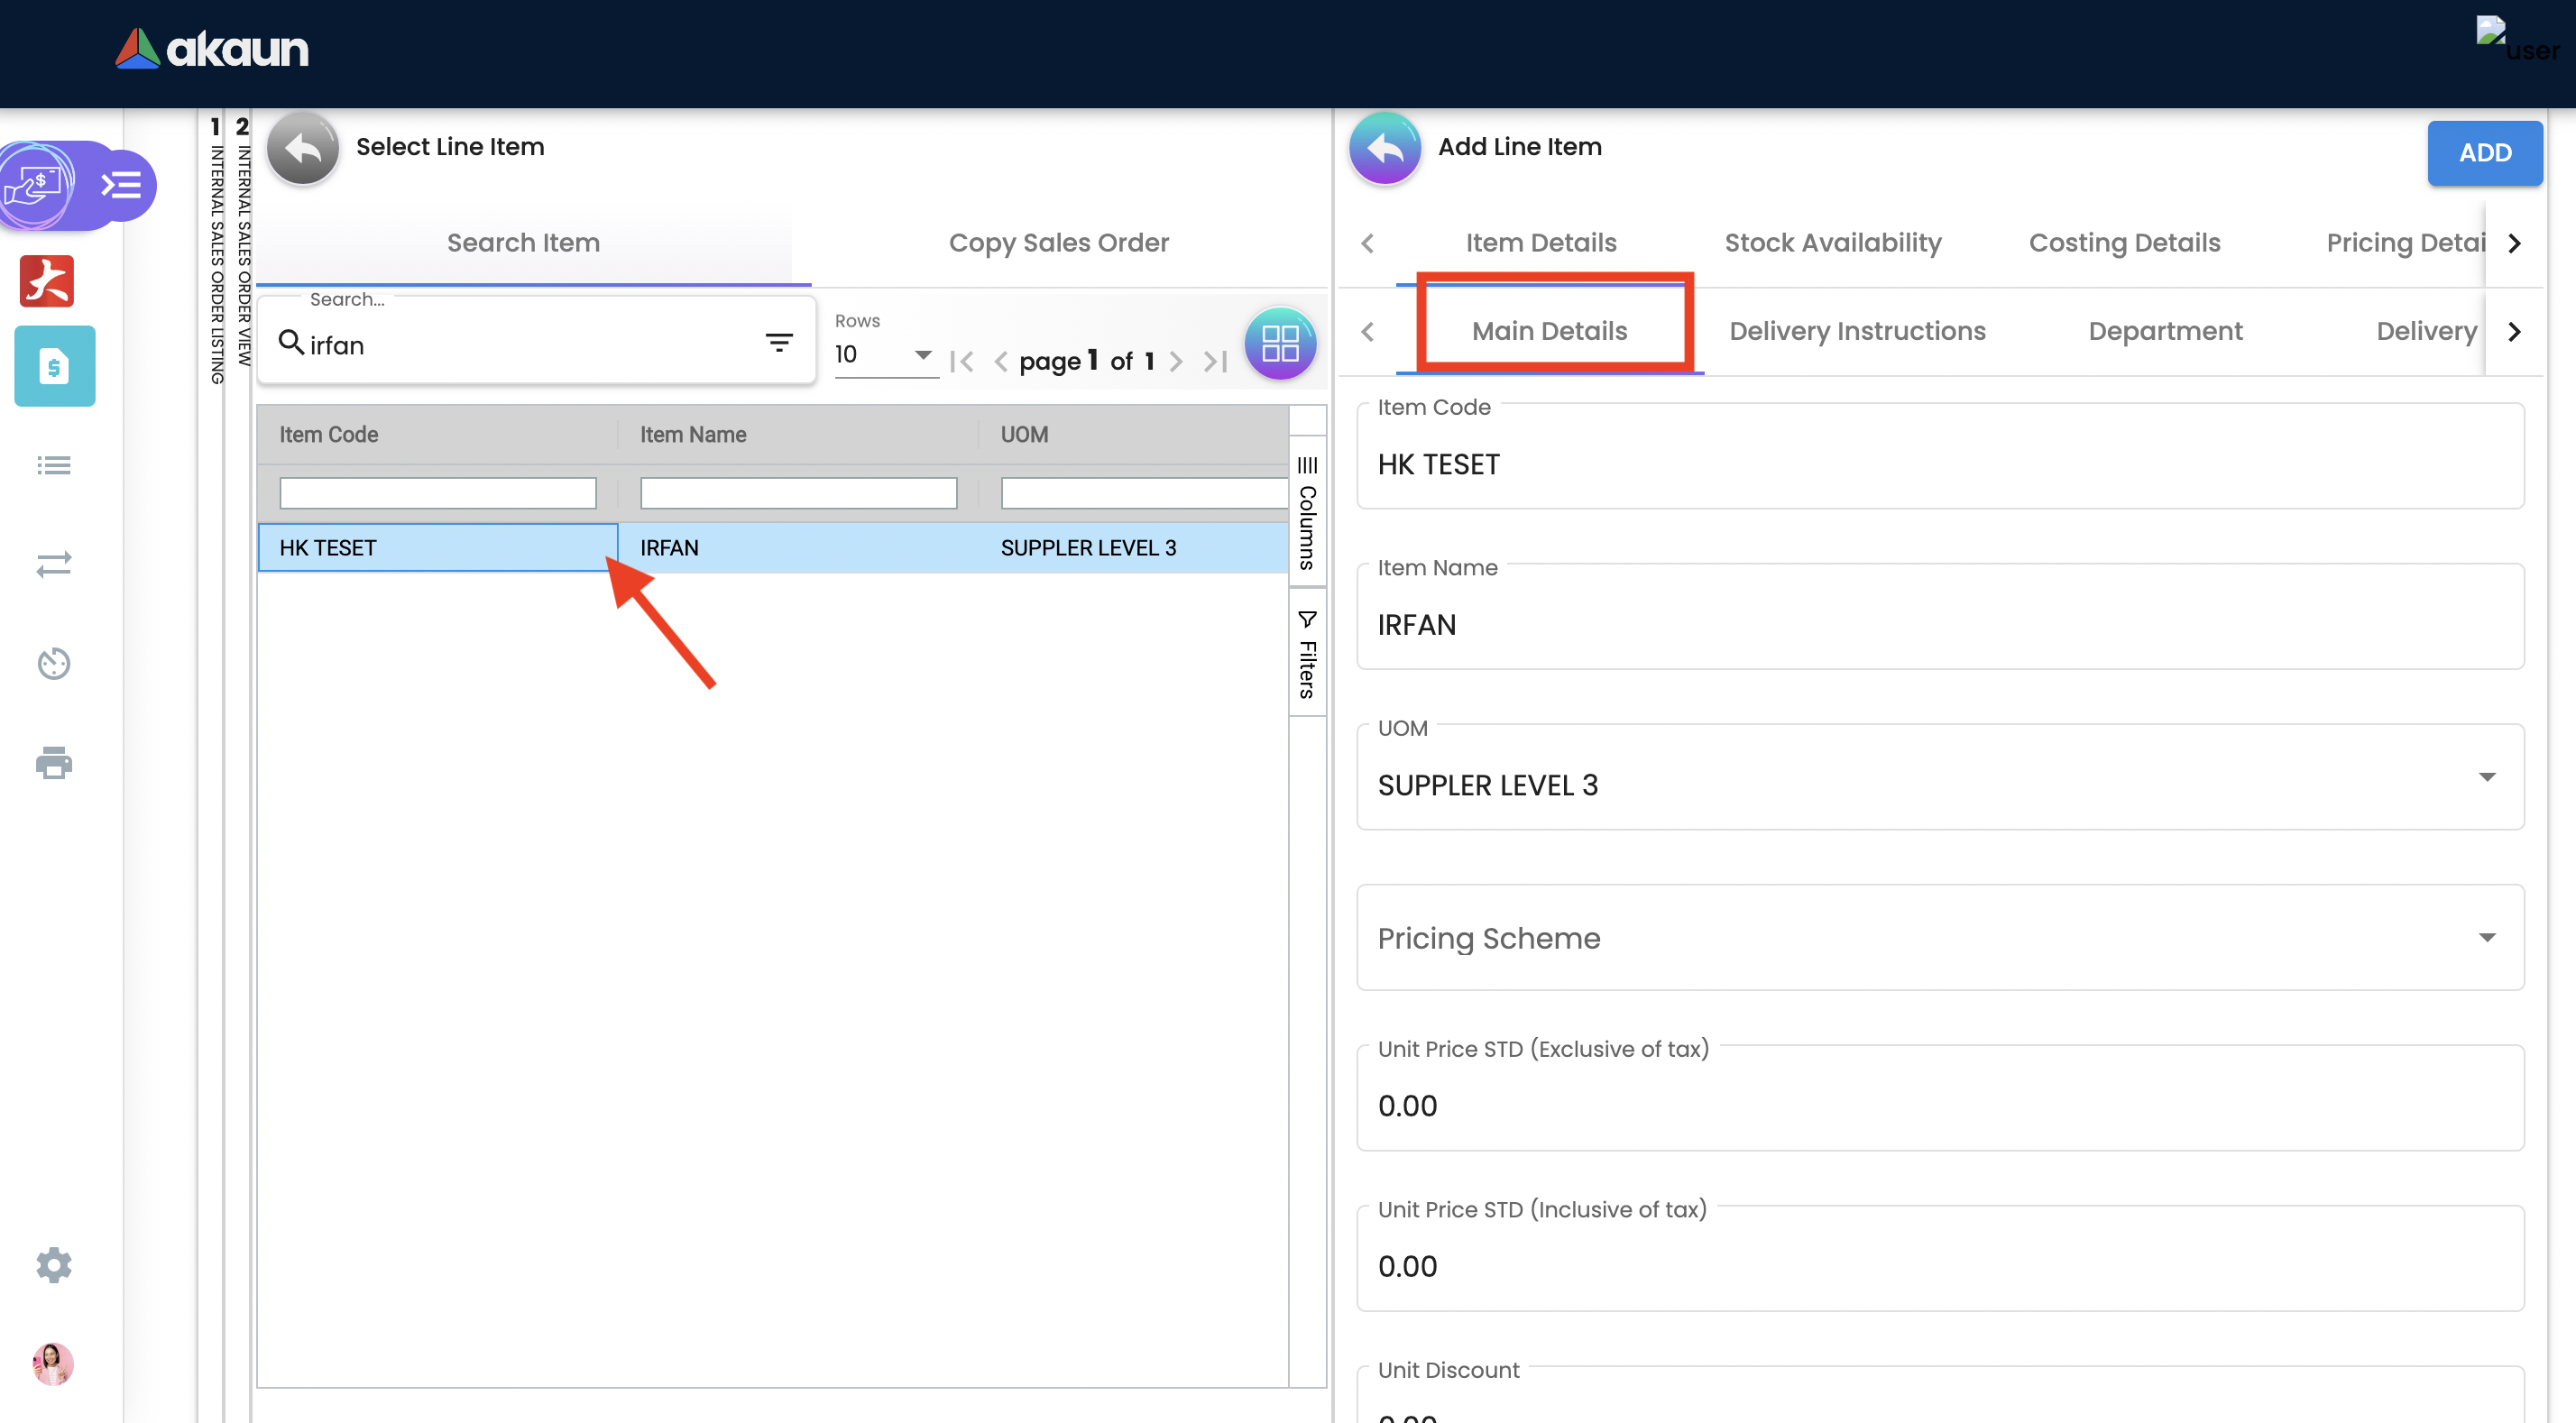
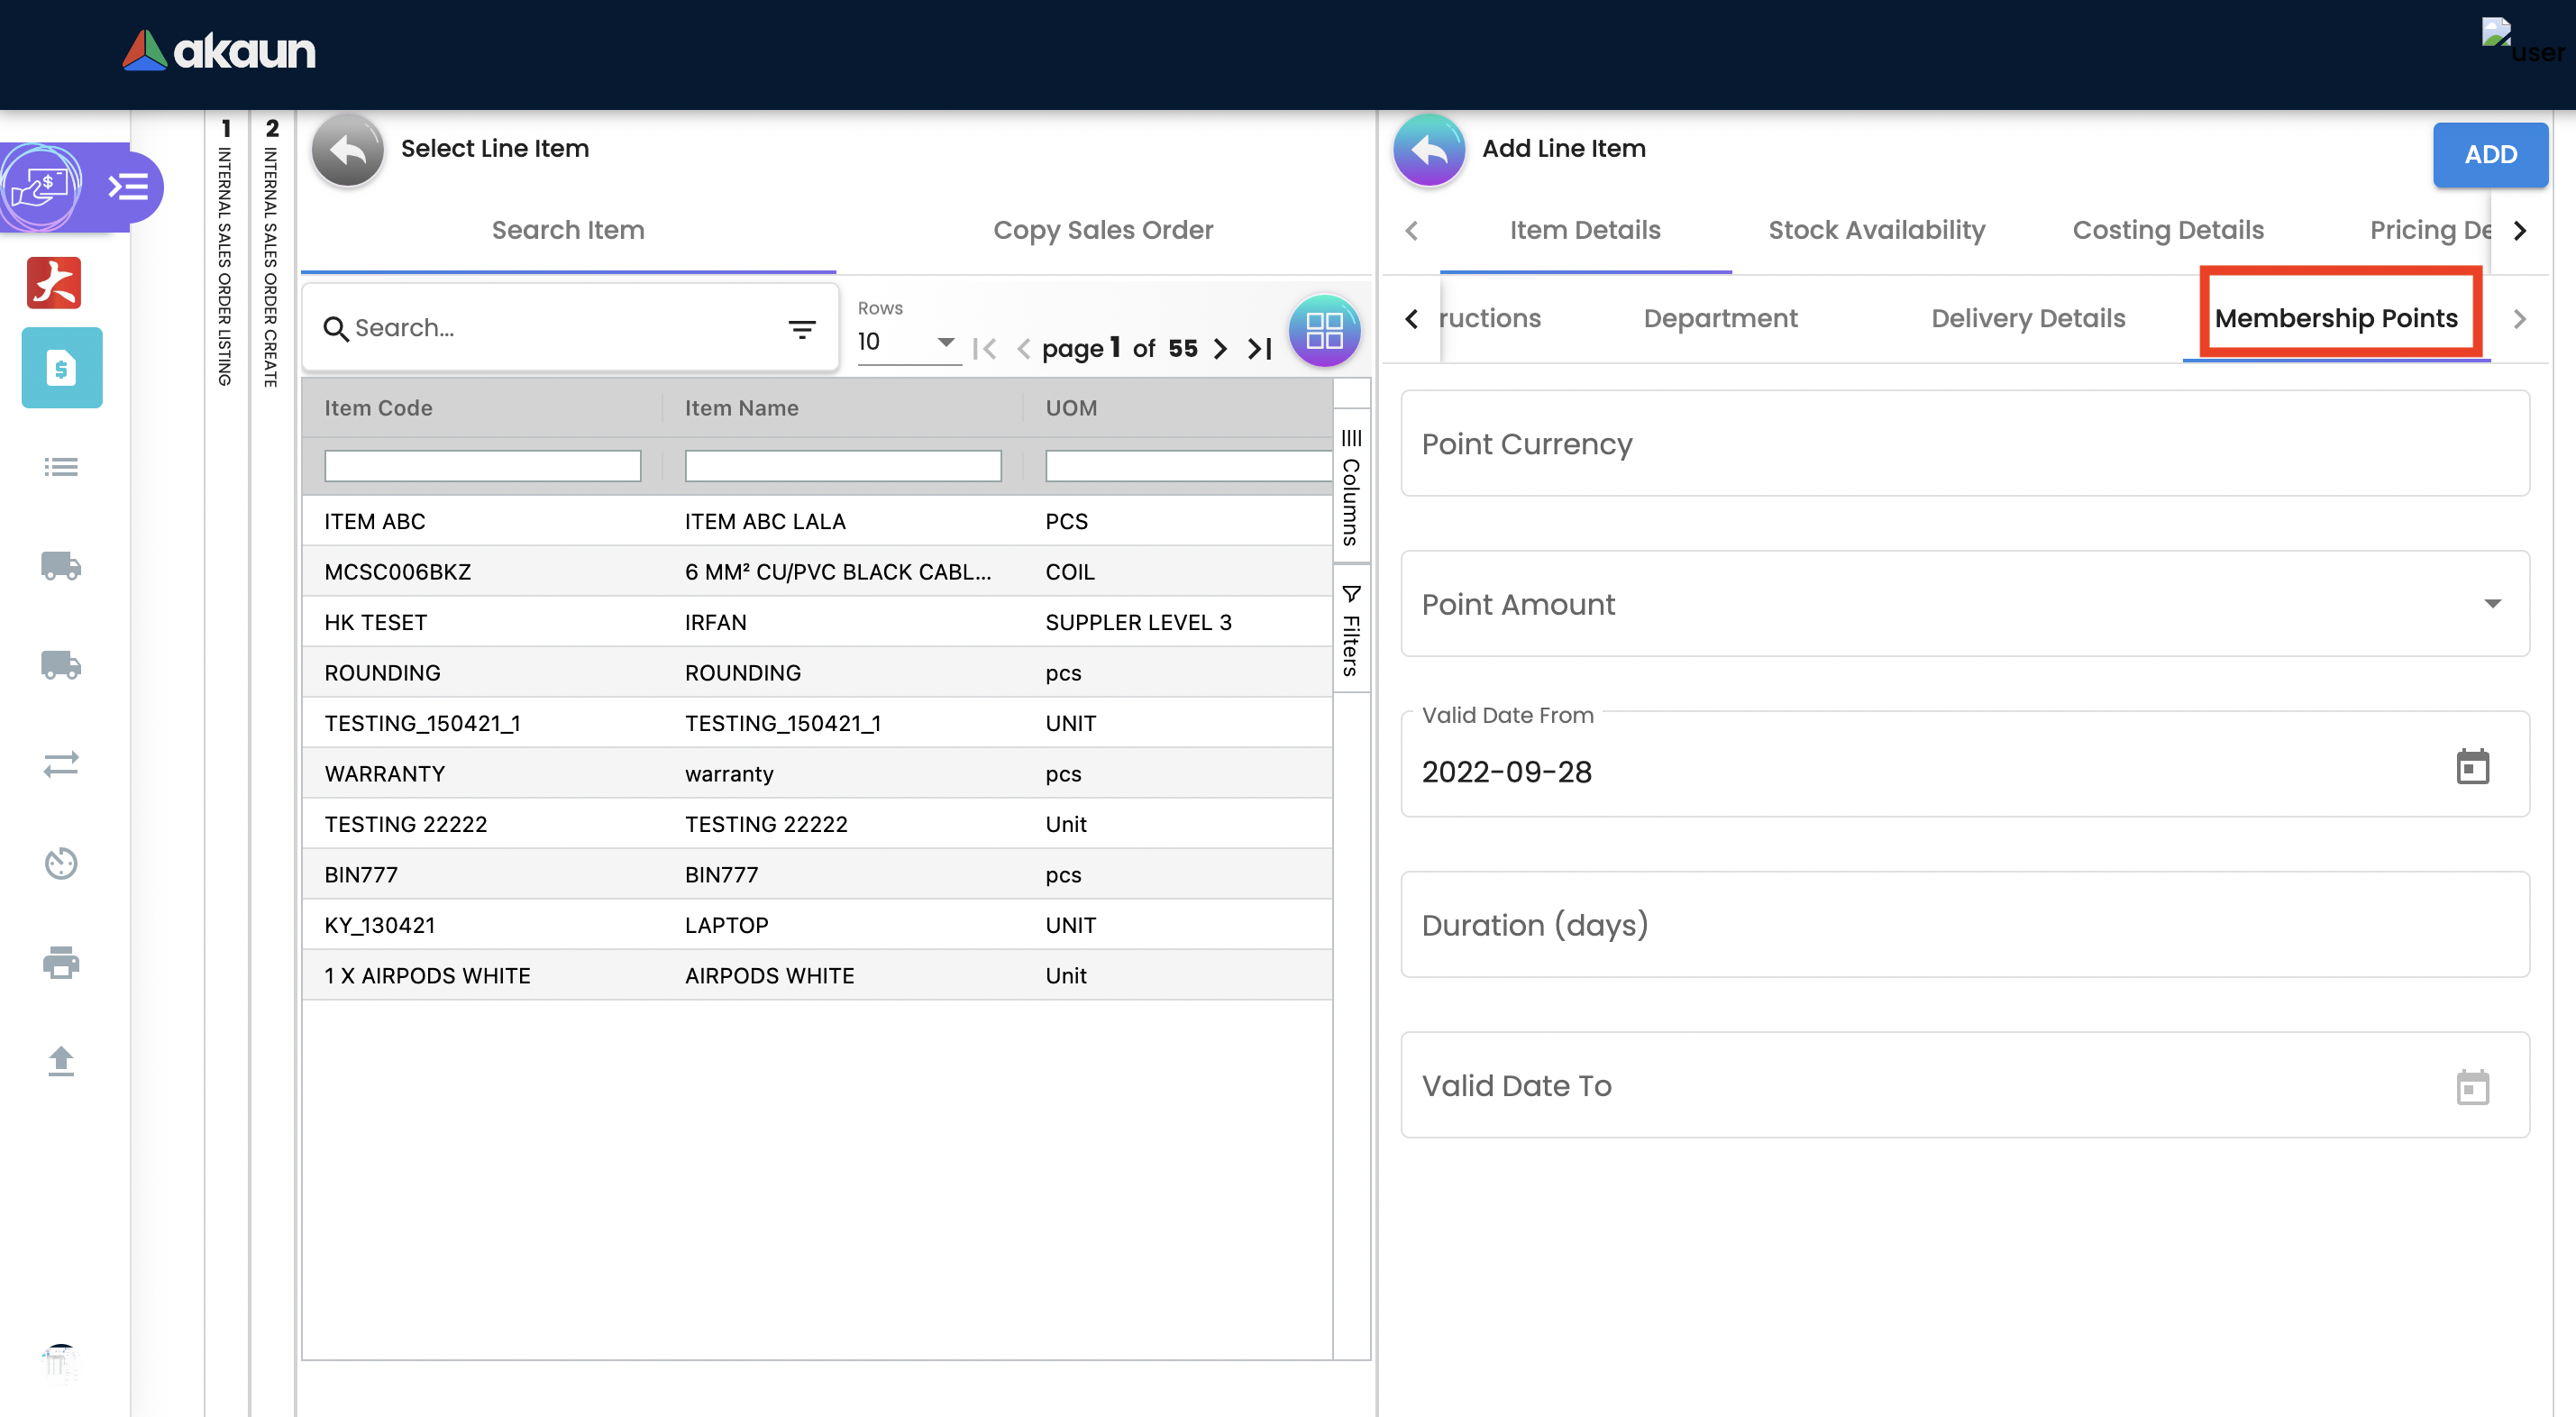
2.3.4 Item Details
2.3.4.1 Main Details Tab
Select the item and upon selecting, key in the main details of the item.
-
Item Code: Used to uniquely identify items that you carry in inventory.
-
Item Name: It is the name given to an item, and it is usually unique to each item identifiable by its item code.
-
UOM: A unit of measure (UOM) is the smallest unit of measurement that can be used to package or assemble a product.
-
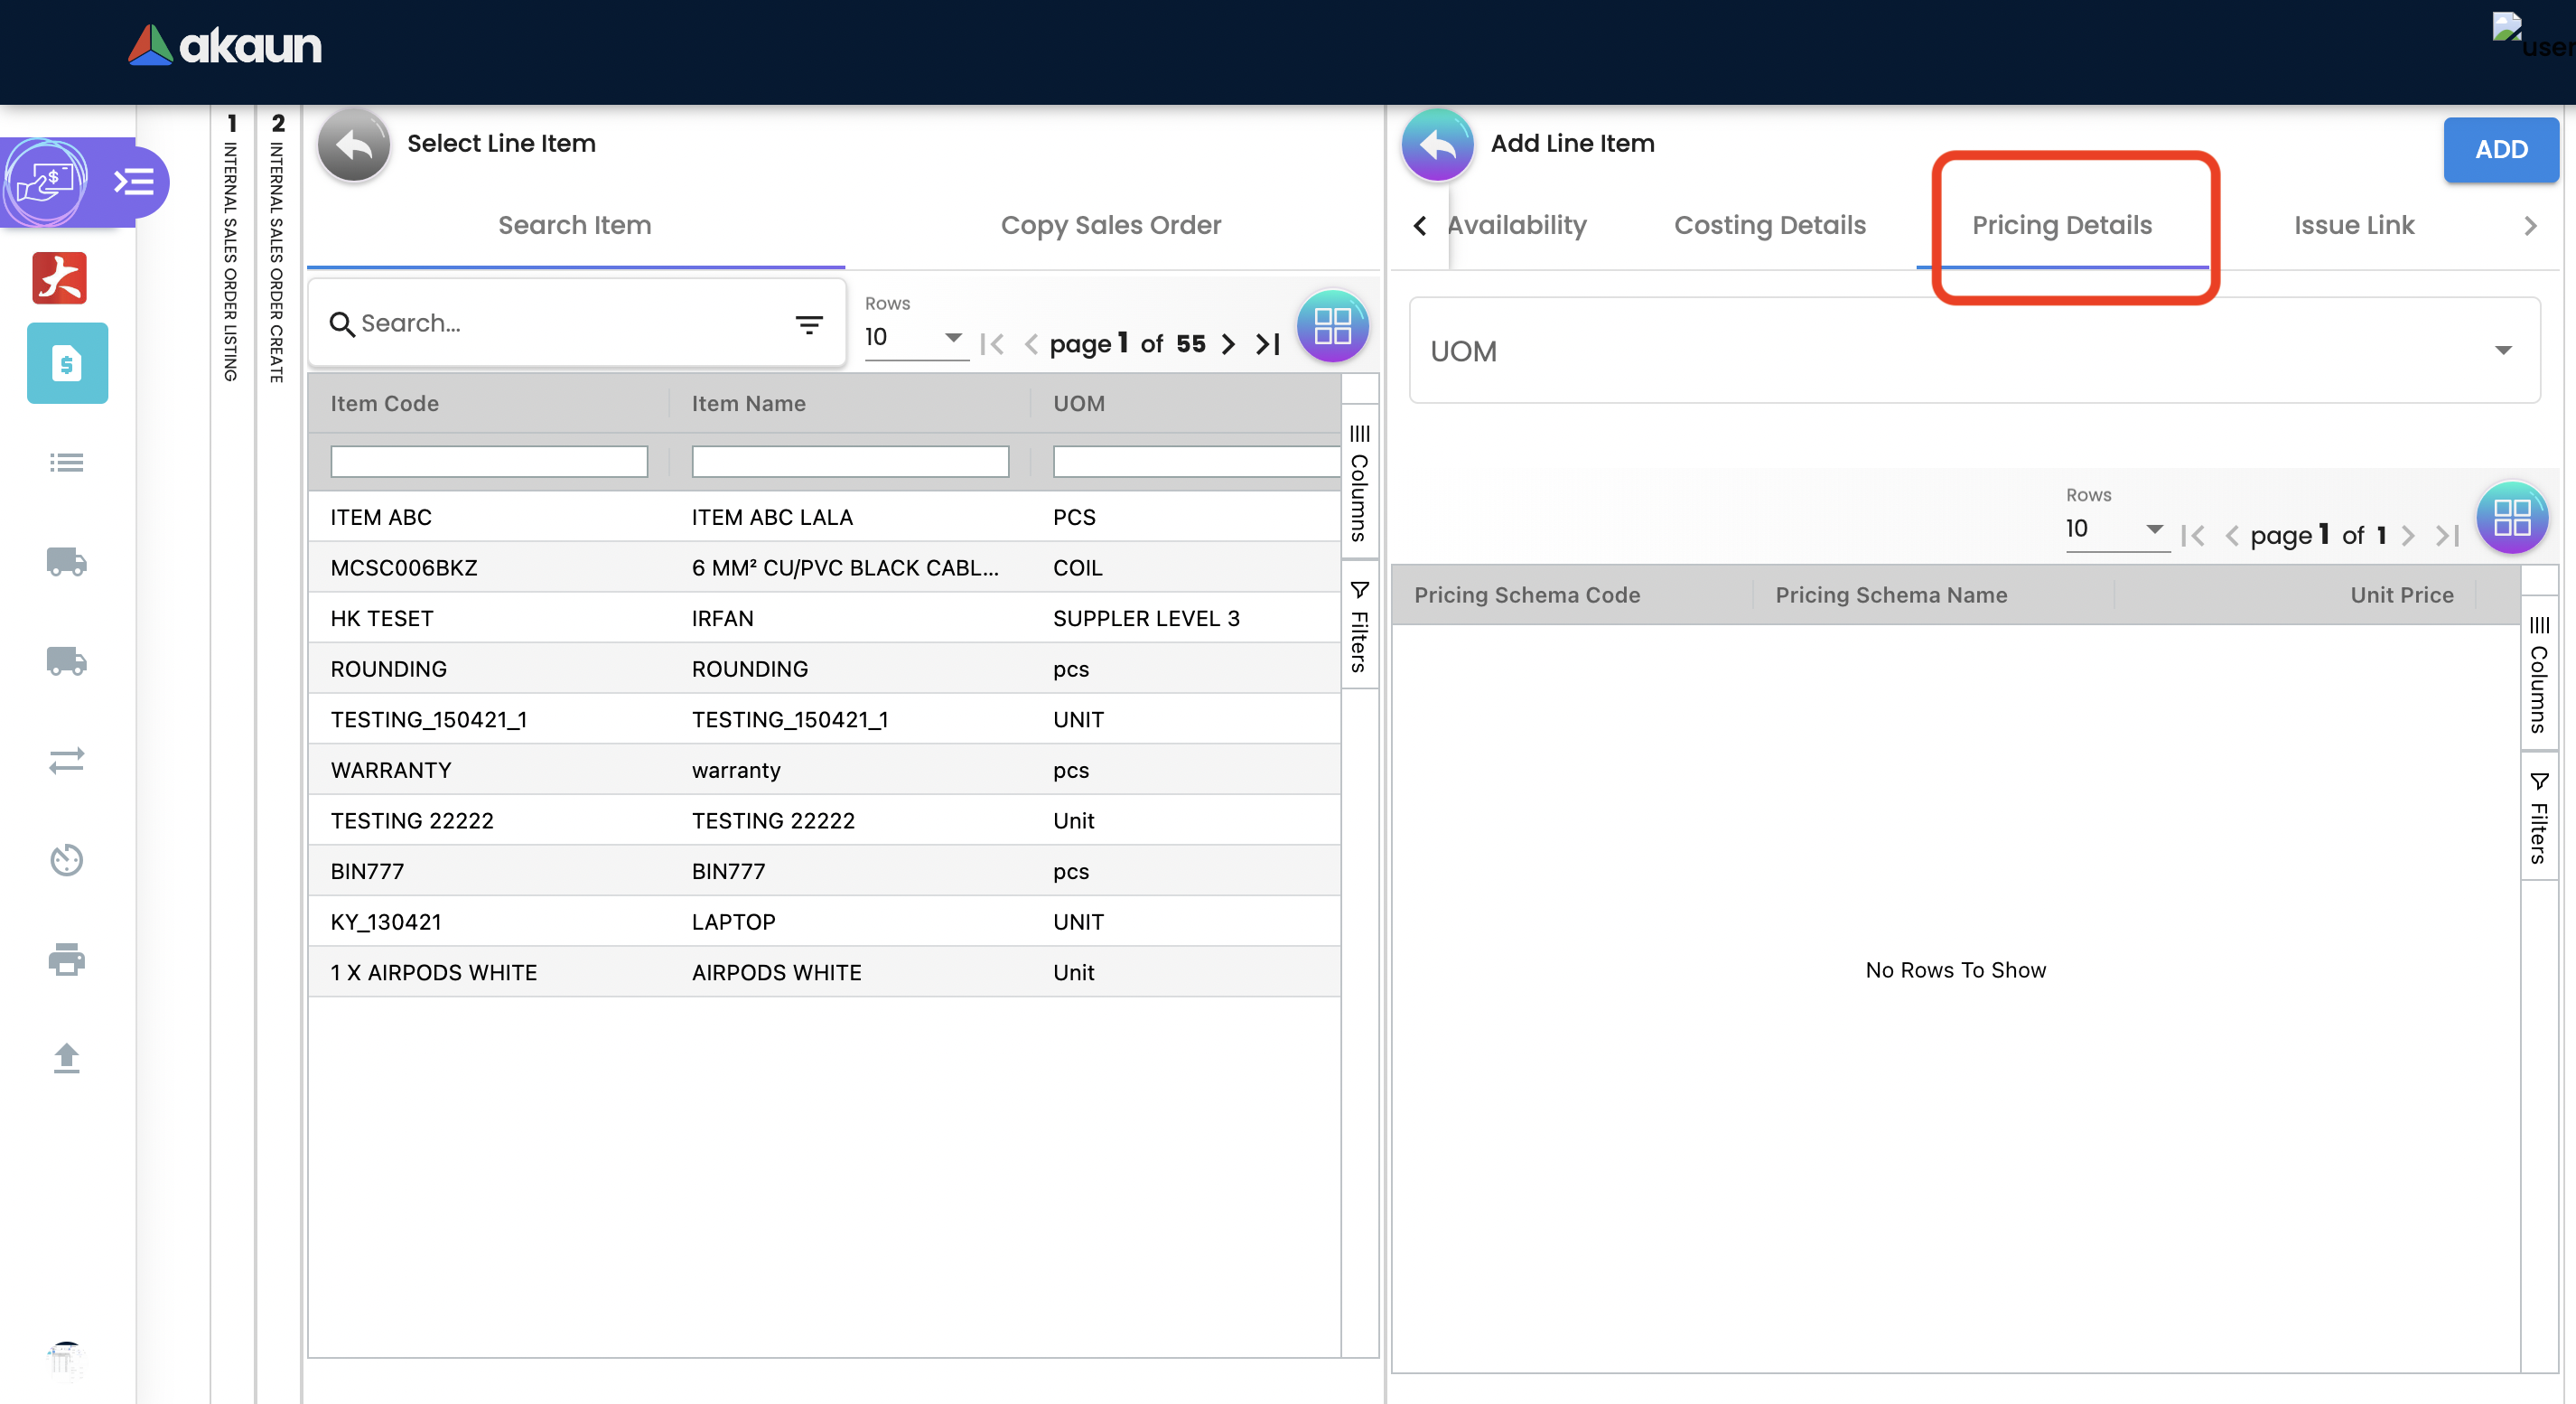
Pricing Scheme: In addition to the default price, a Pricing Scheme allows you to establish a range of standard prices for a product. This enables you to generate customized pricing for certain clients
-
Unit Price STD(exclusive of tax): standart price exclusive price.
-
Unit Price STD(inclusive of tax): standart price inclusive price.
-
Unit Discount: Specify discounts by the unit.
-
Quantity Base: Physical quantities that cannot be defined in terms of other quantities.
-
Quantity UOM: Total number of items by defined UOM.
-
UOM to Base Ratio: Ratio between UOM and the quantity base.
-
Unit Price STD by UOM(exclusive of tax): Standart Unit pricing based on different Unit of Measure exclusive price.
-
Unit Price STD by UOM(inclusive of tax): Standart Unit pricing based on different Unit of Measure inclusive price.
-
Unit Price by UOM (Inclusive of tax): When a product item’s pricing is based on a different unit of measure than its inventory unit of measure, you might specify pricing by the unit of measure (UOM).
-
Unit Discount by UOM (inclusive of tax): Here we can specify discounts by the unit of measure (UOM).
-
Unit Price Net by UOM (exclusive of tax): Quoted, agreed, or standard pricing for your products and services.
-
Unit Price Transaction by UOM(inclusive of tax).
-
Unit Price Net (exclusive of tax).
-
STD amount(unit price and quantity).
-
Discount Amount: Unit discount times quantity base (Auto calculated).
-
Amount Net: Standard Amount minus discount amount (Auto calculated).
-
SST Code: Sales and service tax code, used to determine the tax amount.
-
SST/GST/VAT: Tax amount based on the codes selected .
-
Tax Amount: Total tax amount after specifying GST/SST/VAT codes.
-
Net Amount (SST/GST/VAT x Net amount): Total net tax amount .
-
WHT Code: Withholding tax code, used to determine the tax amount.
-
WHT: Withholding tax rate.
-
WHT Amount: Withholding Tax amount based on the codes selected.
-
Txn Amount: Transaction amount exclusive of discounts and taxes.
-
Remarks: Add extra information to the line item. Communicate delivery methods or special prices to the users.
Note: You may Knock Off (KO) and/or Copy the item and quantity from existing docs. The KO configurations are done in the Organisation Applet > Company > Knock Off Conf.
2.3.4.2 Delivery Instructions Tab
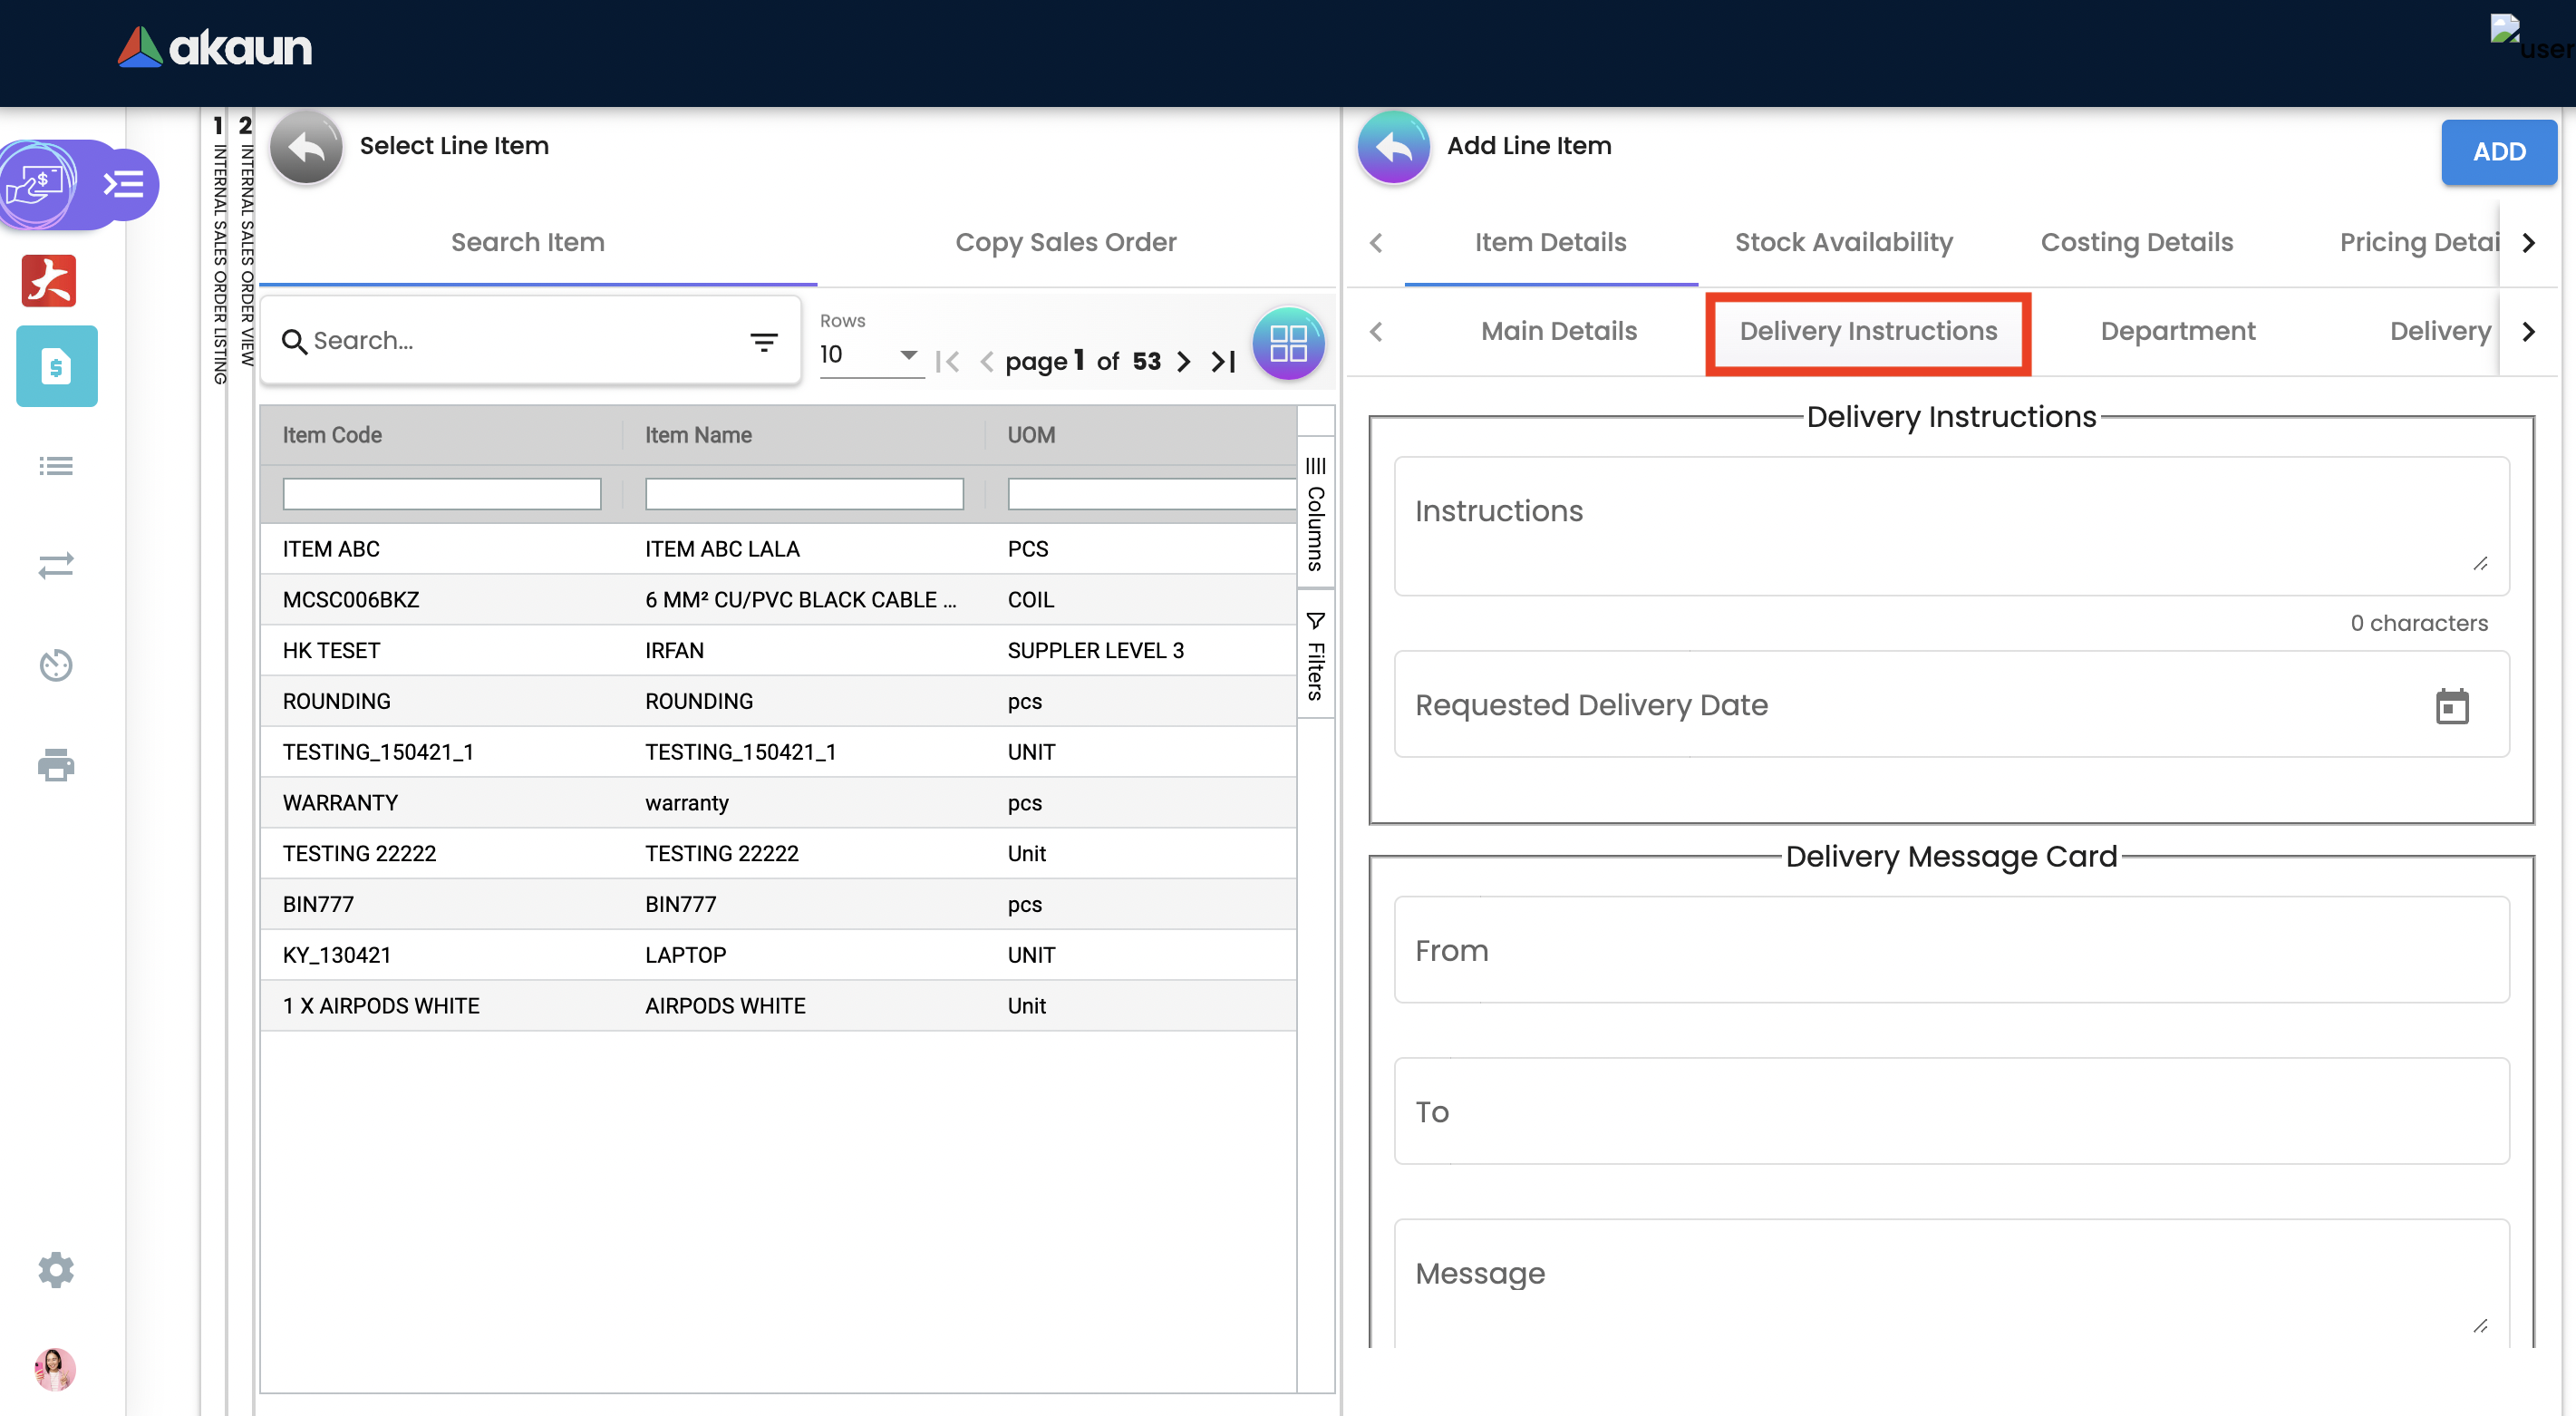
Delivery instructions:
-
You can enter instructions for the delivery of an Order.
-
Specify the delivery date requested by your customer.
Delivery message card:
-
You can also prepare the delivery message card for the receiver.
2.3.4.3 Department Tab
Linking the line item to the following departments is optional and helps in reports.
Segment: Segmentation at the item or hdr level.
Dimension: Selecting dimension at the item or hdr level.
Profit center: Selecting profit center at the item or hdr level.
Project: Selecting project at the item or hdr level.

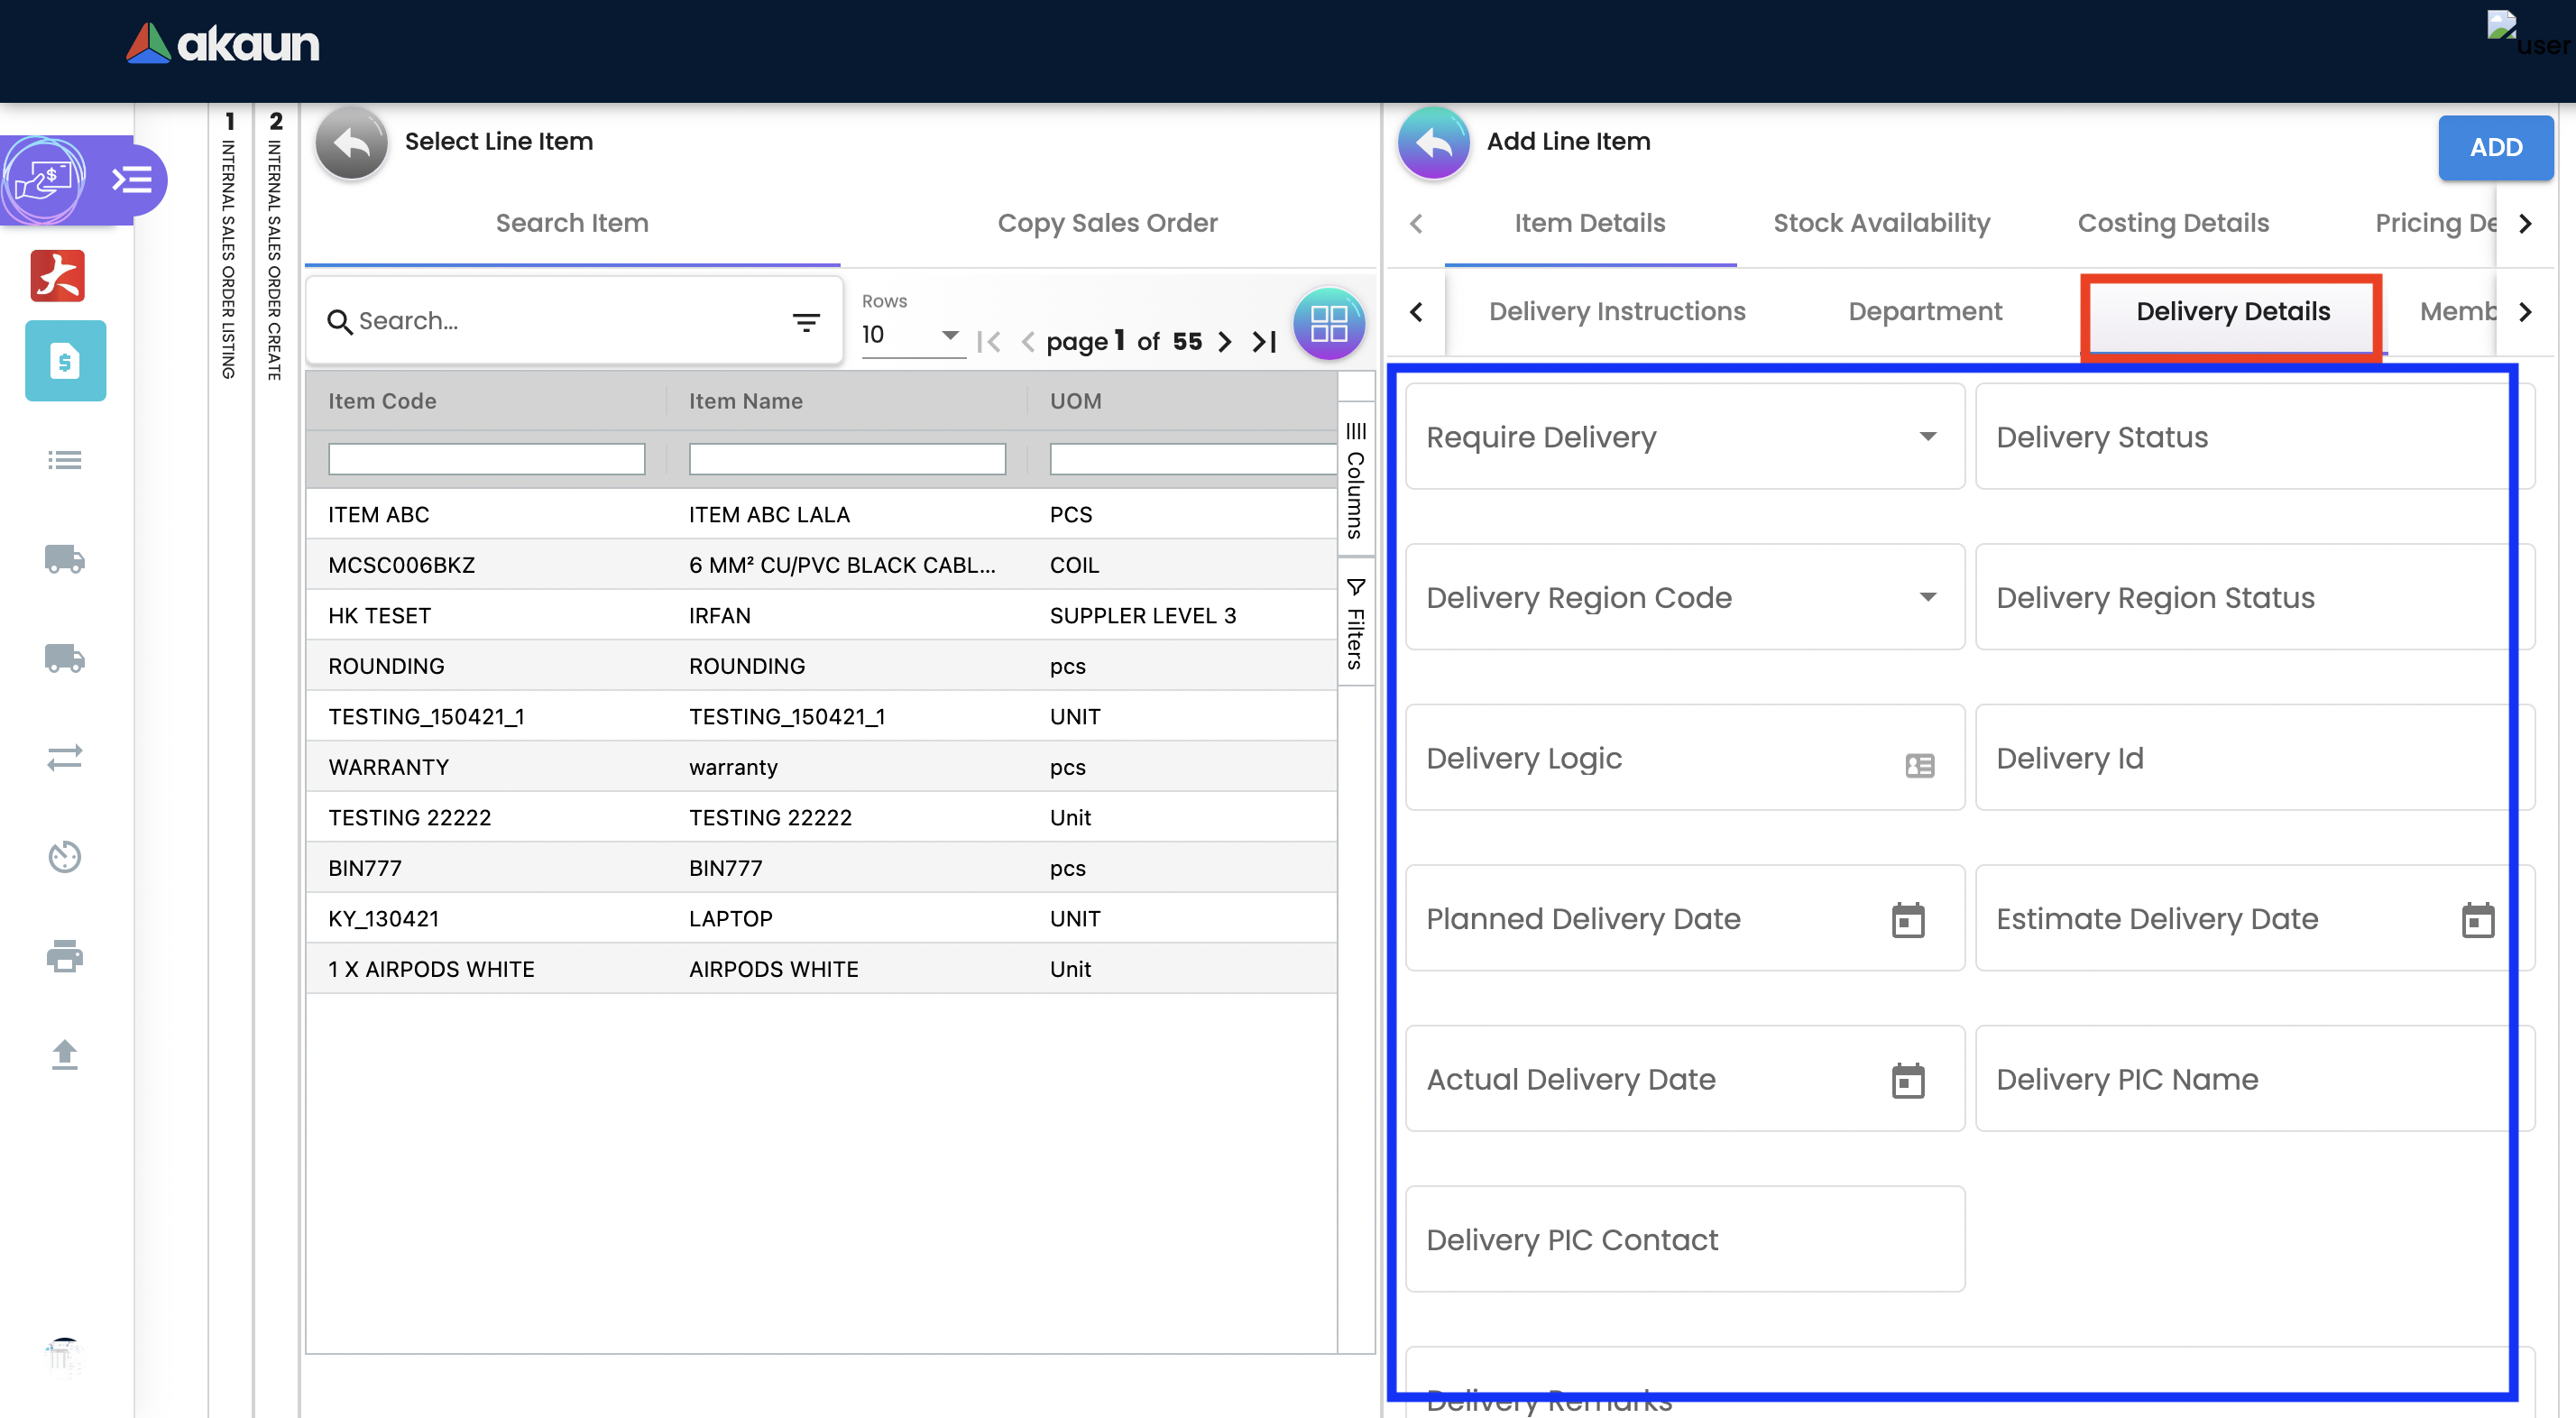
2.3.4.4 Delivery Details Tab
The requested delivery information for the Products specified in the document, including multiple delivery dates (if applicable), location, and responsible person details.
-
Require delivery: Choose from the Dropdown List
-
Delivery Status: Delivery progress.
-
Delivery Region Code: In order to apply different shipping rules and costs to different geographic locations.
-
Delivery Region Status.
-
Delivery Logic: The mechanism of physical settlement, penalties for delivery default, and timelines for submitting delivery intents are all defined by delivery logic.
-
Delivery ID: A unique identifier for delivery.
-
Planned Delivery Date: It’s the date when you are supposed to deliver things based on the order.
-
Estimate Delivery Date: It’s the date when you are expected to delivery things based on the order.
-
Actual Delivery Date: It’s the date when you are actually deiverying things based on the order.
-
Delivery PIC Name: It’s name of the delivery person in charge.
-
Delivery PIC Contact: It’s contact of the delivery person in charge.
-
Delivery Remarks: Additional notes/remarks for delivery.
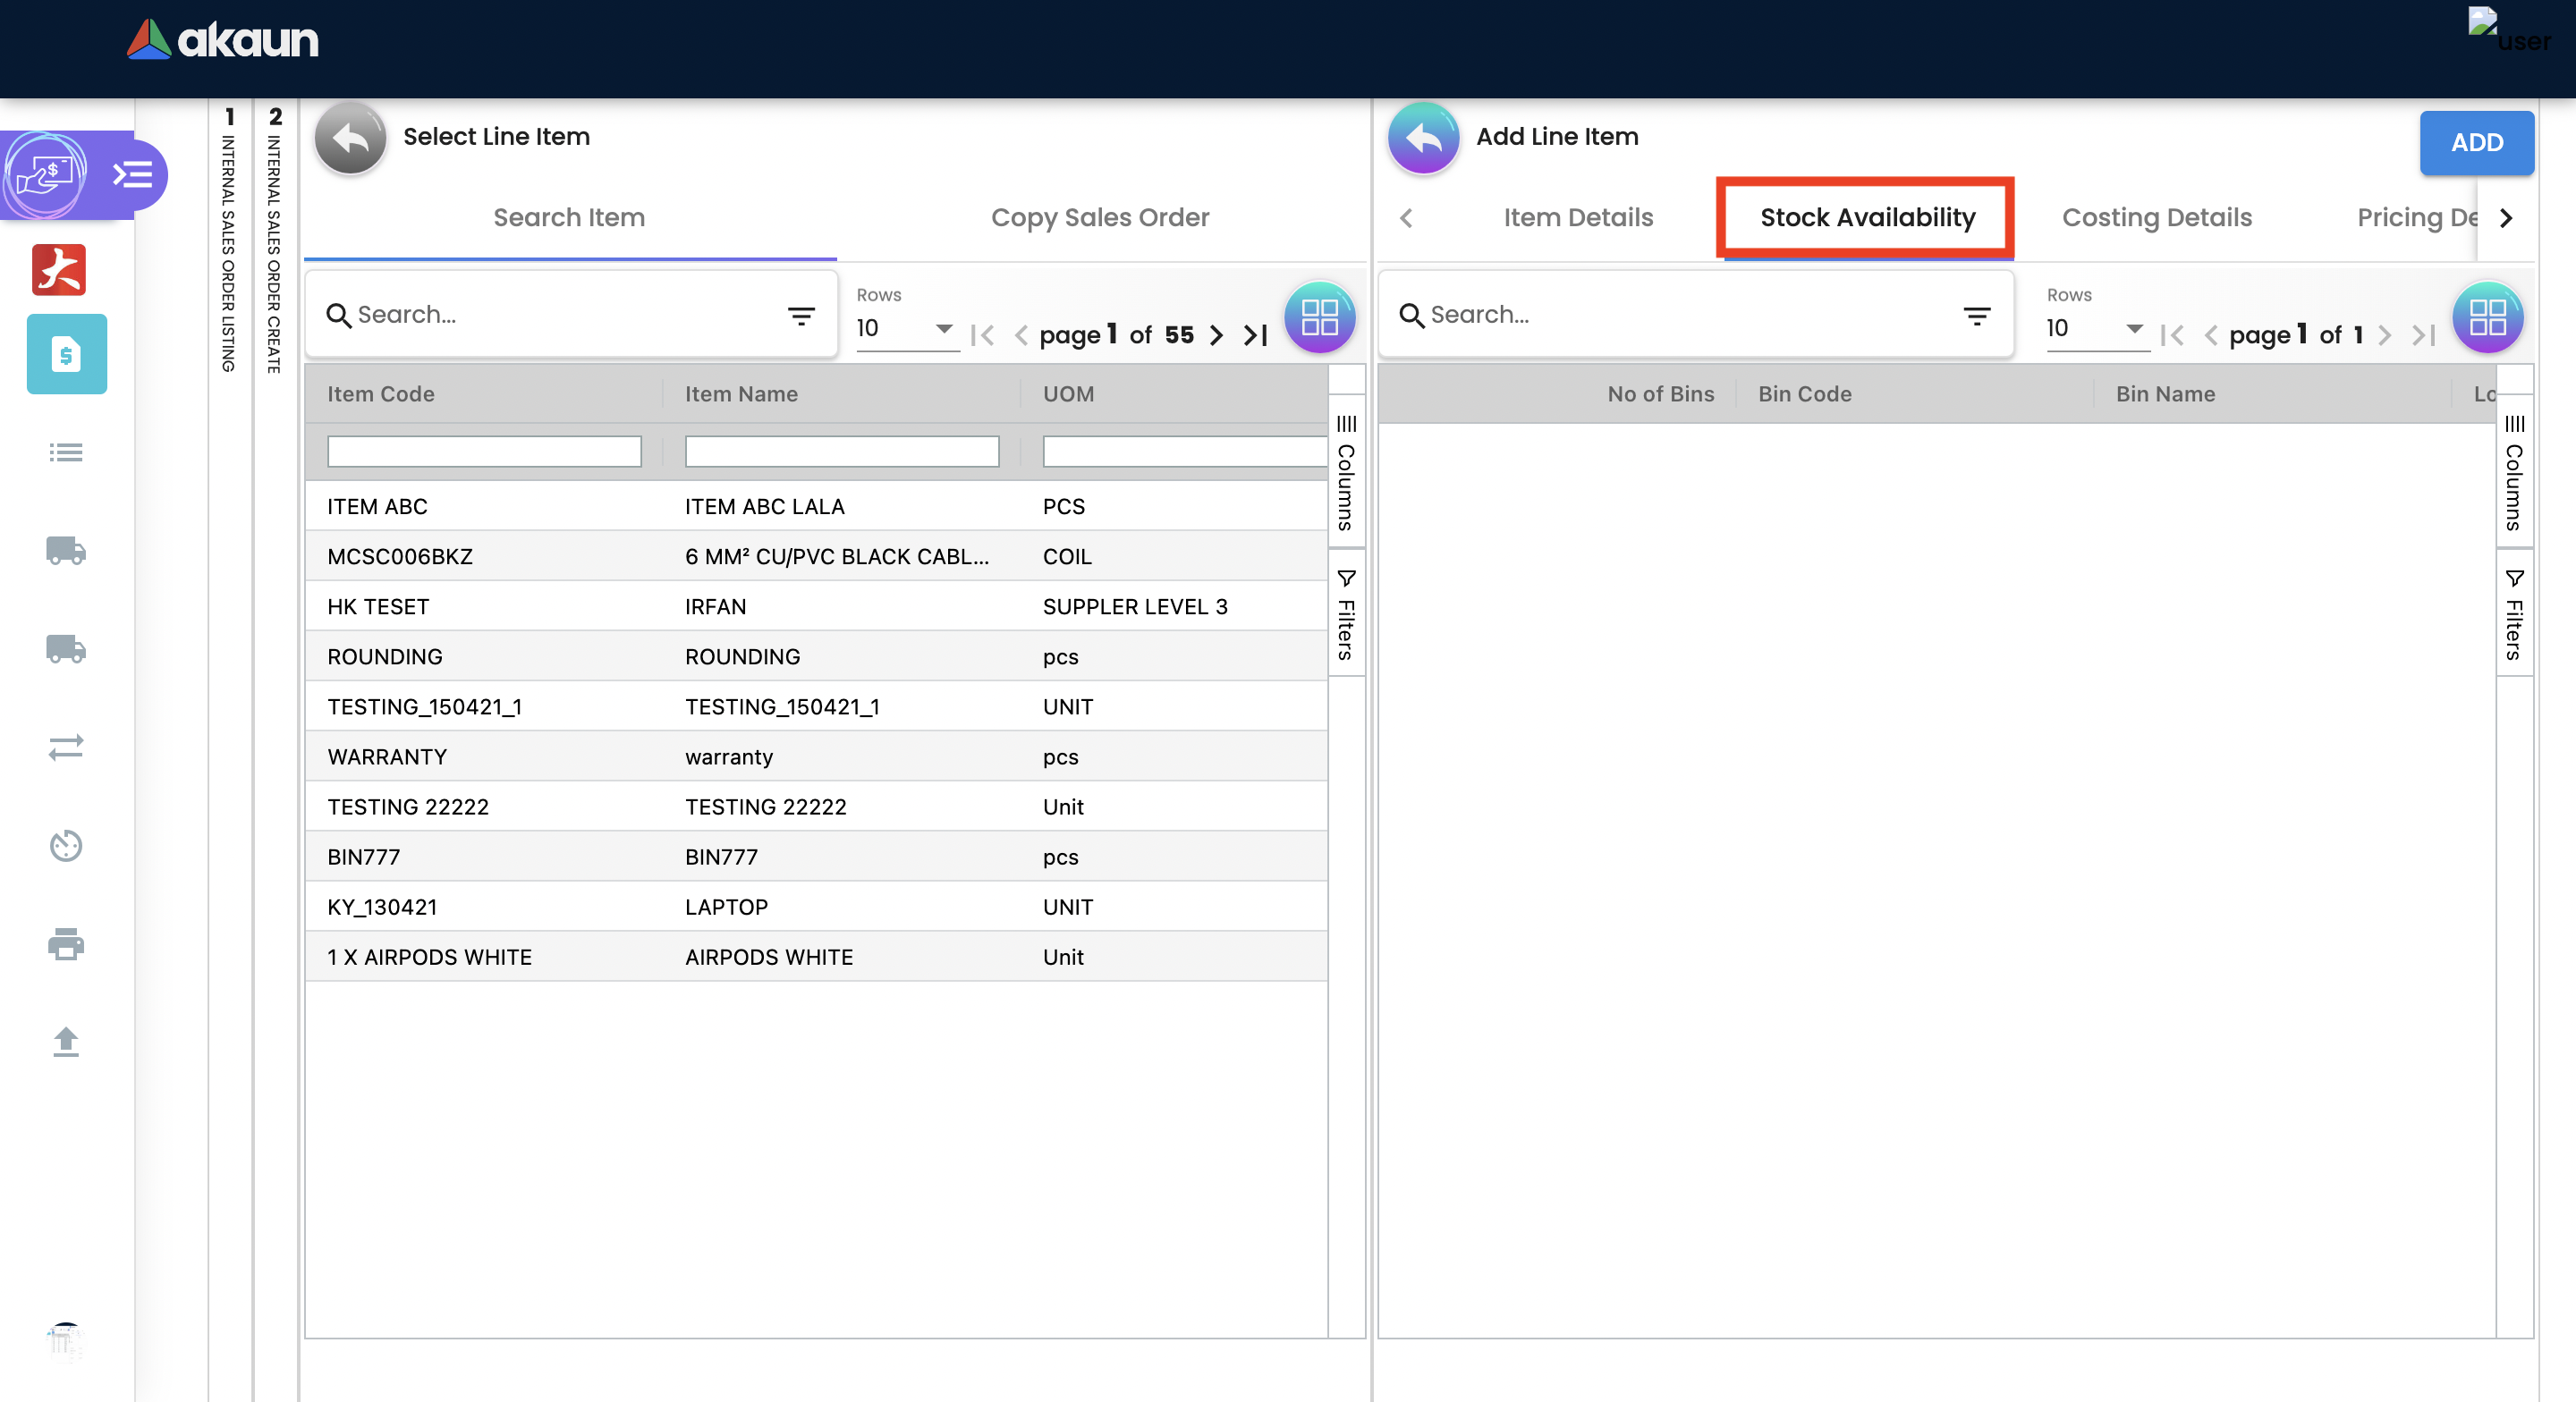
2.3.5 Stock Availability Tab
Stock availability tabs allow users to check whether the products are available in-store.
User can see: System Block Balance Previous Sales order Current Sales Order Stock Availability
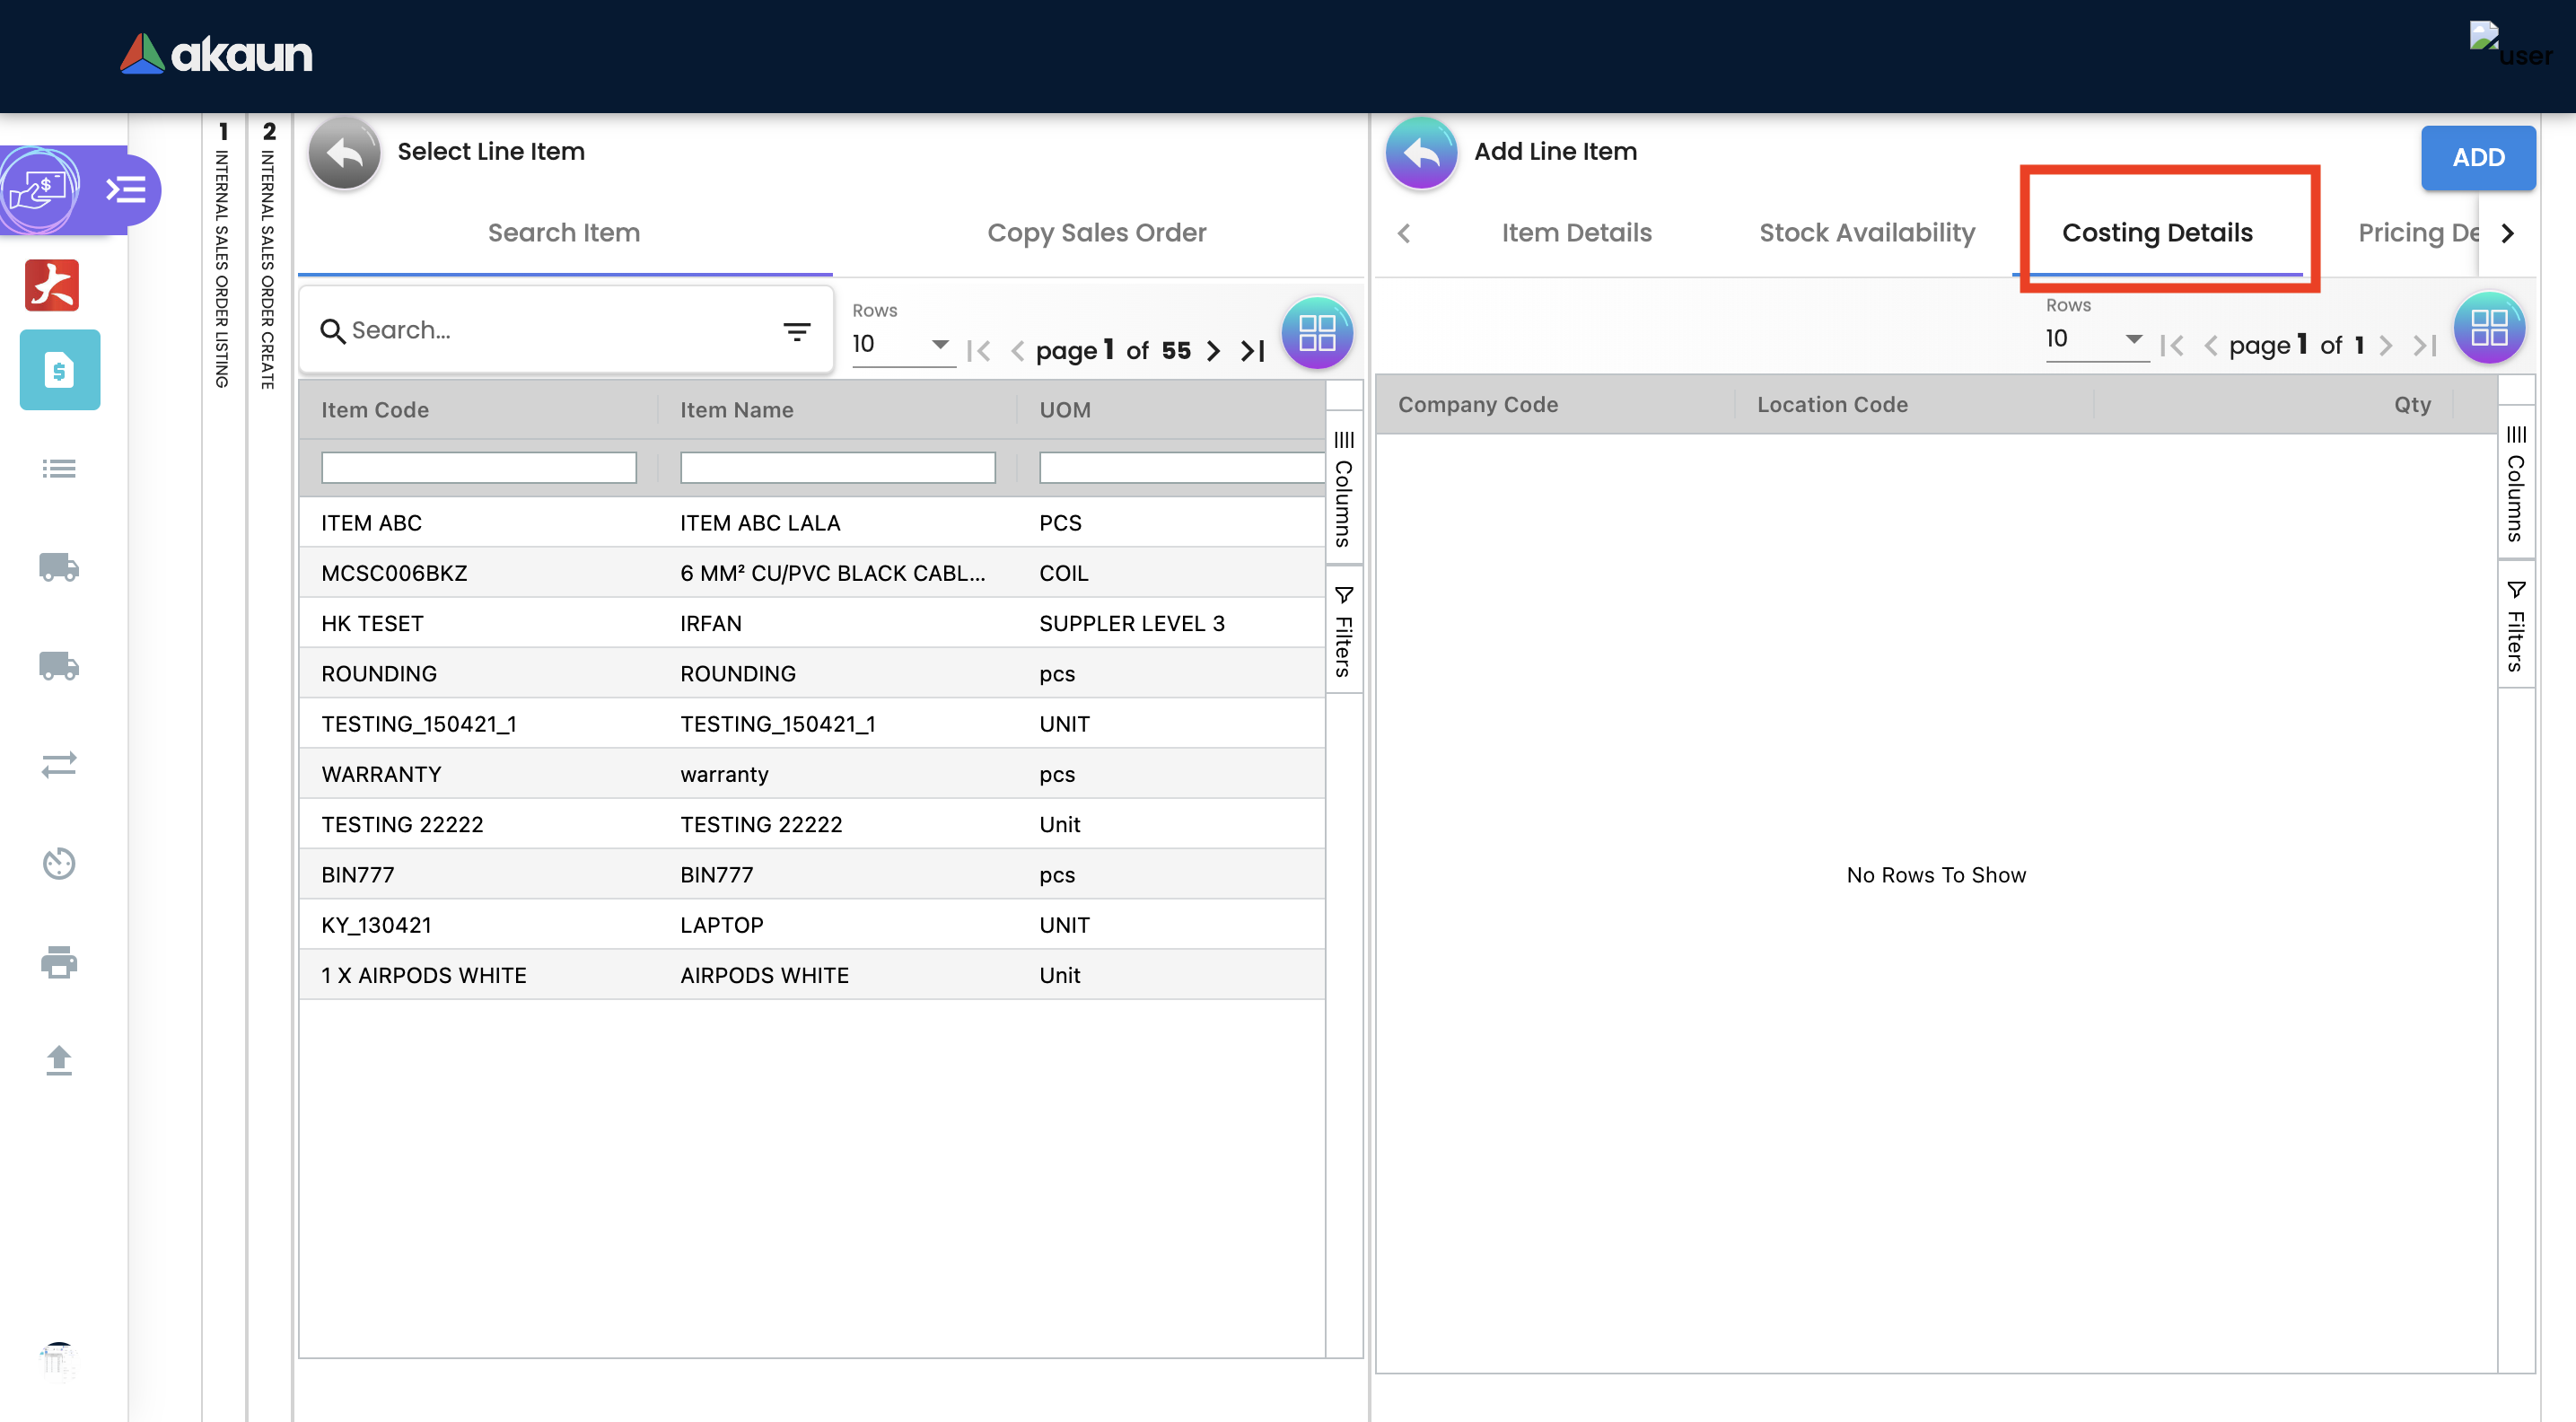
2.3.5.1 Costing Details Tab
List of Costing Details for the particular sales order is displayed here.
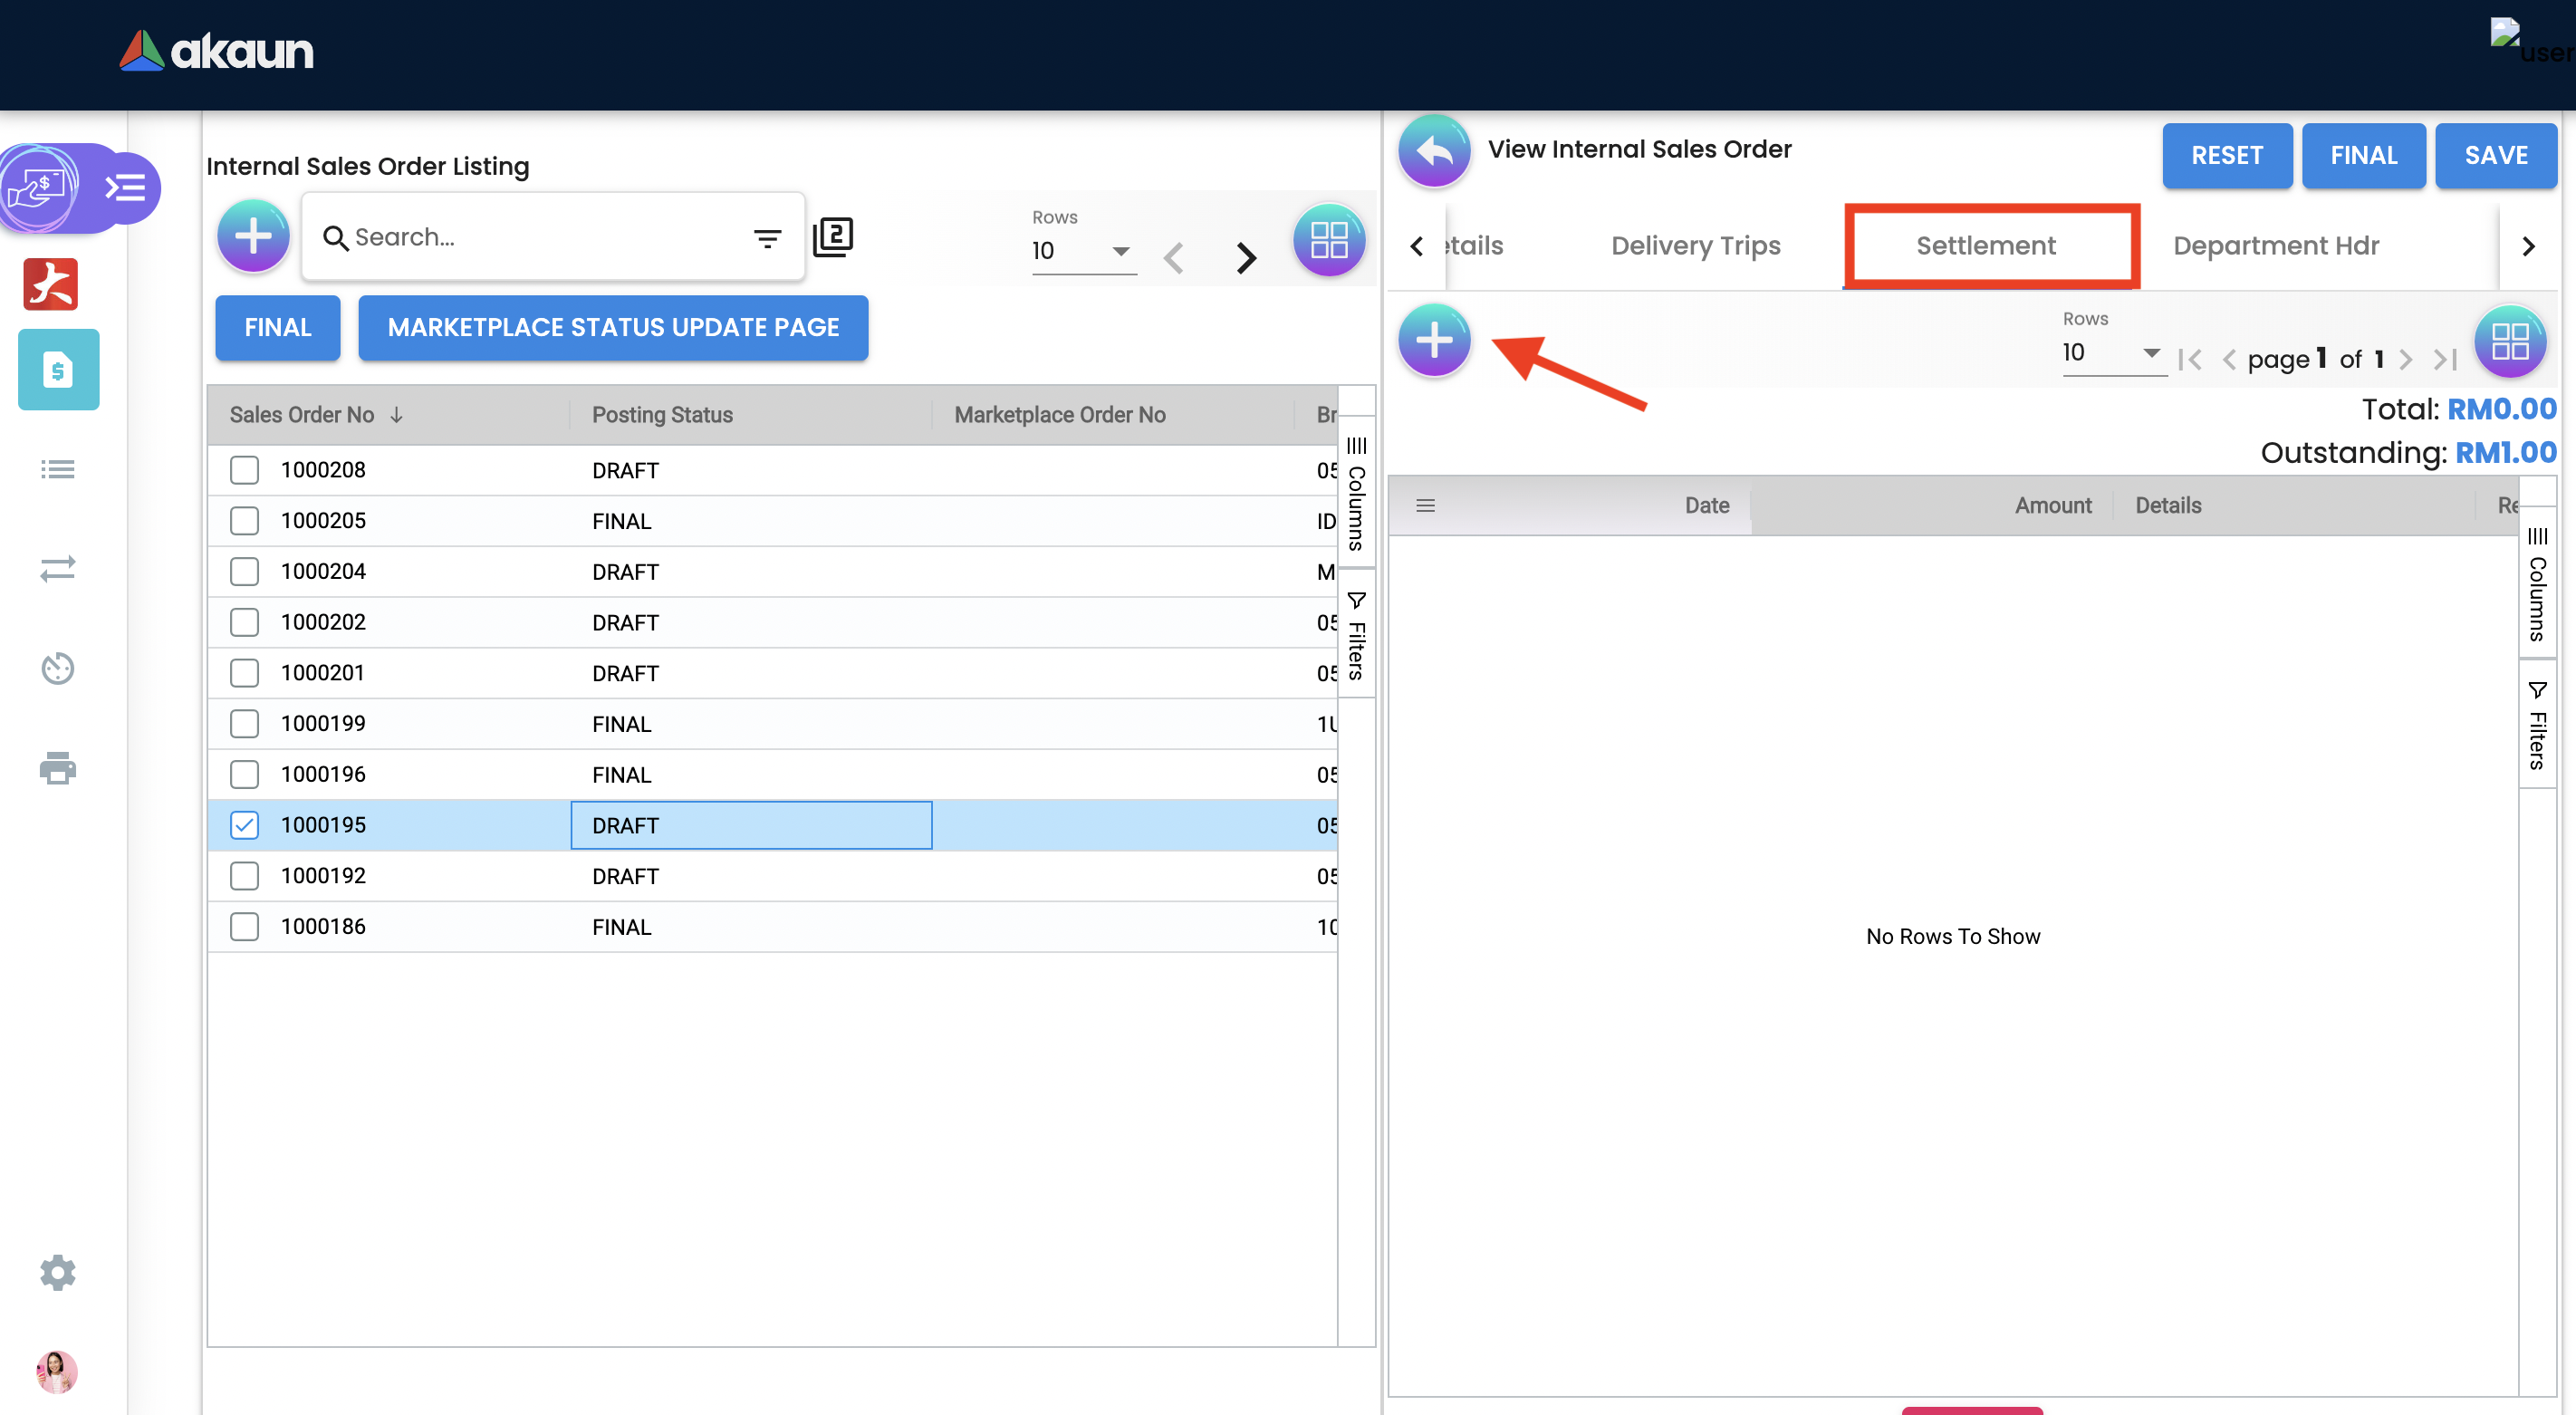
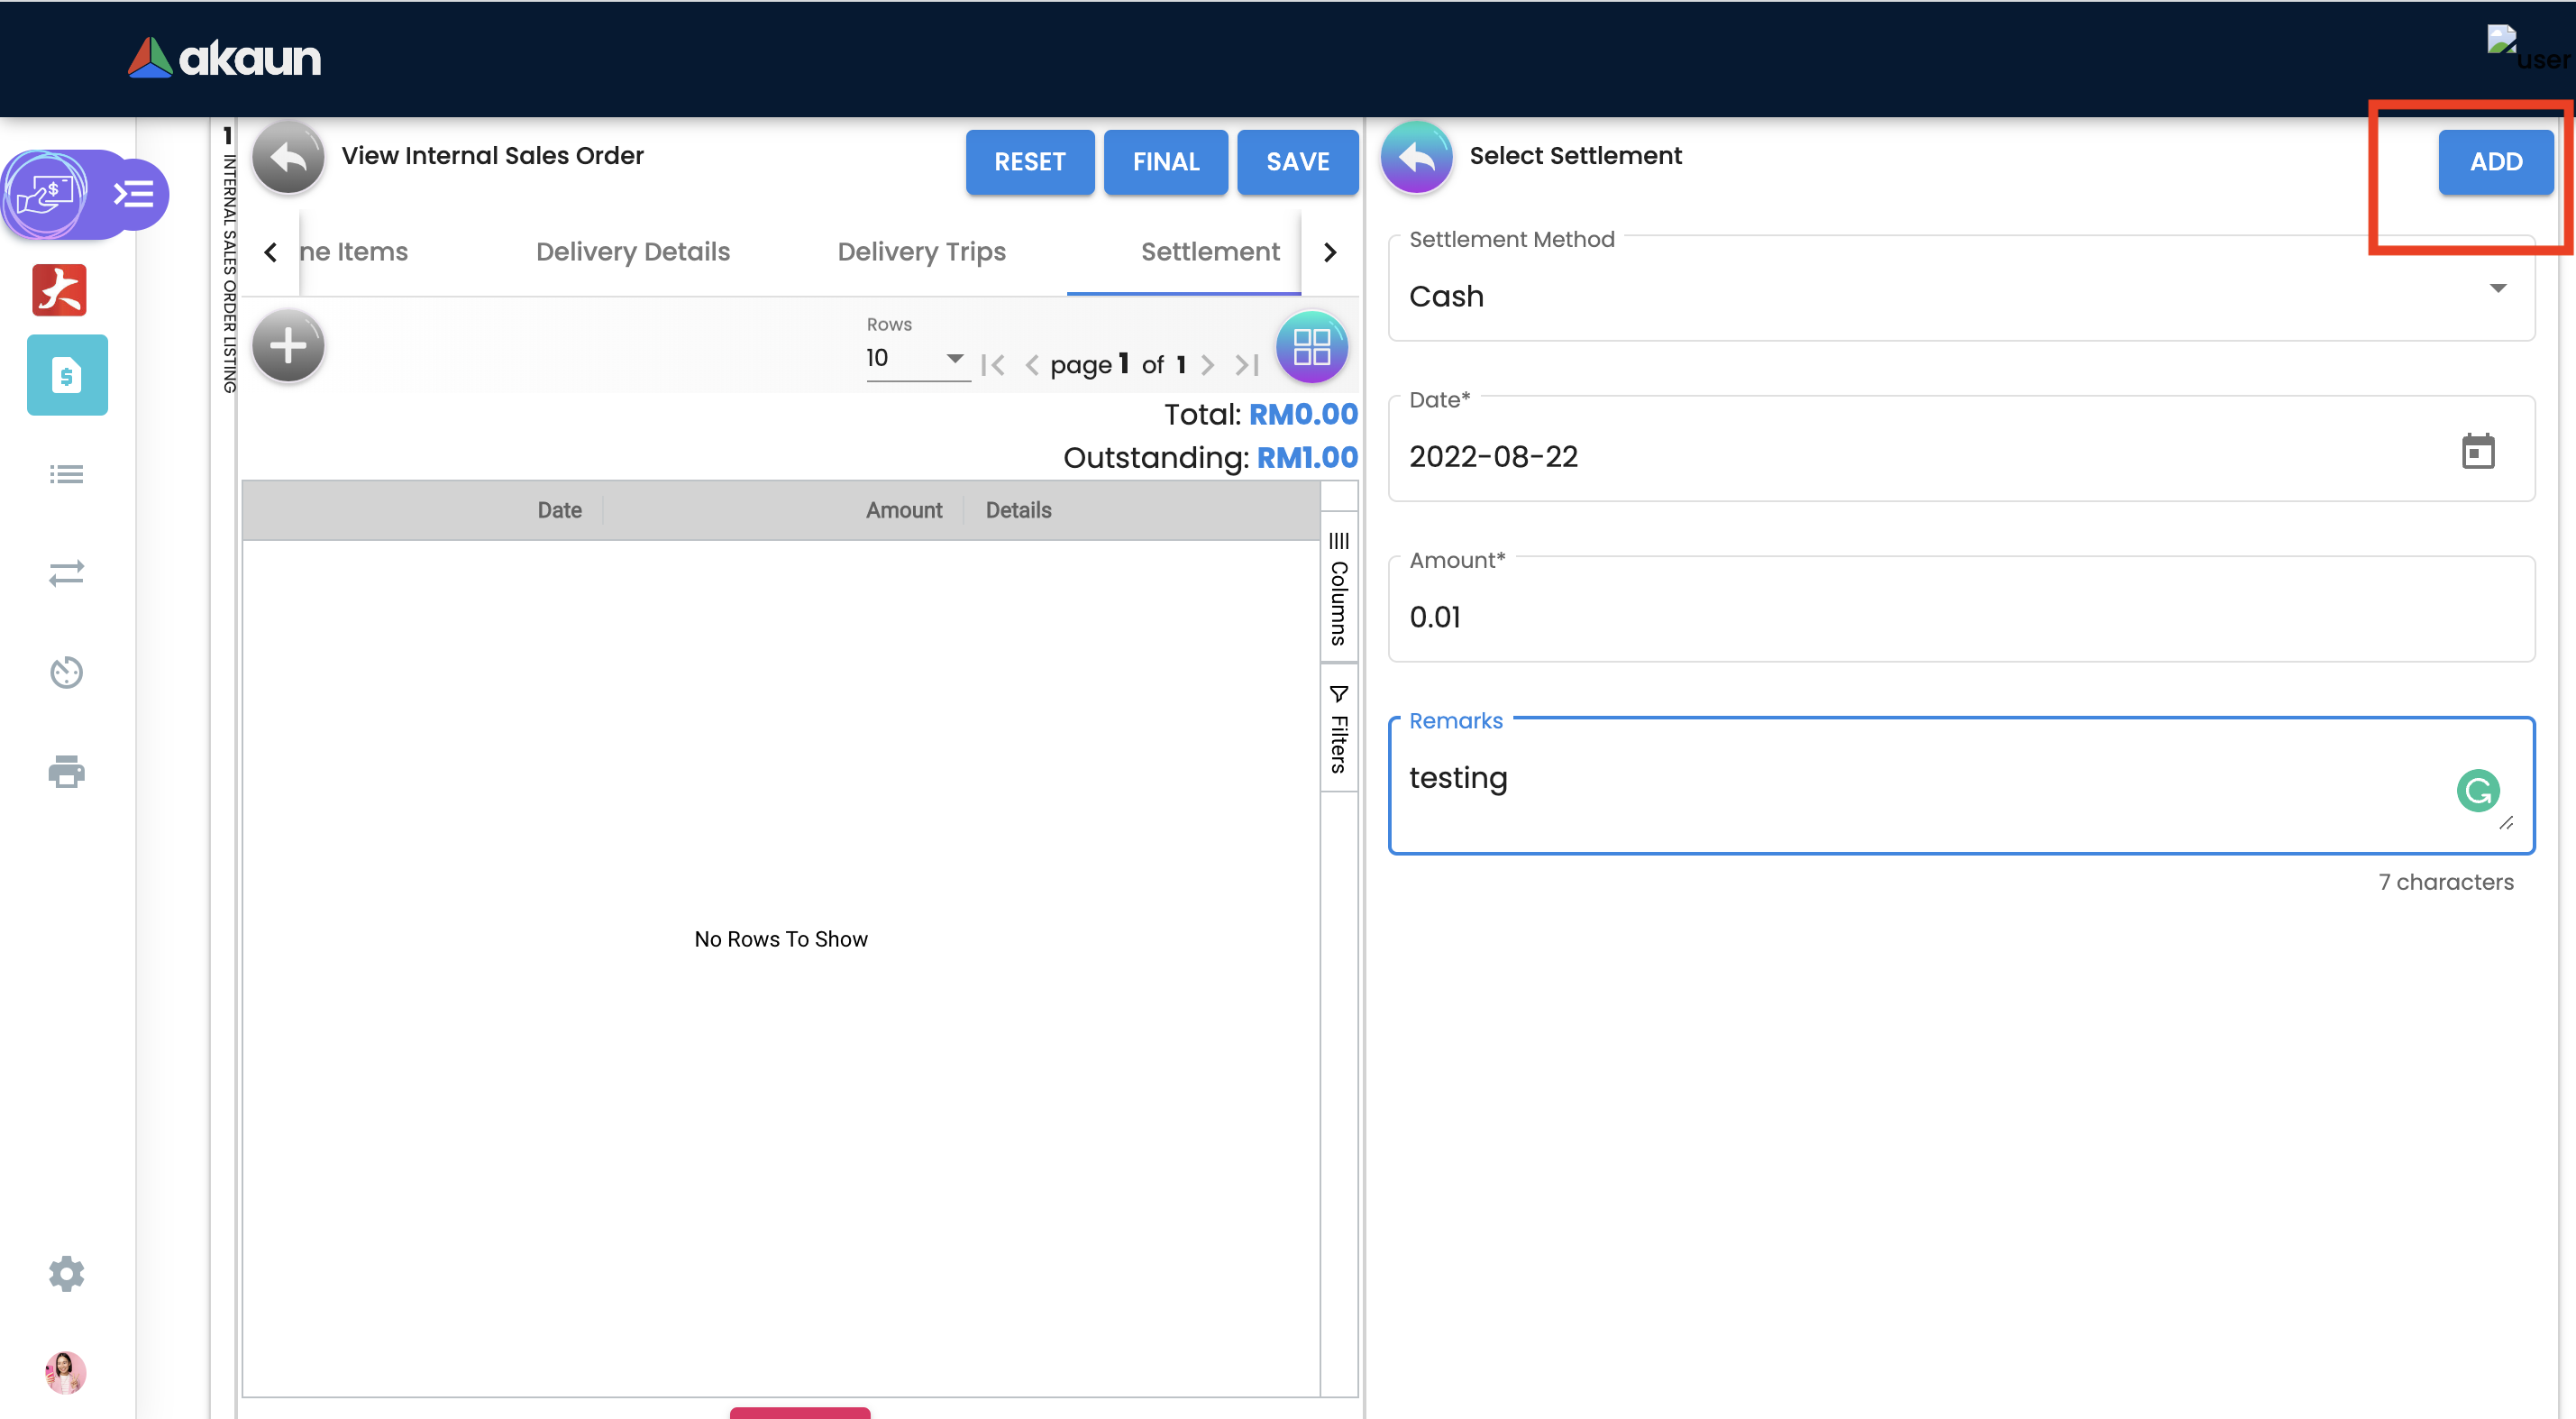
2.3.6 Sales Order - Settlement tab
Transaction in which the sales order is fully or partially settled.
Click on the '+' button to Add a New Settlement.
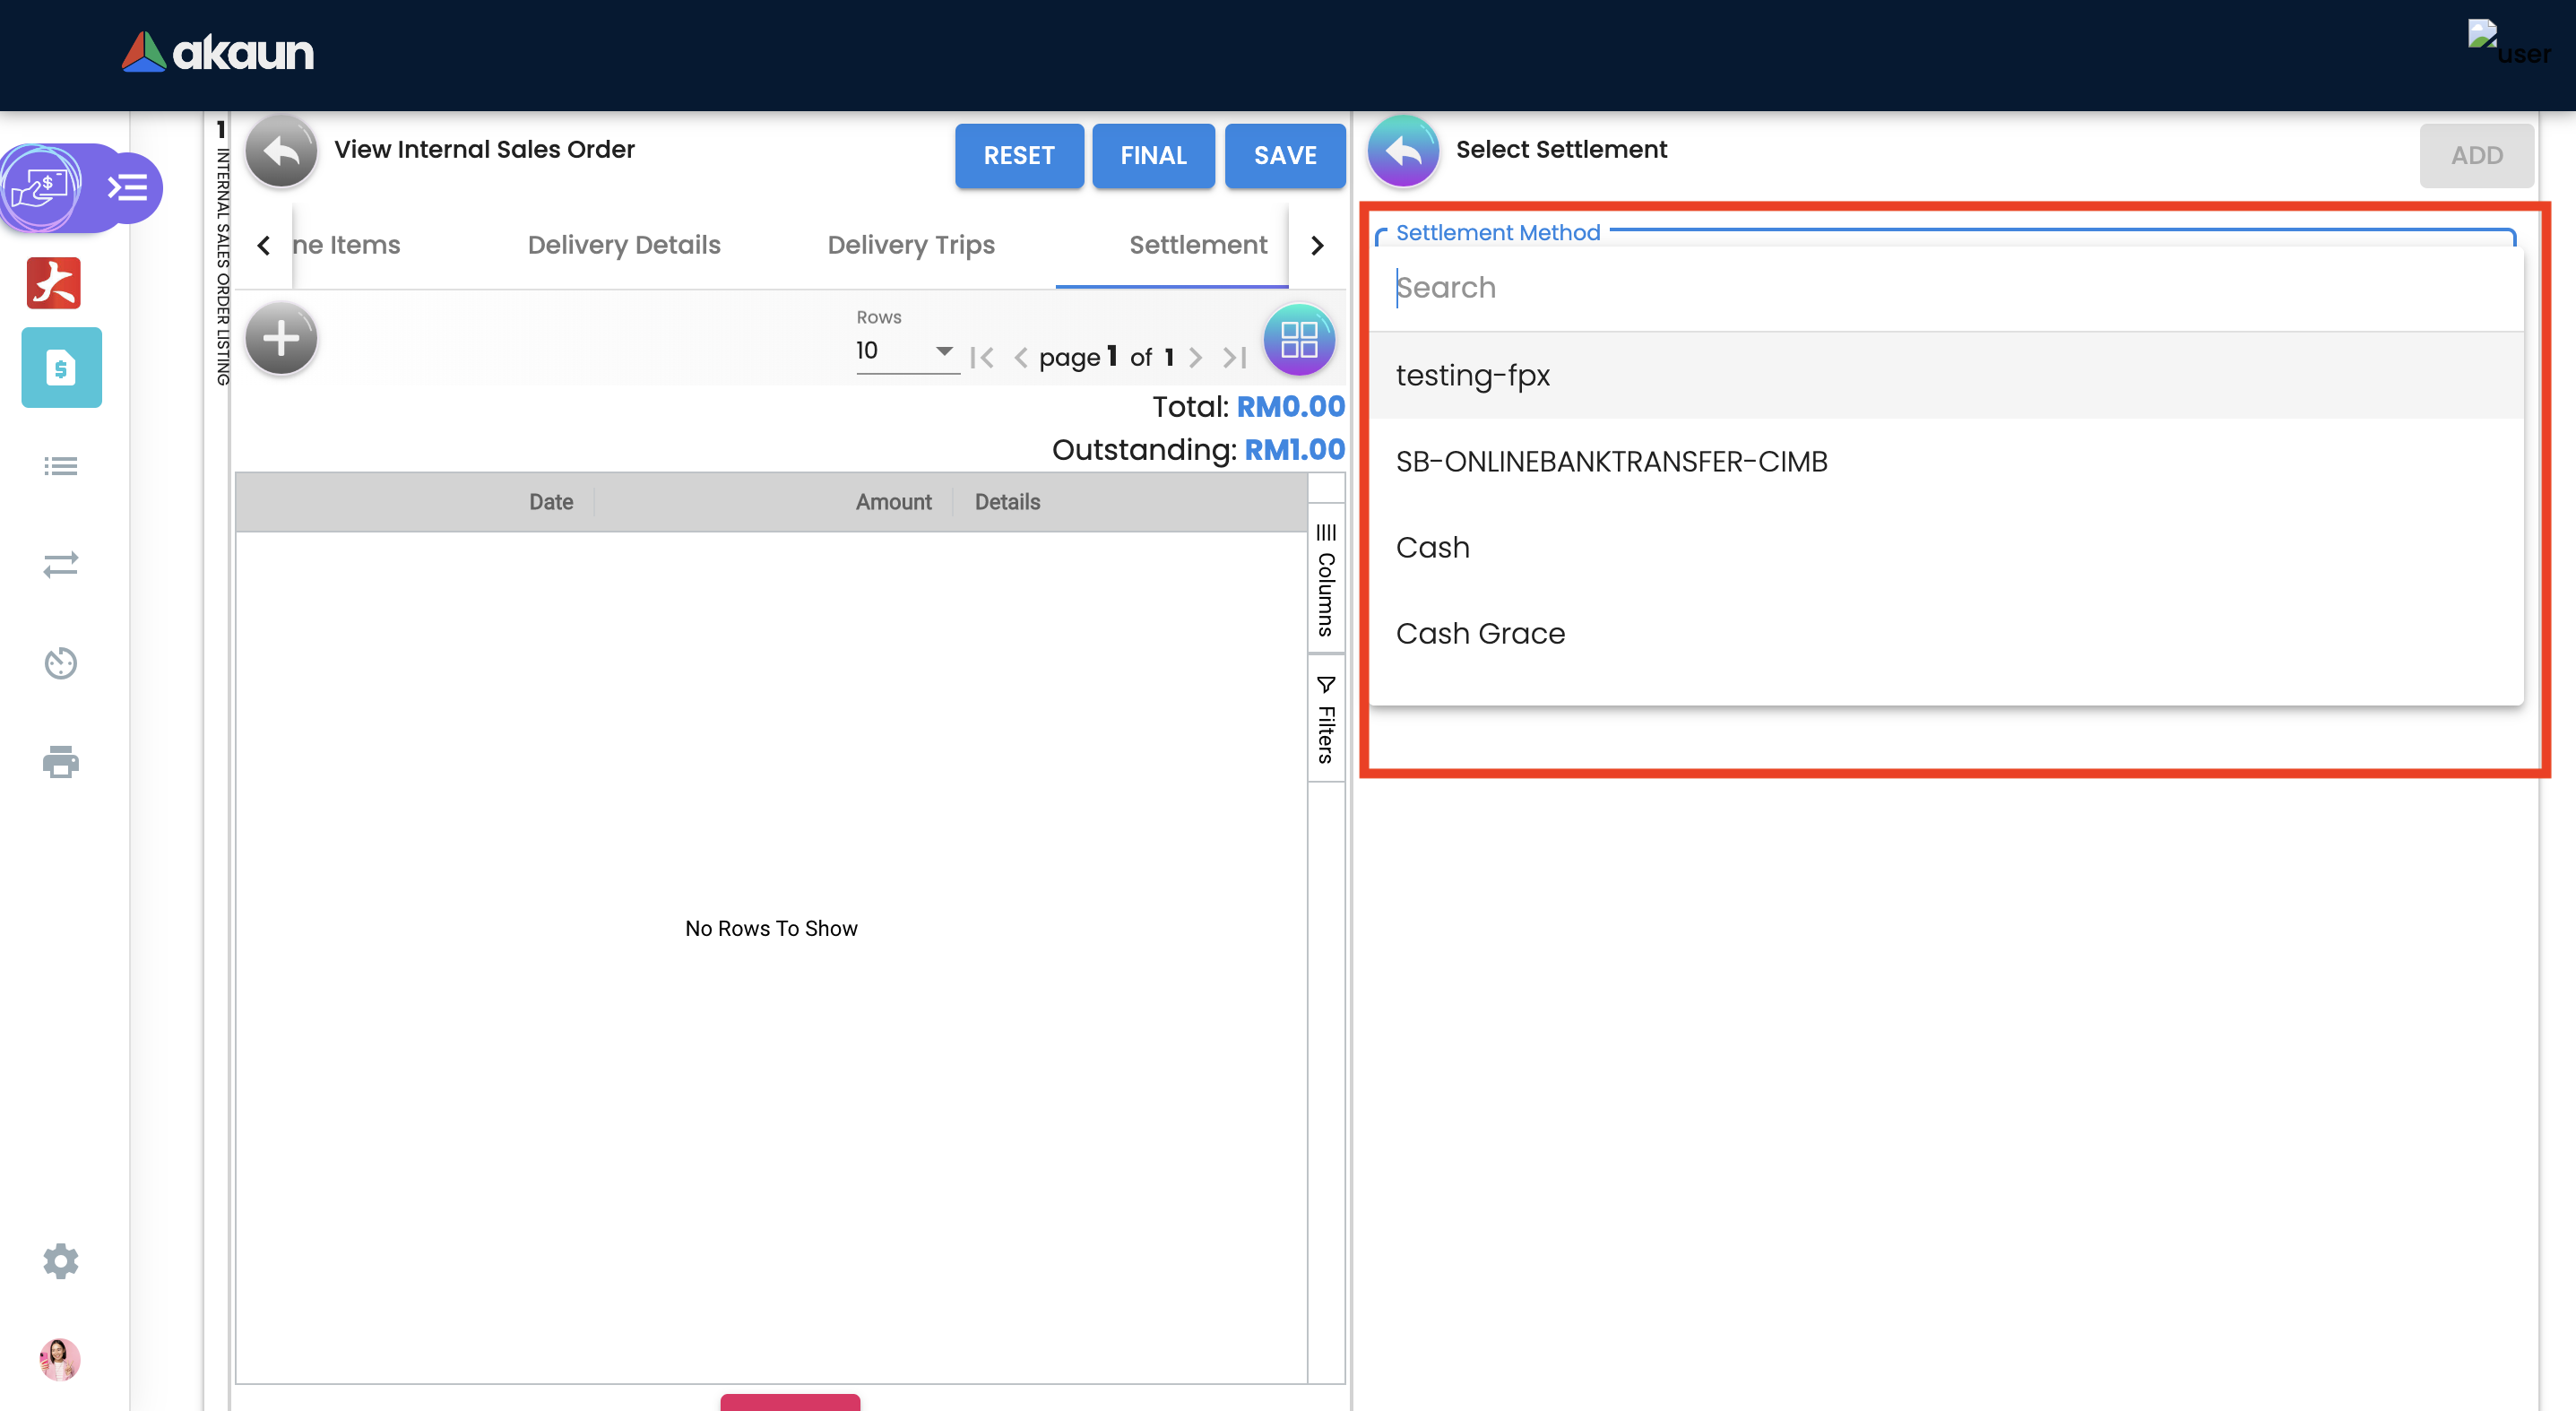
Select the Settlement method.
Based on the settlement type, the user needs to key in the required fields. For settlement type 'Cash'.
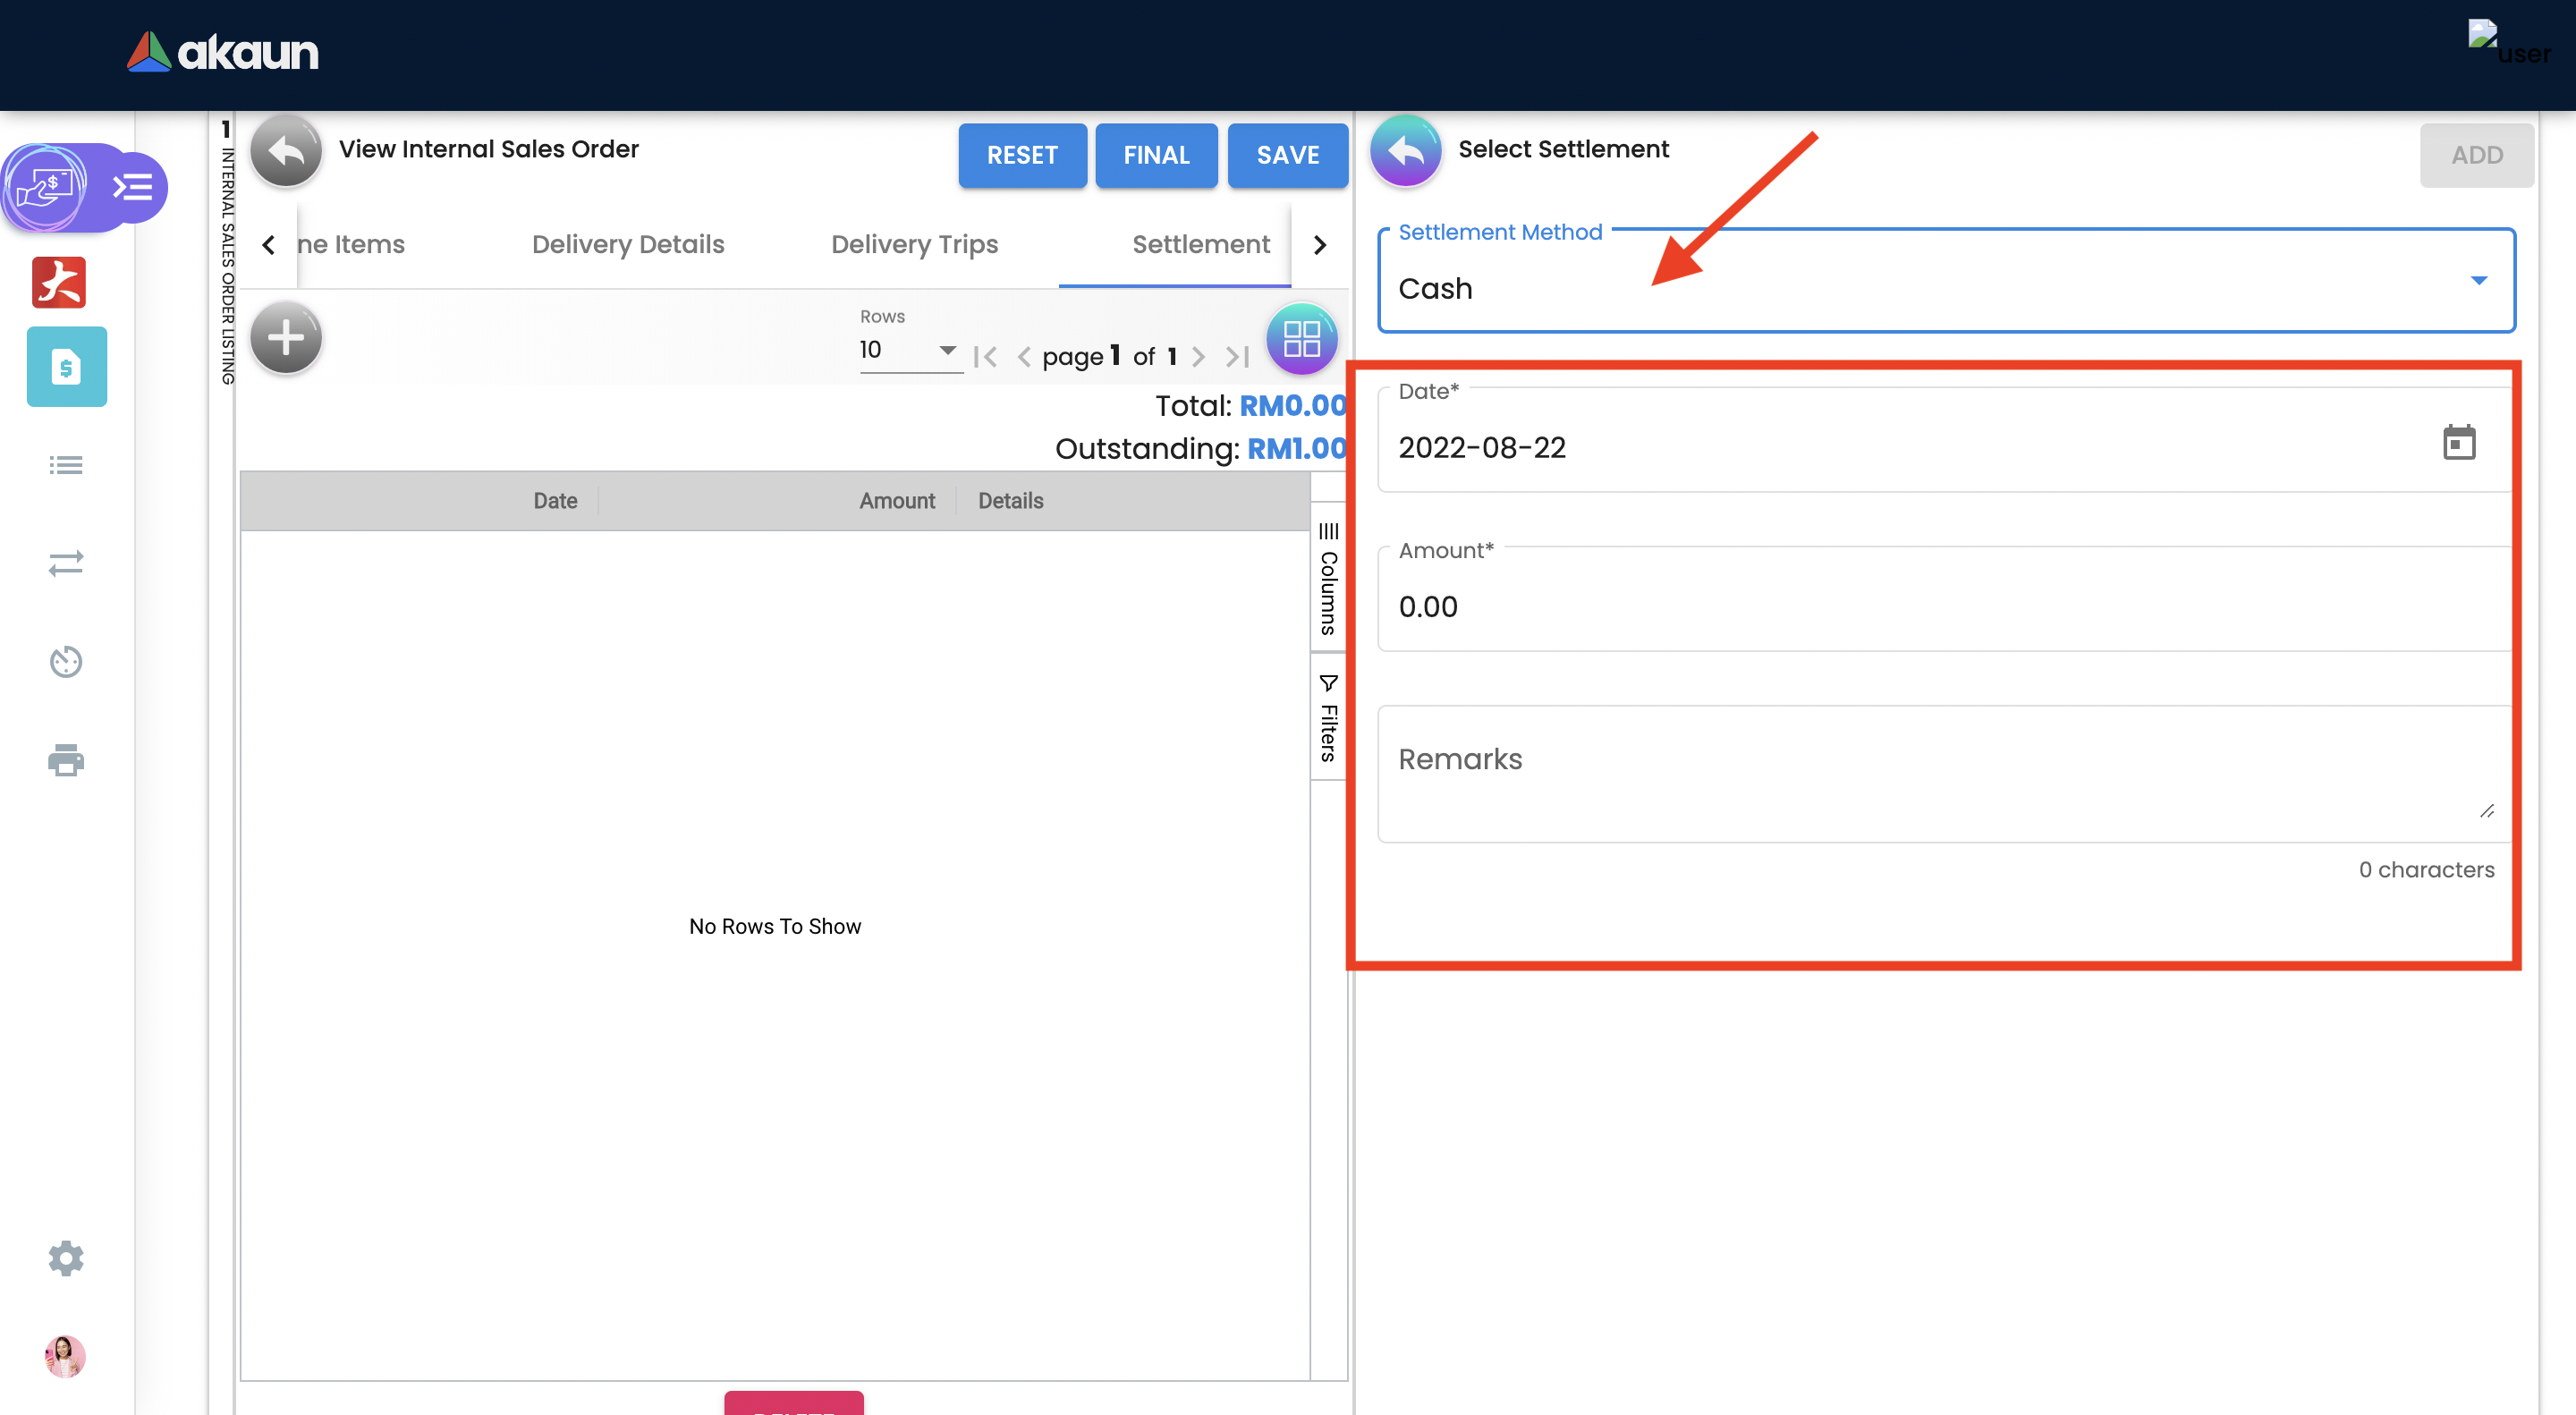
Click the 'Add' button to record the settlement against the sales order.
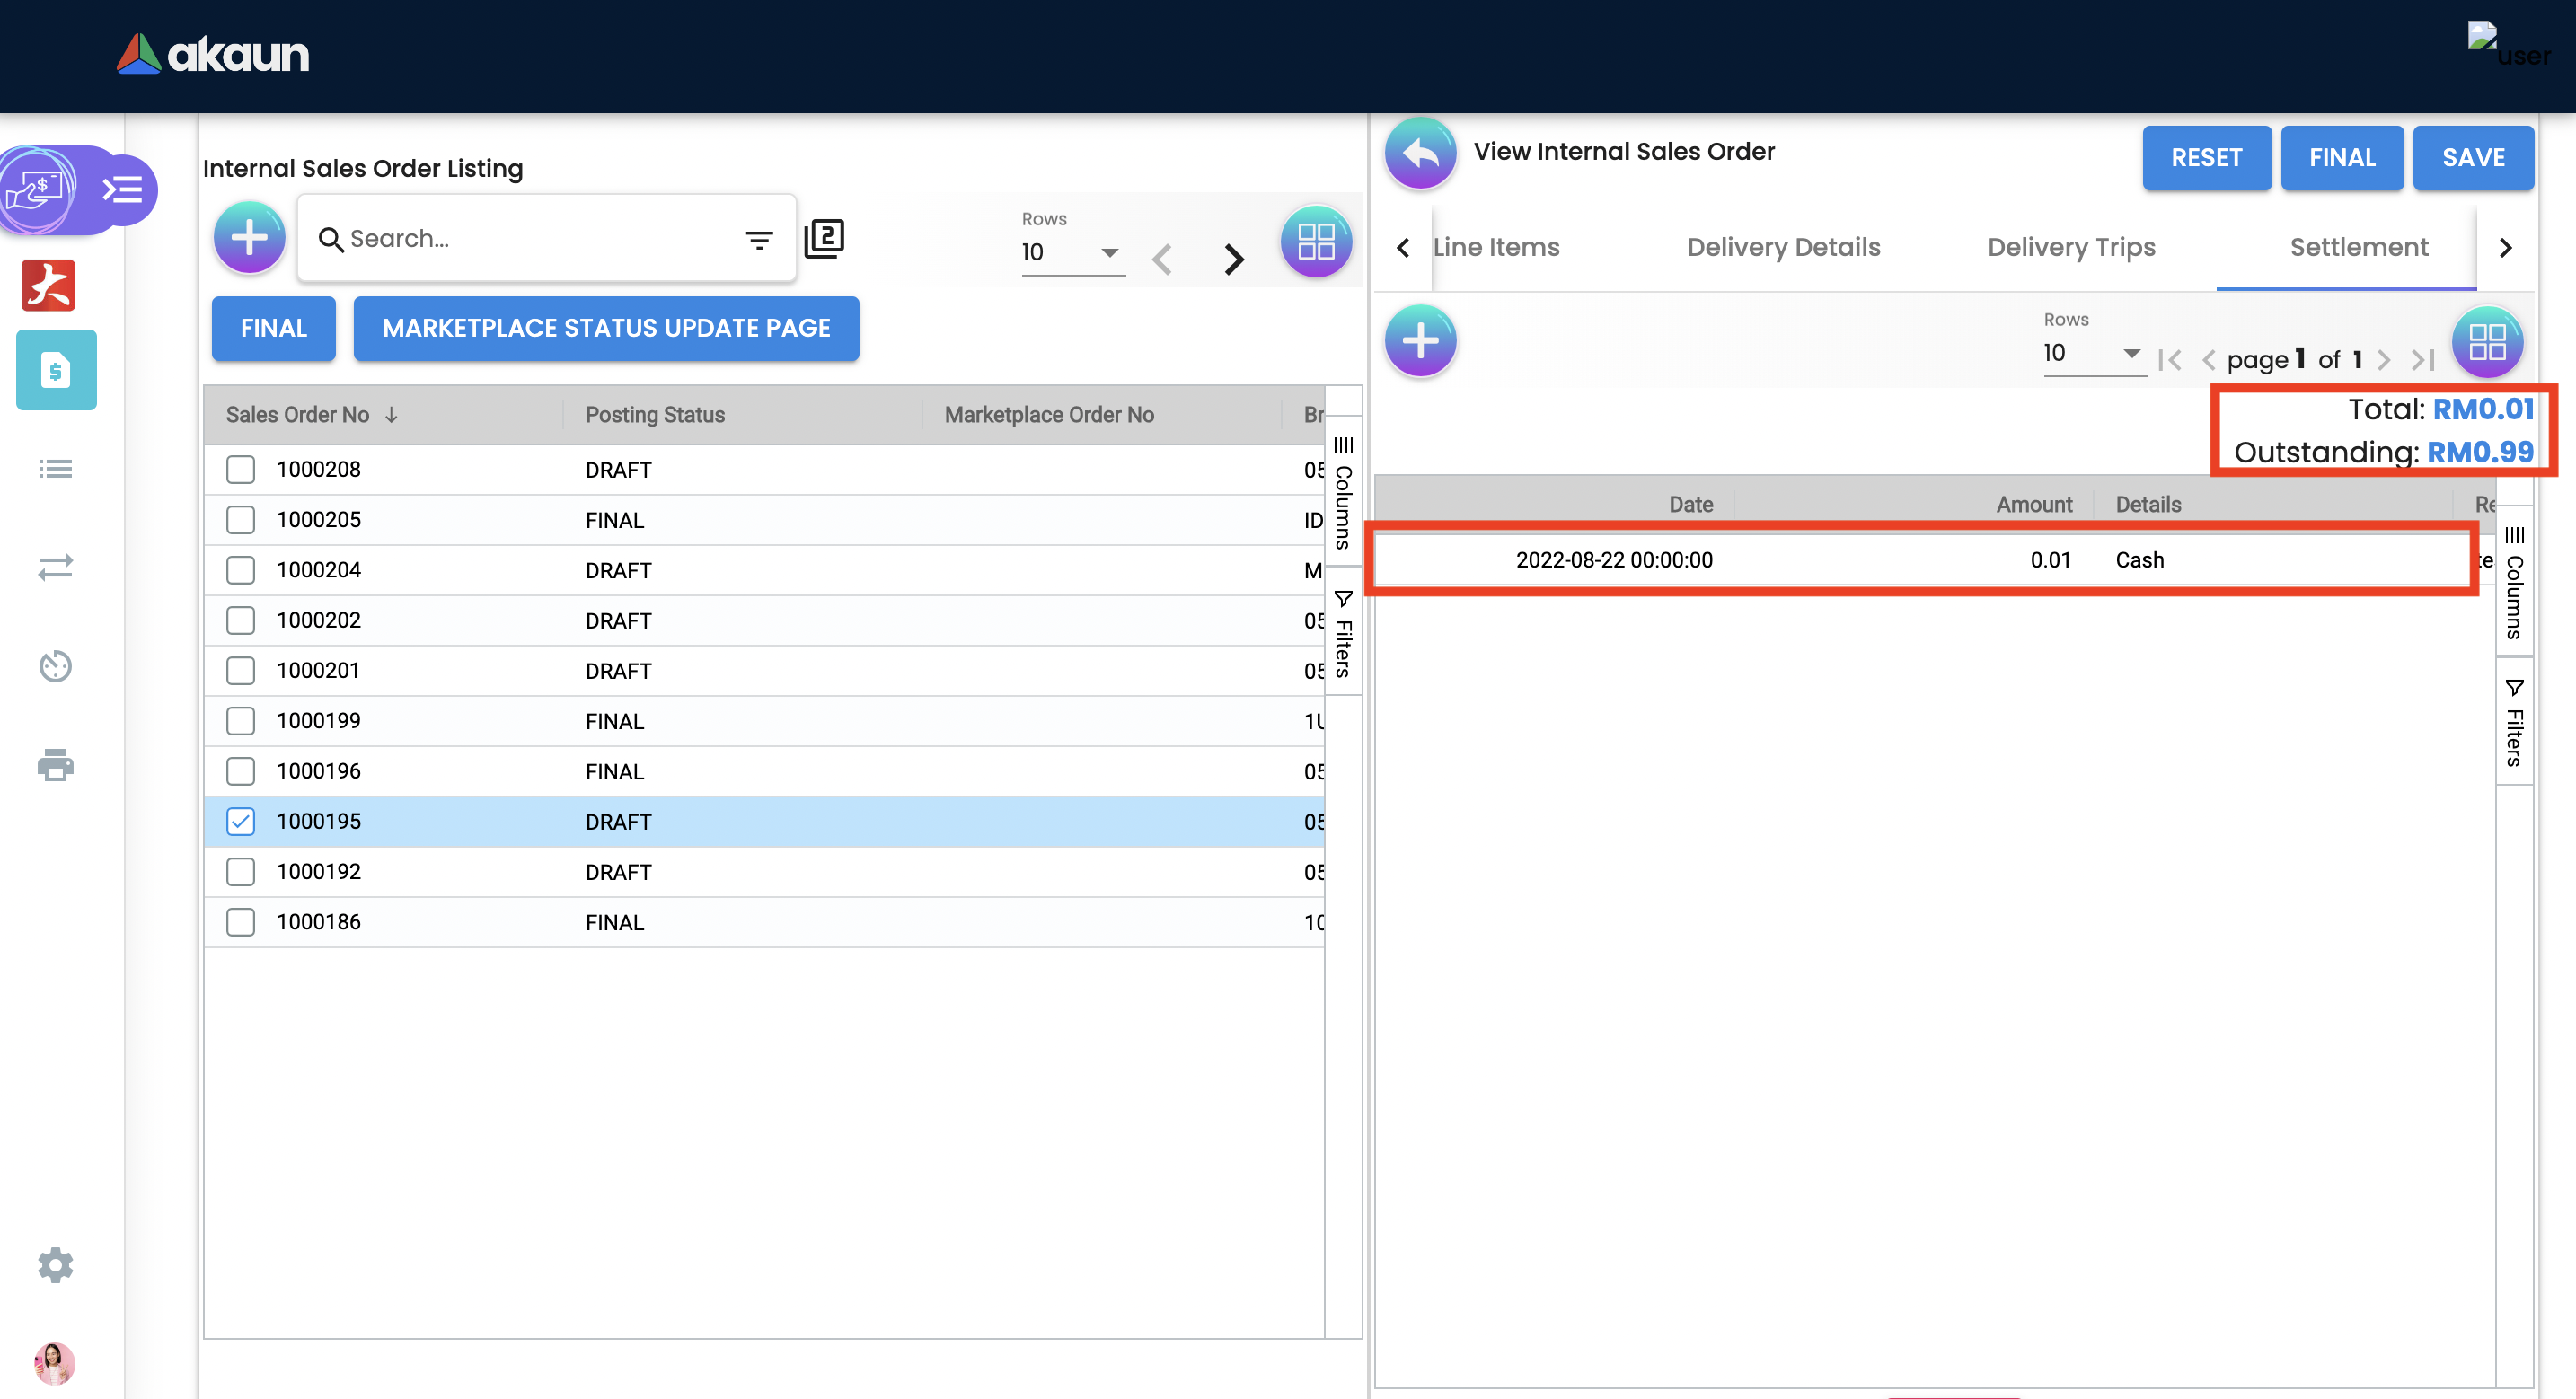
Once added, a new row will be created under the Settlement tab and the Total and Outstanding amounts will be updated accordingly. User may click on the Save button to record the changes.
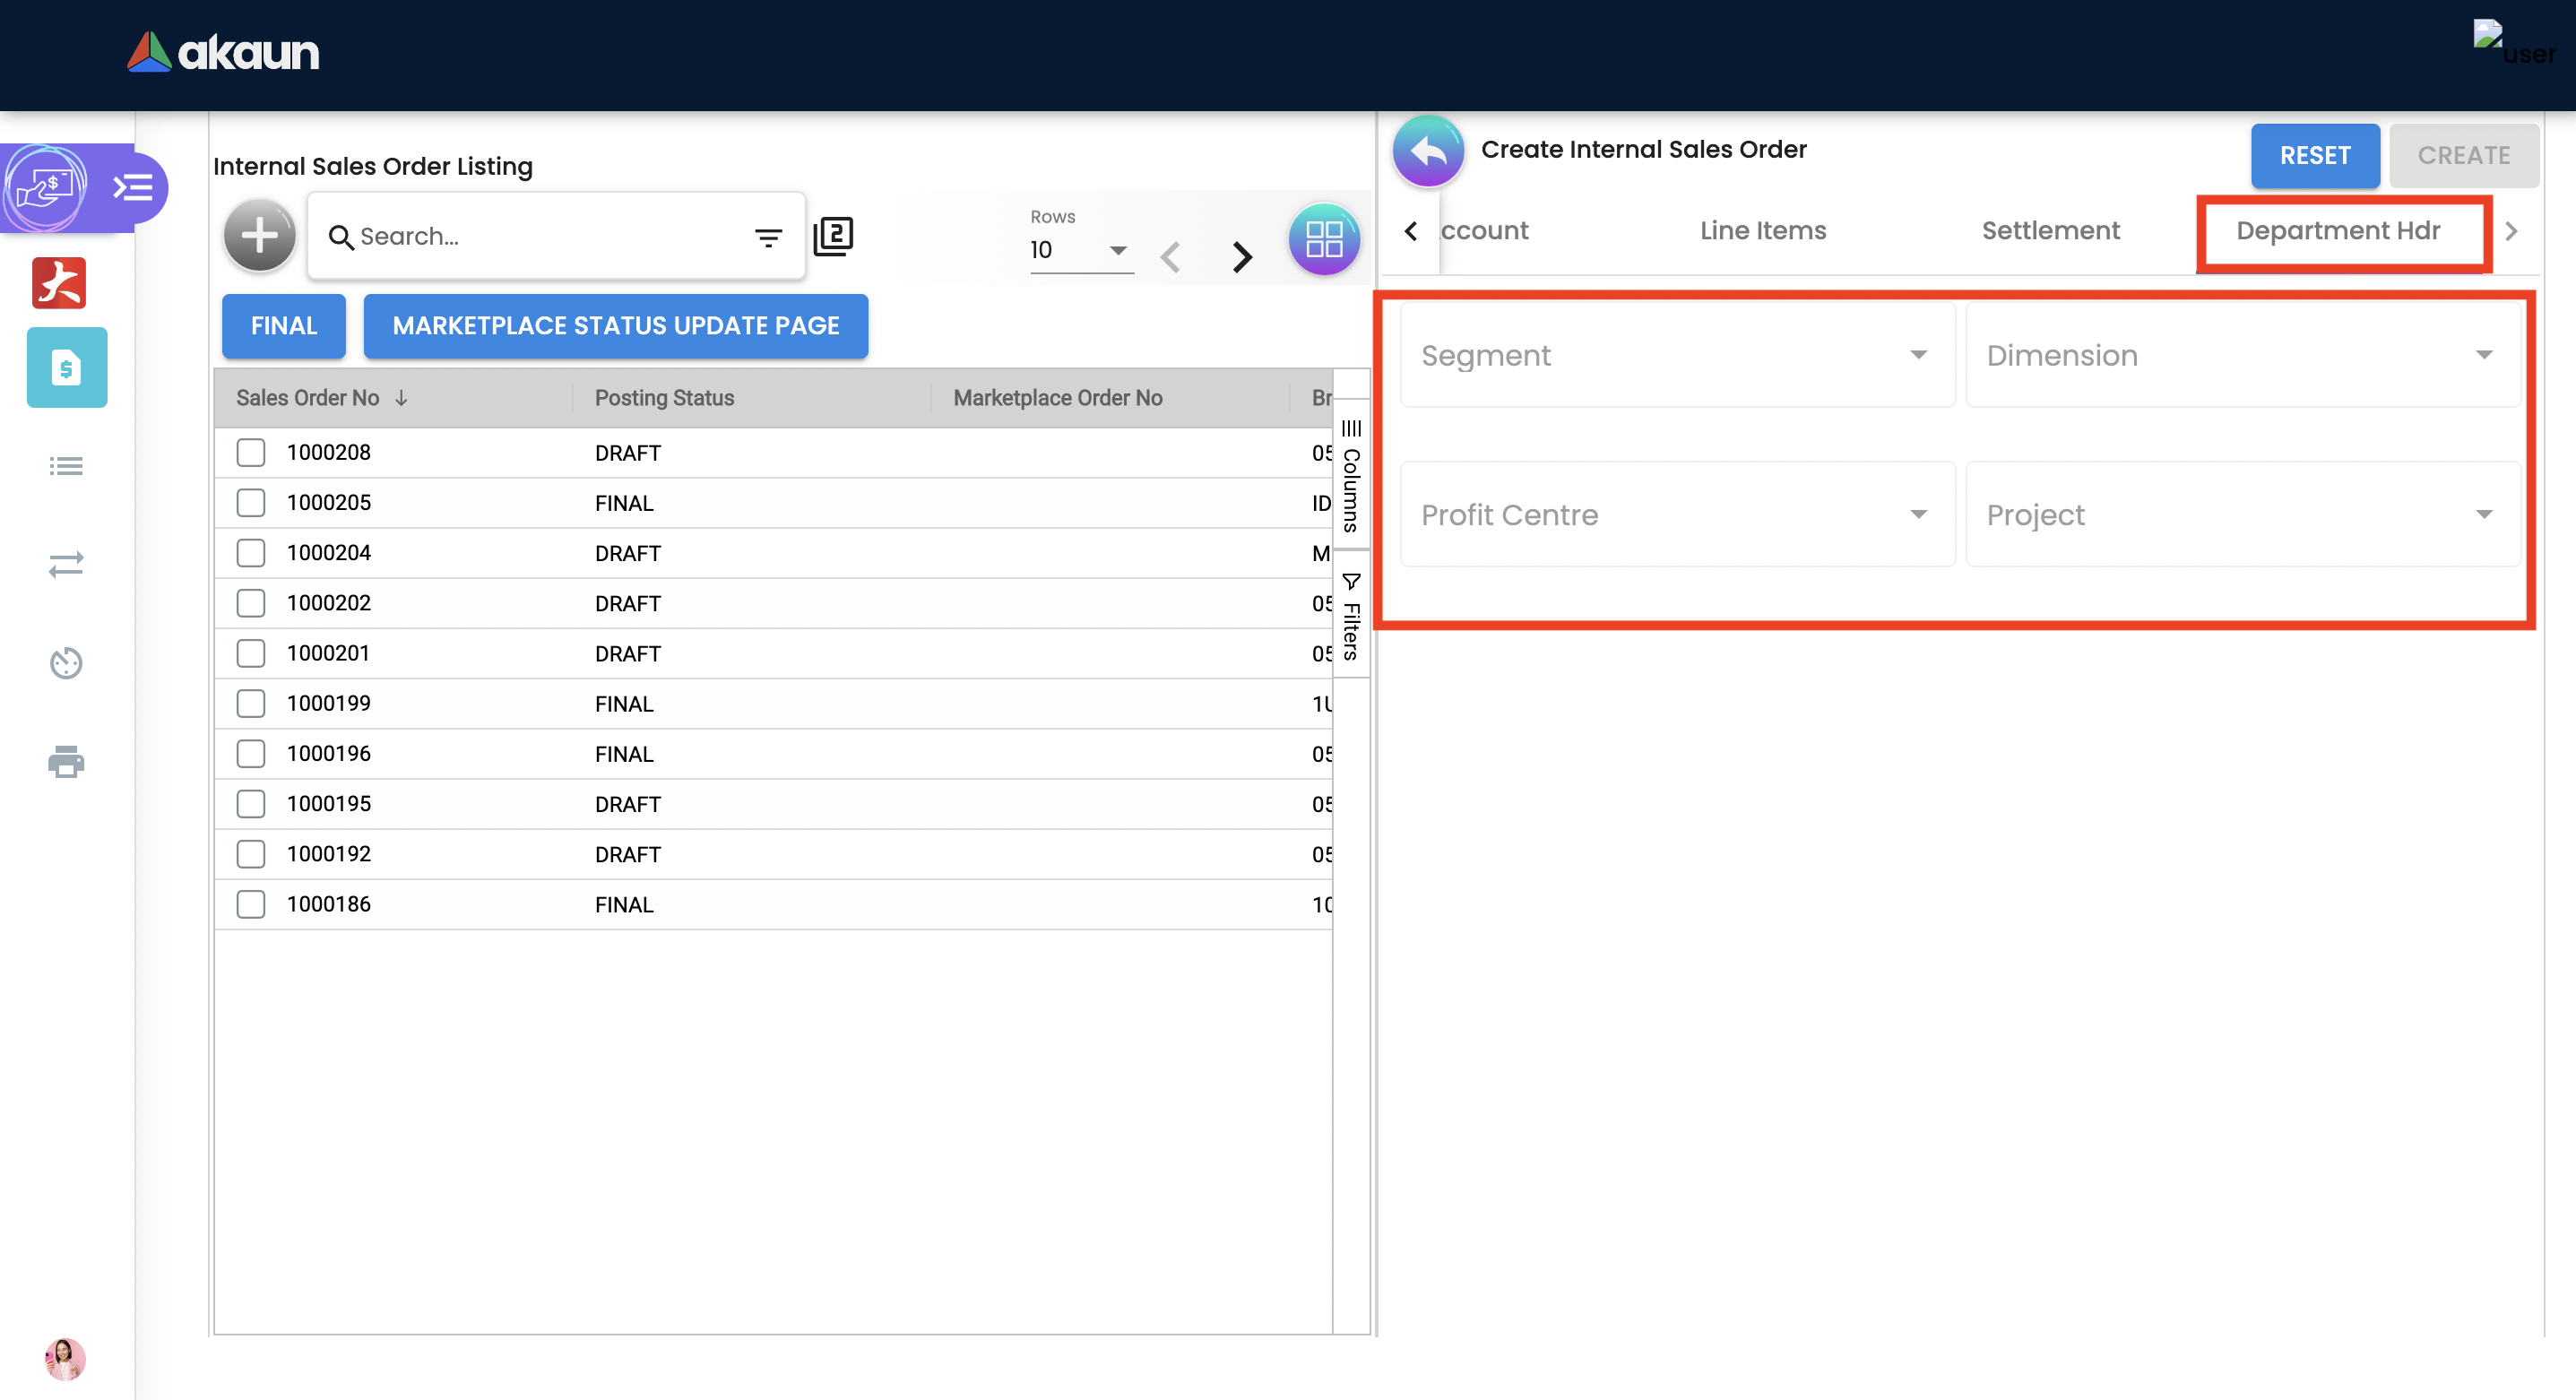
2.3.7 Sales Order - Department Hdr Tab
Linking the sales order to the following departments is optional and helps in reports:
Segment: Segmentation at the item or hdr level.
Dimension: Selecting dimension at the item or hdr level.
Profit center: Selecting profit center at the item or hdr level.
Project: Selecting project at the item or hdr level.
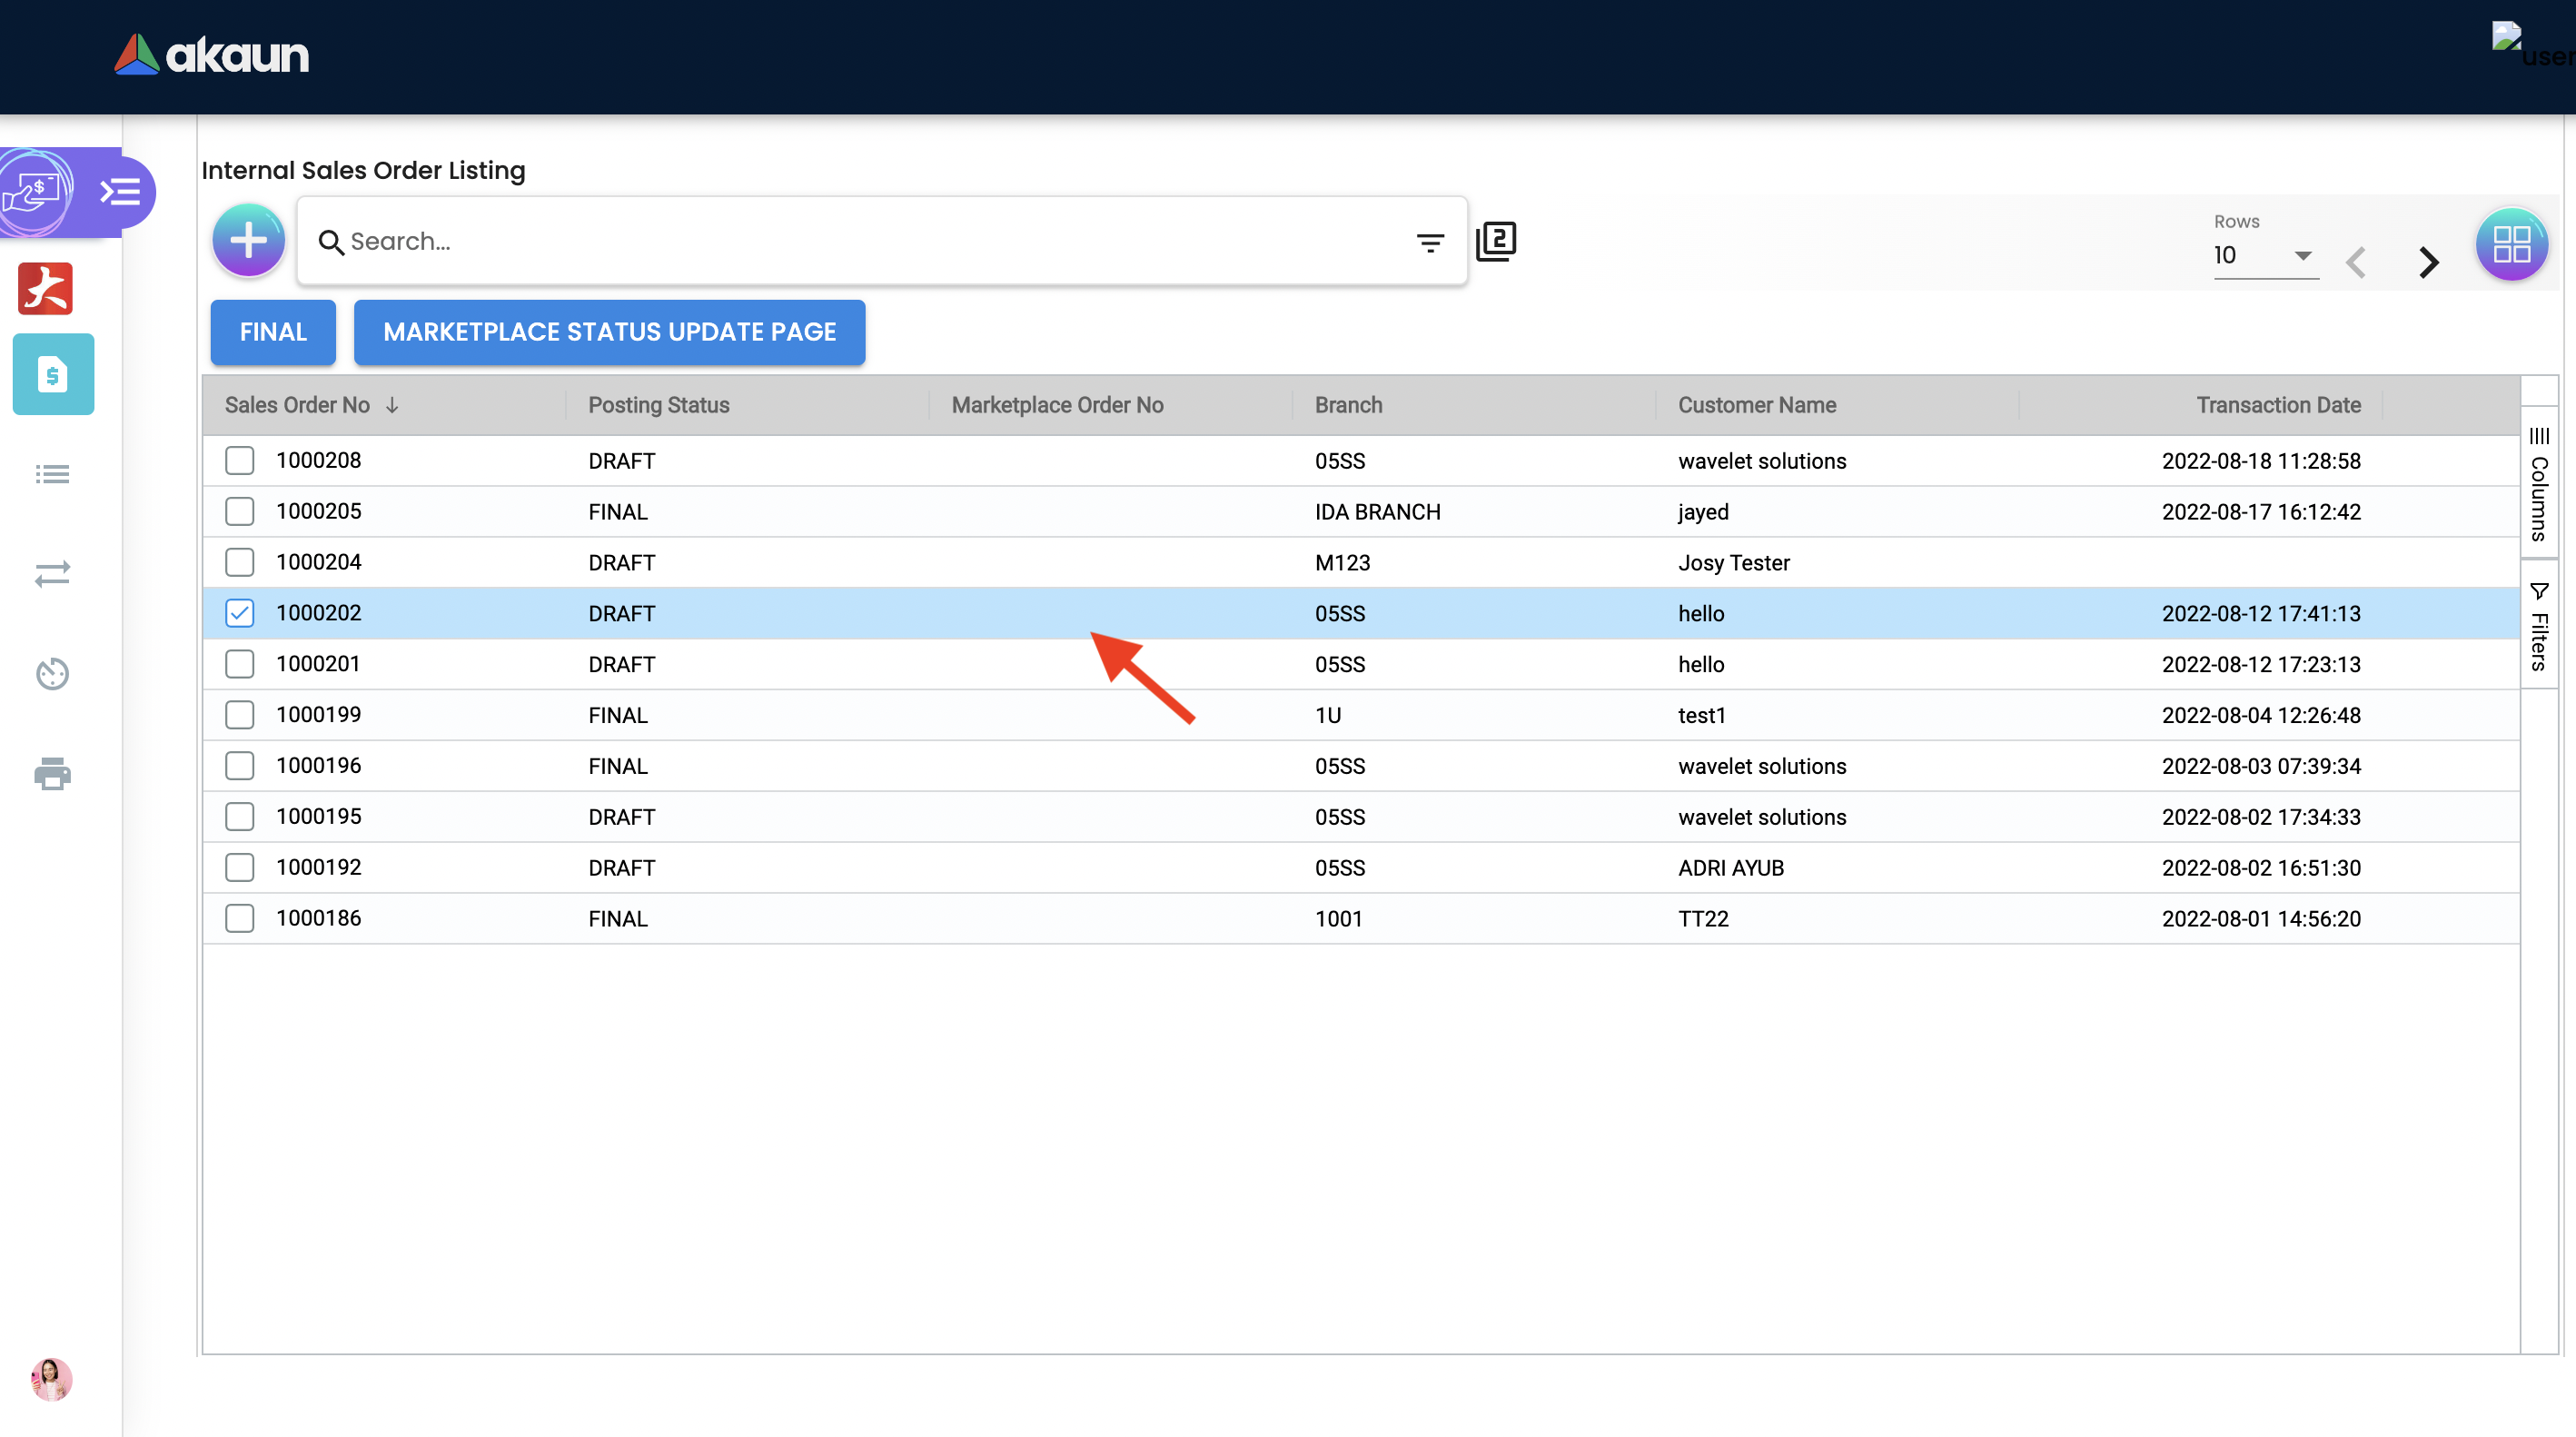
2.4 Edit Existing Sales Order
Go to the Sales Order menu, and click on the exiting sales order to Edit an existing Sales Order.
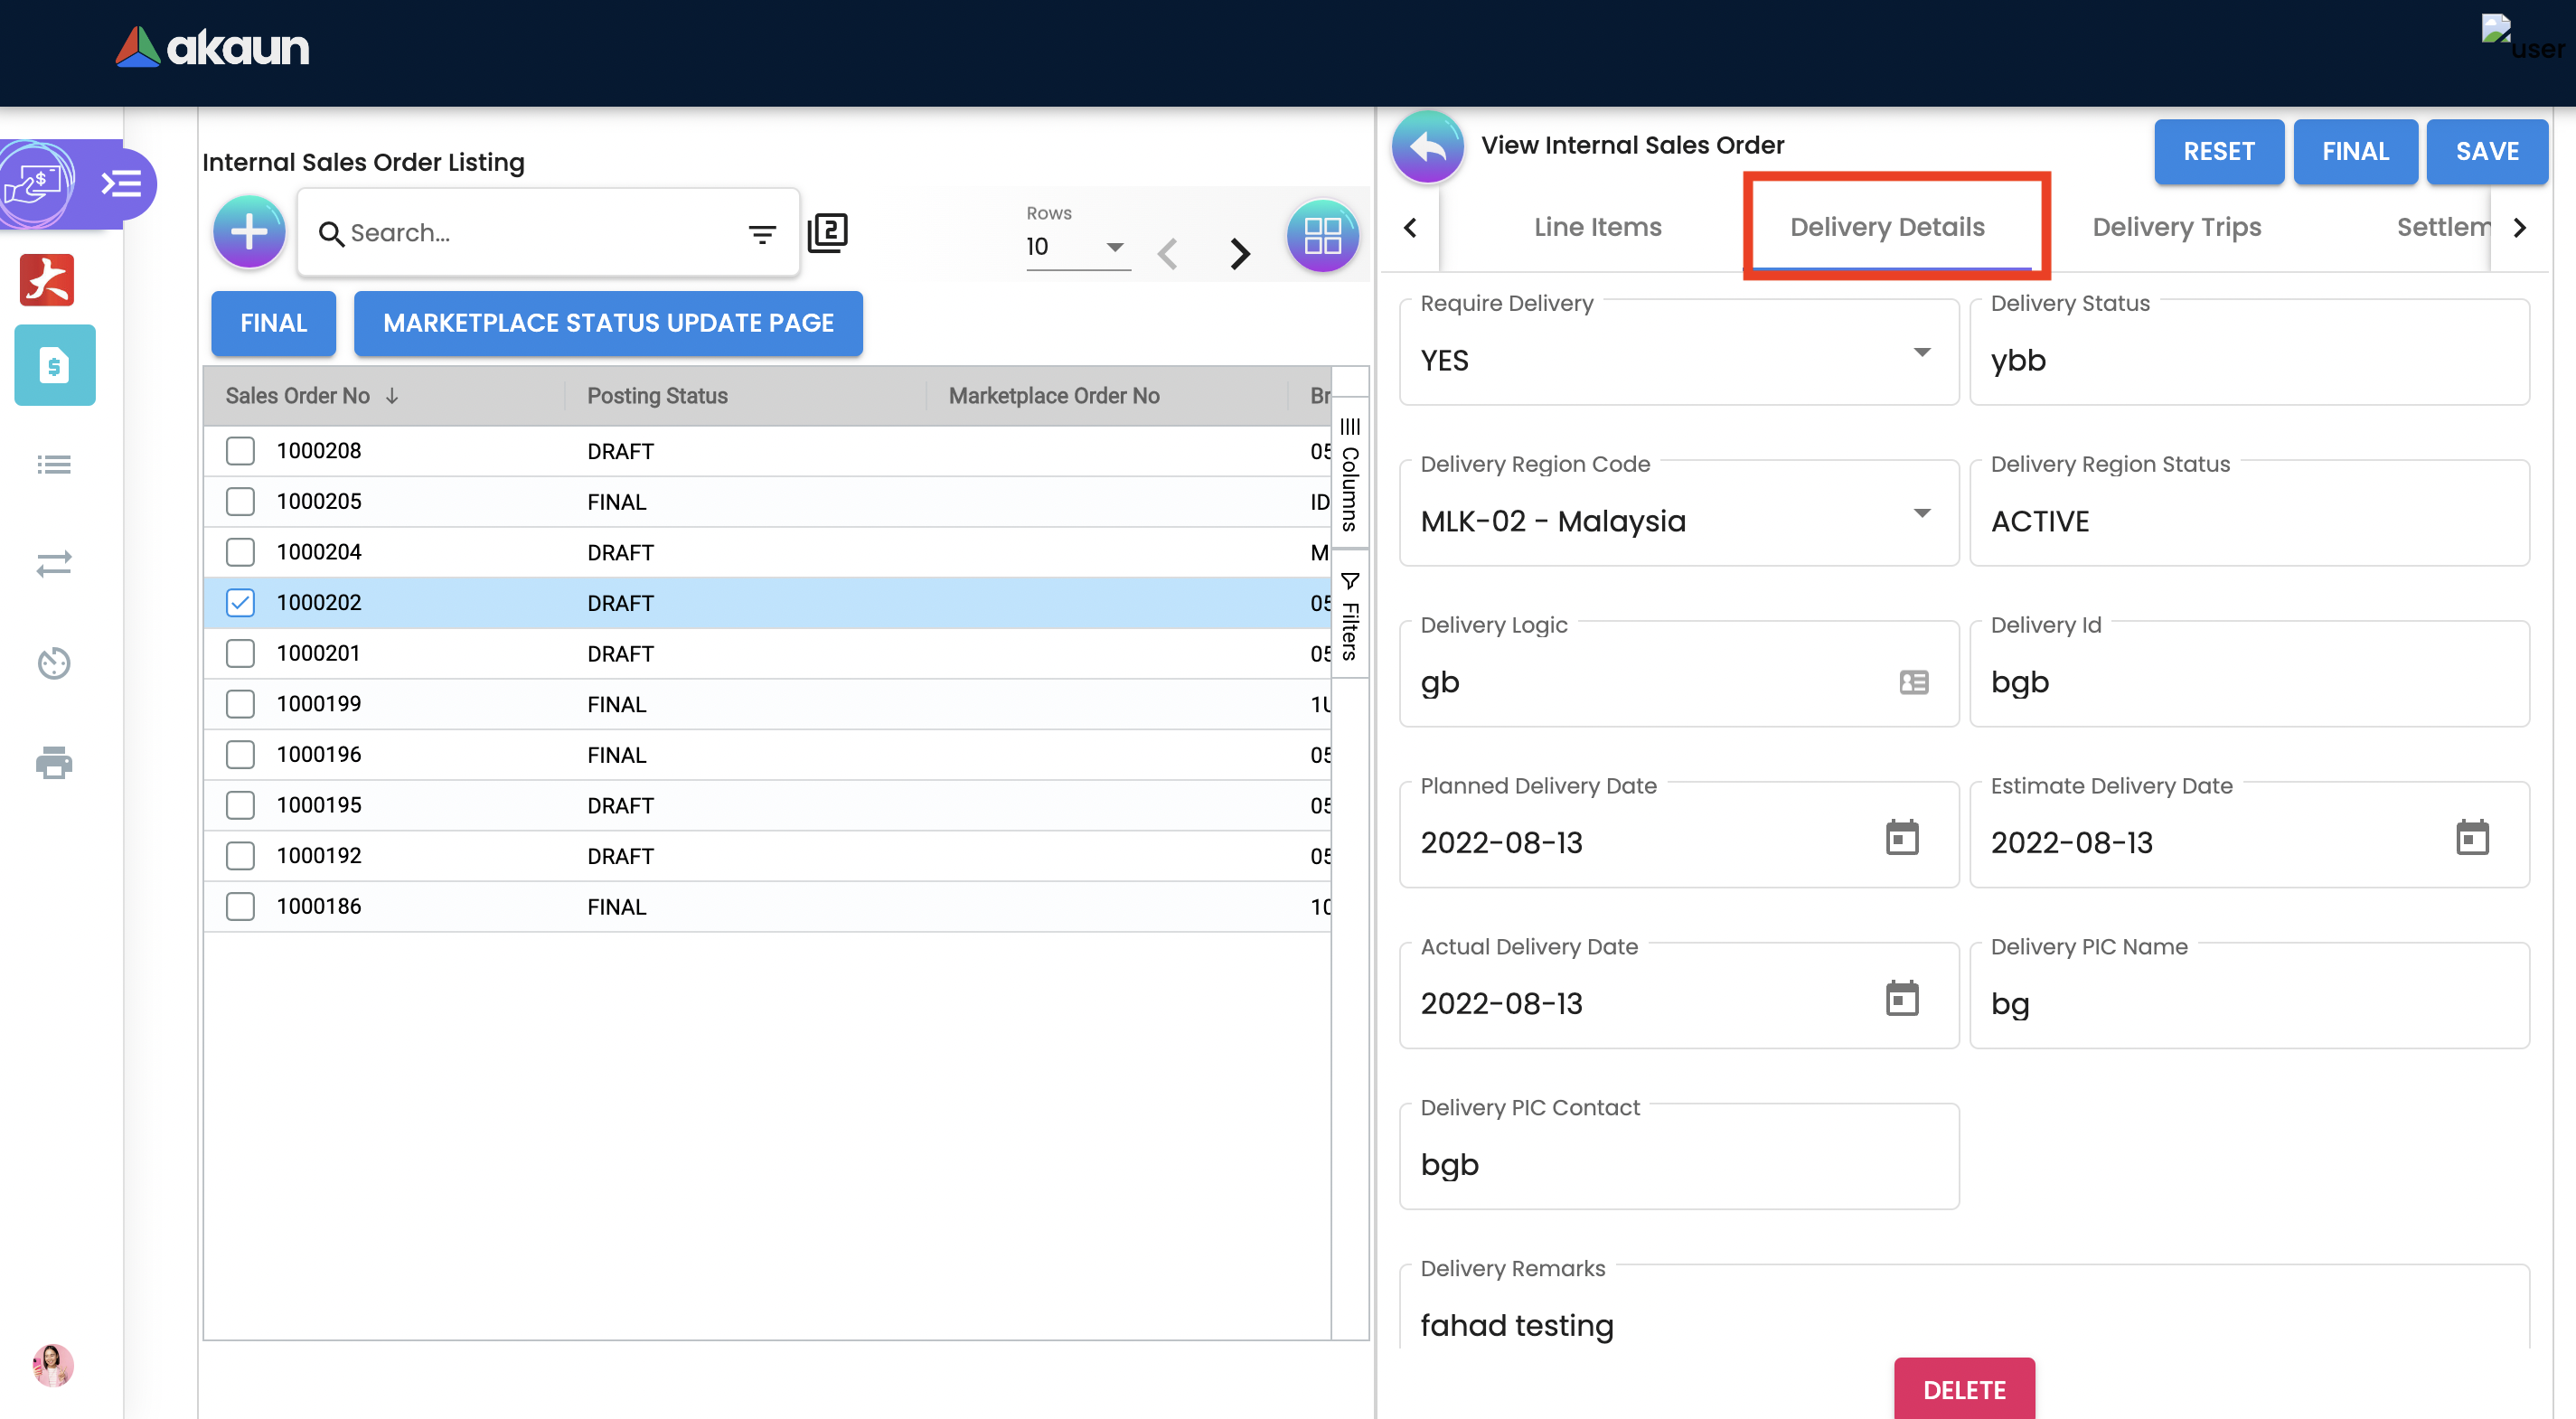
2.4.1 Sales Order - Delivery Details tab
The requested delivery information for the Products specified in the document, including multiple delivery dates (if applicable), location, and responsible person details.
-
Require delivery: Choose from the Dropdown List.
-
Delivery Status: Delivery progress.
-
Delivery Region Code: In order to apply different shipping rules and costs to different geographic locations.
-
Delivery Logic: The mechanism of physical settlement, penalties for delivery default, and timelines for submitting delivery intents are all defined by delivery logic.
-
Delivery ID: A unique identifier for delivery.
-
Planned Delivery Date: It’s the date when you are supposed to deliver things based on the order.
-
Estimate Delivery Date: It’s the date when you are expected to delivery things based on the order.
-
Actual Delivery Date: It’s the date when you are actually deiverying things based on the order.
-
Delivery PIC Name: It’s name of the delivery person in charge.
-
Delivery PIC Contact: It’s contact of the delivery person in charge.
-
Delivery Remarks: Additional notes/remarks for delivery.
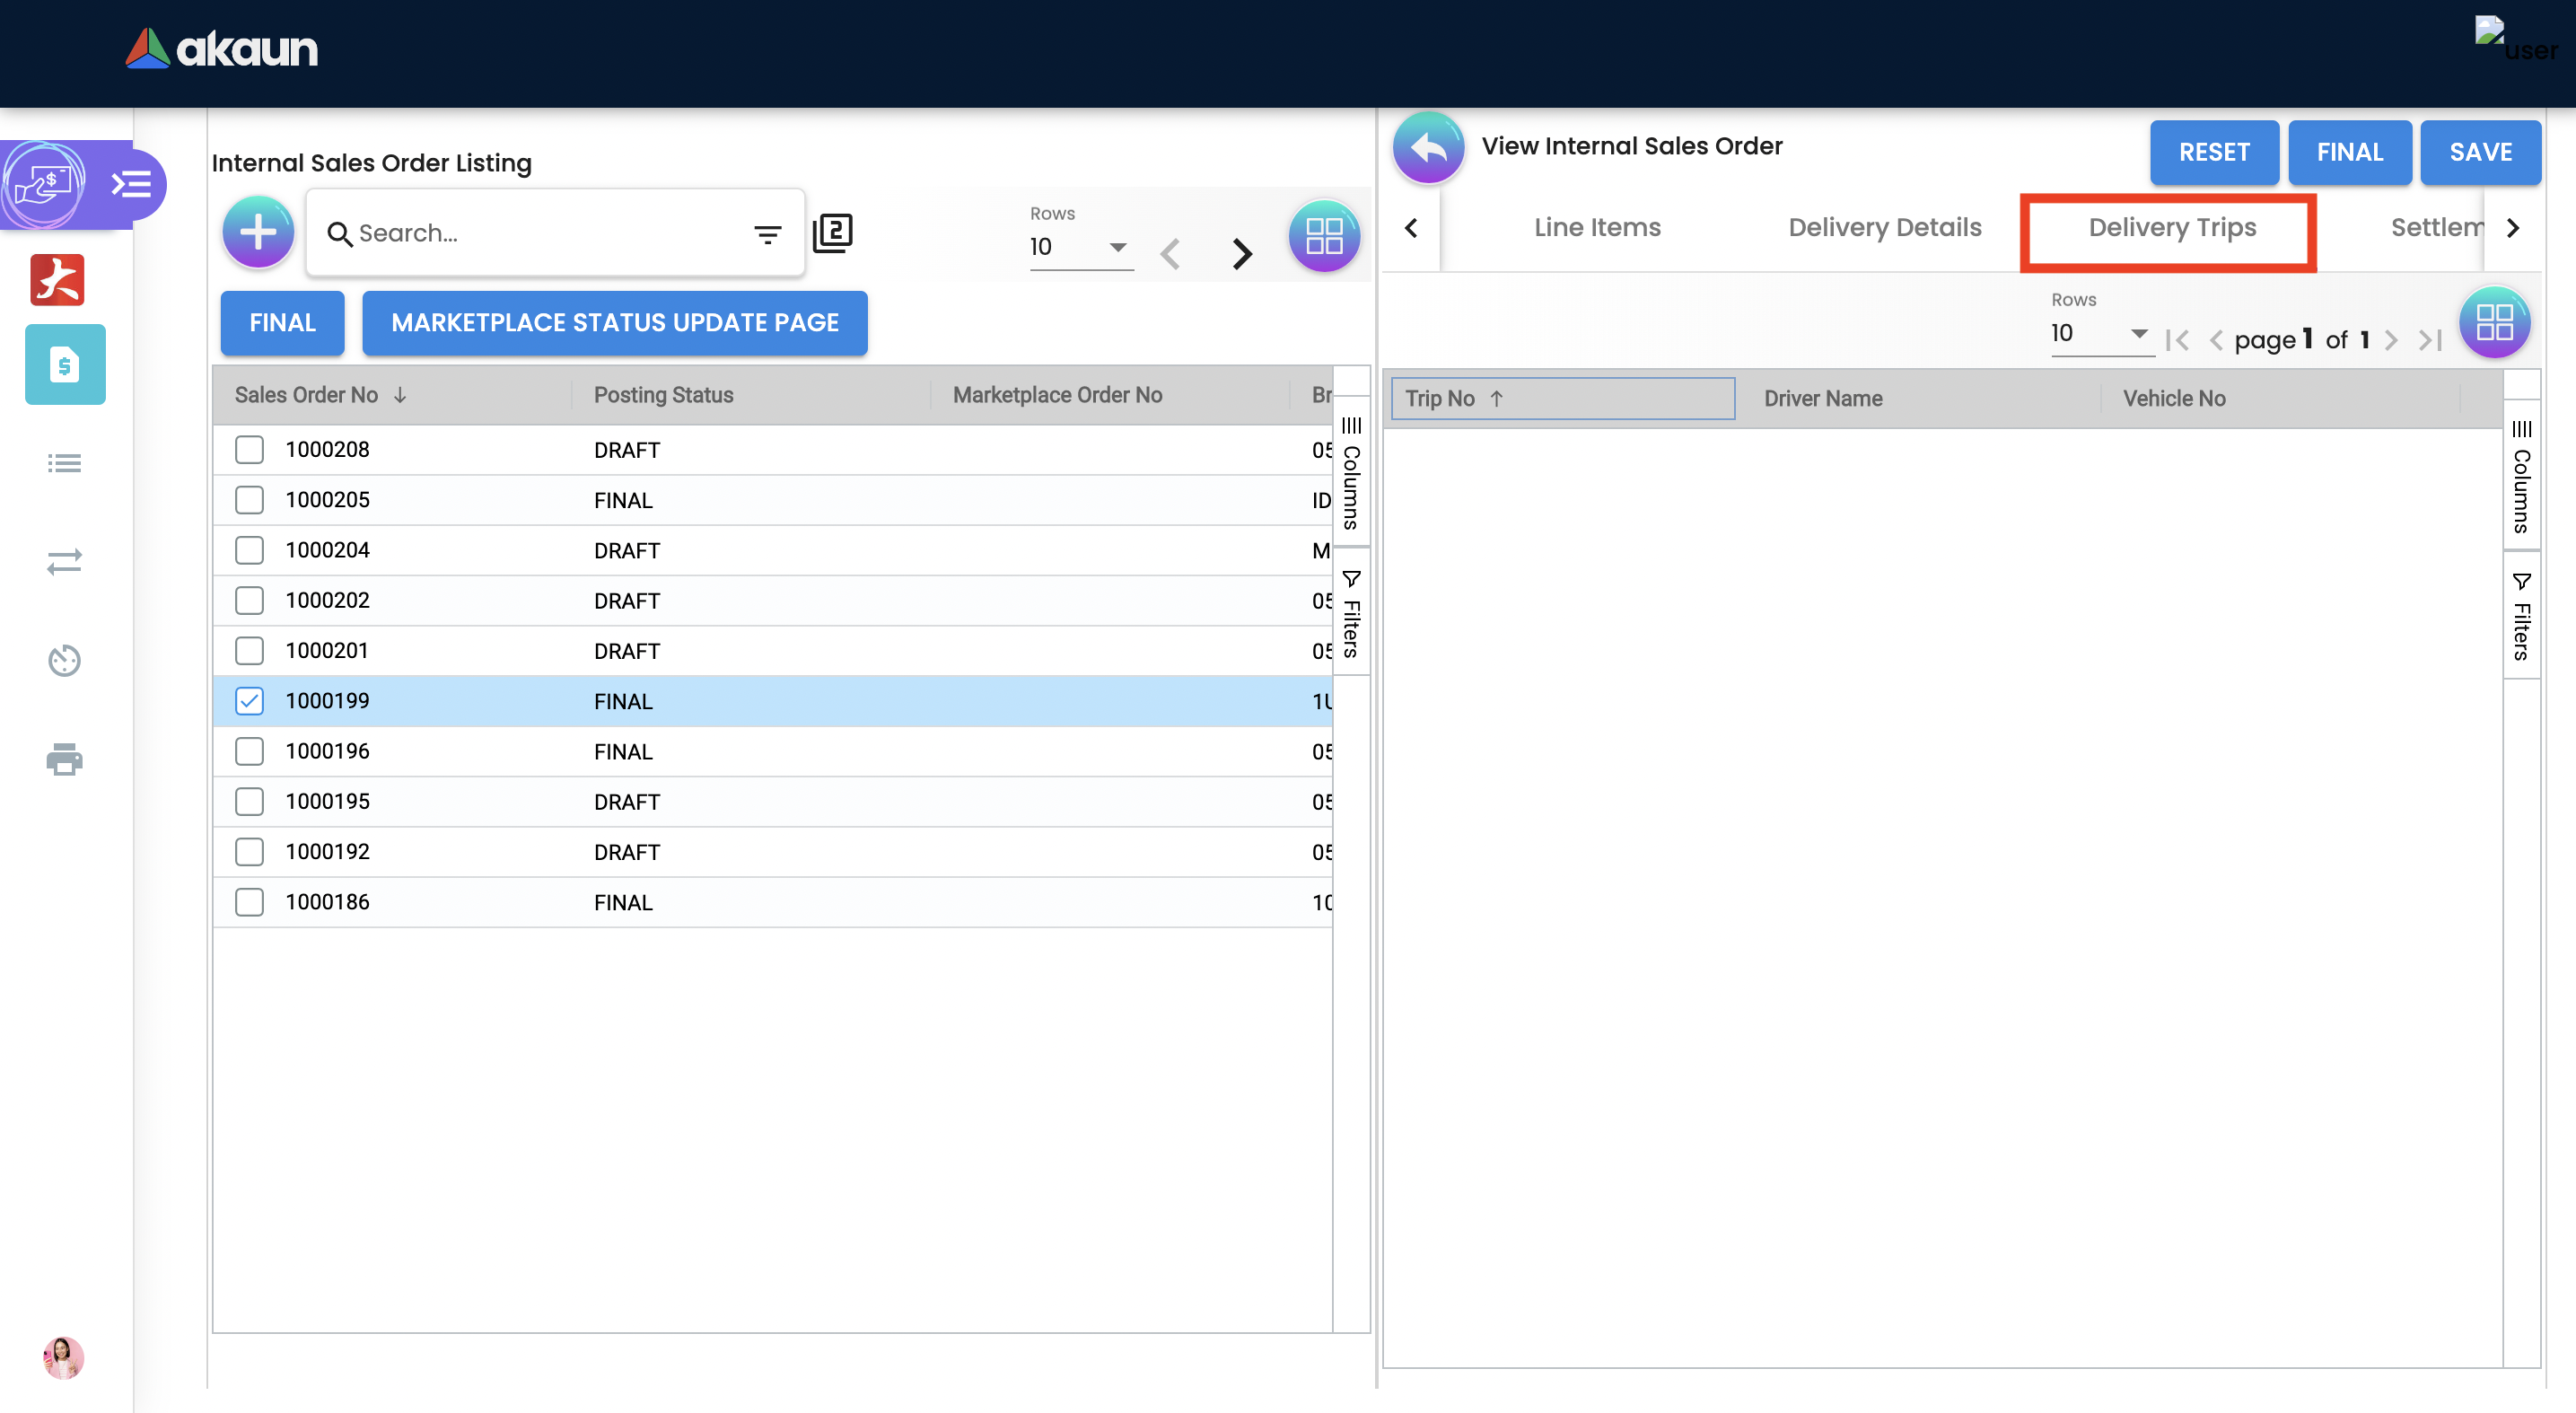
2.4.2 Sales Order - Delivery Trips tab
Delivery trips report for the particular sales order is displayed here.
-
Trip No: A unique number generated and assigned to a scheduled trip.
-
Driver Name: ”Coach man” or "vehicle operator."
-
Vehicle No: A series of letters and numbers assigned to a vehicle, at the time of registration.
-
Job Start Date: The official date on which a person begins their delivery job.
-
Job End Date: The official date on which a person finishes their delivery job.
-
Delivery Status: If the delivery item was successfully delivered to the addressee.
-
Recipient Name: The person’s name that receives.
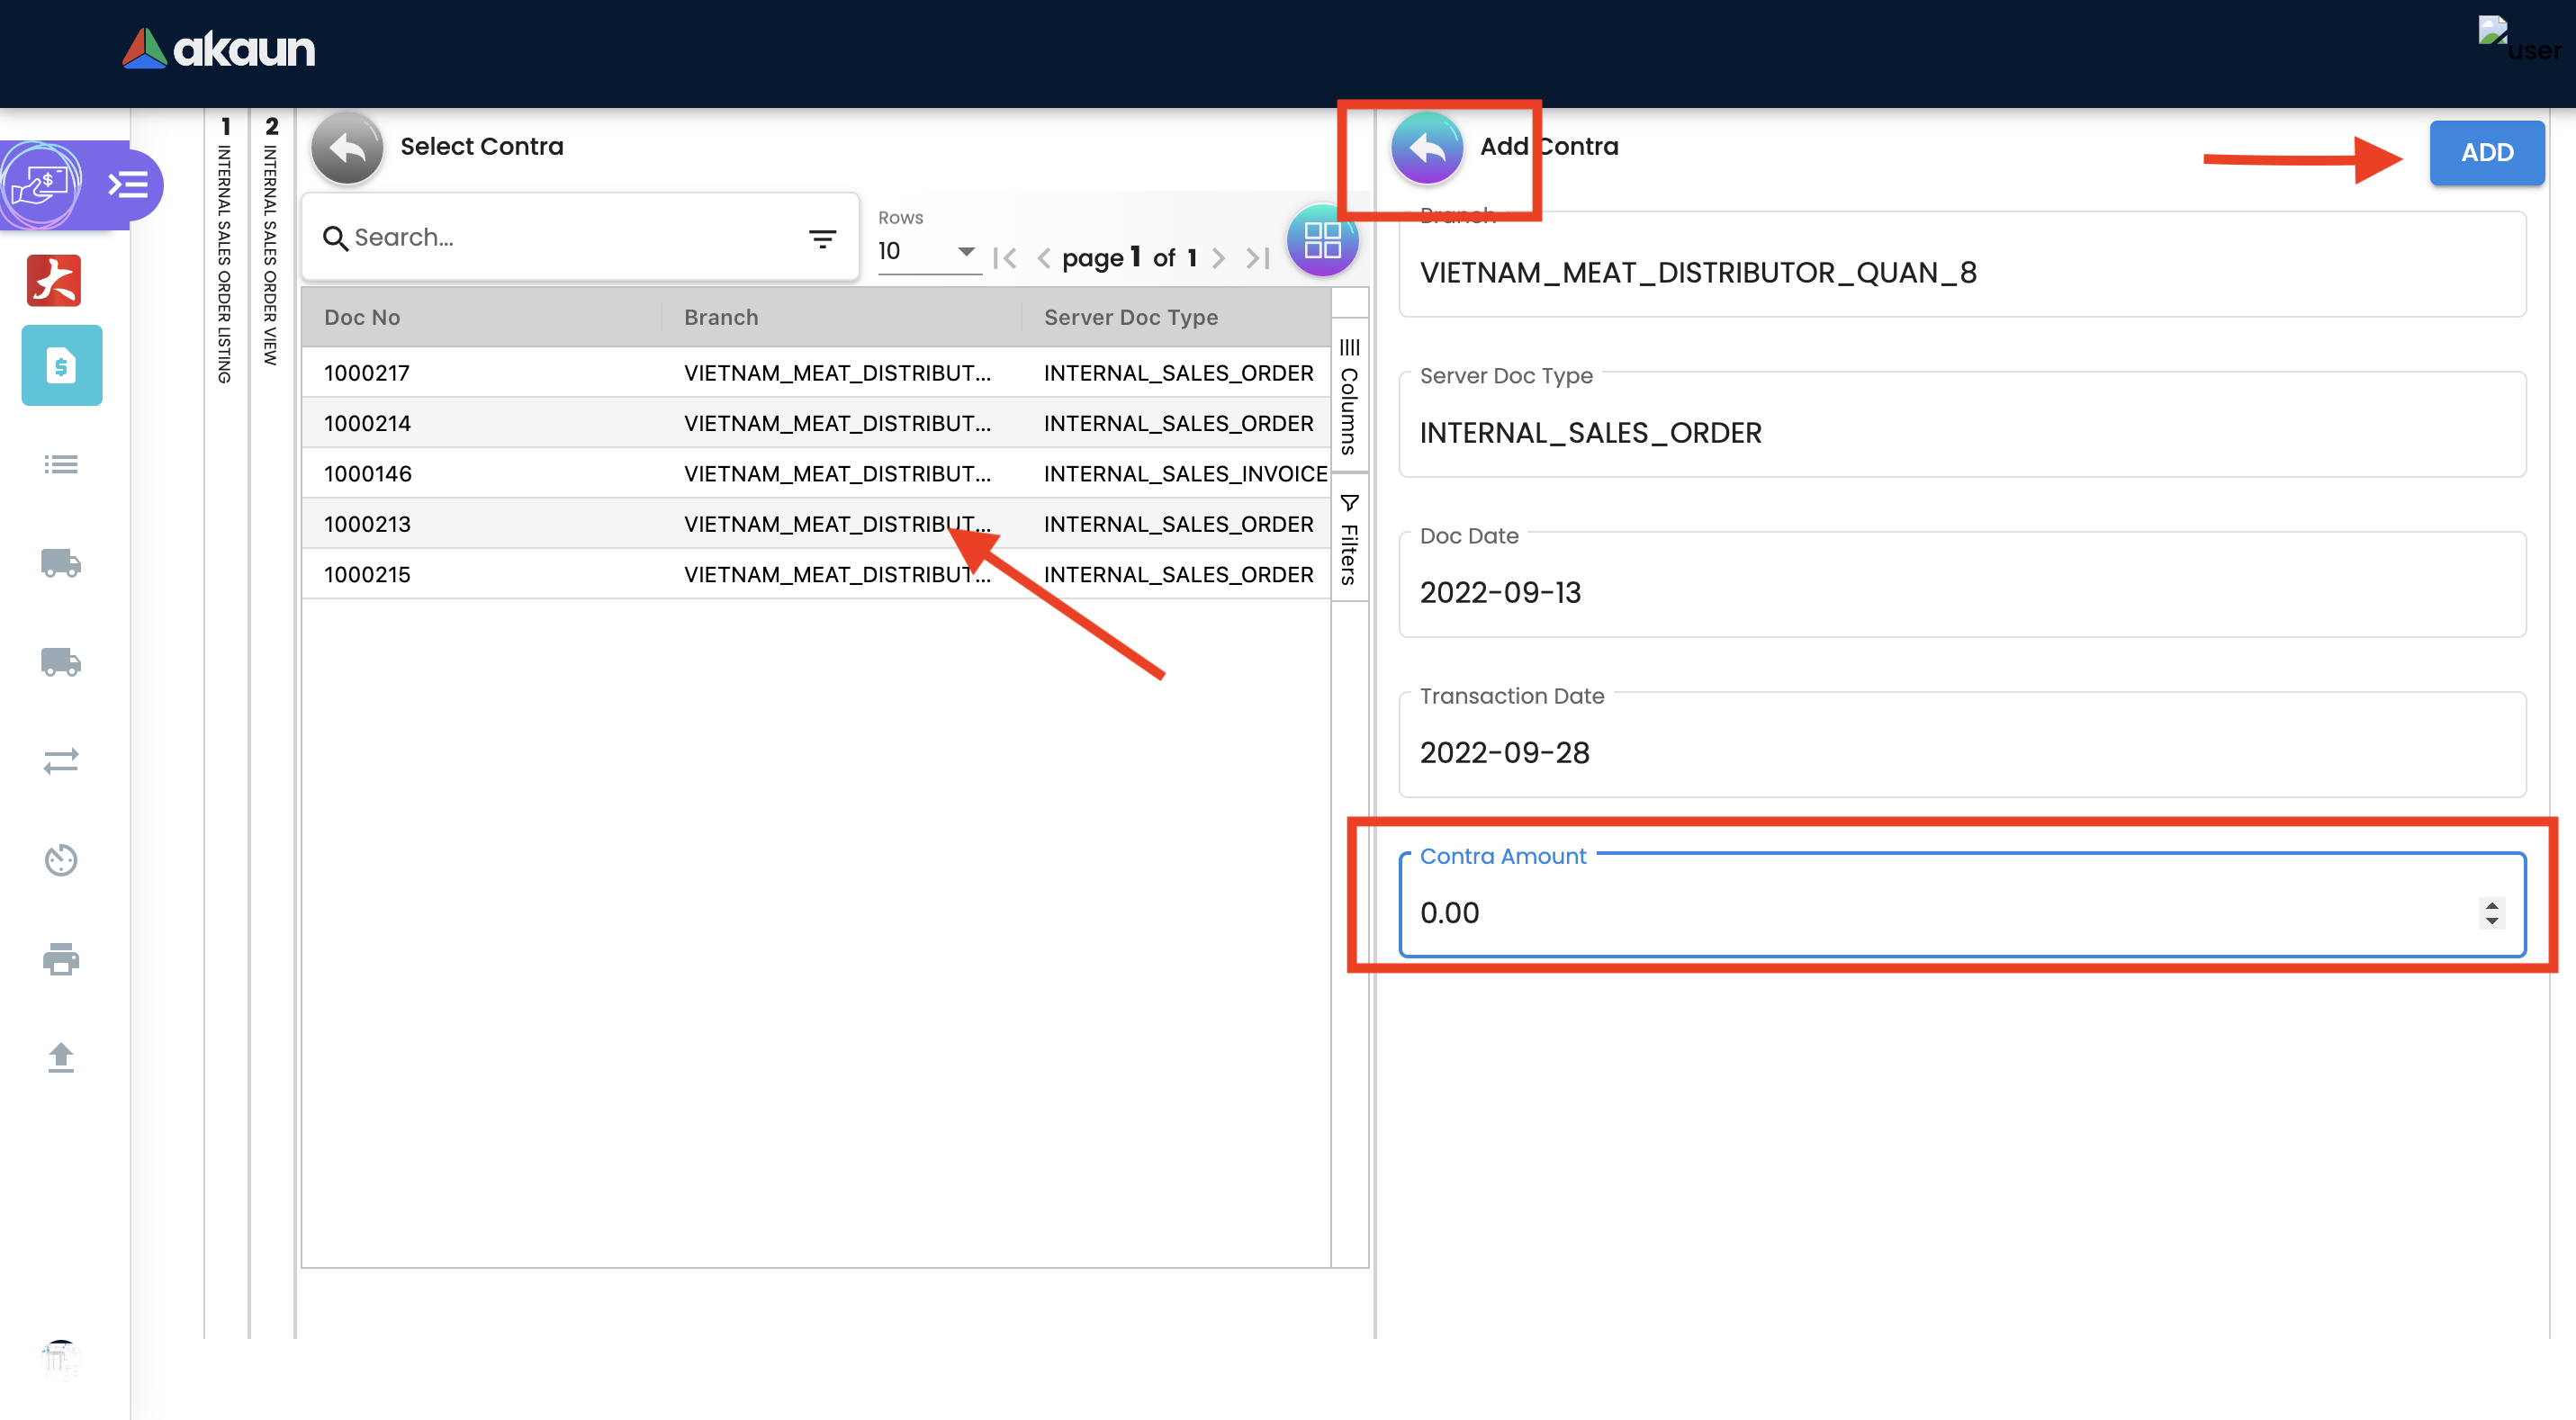
2.4.3 Sales Order - Contra Tab
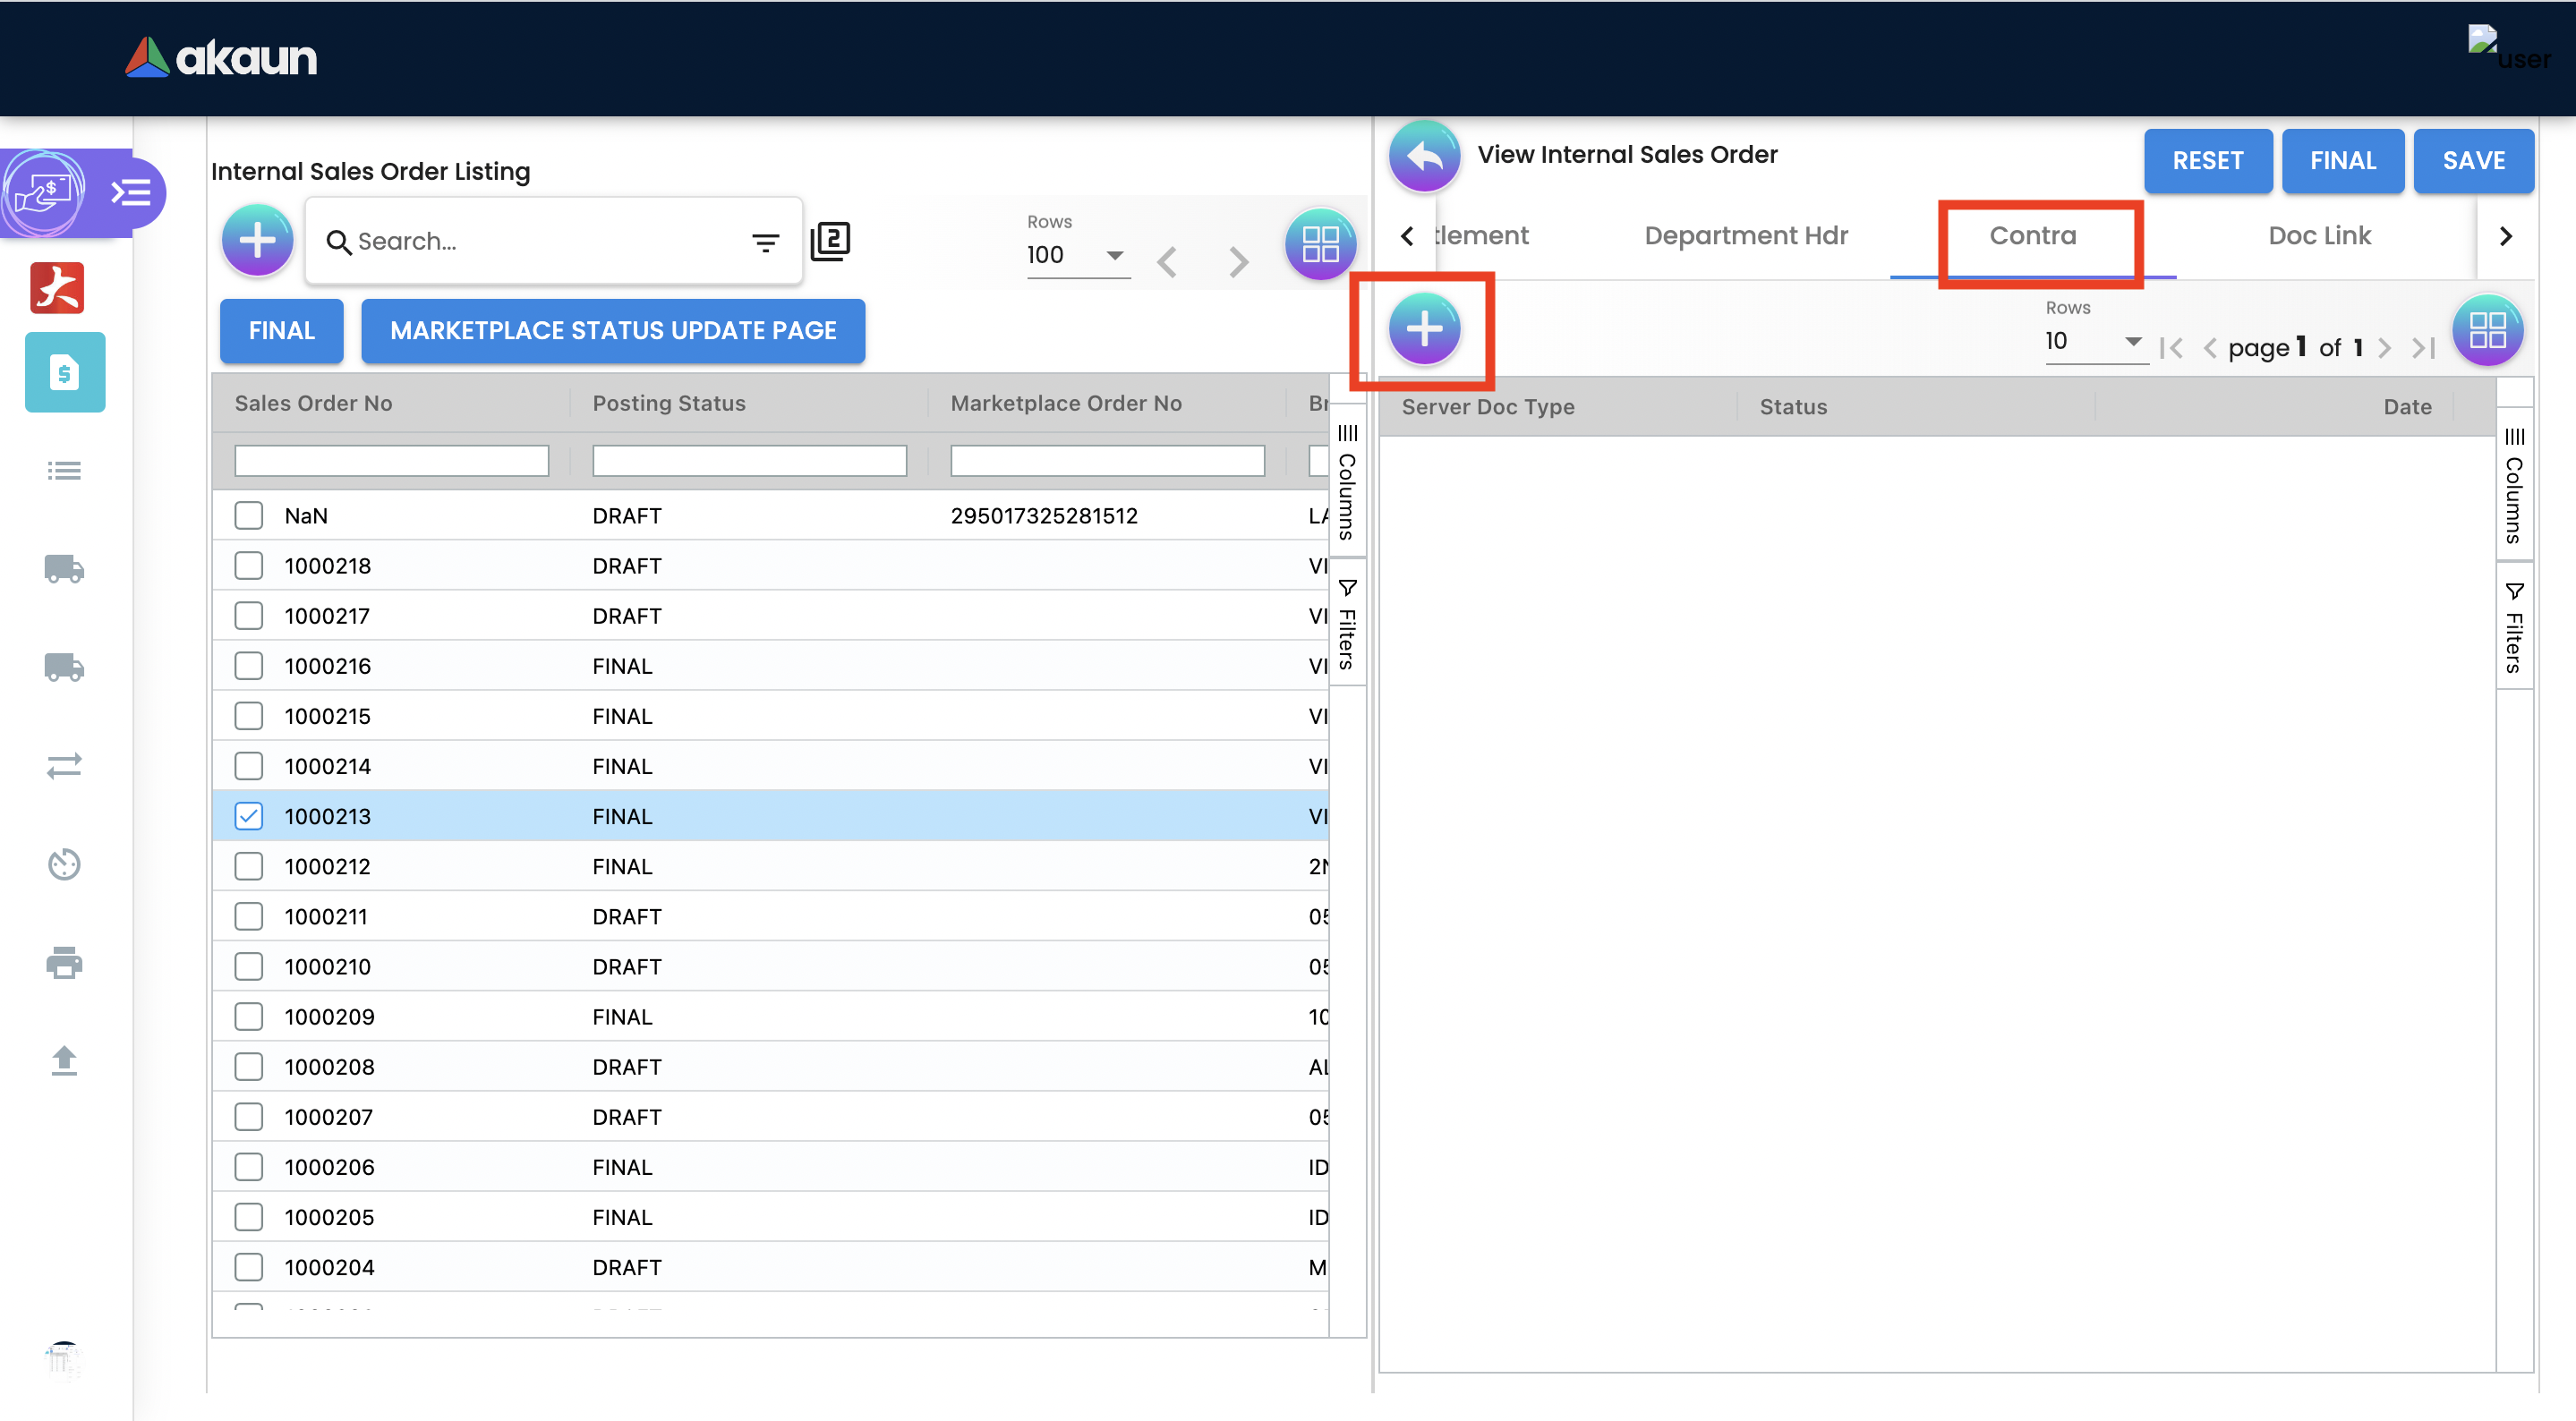
In order to create Contra, users need to click "+" button, it will open the second page where you select the document to add Contra amount.
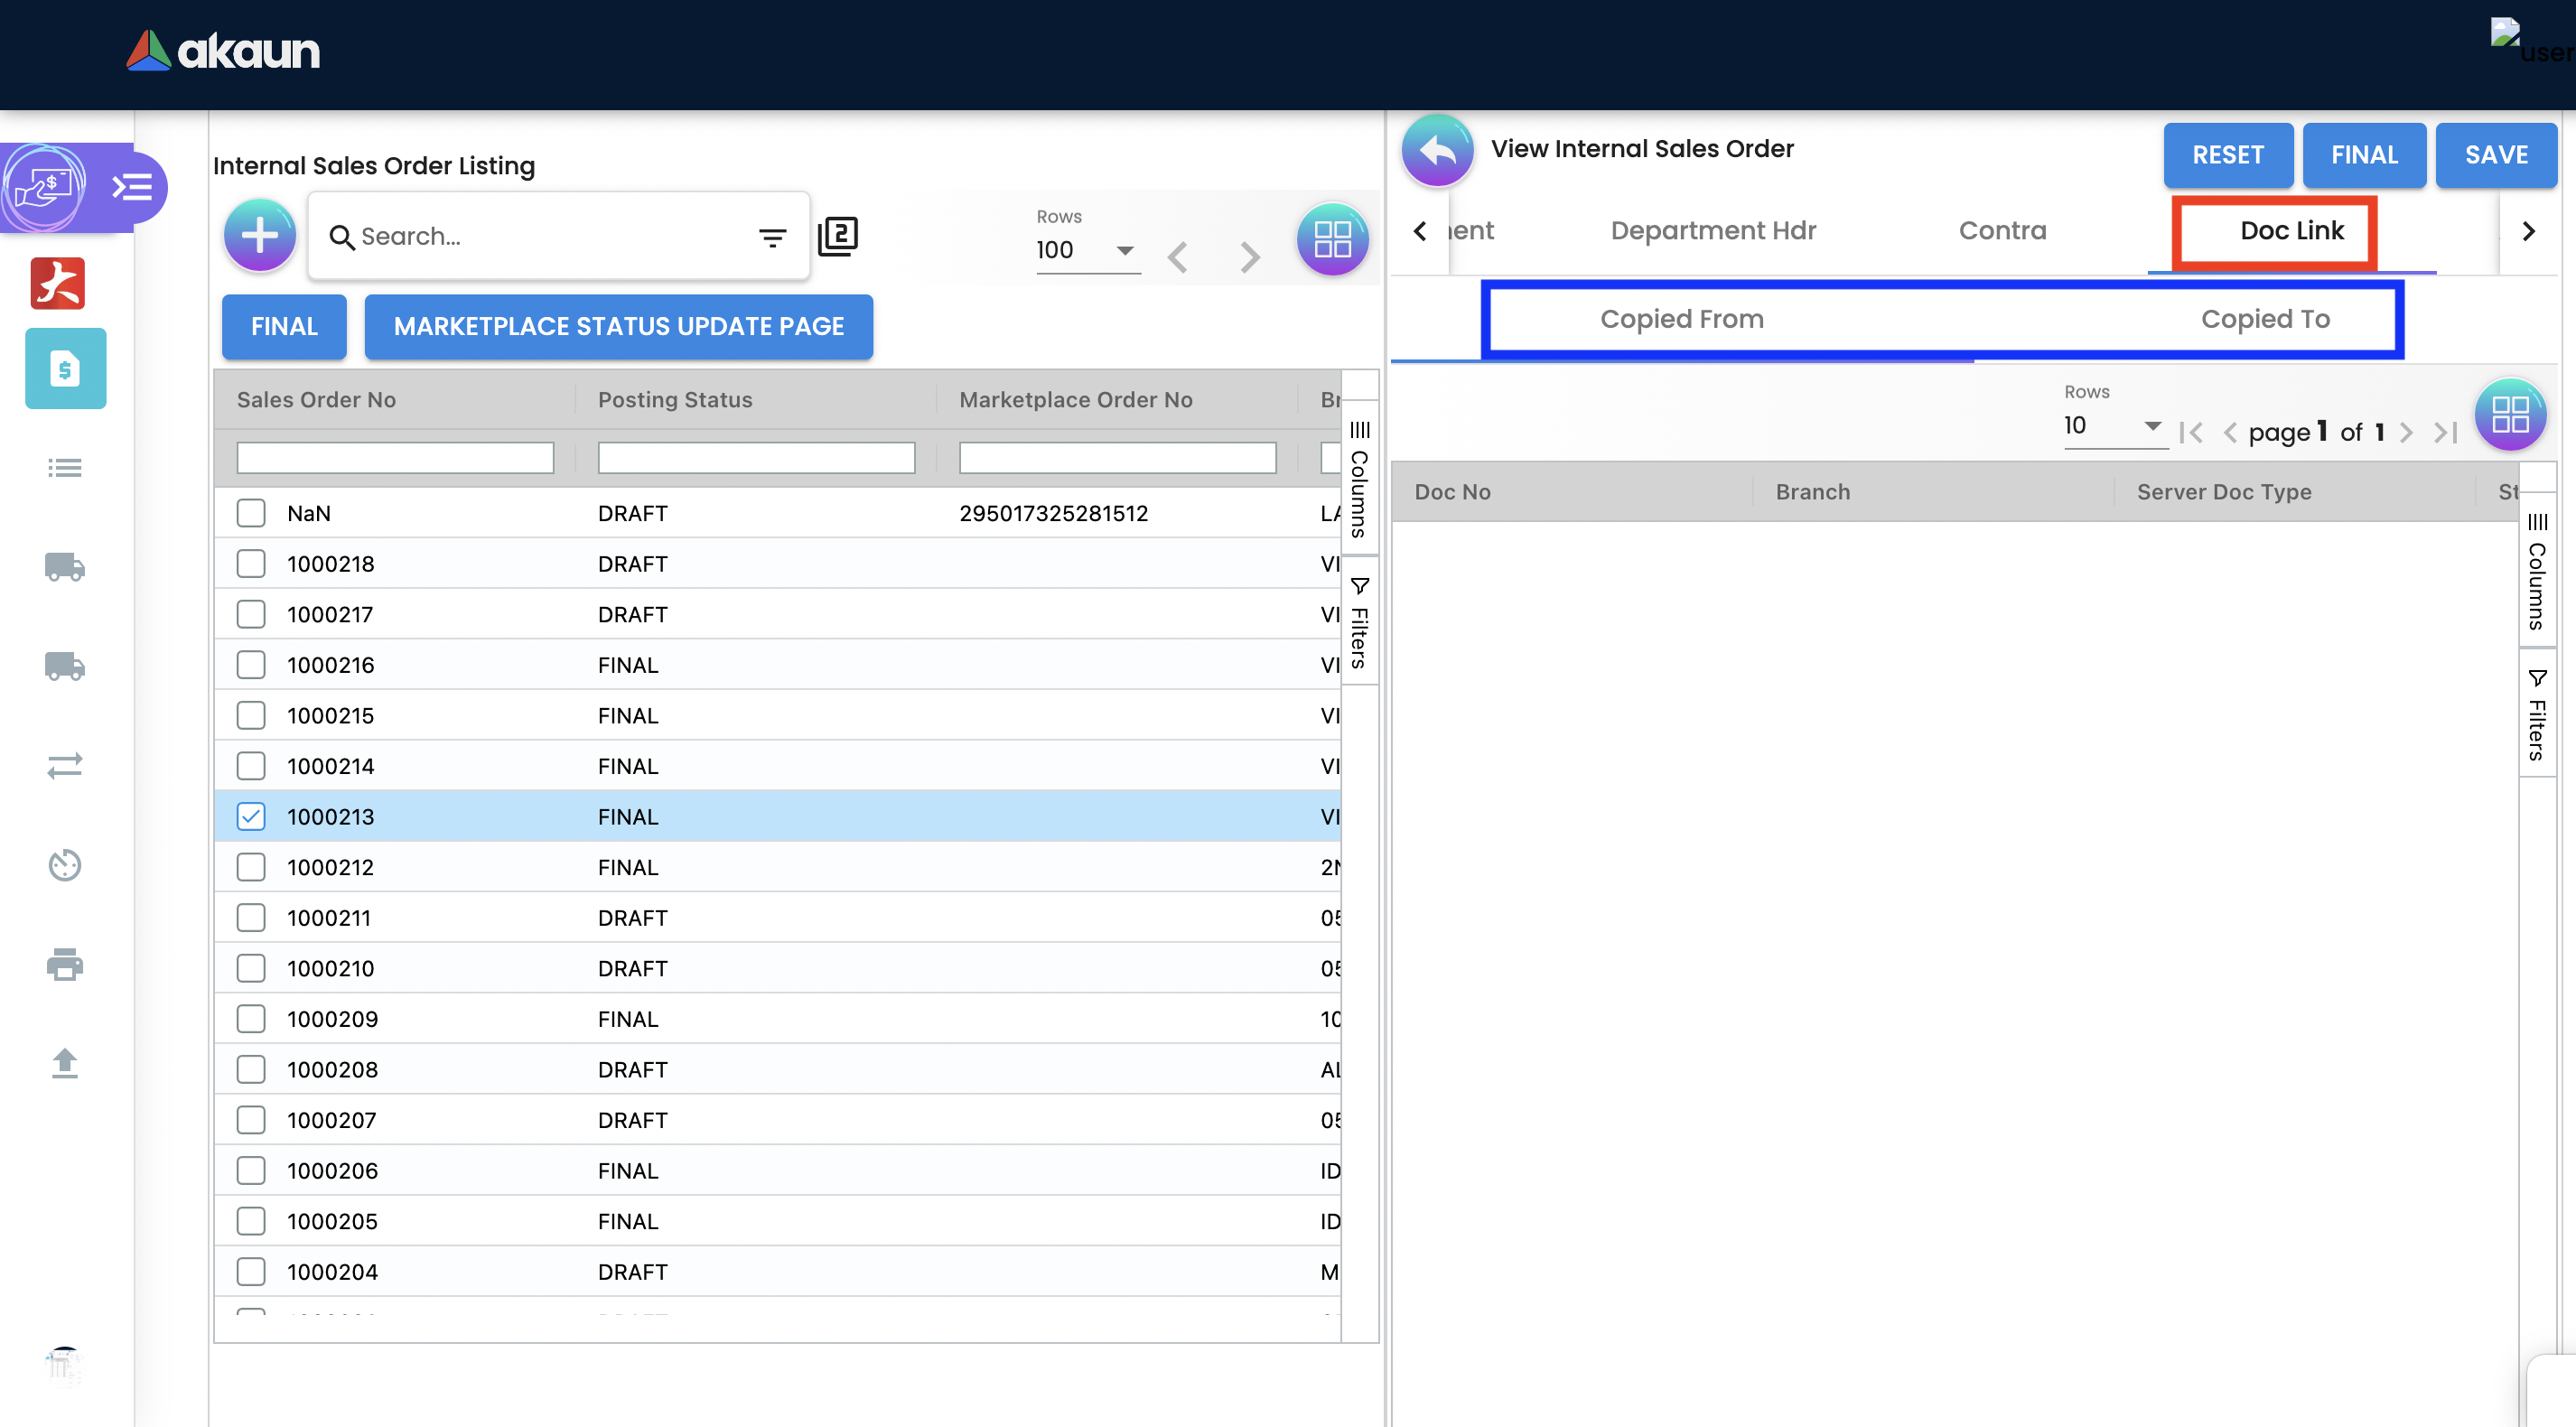
2.4.4 Sales Order - Doc Link Tab
Doc Link is used to show either the selected line item have link with other Gen Doc Line Item.
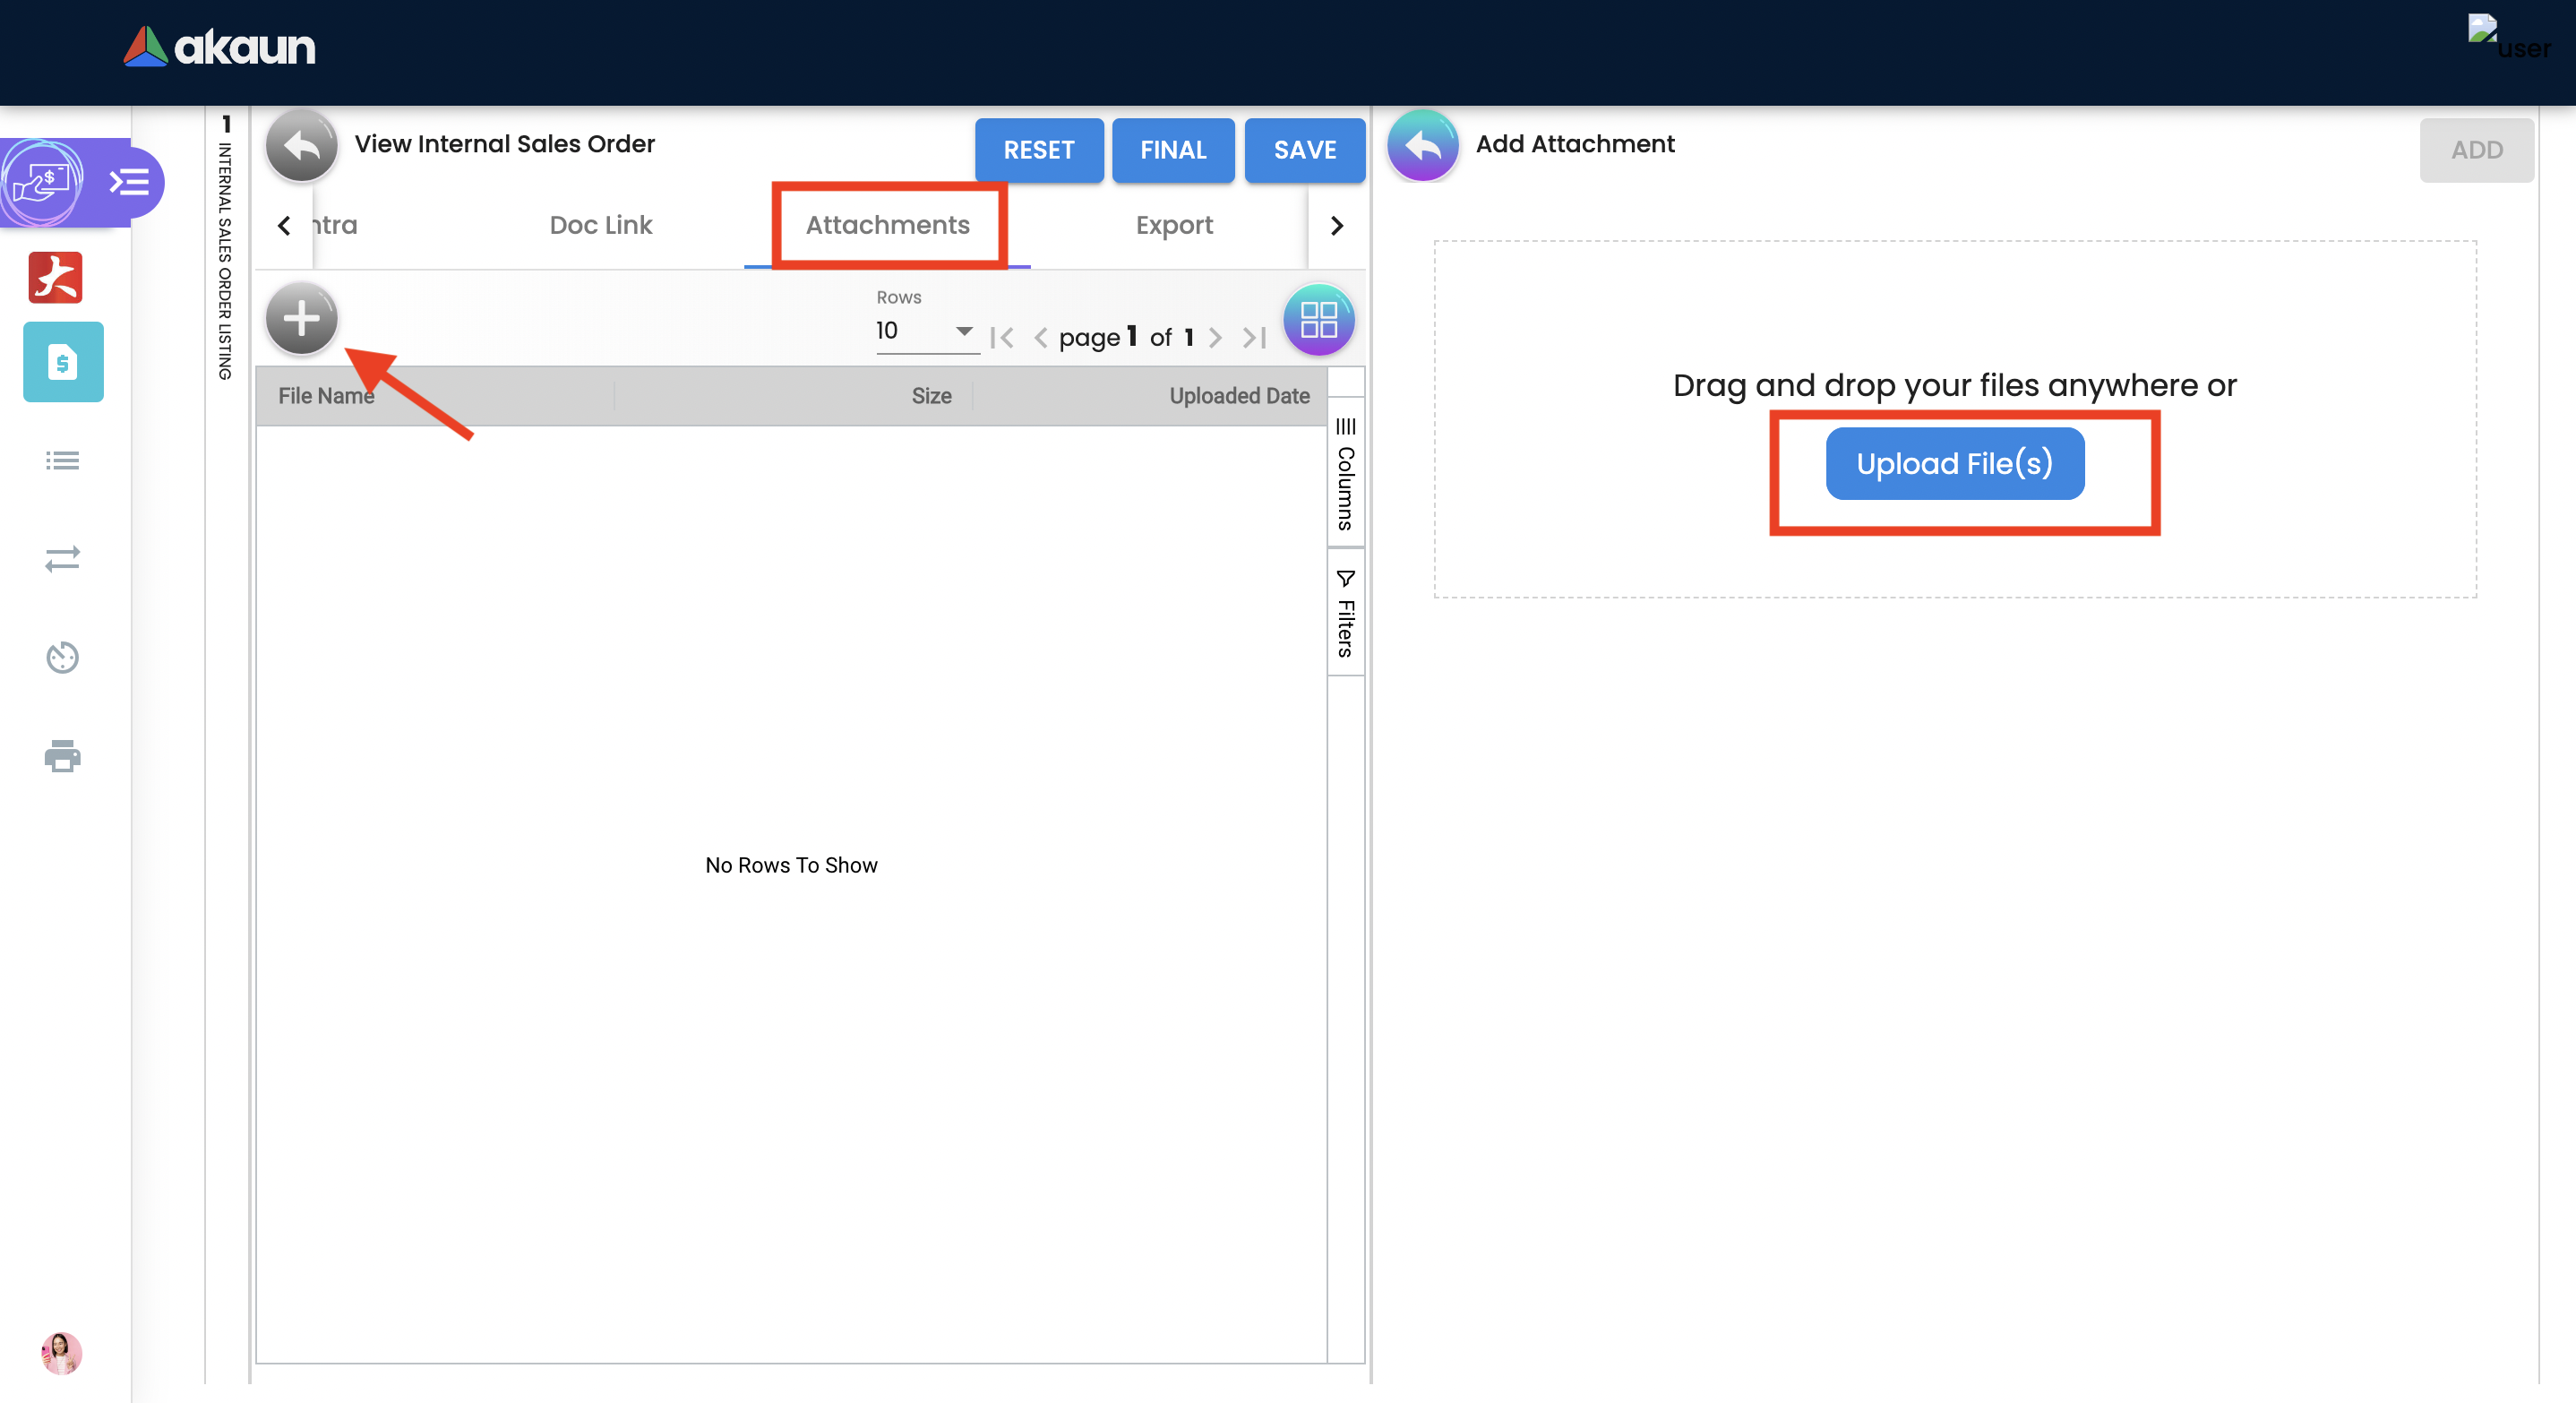
2.4.5 Sales Order - Attachments tab
Any Sales order can have one or more files attached to it for future records and references. For example Sales quotations, Screenshots, etc.
Click on the '+' button to add a new Attachment and Click 'Upload file(s)' button or drag and drop file(s).
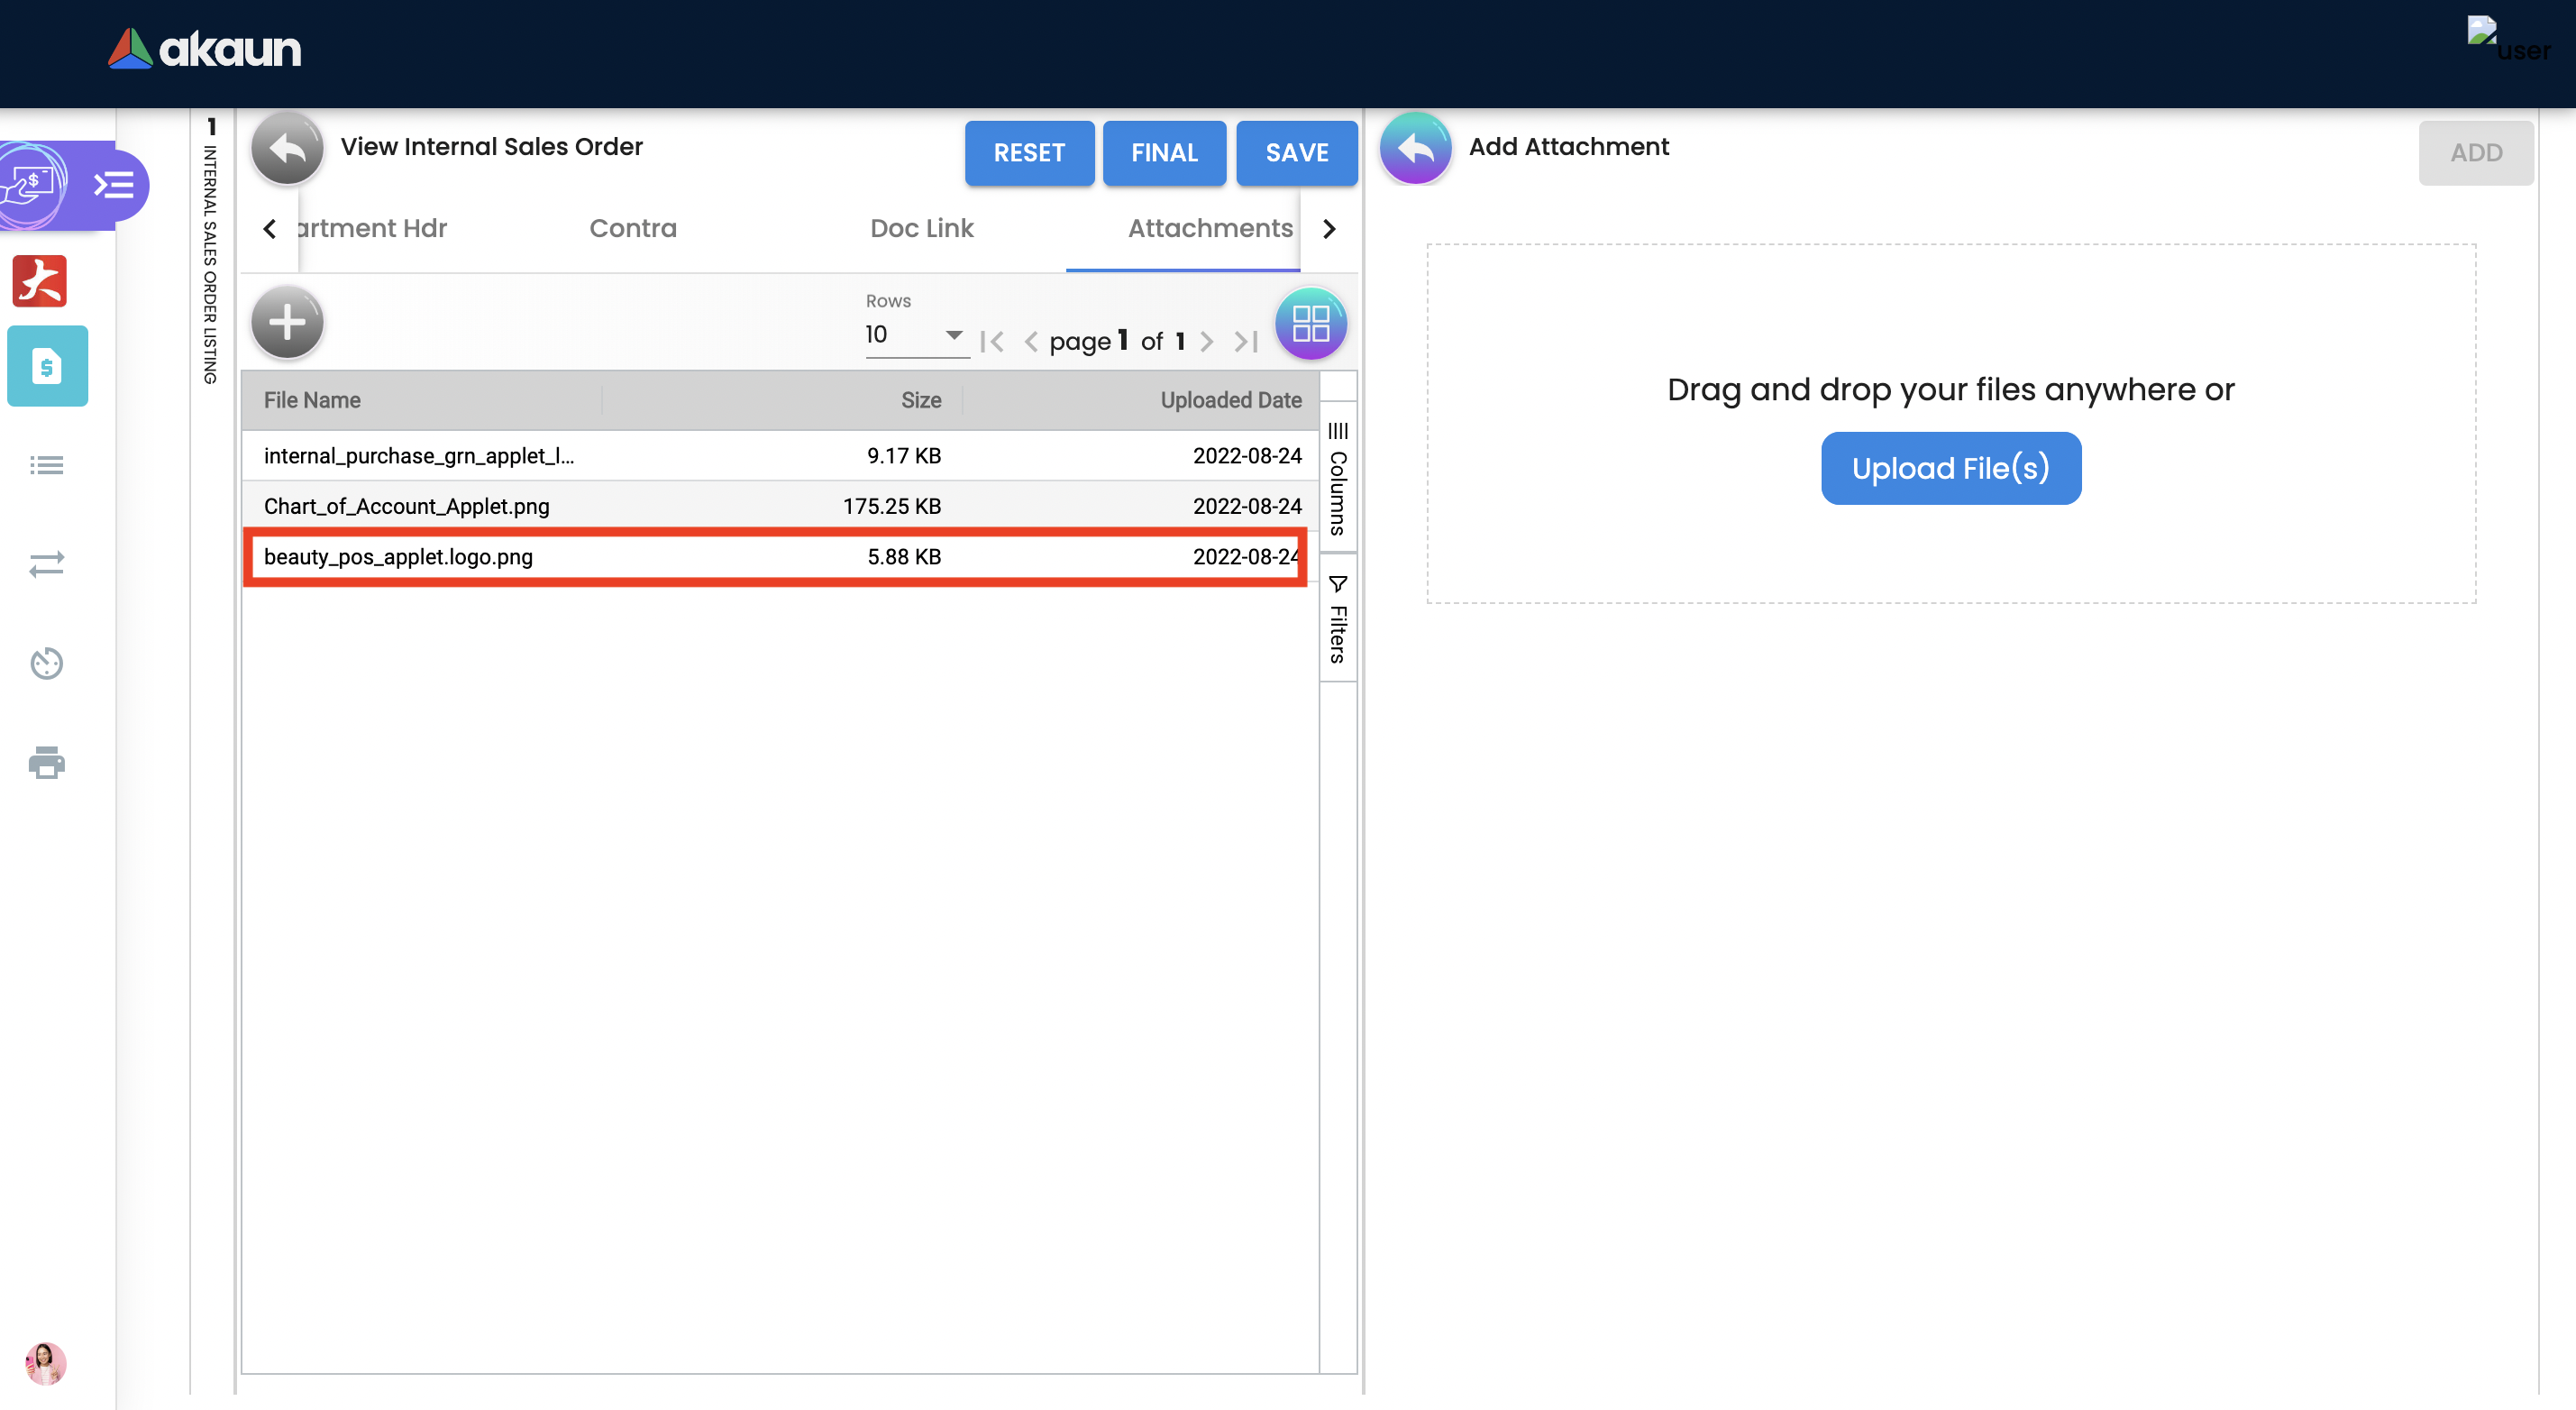
Click 'Add' button after uploading the file.
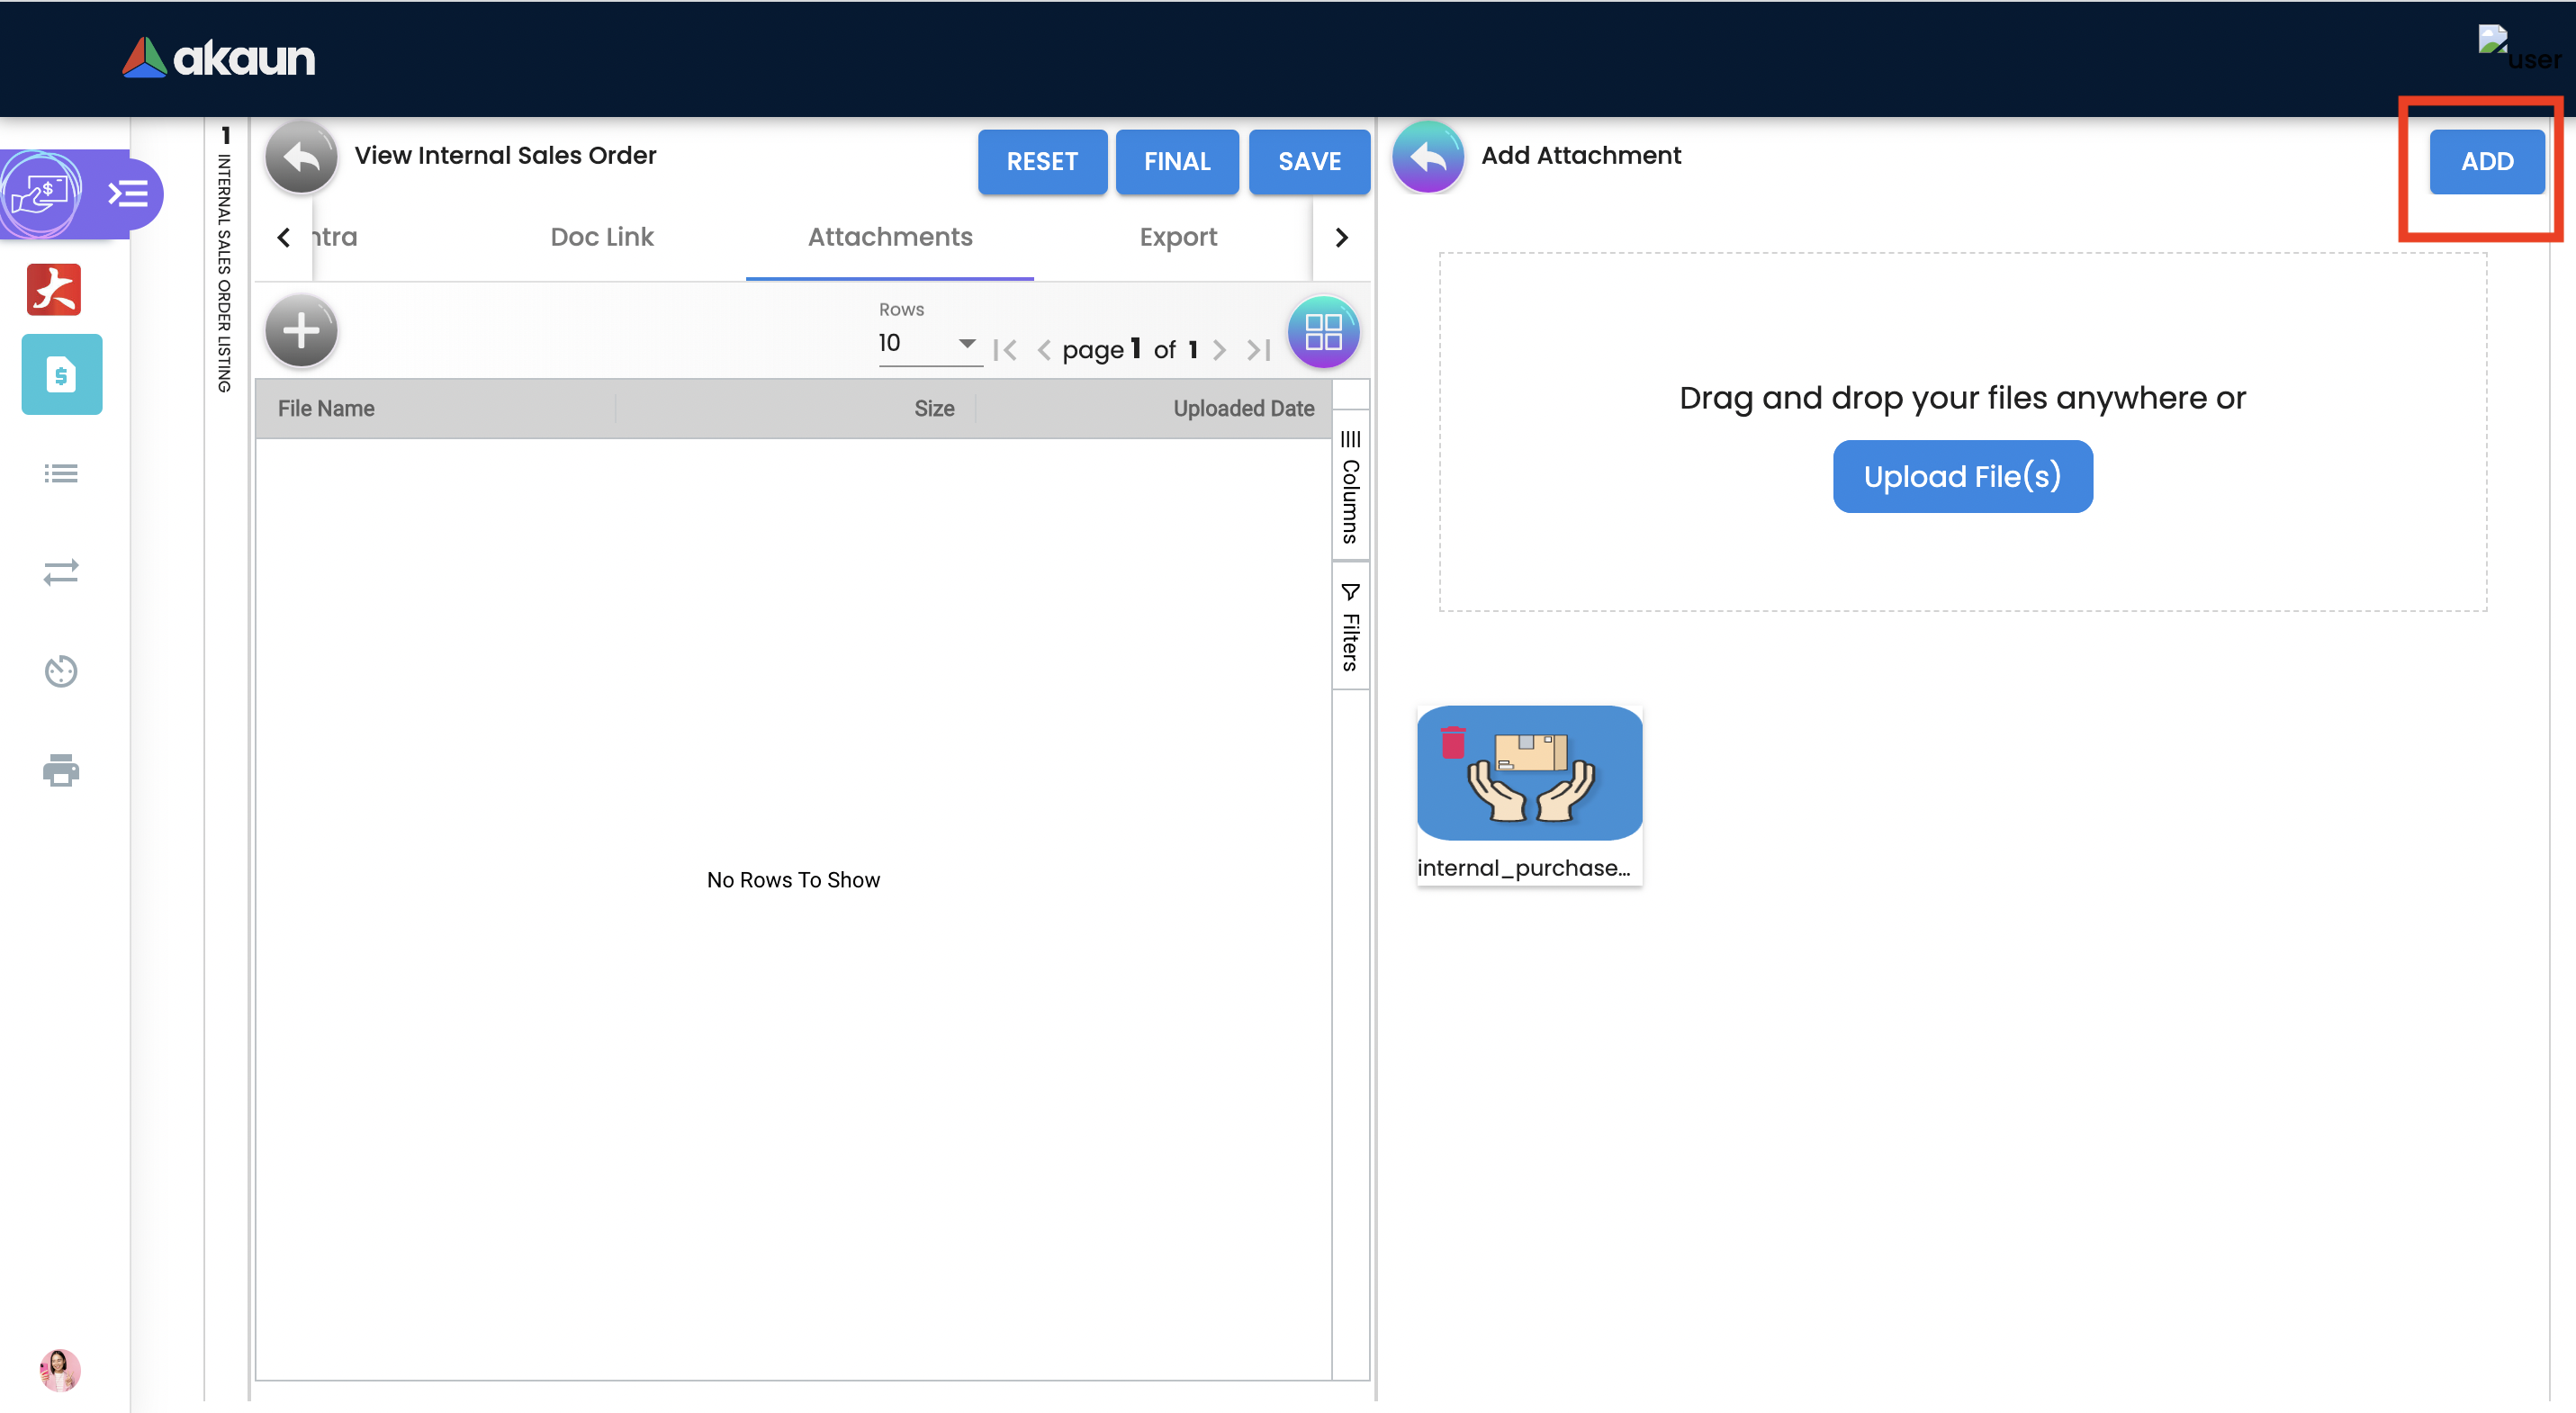
A confirmation message will be displayed and a new attachment will be listed under Attachments tab.
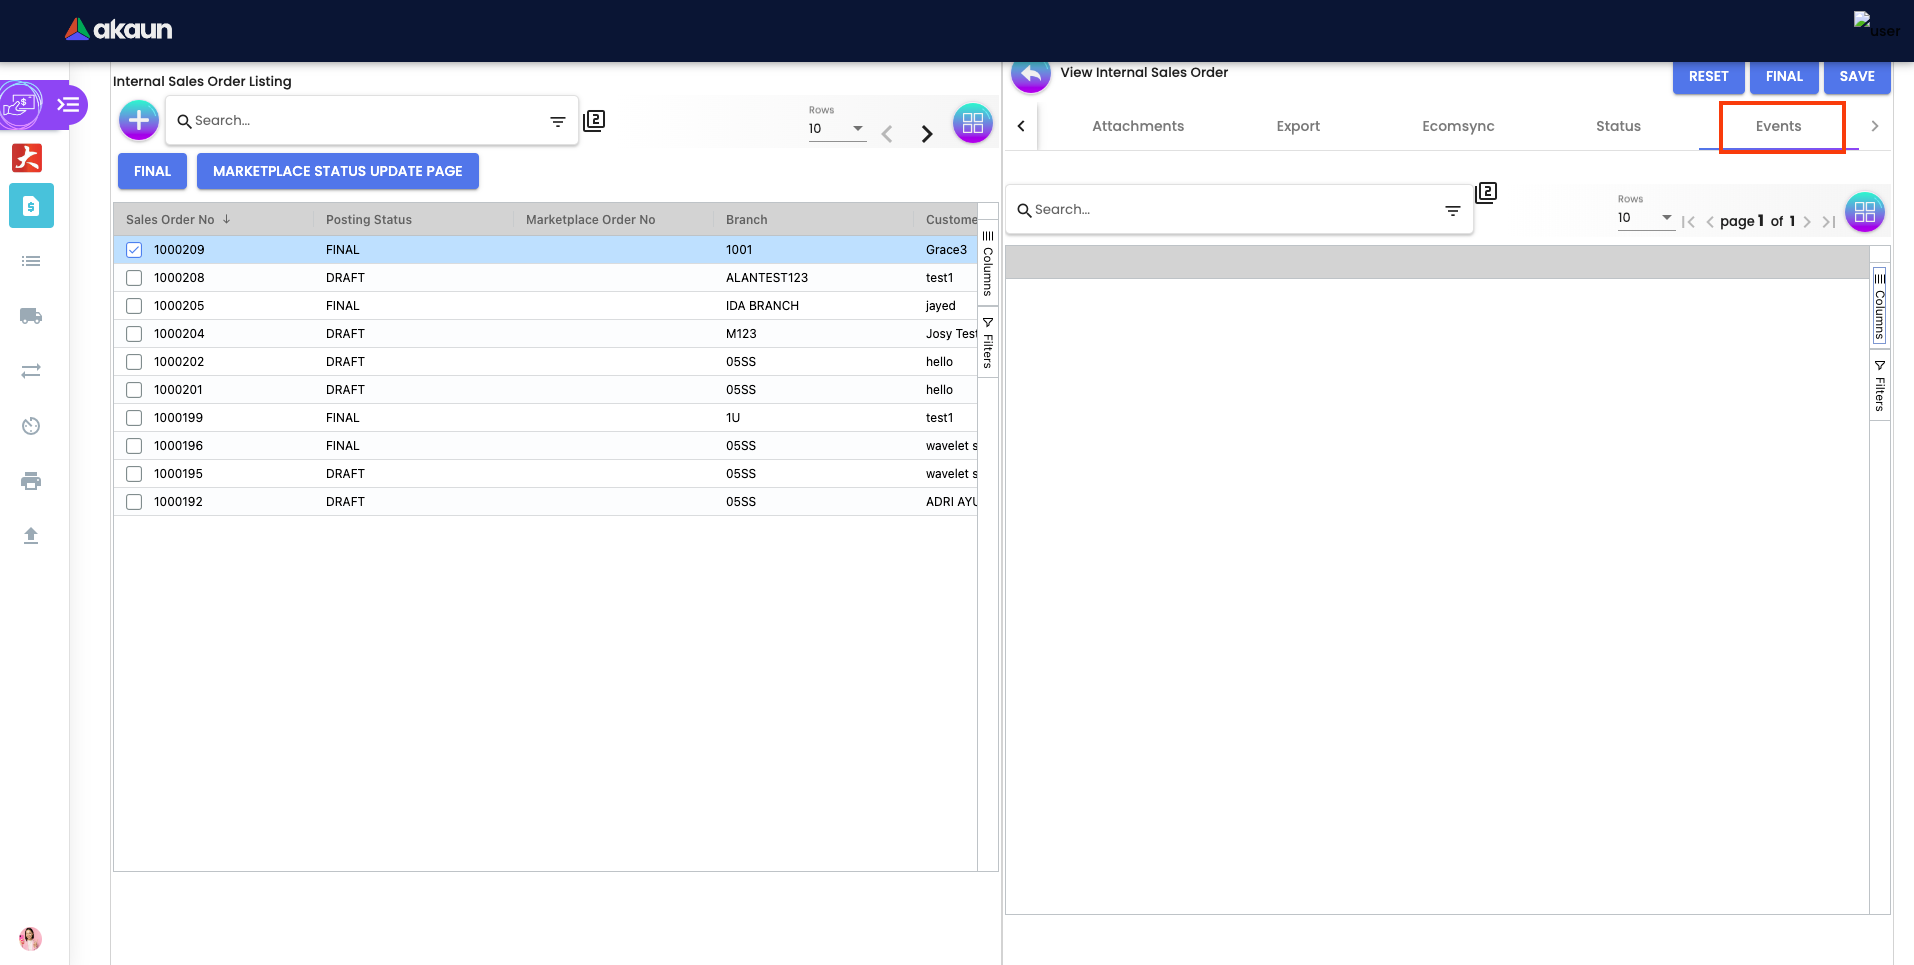
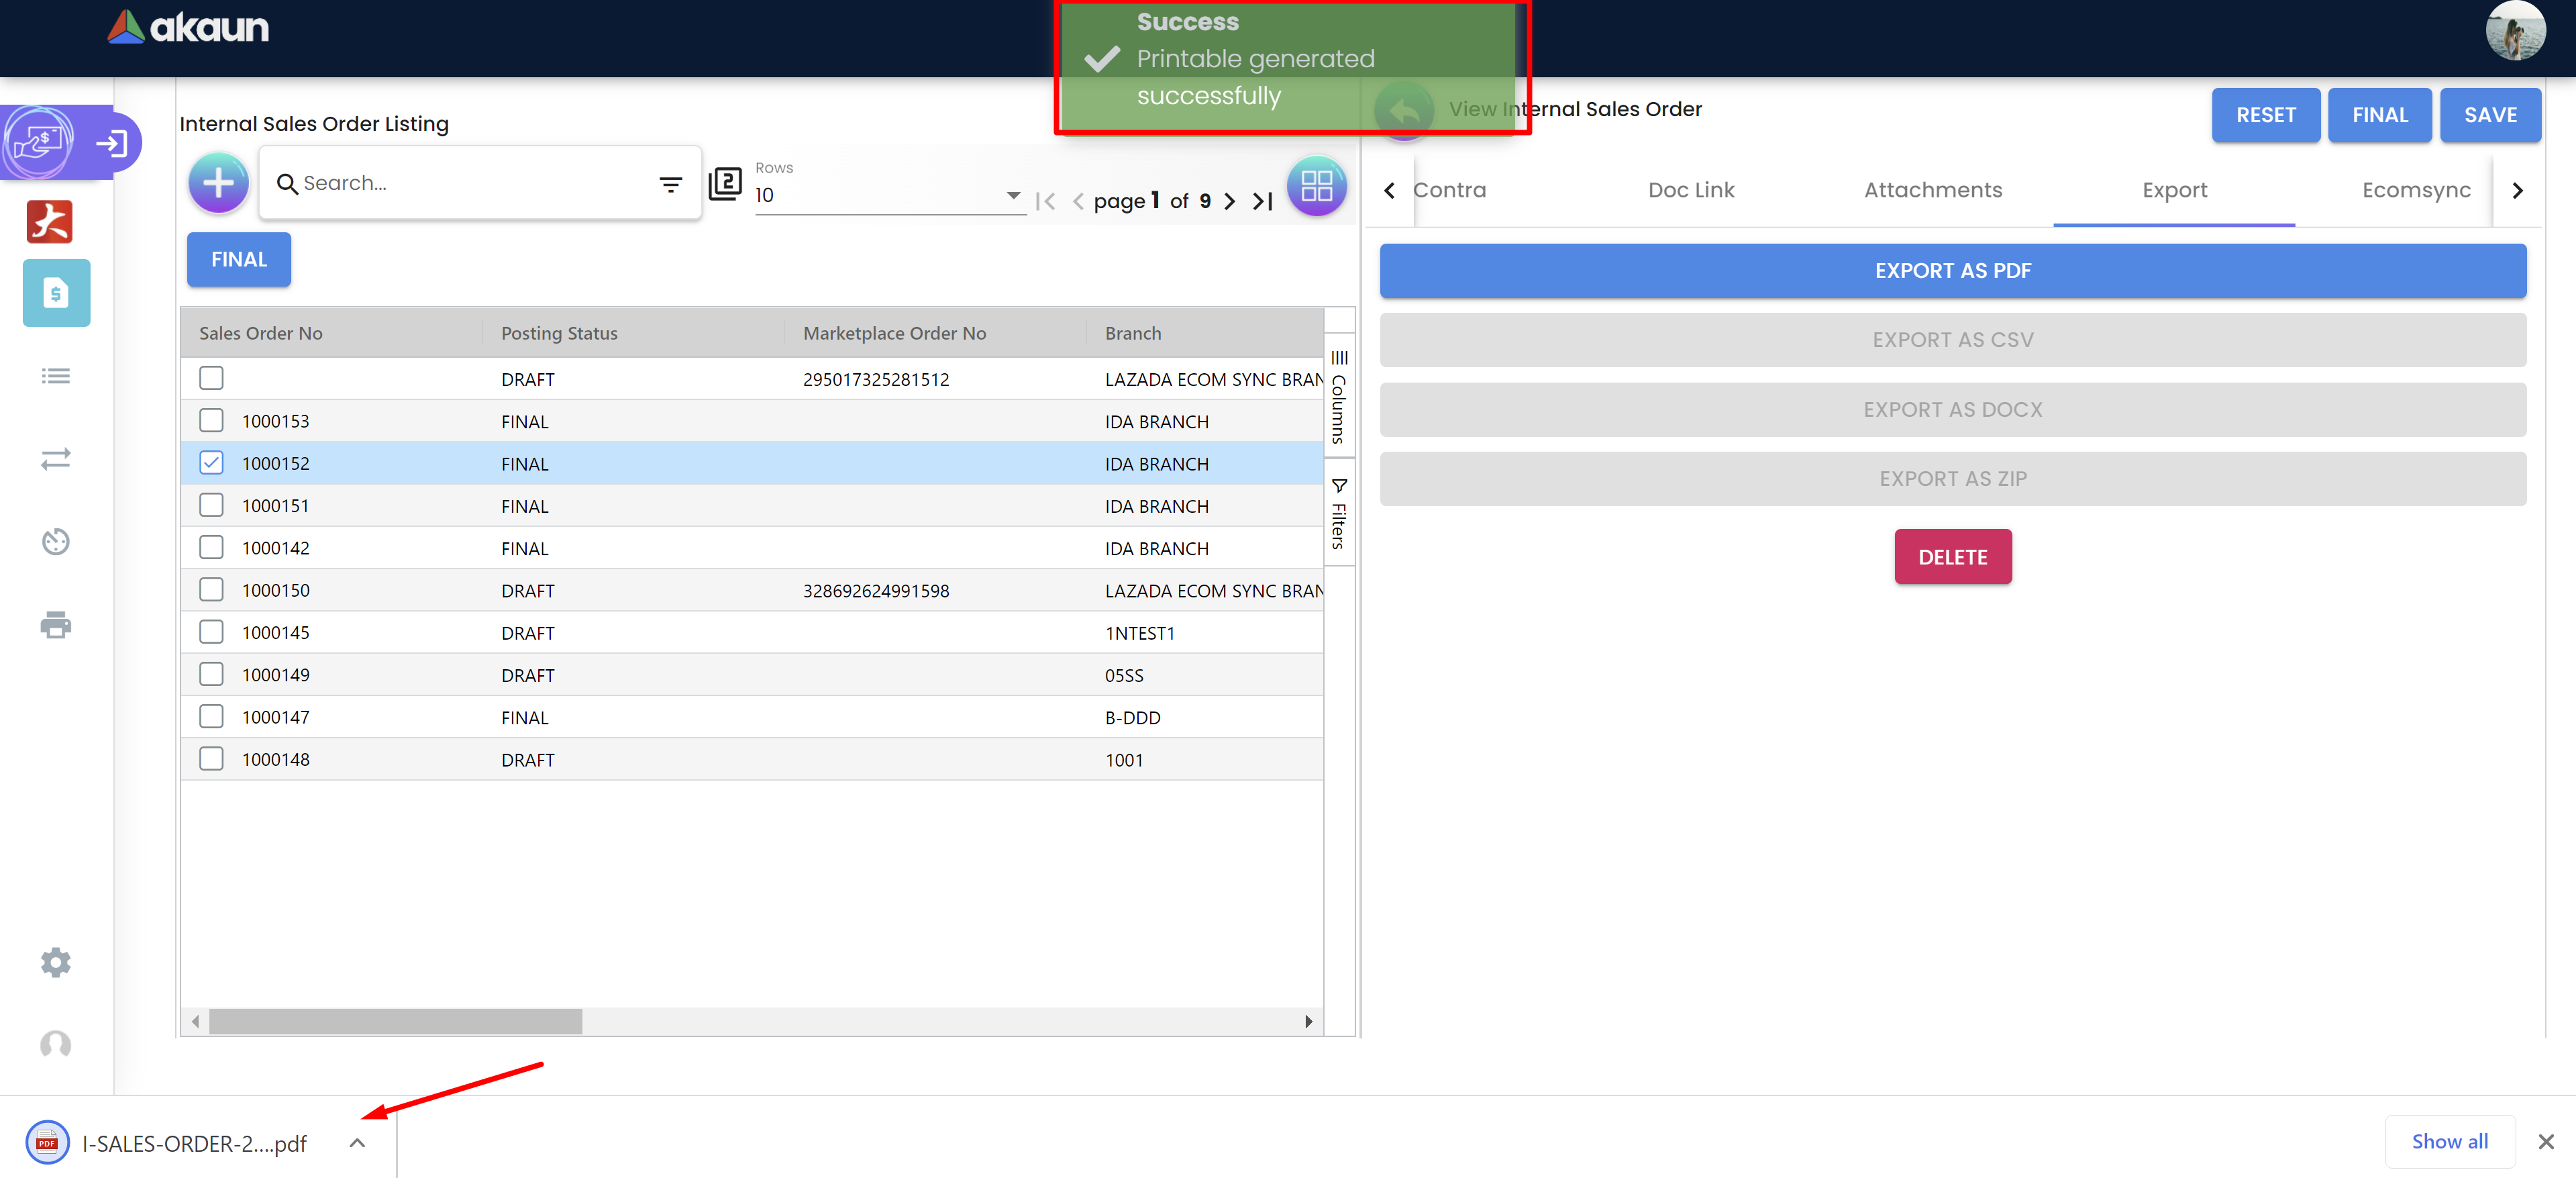
2.4.6 Sales Order - Export tab
The Document can be exported to PDF, CSV, DOCX, and ZIP files.
Go to the export tab and Click on the Export PDF, CSV, DOCX, or ZIP button.
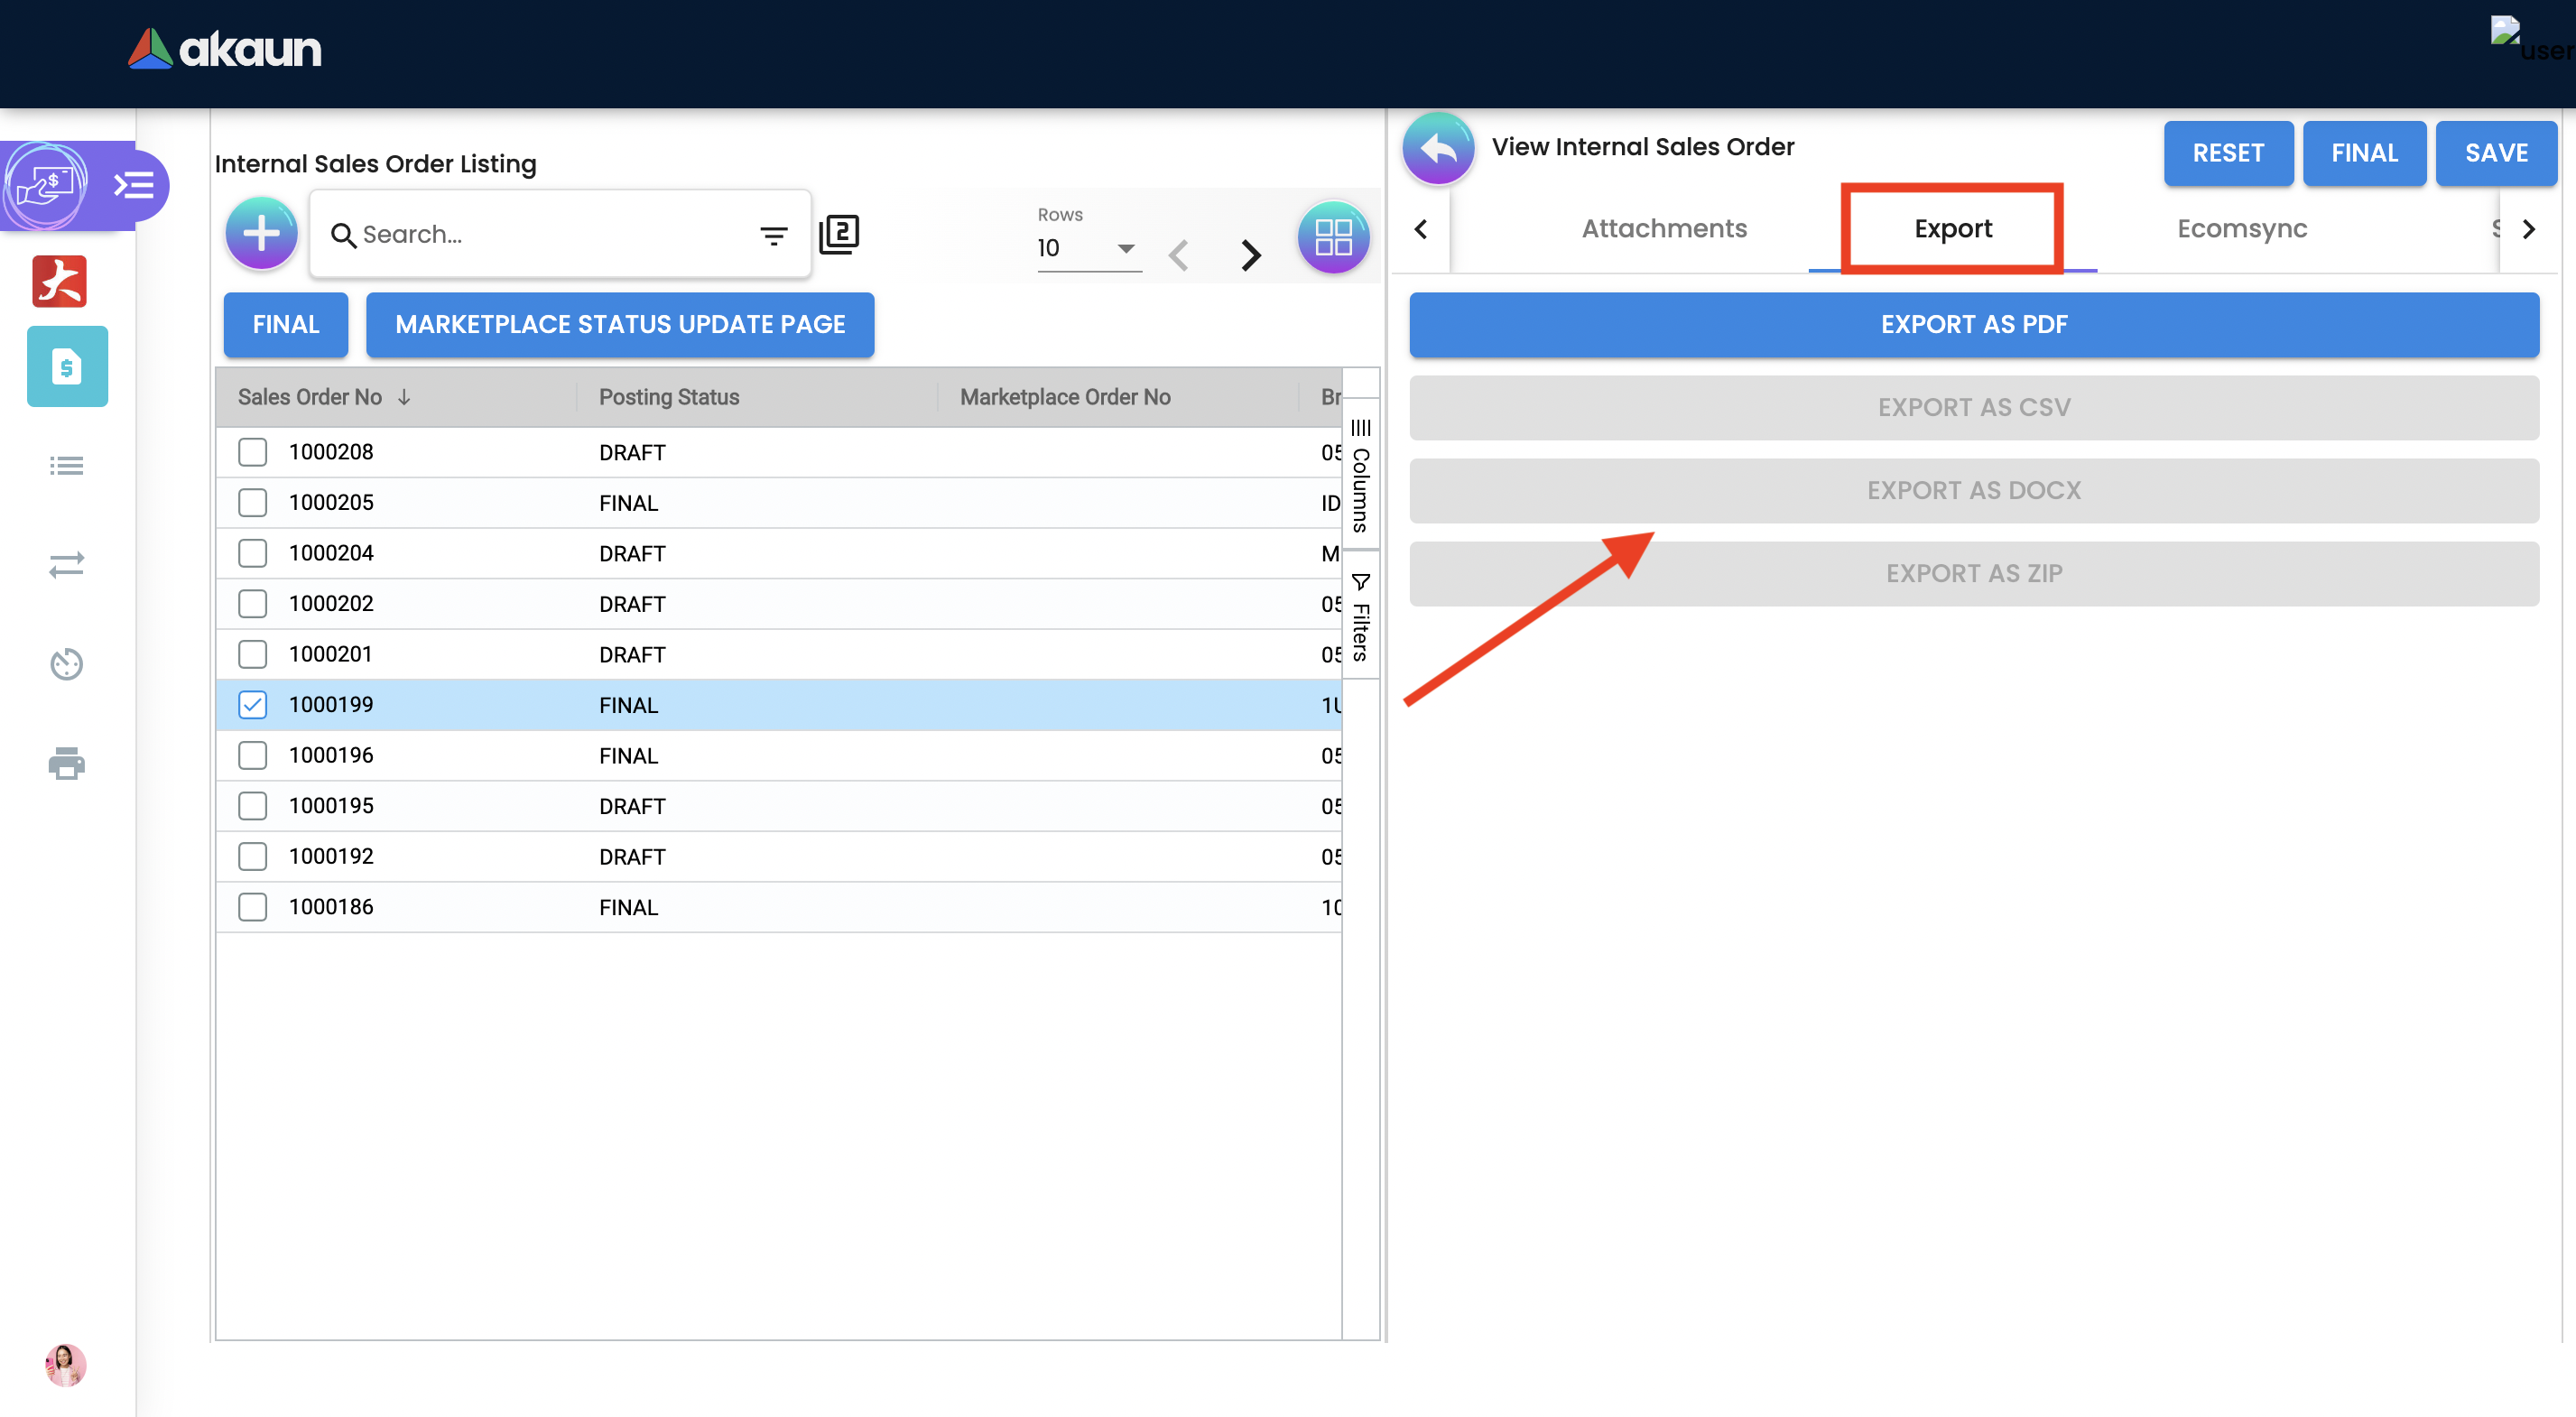
Upon exporting the documents, the system will show a success message, and users will be able to view the file that has been downloaded to their device.
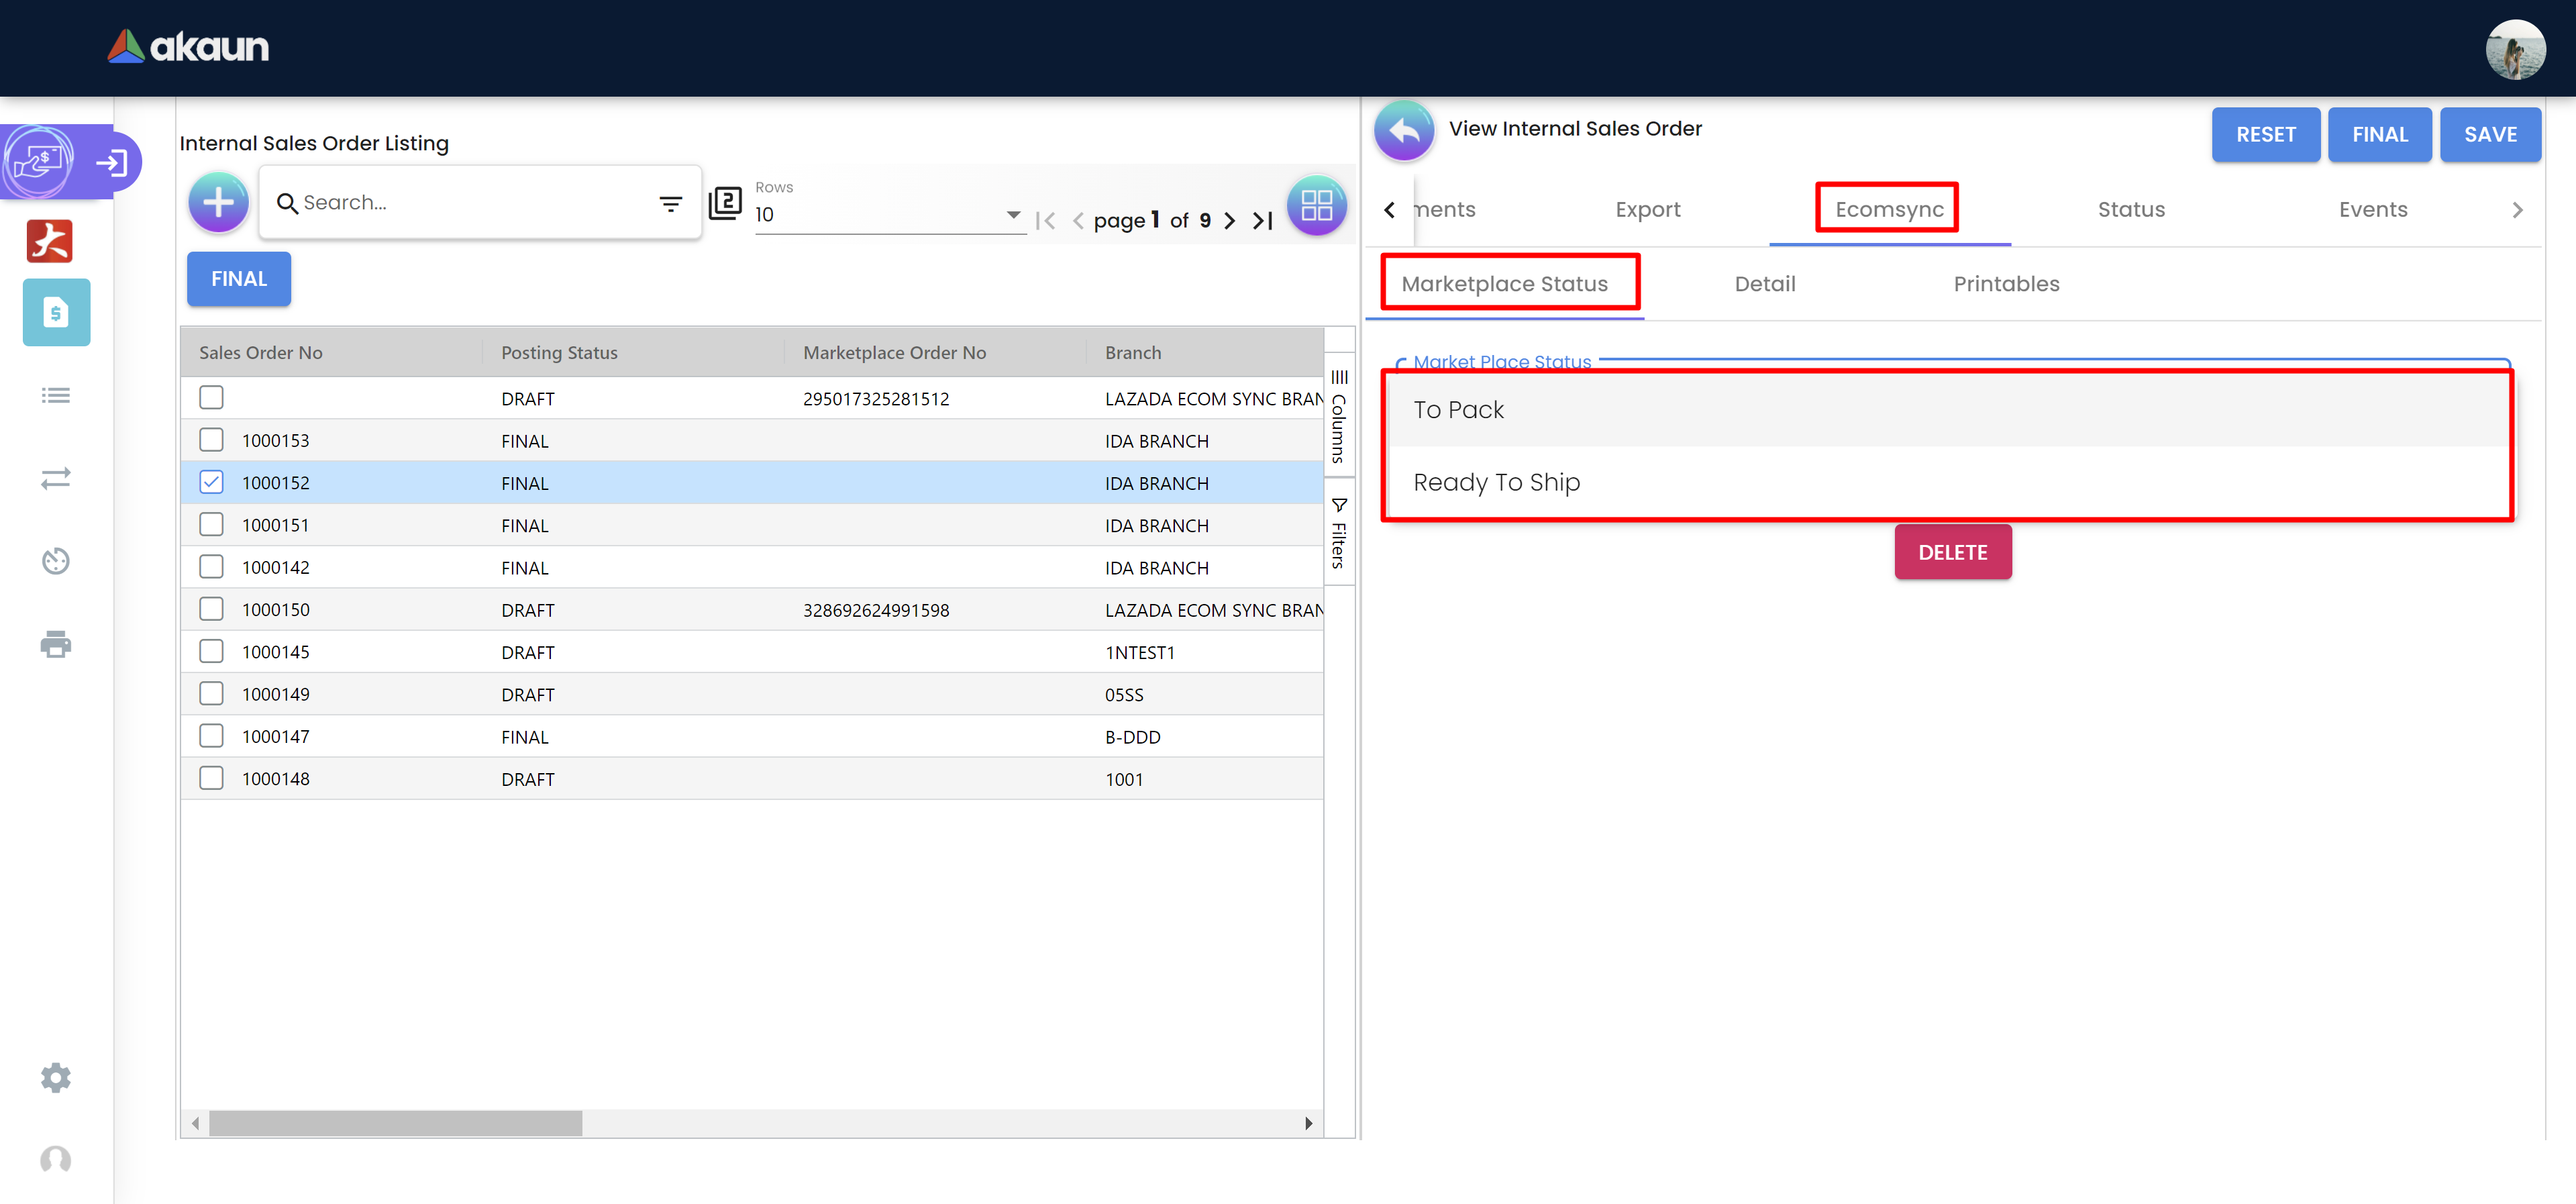
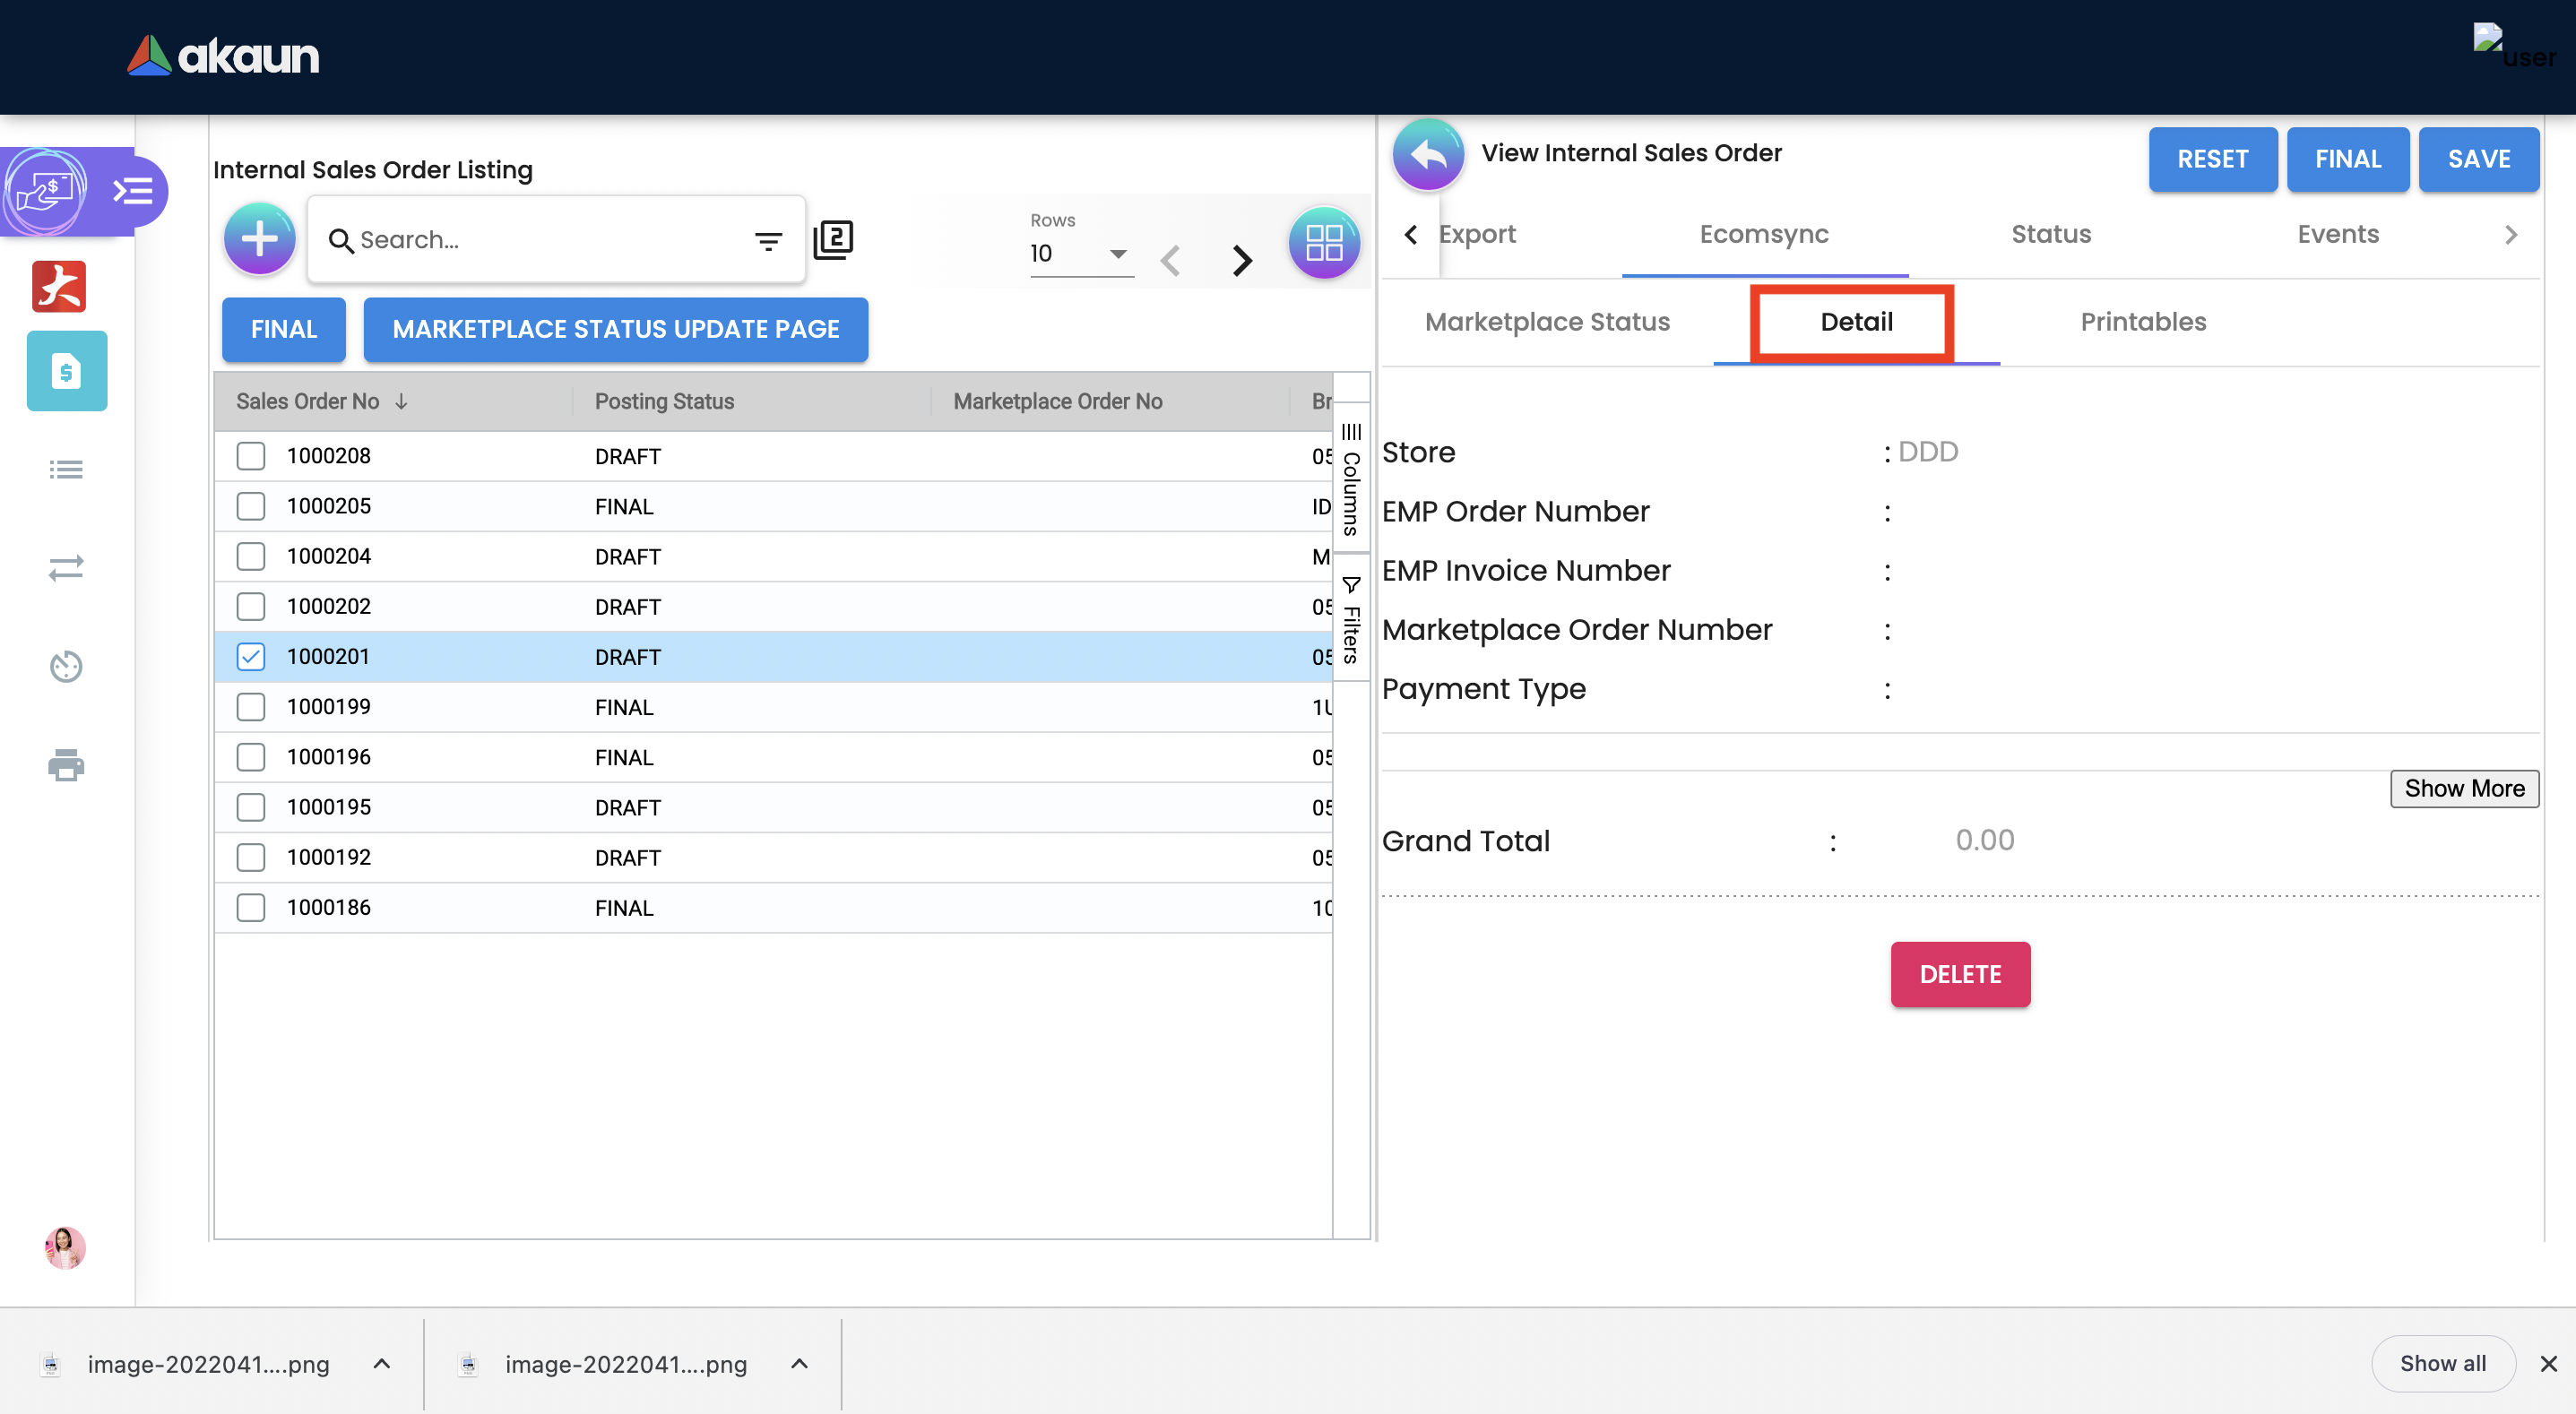
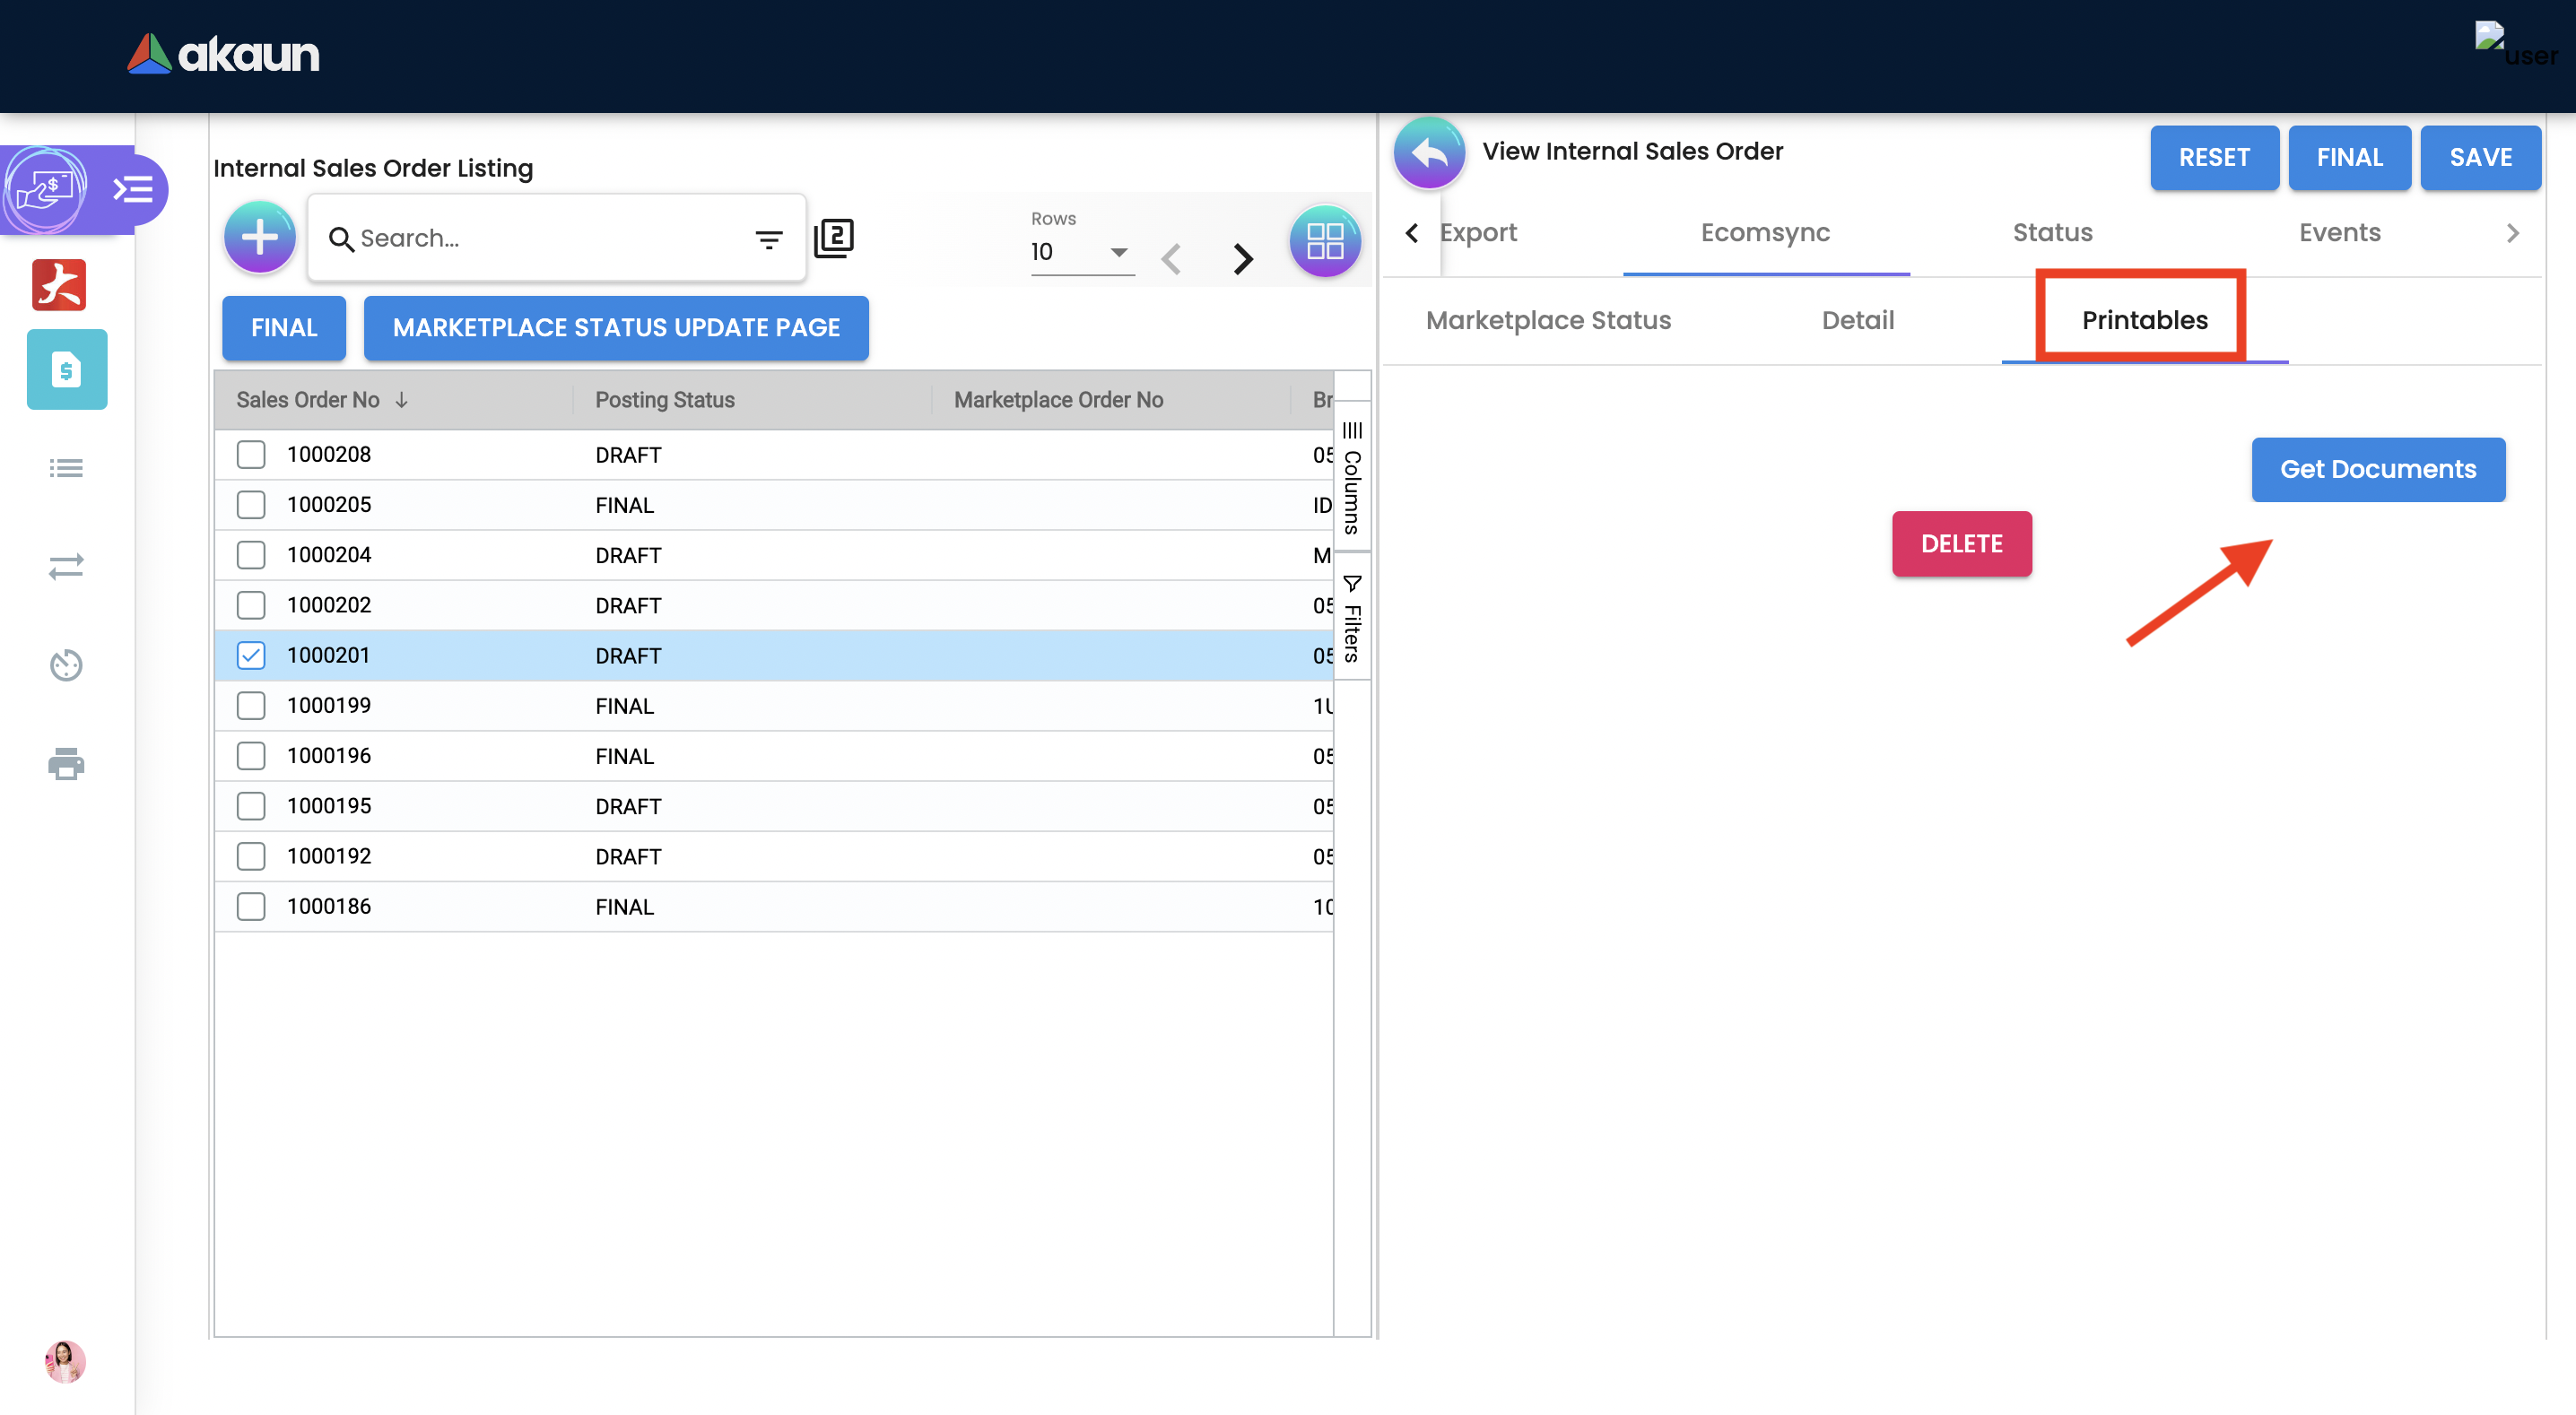
2.4.7Sales Order - Ecomsync tab
To Manage Market place status, view document details, and get or view the document printables from different marketplaces.